Activities
Overview
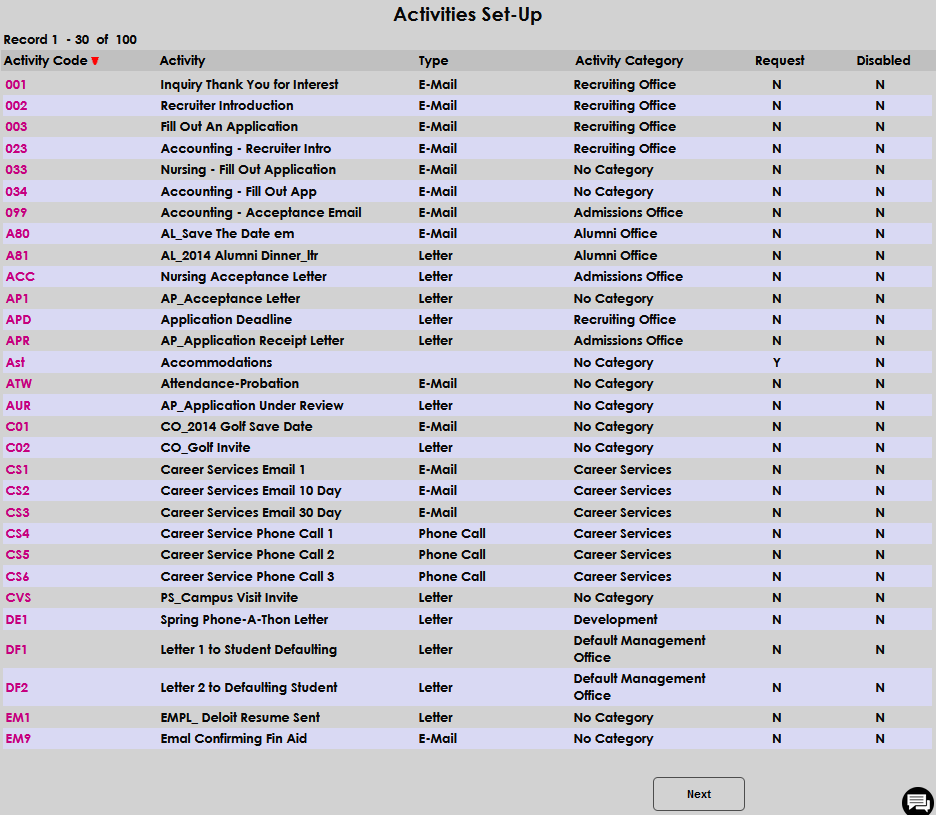
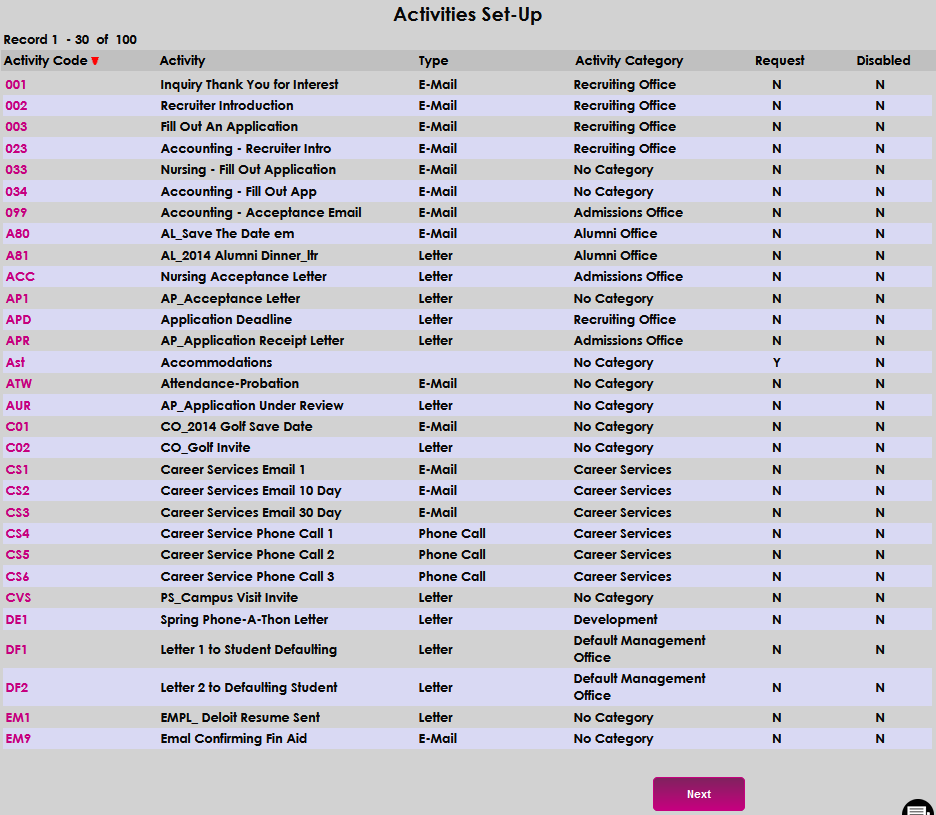
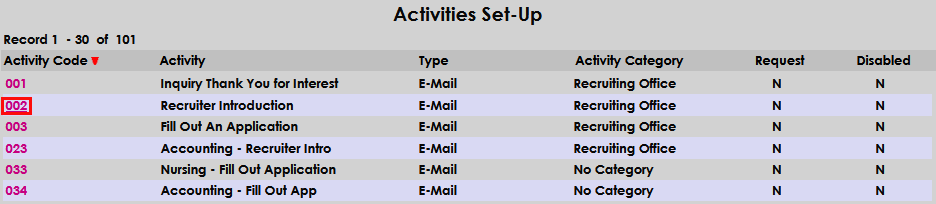
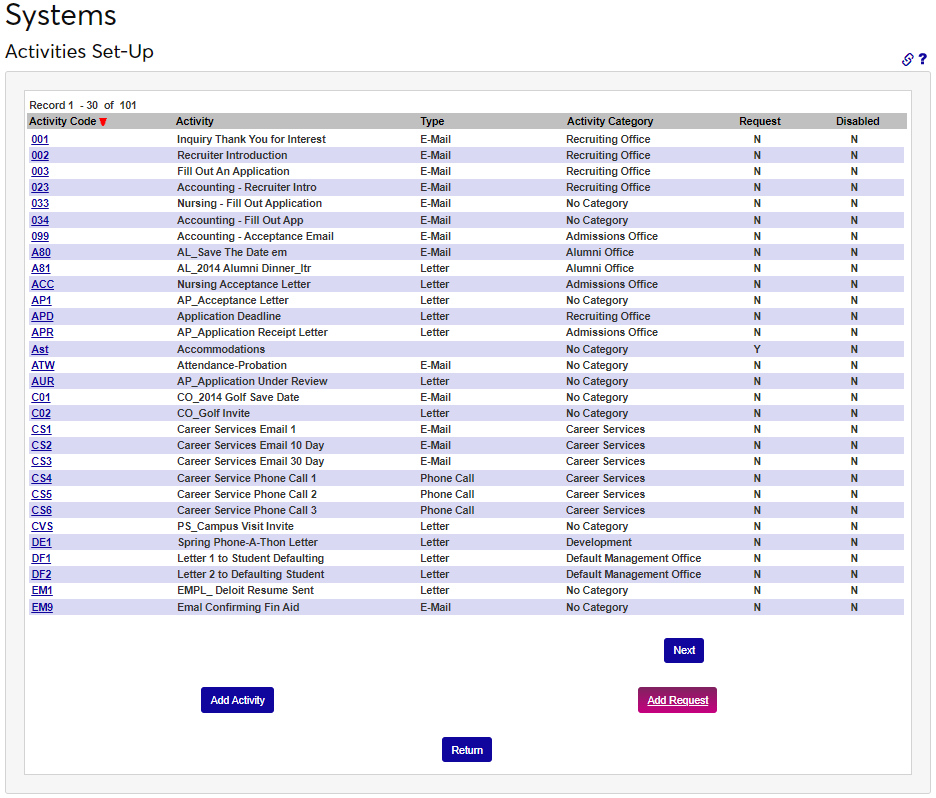
Activities are a versatile tool used within Jenzabar SONIS primarily to automate and archive correspondence. By using the activities function, institutions can log and track any important interaction they have with a student or constituent. The activities are organized alphabetically by Activity Code and can be reverse sorted if desired.
Once an email activity has been created, you can use the Notification Assignments utility to send it out automatically to selected users.
These email variables can be used to create text specific to the individual user being contacted:
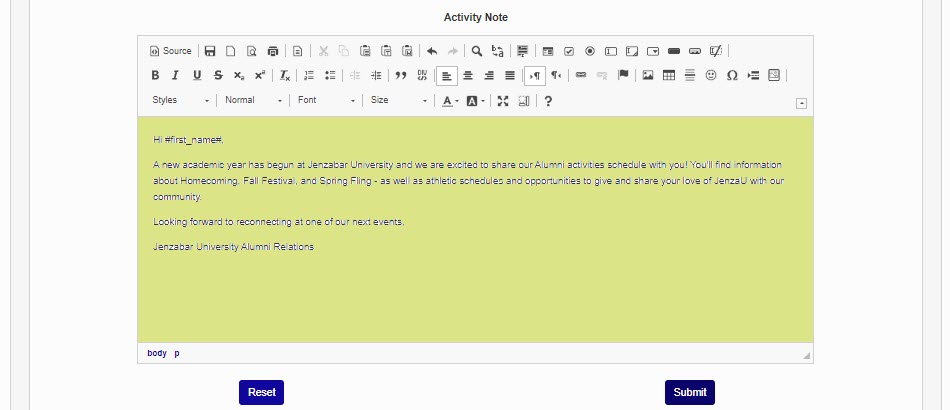
•#Prefix#
• #first_name#
• #mi#
• #maiden#
• #last_name#
• #Suffix#
• #ID#
• #pin#
Activity Categories
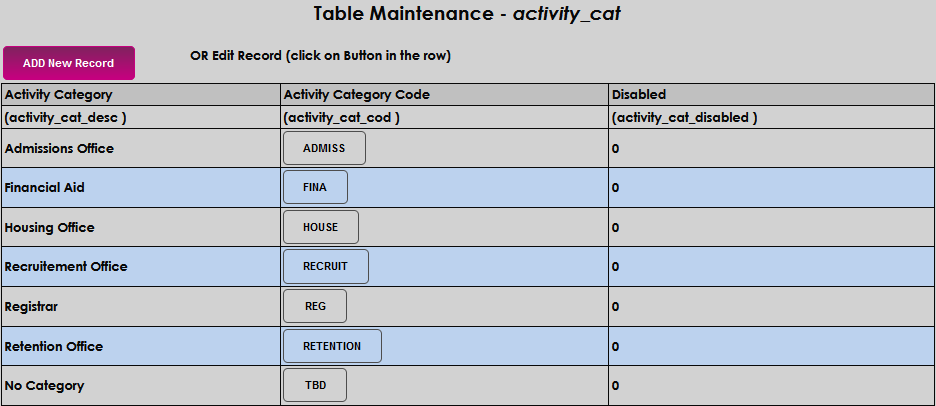
An administrator must add Activity Categories using Table Maintenance before creating activities.
Searching Activities
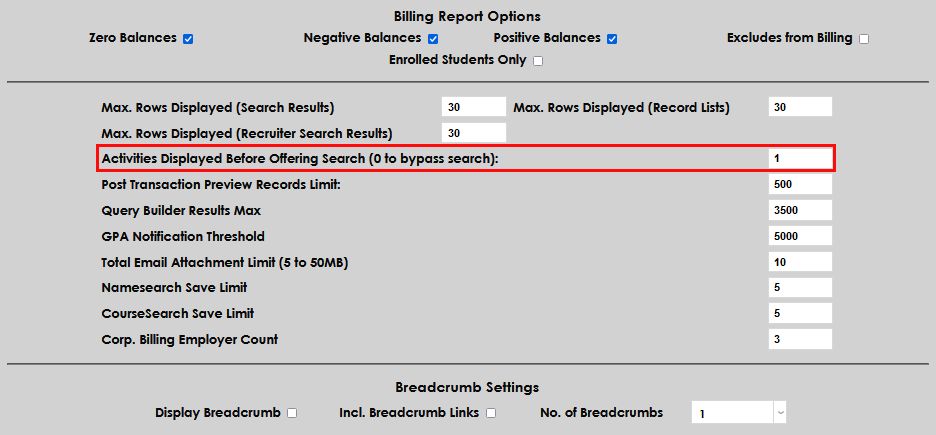
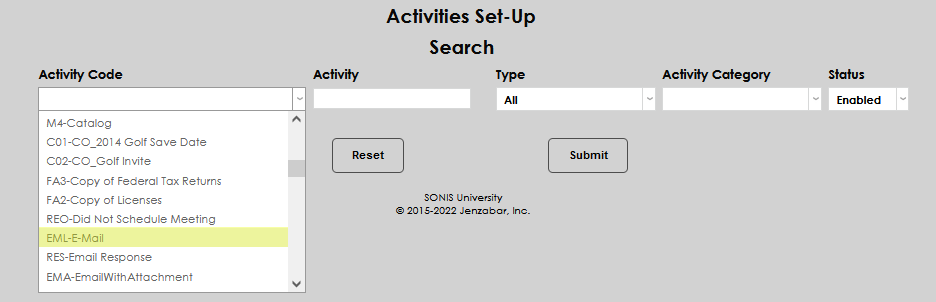
If, upon entering the Activities page, a long list of activities are displayed, the Activities Search function is turned off. To turn it on, go to the Systems hub page Web Options and enter the number 1 in the Activities Displayed Before Offering Search. A 0 setting bypasses the search function's display on the Activities landing page and displays all created activities.
When the search is turned on, the page immediately displays fields and dropdowns that can be used for searching. Enter the desired search criteria and click Submit.
Note
An activity search can include disabled activities by selecting All or Disabled. Activity Category will not return activities with no category associated and leaving a field blank is considered a request for all results to be returned.


Adding Activities
There are two ways to get to the Add Activity button.
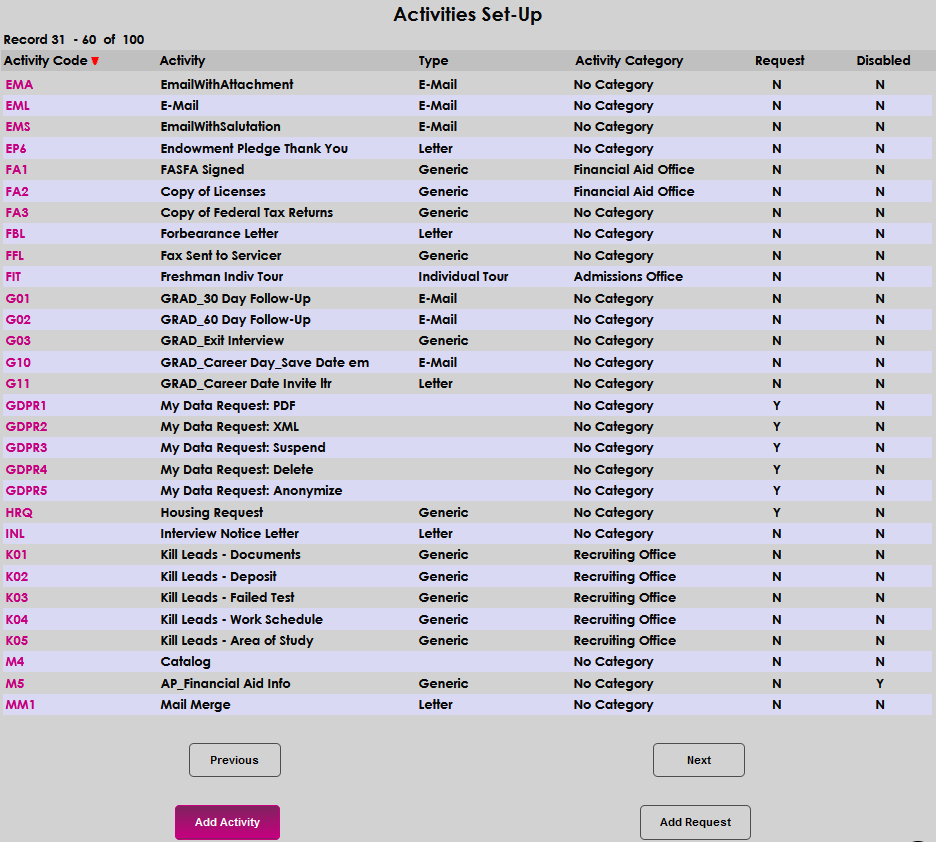
Activity Search Off
When Search is off, the Add Activity button can be found at the bottom of the last activity record page. Use the Next button to navigate to the last page, if needed. Click Add Activity to add the desired activity.
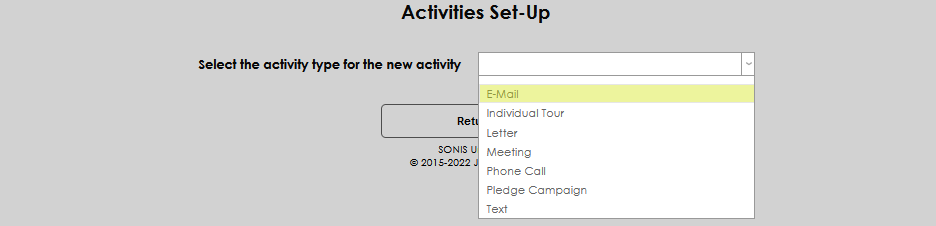
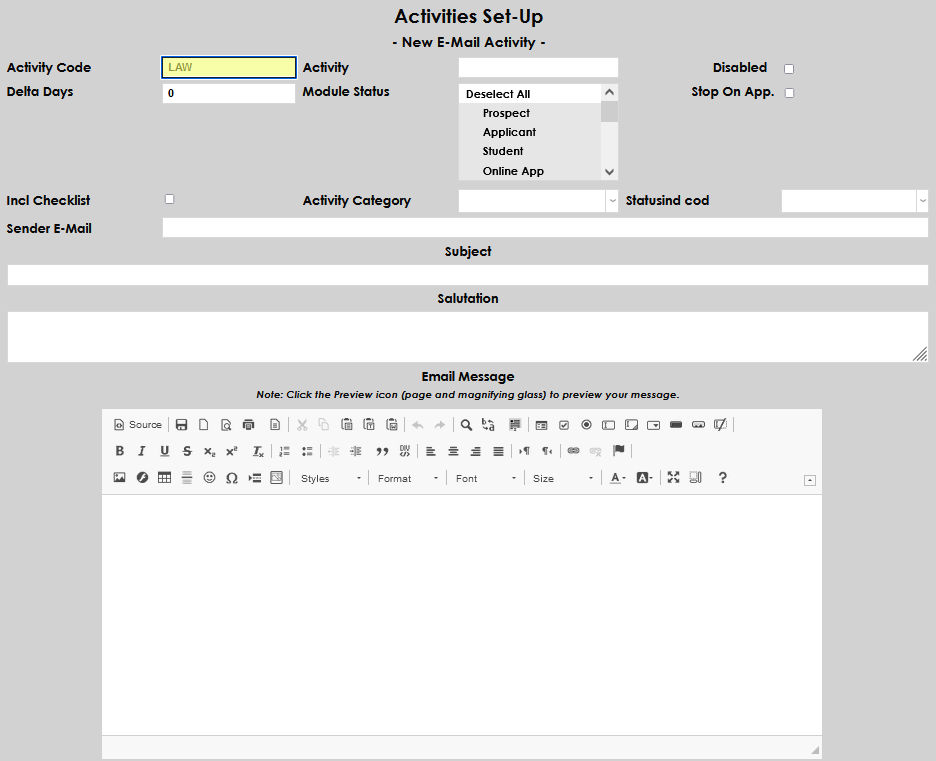
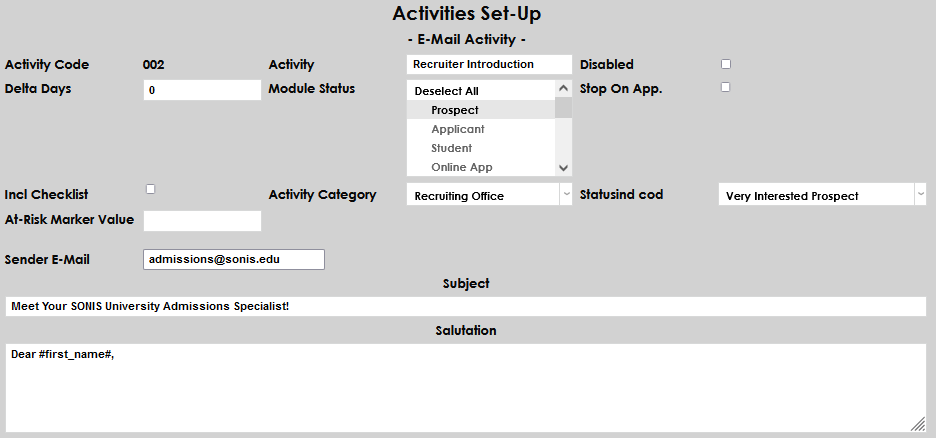
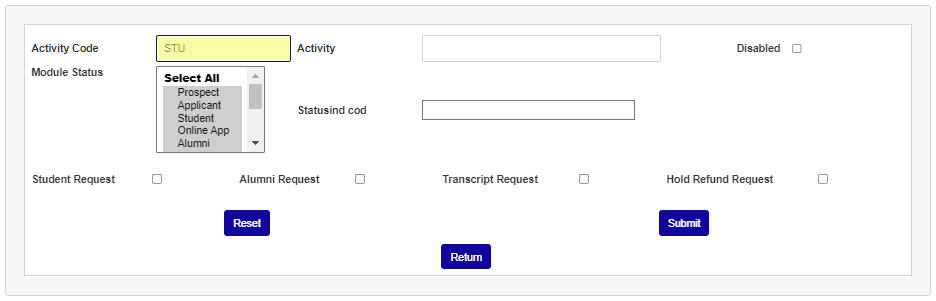
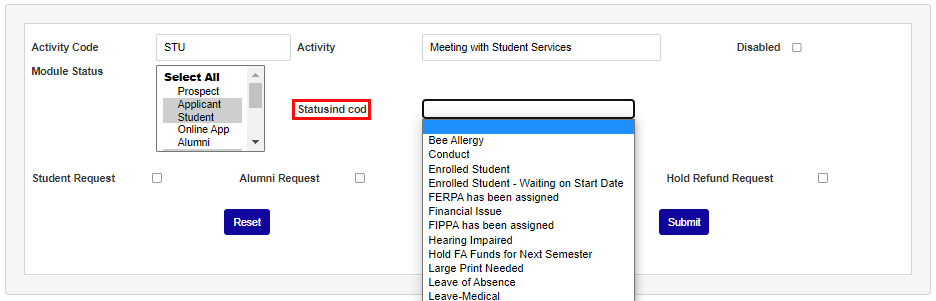
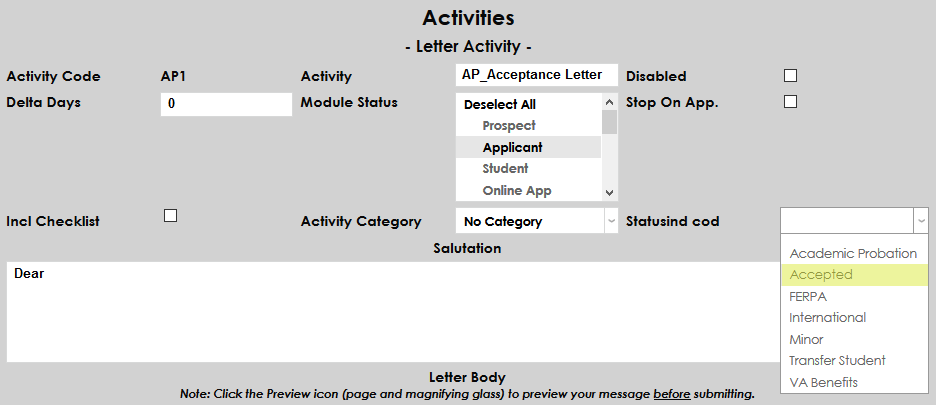
First, select an Activity Type from the dropdown menu. An Activity Code, Activity, and Activity Category are required. Delta Days, Module Status, Stop On App, Statusind cod, and Incl Checklist are optional. Only staff members who have access to the select module status(es) based on their User Security settings will be able to view and edit requests of this type within user records. If the activity will not send an email, the Subject, Salutation, and Email Message will be skipped.
If the Stop on Application box is checked, an email or text activity will not be sent to any student with an application recorded in their Prospect Inquiry Details record. The activity for this user will be marked as stopped.
Click Submit to save the activity.
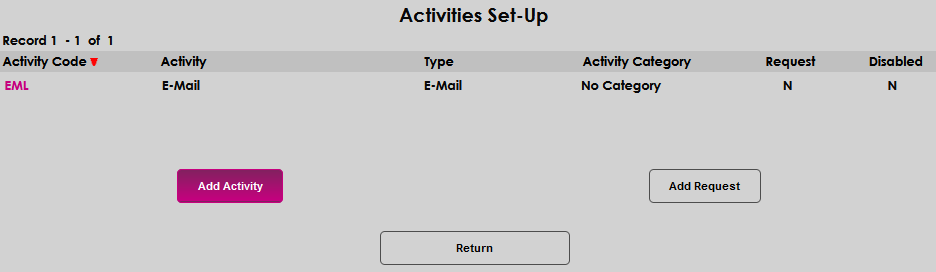
Activity Search On
When Search is enabled, a search must be executed before the Add Activity button appears. Select any Activity Code and click Submit.

The Activities Set-Up page will open with the selected activity code displayed. The Add Activity button will display on the lower left. Click Add Activity to begin adding the new activity.
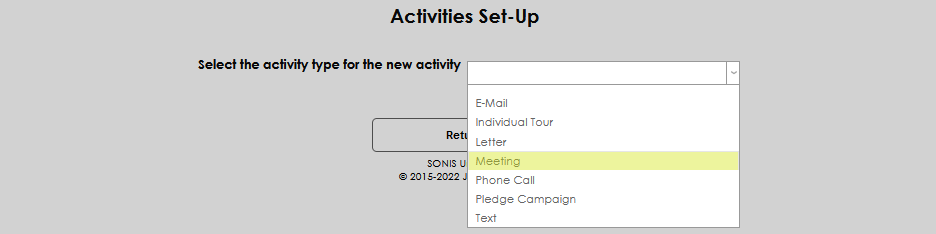
Select the activity type corresponding with the new activity from the dropdown. Selecting an activity will automatically load the template for creating a new activity.
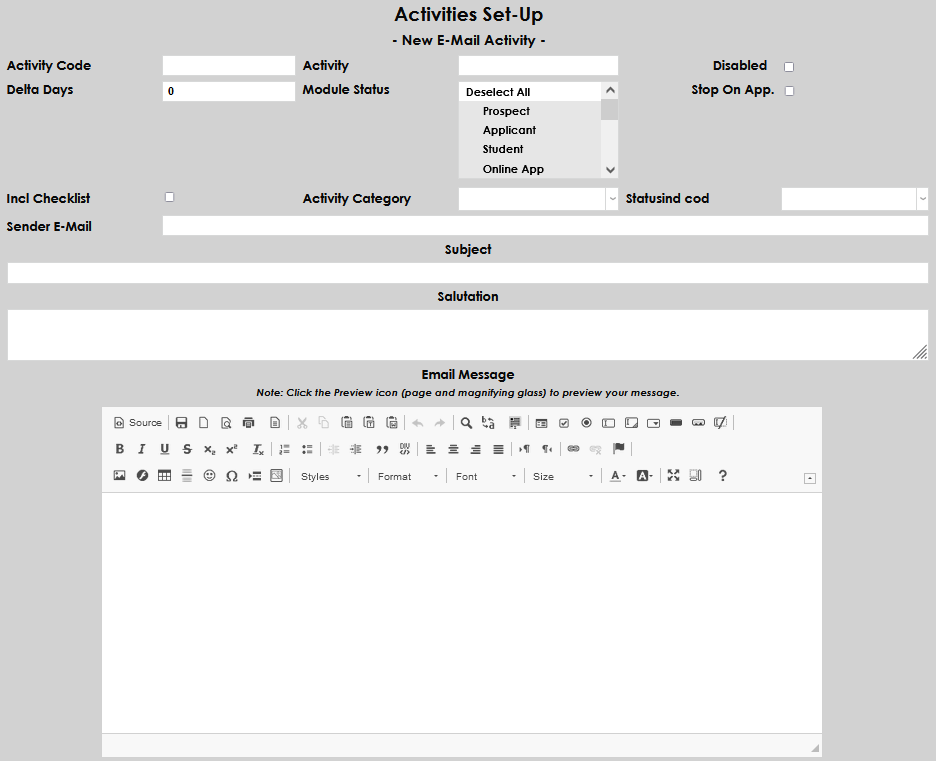
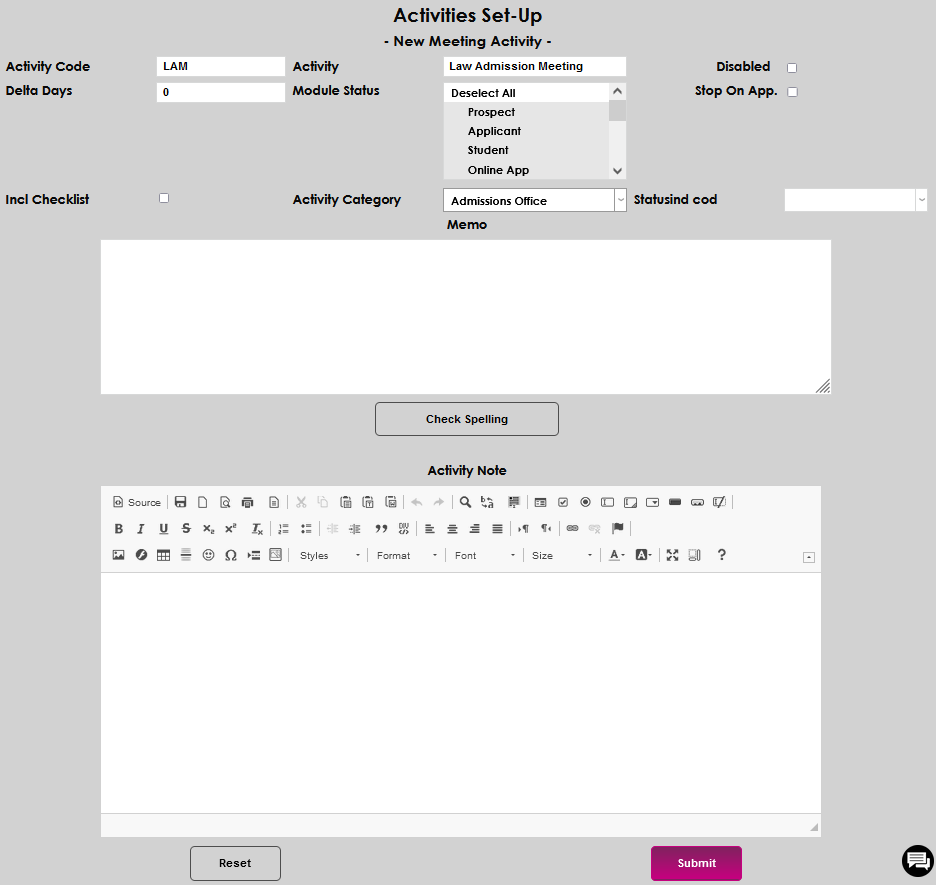
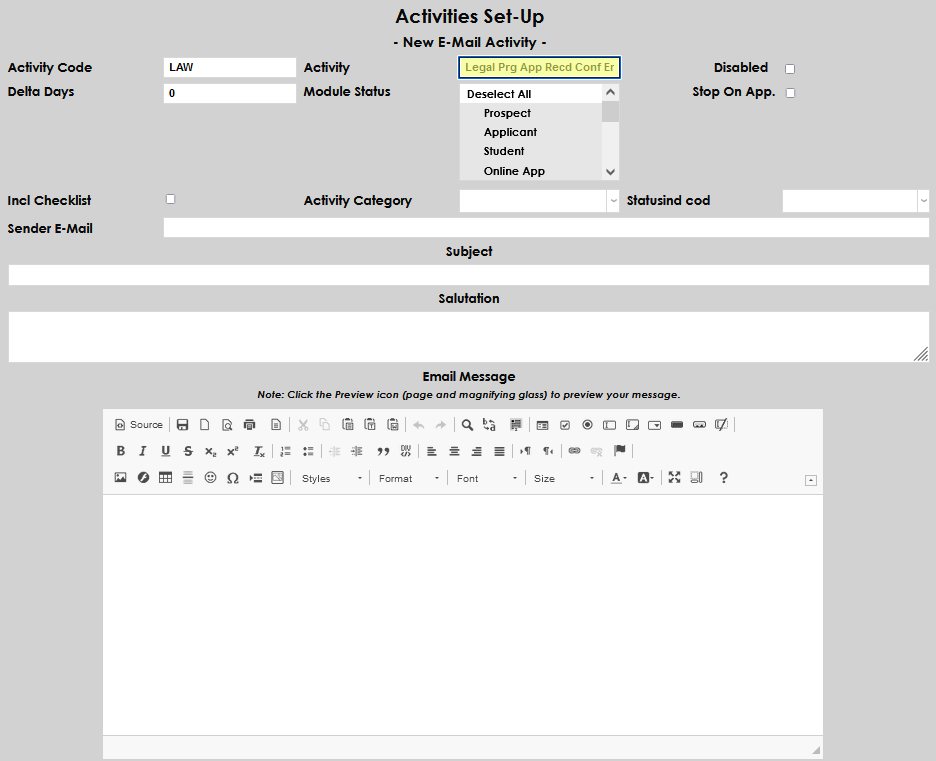
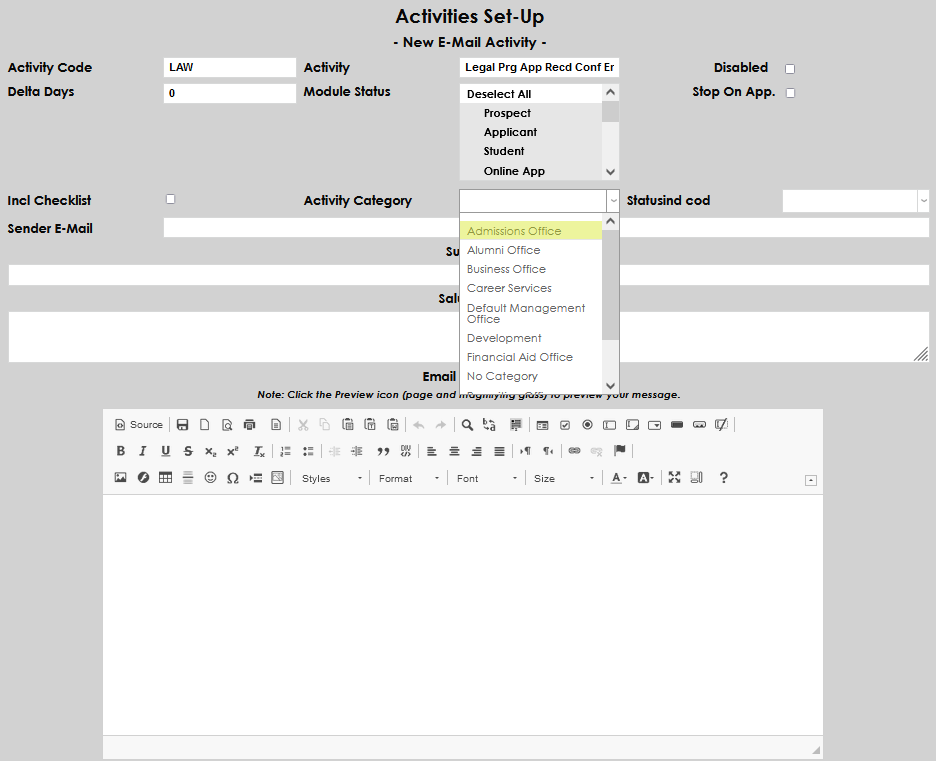
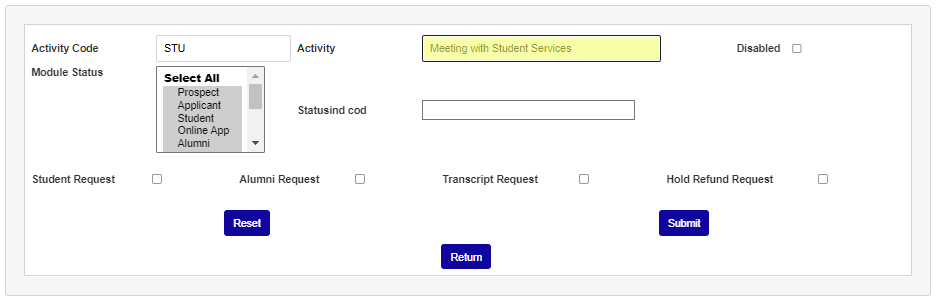
The template must be completed to create the activity. An Activity Code, Activity, and Activity Category are required. Delta Days, Module Status, Stop On App, Statusind cod, and Incl Checklist are optional. Only staff members who have access to the selected module status(es) based on their User Security settings will be able to view and edit requests of this type within user records. If the activity will not send an email, the Subject, Salutation, and Email Message will be skipped. The Activity Code field accepts up to three alphanumeric characters. Describe the action in the Activity field. It accepts up to 30 alphanumeric characters.
Select an Activity Category from the dropdown menu and click Submit if only the required fields need to be entered.
Note
If the Stop on Application box is checked, an email or text activity will not be sent to any student with an application recorded in their Prospect Inquiry Details record. The activity for this user will be marked as stopped.
From Other Pages
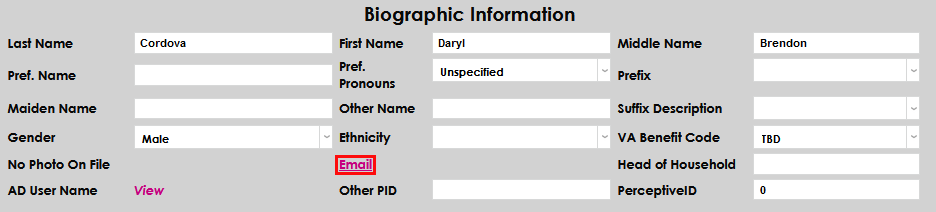
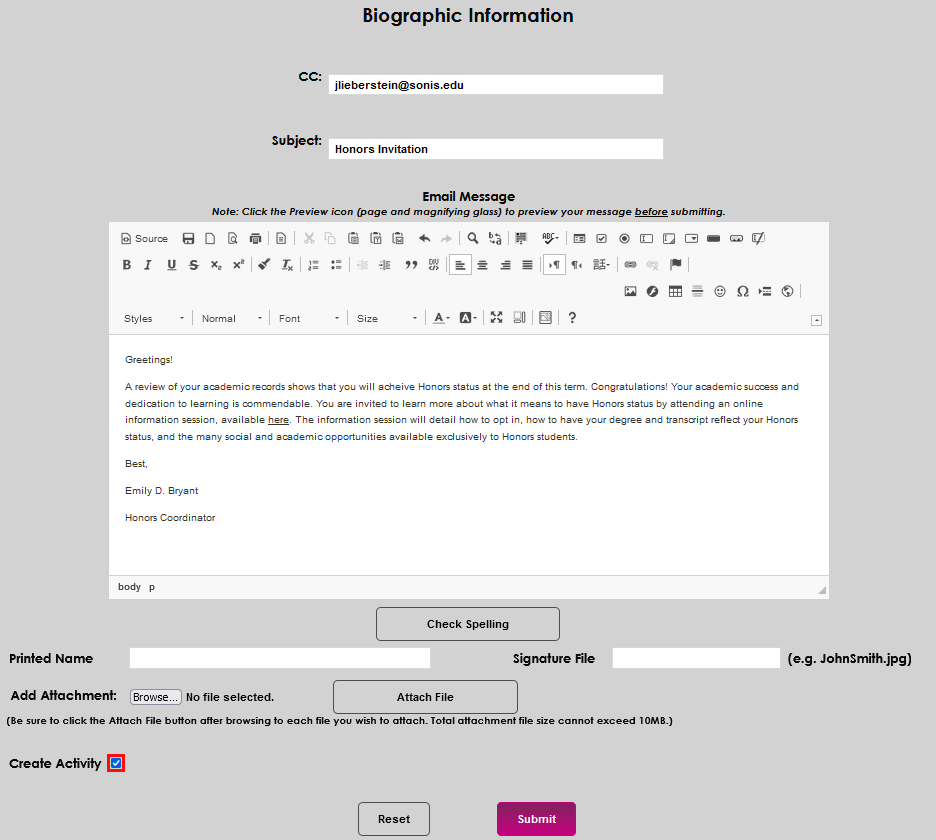
Activities can be added to the system when emails are sent to students through the student's Biographic page or any of their Administration summary pages. To create an activity when sending a student email from the Biographic page, click the Email link, compose the email, and check the Create Activity box at the bottom of the page before clicking Submit. An activity will be created when the email is sent.
Editing Activities
Editing begins when an activity code's link is clicked on the Systems hub page, Activities.
The activity template that appears is basically the same one used for adding an activity type. The significant differences are that field values and current settings are populated, and the type of activity is listed at the top of the page, below Activities Set-Up. As with an editing page, make the desired edits and click Submit at the bottom of the page.

Requests
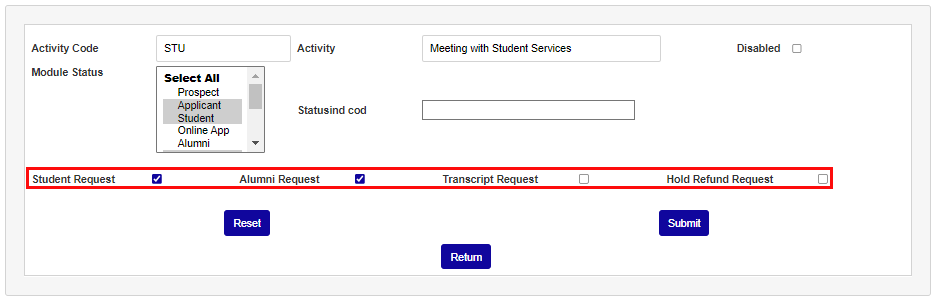
Within the user portals, the option to make a request of the institution can be enabled. The Requests button allows the user to make a request of the school, which can be viewed on various reports and on the user's Activities page. After clicking Requests, a pop-up displays with pre-defined request types. Request types are defined as outlined below.
From the Activities page in Systems, click the Add Request button at the bottom of the page.
Enter up to three alphanumeric characters to represent the request activity in the Activity Code field. Enter up to 30 alphanumeric characters that name the request activity in the Activity field.
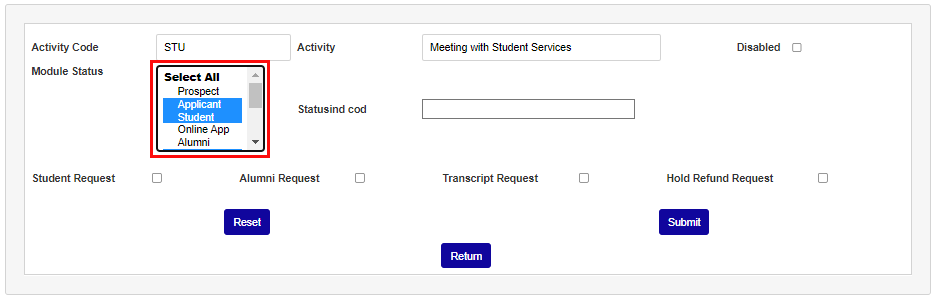
Select one or more statuses from the Module Status menu. Only staff members who have access to the select module status(es) based on their User Security settings will be able to view and edit requests of this type within user records.
Select one or more request types to categorize the request activity and ensure it displays on the appropriate request report. Click Submit to create the request activity.
Assigning Activities
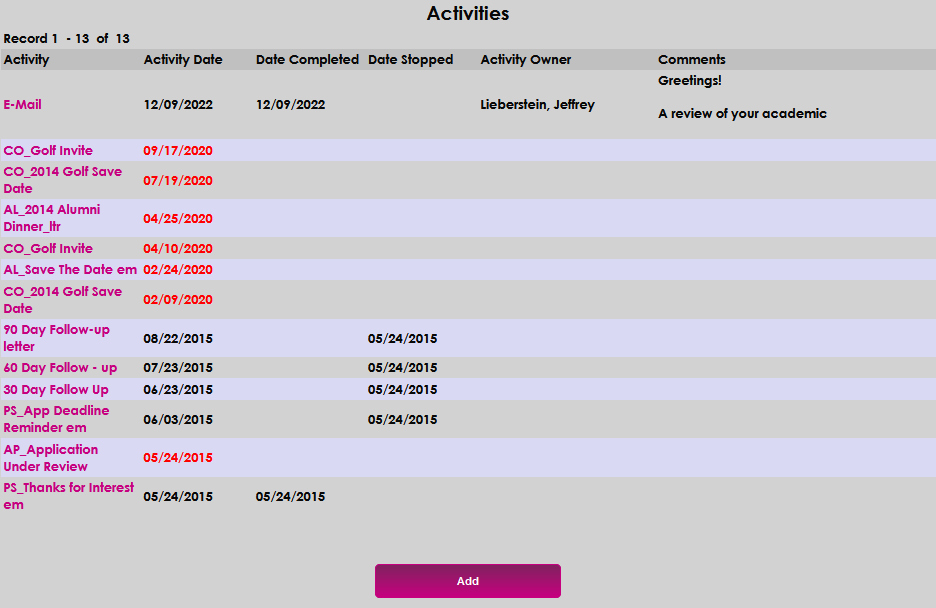
To begin assigning an activity to a student, select their name with the Namesearch function and select Activities from the Users hub. Any previous activities for this student will be listed with the date, the date completed, the date stopped, the owner, and any comments that were included. Click the Add button to add a new activity.
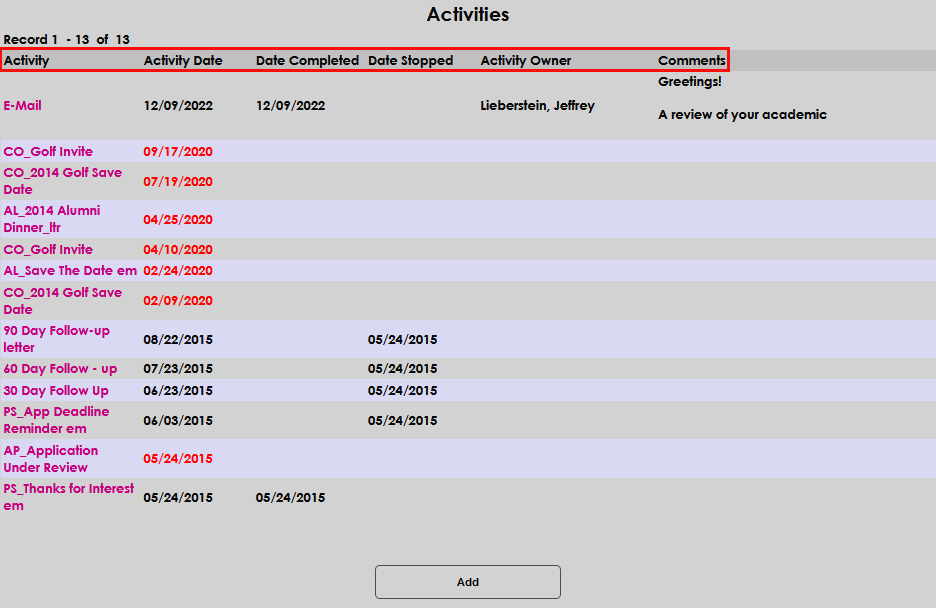
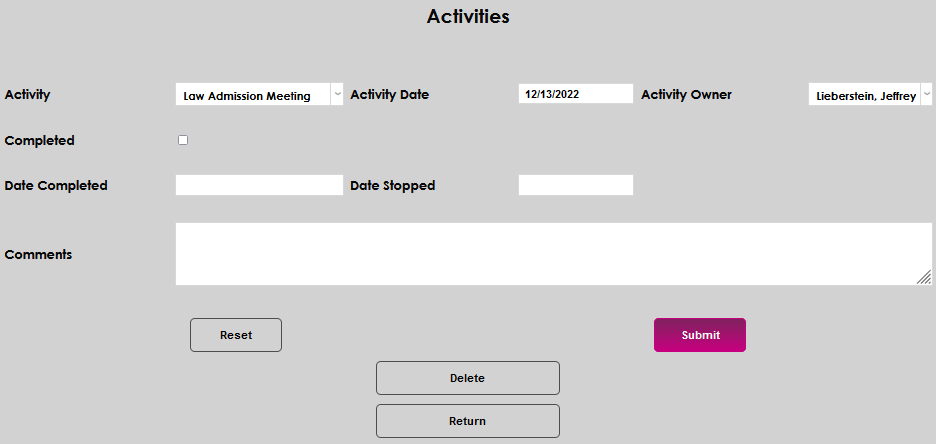
Select an activity type from the Activity dropdown menu. The Activity Date will automatically populate with the current day's date, but this can be changed if the activity occurs in the future.
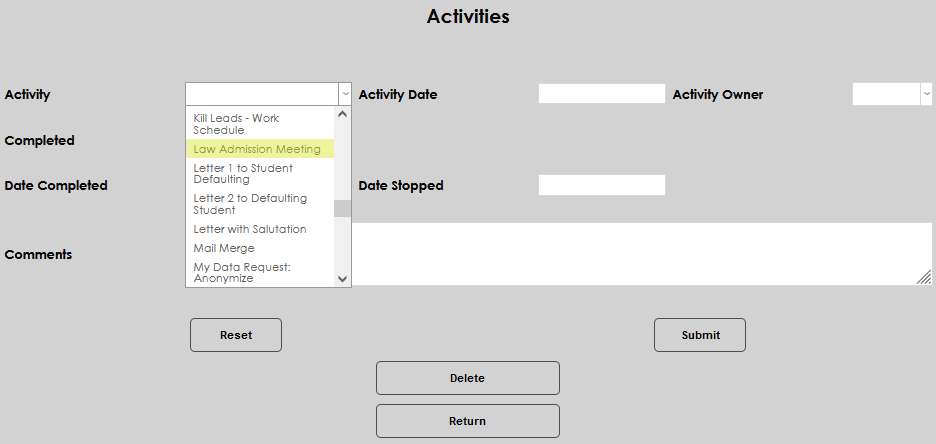
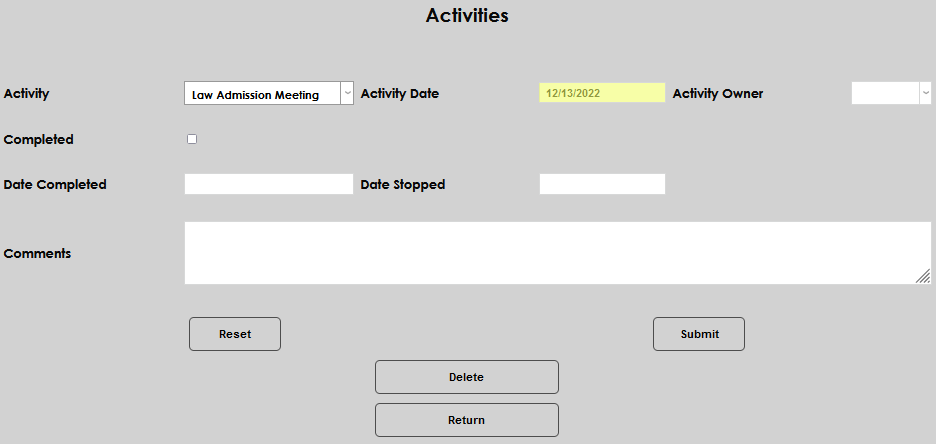
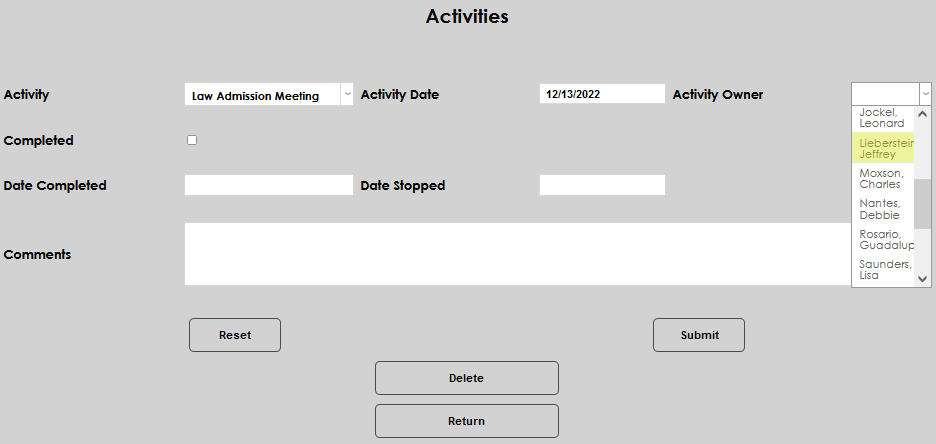
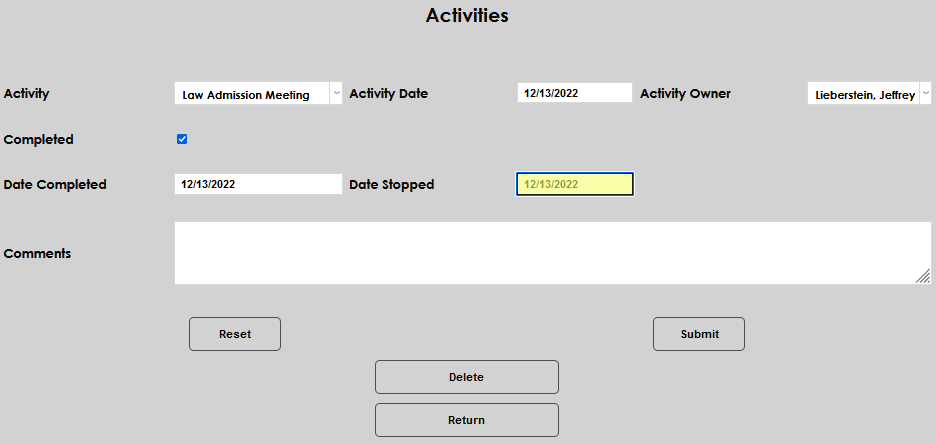
Select an owner for the task from the Activity Owner menu. This menu is populated with all of the Staff members in the Administrative portal. Check the Completed box if the activity has ended. The Date Completed field will automatically fill with today's date and can be updated if necessary.
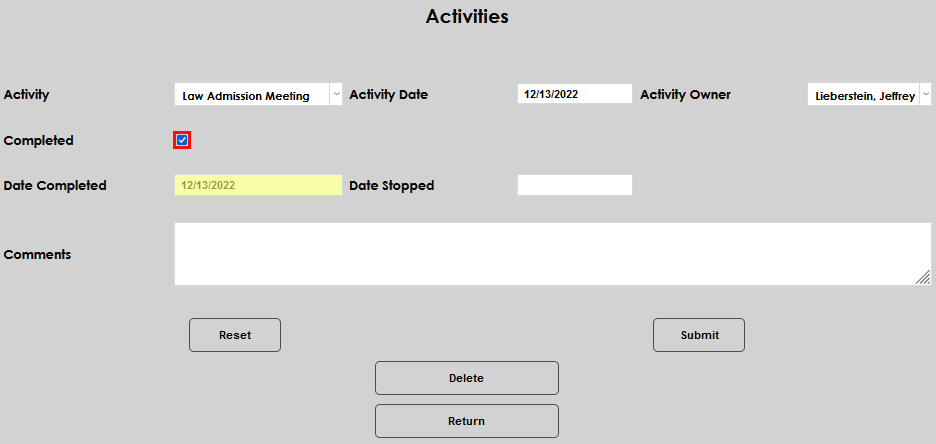
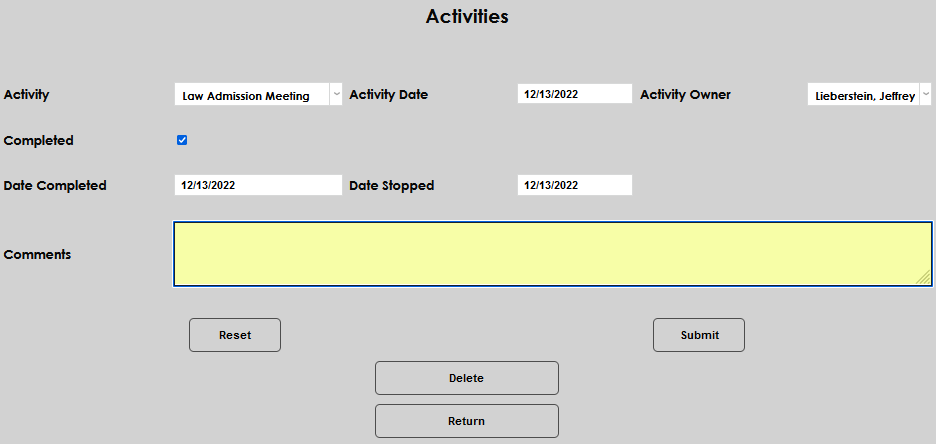
The Date Stopped field is for activities that were canceled or run unsuccessfully. Both the Date Completed and Date Stopped fields affect how the activity is treated in the Reports section and will stop the associated activity from sending automated emails. The Comments field is used for any notes that should be appended to the activity for other users or the school's records.
Click Submit when all fields required by this activity have been filled.
Linking Activities to Status Indications
Status Indications are a Jenzabar SONIS feature that allows administrators to tag students with a status in the system that may be used in a variety of ways. Status indications can be linked to the SONIS activities function so that an indicator will be added automatically when an activity is added. To link an activity to a status indication, edit the activity and select a status indication from the Status Indication Code dropdown menu. Click Submit to save the change. Once this link has been created, assigning the specified activity to a student will also assign the linked status indication.
Text Type Activities
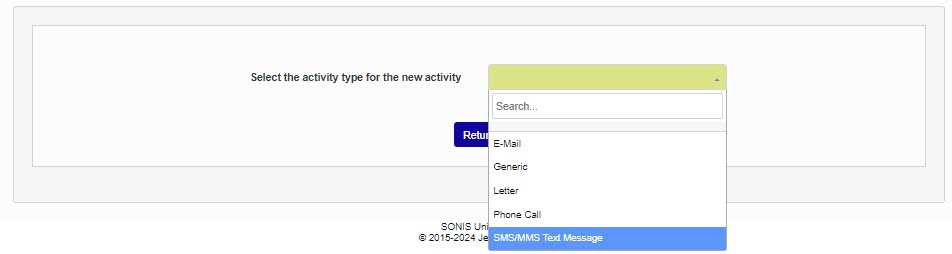
Activities that will send a text are set up in Activities using the Jenzabar-provided Activity Type SMS/MMS Text Message. Begin creating a text activity by entering the Activities page and clicking Add Activity. From the Select the activity type for the new activity menu, select SMS/MMS Text Message. The New SMS/MMS Text Message Activity page will load automatically.
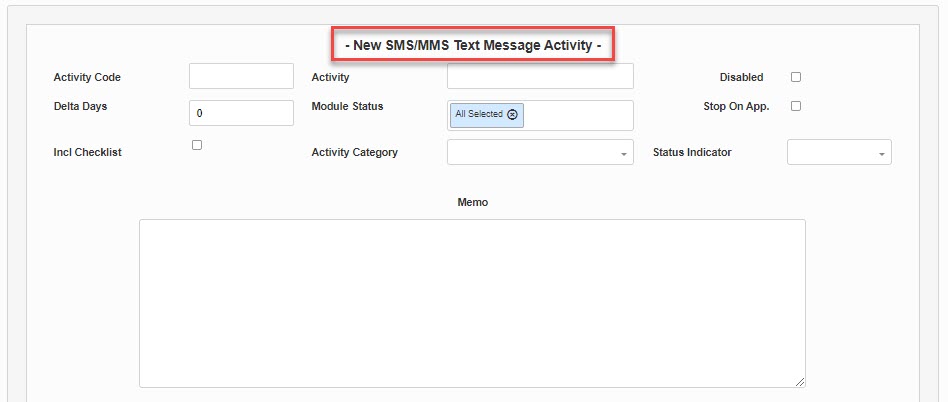
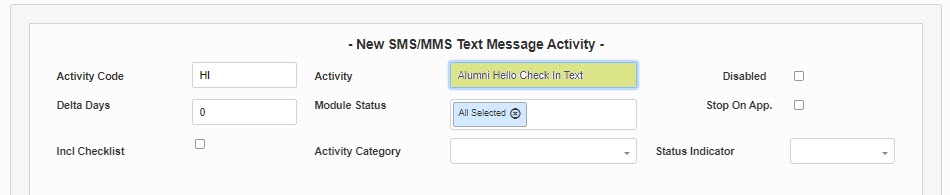
Enter an Activity Code of three alphanumeric characters to represent the activity. Enter the name of the Activity. The name may be up to 30 alphanumeric characters and/or symbols.

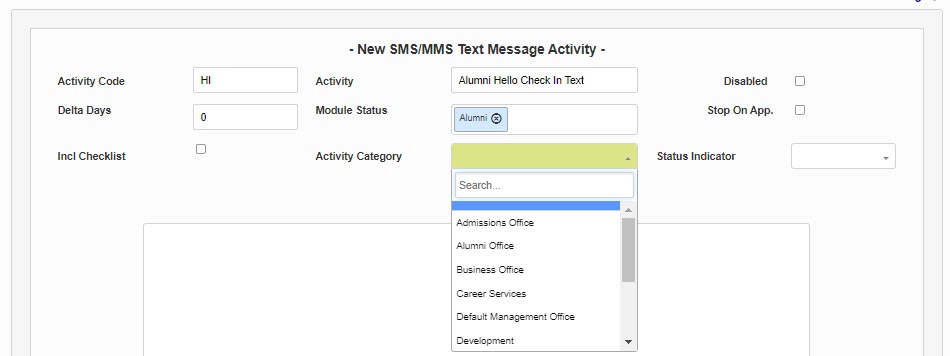
Delta Days is used to indicate the number of days before this activity should repeat. Leave it at 0 if no repetitions should occur. By default, all module statuses are selected. Click in the Module Status field and select the desired module status(es) if this text activity should be used for only certain statuses.

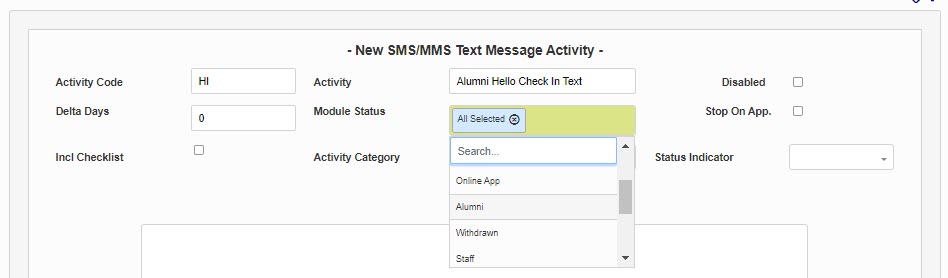
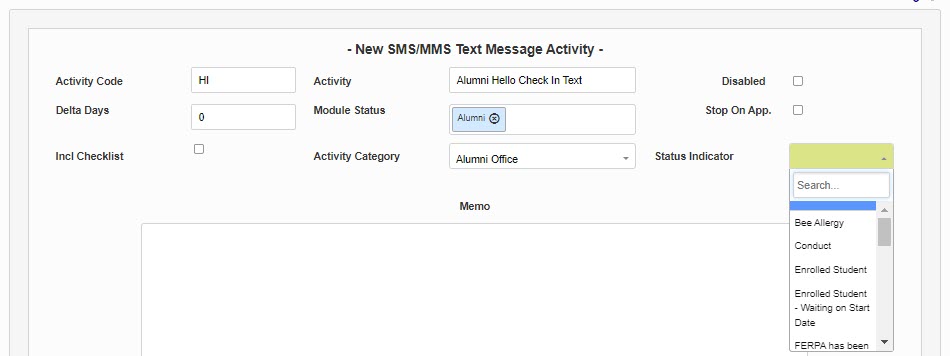
Select the associated Activity Category from the menu. If a Status Indication should be added, select it from the Status Indicator menu.
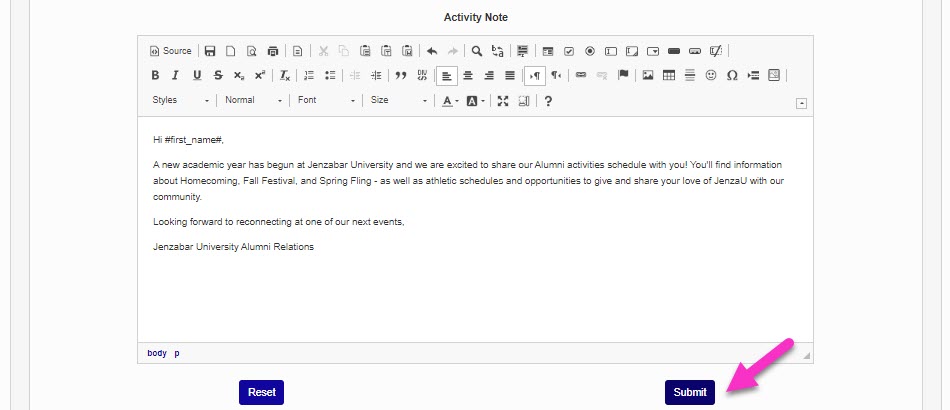
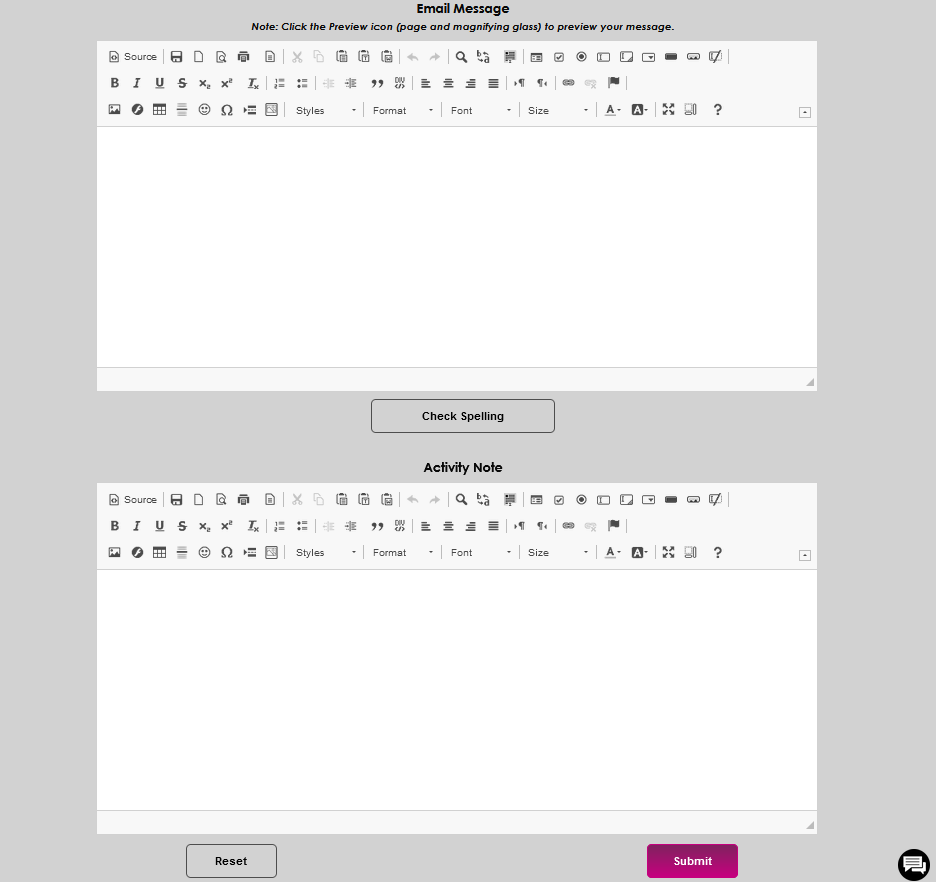
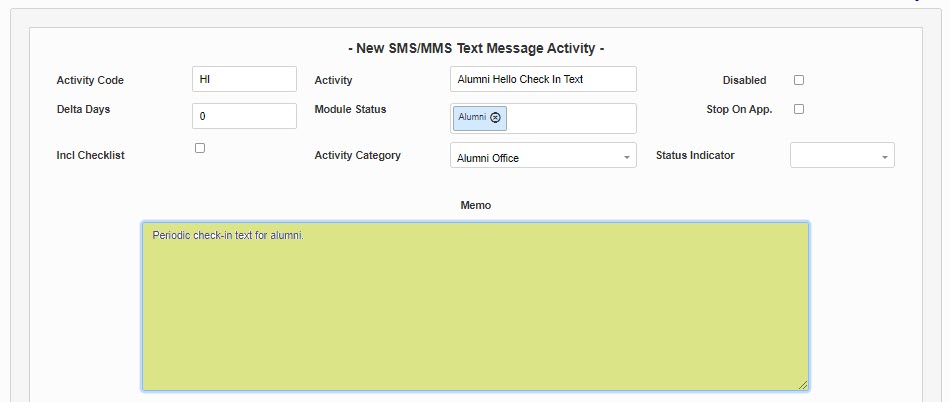
The Memo field is used for internal information sharing and anything entered here will not be included in the text message. The message that will be sent as a text must be entered in the Activity Note field. While a text editor is provided, very little formatting will be included in a text message. Paragraph breaks, links, and images will generally be honored, but this will depend on the receiver's carrier contract, message acceptance type, and style of phone or device receiving the text. The option to opt-out does not need to be added. It must be set up in the third-party text provider's system and will be added automatically as part of the text being sent by the system. The personalization options provided at the beginning of this article can be used to personalize the message.
If the Stop on Application box is checked, an email or text activity will not be sent to any student with an application recorded in their Prospect Inquiry Details record. The activity for this user will be marked as stopped.
Click Submit to finalize the activity for use.