Nelnet Enterprise Integration
Overview
Nelnet is a student loan servicing portal that can be used to administer both loans and payments. The Nelnet integration with Jenzabar SONIS allows customers to use Nelnet to setup payment plans for students, accept payments on those payment plans, send electronic bills to students and parents, and distribute refunds from the Nelnet platform while keeping the SONIS system in sync when it comes to account balances, payments, and refunds. Transactions that are made in Nelnet are automatically imported to SONIS and students who have created an account in Nelnet can link it to their Jenzabar SONIS account.
Setup
To migrate from FACTS to Nelnet Enterprise or set up Nelnet Enterprise for the first time, key pieces of information must be obtained from the institution's Nelnet representative:
1. Account Name - generally, this is an abbreviated version of the institution name, and it should not include special characters;
2. Account Code - this is a code that corresponds uniquely to the institution's instance of Nelnet Enterprise;
3. Nelnet Refund Folder - this is only needed if refund processing will be used as part of the integration and, if possible, should be named the same as the Account Name; and,
4. Nelnet Security Key - this is a 32-character alpha-numeric string that is used for decryption by the SONIS endpoints, as provided by Nelnet.
After obtaining this information, ensure Nelnet has been provided with the three SONIS endpoints needed by Nelnet for accepting and participating in real-time processing with SONIS. The examples below are provided for clarification, but the URL provided to Nelnet should be the URL of the institution's SONIS system. Real-time endpoint examples:
1. RTAA - https://sonisu.jenzabarcloud.com/nelnet-integration/rtaa.cfm;
2. RTPN - https://sonisu.jenzabarcloud.com/nelnet-integration/rtpn.cfm; and,
3. RTAN - https://sonisu.jenzabarcloud.com/nelnet-integration/rtan.cfm.
Nelnet Terms
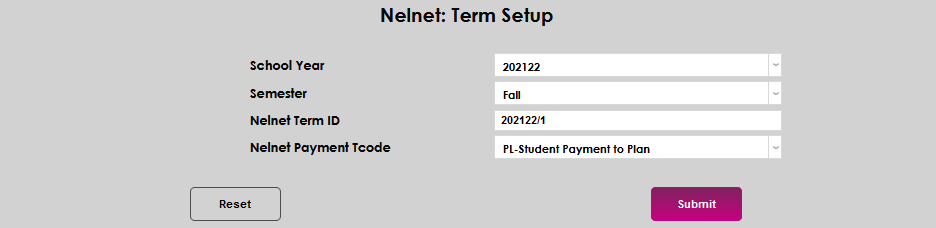
The Nelnet: Term Setup utility allows mapping of the school year and semesters between Jenzabar SONIS and Nelnet. Terms need to be set up in SONIS for any Nelnet terms that will be used. This also allows the specification of any t-codes that should be used for incoming payments from Nelnet.
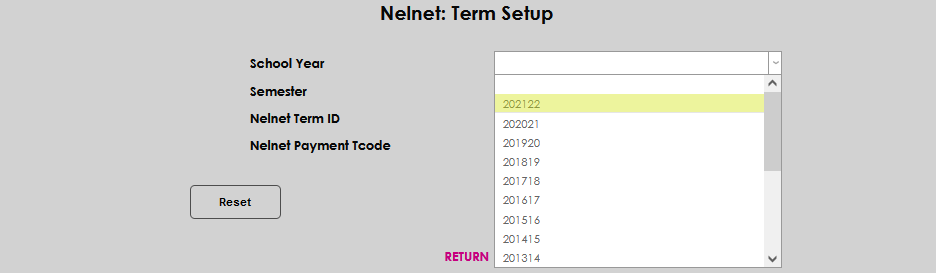
Select the Nelnet: Term Setup page from the Systems hub, and click Add Record to begin associating terms.

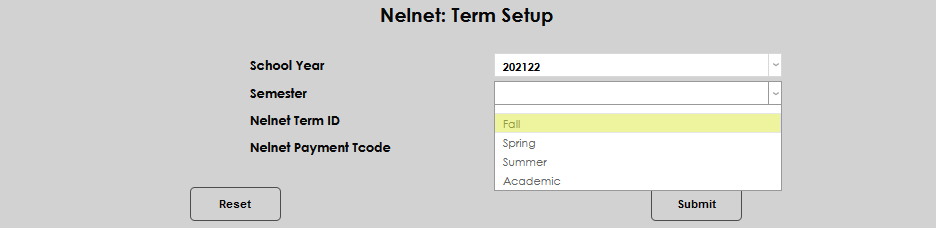
Select the appropriate School Year from the drop-down menu. Select the corresponding Semester from the drop-down. This is not a multi-select list; each semester must be configured individually.
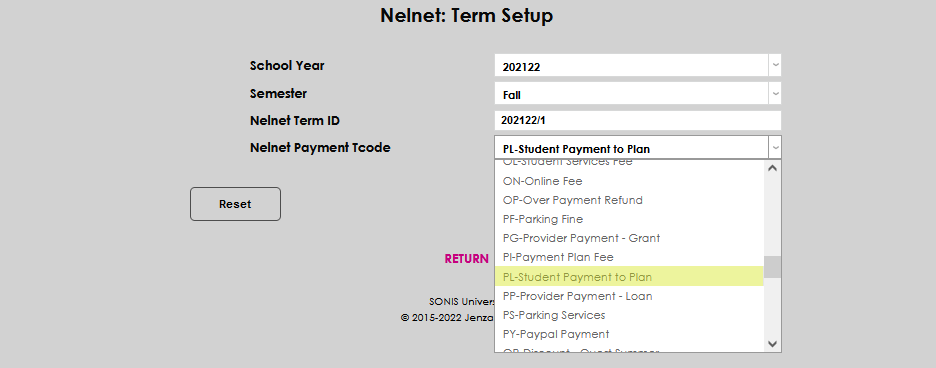
Enter the name of the term from Nelnet in the Nelnet Term ID field. This must be accurate for the term association with SONIS to work correctly. Select the transaction code from the Nelnet Payment T-code dropdown that should be used for incoming Nelnet payments. This can be unique per semester.
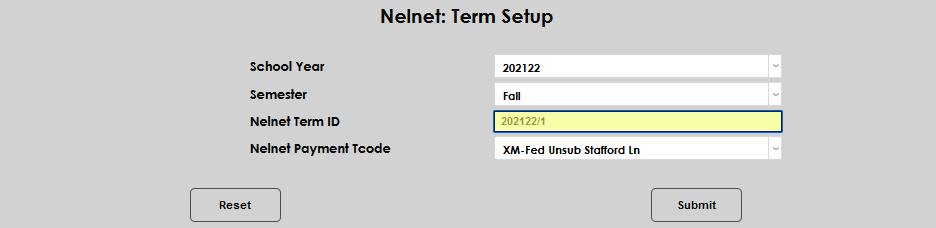
Click Submit to save the entered information. The user is returned to the main page to add more term association records and/or manage existing term associations.

Nelnet Account
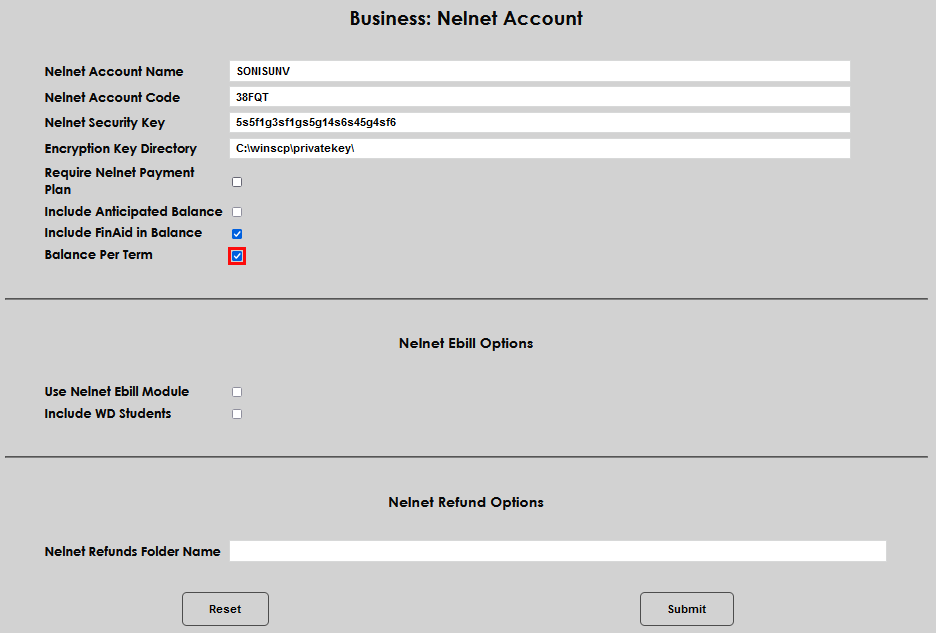
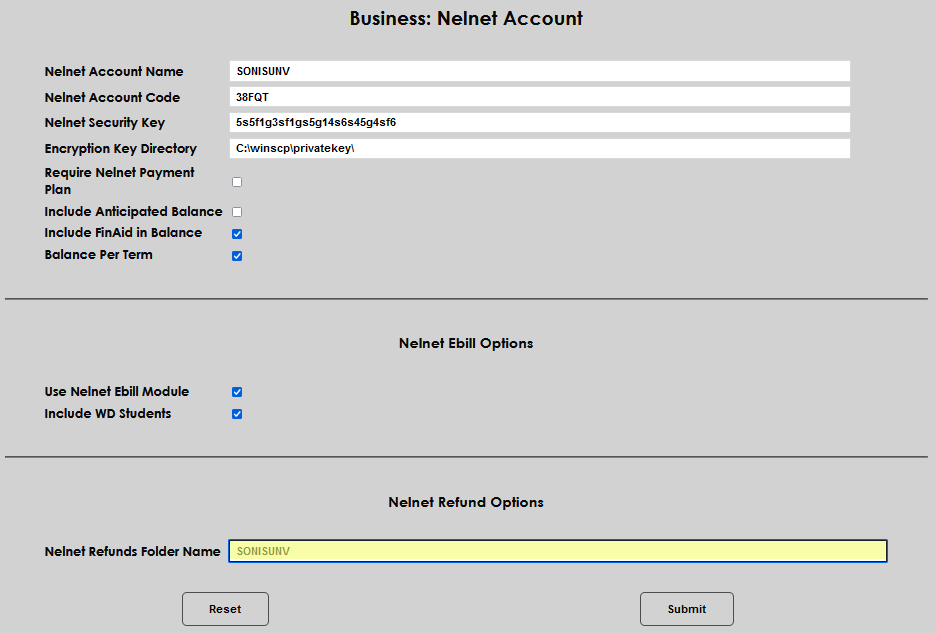
There are many options that can be selected to allow an institution's desired Nelnet Enterprise setup. These global settings are all housed in the Systems hub page Business: Nelnet Account. After entering the page, enter the Nelnet Account Name and Nelnet Account Code as provided by the institution's Nelnet representative.
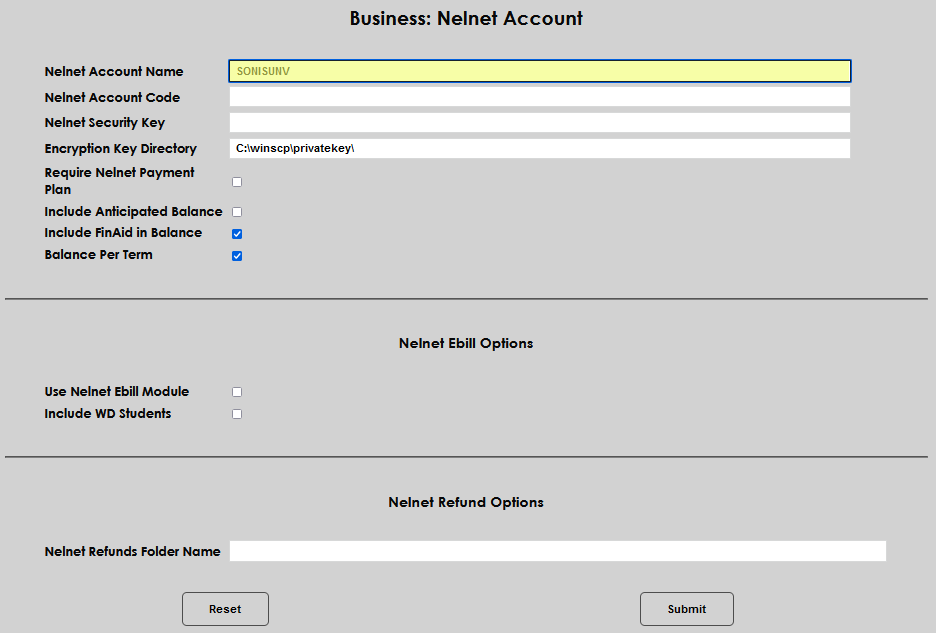
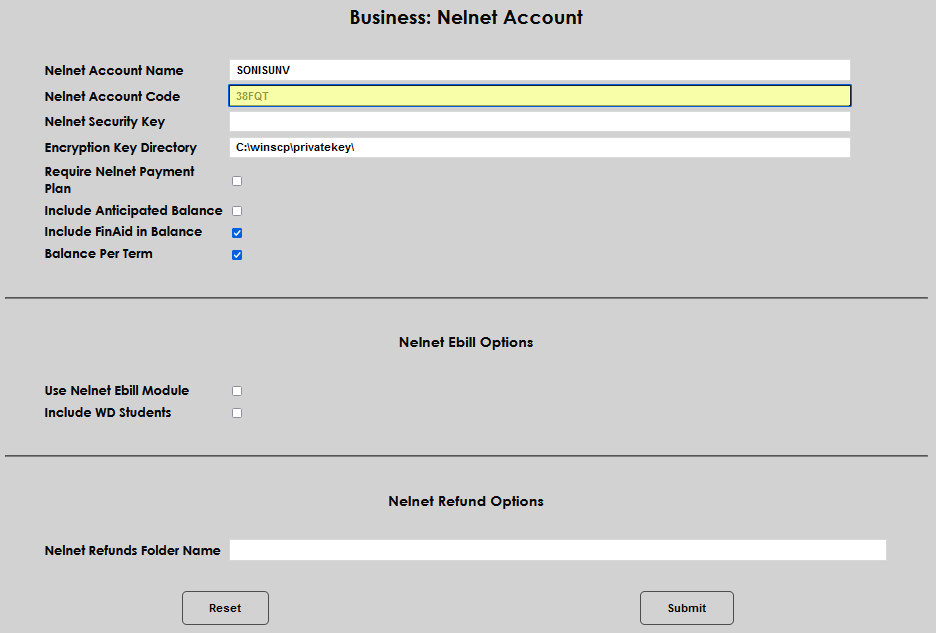
Enter the Nelnet Security Key and the Encryption Key Directory URL as provided by the institution's Nelnet representative.
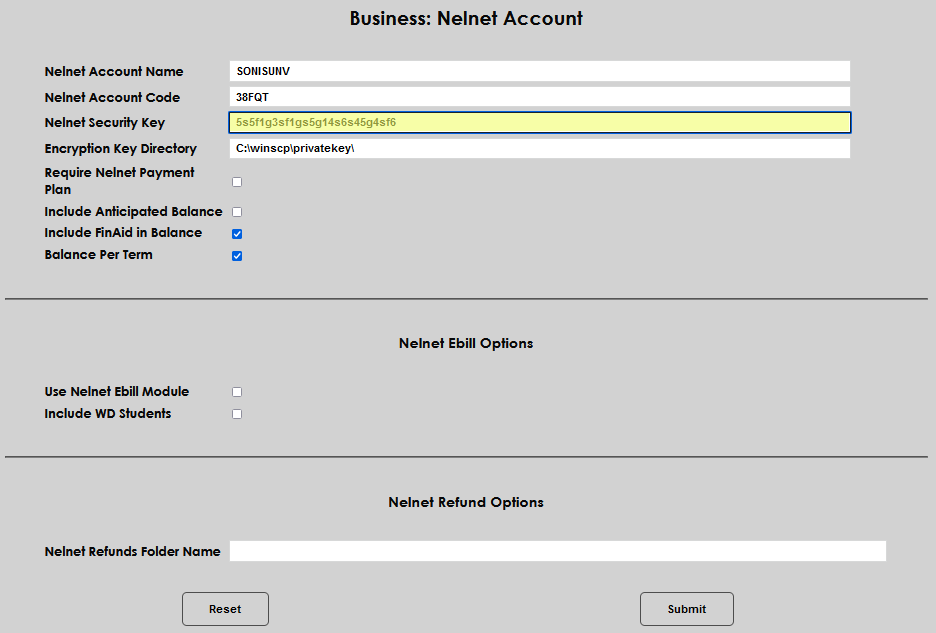
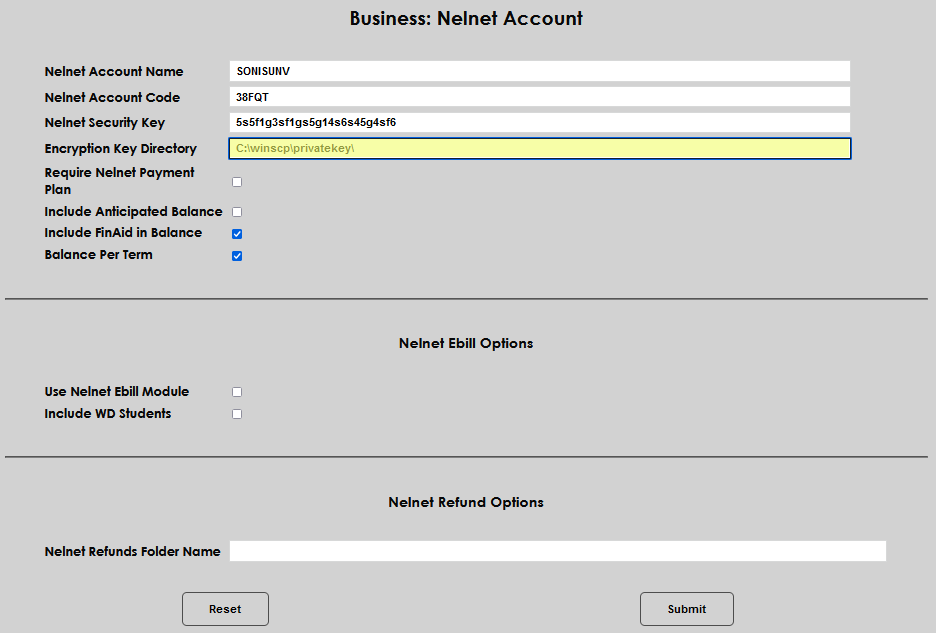
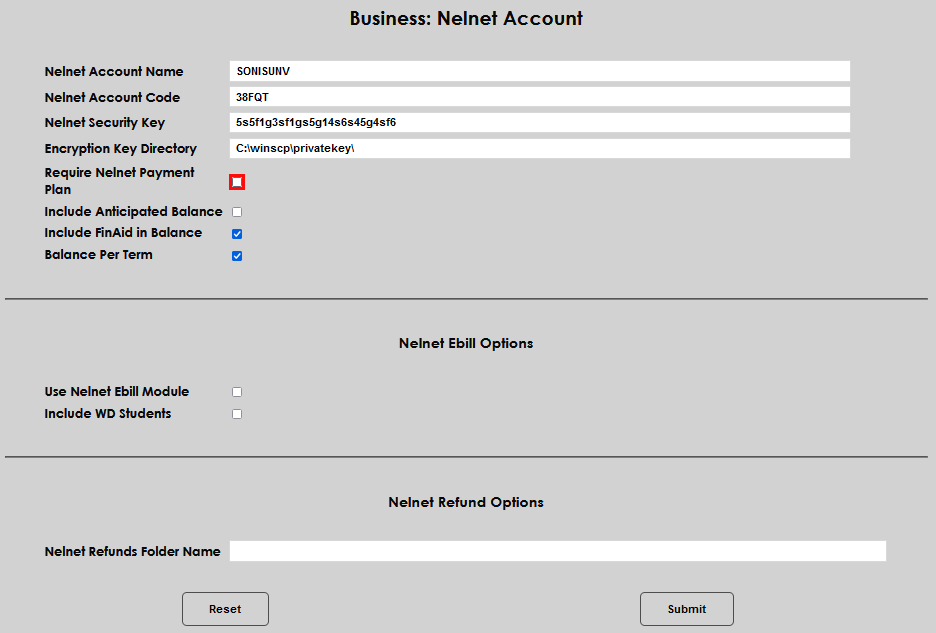
After entering the account details, the options provide the opportunity to configure Nelnet as needed by the institution. The Require Nelnet Payment Plan checkbox is used to determine which student balances get sent to Nelnet as part of the Nelnet Balance Export timed task. It should be used if the institution has a large population of students that will not be using Nelnet and therefore will not have balances sent to Nelnet for processing payment plans.
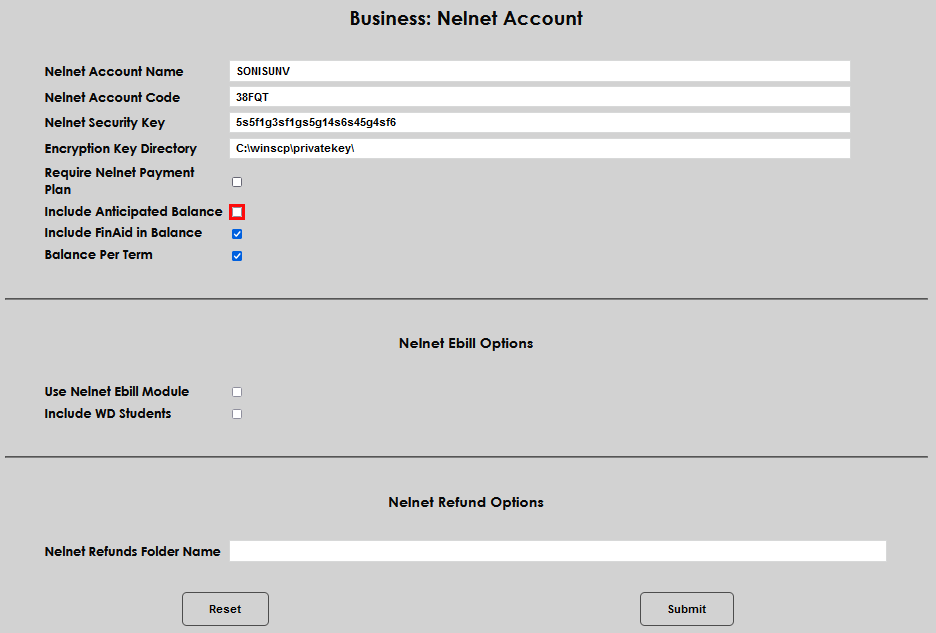
If Include Anticipated Balance is checked, all of the student's prebill or anticipated charges will be included when calculating the current balance due for export to Nelnet.
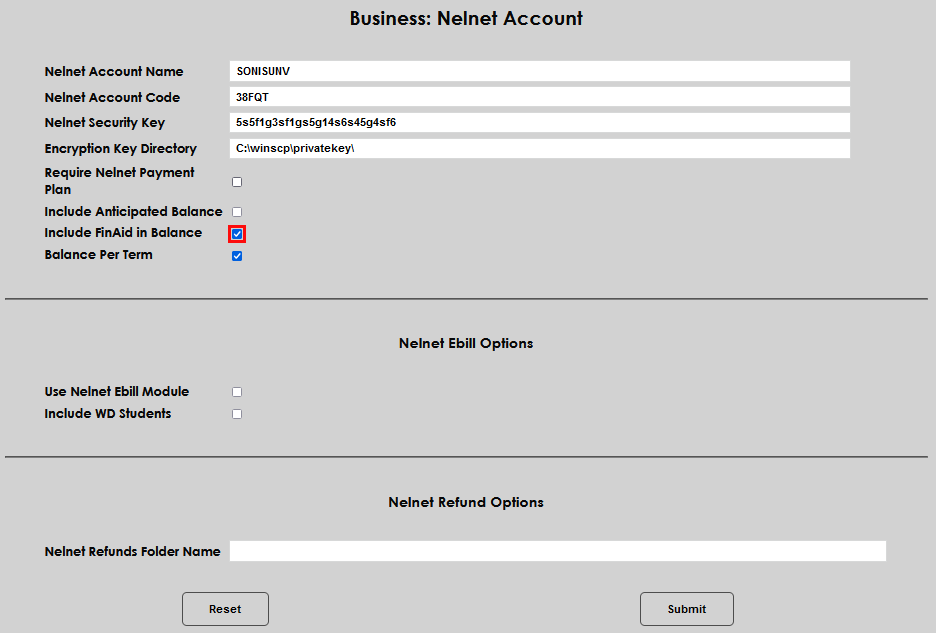
The Include Financial Aid in Balance option determines whether not-yet-disbursed awards will count towards the student's balance that is calculated and sent to Nelnet. By default, this box is checked and unpaid financial aid is included.
When Balance Per Term is selected, the balance that is exported to Nelnet will only include the current term's charges. If the student had a prior balance it will not be included. In Nelnet, each semester is treated as a blank slate when determining payment plan details. By default, this setting is off.
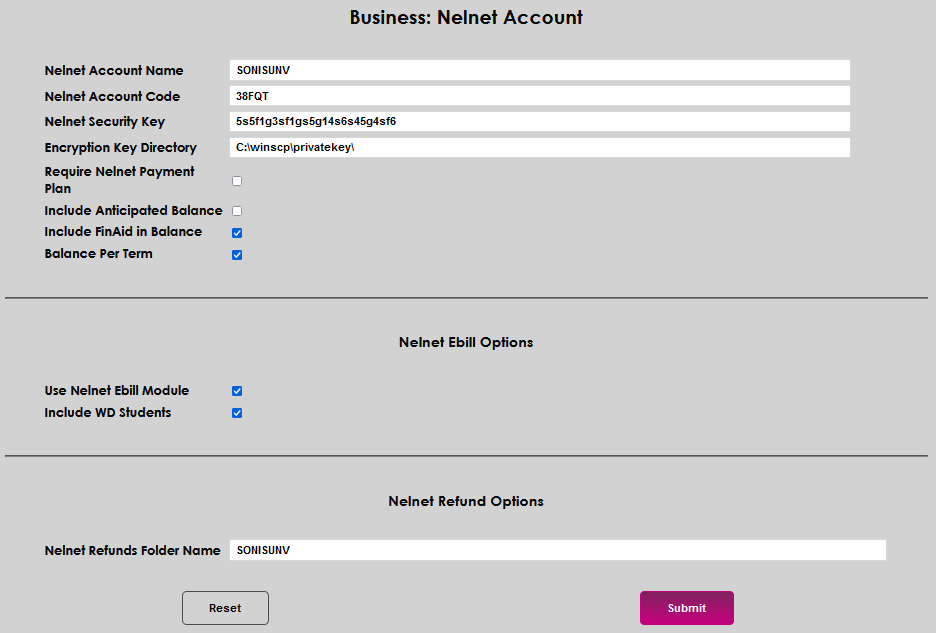
Click Submit to save the entered settings.
Ebill Options
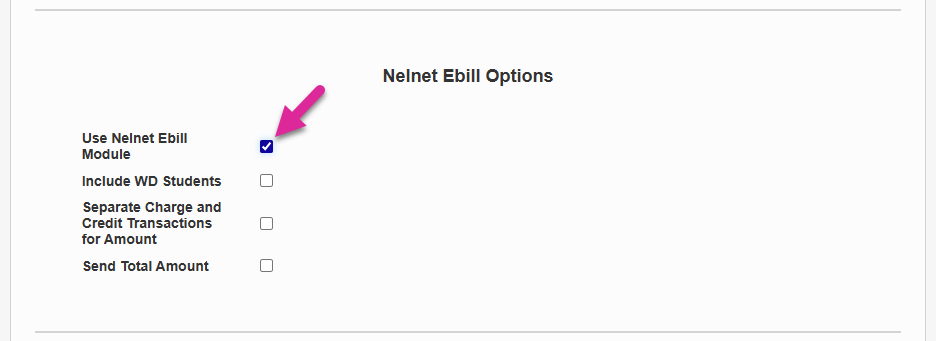
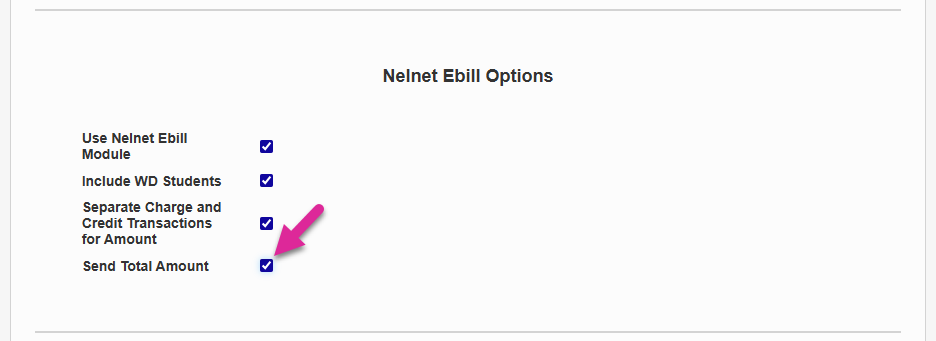
The checkbox Use Nelnet Ebill should only be selected if the institution is using the Nelnet Ebill module of Nelnet Enterprise to create electronic bills for students.
Select Include WD Students to include withdrawn students that may still need bills delivered to them in the Nelnet E-bill export file.

Check the Separate Charge and Credit Transaction for Amount box to change the XML data that is sent from Jenzabar SONIS to Nelnet. With this box checked, SONIS replaces the Amount data with separate Charge Amount and Credit Amount data.
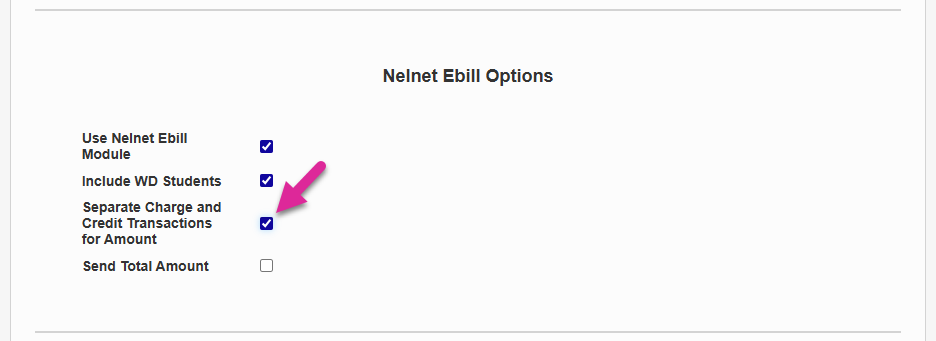
Check the Send Total Amount box to send the Total Amount Due in the XML file exported to Nelnet.
Refund Options
The Nelnet Refunds Folder Name should match the Nelnet account name. The refunds folder name is only used by schools utilizing Nelnet Enterprise to create and distribute physical checks for refunds to parents and students.
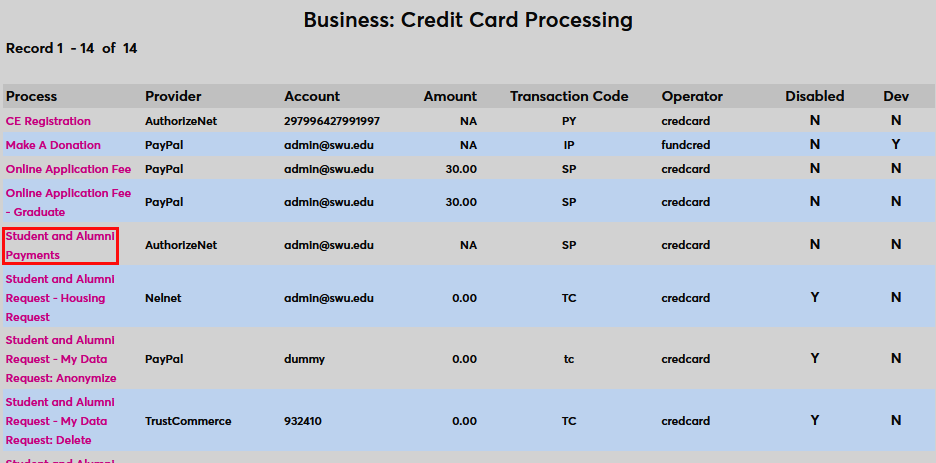
Credit Card Processing
Navigate to the Credit Card Processing page in the Systems hub. Select a Process with Nelnet currently listed as a provider or the process that will now be handled by Nelnet and click on the process name to edit.
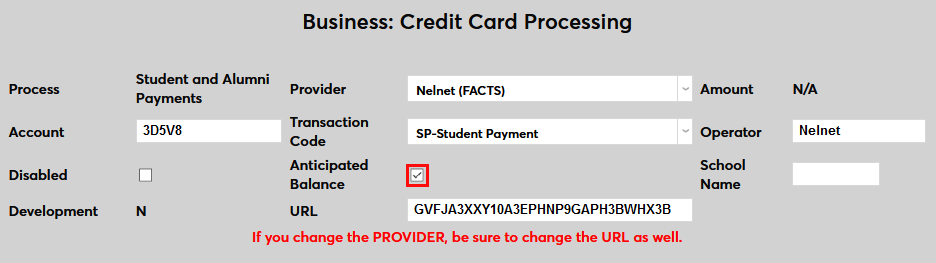
On the following page, ensure that Nelnet (FACTS) is selected from the dropdown menu at the top.
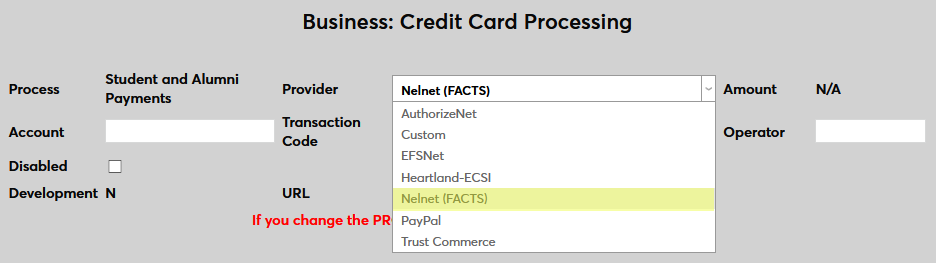
Next, enter the Account number as provided by Nelnet.
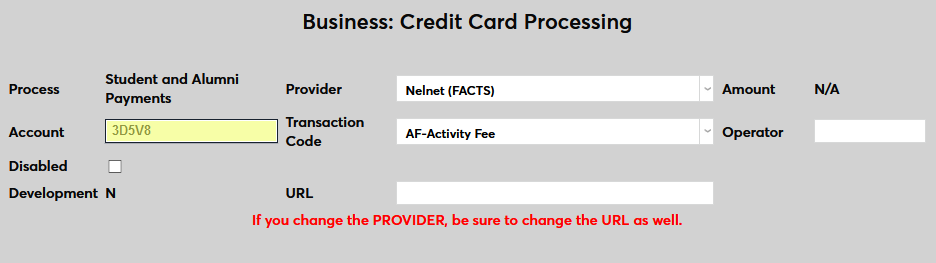
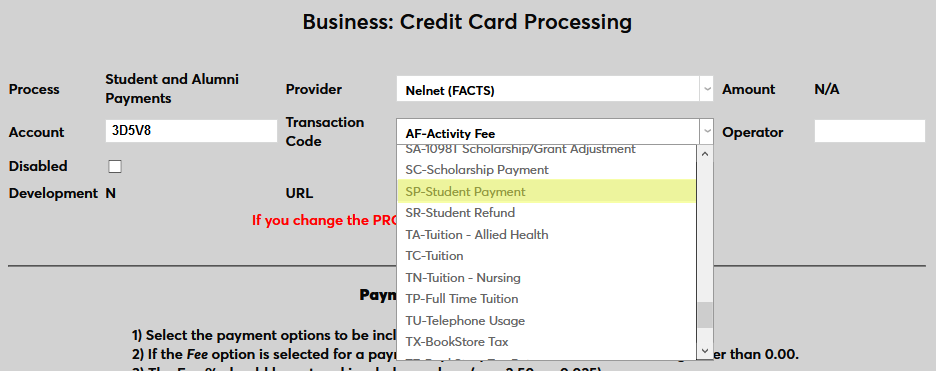
Select the appropriate student payment Transaction Code to associate with payments using Nelnet.
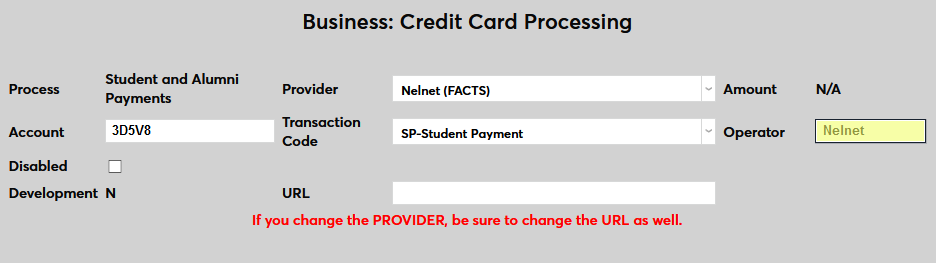
The Operator field holds an eight-character value, which will be stored in the the Operator field on all transaction records created by the Nelnet Real-time Transaction Payment Notification (RTPN) process.
The private key provided by Nelnet is entered in the URL field. This key is used to securely transmit data to and from the Nelnet Enterprise website.
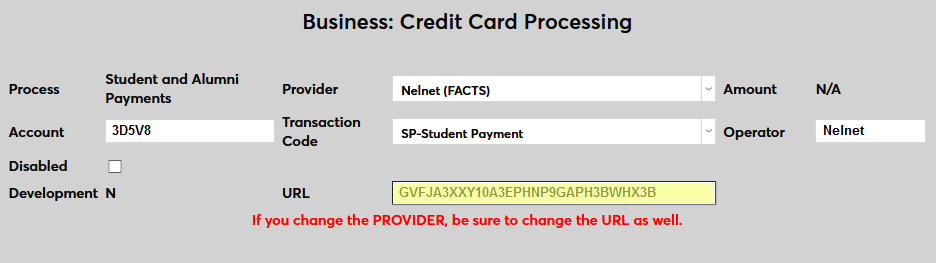
Click the Submit button at the bottom of the page to save the changes and activate Nelnet as the payment gateway.
If setting up Student and Alumni Payments, a new option will be presented upon returning to the page. Check the Anticipated Balance box to include anticipated awards in the balance calculations. Or leave it unchecked to ignore this data when calculating balances.
Scheduling Tasks
After activating Nelnet Enterprise, schools will need to set up recurring tasks to ensure that everything continues running smoothly. There are six timed tasks that manage the Nelnet processes in SONIS. Not all may be applicable to each institution. Most are designed to catch any issues that may have occurred due to internet connectivity problems and get them processed appropriately.
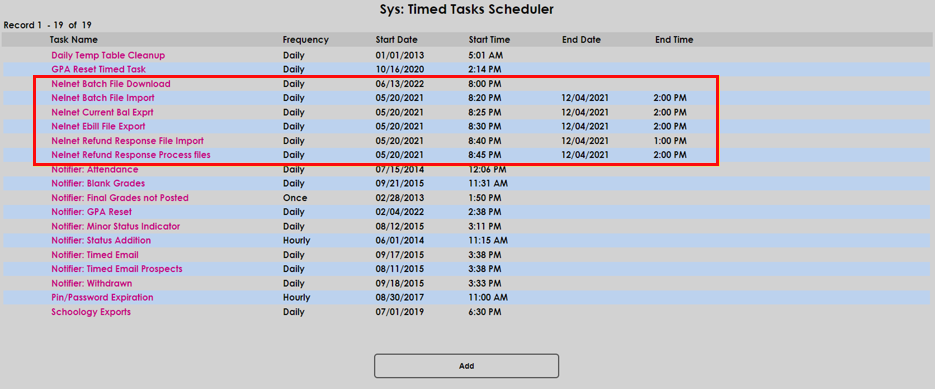
The timing of the timed tasks is important. Nelnet generally begins creating batches after 6 PM EST, daily, and some batch types may need to be run before others. Independent of the order, it is always a good idea to stagger timed tasks to minimize the load on the system. Batch processes can often be resource-intensive and will slow the system. The recommended order and timing for scheduling the Nelnet tasks are:
1. Nelnet Batch File Download: 8:00 PM EST. Downloads the batch files for payment plan agreements and payments from Nelnet.
2. Nelnet Batch File Import: 8:20 PM EST. Processes any imported batch files into SONIS and updates corresponding student records.
3. Nelnet Current Balance Export: 8:25 PM EST. Exports the current balances of students from SONIS to Nelnet, based on institutional settings.
4. Nelnet Ebill File Export: 8:30 PM EST. Creates and exports the Ebill file, if appropriate to institutional use. If the institution does not use the Ebill module, skip this task.
5. Nelnet Refund Response File Import: 8:40 PM EST. Imports any files for processed refunds in Nelnet into SONIS.
6. Nelnet Refund Response Process Files: 8:45 PM EST. Processes the refund response files that were imported in the previous timed task and updates any corresponding records.
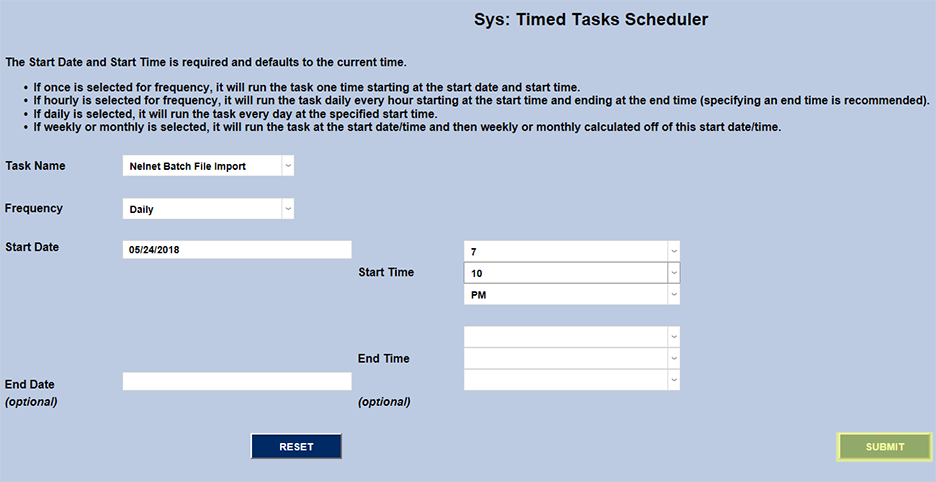
Open the Sys: Timed Task Scheduler in the Systems hub and click Add to set up the new tasks.
Select Nelnet Batch File Download from the task name dropdown. The Nelnet Batch File Download task retrieves the End of Day Agreement Activity and Transaction Activity batch files. The purpose of these files is to allow the processing of activities that were somehow unable to be processed via the real-time notifications sent from Nelnet when the activities took place, likely as a result of Internet or network issues. It is a way to keep Nelnet and SONIS in sync. The frequency should be set to "Daily." The Start Time should coordinate with the generation of the Nelnet EoD files at 6 PM in the Central Time Zone. It's recommended that the first task be set to run at 7 PM Central Time, adjusted accordingly from the time zone where the university is located. For example, schools in the Eastern Standard Time Zone will need to set their first take to run at 8 PM. Once the Task Name, Frequency, Start Date, and Start Times fields have been filled, click Submit to save changes and create the task.
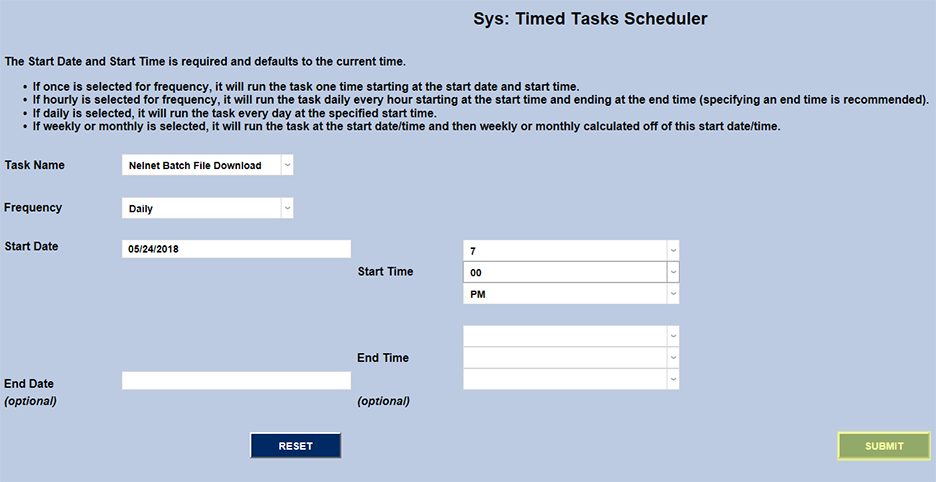
Administrators will need to return to the page to create a second task associated with this process, selecting Nelnet Batch File Import from the dropdown. It's recommended that this task be scheduled 20 minutes after the previous task to avoid conflicts.
The next task that needs to be set up is the Nelnet Current Balance Export. The purpose of the Balance Export file is to notify Nelnet of any changes to a student’s balance after the original payment plan was set up such as charges added or credits applied. The student will be notified of the balance difference and will be given the opportunity to adjust the balance of their payment plan accordingly. Select the Nelnet Current Balance Export, fill out the other fields, and click Submit to save the changes. Remember to allow at least 20 minutes for the previous task to complete.

Note
Agreement Activity and Transaction Activity batch files are only created by Nelnet as warranted. If no qualifying activities took place on a given day, then the batch file(s) won’t be created by Nelnet and therefore will not be imported into Jenzabar SONIS.
Nelnet Refund Export
Jenzabar SONIS member institutions that have purchased the Nelnet Refund module of Nelnet Enterprise and wish to use SONIS to keep refund activity in sync can use the Nelnet Refund Export in the Systems hub.
The Nelnet Refund Export process will find and list every student that has a negative balance for the school year and term selected. The list can be further defined by specific Transaction Code. Refund transactions can be created for the students identified. This process will also send the students and their refund amounts to Nelnet so that proper refunds can be distributed from the Nelnet platform. When the refund is distributed out of Nelnet, Nelnet will send back confirmation, or rejection, that the refund was successfully processed and SONIS will then mark that transaction as verified or not. Because SONIS is creating refund transactions for students at the time of export from SONIS to Nelnet, if there is a problem with the refund and it needs to be canceled on the Nelnet side, that correction will occur in the timed task to/from Nelnet and void the refund transaction without any need for this to be done manually.
Parent PLUS Loan Processing
If students have a ParentPlus award type for the school year and semester the refund is being processed for and they have a preferred relationship record in SONIS that is tied to the borrowing family member, that student's relationship contact information will be sent to Nelnet so that the refund check can be distributed to the borrower and not the student.
Generating the Nelnet Refund Export
To create the Nelnet Refund Export, select the desired School Year and Semester from the corresponding drop-down menus.
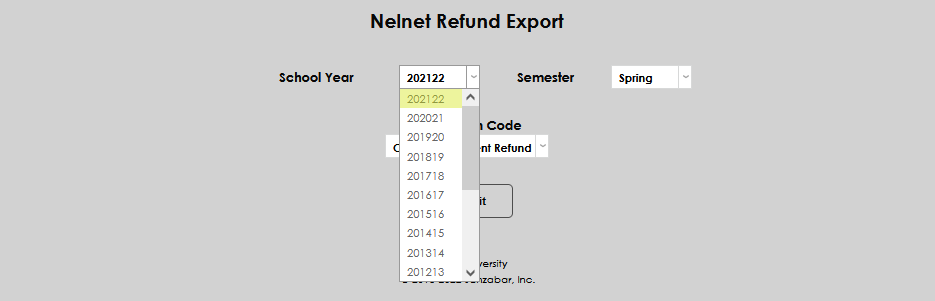

Select the appropriate Transaction Code that applies to financial aid refunds at the institution. Click Submit to create the transactions display.


The students with credit balances that meet the selected conditions will display. After reviewing, if no data is incorrect or students should be removed, click Select All. All students on the list will be selected. If this is incorrect, click Unselect All.
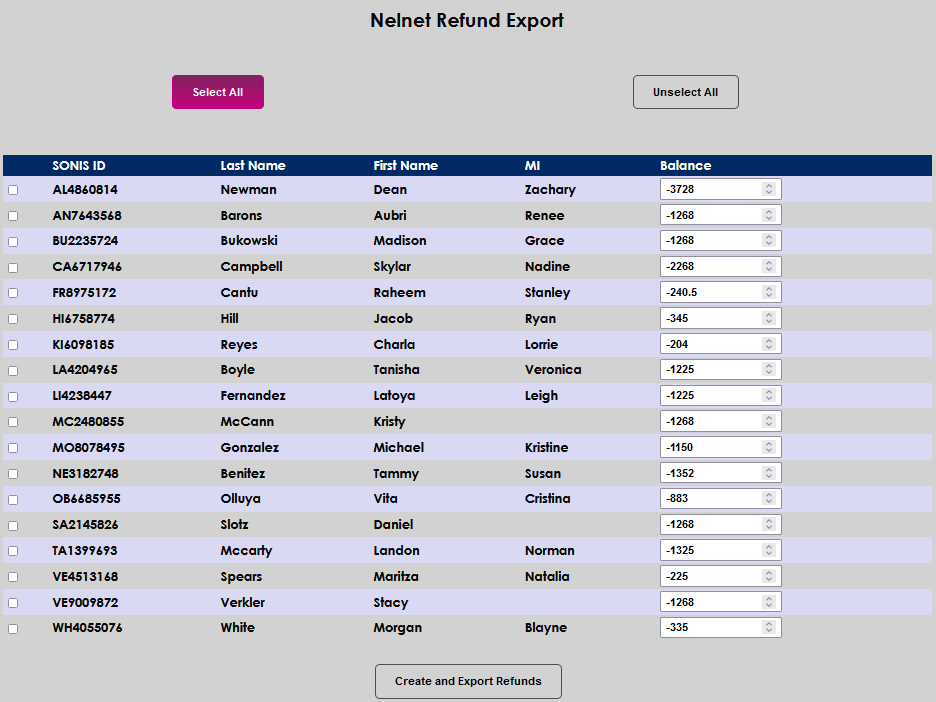
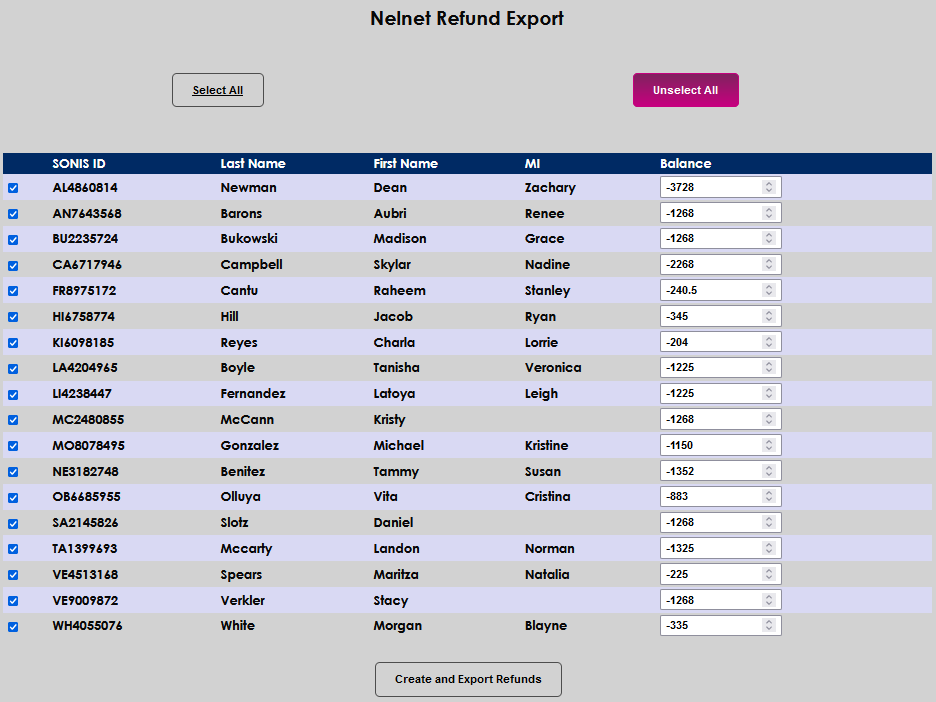
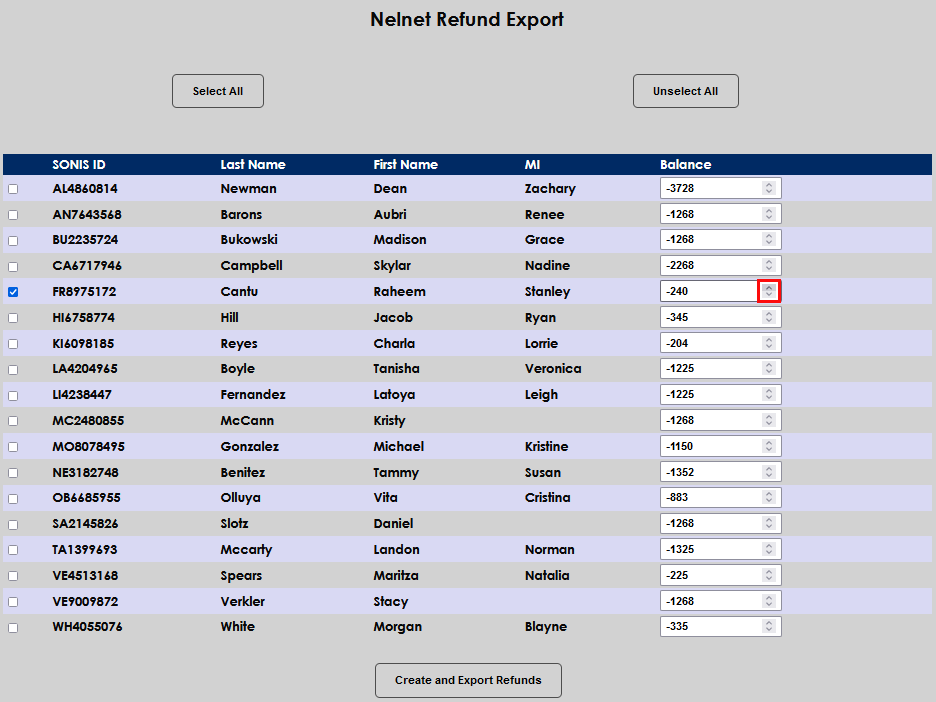
Students can be individually selected by clicking the checkbox to the left of the SONIS ID. If a student should be included, but the balance should not be refunded as displayed, for example, if the institution has a policy to only refund rounded amounts., the Balance field can be adjusted up or down using the arrows.
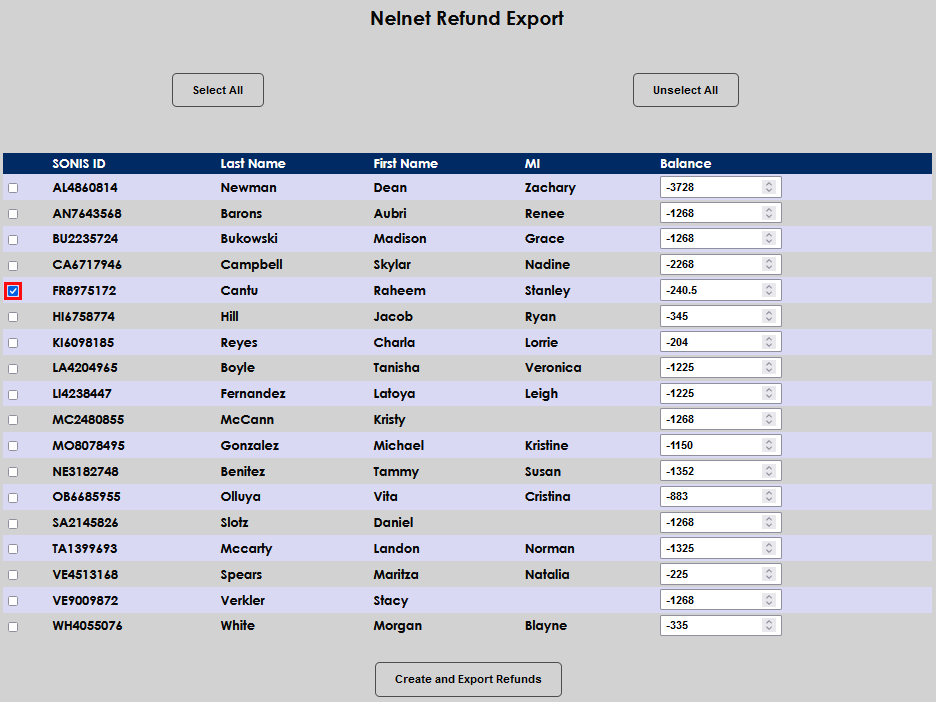
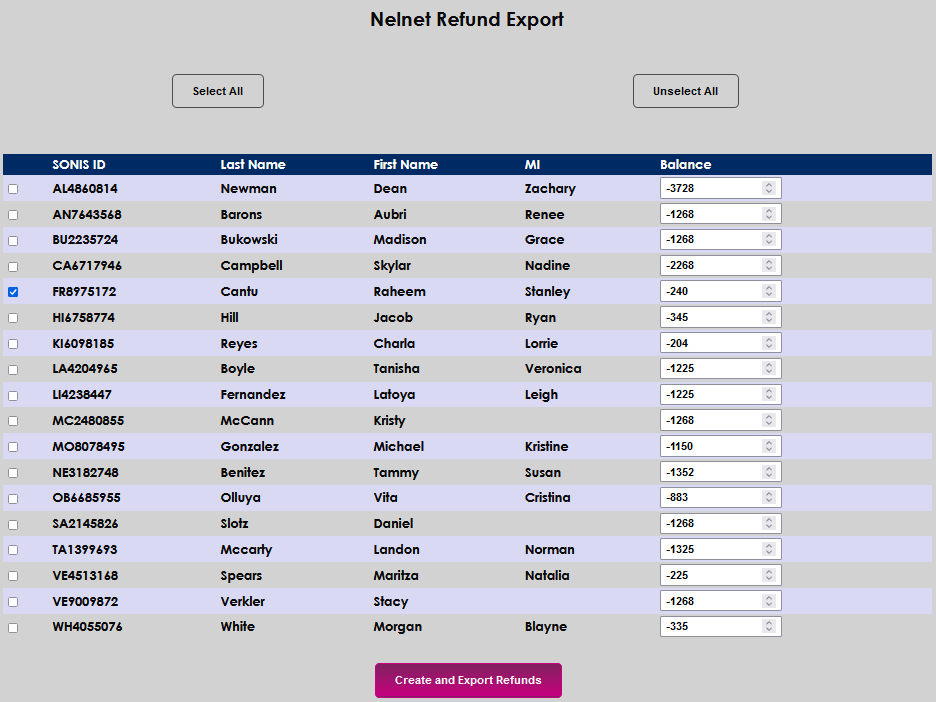
Click Create and Export Refunds to process the refund transactions and create the export file. A summary screen then displays the details of the batch, including the batch number and transaction number.

Hold Refund Requests
If the option has been activated, students can request that their financial aid refund money held by the school and applied to future transactions rather than being returned to them. If a student has a hold refund request on file, this information will appear on the export summary page and that student's refund record will not be exported to Nelnet.
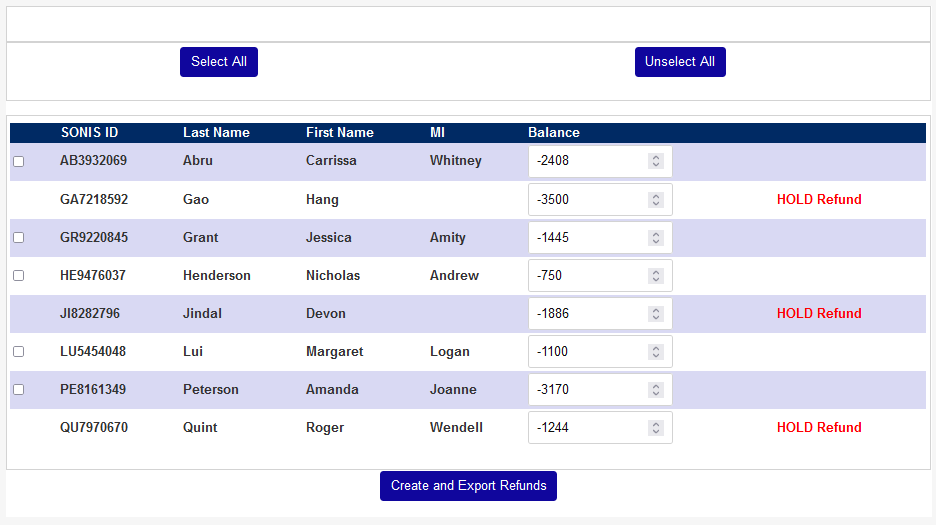
See Hold Refund Request for more information on this process.
Nelnet Transaction History Report
The Nelnet Transaction History report provides the ability to pull a ledger for all activity from Nelnet to SONIS and group it by term, person, and event. To access the report, select Nelnet Transaction History from the Reports menu. When the page opens, the School Year and Semester menus default to the current term. If necessary, select the correct year and term.
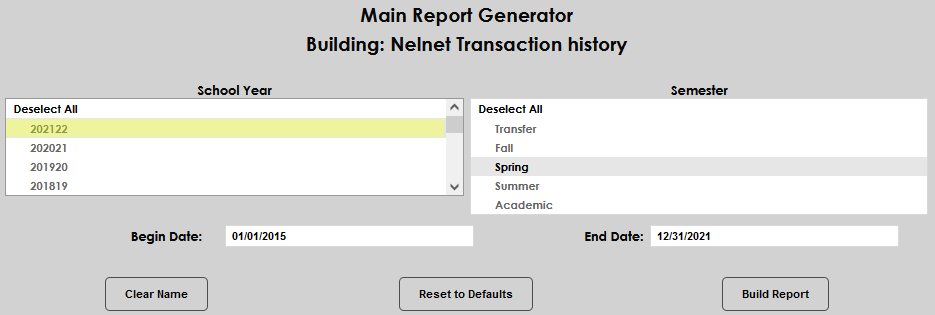
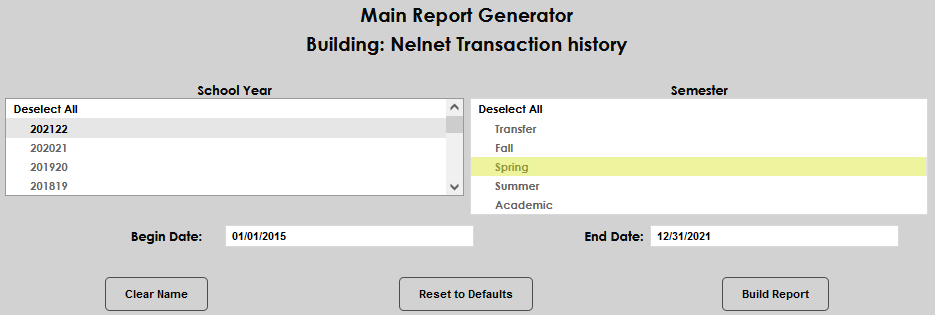
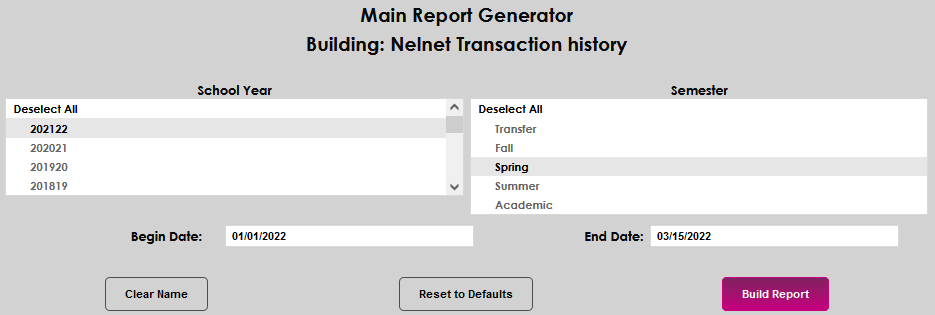
If desired, the results can be narrowed further by entering a Begin Date and End Date.

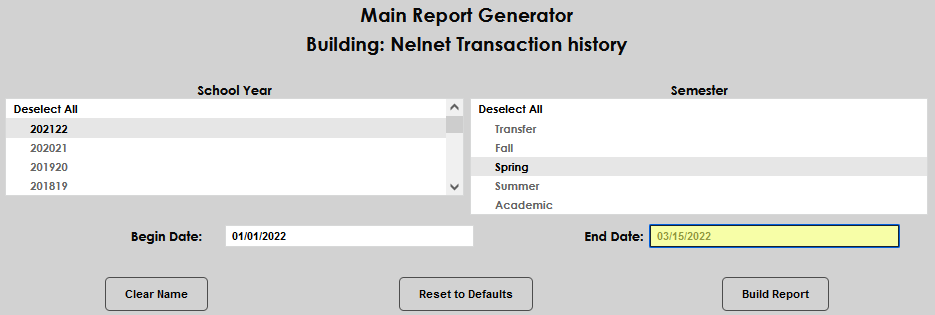
Click Build Report to compile the report. Click Preview Report to open the results in a new window.

Student Portal
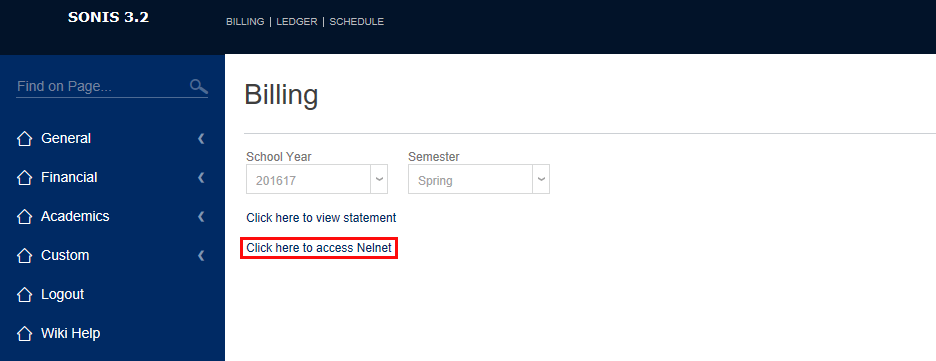
When a student logs into the Jenzabar SONIS student portal and clicks on the Billing link under Financials, a link to access the Nelnet website is displayed. When the link is clicked, a pop-up will appear asking the student if they want to continue to the Nelnet website.

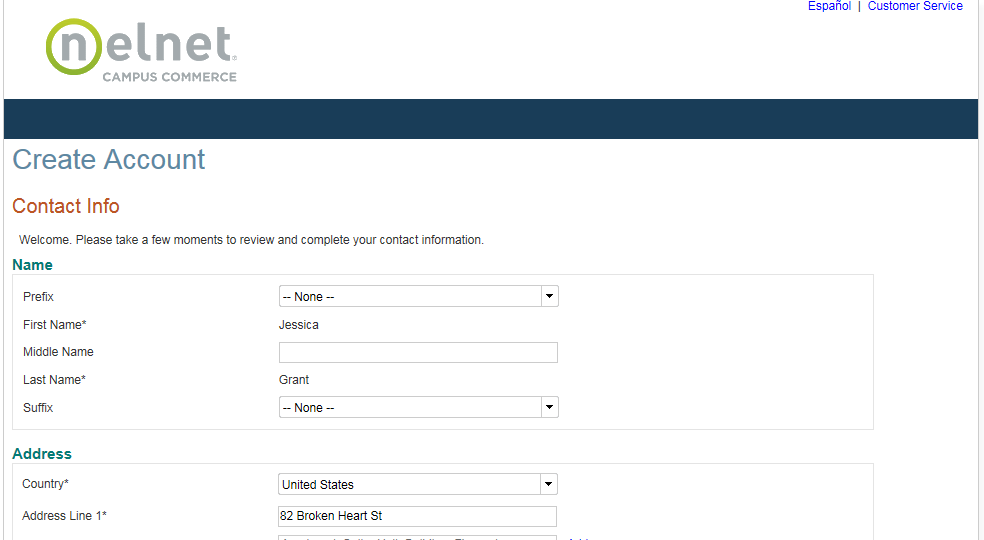
Clicking OK will open a new browser tab and the student will be logged into the Nelnet Enterprise website. The first time the student logs into Nelnet they will need to complete the process of setting up their account.
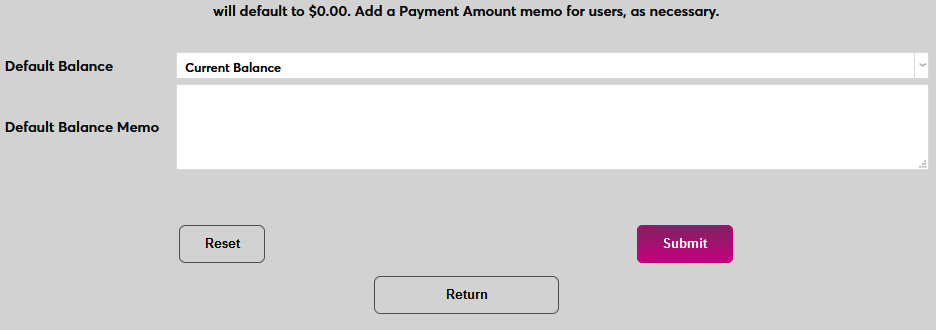
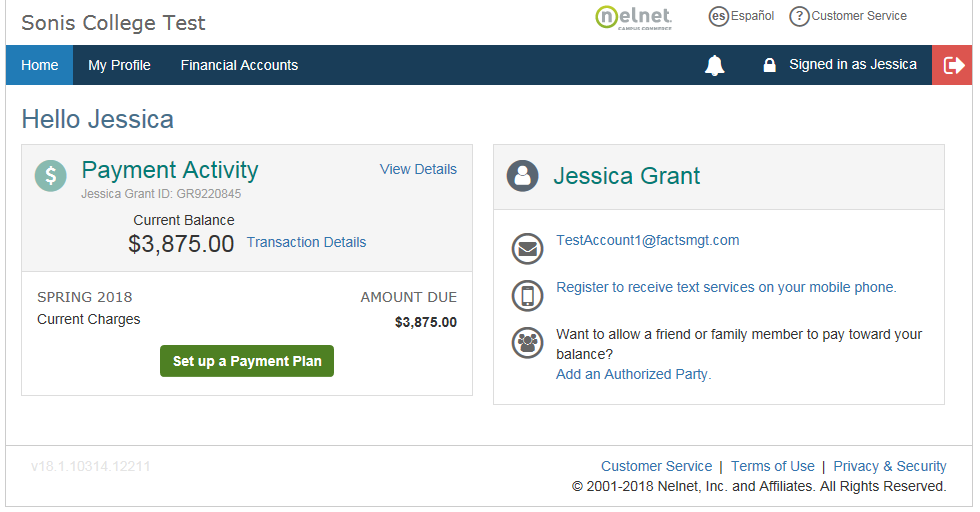
Once the setup process has been completed, the student will be returned to the Nelnet homepage where their balance is displayed as was defined in the institution's configuration of Business: Nelnet. This page will become the starting page for all future logins by the student to Nelnet from SONIS.
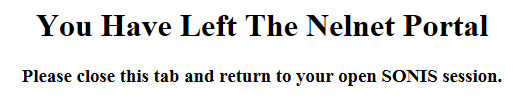
After clicking on the Exit icon in Nelnet, the student will see a Close Tab message displayed in the tab where they had been logged into Nelnet.
Student Records
A student's Nelnet activity can be viewed by navigating to the Nelnet page from the student's Names menu. The actions display in reverse chronological order. All activity for payment plan agreements, payment transactions, and refund activity will display and will be updated with the current status. Status possibilities for payment plans are Completed, Active, and Canceled. Refunds will display as Verified when the refund check or EFT is confirmed by Nelnet. If there is a problem processing a refund, it will display as Cancelled.

The values displayed in the Type column identify the type of activity that took place:
RTAN - Real-Time Agreement Notification: each time a student sets up a payment plan for an active term or year Nelnet sends a notification to SONIS with details of that plan.
RTPN – Real-Time Payment Notification: when a payment is made for a payment plan, whether automatically or manually, a notification with the details is sent to SONIS and a transaction is created to post that payment to the student’s account.
