General Ledger Page Setup
Overview
The General Ledger Page Setup utility allows administrators to choose a configuration for the export file that's created by Post to Accounting. Currently, Jenzabar SONIS supports Abila MIP GL, AccPac GL/Sage ERP 300, Financial Edge (CSV), Great Plains/MS Dynamics (CSV), MediTech GL, MS Dynamics (tab-delimited), QuickBooks GL, QuickBooks Online, and Sage Intacct. Administrators can select one of these products and enable it for their institution.
Additionally, the General Ledger Page Setup utility is used to set up a connection to QuickBooks Online.
The Transaction Code Mappings and General Ledger Mappings Import Utility can be used to quickly create associations between the general ledger software and SONIS transaction codes.
Selecting Accounting Software
For existing SONIS clients who are still using the same general ledger accounting software, no changes need to be made. For new clients and clients who have changed software, the Posting to Accounting export file can easily be changed by navigating to General Ledger Page Setup in the Systems hub.
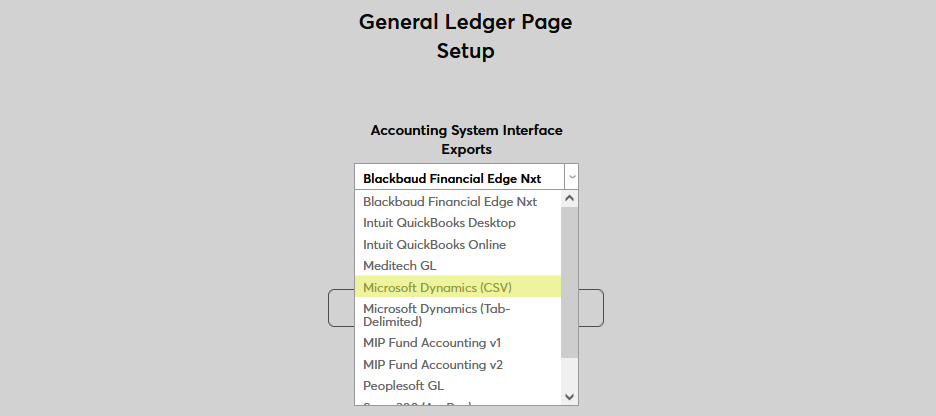
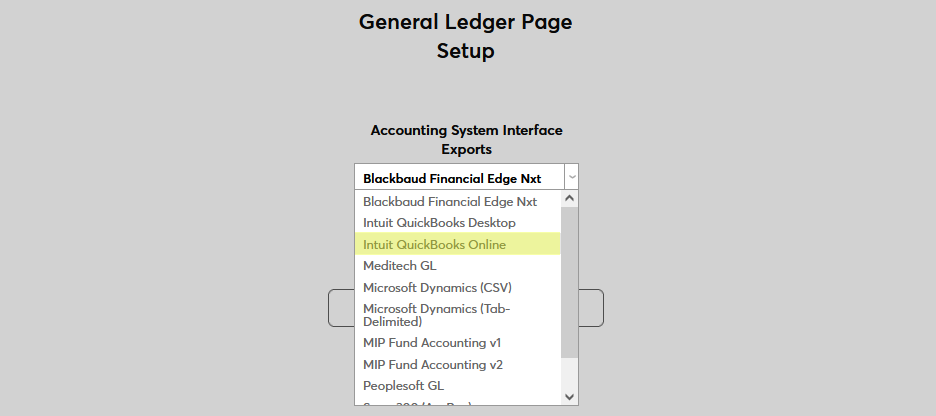
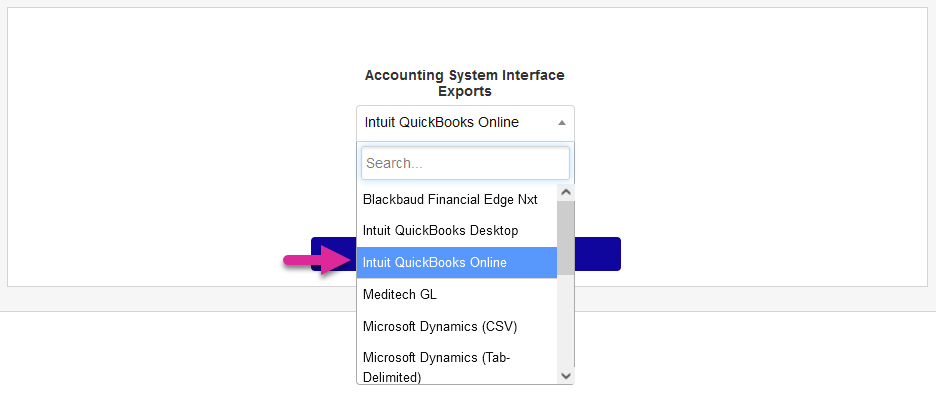
Select an accounting software from the Accounting System Interface Exports menu. The page will automatically reload.
Check the Enabled box to set this software as the one that will be used for Post to Accounting exports.

Click Submit to save the changes. All Post to Accounting exports will now be in the correct format for the selected software.

Sample Files
• ACCPAC
QuickBooks Online
Intuit Developer Setup
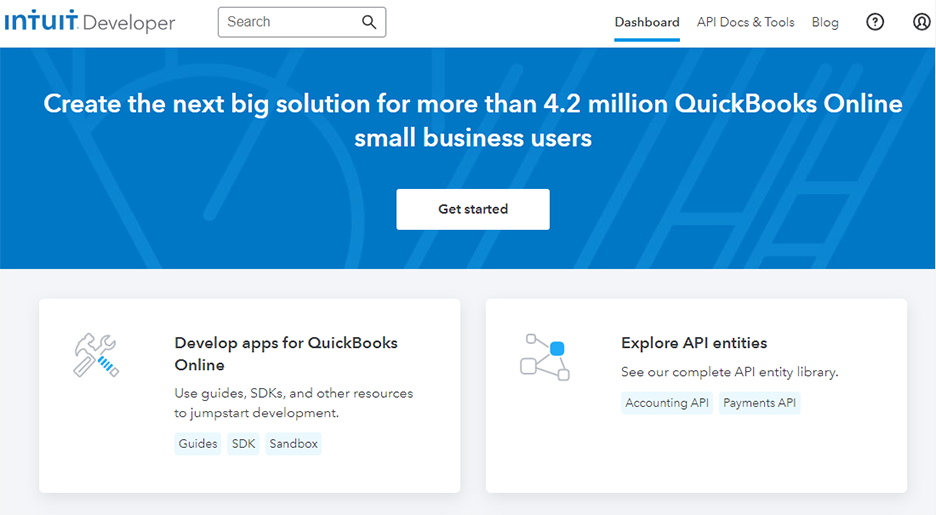
A few simple steps need to be taken on the Intuit Developer site in order to create the connection to Jenzabar SONIS. First, create a developer account or log in to an existing account. Select the Dashboard tab to begin.
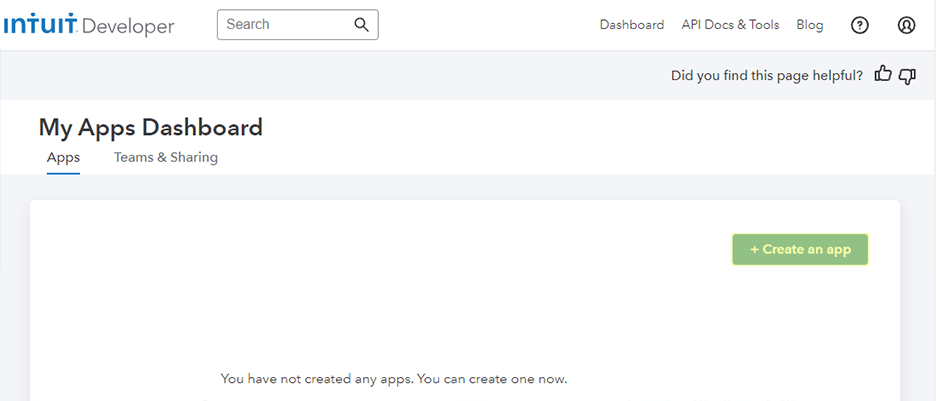
Click Create an App to get started.
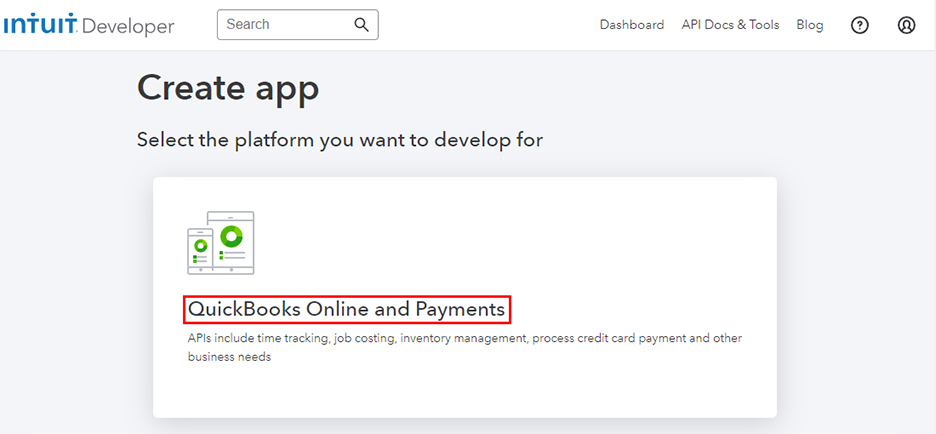
Click the QuickBooks Online and Payments button to continue.
Give the application a name. We suggest SONIS , but any name that will be easily identified in the future will do.
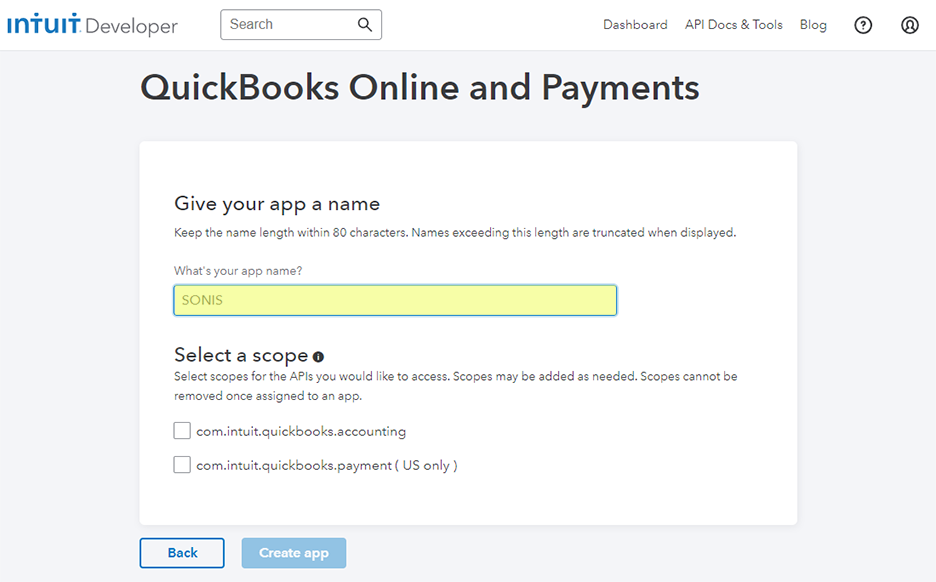
Select the accounting scope only.
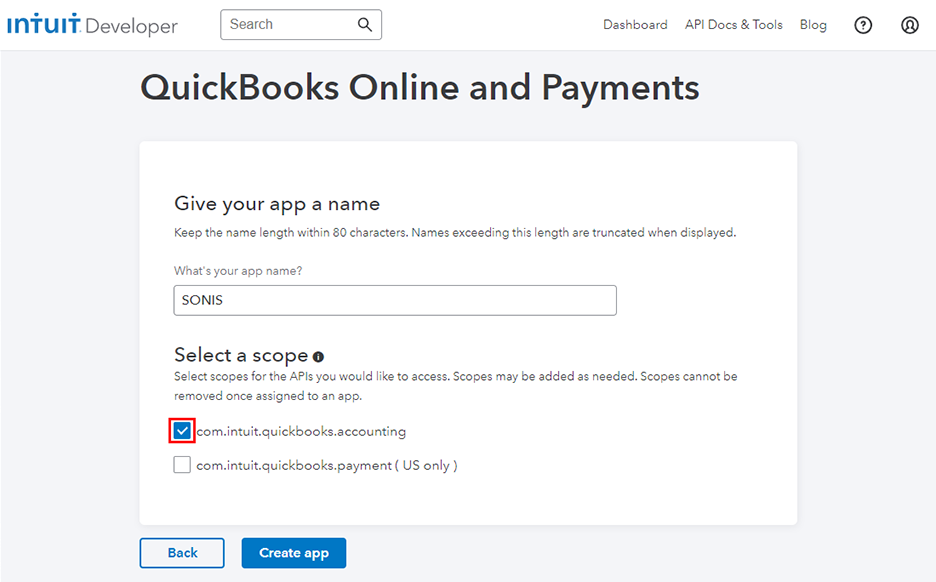
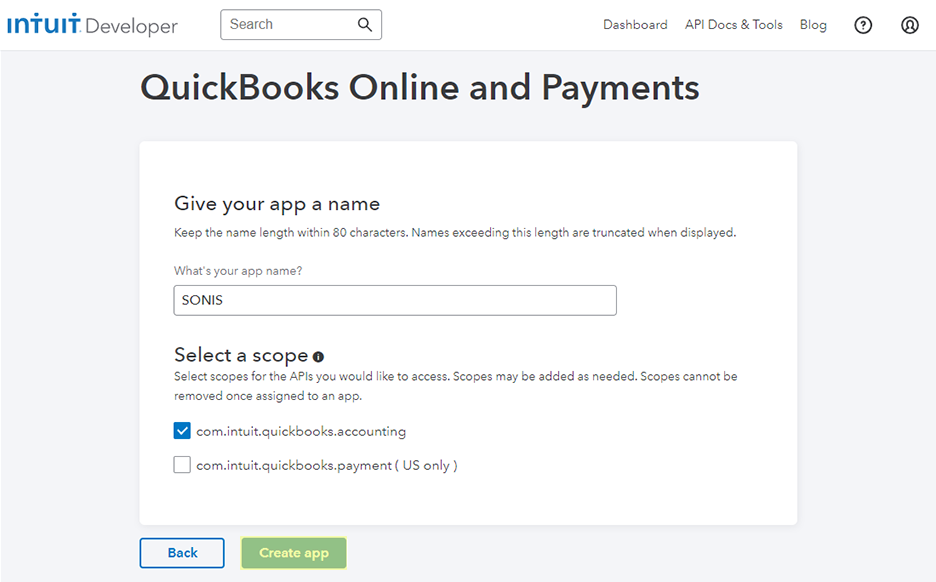
Click Create App to complete the process.
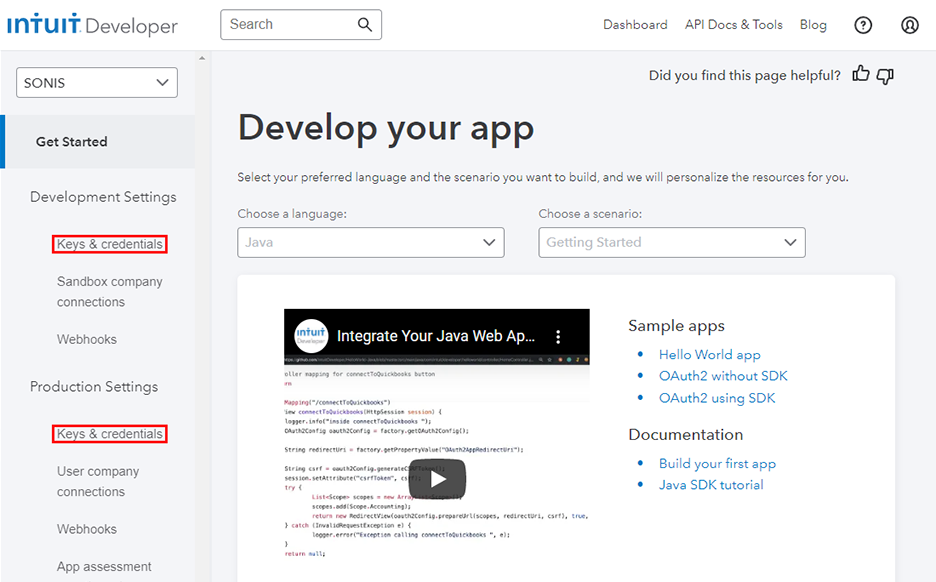
In the Developer Dashboard, navigate to the Keys & Credentials page. For sandbox testing, select the Keys & Credentials page under the Development menu. When going live, select the Keys & Credentials page under the Production menu.
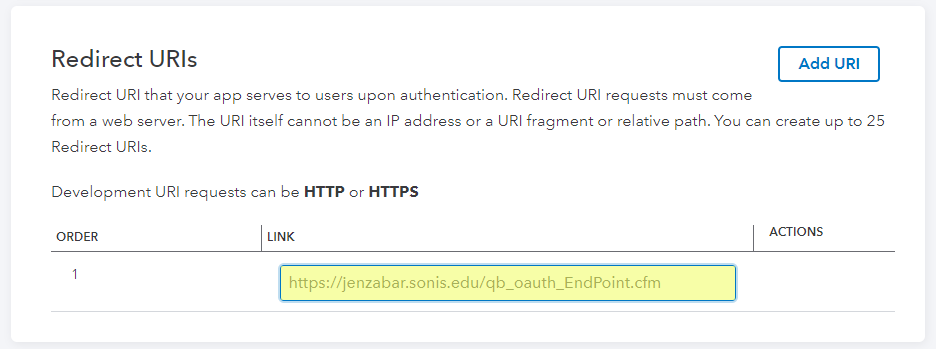
In the Redirect URIs section, enter https://[FQDN]/qb_oauth_EndPoint.cfm , replacing [FQDN] with the fully qualified domain name where SONIS is accessed locally.
Note
In this example, jenzabar.sonis.edu represents the institution's domain name for accessing SONIS.
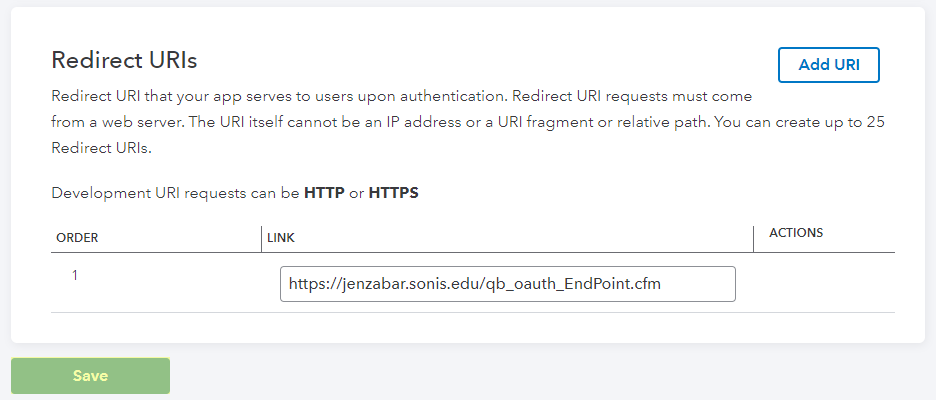
Click Save to save the URI change and then return to the page.
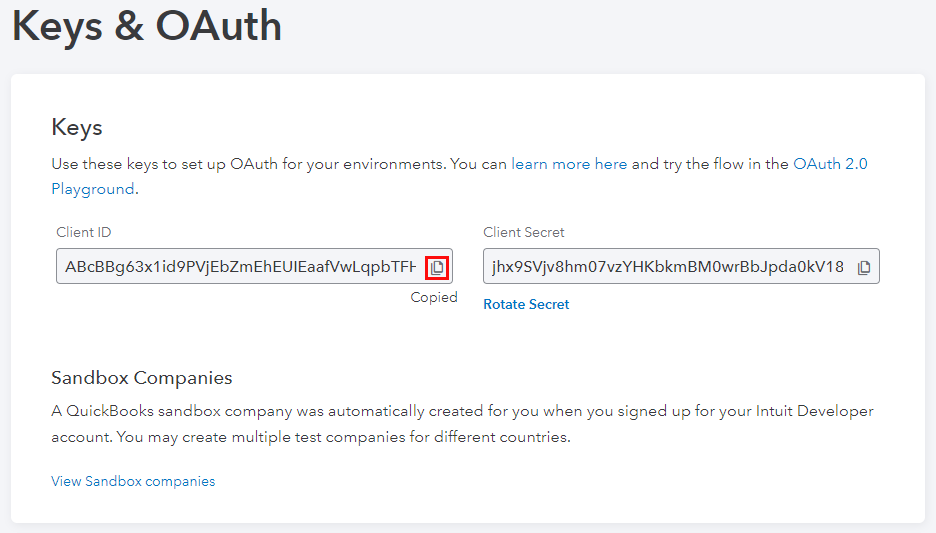
In the Keys & OAuth section, copy the Client ID and the Client Secret . These values will be needed in just a moment.
SONIS Setup
General Ledger Setup - Line Item
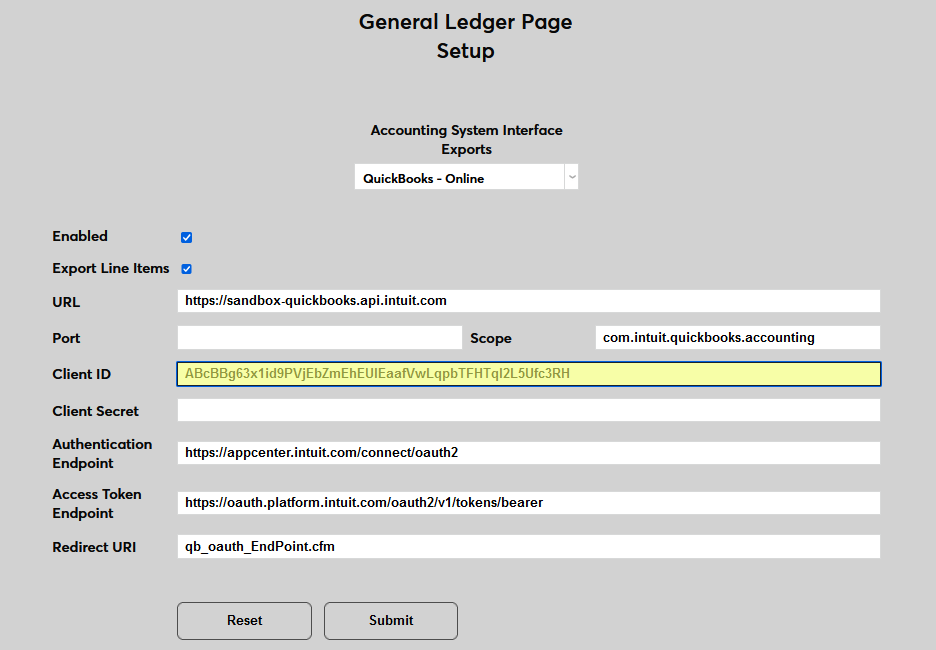
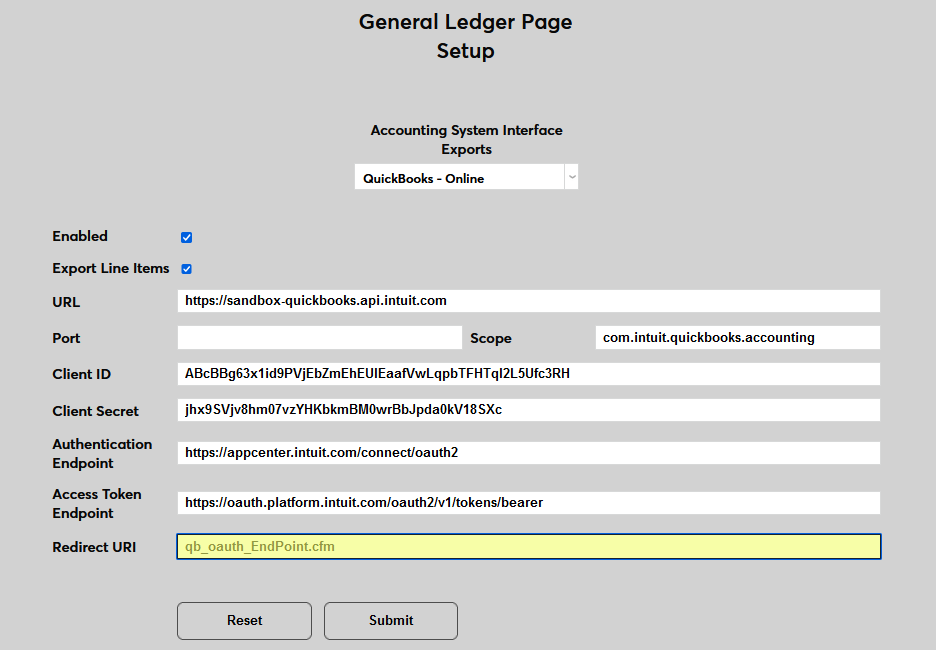
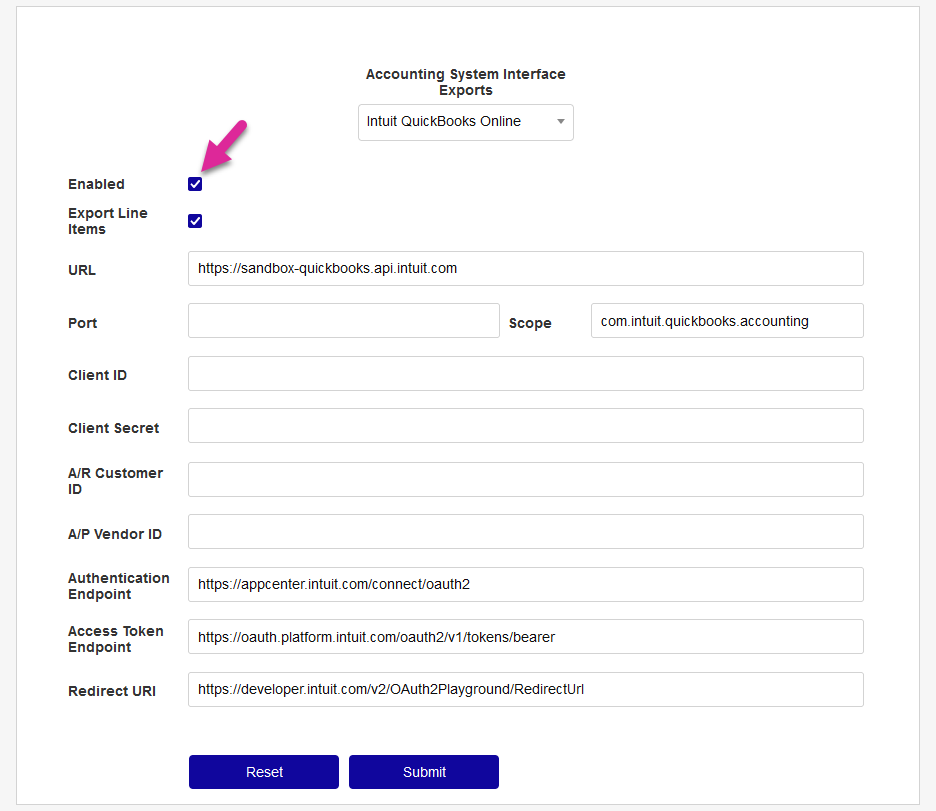
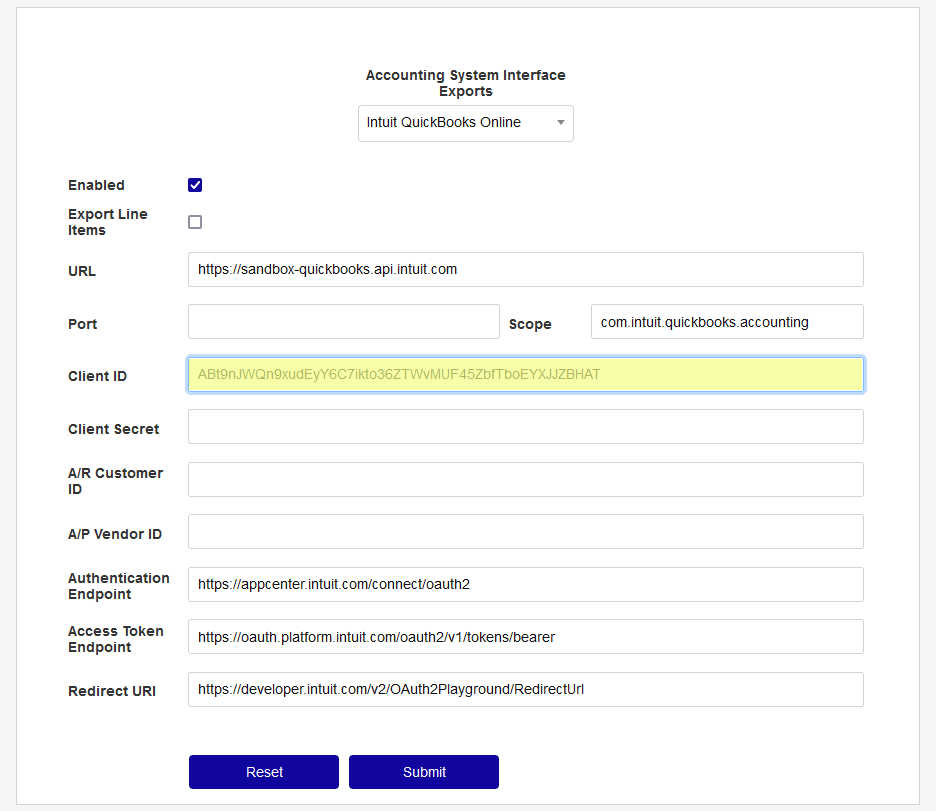
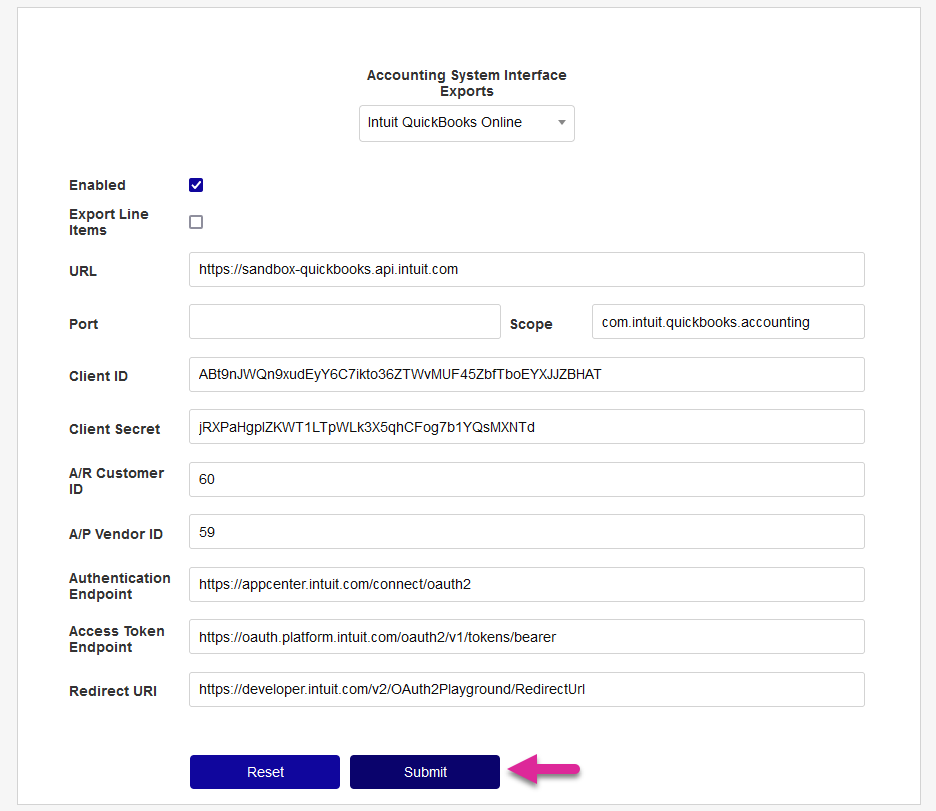
To continue the setup process, navigate to the General Ledger Page Setup utility and select QuickBooks-Online from the Accounting System Interface Exports drop down menu. The page will reload with the setup fields.
Check the Enabled box to set this software as the one that will be used for Post to Accounting exports.
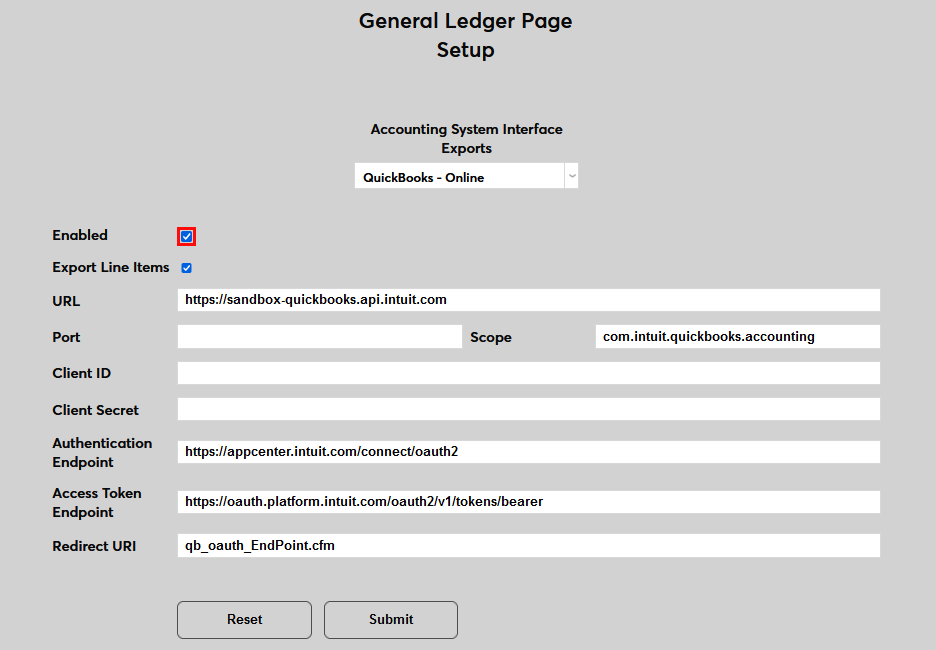
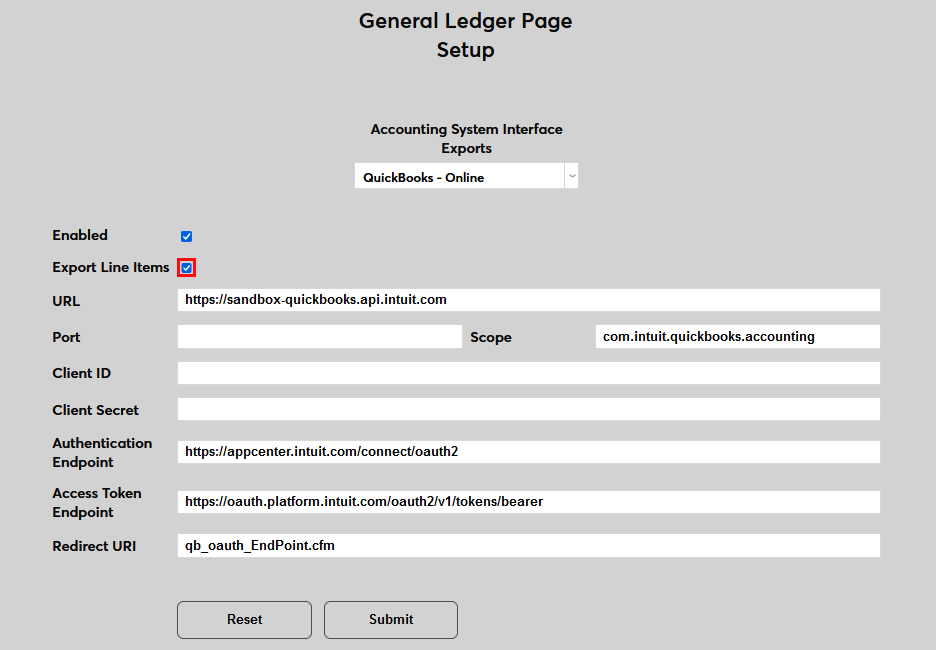
Check the Export Line Items box to send each individual transaction in the SONIS system separately.
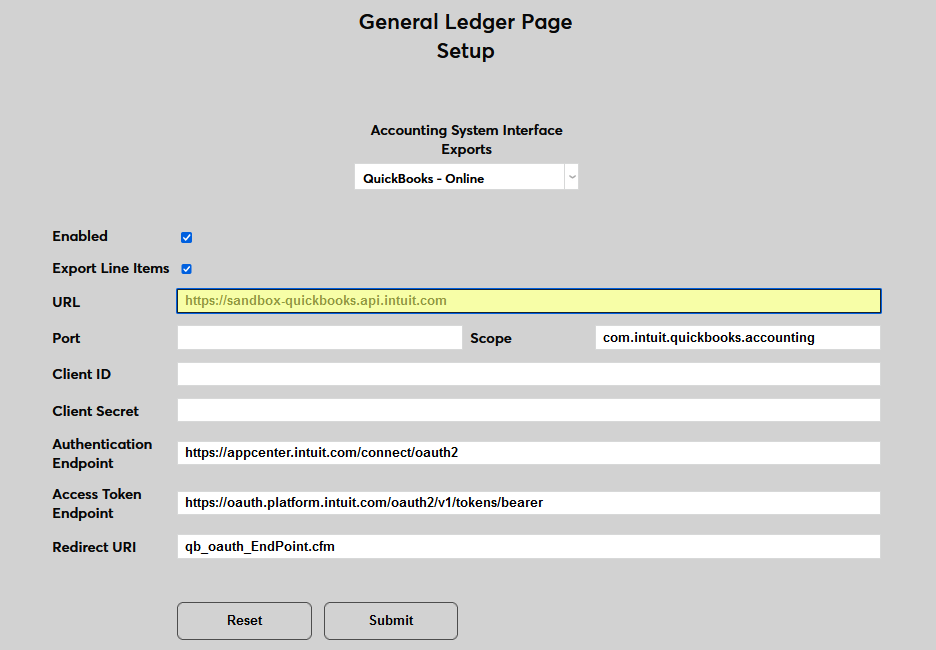
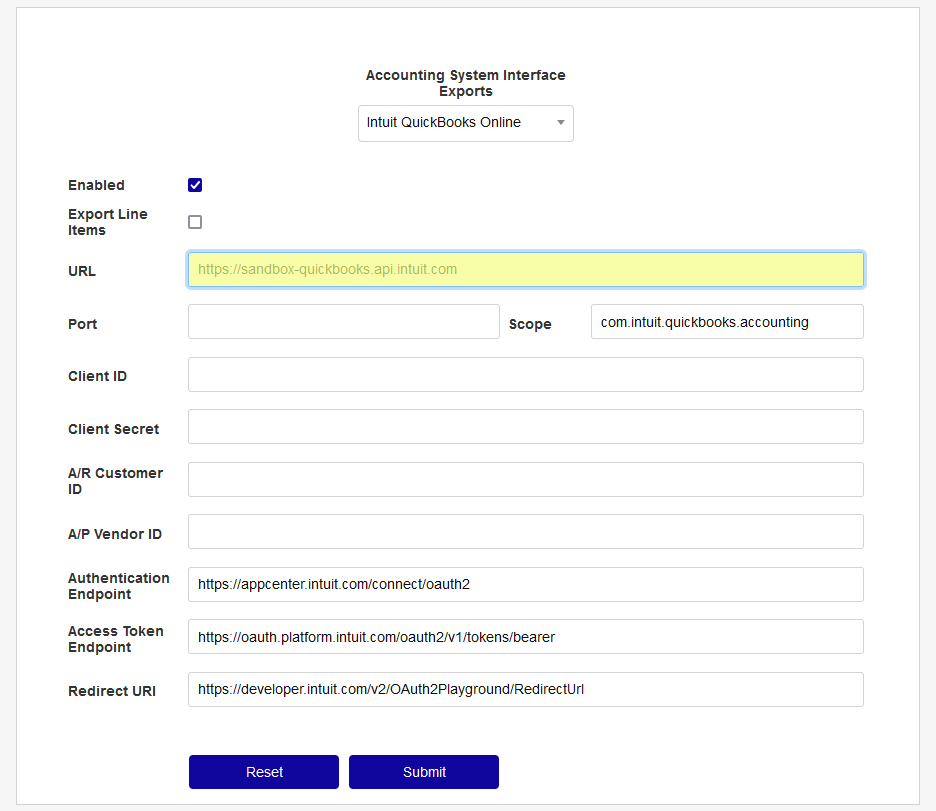
The URL field is prepopulated with the correct sandbox testing URL, https://sandbox-quickbooks.api.intuit.com . For production usage, replace it with https://quickbooks.api.intuit.com .
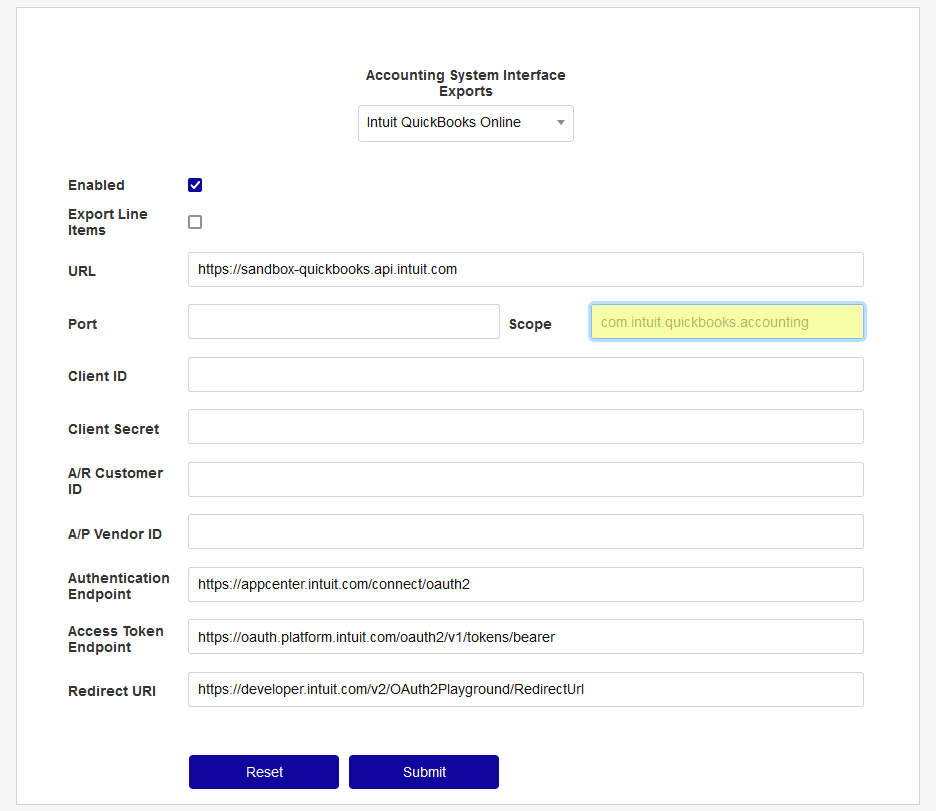
The Port field is not used at this time but may be required in the future. The Scope field comes prepopulated with the scope that was selected when creating the API, "com.intuit.quickbooks.accounting". Leave this value in place; do not change it.

Copy the Client ID and Client Secret from the Keys & OAuth section in the Intuit Developer portal into the fields with those labels.
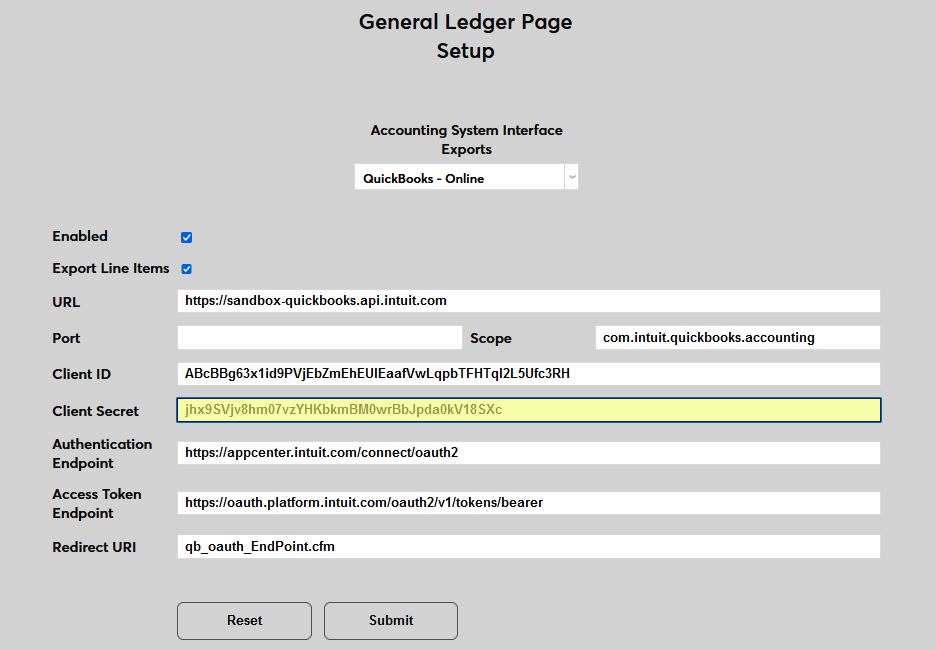
The Summary Account ID and A/P Vendor ID are not used for line item exports.
The Authentication Endpoint is prepopulated. The value should be "https://appcenter.intuit.com/connect/oauth2". Do not alter it.
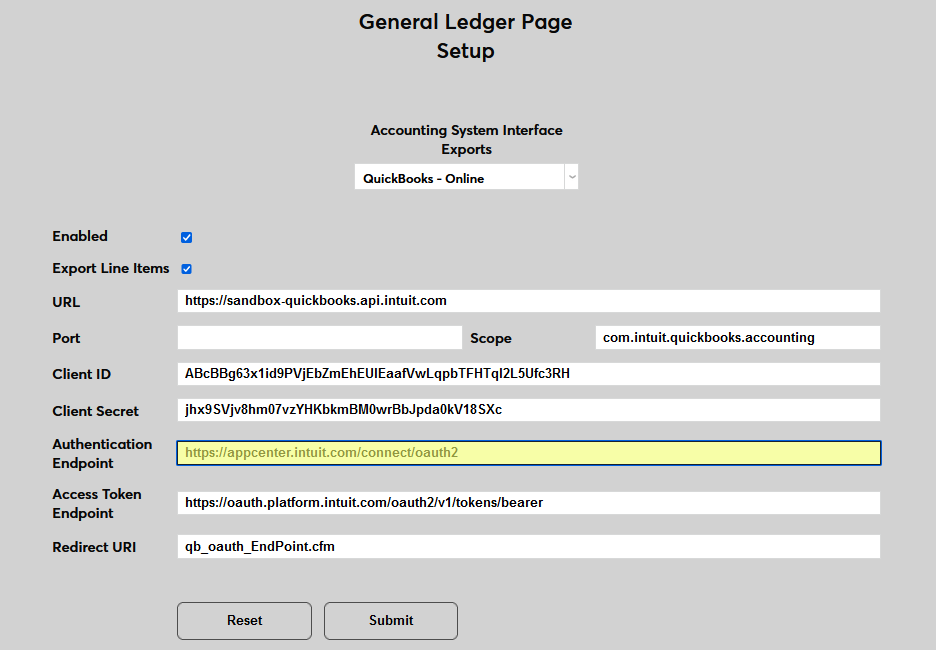
The Access Token Endpoint is prepopulated. The value should be "https://oauth.platform.intuit.com/oauth2/v1/tokens/bearer". Do not alter it.
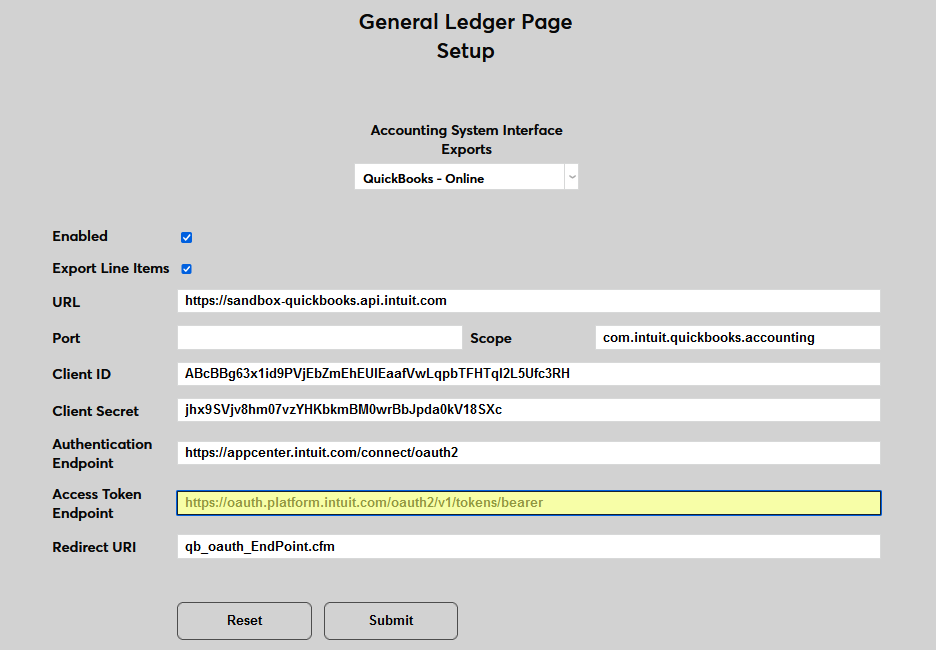
In the Redirect URI field, enter the same value that was entered in QuickBooks for the Redirect URI.
Note
In the previous example, jenzabar.sonis.edu/qb_oauth_EndPoint.cfm was entered. Jenzabar.sonis.edu represents the institution's domain name for accessing SONIS and must be replaced by the appropriate value for the institution.
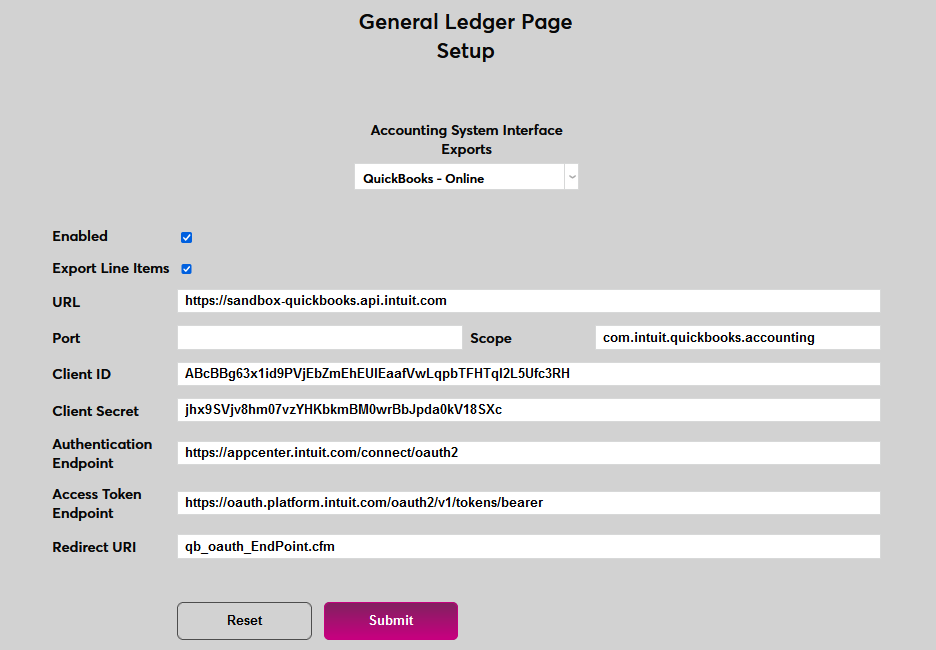
Click Submit to complete the connection setup and activate QuickBooks Online as the institution's general ledger system.
Associating Name Records with QuickBooks
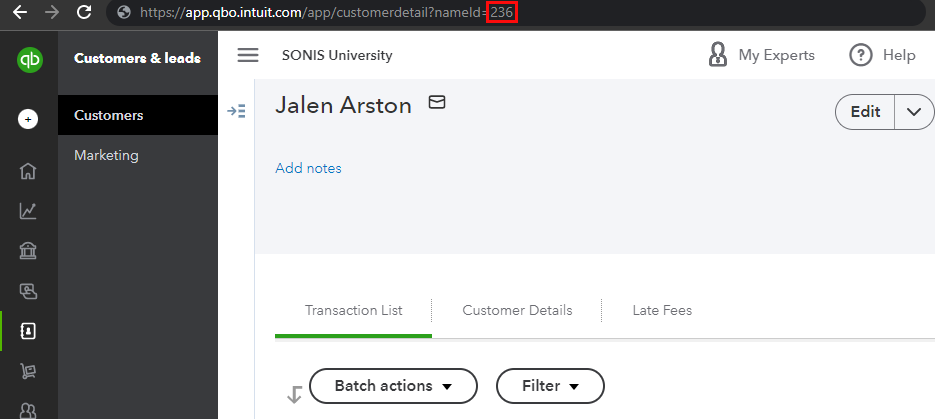
In order to send billing data to QuickBooks Online, SONIS students and other users who will be billed and/or credited must be added to QuickBooks as customers. Once a user has been added, navigate to their Customers page. The URL at the top of each Customer page contains the user's customer ID as the last value after the nameID= portion of the URL. Copy this number.
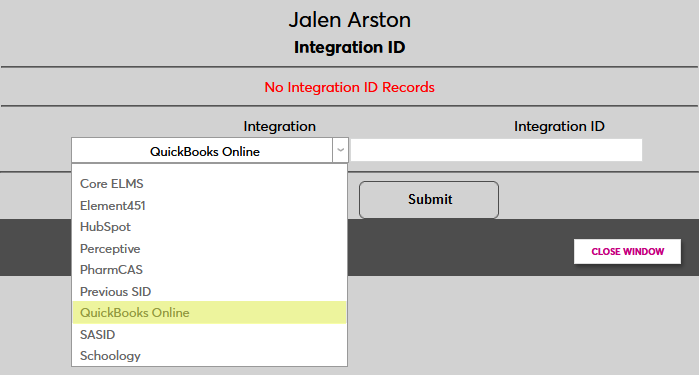
Next, navigate to the SONIS user's Biographic page and click the View link next to the Integration ID label. A new window will open.
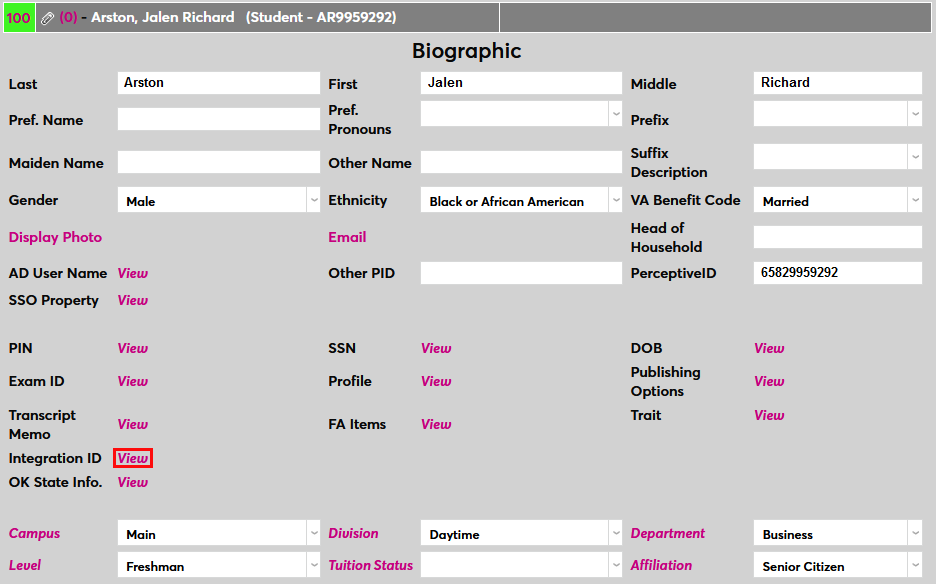
Select QuickBooks Online as the Integration and enter the user's QuickBooks Online customer ID number in the Integration ID field.
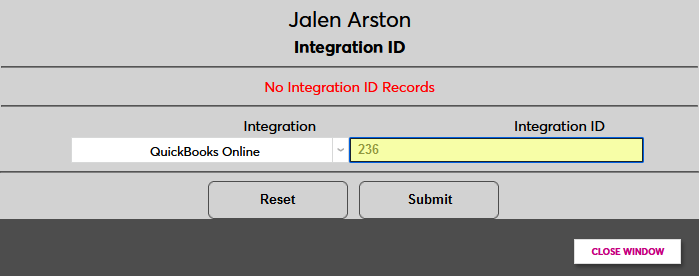
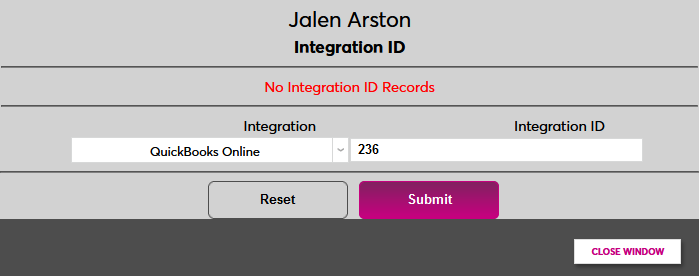
Click Submit to save the integration ID. Repeat this process for each SONIS user who will have transactions exported to QuickBooks Online.
General Ledger Setup - Summary Journal Entry
To continue the setup process, navigate to the General Ledger Page Setup utility and select QuickBooks-Online from the Accounting System Interface Exports drop down menu. The page will reload with the setup fields.
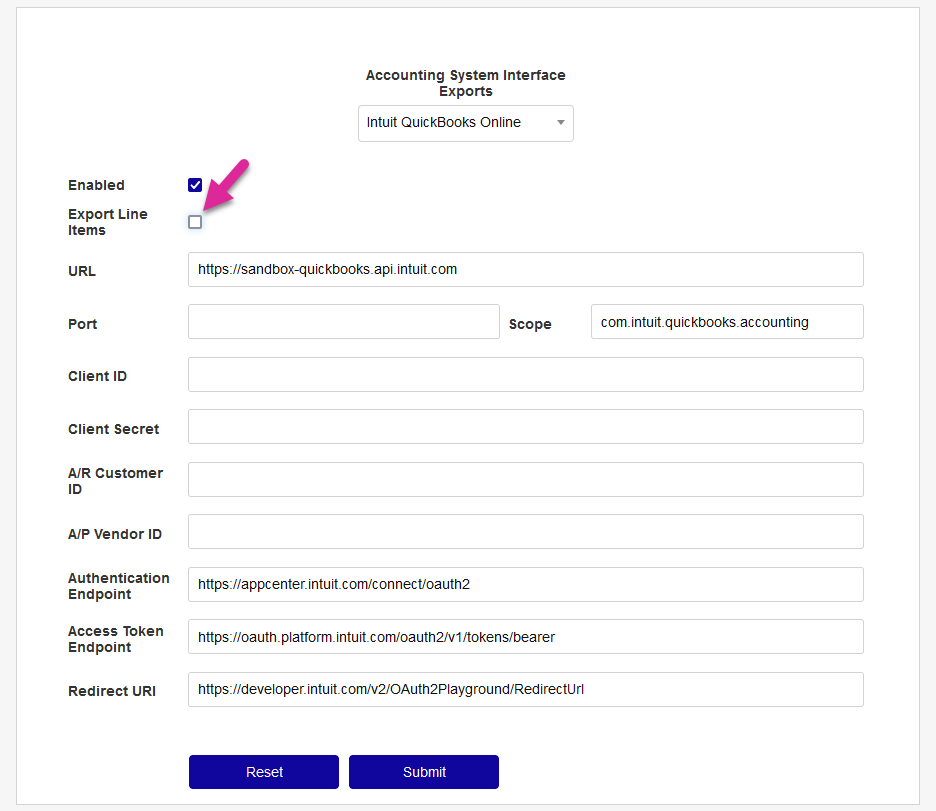
Check the Enabled box to set this software as the one that will be used for Post to Accounting exports.
Uncheck the Export Line Items box to send summary journal transactions to QuickBooks rather than line items.
The URL field is prepopulated with the correct sandbox testing URL, https://sandbox-quickbooks.api.intuit.com . For production usage, replace it with https://quickbooks.api.intuit.com .
The Port field is not used at this time but may be required in the future. The Scope field comes prepopulated with the scope that was selected when creating the API, com.intuit.quickbooks.accounting . Leave this value in place.
Copy the Client ID and Client Secret from the Keys & OAuth section in the Intuit Developer portal into the fields with those labels.

Creating Summary Accounts
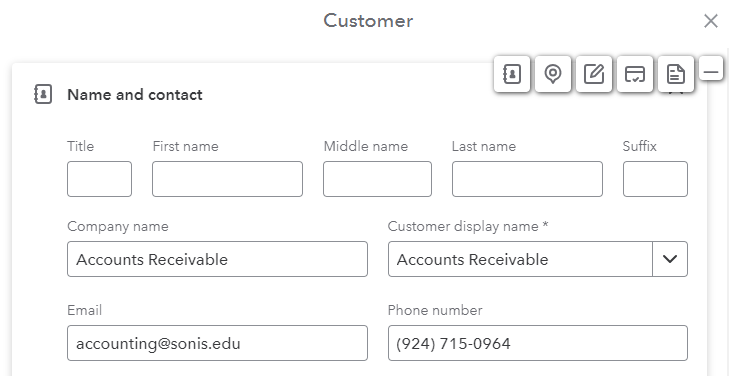
Because QuickBooks Online is designed to be used with individual customers and vendors, before summary journal entries can be sent, two dummy accounts must be created to associate with these journal entries. First create a Customer account to store accounts receivable transactions.
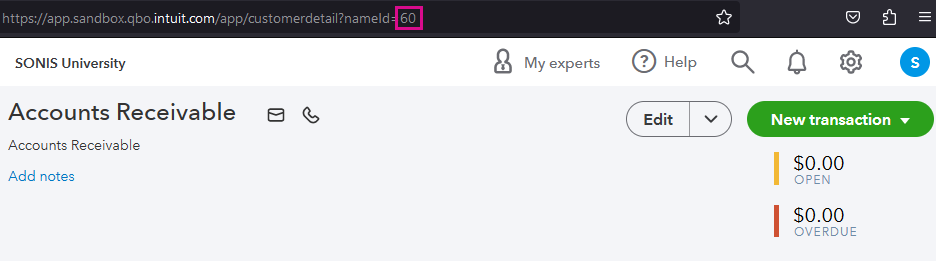
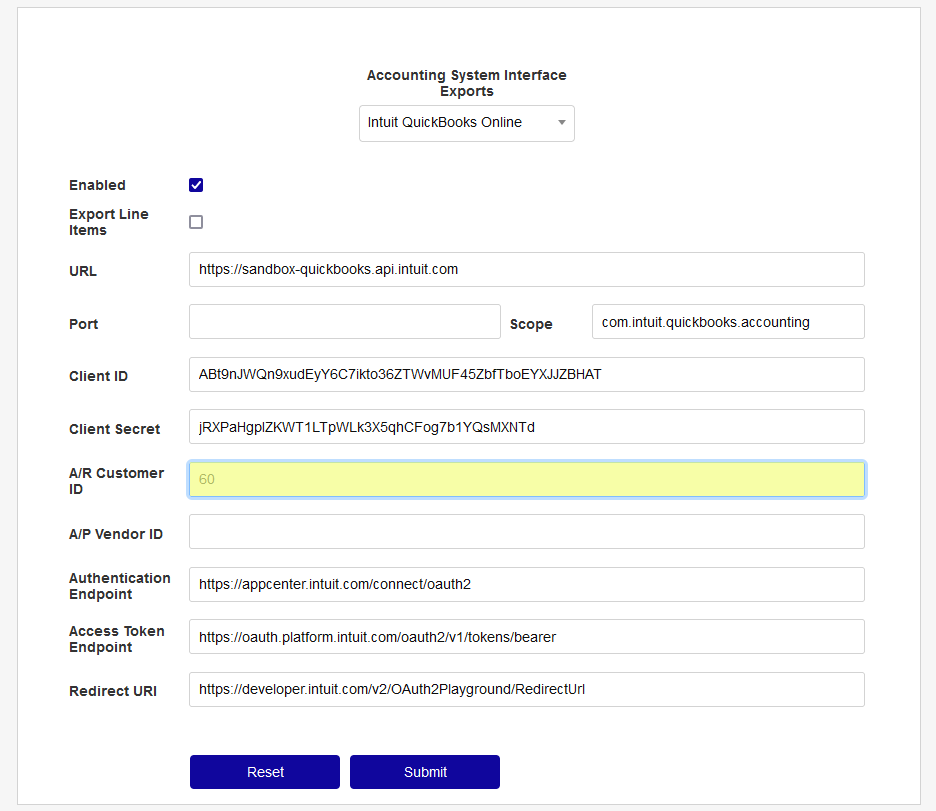
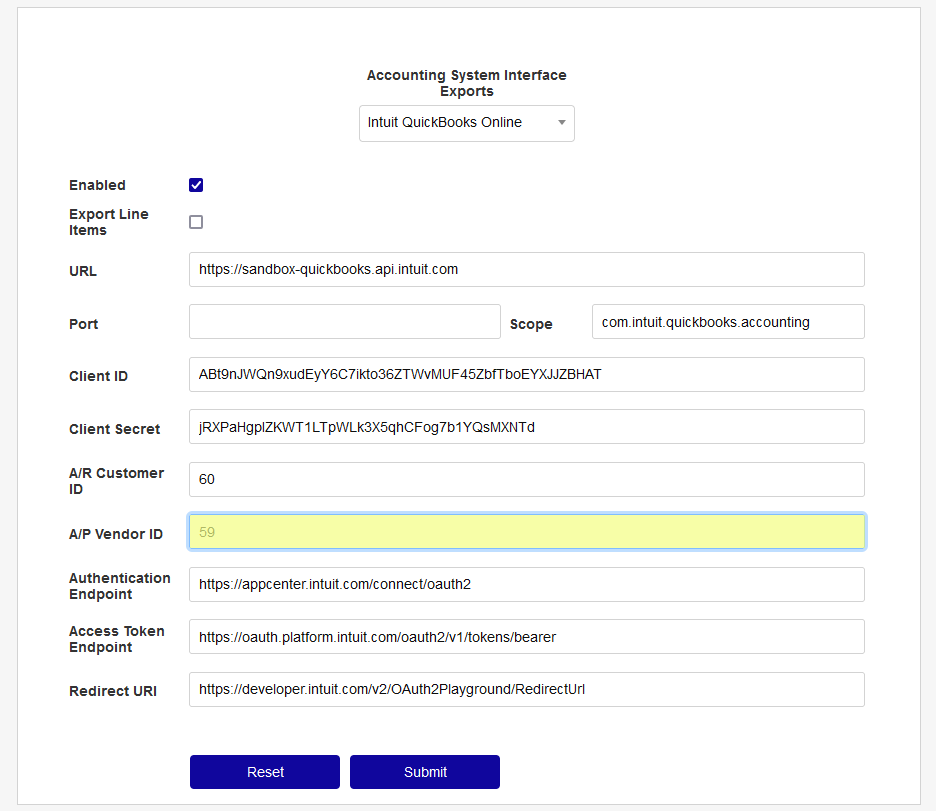
Once the dummy user been added, navigate to their Customers page. The URL at the top of each Customer page contains the user's customer ID as the last value after the nameID= portion of the URL. Copy this number and paste it into the A/R Customer ID field.
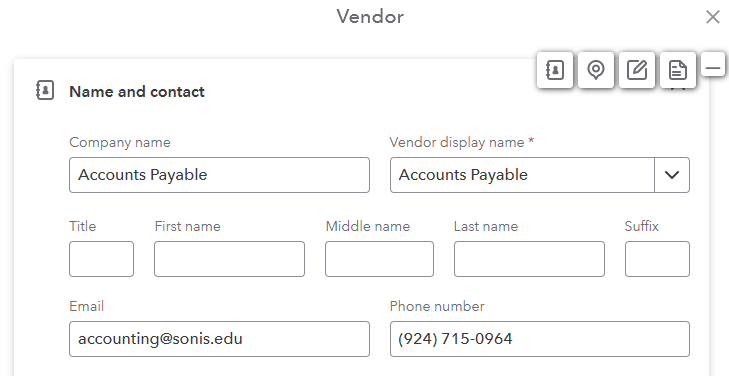
Next, create a Vendor account to store accounts payable transactions.
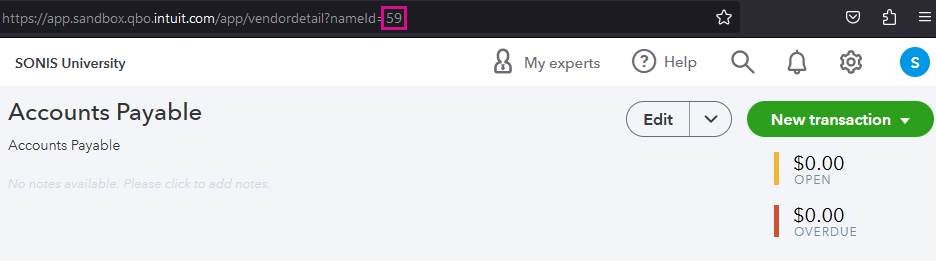
Once the dummy user been added, navigate to their Vendors page. The URL at the top of each Vendor page contains the user's vendor ID as the last value after the nameID= portion of the URL. Copy this number and paste it into the A/P Vendor ID field.
Continuing Setup
The Authentication Endpoint is prepopulated. The value should be https://appcenter.intuit.com/connect/oauth2. Do not alter it.

The Access Token Endpoint is prepopulated. The value should be "https://oauth.platform.intuit.com/oauth2/v1/tokens/bearer" . Do not alter it.

The Redirect URI is prepopulated. The value should be "qb_oauth_EndPoint.cfm". Do not alter it.
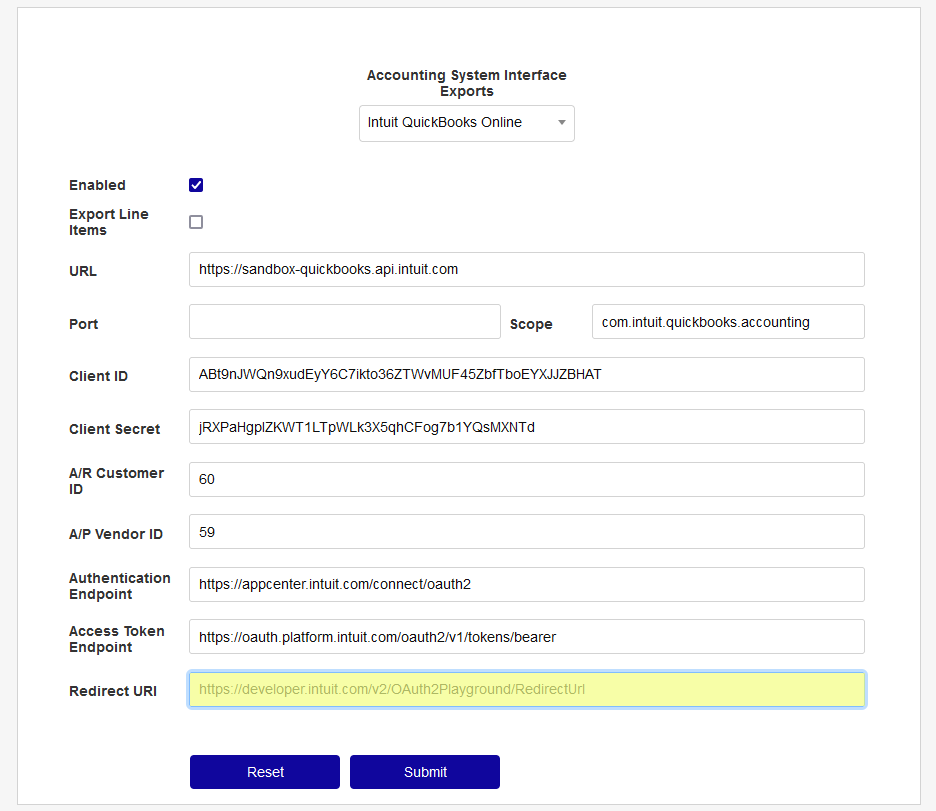
Click Submit to complete the connection setup and activate QuickBooks Online as the institution's general ledger system.
T-Code Mapping
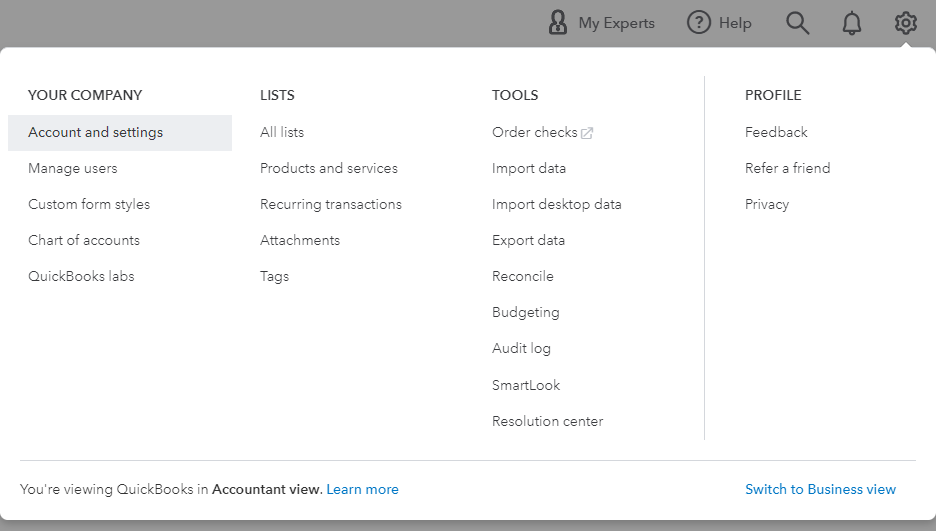
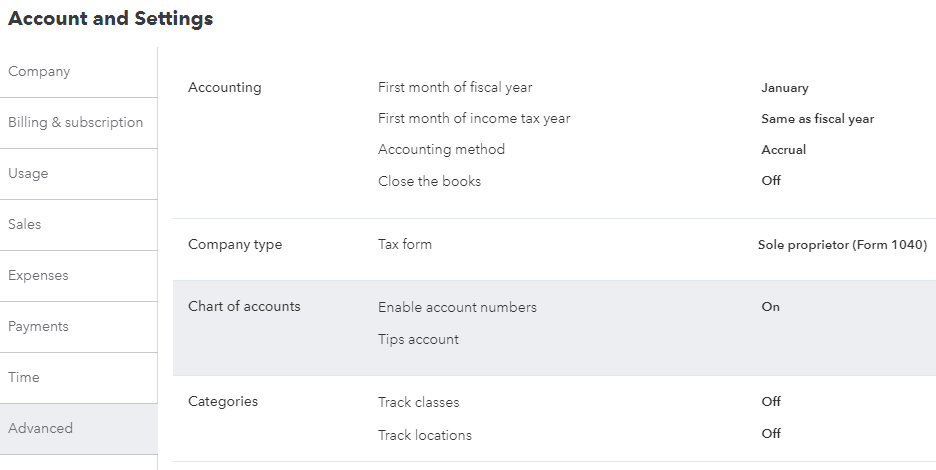
Before mapping transaction codes in SONIS, ensure that account numbers have been enabled in QuickBooks Online. This setting is located under the Advanced tab in the Accounts and Settings Menu.
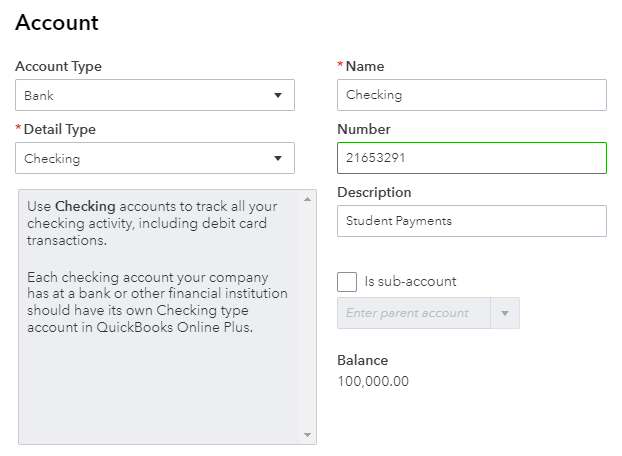
Then ensure that all accounts in QuickBooks Online that will be mapped to SONIS have account numbers attached.
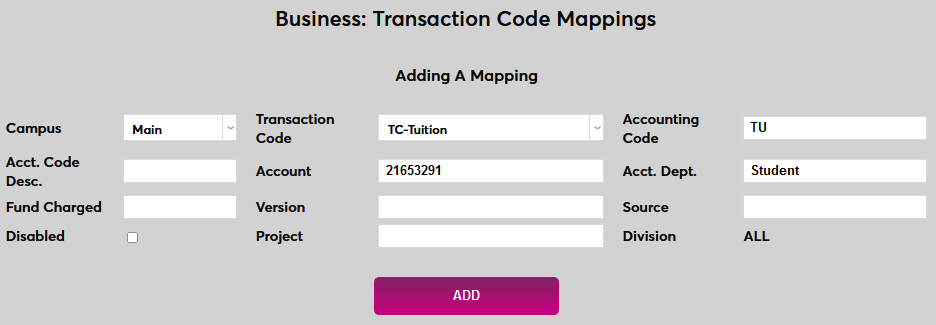
Back in SONIS, navigate to Transaction Code Mappings in the Systems hub and ensure that the appropriate account numbers are mapped to transaction codes and match what's in QuickBooks Online.
Posting to QuickBooks Online - Line Item
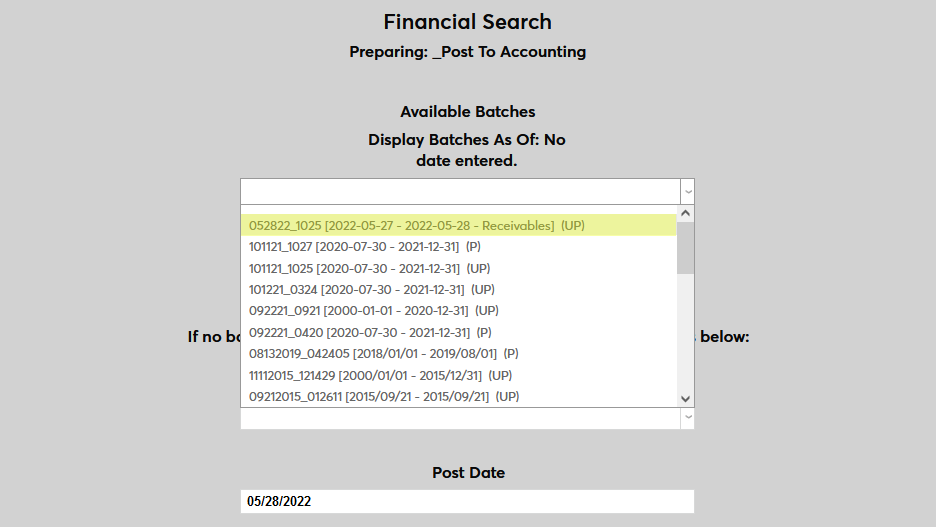
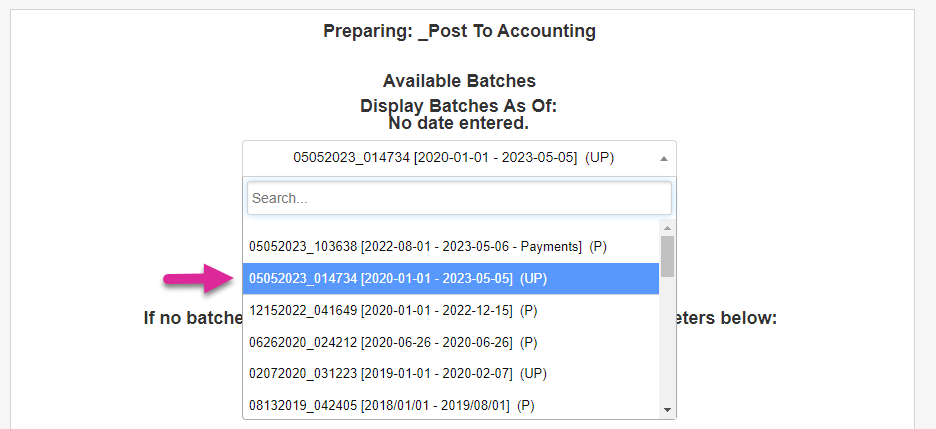
To send transaction data to QuickBooks Online, navigate to Post to Accounting under the Systems menu. Select an available batch at the top of the page or create a new batch using the lower section.
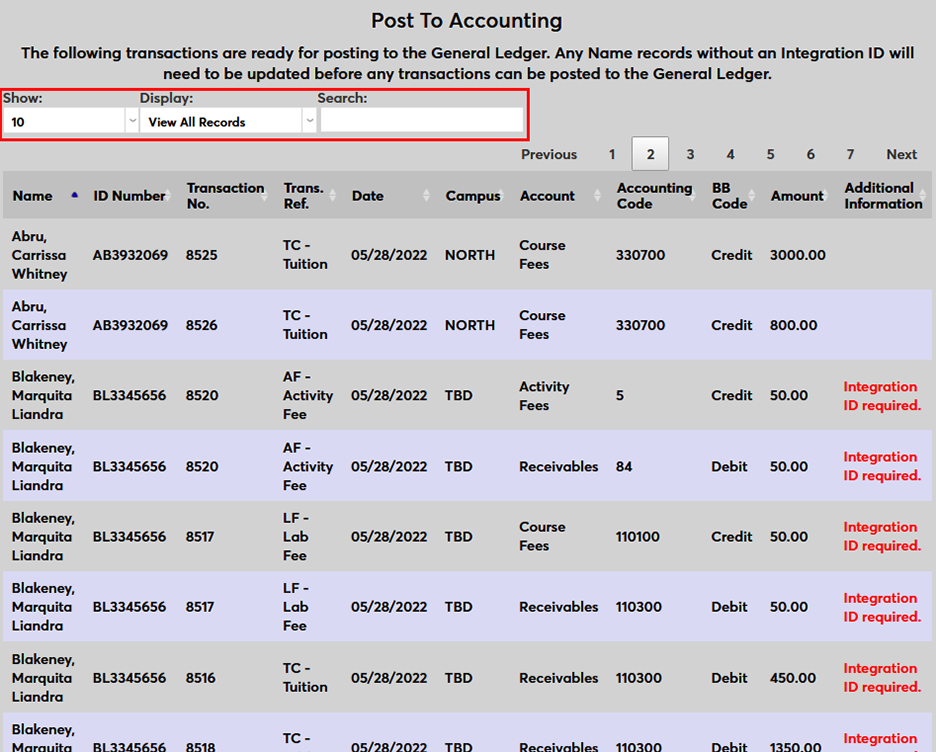
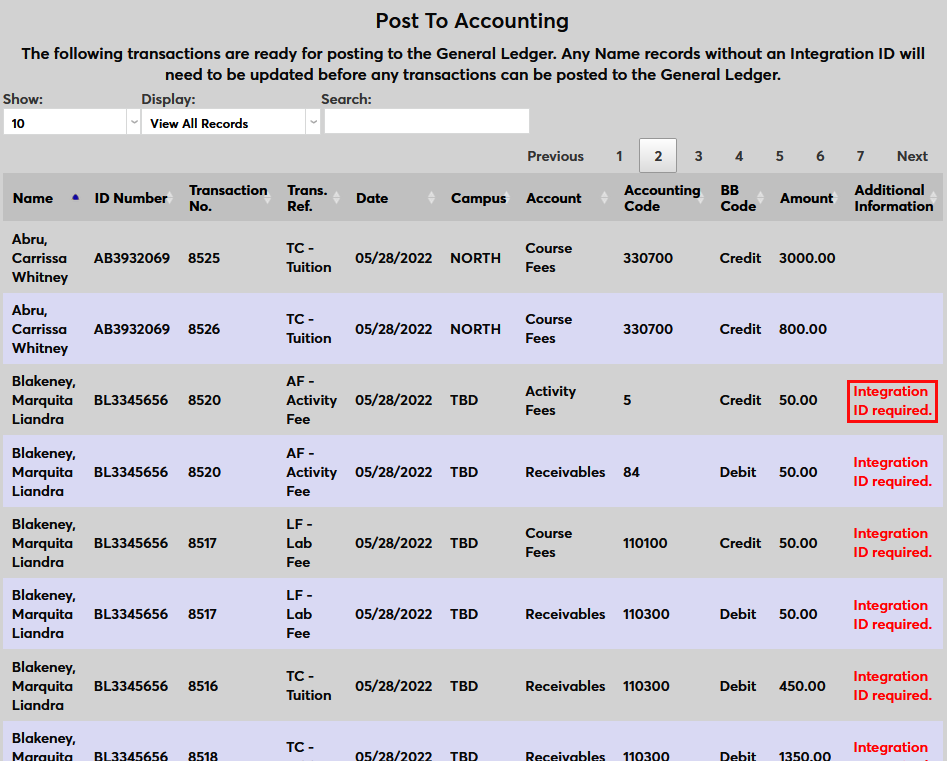
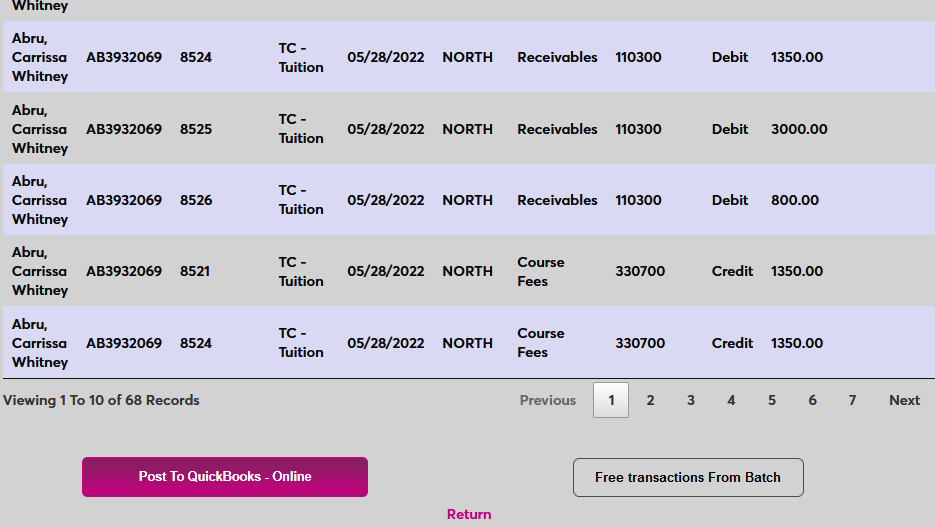
On the following page, each individual transaction is listed along with the student's name and ID number. Use the tools at the top of the table to choose how many records display on each page, which records display, or to search for a specific record.
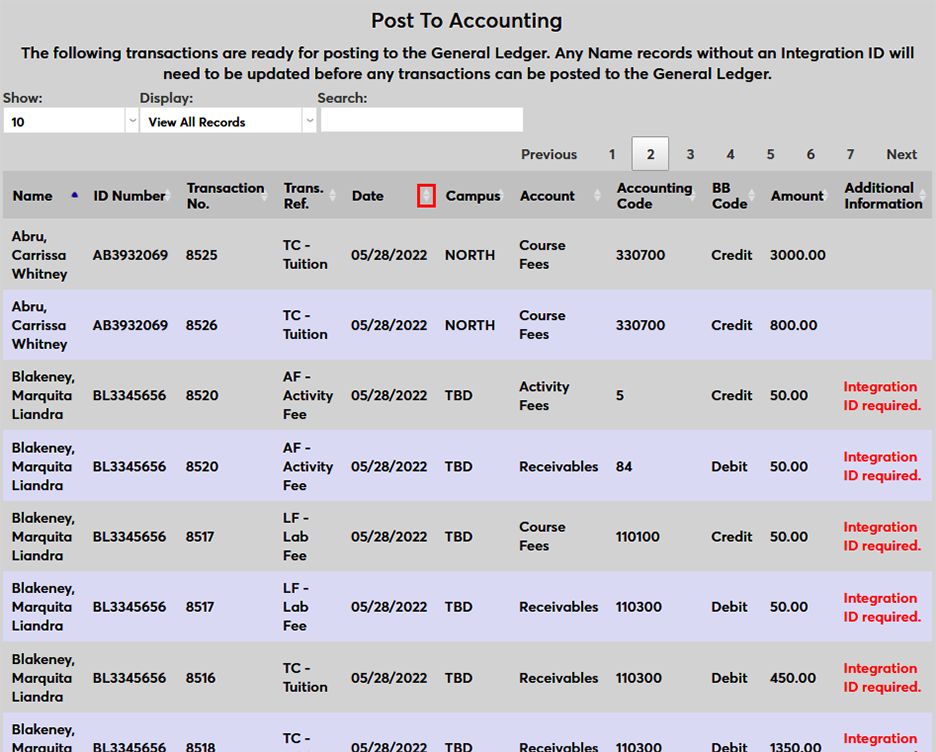
Each column can also be sort either ascending, with the first click on the double arrow icon, or descending, with the second click.
If a student is missing an Integration ID, it will be noted in the Additional Information column. None of the transactions can be posted until this is corrected.
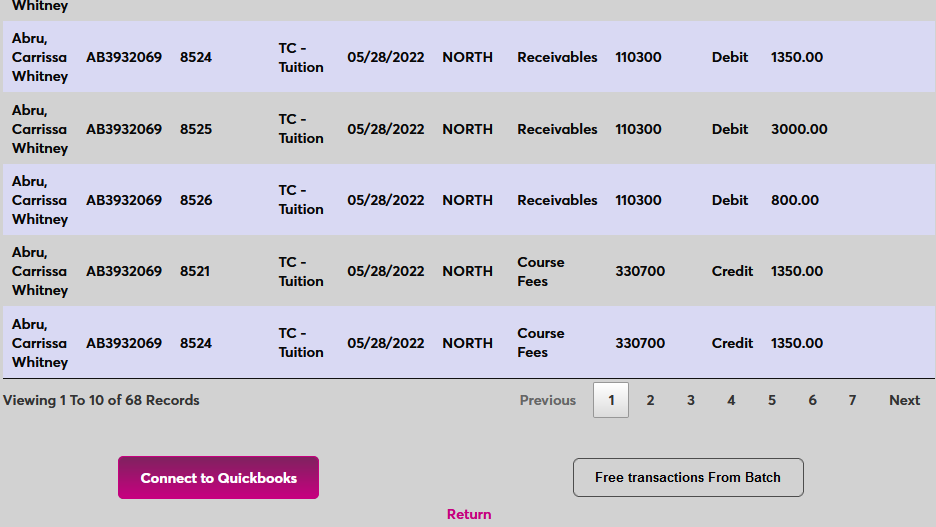
At the bottom of the page, click Connect to QuickBooks to establish the connection.
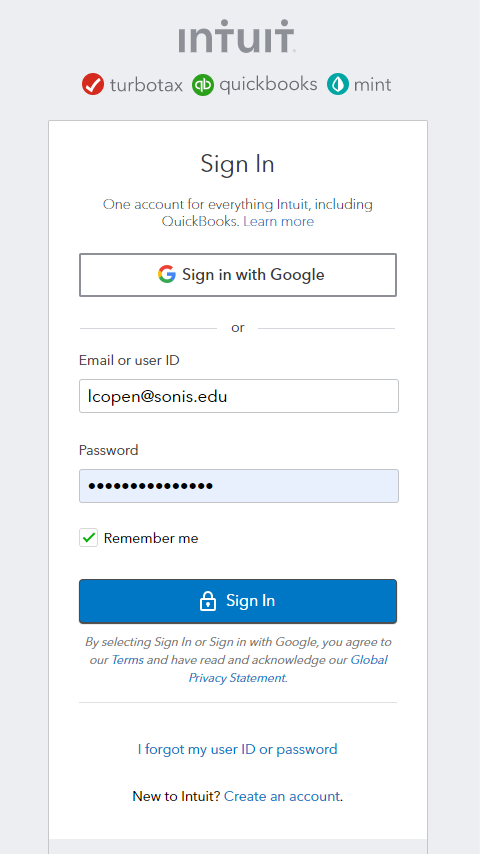
In the new window that opens, sign in to QuickBooks Online. If this is the first time sending data from SONIS to QuickBooks, the application may ask for a company name.
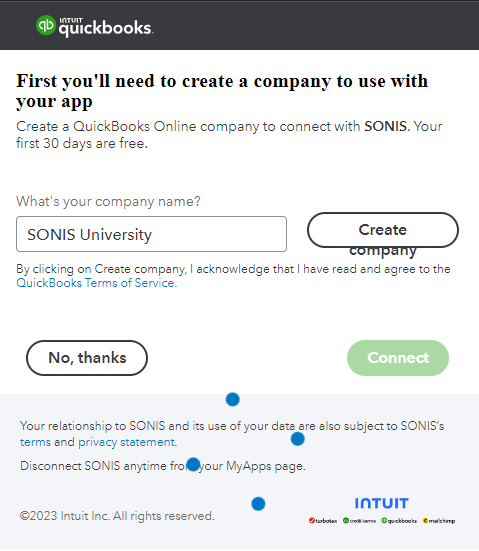
Click Connect to authorize the app. Only a Company Administrator for QuickBooks Online can grant access.

Once the system has been connected, click Post to QuickBooks Online to complete the process and send the transaction data to QuickBooks.
Posting to QuickBooks Online - Summary Journal Entry
To send transaction data to QuickBooks Online, navigate to Post to Accounting under the Systems menu. Select an available batch at the top of the page or create a new batch using the lower section.
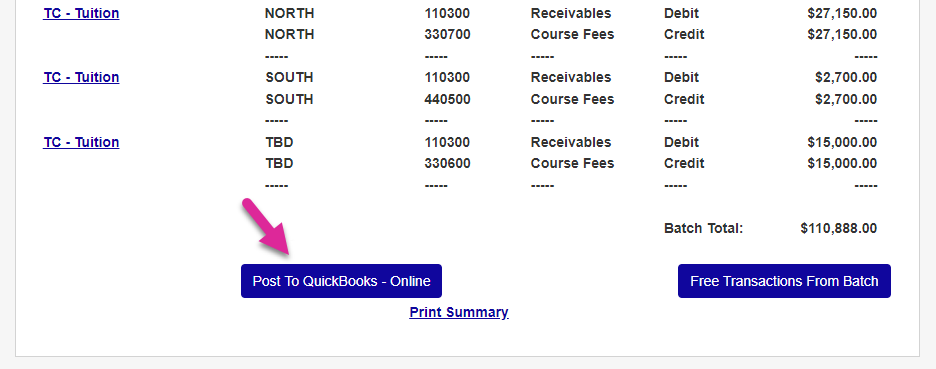
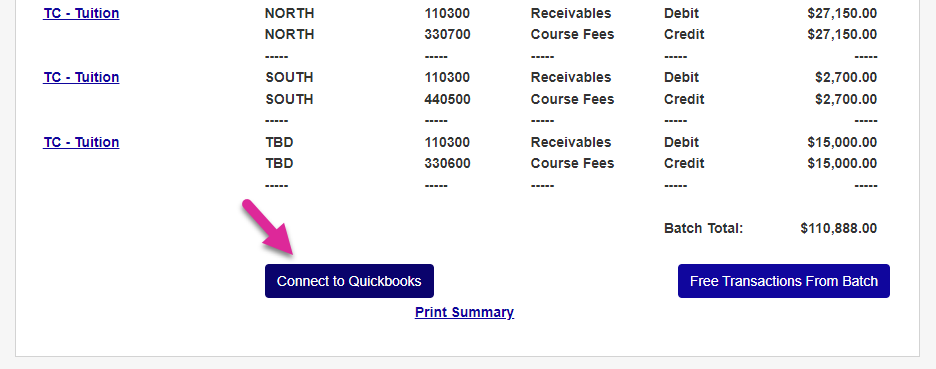
On the following page, a summary of the transactions is listed, sorted by transaction code and campus. At the bottom of the page, click Connect to QuickBooks to establish the connection.
In the new window that opens, sign in to QuickBooks Online. If this is the first time sending data from SONIS to QuickBooks, the application may ask for a company name.
Click Connect to authorize the app. Only a Company Administrator for QuickBooks Online can grant access.
Once the system has been connected, click Post to QuickBooks Online to complete the process and send the transaction data to QuickBooks.