Izenda Admin
Overview
Jenzabar SONIS offers an expansion of current reporting options through third-party software from Izenda. Jenzabar representatives, including Support, can provide additional details on Izenda and how to purchase this reporting add-on.
Jenzabar recommends purchasing Izenda as part of an institution's Jenzabar contract so that Jenzabar technical assistance is available for fully integrating this reporting software with SONIS. Once Izenda has been purchased, the Izenda representative will provide a key that must be entered to unlock Izenda and begin integration.
Modify IIS as a Server Administrator
After Izenda has been installed and unlocked, non-hosted server administrators must modify IIS for Izenda. Hosted clients will have this completed by Jenzabar Support.
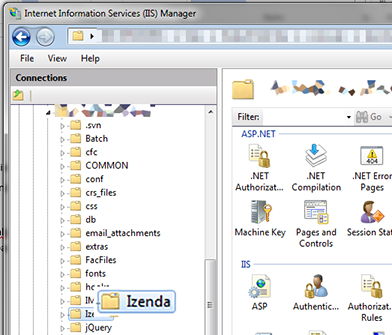
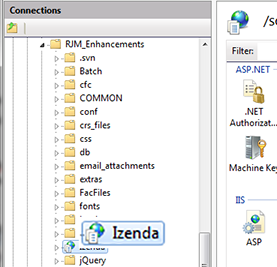
Open Windows IIS Manager. In the left panel, locate the main SONIS folder and locate the Izenda folder.
Right-click the Izenda folder, and select Convert to Application. Make note of the folder icon.
Visually check that the Physical Path is correct and then click OK.
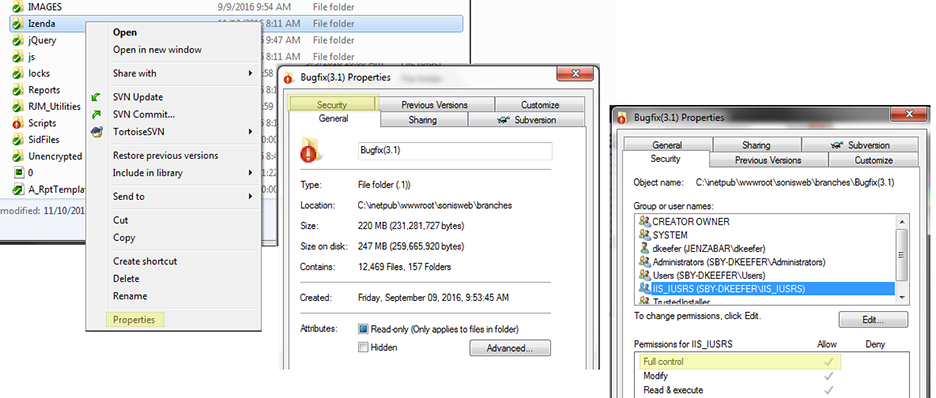
On the web server, locate the SONIS folder. Open it, locate the Izenda folder, right-click it and select Properties. Go to the Security tab and ensure the IIS_IUSRS account has full control of this folder. Click OK.
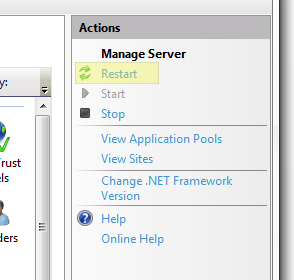
Return to the IIS Manager page, go to the right panel, and click Restart.
After the restart, Izenda will now be an application. This is confirmed by the icon changing from the folder icon in picture 2 to the application icon.


SONIS Configuration
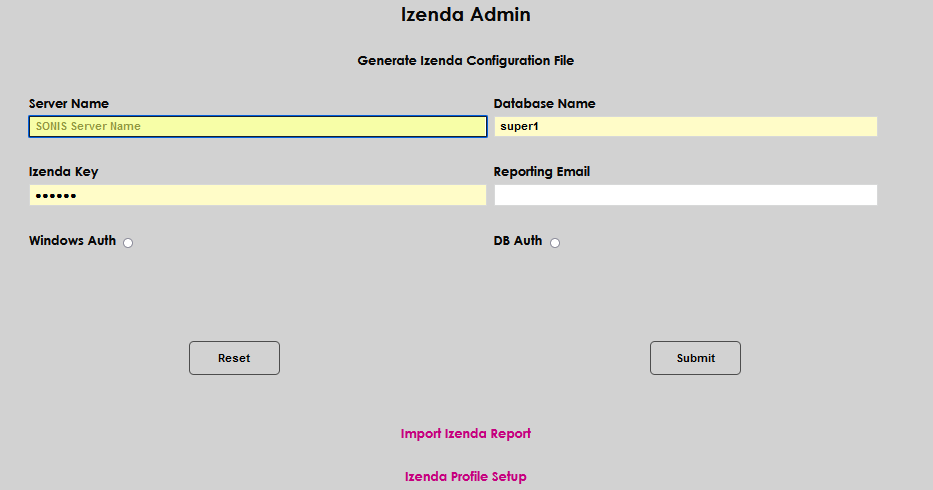
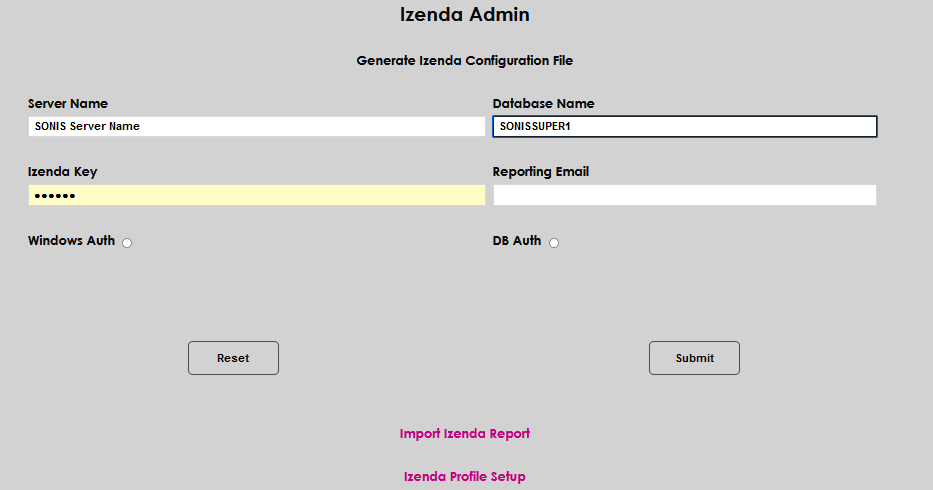
From the Systems menu, select Izenda Admin. Enter the name of the database server in Server field. Enter the name of the SONIS database as shown in SQL.
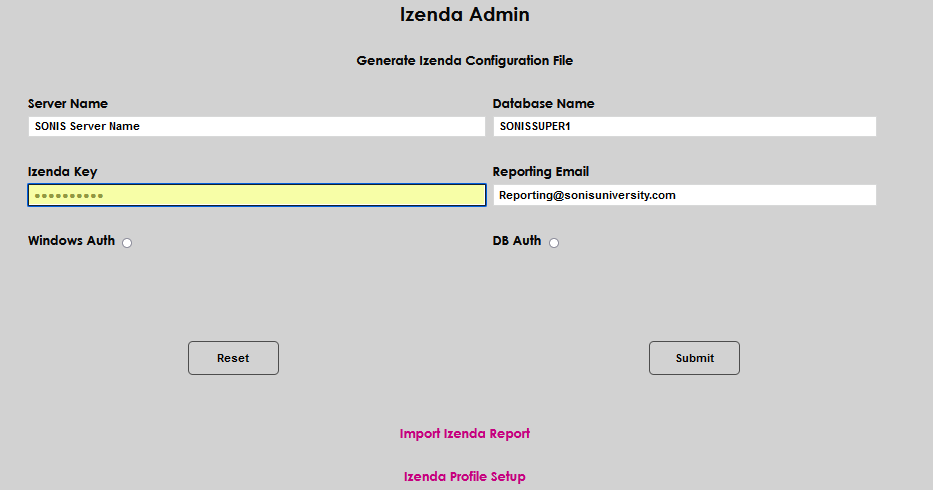
Enter the Izenda Key that was provided by the Izenda client representative. This key will allow Izenda to be unlocked for SONIS communication. The key will encrypt as it is typed, so use caution to be accurate and avoid a data entry error. Enter the email address that reports should be sent to users from. This must be an email account with sending privileges and should be unique for reporting.
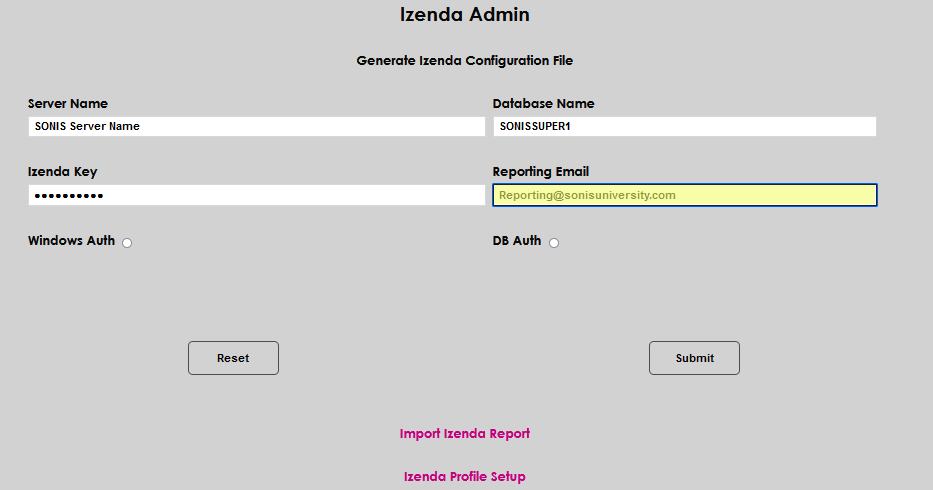
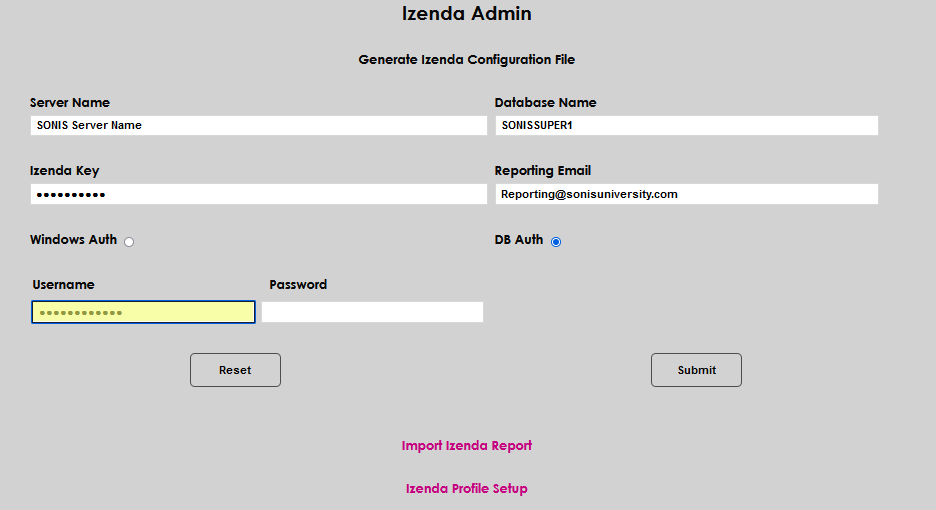
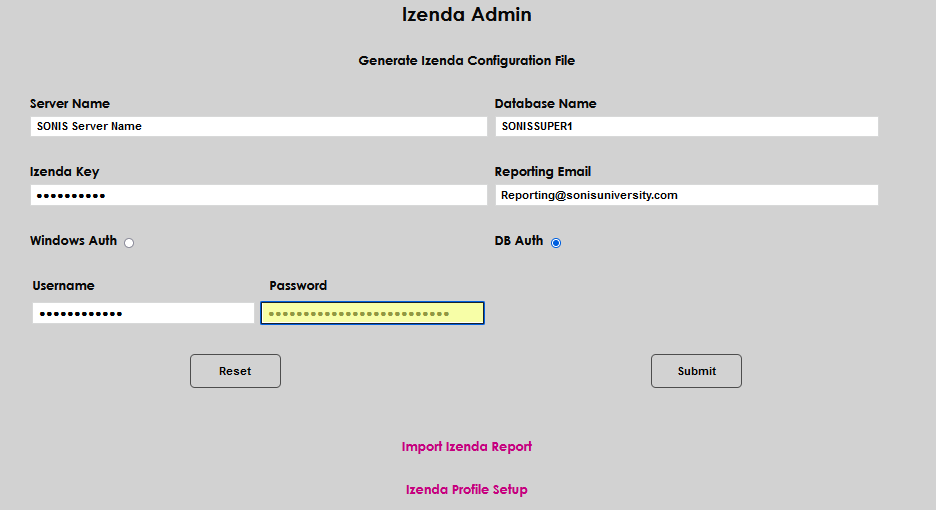
Select whether Windows Auth or DB Auth will be used by clicking the appropriate radio button. Windows Auth direct connection to the database will be used, with each user's windows credentials being needed for each login. Windows Auth is only available to self-hosted SONIS member institutions. DB Auth will be used by all hosted member institutions. When it is selected, SQL credentials will be used for logging in to Izenda. It is best practice to create a single, unique, SQL user that has been granted access rights to the SONIS DB. If DB Auth is selected, enter the Username and Password for the appropriate SQL account. Click Submit to save the entries.
Izenda Admin
After Izenda has been configured, when an administrator selects Izenda Admin from the Systems hub the configuration options no longer display and are replaced by options to Import Izenda Report and complete the Izenda Profile Setup. Neither of these options will display until the configuration has been completed.
Izenda Profile Setup
The configuration of the Izenda Profile Setup area is not required to use Izenda Reports. The Izenda Profile Setup simply allows SONIS administrators to determine what users have access to specific data available on tables and within various reports. If a profile is not set up here, the user(s) associated with the profile will be able to run reports assigned to that profile without any data limitations. The opposite is true for profiles setup here: any user that has that profile will only be able to see reports that only consist of data from tables and/or views that are authorized for the profile.
When Izenda Profile Setup is clicked, a page is displayed with two distinct areas. The top portion of the page allows administrators to select the views and tables that should be associated with a selected SONIS Profile Name. Views are snapshots created from a query and are often made up of multiple tables. Views display at the top of the Table menu, followed by the tables, each displayed alphabetically within the appropriate category.
The lower portion of the page displays the Profile Names within the SONIS member institution's database and the number of tables and/or views that have been assigned to the profile. By clicking the Profile Name link, the selected profile name is listed with each view or table that has been associated with the profile. Assignments to specific tables or views can be deleted by clicking the Delete checkbox and then clicking Submit.
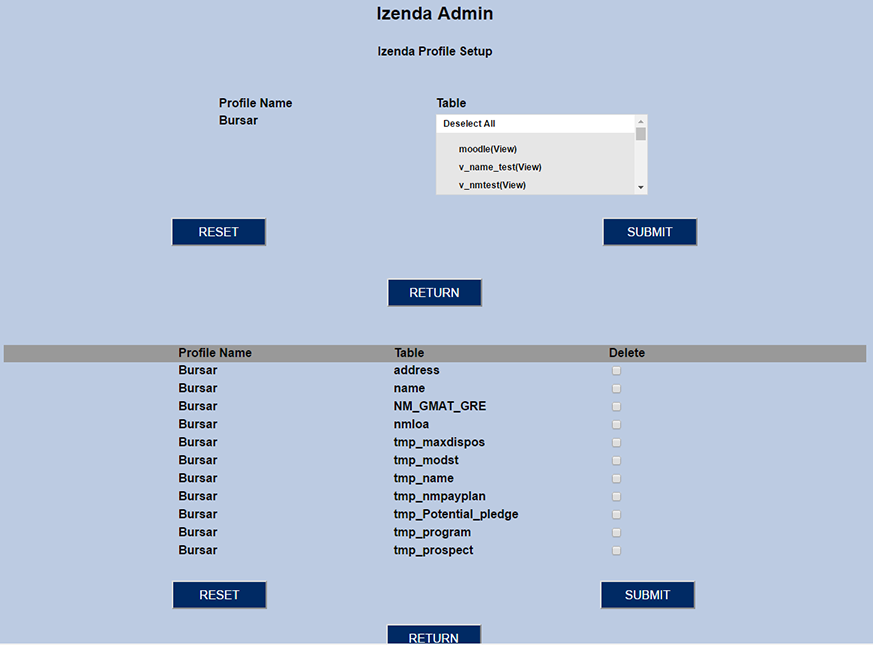
When a profile is chosen, any number of views and tables can be chosen from the Table drop-down menu. Views are listed first, followed by tables. After a profile and tables are selected, a list of all profiles that have tables assigned to them will be listed below the initial selection.
After assigning a profile tables and/or views, the number of items assigned to it will display at the bottom of the page and the Table drop will only display the tables and/or views that are not assigned to the profile.
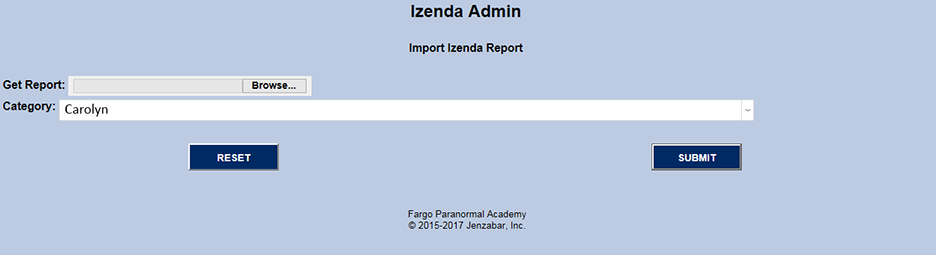
Import Izenda Report
The Import Izenda Report utility allows administrators to copy an existing, saved, Izenda report from a local computer to the Izenda Reports in SONIS. The format of the report is imported, not the data. Importing the report allows the filters and formatting in the report to be used with the Izenda Reports within SONIS. Typically, locally-stored Izenda reports were created in a test or non-production version of SONIS and Izenda Reports. This feature allows and encourages Izenda Report users to share institutionally-created reports with other Izenda SONIS institutions.
To import a created report, Browse for the desired locally-stored Izenda report, assign the report an Izenda Report Category, and click Submit to complete the import.
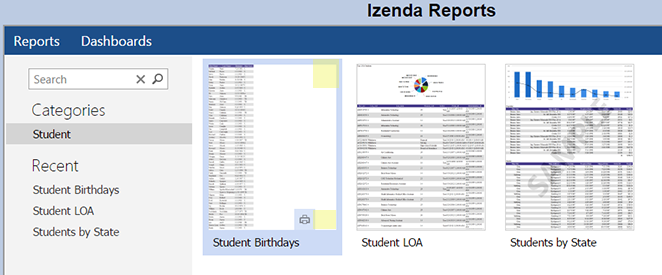
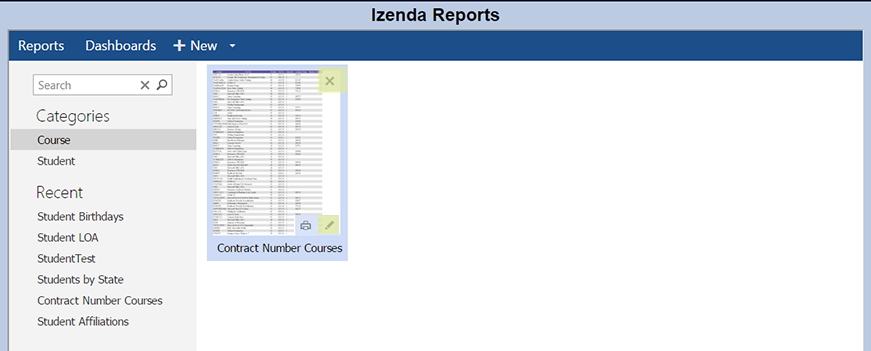
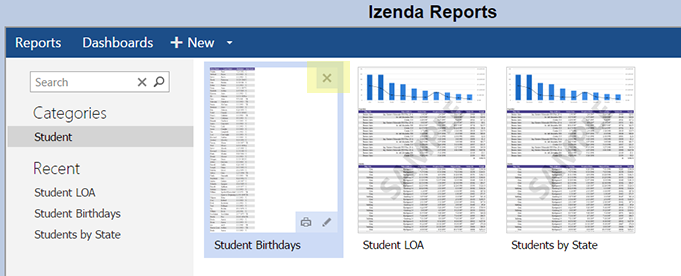
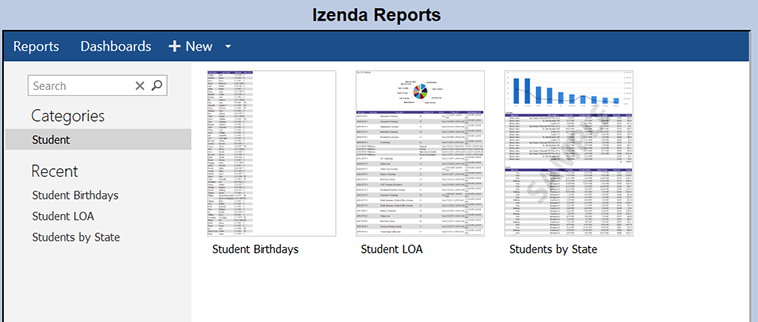
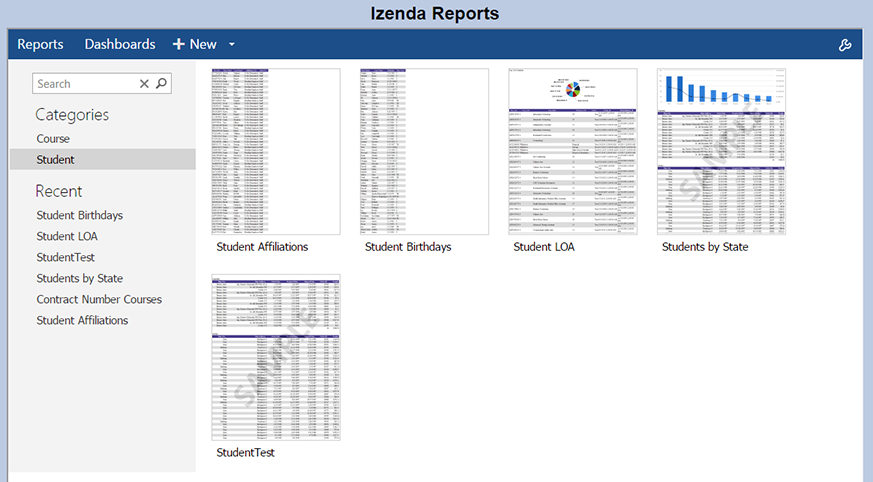
Izenda Reports
If there is no link in the SONIS Reports menu for Izenda Reports, or if clicking the link results in the screen below, it is likely the connection steps outlined above have not been completed.

User Security
When an administrator is given the Admin. Izenda Reports security role using the User Security utility in the Users hub for at least one of their profiles, they will have the ability to add and edit Izenda Reports. If an administrator does not have this security role, their access to Izenda Reports will only be to run the reports and view the results. If any administrator or user is assigned views/tables in , that individual will have unlimited access to the reports that show up under Reports menu for that profile.

Izenda Roles
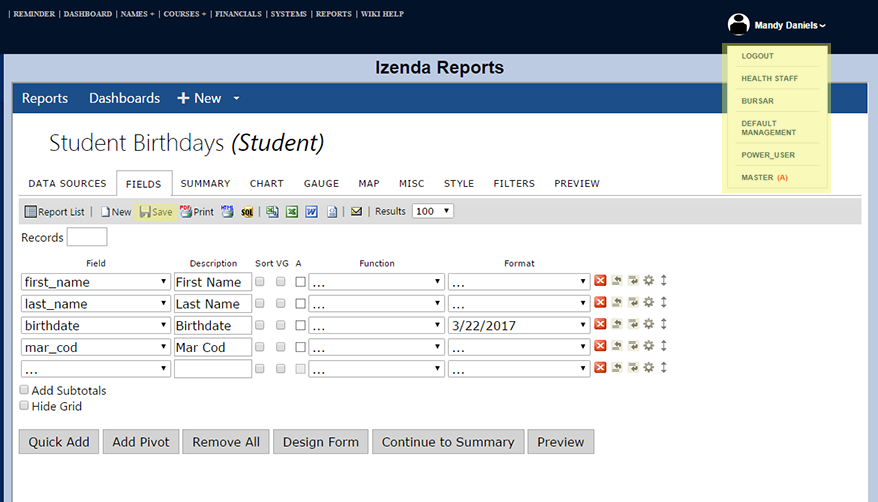
In addition to the access provided by the roles assigned to an administrator or user in User Security, the Izenda Roles also control access. Multiple roles can be assigned to multiple profiles. Located under the logged-on user, there will be a list with all the profiles assigned to the user. The current active profile is in red with the ‘(A)’. Selecting a profile will re-load the Administration portal with all the settings for that profile.
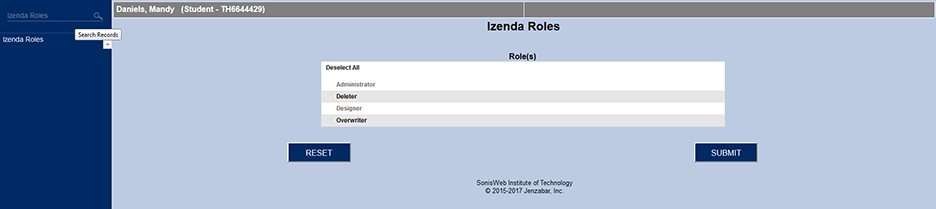
Blank or No Role
If the user is assigned the Izenda Reports role, they will only be able to view reports associated with their security profile. The user will not be able to edit or modify reports.
Administrator
The Administrator role allows the user to create, modify, remove, and share Izenda reports. Administrators can run and view all Izenda reports. The difference between the Izenda Role Administrator and the User Security role, is that the User Security role allows the administrator to alter Izenda’s configuration settings.
Deleter
This will allow the administrator to delete any report their profile is allowed to see. Deleters will have the ‘x’ on the top of the report indicating that they can delete the report. However, if a report is created as locked or view only, users with the Deleter role will NOT be able to delete the report.
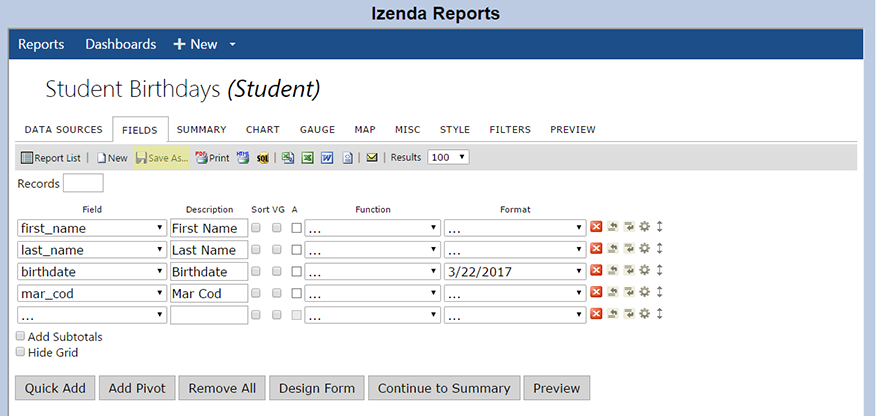
Designer
Designers have the Save As button when creating a new report or editing an existing report. This allows Designers to use existing reports as a template for creating new reports. Designers can also create new categories.
Overwriter
Overwriters have the Save button when modifying a report. This allows Overwriters to save reports they modify. These modifications can then be seen by all with access to the report.
Role Examples
In the example below, the Bursar has access to a specific set of reports.
In the example below, the Registrar has access to a specific set of reports that may or may not include reports to which the Bursar also has access.
If the administrator has the Designer and/or Overwriter role, that administrator only has create/modify rights to tables in the reports assigned to the administrator's security profile.
Session Management
The session management features ensure processing performance is not affected when running Izenda reports within SONIS. To ensure optimal performance, SONIS administrators should verify that their system is set up as outlined in this article.
Timeout Value
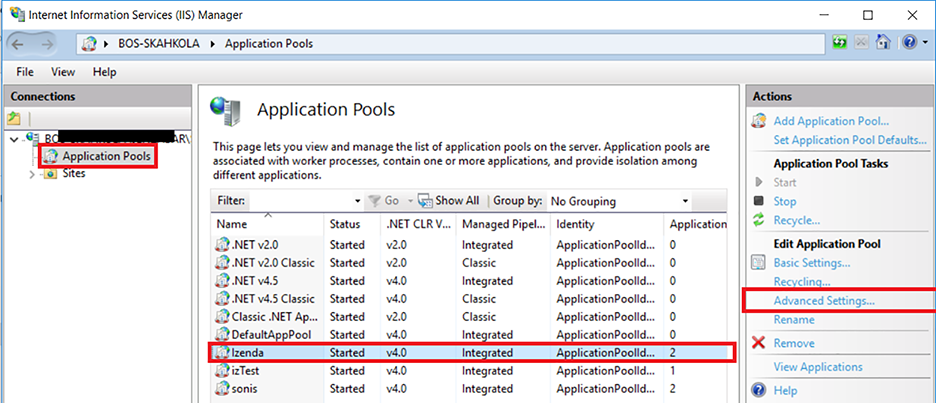
The timeout value of the application should be set to 19 minutes or less. On the server, open the Internet Information Services Manager (IIS). Drill down to the Applications section and find the application which has been assigned to SONIS. Select it and click on Advanced Settings on the right-hand side under Actions.
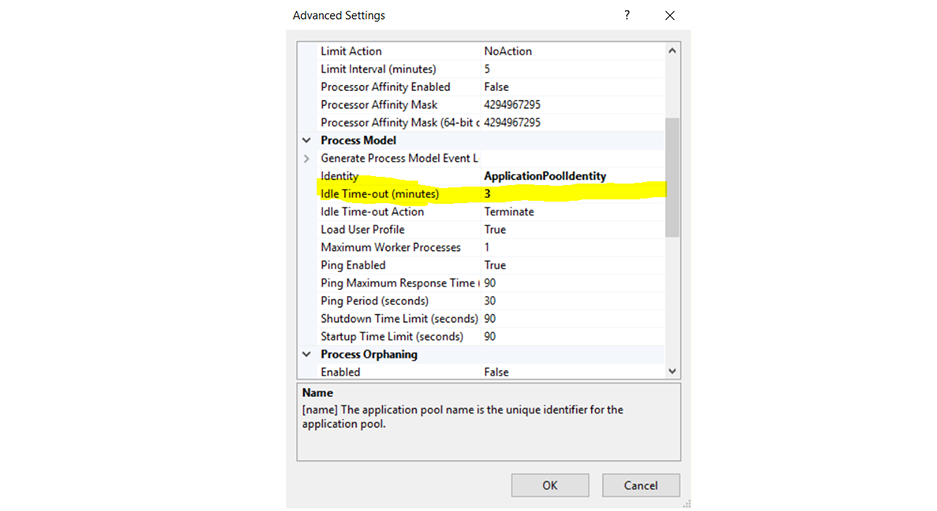
Change the Idle Time-out (minutes) setting to a number less than 20. 3 minutes are selected in this example.
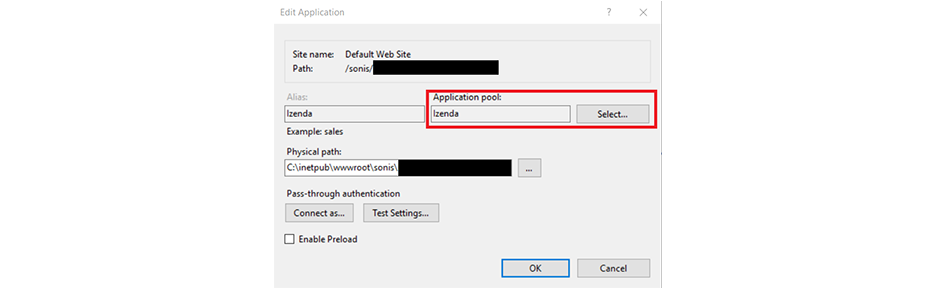
Separate Application Pool
Ensure Izenda is in a separate application pool by opening the Internet Information Services Manager (IIS) on the server. Drill down to the Izenda folder in the IIS connection sites, select it, and click on Basic Settings on the right-hand side in the Actions column.
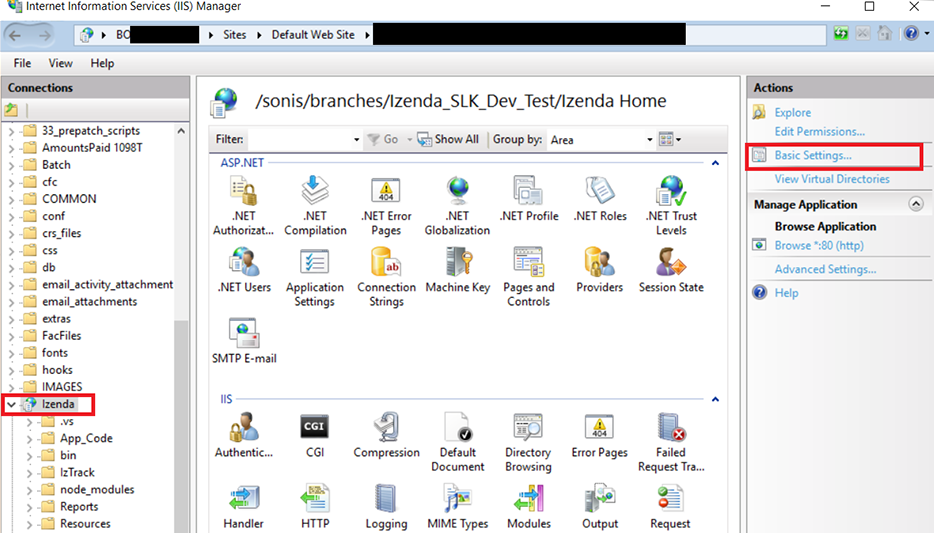
In Basic Settings, ensure that the application pool modified in the idle-timeout is selected. Click the OK button and close IIS.