Advisee Registration
Overview
The Advisee Registration menu option within the Faculty & Advising portal allows faculty advisors to register their advisees for upcoming course. There are two types of advisors in Jenzabar SONIS, general advisors and registration advisors. Only registration advisors have the ability to access the registration system and sign students up for classes.
For administrators, most registration settings and faculty access settings can be changed on the Web Options page. Administrators can register students directly, much in the same manner as this page allows, through the Registration utility within the Systems hub.
Registering Students for Courses
To begin registering a student, first select them using Select Advisee or Advisee Listing. Review the Memo and Online Registration Hold areas to ensure there are no conflicts or information to be aware of before registering the student.
Displays, Navigation, & Filtering
The top section of the Registration page offers an Enrollment Summary. The system lists the selected student's degree and the school where you're registering. You can also see the semester you're registering for along with the begining and ending dates. The registration status must be green and Active in order for you to begin registration.
You can use the Registration Filters menu to change the Regristration Period you're registering for, if additional periods are available. For example, if your school allows you to register students for both Summer and Fall courses at the same time. To change the registration period, select a different period from the drop-down menu and click Submit.
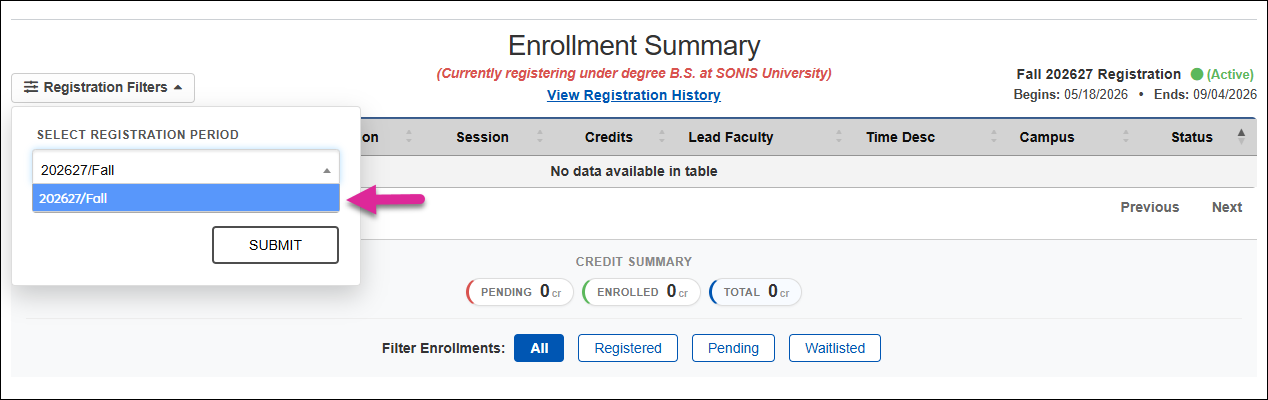
If your school uses the option View Registration History link, you can click it to see courses this student has registered for in the past.
Note
System administrators can turn the View Registration link on and off from the Web Options page under the Systems hub.
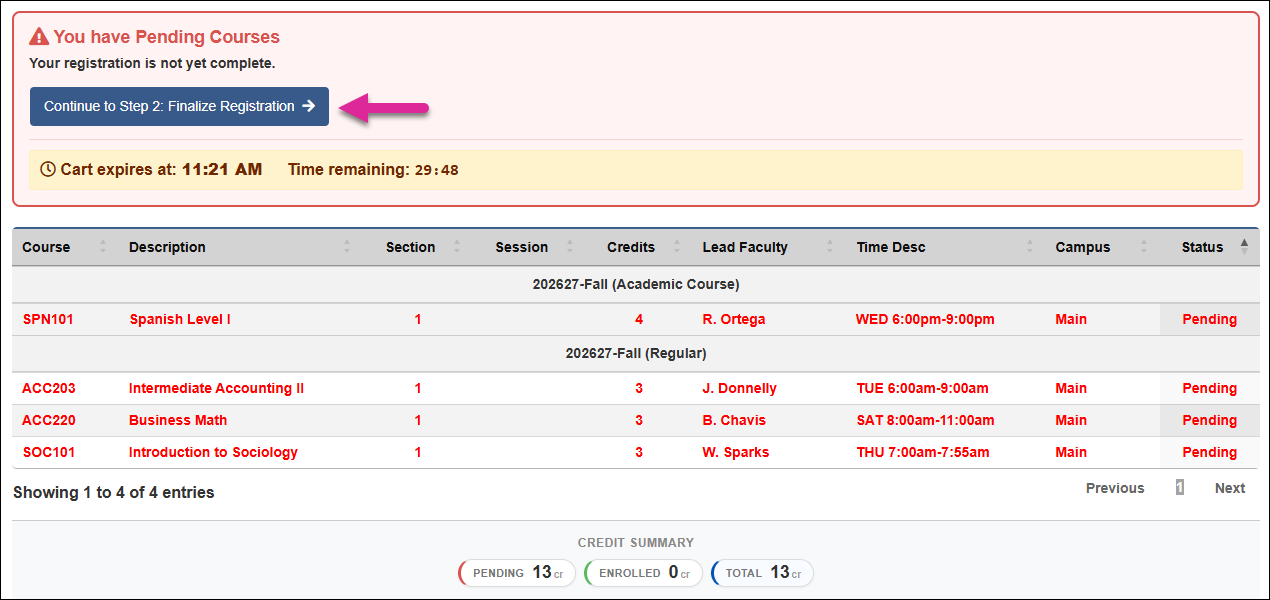
Courses that are pending or already registered also appear in this section. Pending courses appear in red with a timer that expires to keep students from holding courses for extended periods of time. You can sort any column in the table in ascending or descending order using the arrows next to each column header. Use the Previous, Next, and page number links to view additional pages of courses if not all of them display.
The Credit Summary provides a color-coded visual count of your Pending, Endrolled, and Total courses. You can click one of the Filter Enrollments buttons to display only Registered, Pending, or Waitlisted courses.
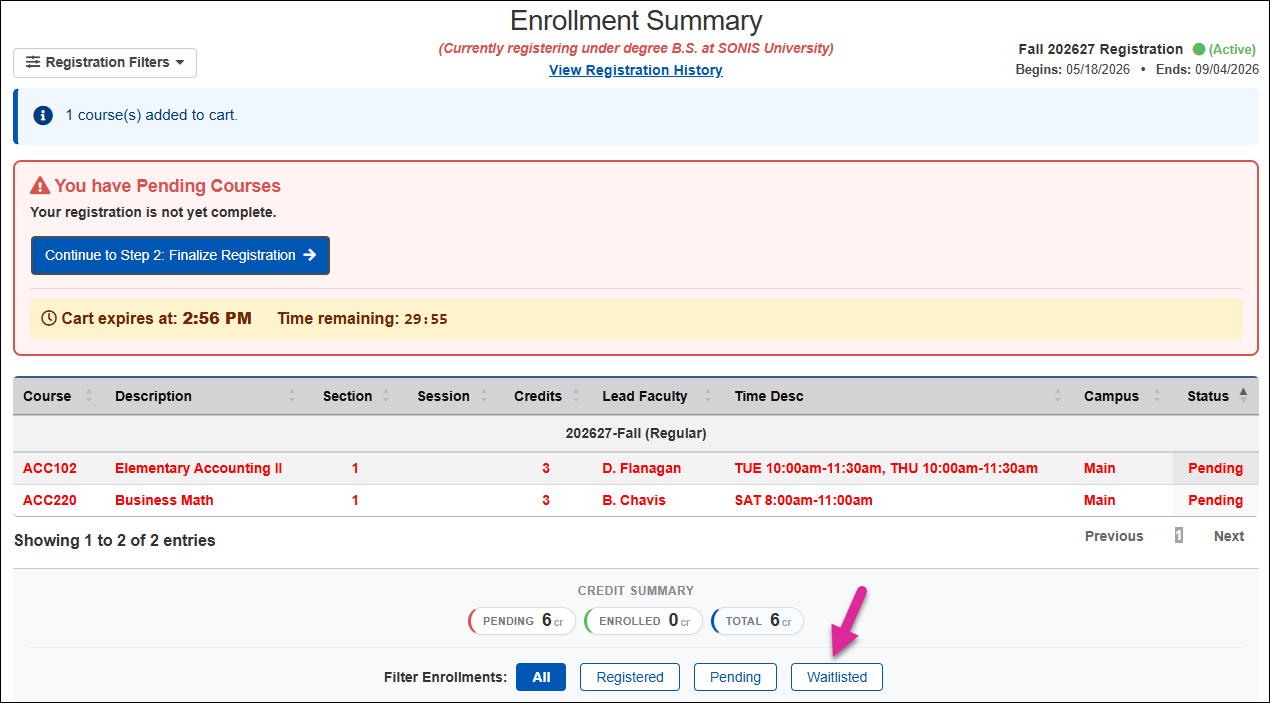
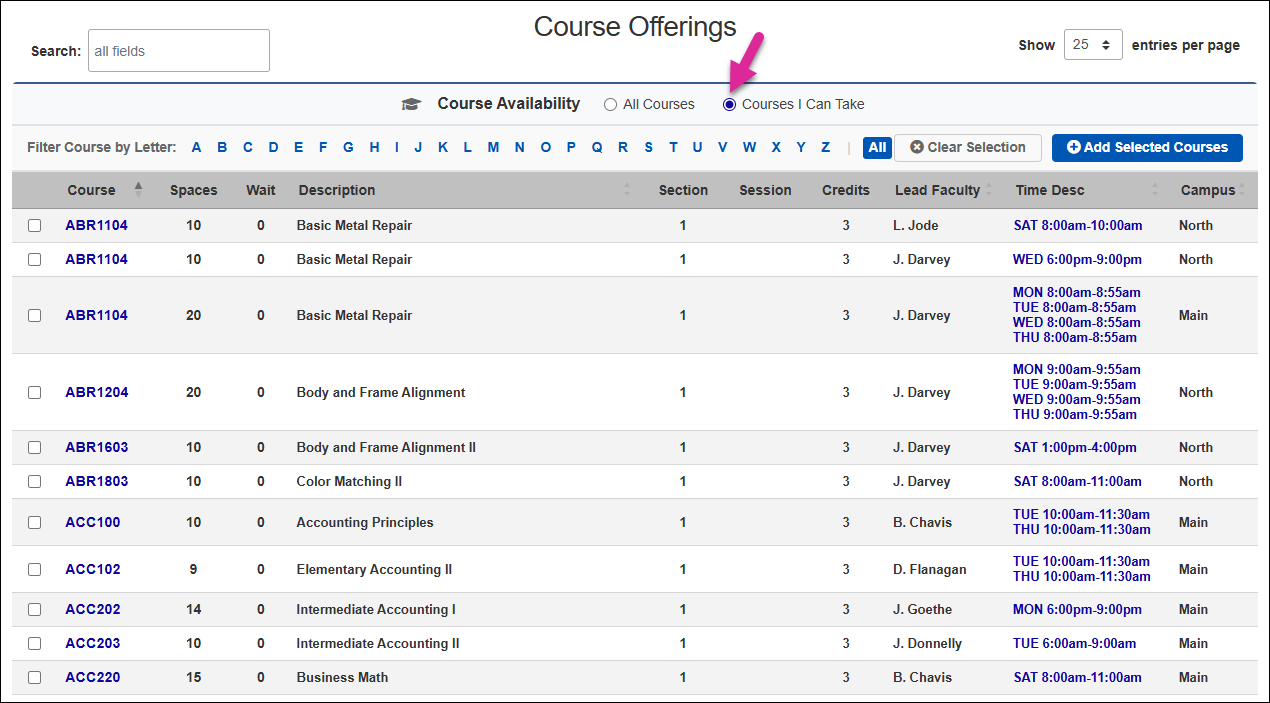
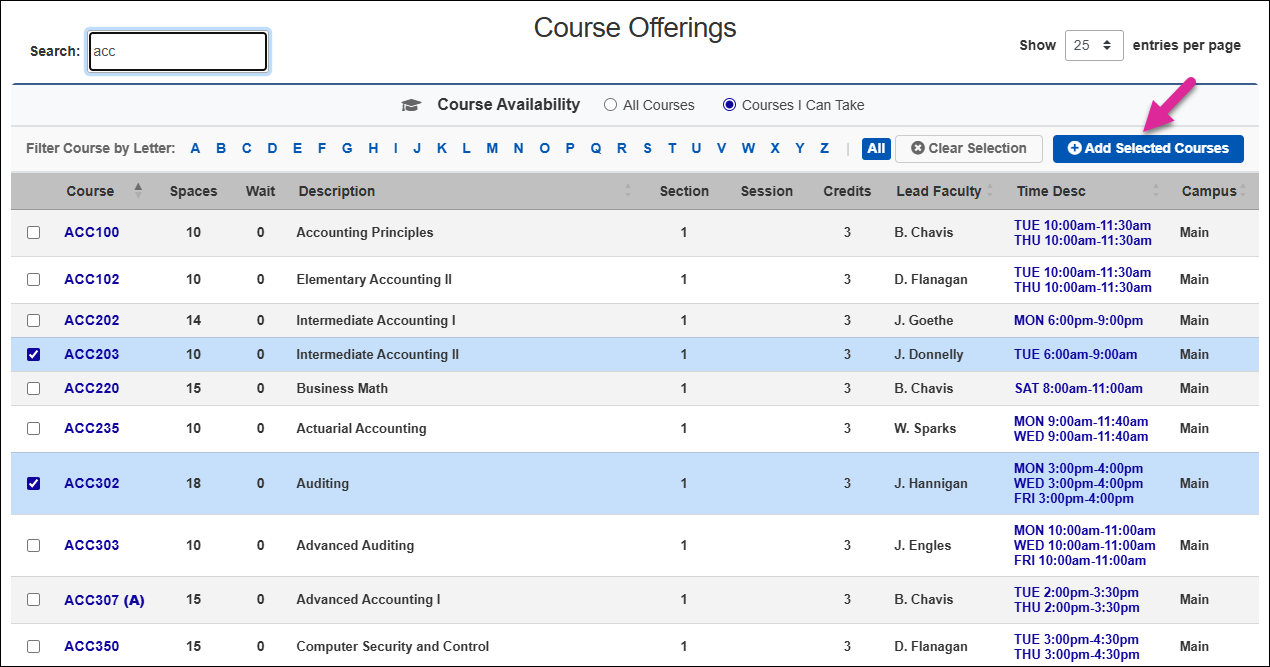
The Course Offerings section displays the courses that are available for registration. A few filter options are available to control which courses display in the table.
You can use the Course Availability filters to show only courses the student can take (based on program restriction, level restriction, prerequisites, etc.) or set it to show everything.
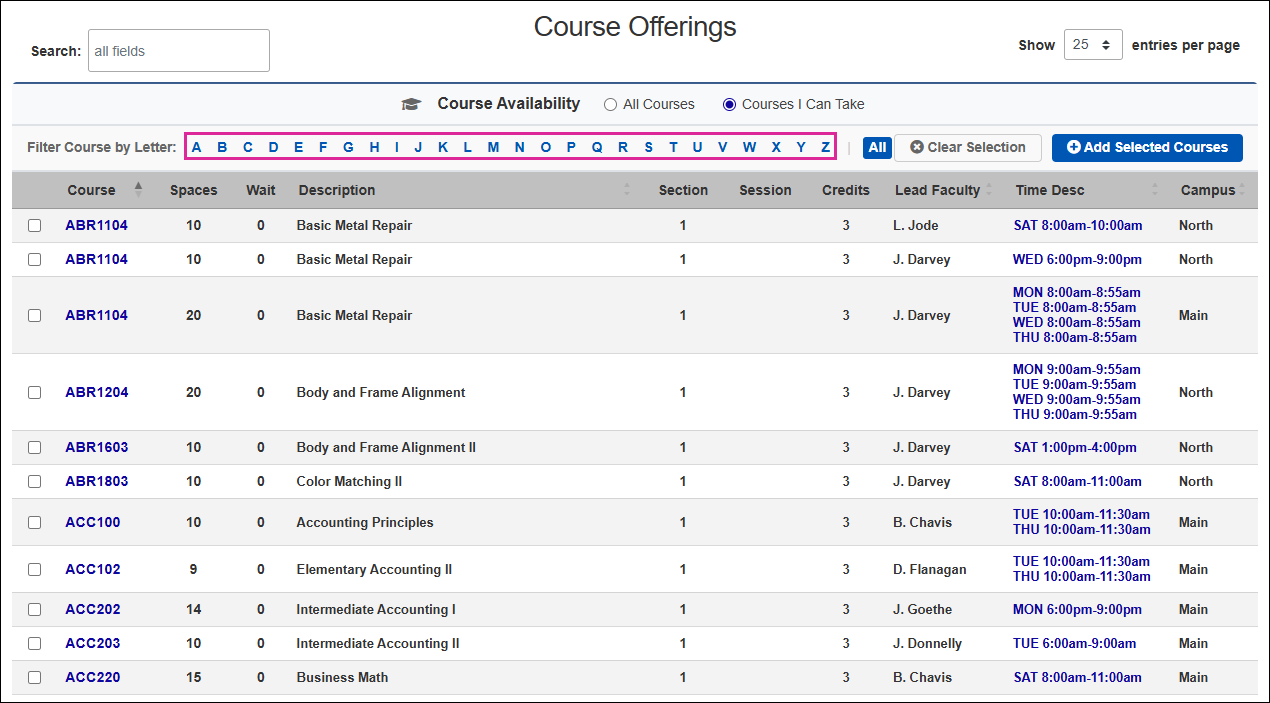
You can also filter courses based on the first letter of the course name. Click All to remove this filter and view courses that begin with any letter.
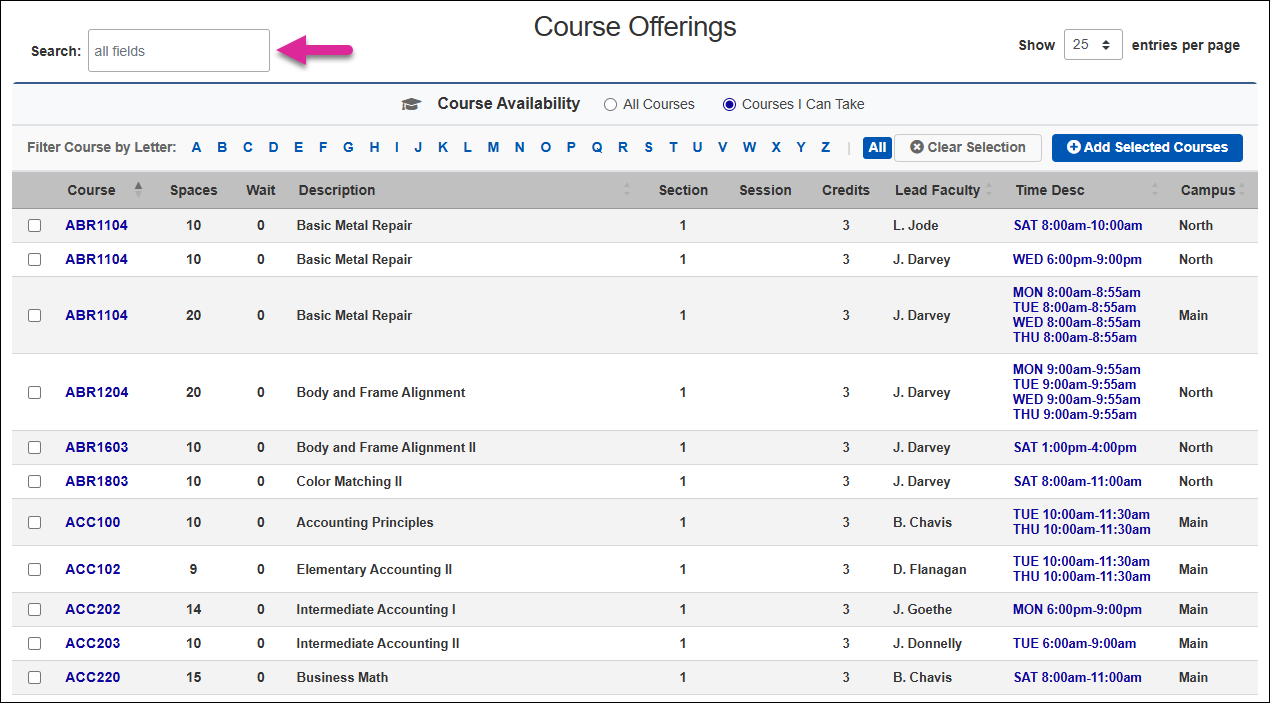
Use the Search box to find a specific course or group of courses. The search box searches all the fields in the table and begins searching as you type.
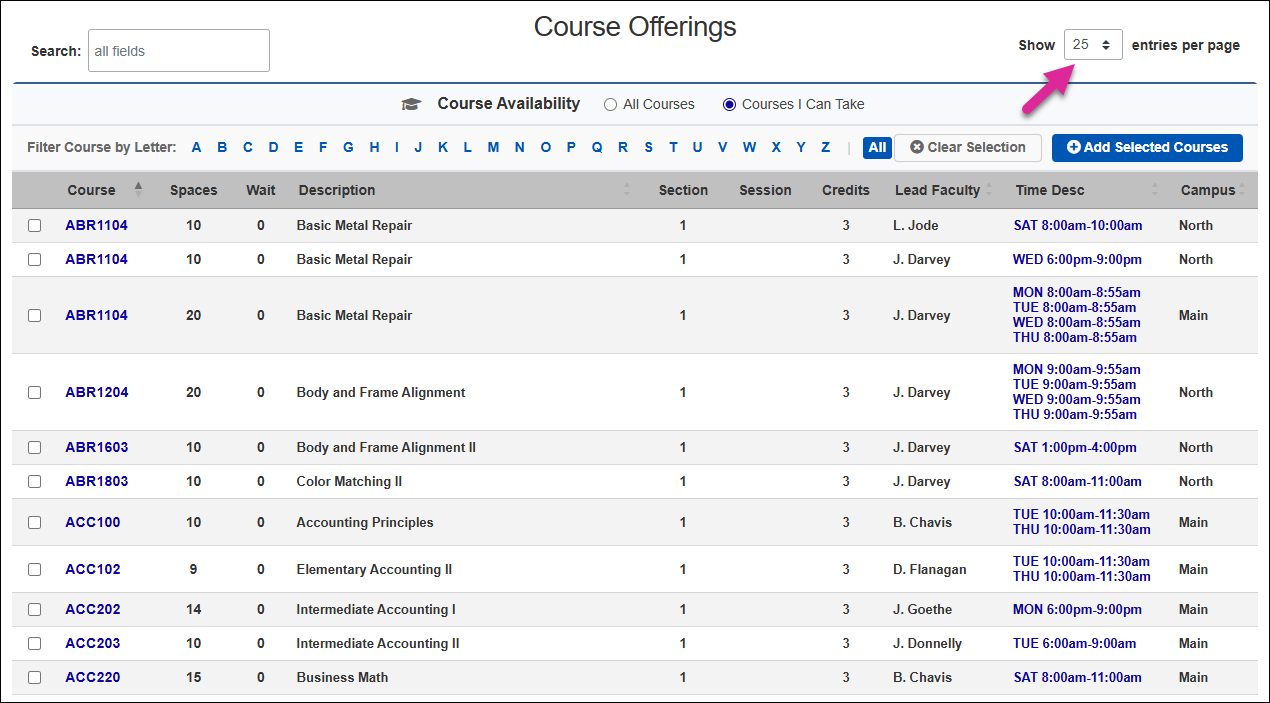
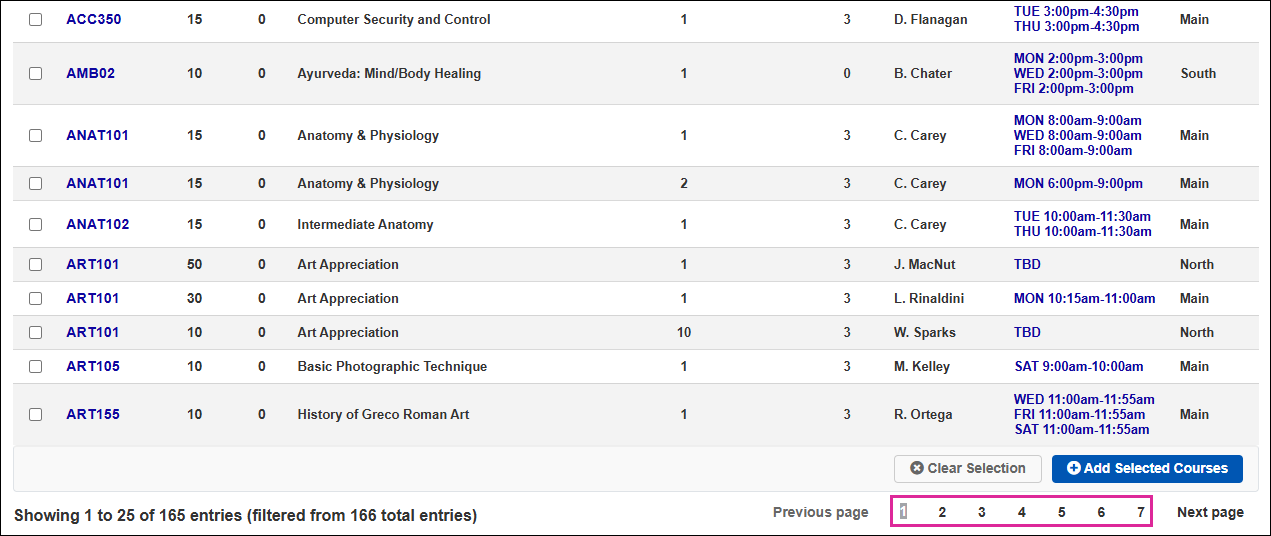
The Show menu controls how many courses are displayed per page. Use the Previous Page, Next Page and number links at the bottom of the page to navigate between pages in the course list.
Registering for Courses
Once you've located the courses you wish to register the student for using the filters, search box, and or page controls, you can click on the date and time of the course to view the full course information one table in a pop-up window.
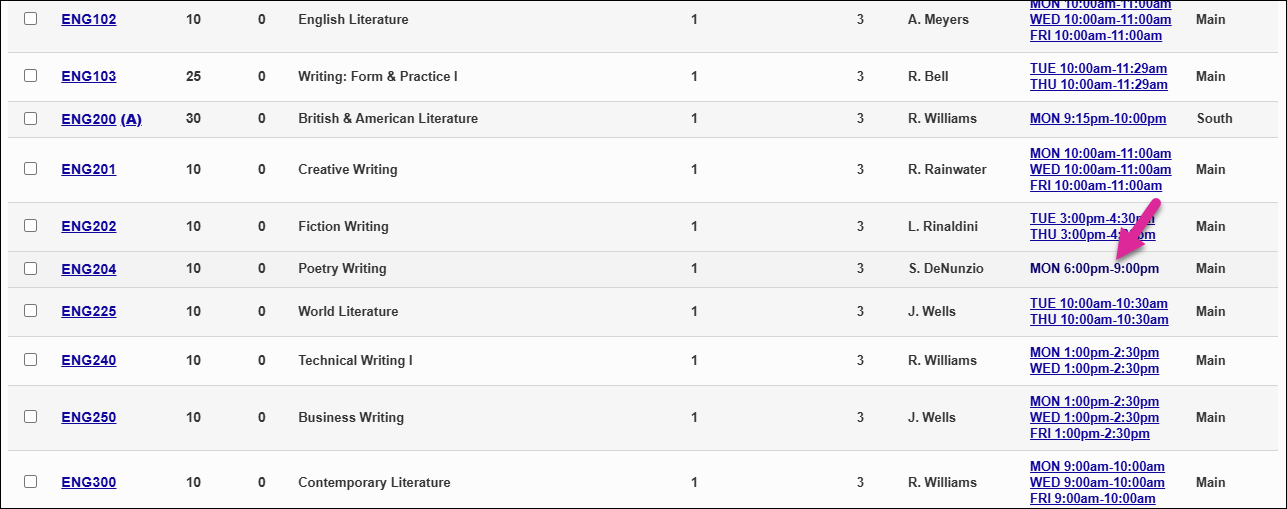

If a course has a letter in parentheses next to the name, this means that the course needs additional authorization of some kind. Click on the letter to open a pop-up window containing information about the required authorization.
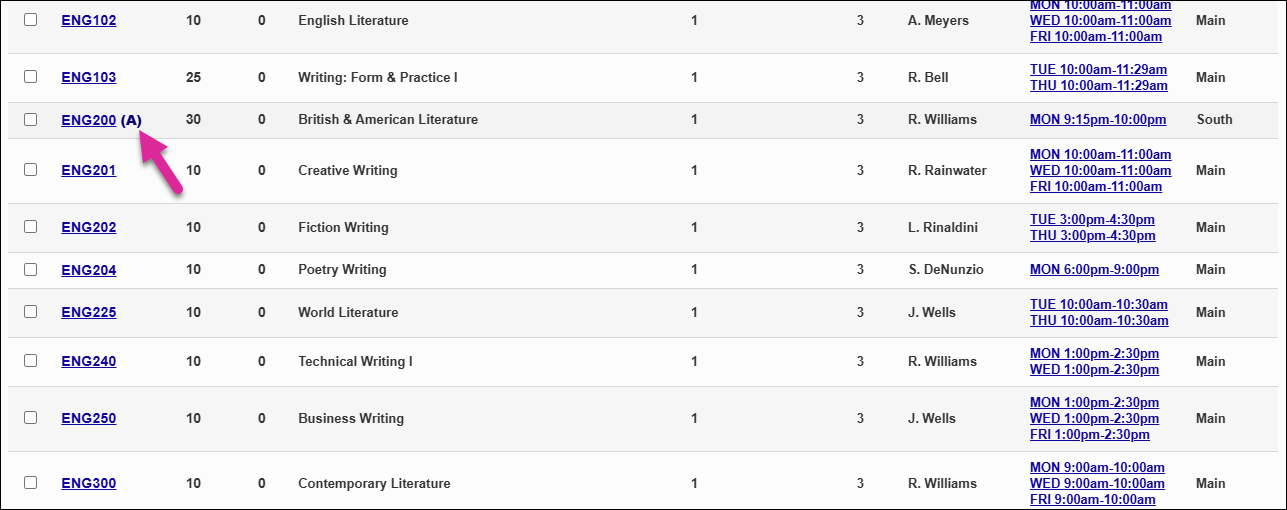
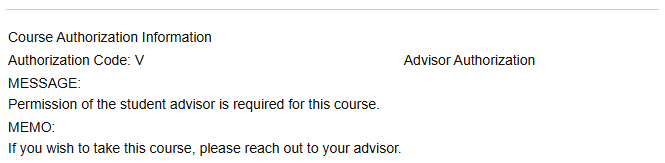
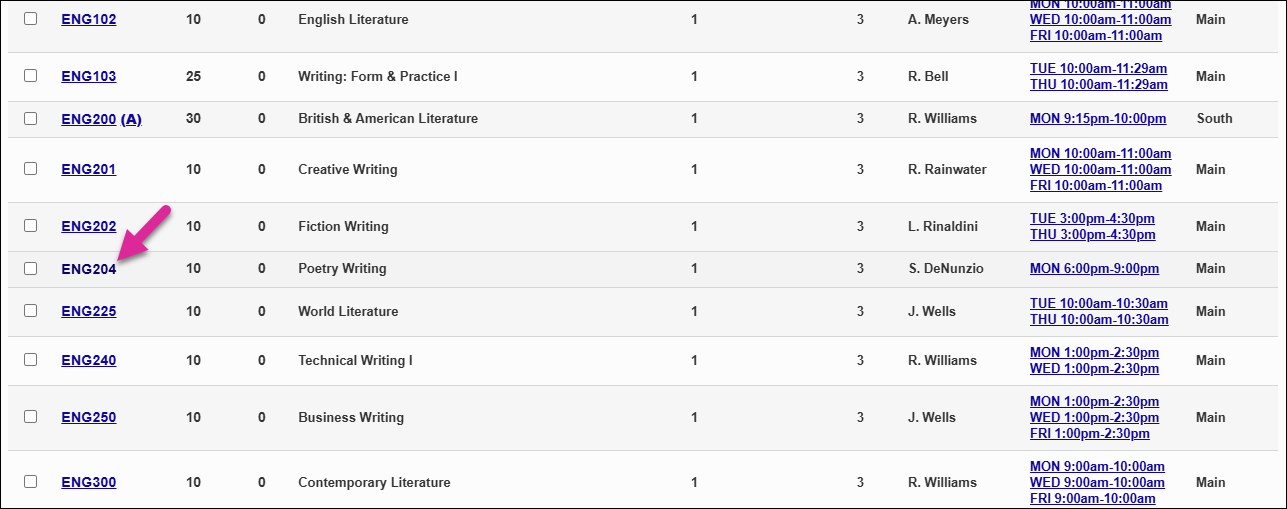
To select an individual course for registration, click on the name of the course.
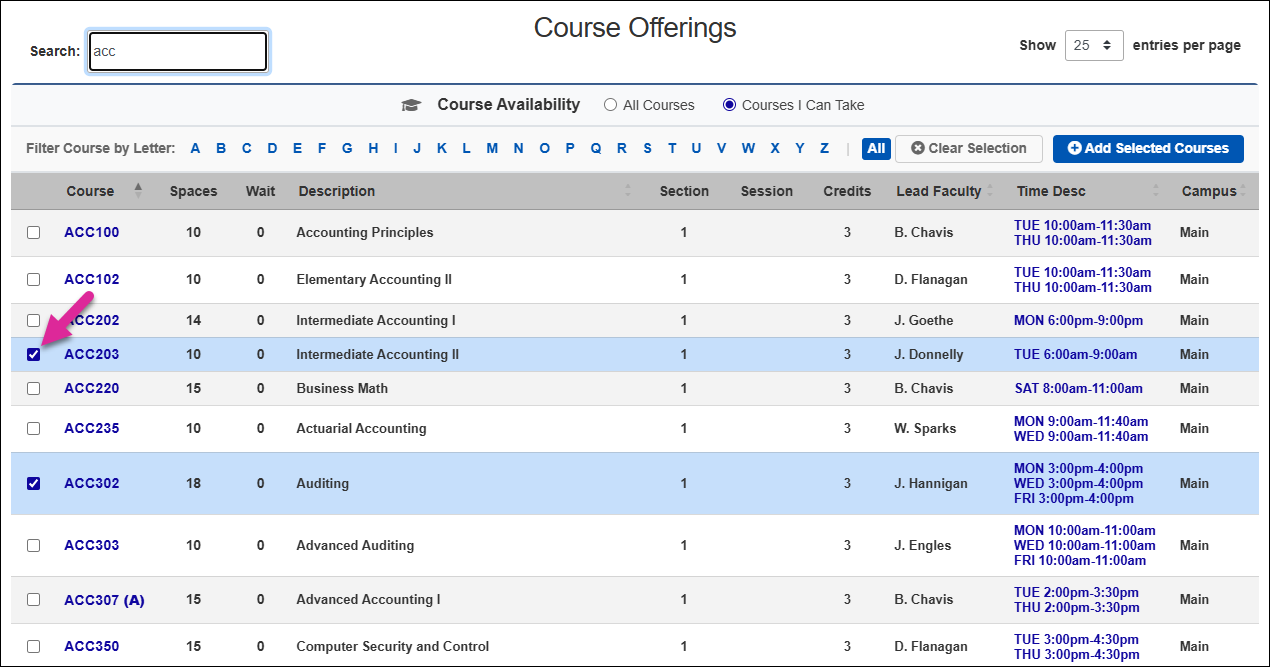
Alternately, you can select multiple courses for registration. Check the box next to each course name you want to select and then click Add Selected Courses.
Note
You can select courses that do not appear on the same page or within the same filter and they will stay selected as you switch between pages or filters. Click Clear Selection if you wish to unselect the boxes you previously checked.
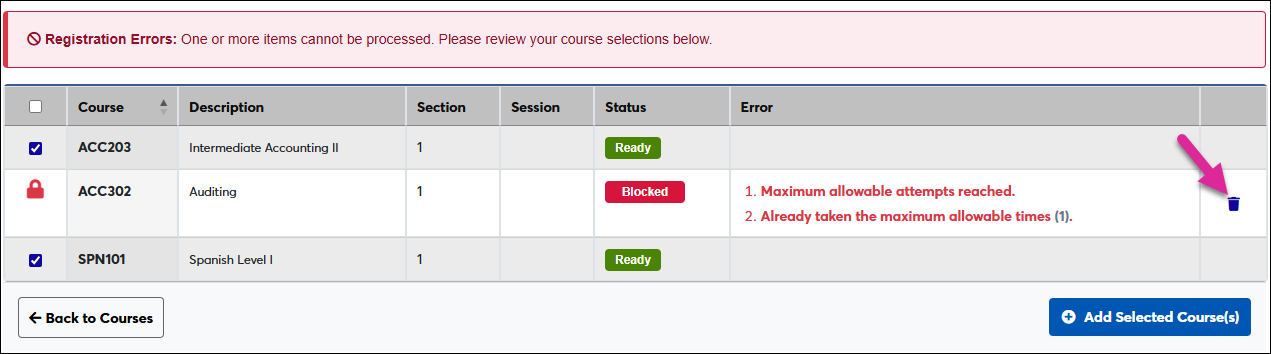
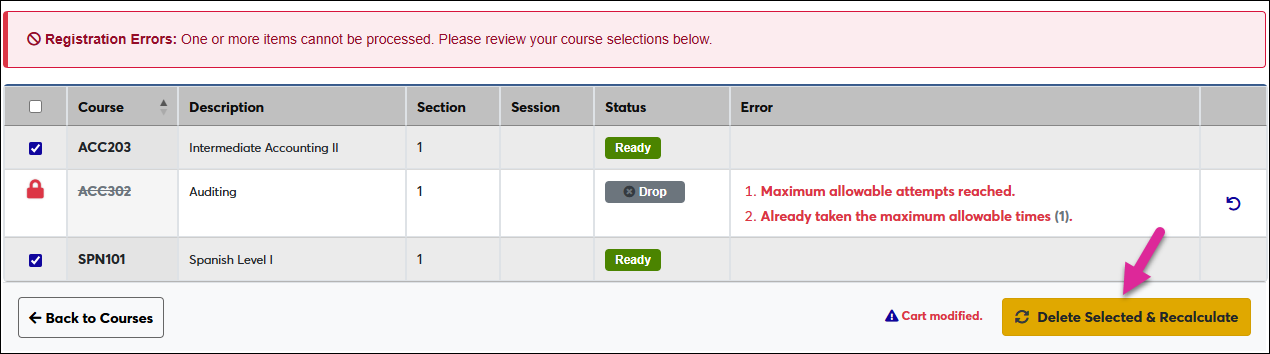
If there are restrictions or conflicts that would prevent the student from taking these courses, you will be taken to a page that displays all the selected courses with the restricted course highlighted. To remove a course that is blocked, click the  icon followed by the Delete Selected & Recalculate button.
If the courses you've selected have no restrictions or the restricted courses have been removed, the courses you selected are added to the Enrollment Summary.
To remove a course that you've selected, click the course name.
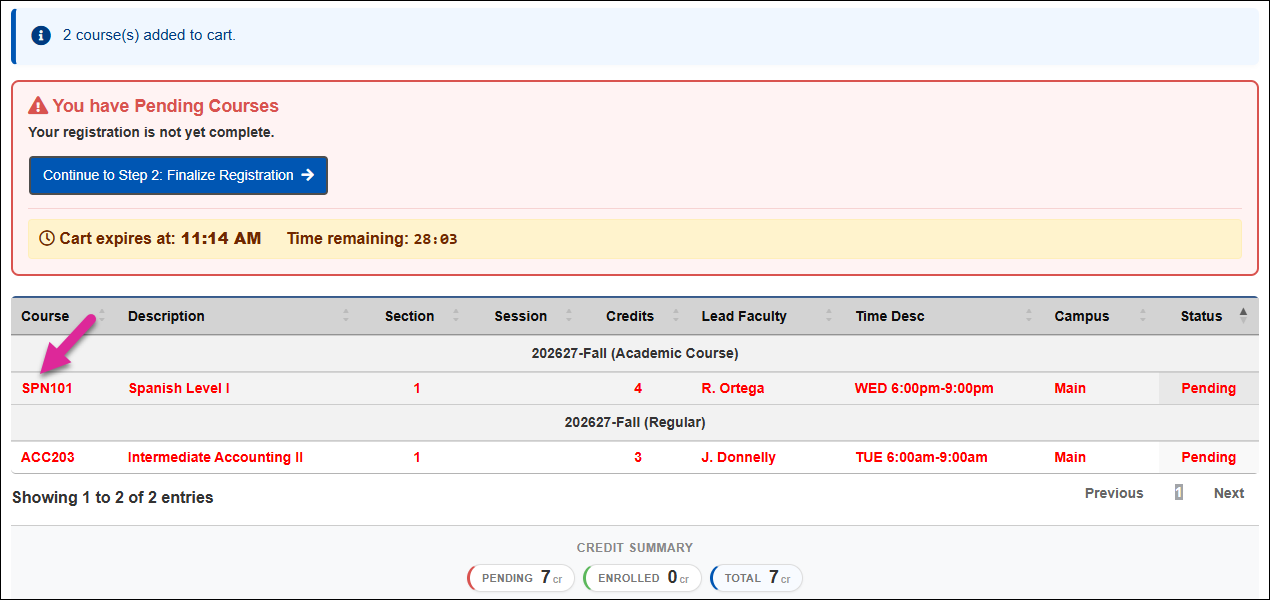
You can add additional courses to the cart and preserve the courses you've already selected. The cart expiration timer will reset each time you add more courses.
Once you've added all the courses you wish to register for this session, click Continue to Step 2: Finalize Registration.
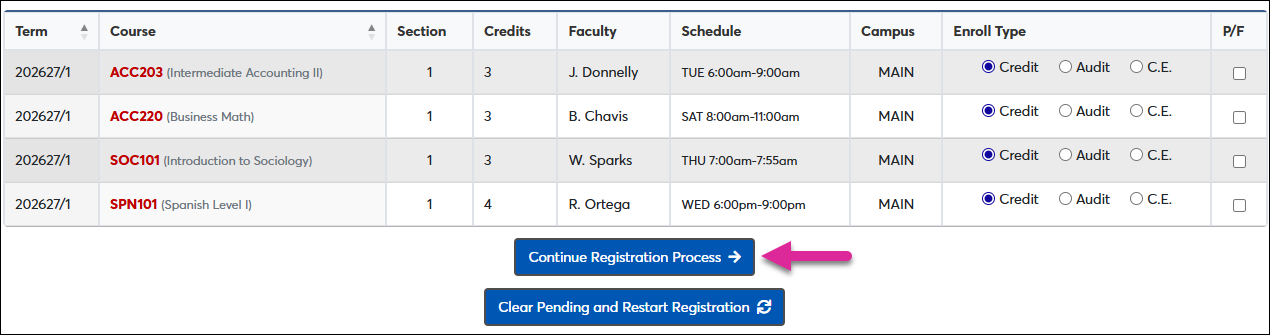
Depending on your school's registration procedure, you may be asked to select an Enrollment Type and/or choose whether the course will be taken with Pass/Fail or traditional grading. If your school offers these options, make these choices for each course before continuing.
Note
Among the Enrollment Options, Credit is the standard for full-time students. C.E. stands for continuing education. This is typically for part-time students who did not apply for enrollment at the school. To Audit a course means to sit-in on the classes without receiving any credit.
The P/F option stands for Pass/Fail and is not offered by most schools. Check this box to take the course with a binary outcome instead of receiving a letter grade.
Note
System administrators can change these settings from the Web Options page under the Systems hub.
When you're ready to finalize the registration, click Continue Registration Process. If you have selected a course in error and need to start over, click Clear Pending and Restart Registration to remove all courses and return to the Enrollment Summary and Course Listing page.
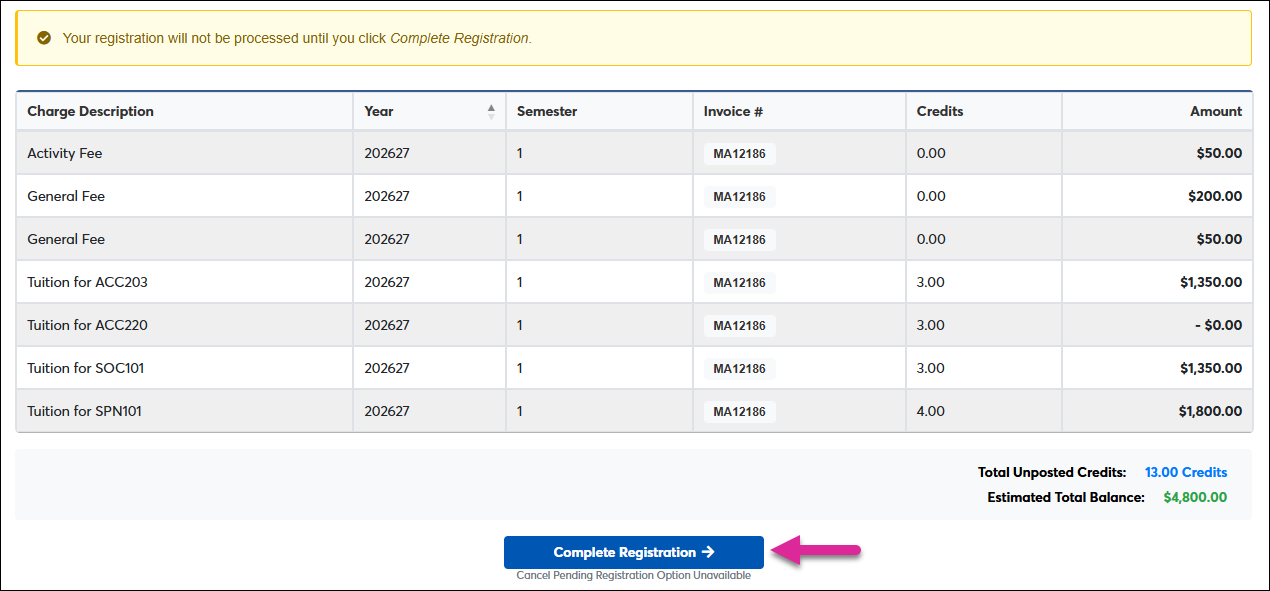
The final page lists the cost for each course, including fees. It also lists the student's estimated total balance and the total credits the student is signing up for at the bottom. If this all looks correct, click, Complete Registration to finalize the process.
You will be returned to the primary registration page where the selected courses will be listed as Enrolled.
Course Removal Explanation
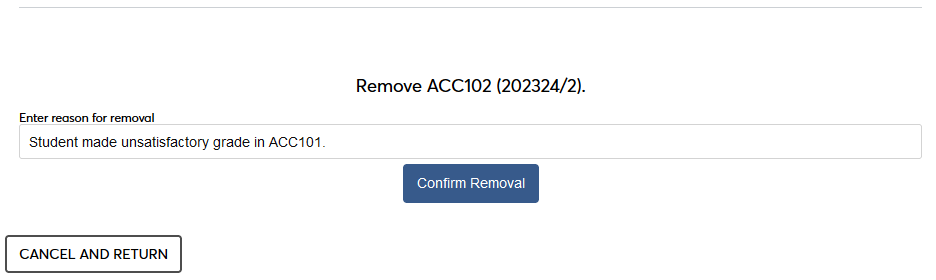
Some schools may require faculty members to explain why they deleted a course from a student's list of registered courses. If this option is active, you must enter text in the Enter reason for removal field before clicking the Confirm Removal button.
Note
Administrators, this functions is turned on using the System Variables utility.