Messenger
Overview
SONIS Messenger is a live chat client built into the system. It allows instant communication between Jenzabar SONIS users of any module status and across portals.
Setup
Two tasks must be accomplished to begin using SONIS Messenger. The first is to enable Messenger and Messenger History in the Master Profile for all security groups that will be using messenger or could potentially be messaged.
Note
It's important to be thoughtful about what groups will potentially be sent messages, as only users, students, applicants, and/or constituents with access to a portal will have access to view chat messages.
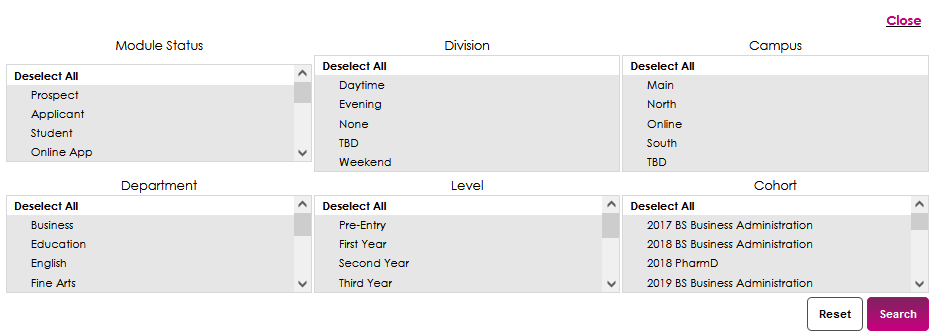
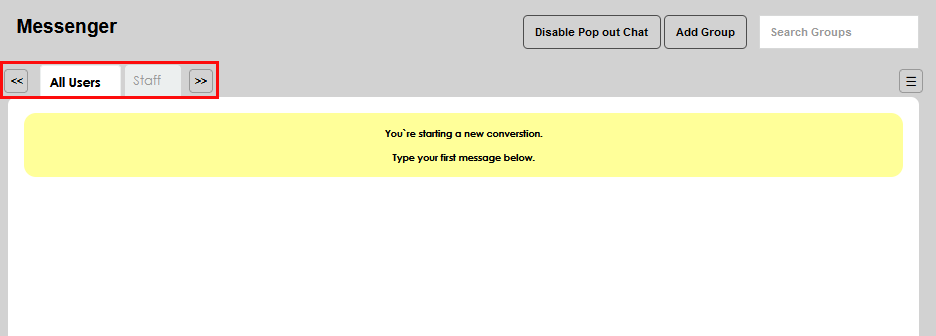
Second, an administrator-level user must create a group chat within messenger in the administrative portal. From the Systems menu, select Messenger. Click Add Group.
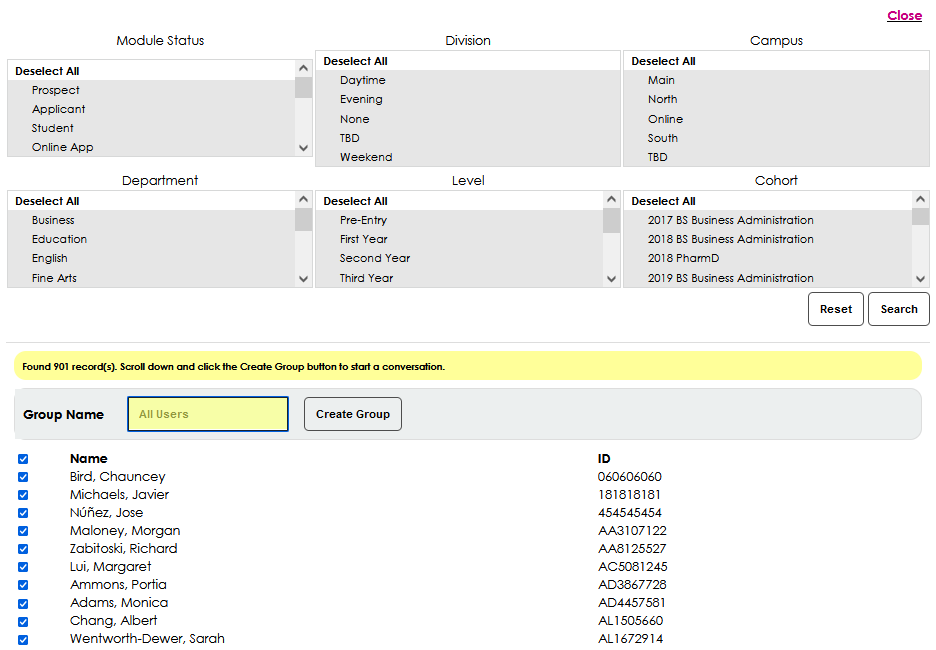
A window with six filters will open. By default, all filter options are selected. This allows ease of creation of an All Users group. A group including all users is recommended to ensure there is the ability to message all in case of an institution-wide communication occasion, such as an emergency closure. If creating an All User group, simply click Search to begin creating the group. If not, select the appropriate group members from the filters, then click Search. The results will display below the search filters.
Enter the name of the group in the Group Name field. This field accepts up to 50 alphanumeric characters. Click Create Group to compile the group and make it available for use. The newly created group will display in the chat navigation.
Using SONIS Messenger
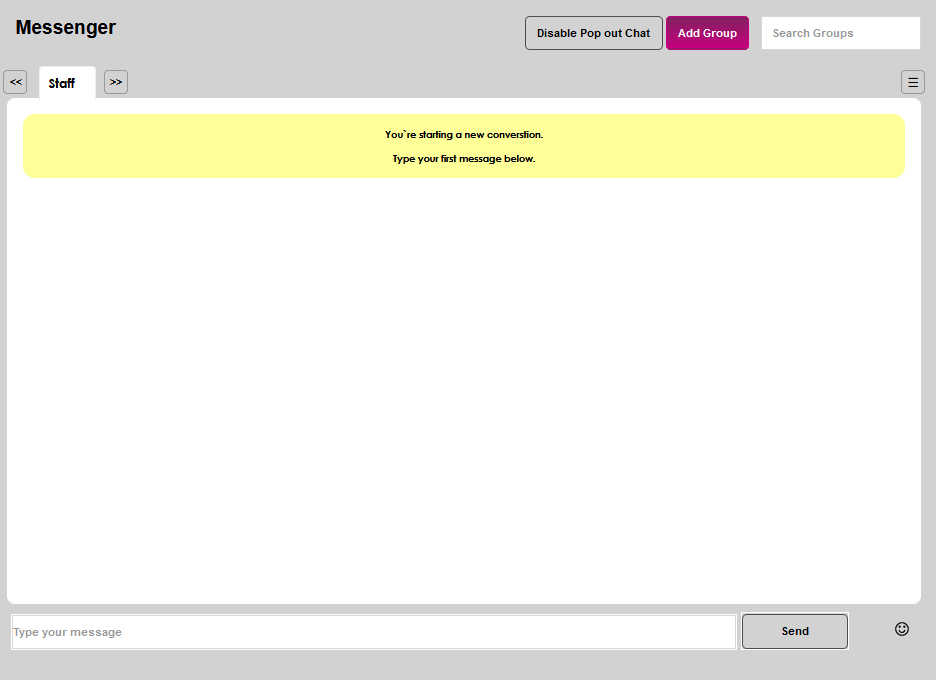
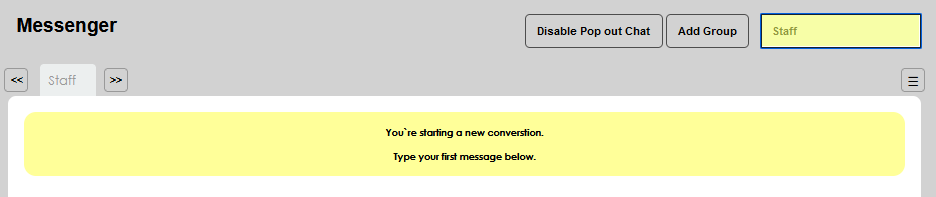
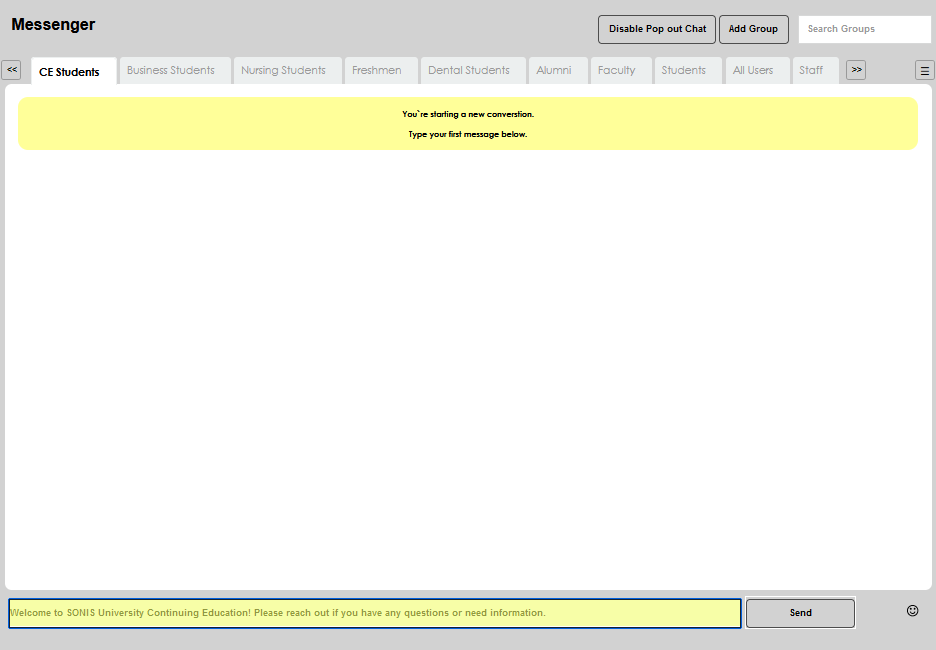
All constituents other than students can create group chats. As chat groups are created, they will populate the navigation area and can be selected by using the arrows to scroll to the appropriate chat and clicking on the name. Chats can also be selected by using the Search Groups function.
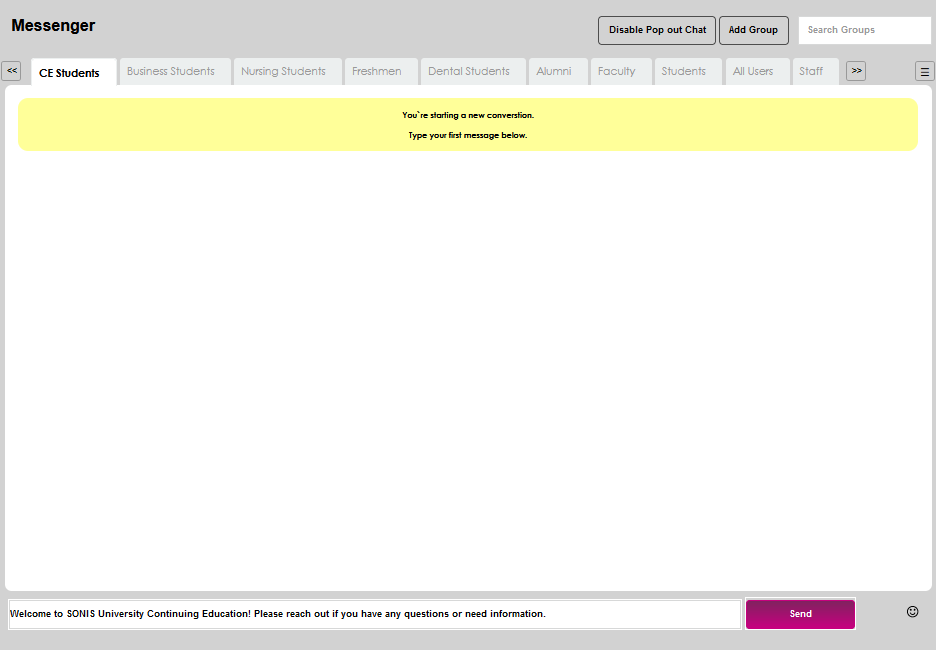
To compose a chat, simply type your message in the field and click Send to send it to the desired group.
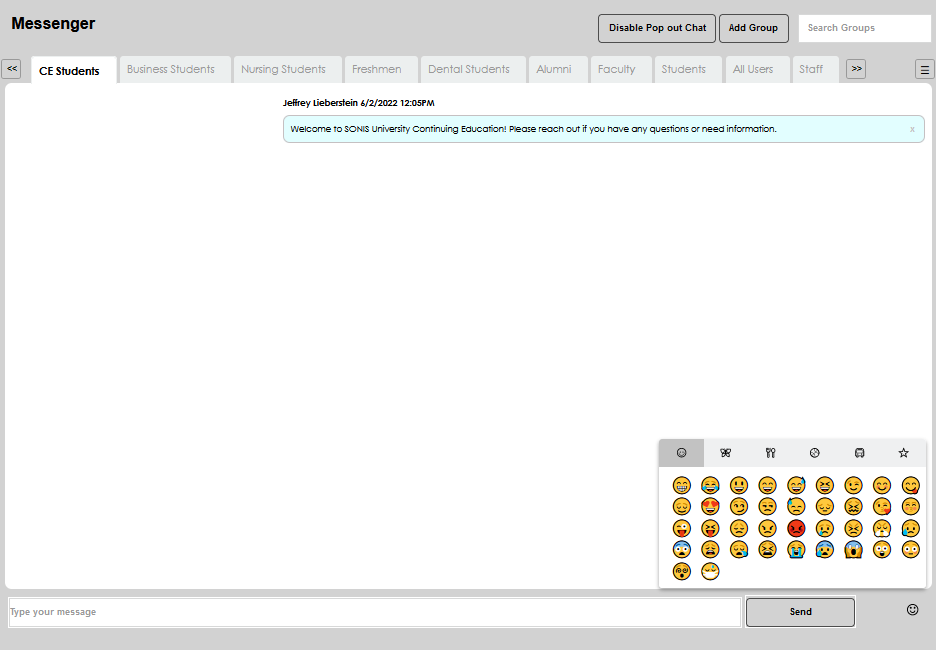
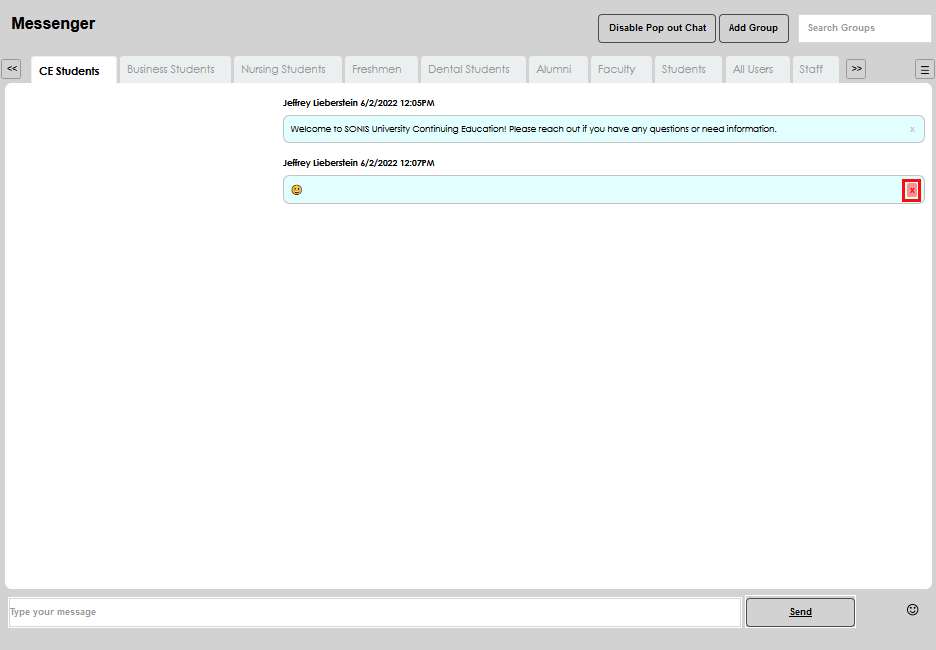
Emojis are enabled and can be used by clicking the smiling face icon. If a message is sent incorrectly, simply click the x at the end of the message and confirm the delete by clicking OK in the popup window.

Managing Group Chats
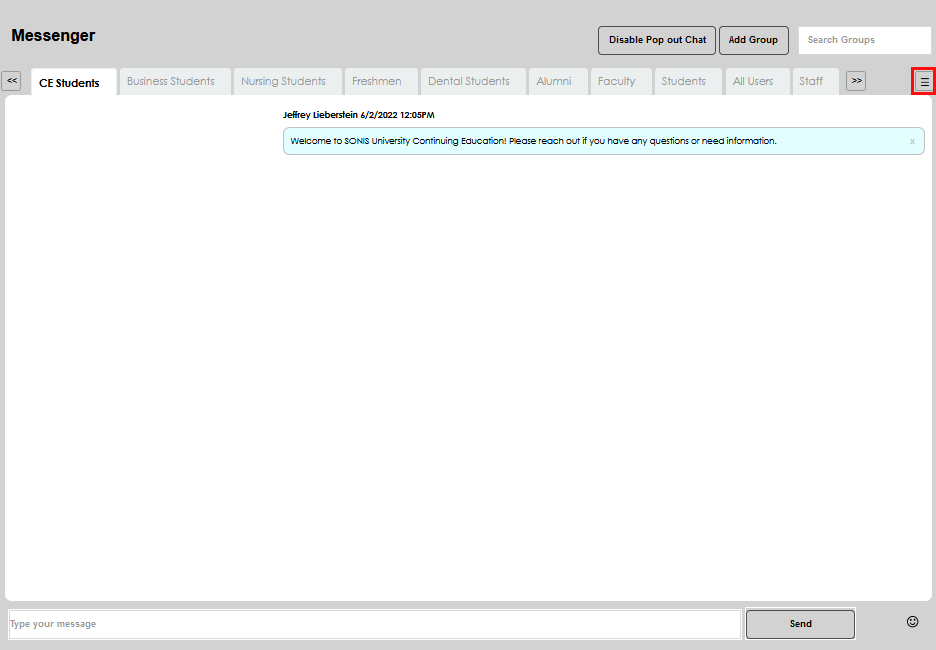
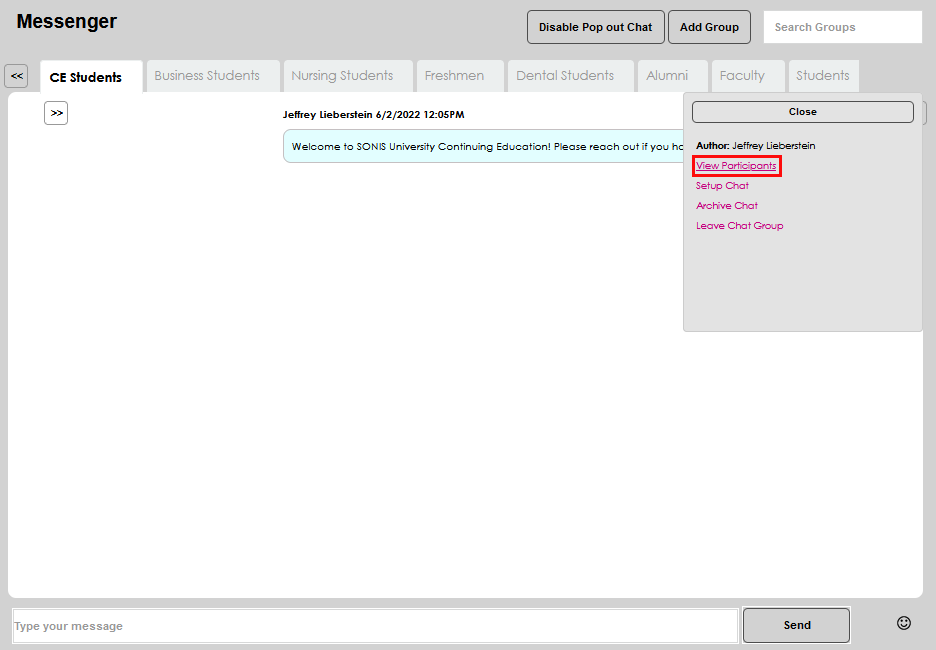
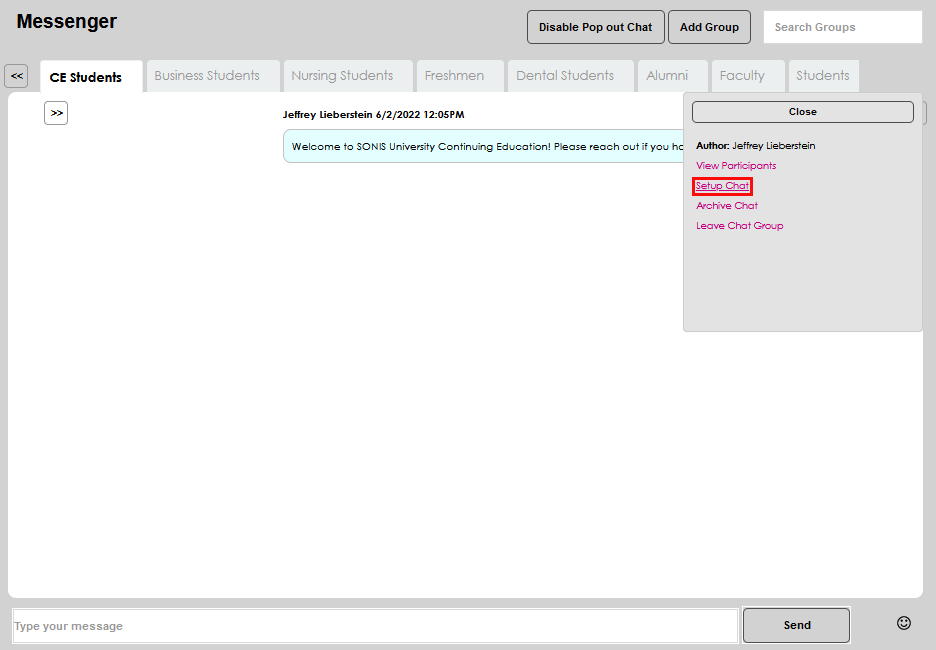
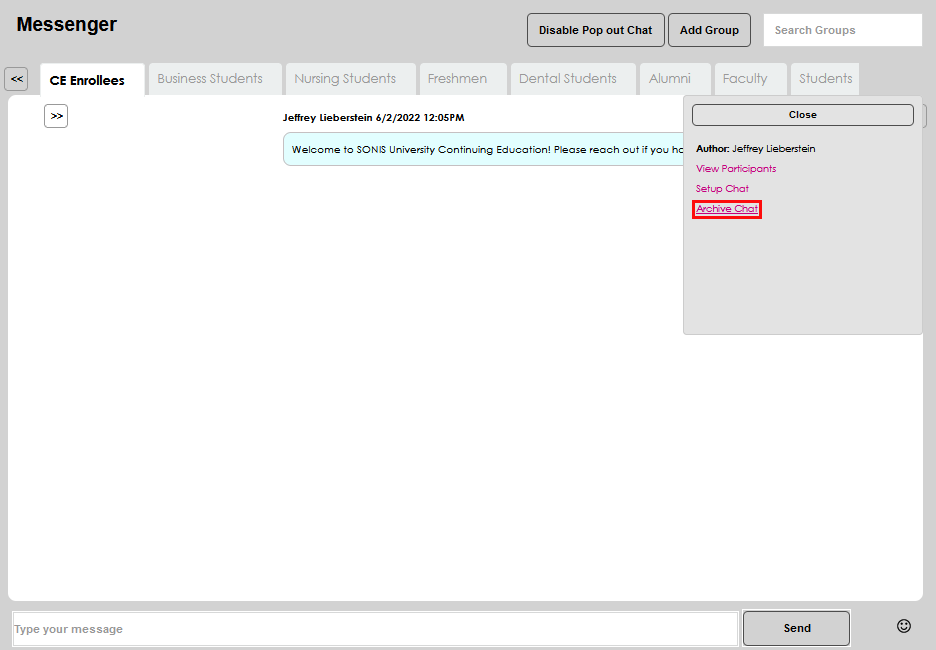
On the top right of each chat page there is an icon provided for managing a group chat. Clicking the icon provides the ability to see the author of the chat and complete actions.
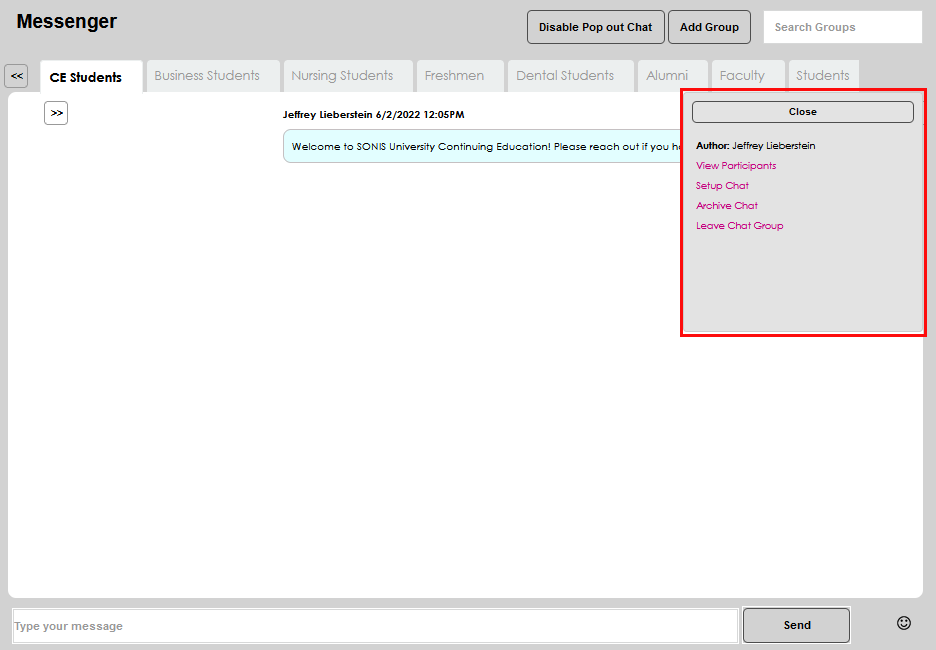
Click View Participants to display a list of the group members.
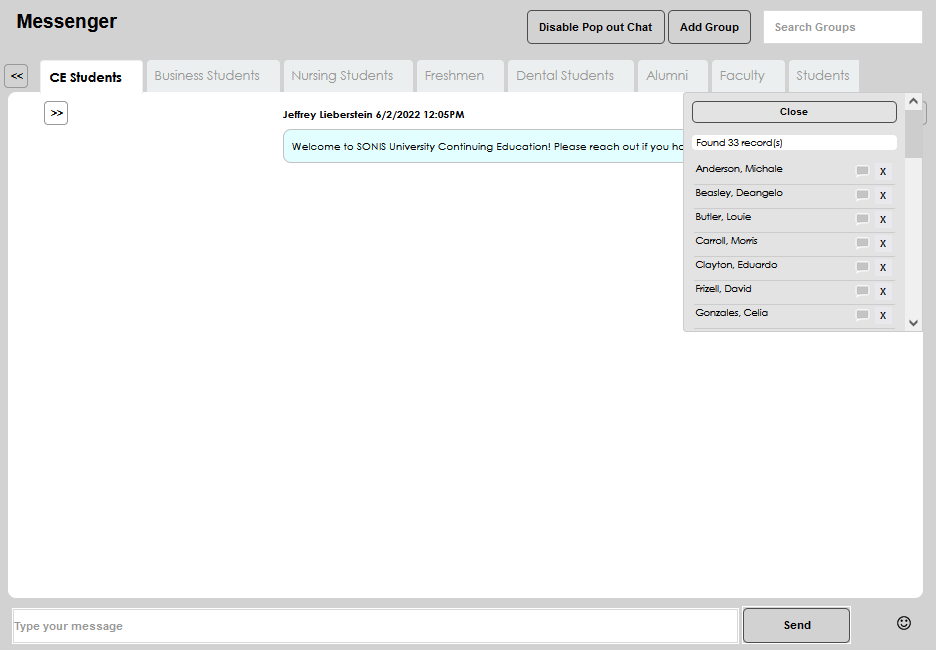
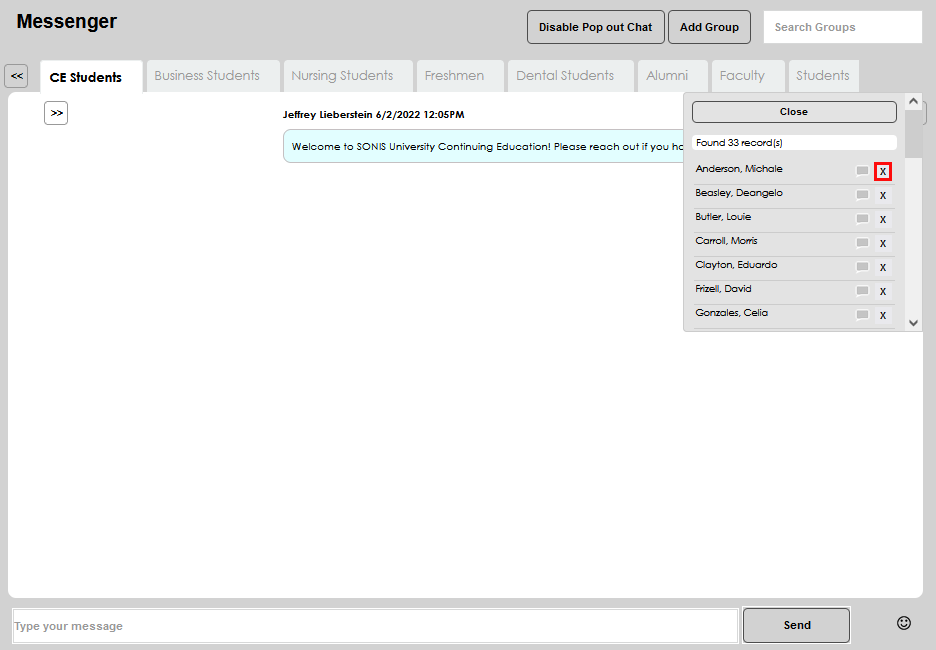
By clicking the speaking bubble icon next to a name, a chat can be sent to only the named individual. By clicking the x in a name's row, the individual can be removed from the chat.

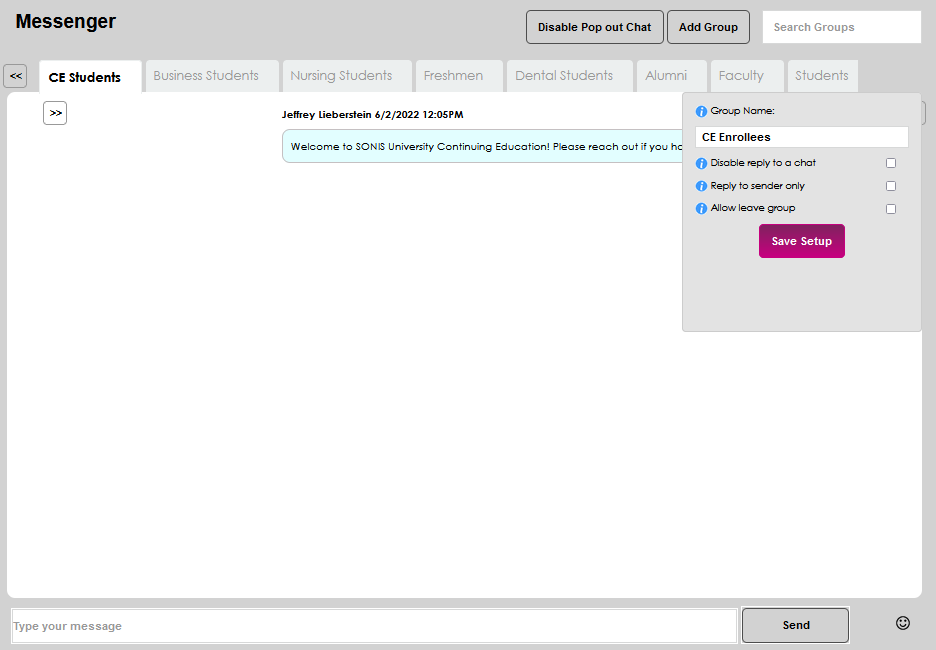
Click Setup Chat to access further chat management options. Rename the chat by clicking in the field displaying the current name and making the desired edits.
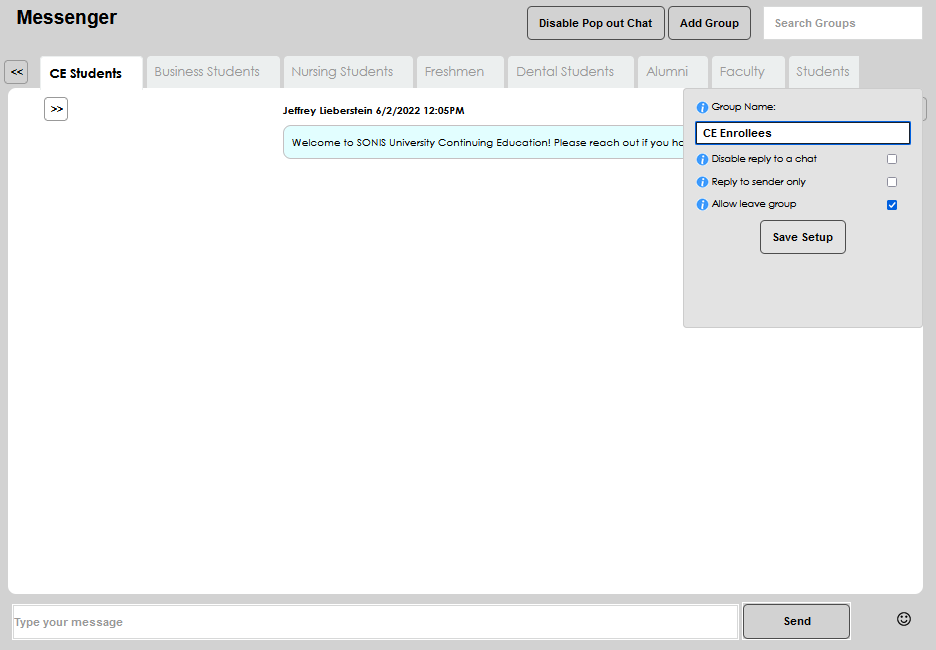
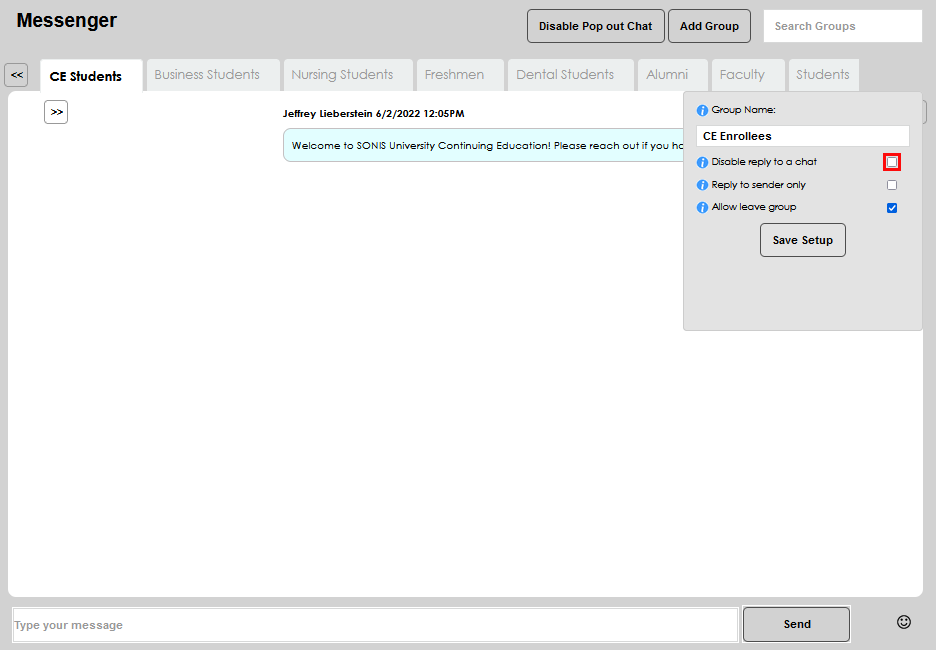
By clicking Disable reply to a chat, group members will not be able to respond to messages. Only the creator or author of the group will be able to send messages to the group.
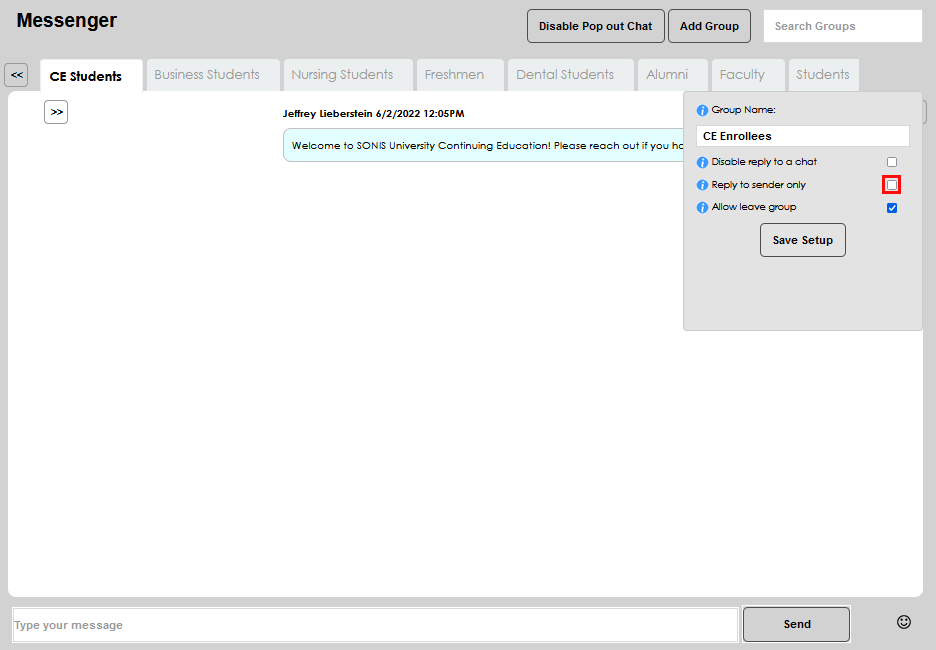
By clicking Reply to sender only response messages will be sent to only the author of the message being replied to.
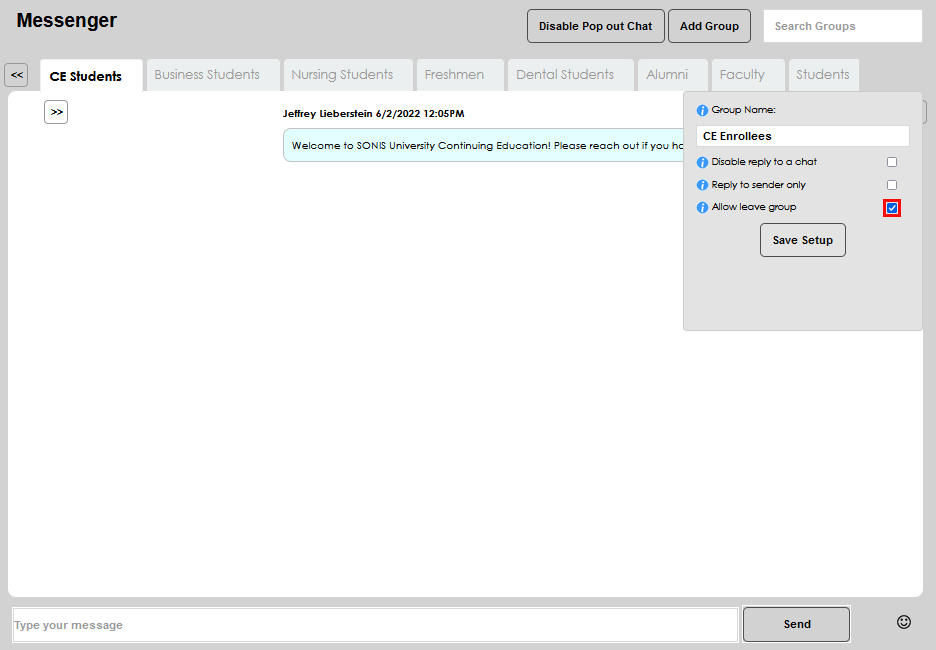
By clicking Allow leave group group members can choose to leave the group and no longer receive group chat messages.
After making any desired setup choices or edits, click Save Setup to save the updates and exit the window.
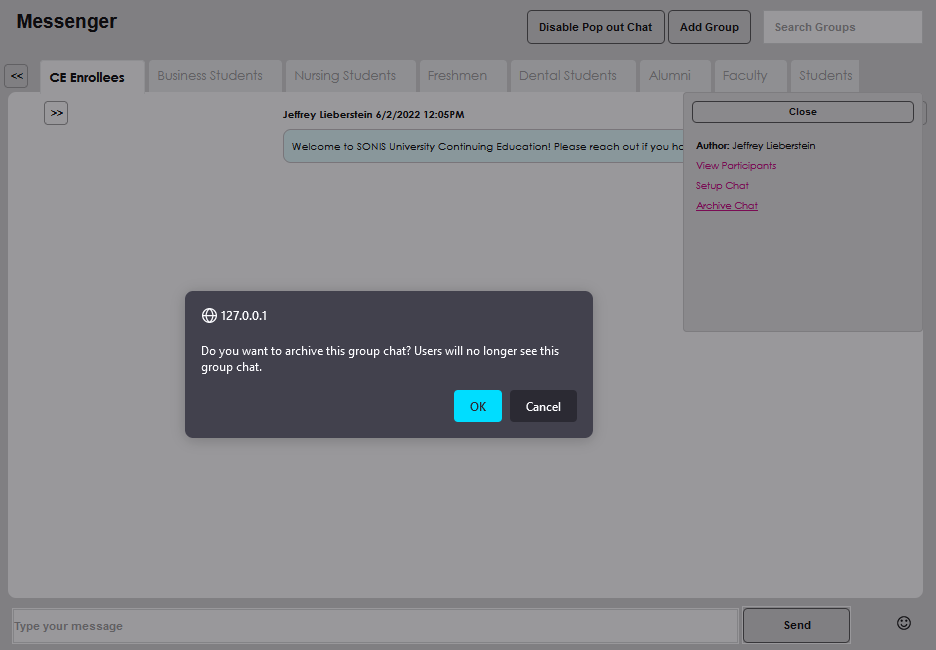
If the chat group and associated messages will no longer be utilized and should be removed, click the Archive Chat link to remove the group chat from the user display and retain the history within Messenger History. Click OK to confirm the archive.
After the chat has been viewed, the notification count will automatically decrease.