Clearinghouse
Overview
The National Student Clearinghouse is a non-profit organization which assists schools in student reporting to maintain compliance with FERPA, the Higher Education Act, and other federal regulations. The SONIS Clearinghouse utility allows member institutions to create, view, and export the data that the National Student Clearinghouse needs. To be included in the report, a student has to be enrolled in at least one course for the selected school year and semester, unless they have an active NSC approved leave of absence record with a start date that is less than or equal to 180 days in the past.
CIP codes, where needed, can be obtained through the National Center for Education Statistics website.
System Setup
Before submitting anything to the National Student Clearinghouse, it's important that institutions have all of the following areas set up properly. Failure to do so will result in inadequate or inaccurate information being passed.
FICE
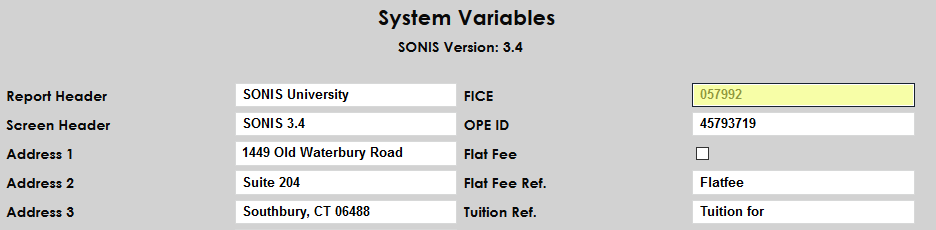
Every school that utilizes the National Student Clearinghouse must have a six-digit FICE code for identification. The FICE field is located in the upper right-hand corner of the System Variables page under the Systems menu. If the school's code is not already listed in this field, enter the number and click Submit to save the page.
Multiple FICE Codes
Some institutions may have more than one school, each with their own FICE code. If this is the case, contact SONIS support to turn on the multi-NSLCH option. Once this option has been activated, a new utility is available under the Systems menu called Clearinghouse Setup. Navigate to this utility and click Add Record to continue.
Any programs that are under the institution's primary FICE code designated in System Variables will still have that value attached to them for Clearinghouse purposes, but any programs which do not fall under that code must be listed separately. Select a Program from the dropdown menu and enter the FICE code for that program in the School Code field.
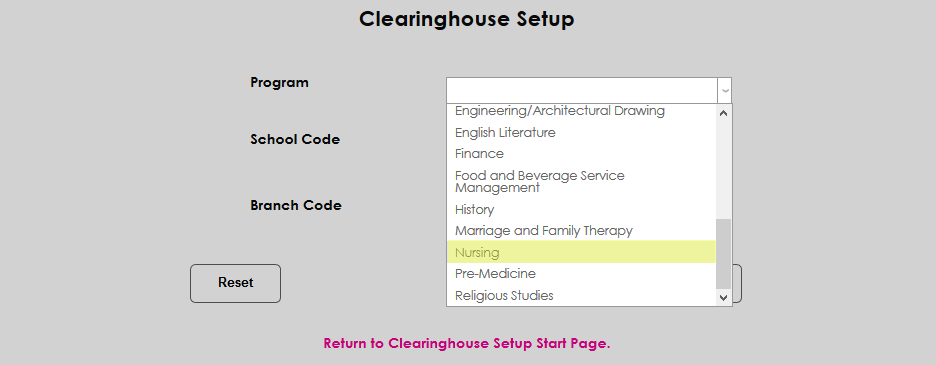
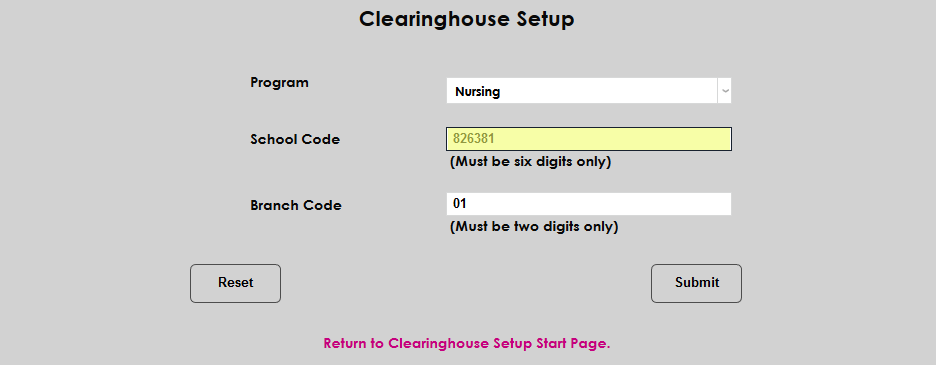
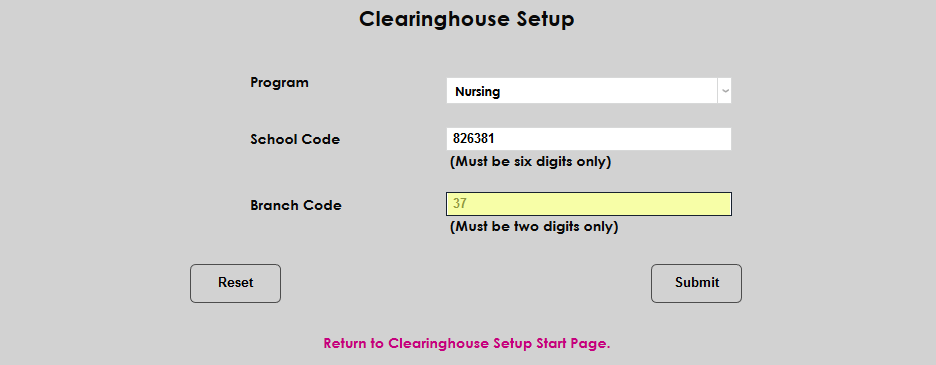
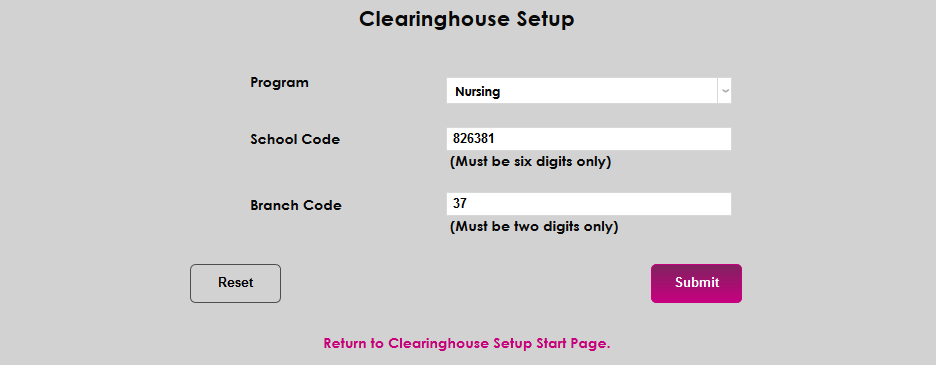
Finally, enter the appropriate NSC branch code in the Branch Code field and click Submit. Repeat the process until all programs that are not listed under the institution's primary FICE code have been set up.
Biographic
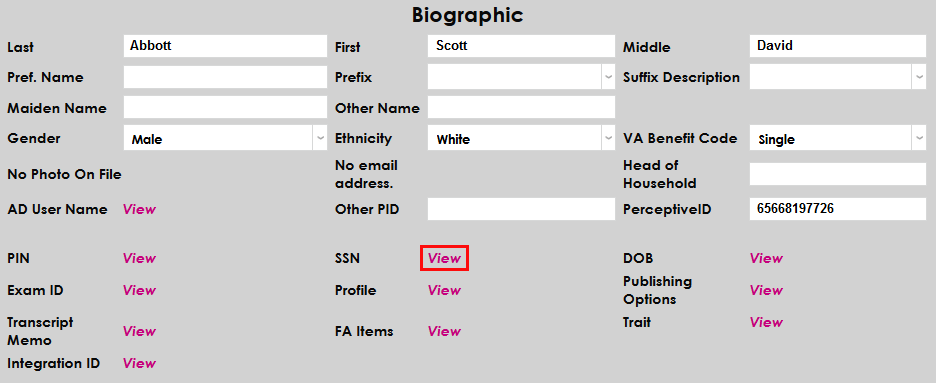
All students included in the Clearinghouse import/export must have a valid social security number listed in the SONIS system. Any student who does not have one will have No SSN listed in red next to their name when the Clearinghouse data is imported. To add or edit a student's social security number, navigate to their Biographic page and click View next to the SSN label.
If the student is a US citizen, ensure that the Citizen box is checked.

Also on the Biographic page is a box labeled NSLCH Block. Checking this box will prevent the NSC from sharing the student's data with third party groups.

Address
Another piece of data exported through the Clearinghouse utility is the student's NSC permanent address. Institutions can choose to designate one of their address types as the NSC permanent address using the Address Types table in Table Maintenance.
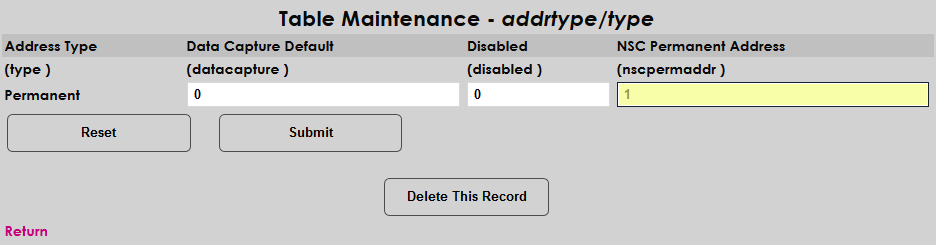
If no NSC permanent address has been designated by the institution or a student does not have the address type with the NSC permanent address designation in their records, the student's preferred address will be used.
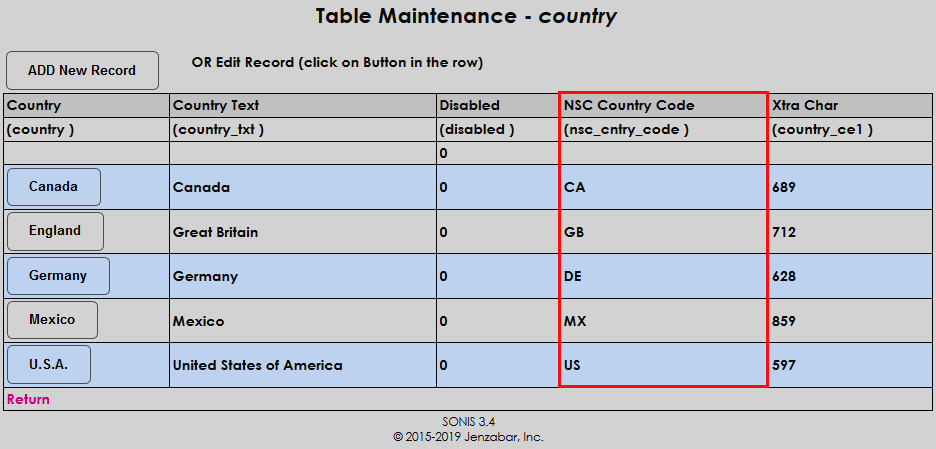
In addition each student must have a country. To send this data, each country must have an NSC country code. Ensure that these values are set in the Country table under Table Maintenance. These codes are provided by the National Student Clearinghouse. If a student does not have a country in their address record, SONIS will insert the United States as their country as a default when creating the export file.
Education Record
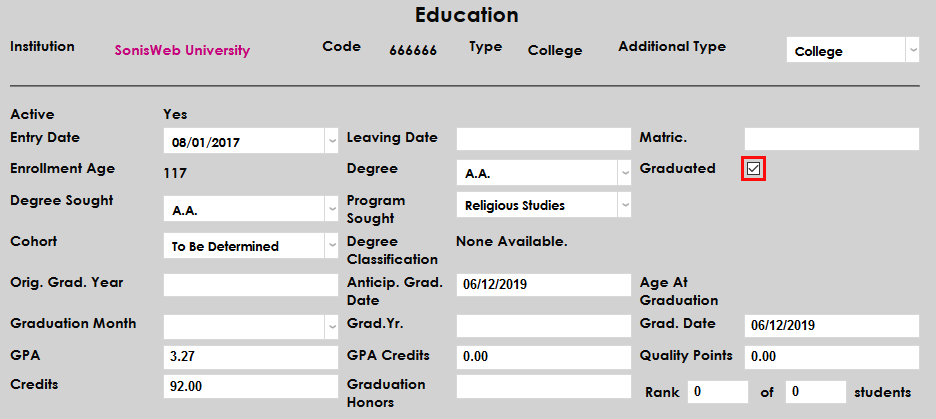
Each student in the SONIS system should have an Education record that lists some basic data about their studies at the SONIS member institution. The Clearinghouse utility uses graduation data from each student's Education record. If the student is still enrolled, they should have an Anticipated Graduation Date.

If no anticipated graduation date is entered, when the import is created, it will replace the blank with a calculated AGD. The calculated AGD is "5/1" (May first) and one year from the current year. So for example, if the current year is 2020, all blank AGD values would be replaced with "5/1/2021."
If the student has graduated, the Graduated box should be checked. The Clearinghouse utility uses this box to build a Graduates Only report.
If the student has transferred to another institution, the Transferred Students box should be checked in the Education record of the school they transferred to.

Additionally, the start date on that non-home institution education record the student is transferring to must be greater than or equal to the leave date on the active home institution record and the non-home institution must have an OPE ID.
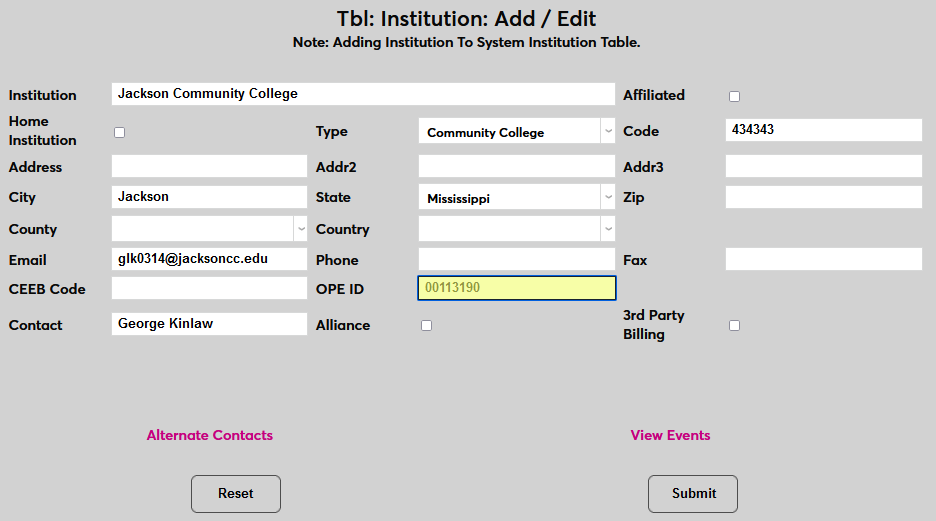
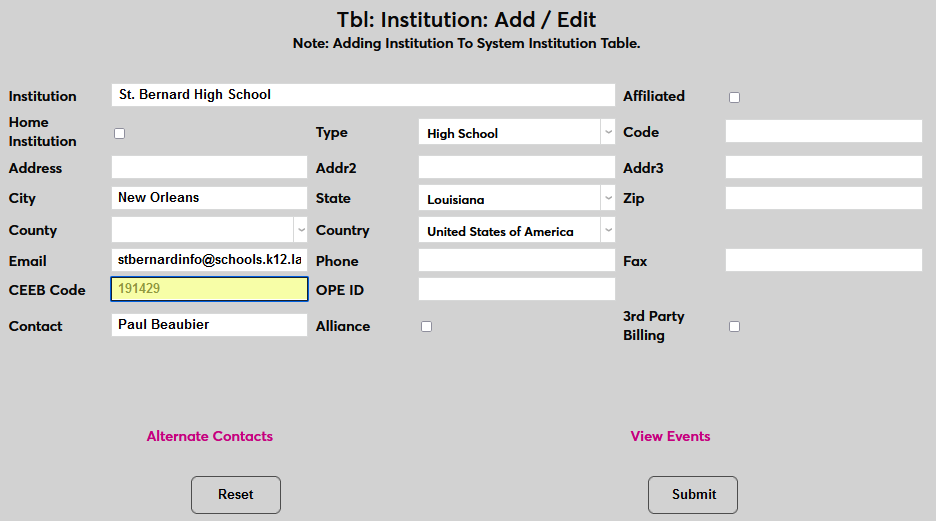
If the student has a high school record in SONIS, the high school should have a CEEB code in the Institution table.
Program
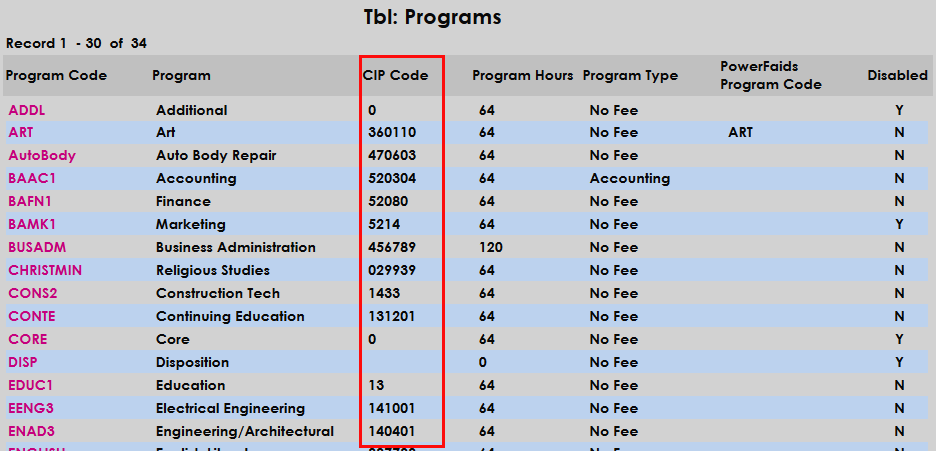
Another piece of important data used by the Clearinghouse utility is each student's active program. Before programs can be assigned, each program should have a valid CIP code. The Classification of Instructional Programs is a universal numerical code that allows disparate organizations to standardize and share instructional data. In order for the proper program data to be passed to the NSC, each program in the SONIS system must have a CIP code attached. To ensure that this is the case, navigate to the Programs table under the Systems menu. The CIP Code is listed in the third column. If a program does not have a CIP code attached, click on the Program Code and add it. Do not include the decimal as the NSC upload does not accept punctuation.
Once each program has the proper CIP code, individual student program data can be created and edited from the student's Program record or from the bottom of their Education record. Data entered or altered in either location is stored in the same SONIS table.
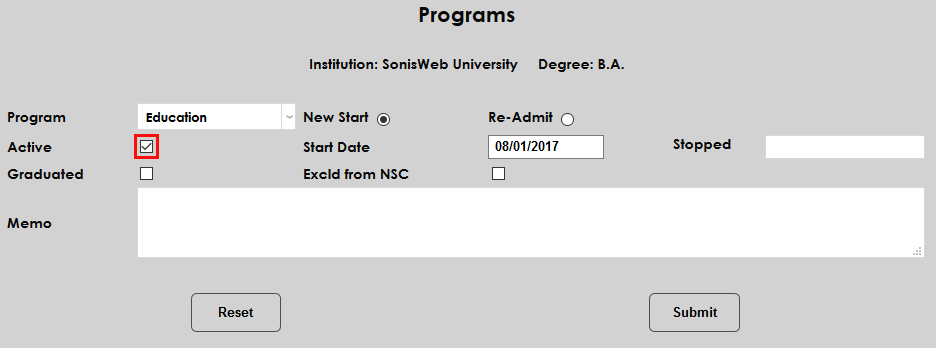
The Clearinghouse utility will only pull in data from the student's active program. Ensure the the Active box is checked.
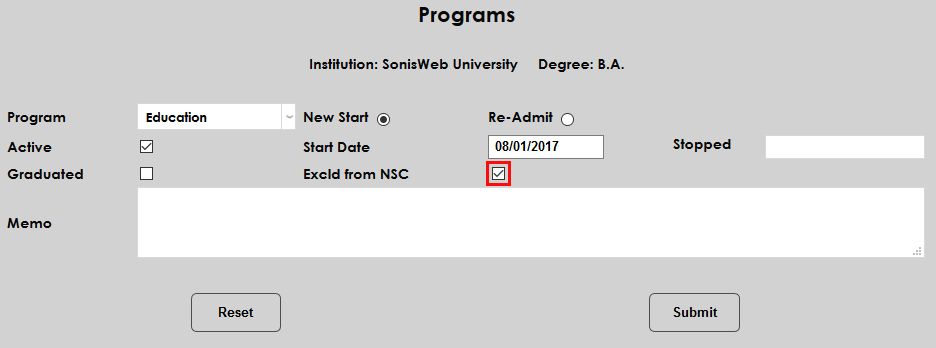
Alternately, schools may wish for some program data to be excluded from the Clearinghouse export. To exclude a student's program, check the Exclude from NSC box on the program edit page.
Note: If a student has more than one program during the course of a semester, all of these programs (up to six) will be reported to the NSC. The Program Start Date included in the report will be the date that corresponds to the program that was active at the time of registration even if this program is no longer active when the report is created. This program is listed in the report as Program 1.
To further clarify, the program used as the basis for the reporting is the program attached to the student course records for the reporting period. If there is no program associated with any of the student course records, then no program attributes will be reported. If there is more than one Program associated with the student course records (this can happen if some enrollments were completed when one Program was active and other enrollments completed when another Program was active), then the Program associated with the most recent enrollment will be used.
The associations between a students' courses and their program(s) can be created or altered using the Course/Degree/Program Association utility.
Degree
Degrees must also be set up properly in order to send information to the NSC. First, each degree in use must have a Degree Rank. While degree names are left up to each individual institution, degree ranks are standardized and provided by SONIS.
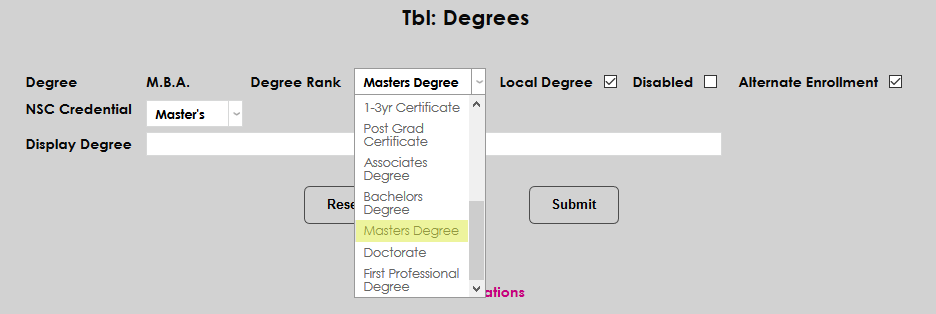
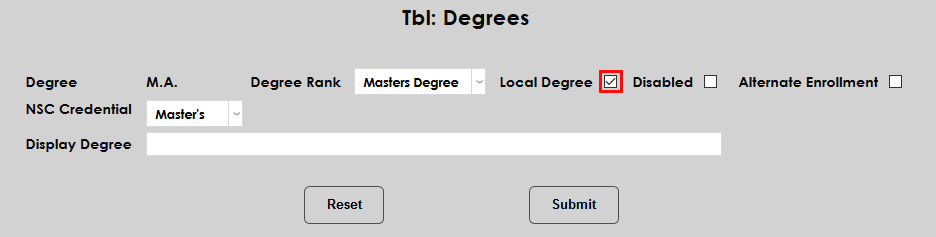
Next, all degrees that are being issued by the SONIS member school need to be marked as a Local Degree. Any degree that is listed in students' education record but is not offered by the member institution should have the local degree box unchecked. Only local degree data will be transferred to the NSC.
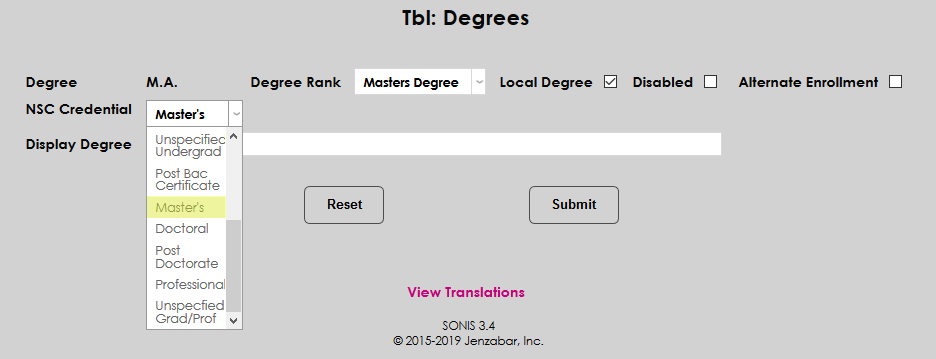
If the degree is not designated as a bachelor's degree in the Degree Rank field, schools should provide an NSC Credential as well. This terminology is specific to the National Student Clearinghouse.
If the degree rank is specified as a bachelor's degree, the NSC Credential field does not appear. Instead, click the Manage NSC Credentials link to set up the levels associated with this degree.
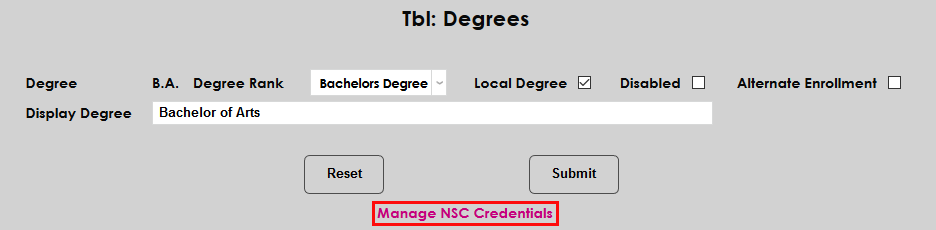
On the following page, select the NSC Credential that correlates to the school's names for each level. NSC credentials provide consistency across the range of all schools while allowing them the freedom to keep their familiar level names. Click Submit to save the associations.

Majors
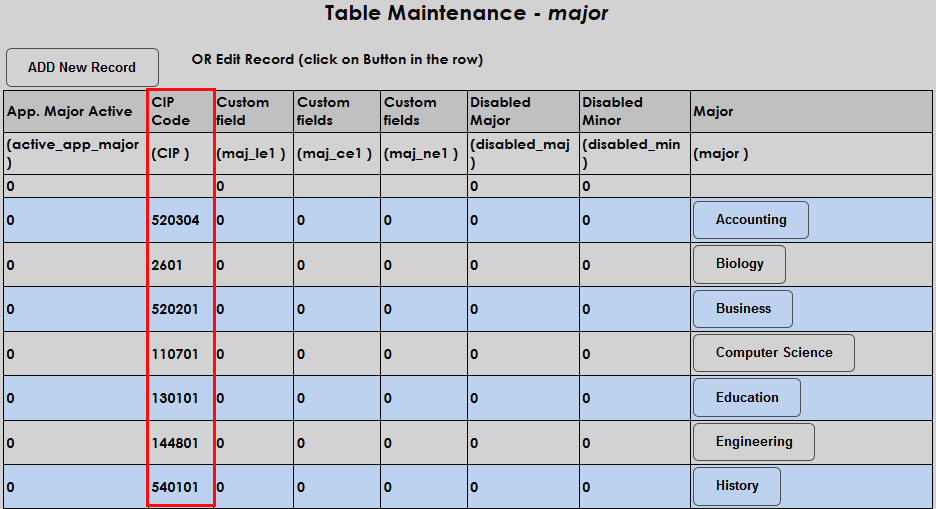
The National Student Clearinghouse offers an additional service that some schools participate in called StudentTracker. In order to utilize the StudentTracker service, schools should ensure that their students have been assigned a major and that each major has a CIP code. Do not include the decimal as the NSC upload does not accept punctuation. Up to two majors can be active.
CIP codes for majors are defined in the Majors table under Table Maintenance.
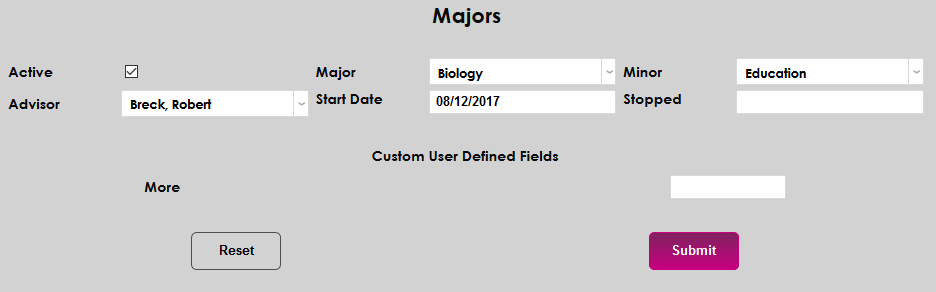
Navigate to the Majors page under a student's Records menu to assign a major.
Enrollment Status
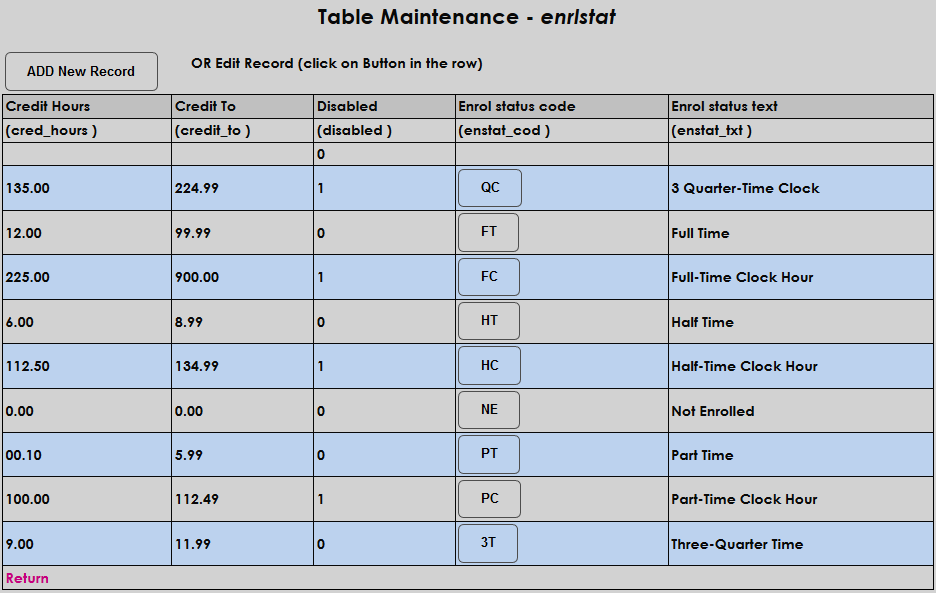
Another critical setting for NSC reporting is the Enrollment Status. This table is located in Table Maintenance under the Systems menu. The Clearinghouse enrollment status is based upon the values in the Credit Hours and Credit To columns, so these values must meet Clearinghouse standards for accurate reporting.
While the above table is used for standard enrollment status, some degrees may have differing credit hour requirements. For these degrees, the differing standards must be sit using the Alternate Enrollment Status Utility.
Clearinghouse Data in Programs
In addition to using the Clearinghouse utility, some institutions may wish to view and edit clearinghouse data in the Programs table. To enable this option, navigate to the Web Options page under the Systems menu and check the Display Clearinghouse Data in Programs box. Click Submit to save the change.

Once the option has been activated, a Clearinghouse Items section will appear in each program in the Programs table. Altering these fields will change what data is reporting to the NSC through the Clearinghouse utility. The fields can be hidden again once they've been filled out and the data will still be reported.

Leave of Absence
Students can apply for and be granted an NSC-approved leave of absence. If their leave of absence is approved and active, their NSC enrollment status will be reported as active for up to 180 days from the start date. To create a leave of absence in the SONIS system, navigate to Leave Status under the student's Records menu. After filling out the other fields, check the NSLCH Approved box to designate it as an NSC-approved absence and add an approved status code.
If a student returns from one leave of absence in the semester and later takes another approved leave of absence, SONIS will not calculate the total number of days that the student has been out on approved leaves of absence. It is the responsibility of the school to determine whether or not the student's combined LOAs exceed 180 days for the reporting period. It is also the responsibility of the school to update Anticipated Graduation Date values if a student's leave of absence causes their enrollment to extend beyond their current AGD. Anticipated graduation dates cannot be earlier than the term end date of the report in which the student appears.
The Leave of Absence record is also used to designate students as withdrawn. Students who completed their courses and then withdrew at the end of the semester can be included in the Graduates Only Clearinghouse report. To be included, these students must have a Leave Type with the Withdraw Update set to 1 in Table Maintenance. The NSLCH Approved box should be checked for these students as well to ensure that they are included in the Graduates/Withdrawn file, though they will not be marked as being on an approved leave of absence.
Military Type
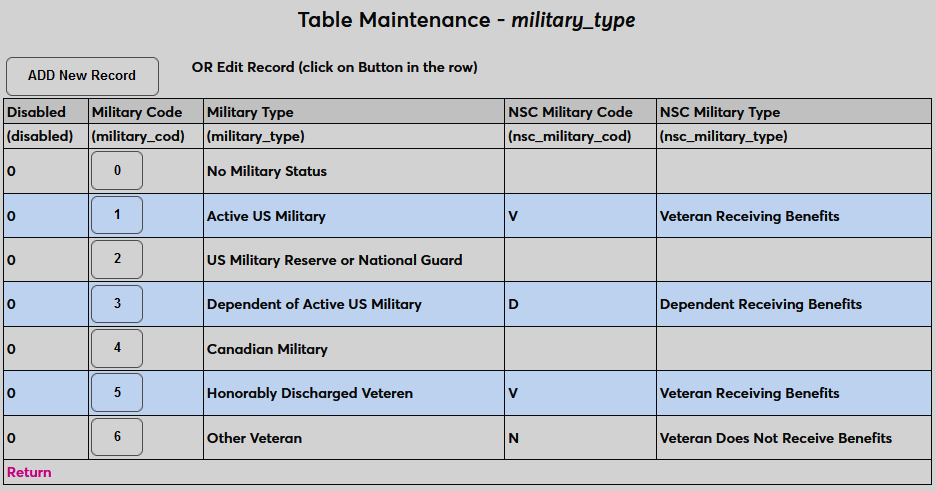
Military type is an optional field, but clients who wish to include it must first set up their Military Type table under Table Maintenance. The three values that are used by the Clearinghouse should be placed in the NSC Military Code field with a longer description of the code in the NSC Military Type field. V is used to designate veterans receiving benefits. D is used to designate dependents receiving benefits. N is used to designate veterans not receiving benefits. Codes and descriptions can be used more than once and some military types may not have a code if the table is also used for other reporting.
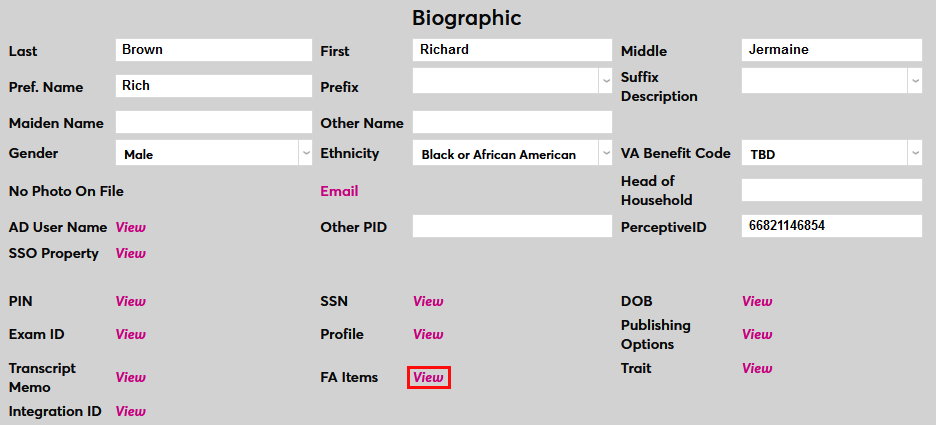
To assign a military type to a user, navigate to that user's Biographic page and click the View link next to the FA Options label. A pop-up window will open.
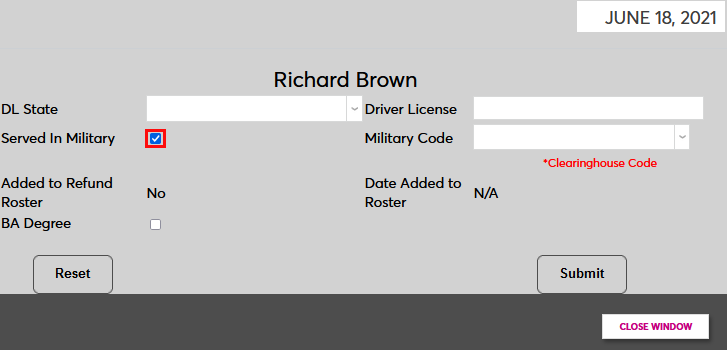
Check the Served in Military box to designate that the user's military type should be included in the report. The box should be checked for dependents as well.
Select a Military Code for the user. This menu includes both the description and the code.
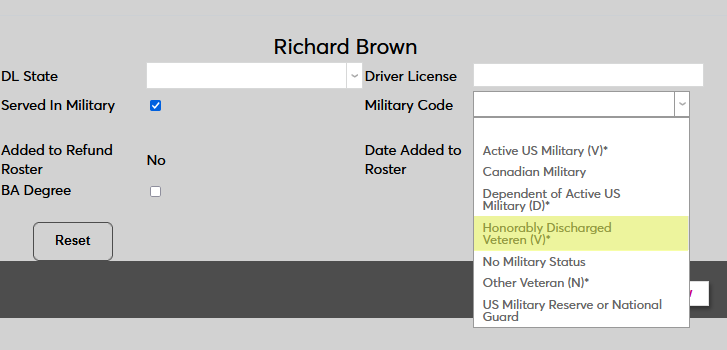
Click the Submit button to save the changes. This information will now be included in all Clearinghouse reports.
SSO Setup
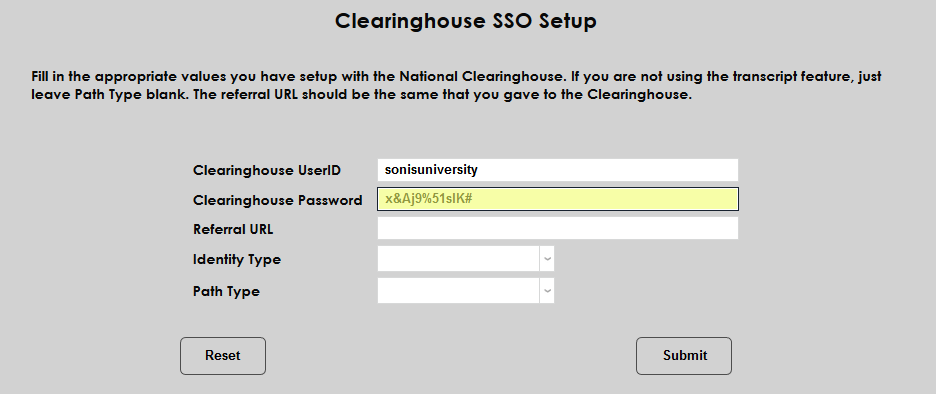
Students can access the National Student Clearinghouse's Student Self-Service site through SONIS. To set up student access, navigate to the Clearinghouse SSO Setup page and enter the User ID and Password provided by the National Student Clearinghouse.
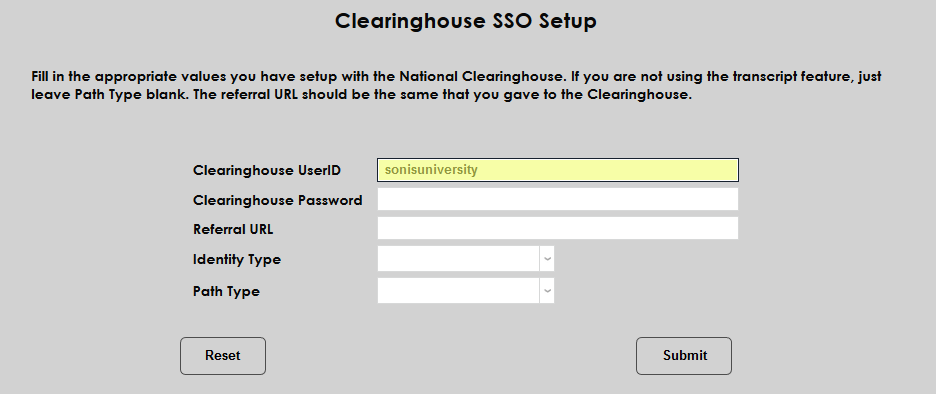
Next, enter the Referral URL, the school's path to SONIS and the SONIS file, clearhouse1.cfm. This URL must be shared with the NSC so that they can enter it into their system as well.
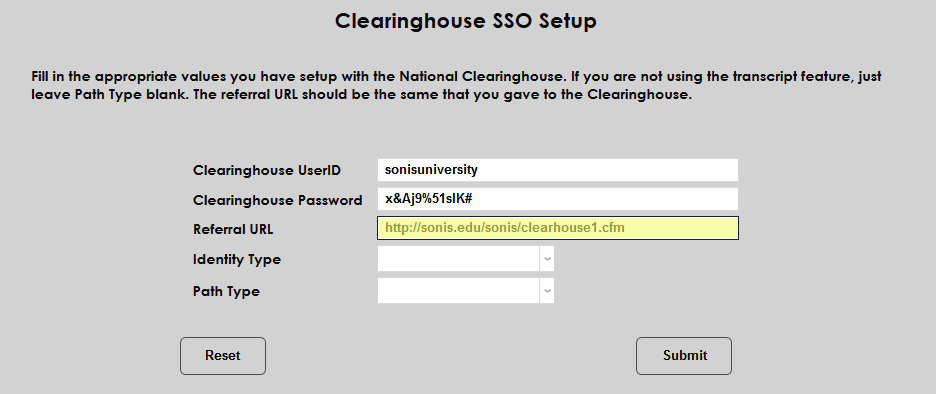
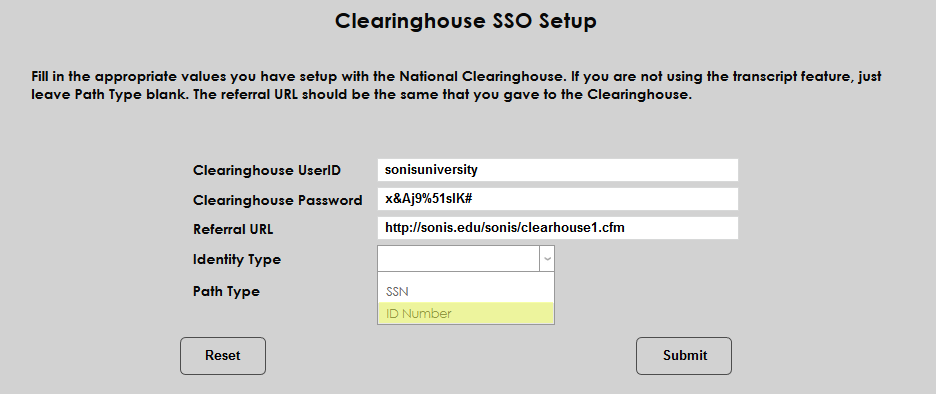
Choose the Identity Type that the students will use to access the Student Self-Service site. The two options are Social Security Number and SONIS ID Number. Choosing the SONIS ID option provides greater protection from identity theft for students, but if this option is chosen, schools must figure out a secure way to pass these numbers to the Clearinghouse.
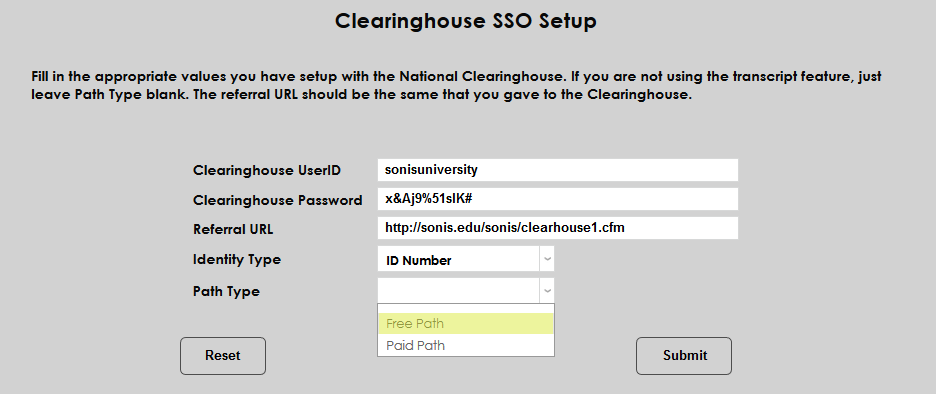
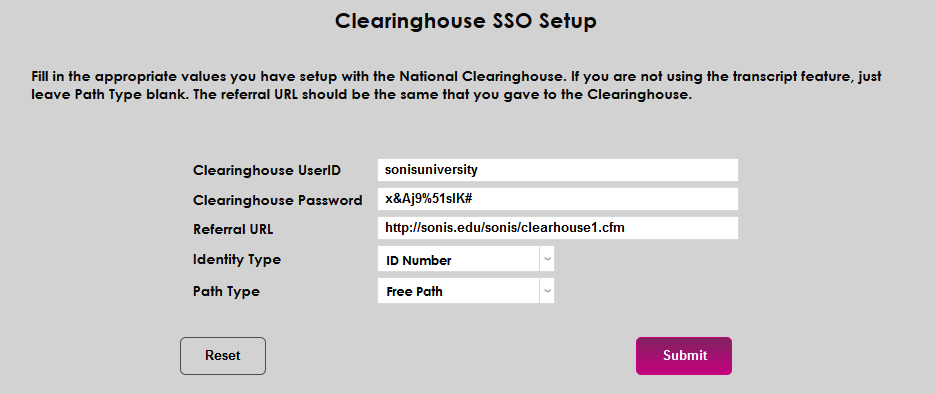
Path Type is used with an optional transcript service to which some institutions may subscribe. Choose Free Path or Paid Path based on the service being used. It should remain blank for schools who do not subscribe.
Click Submit to save the setup and activate the link in the Student Portal.
If the Clearinghouse link is enabled on the Home & Summary Options page, the student will see a link to the Clearinghouse when they visit their Home page under the General tab. These labels can, of course, be changed to suit each school's preferences. Students will be taken to the Self-Services page and logged in upon clicking the link.

For more information on the Student Self-Service feature, visit the National Student Clearinghouse.
CIP Year
The U.S. Department of Education’s National Center for Education Statistics (NCES) updated the Classification of Instructional Programs (CIP) codes for 2020. Due to this update, SONIS clients needed the ability to specify whether they will use the 2010 or 2020 CIP Year designation for their Clearinghouse enrollment reporting. These values are stored in the CIP Year table under Table Maintenance. 2010 and 2020 are already included in the table, but it will be up to clients to maintain this data going forward.
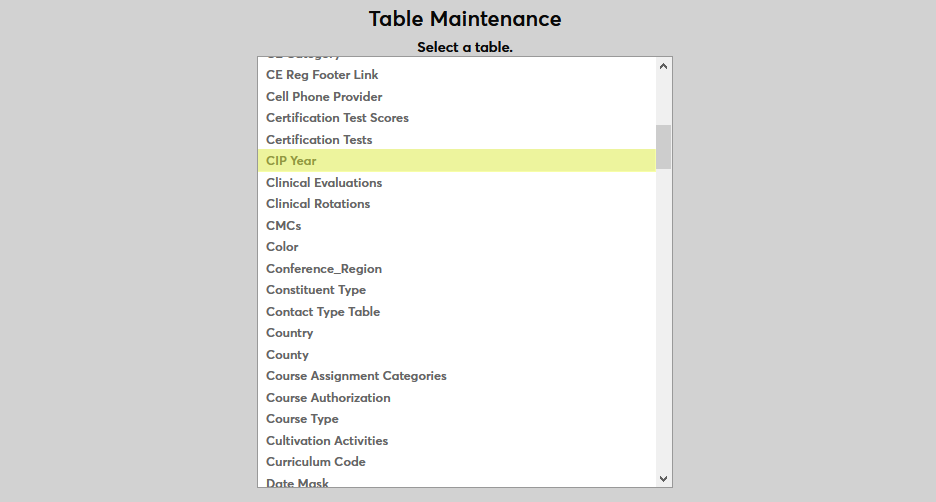
To add a new CIP year or edit the data already in this table, navigate to the Table Maintenance utility under the Systems menu and select CIP Year.
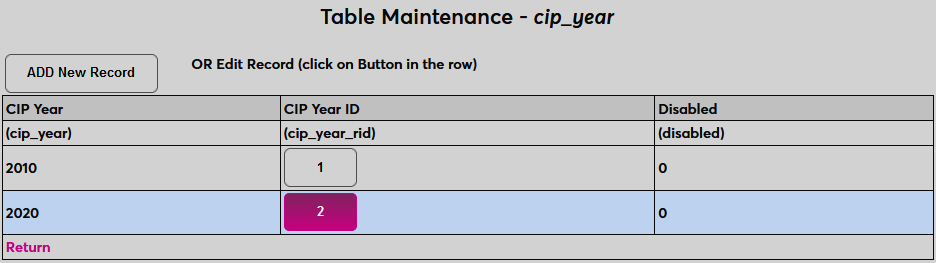
The existing years are listed on the following page. Click Add New Record to add a new year or click on the CIP Year ID of an existing year to make changes.
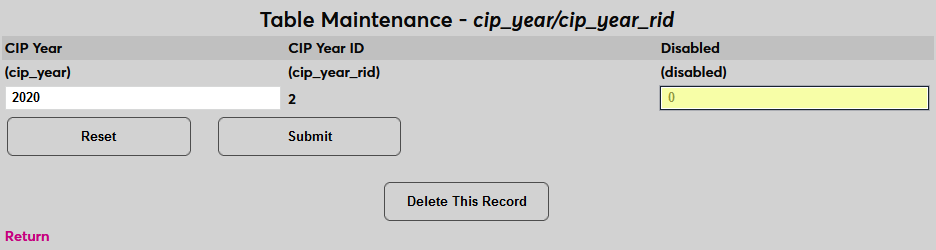
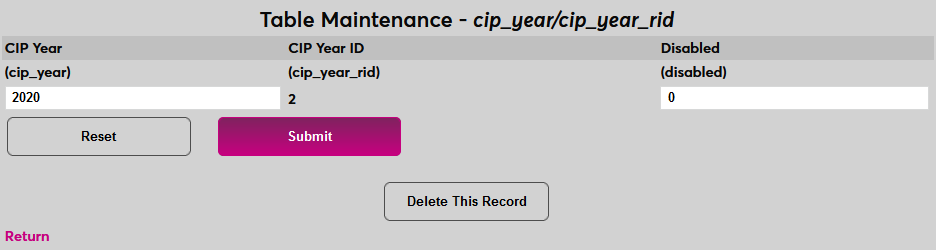
On the following page, administrators can add or edit a CIP Year.
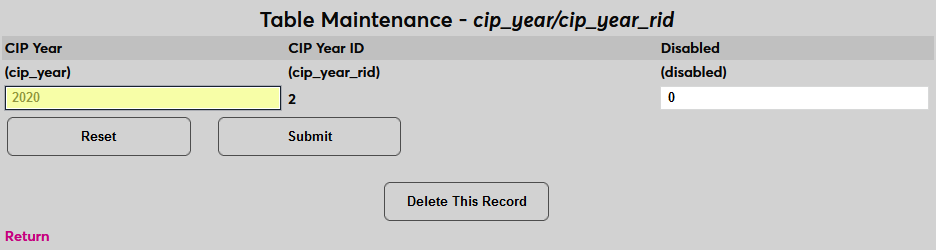
To disable to year and prevent it from being used, place a 1 in the Disabled field. Click Submit to save the changes.
Import/Export
SONIS member institutions can export data to the National Student Clearinghouse using the SONIS utility simply known as Clearinghouse or on some systems Academic: Clearinghouse. Once the necessary data has been created elsewhere in the system, navigate to this page to begin the export process.
Import
Before data can be exported to the Clearinghouse, the file must first be created in SONIS using the Import process. Begin by selecting a School Year and Semester to import at the top of the page.
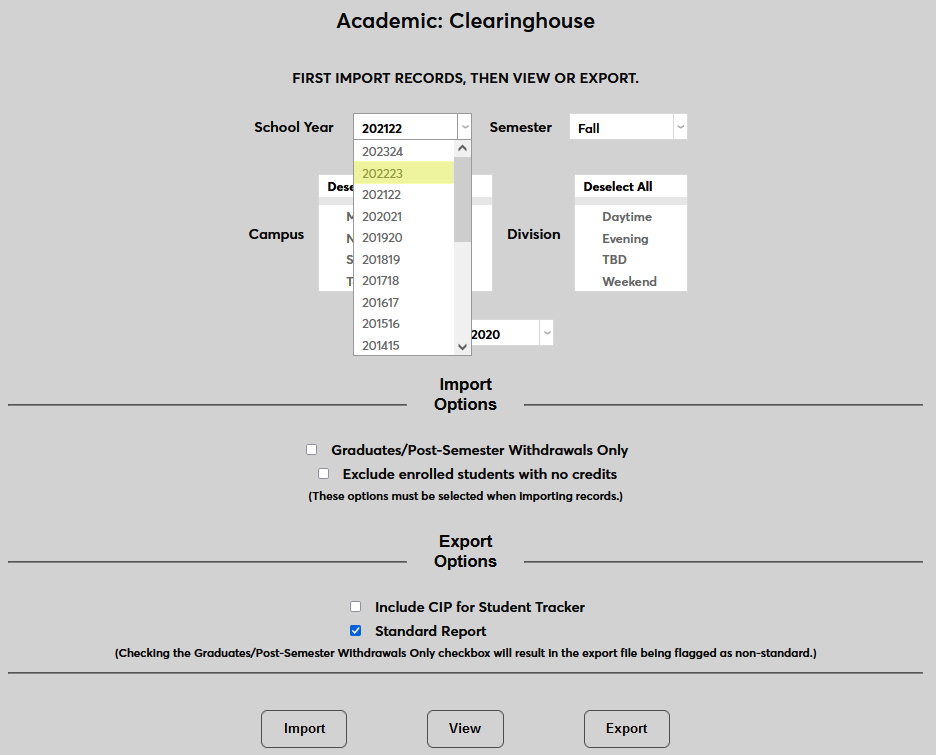
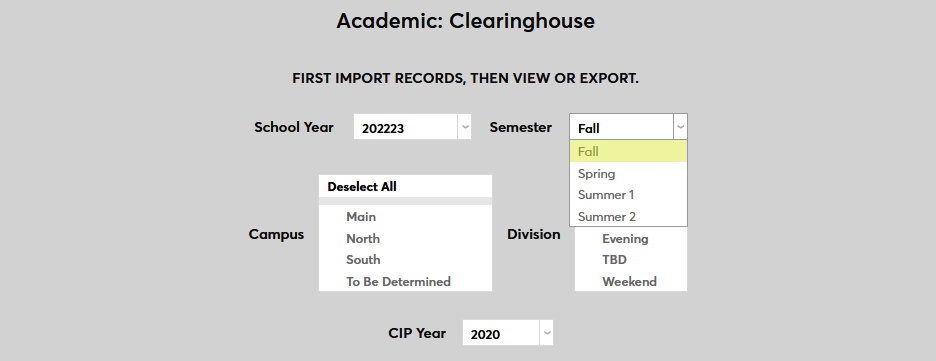
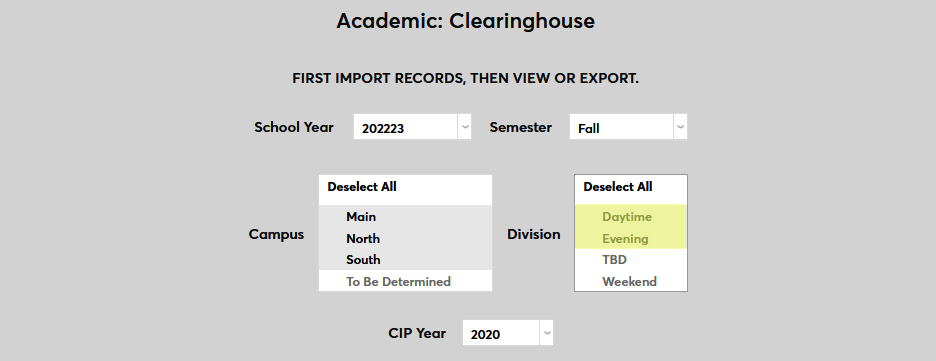
Next, select a Campus or campuses and a Division or divisions to include in the report.
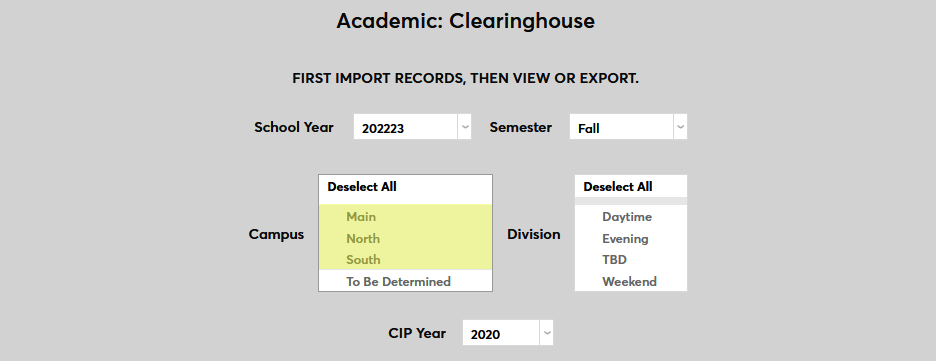
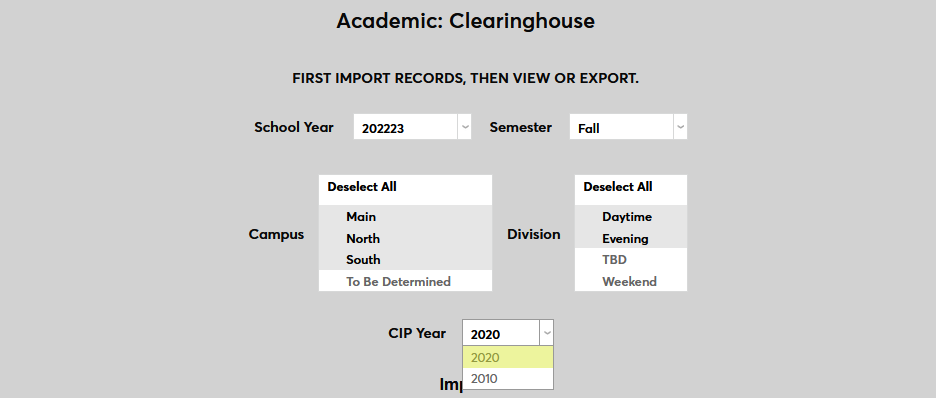
Select a CIP Year for the file. For more on CIP year designation, see the CIP Year setup section above.
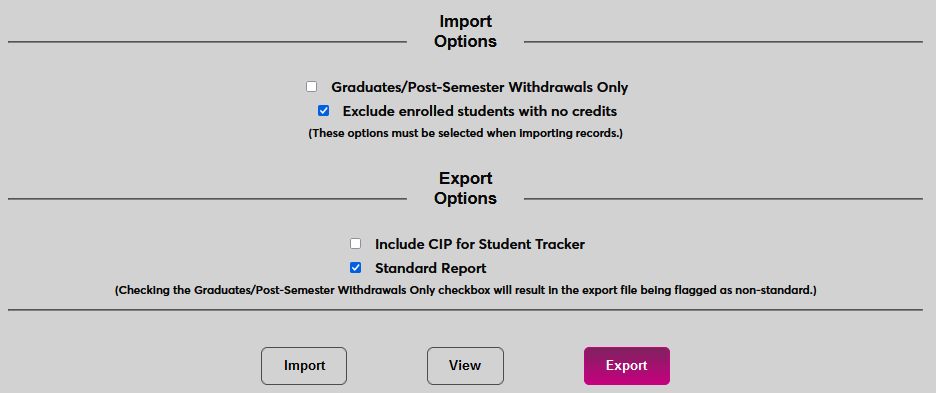
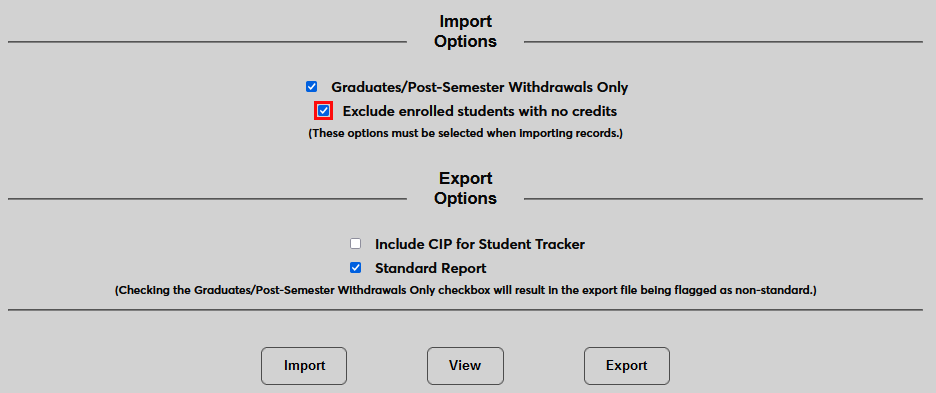
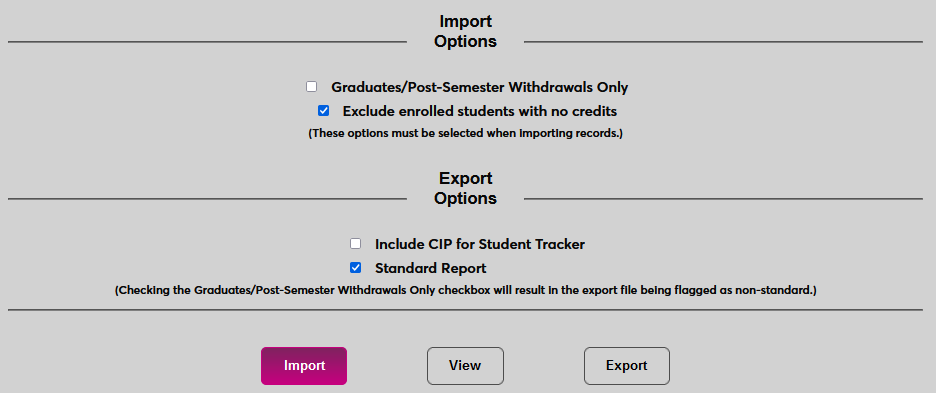
Check the Graduates Only box to create a report that only includes students who graduated during the selected semester. It will also include students who completed their courses and then withdrew if they have a withdrawn Leave of Absence record. See the Leave of Absence setup section above for more details.
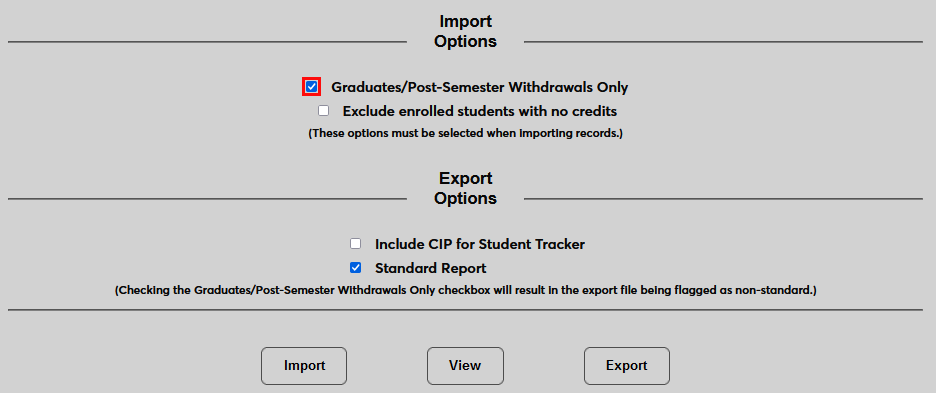
Administrators can also choose to Exclude enrolled students with no credits. As noted on the page, both of these options only apply during the import phase. They will not alter a report once it's been created.
Click the Import button to create the report.
View/Edit
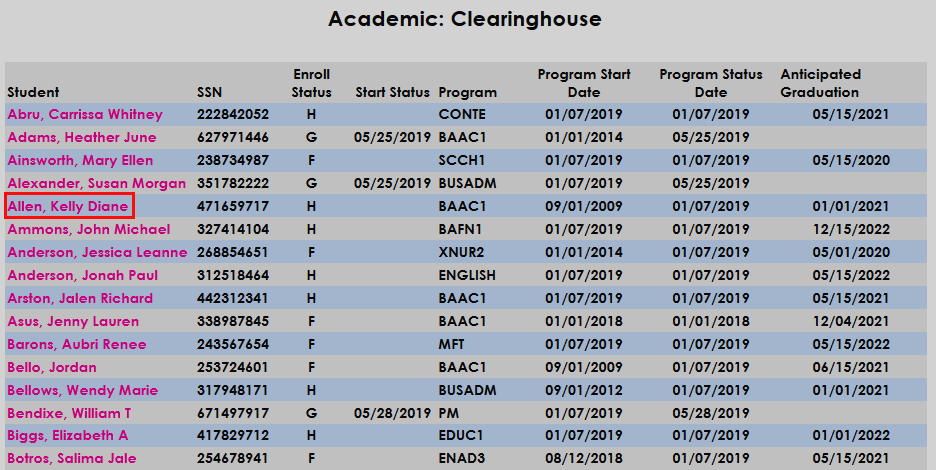
Once the import button is clicked, the report will appear. To view it again, click the View button on the Clearinghouse home screen. Keep in mind that clicking View will only display the current report and will not reflect any changes that have been made since the last time it was imported.

The report displays the student, the student's social security number, the student's enroll status (full-time, half-time, less than half-time, or graduated), the student's start status, their program, the start date (the earliest date with a course associated with that program), the program status date (the latest date with a course associated with that program), and the anticipated graduation date. If a student does not have a social security number or program, a message appears in red so this error can be corrected. If a student's anticipated graduation date has passed, the date will be listed in red.
To edit the report, click on the name of a student.
In addition to editing the student's name, date of birth, address, enrollment status, etc., administrators can check the Exclude from NSC box to prevent the student's information from being sent with the report.
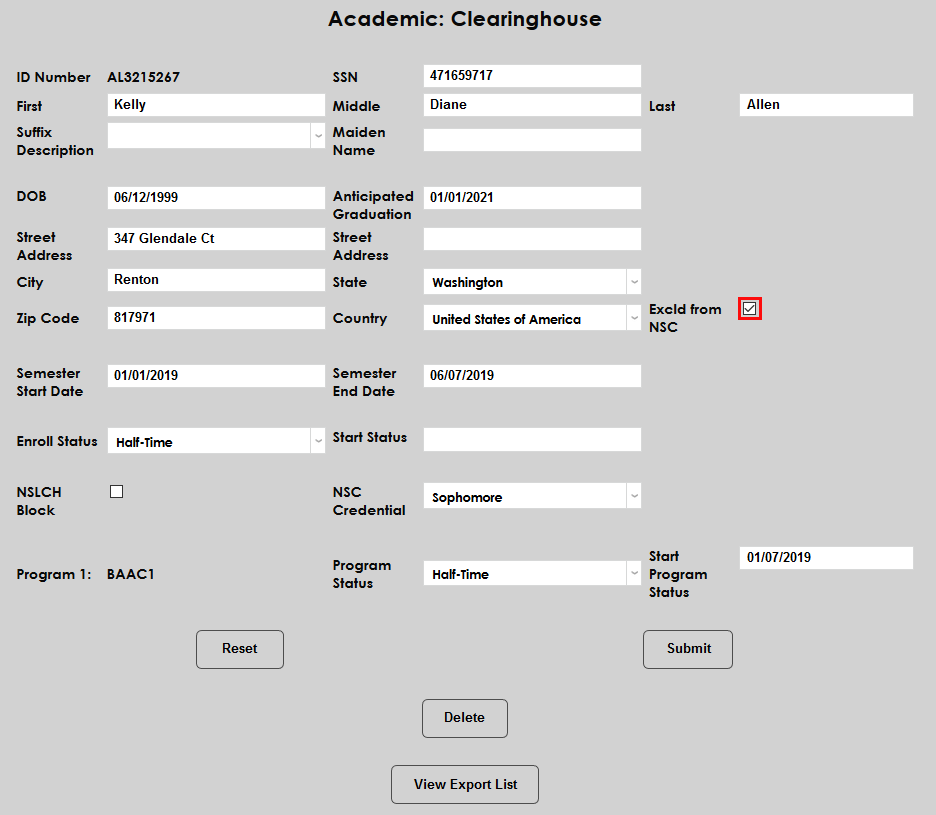
Another option available on this page is the NSLCH Block box. Checking this box will forbid the National Student Clearinghouse from giving the student's data to third parties.
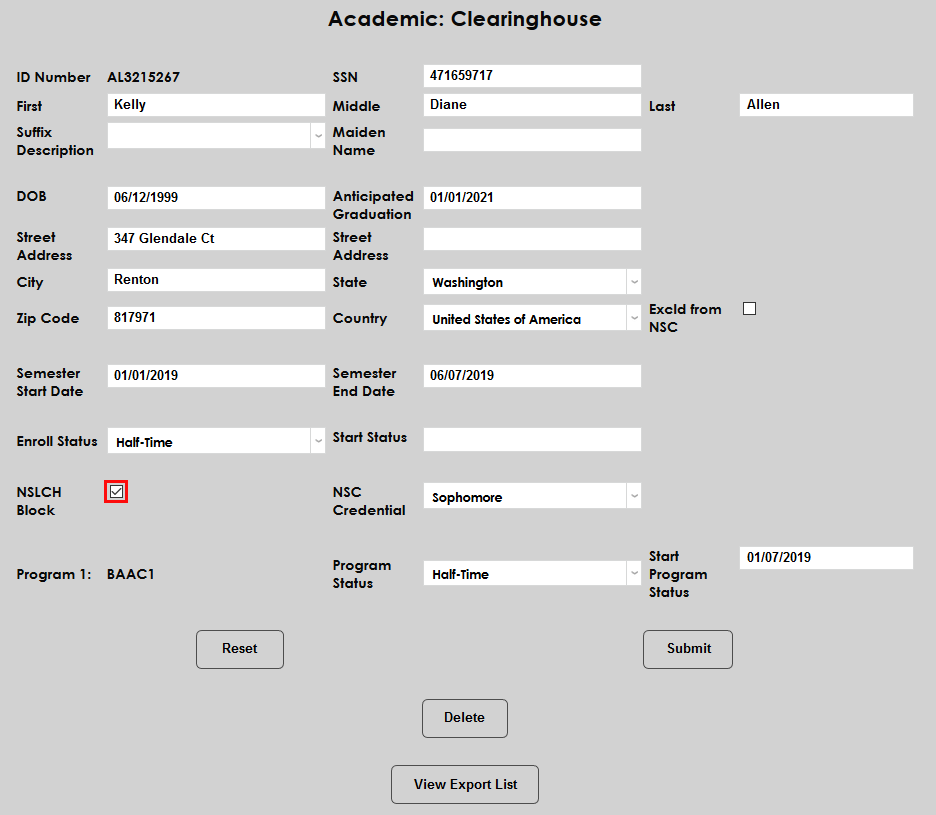
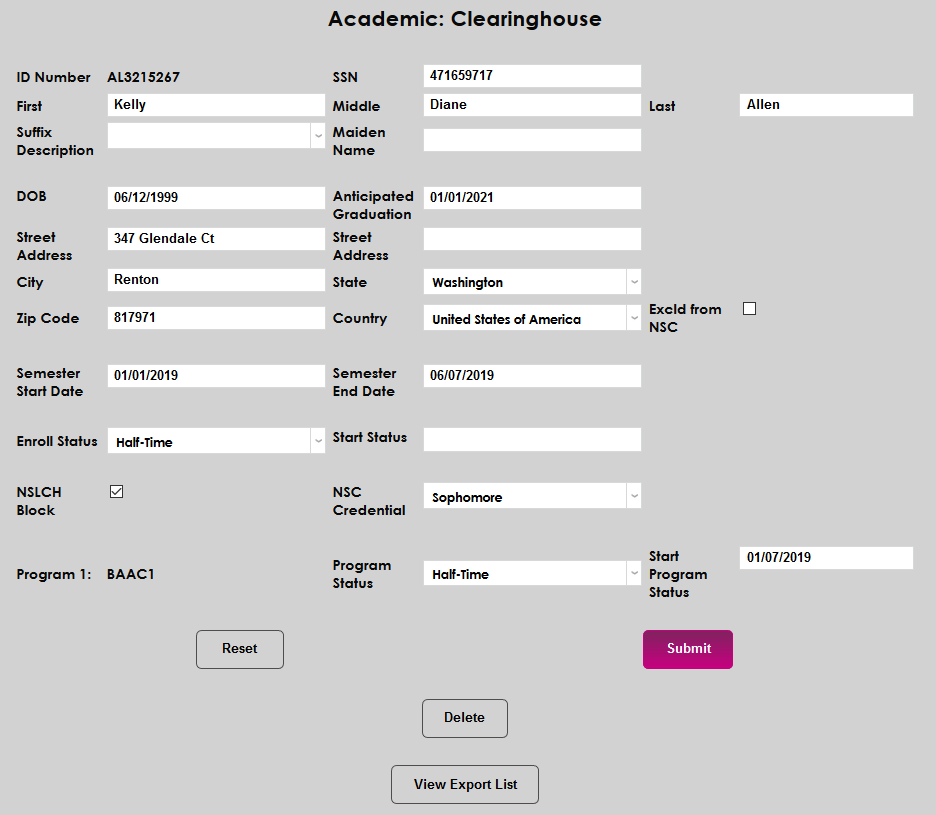
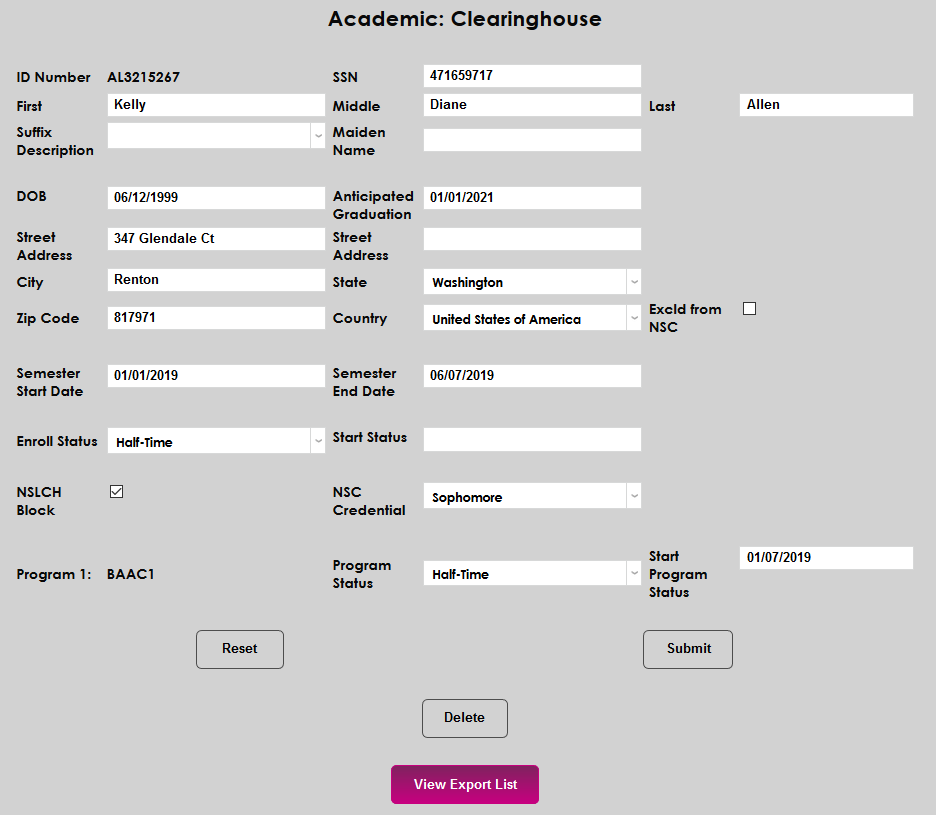
Changes made on this page will only affect the report and will not change the student's Records settings. Click Submit to save any changes made and/or View Exports List to return to the list. A Delete button is also included to remove the student from the report altogether.
Once all necessary changes have been made to individual students, click the Return to Clearinghouse start page. link to return.

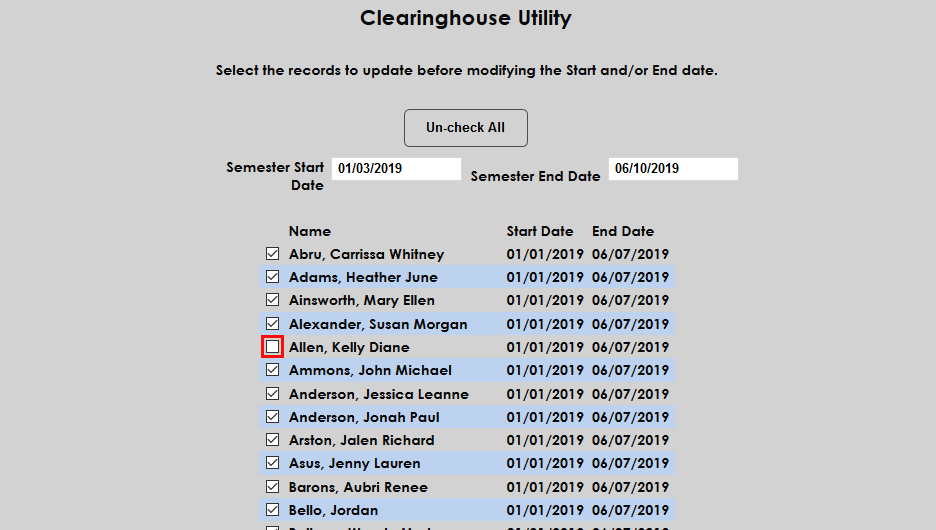
Update Start/End Dates
Because bulk changes to Clearinghouse data are sometimes necessary, SONIS also offers a separate utility simply labeled Clearinghouse Utility that allows administrators to change the start and end dates of a semester. Once a Clearinghouse file has been created via the import process, the Clearinghouse Utility will show that same list of students along with the current start and end dates for the semester in the report. Update the Start Date and/or End Date fields to make a bulk change.
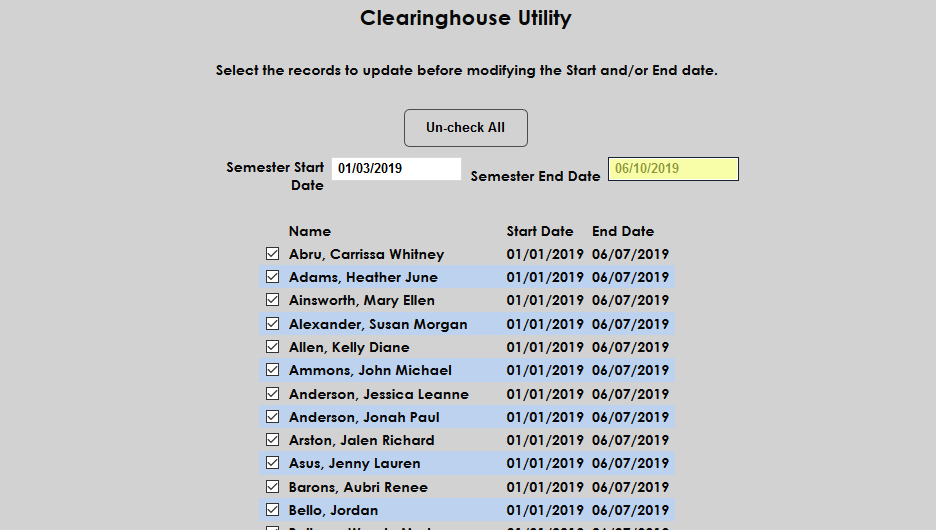
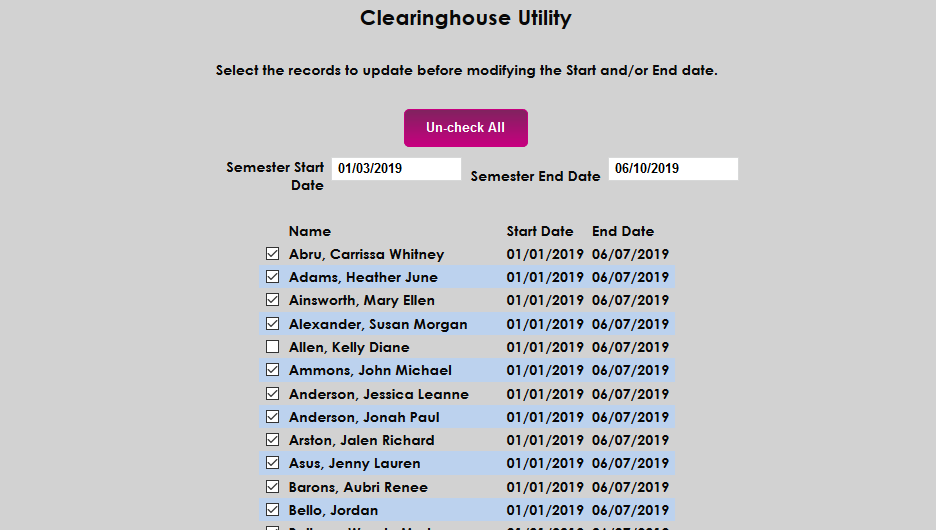
If any students should not be included in the change, uncheck the box to the left of those students' names. An Uncheck All button is available at the top of the page to make changes that involve just a few students easier.
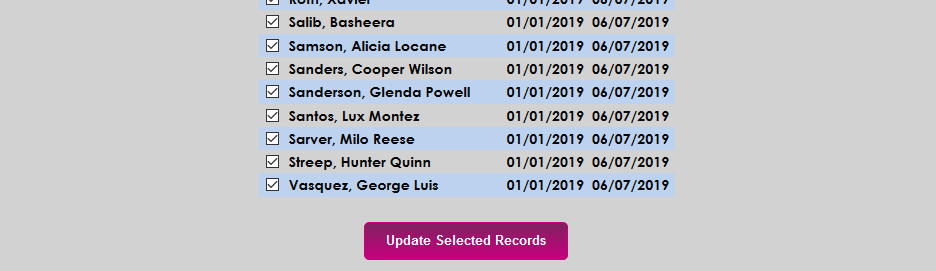
Click Update Selected Records at the bottom of the page to make the change.
Export
Before saving the report as an export file, finalize the report by checking or unchecking the CIP and standard report boxes. Schools that utilize the NSC's StudentTracker service, should check the Include CIP for StudentTracker box. When this box is checked, the CIP codes for each student's program and major will appear in a second location in the file that's recognized by the StudentTracker.
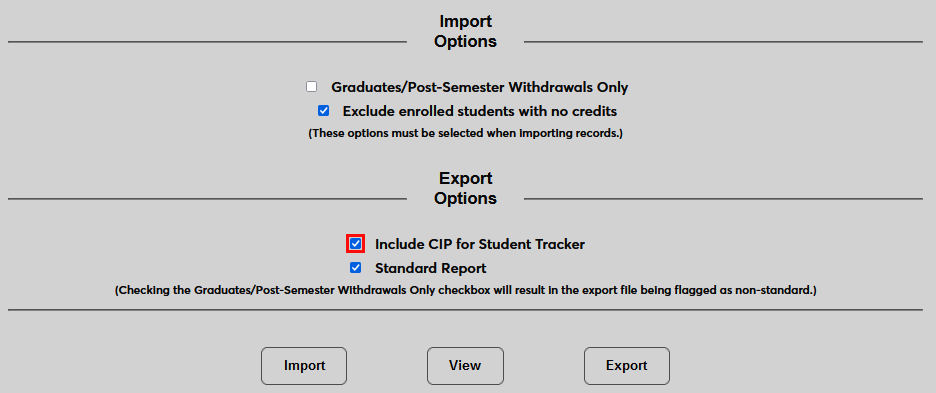
The Standard Report box flags the export as either standard or non-standard. Standard reports are reports created during the current school year and semester as set in System Variables or, if this value has been changed to reflect an upcoming semester that has not yet begun, the current reporting period. If the Graduates Only box is checked, the report will be flagged as non-standard by default regardless of whether the Standard box is checked or not.
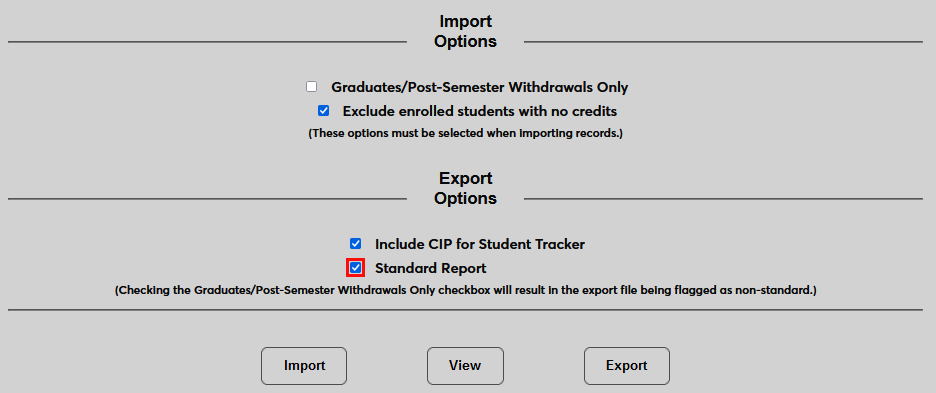
Click the Export button to finalize the report. The file will be saved on the local machine where it's created and can be sent to the National Student Clearinghouse for import.