Microsoft Azure Integration
Overview
Azure is a set of cloud-based systems from Microsoft for creating, testing, and deploying services and application software. Azure offers seamless single sign-on, meaning that the user is authenticated by logging into their machine and does not need to log in to each application separately. When Azure seamless single sign-on is activated in Jenzabar SONIS, domain-joined devices can be automatically logged in to SONIS without the user having to present their credentials a second time. This is more convenient for the user and gives more control to the organization regarding the resources to which the user has access.
In addition to seamless single sign-on, Azure Active Directory Sync can be used to import Microsoft account information into SONIS and tie the two accounts together. Schools can still use Azure seamless single sign-on without performing a sync. If no sync is performed, each individual must register their own SONIS account with Microsoft.
NOTE
A third party consultant may be needed for some SSO setup as the setup process outside of Jenzabar SONIS can be challenging.
Setup
Microsoft Setup
Before attempting to link Microsoft Azure to SONIS, clients must create an Azure account and a SONIS seamless single sign-on enterprise application that can be deployed.
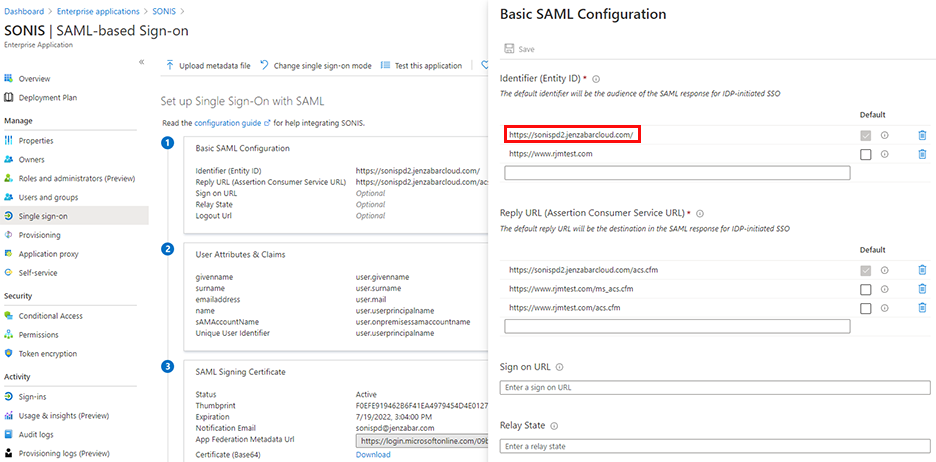
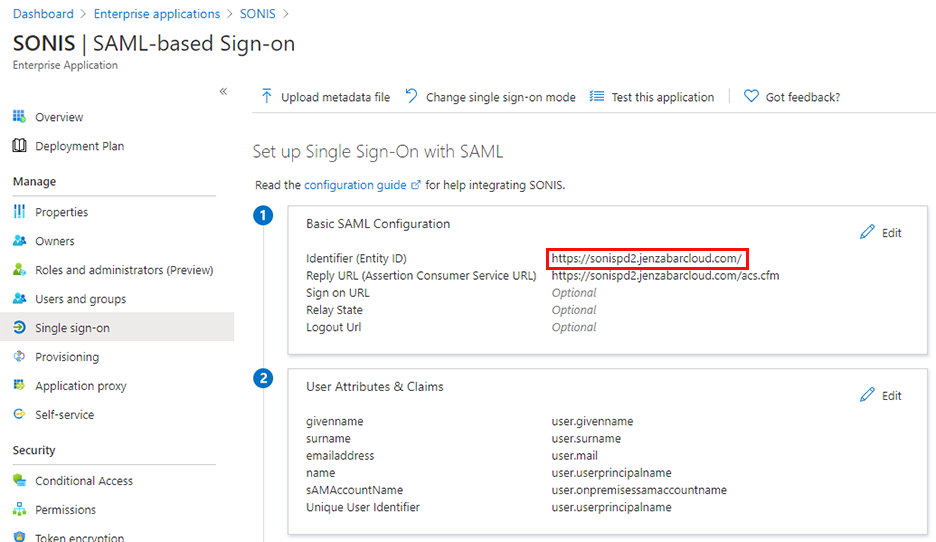
When setting up the application, the Identifier (Entity ID) should correspond to the location where the SONIS software is located on the institution's local system.
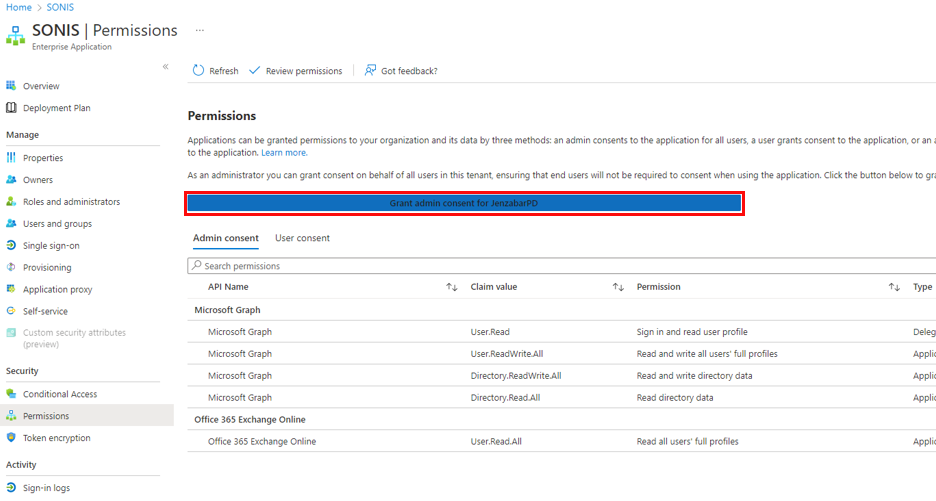
The SONIS API will also need the following API Permissions in order to function properly.
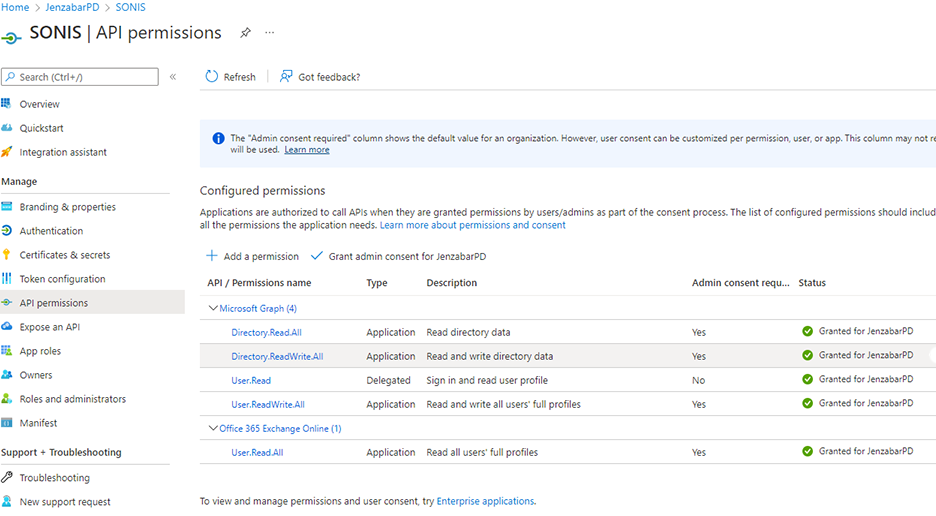
Additionally, the Security Permissions listed here need to be granted. Note that the Office 365 Exchange Online permission is only needed for clients who are importing pictures.
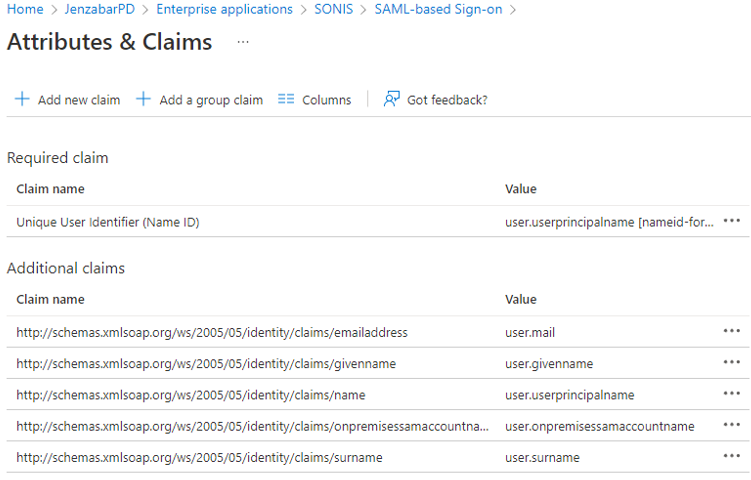
The required Attributes & Claims are pictured below. Click here for further details on Microsoft permissions and how they function.
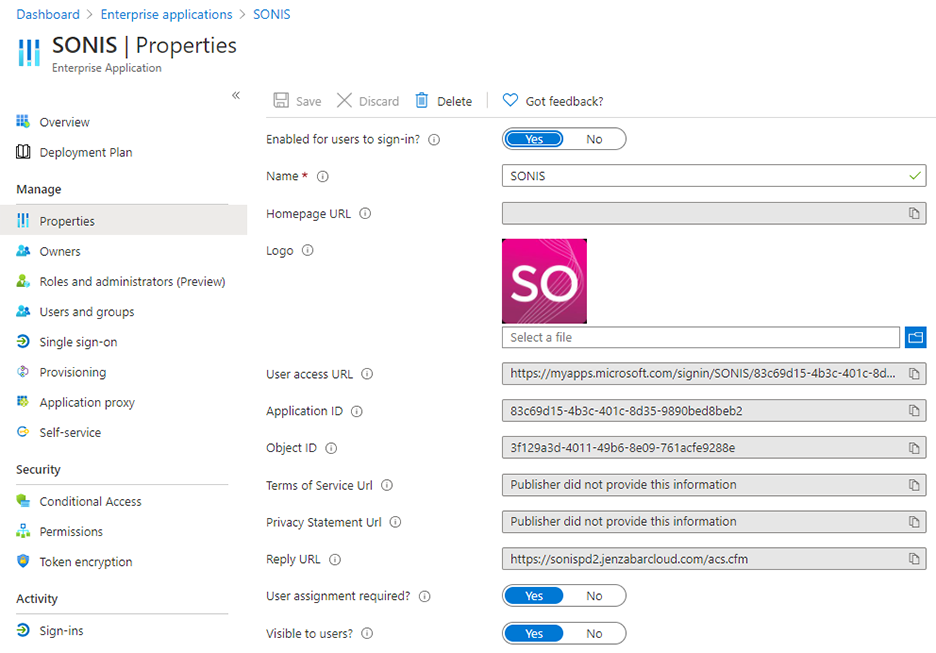
When set up properly, the application's properties should look similar to the following screenshot.
Consult the following documents from Microsoft for more information on this process:
SONIS SSO Configuration
SONIS uses both SAML and oAuth to pass information back and forth with Microsoft. SAML is used for authentication, passing credentials for the logged-in user to Microsoft via an XML formatted AuthN request. oAuth is used to provide SONIS with additional information about the user—the user's Microsoft login name and their profile photo. The second is only needed for the Azure Active Directory Sync.
Before activating either feature, SAML and/or oAuth must be turned on from the Web Options page. Check the SAML box to use seamless single sign-on and the oAuth box to use the sync feature as well. Click Submit to save the page.

SAML
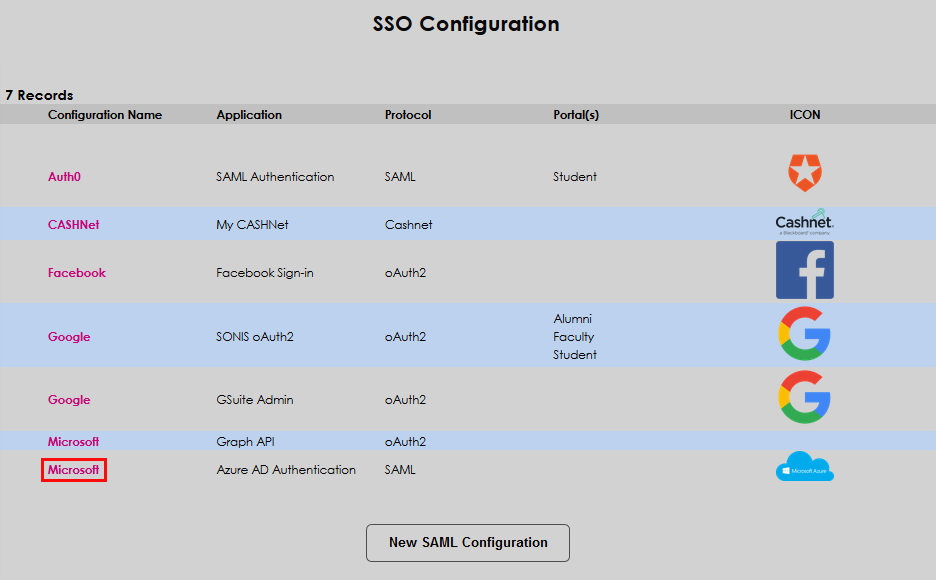
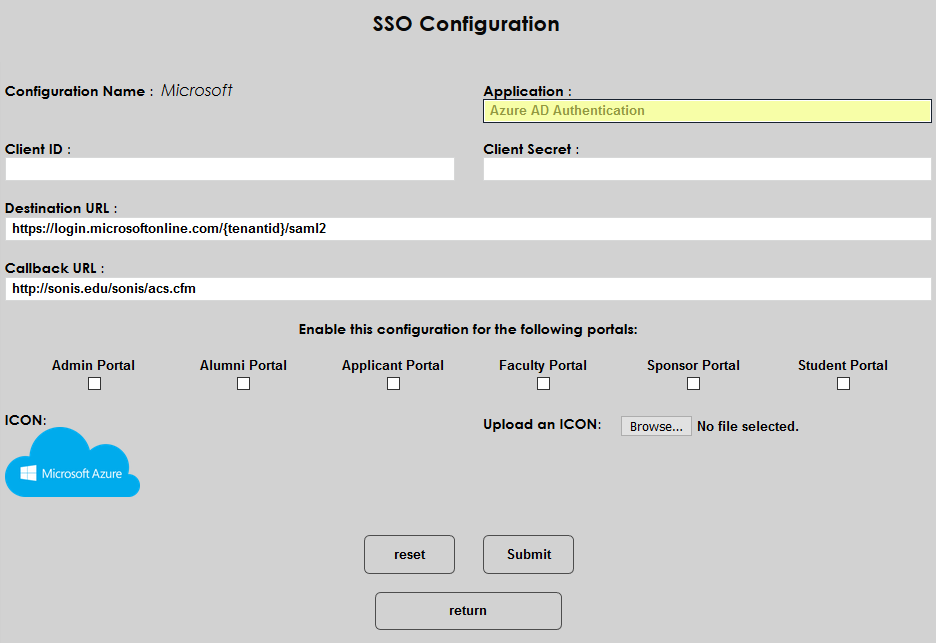
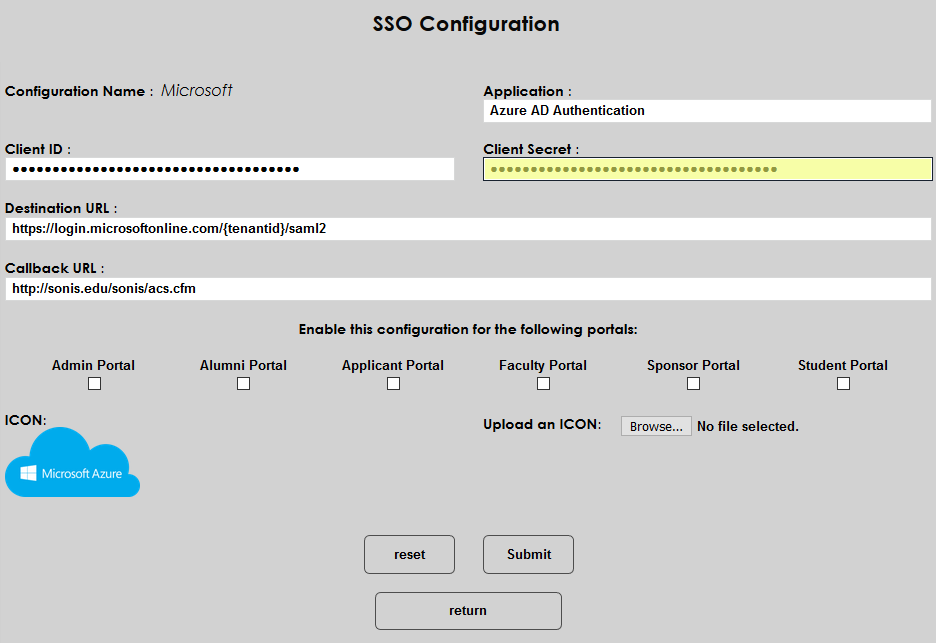
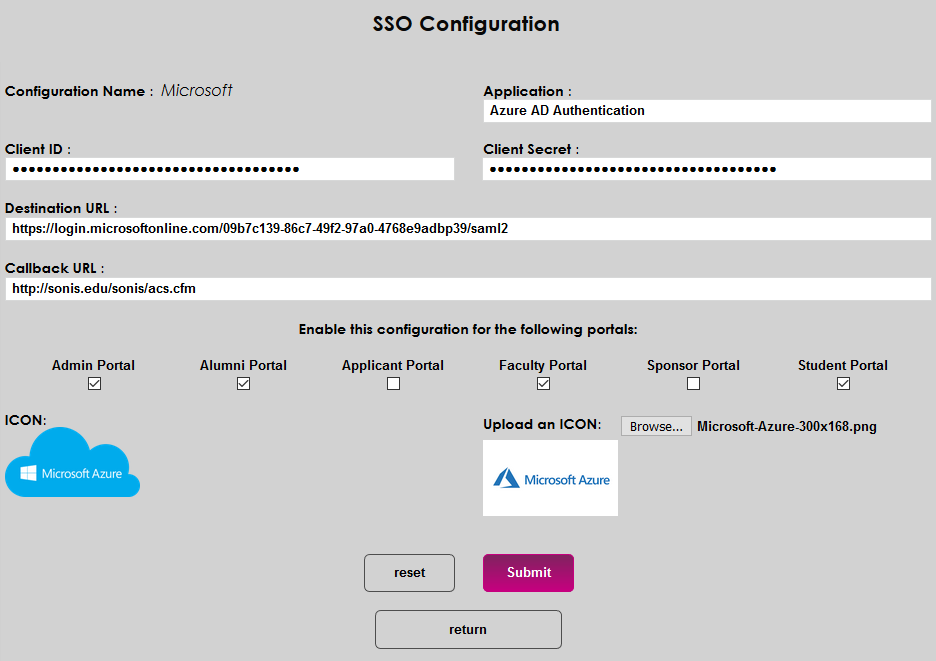
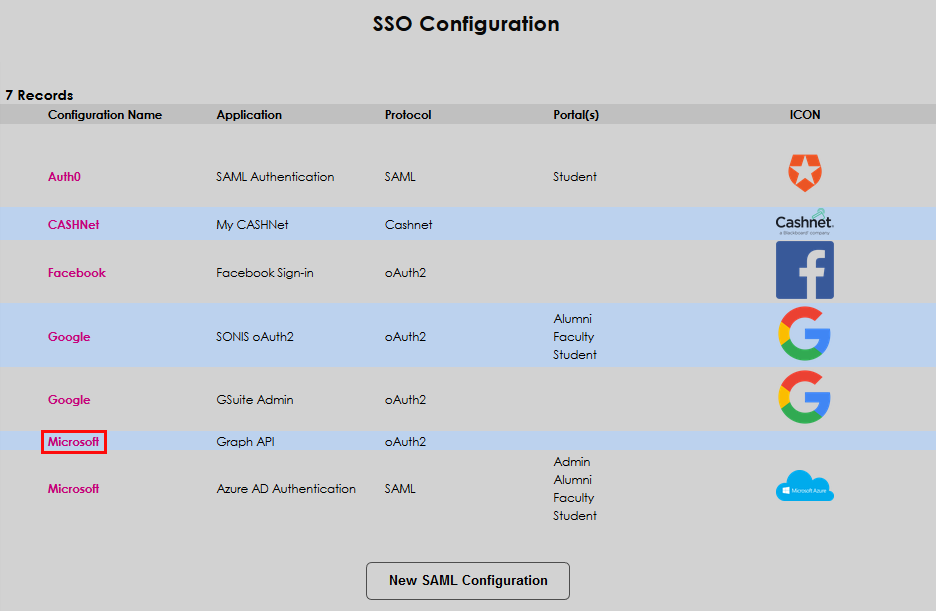
To use the seamless single sign-on feature, navigate to the SSO Configuration utility under the Systems menu. Click the Microsoft link for the Azure AD Authentication application with the SAML protocol.
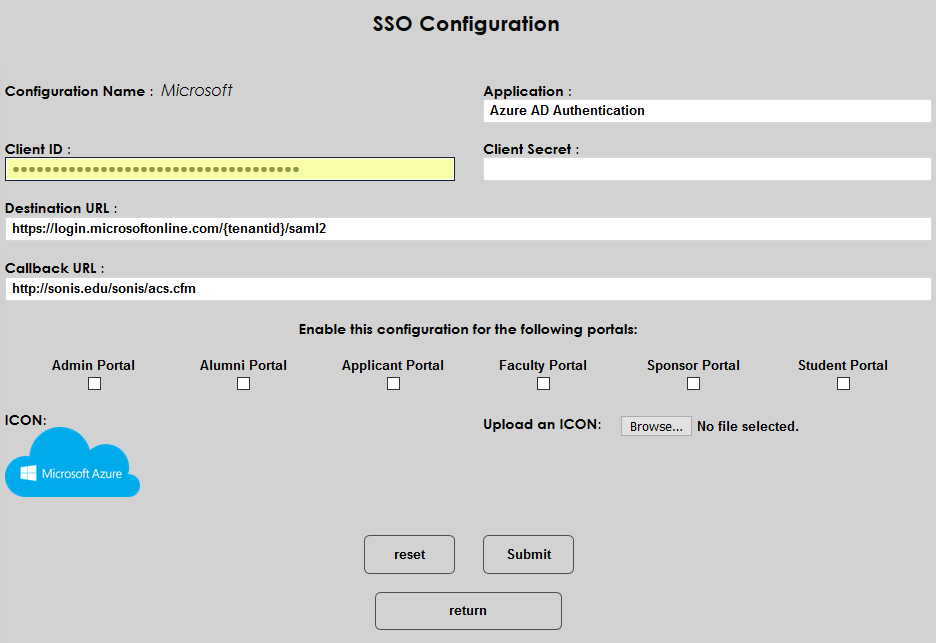
On the following page, three of the fields are prepopulated, including the Application field. By default, the application is called Azure AD Authentication, but this can be changed to suit client preferences.
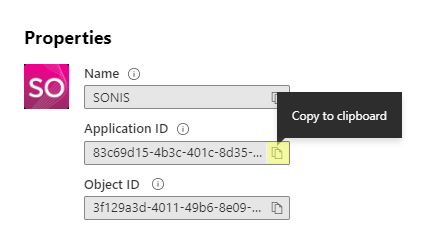
To locate the correct Client ID, log in to Azure, and navigate to the SONIS Enterprise Application. Click Copy to clipboard next to the Application ID field and paste the data into the Client ID field in SONIS.
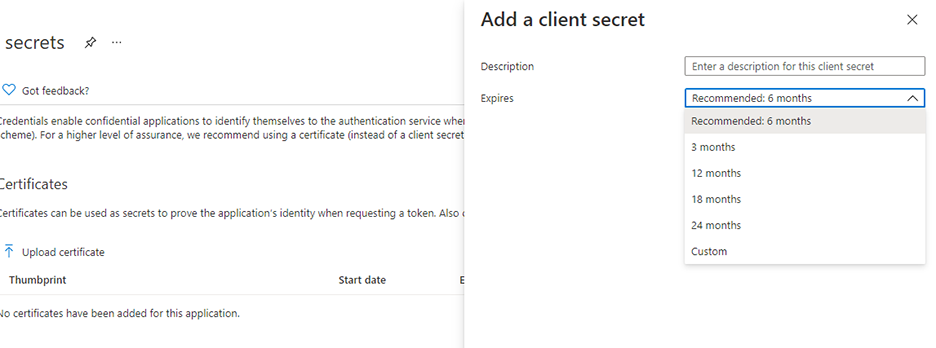
To locate the Client Secret, navigate to the Certificates & secrets page on the Azure site. Click New client secret and copy the client secret Value to the Client Secret field.
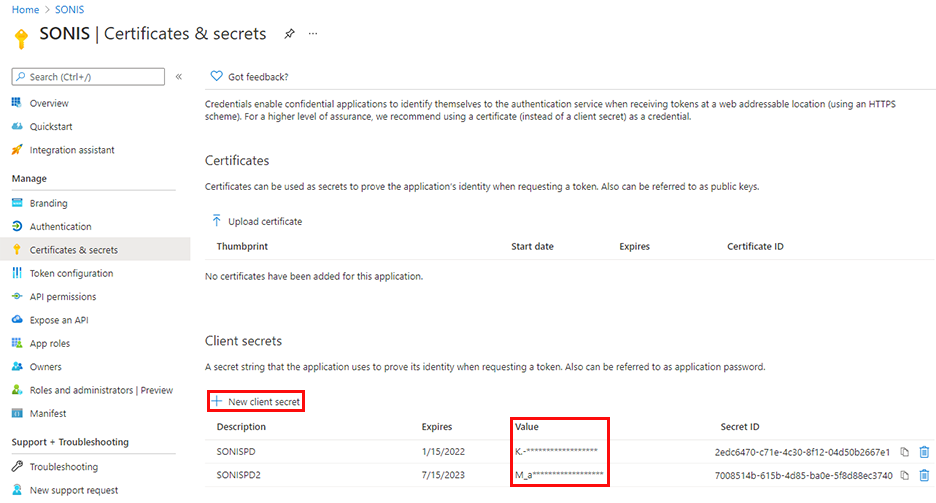
Note that client secret values are only available for a short period of time after being created. They soon become permanently masked and a new value must be created. Additionally, secrets expire and must be replaced periodically. Clients can choose the expiration time period when creating a new secret with a maximum value of two years.
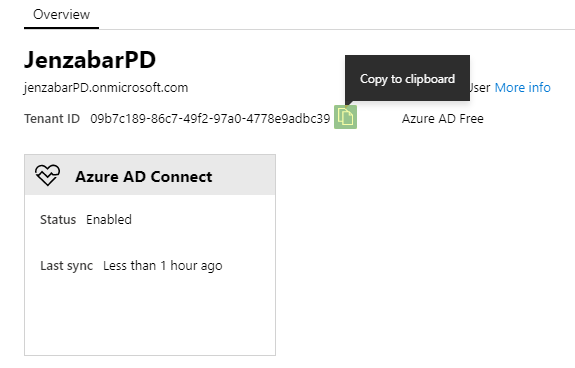
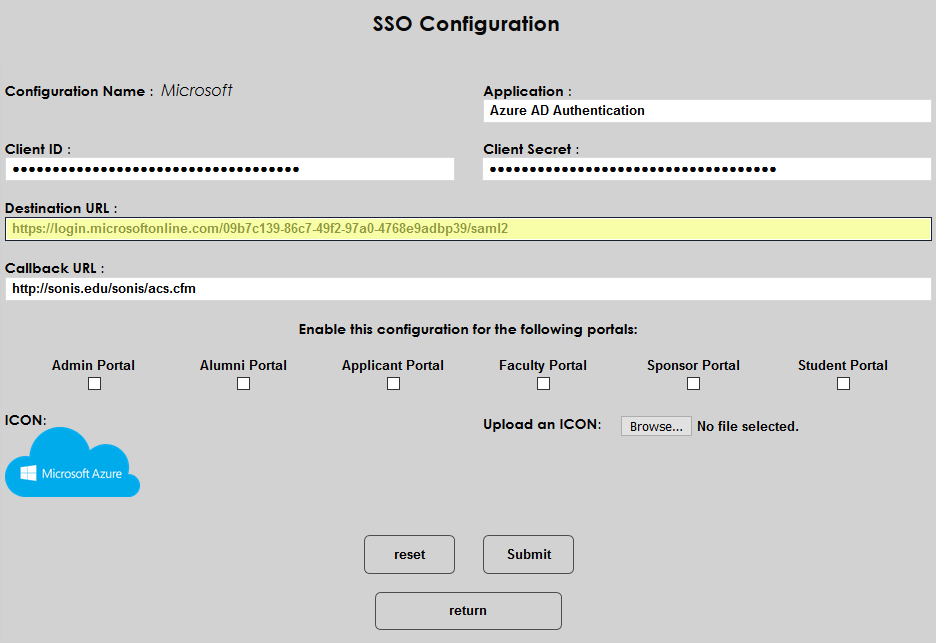
The Destination URL is another prepopulated field. To locate the Tenant ID, navigate away from the application-specific data to the the Overview page in Azure AD. Replace the section labeled {tenantid} with the school's actual tenant ID.
The Callback URL is based on the local domain where SONIS is accessed. It should be https://[yourdomain]/acs.cfm with [yourdomain] replaced by the local domain. For example: https://sonisu.jenzabarcloud.com/acs.cfm.
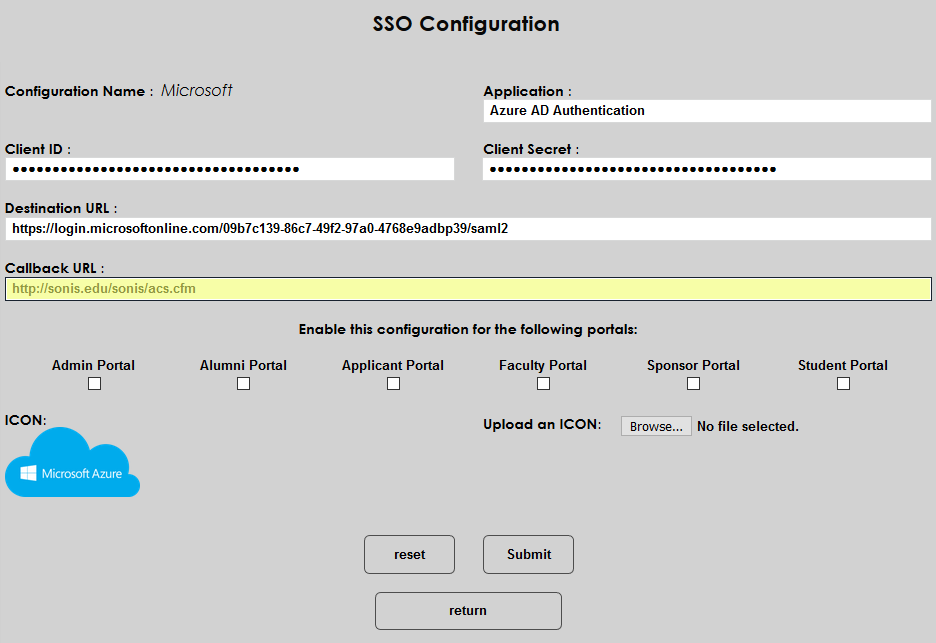
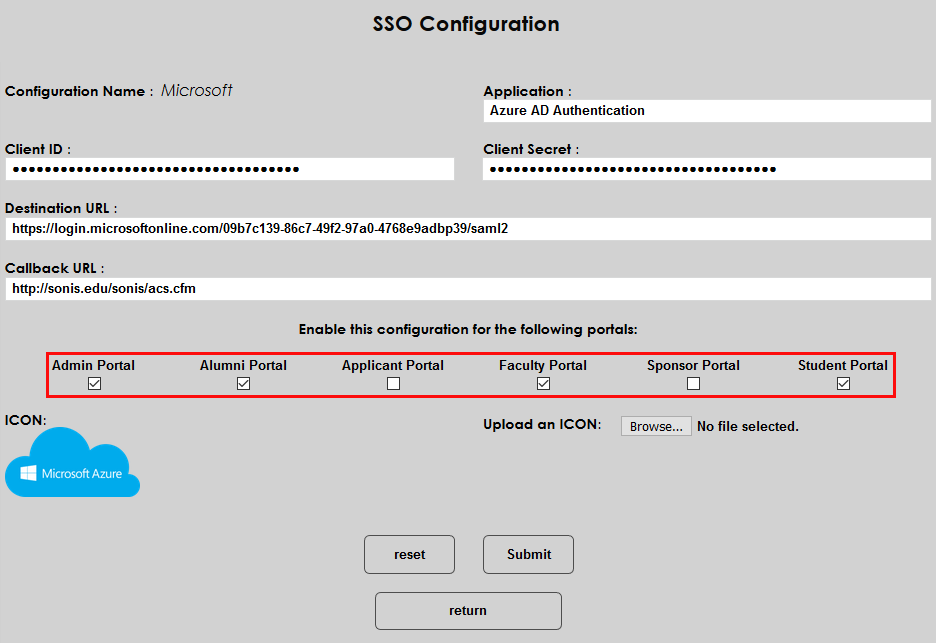
Choose a portal or portals to enable and check the corresponding boxes.
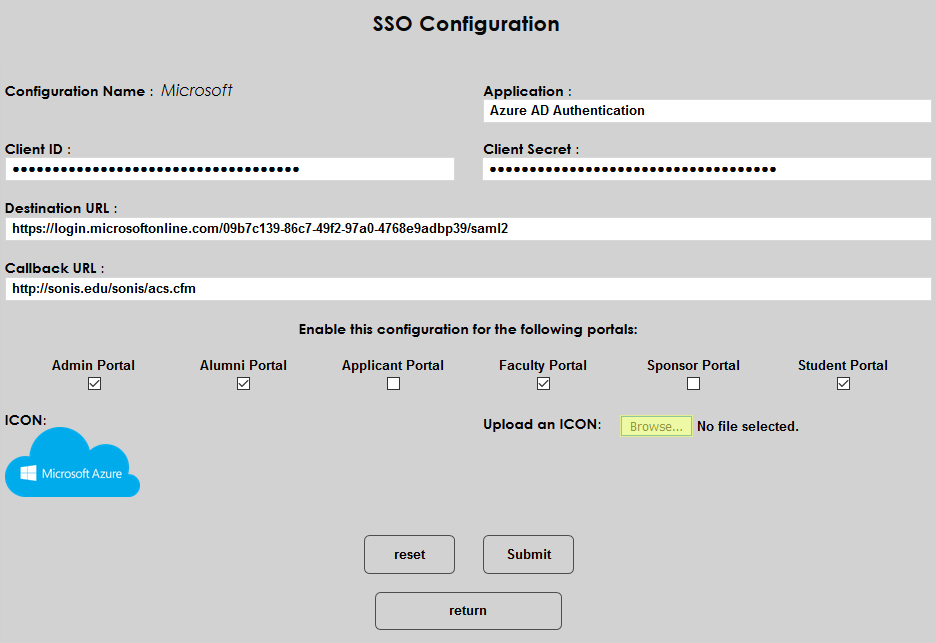
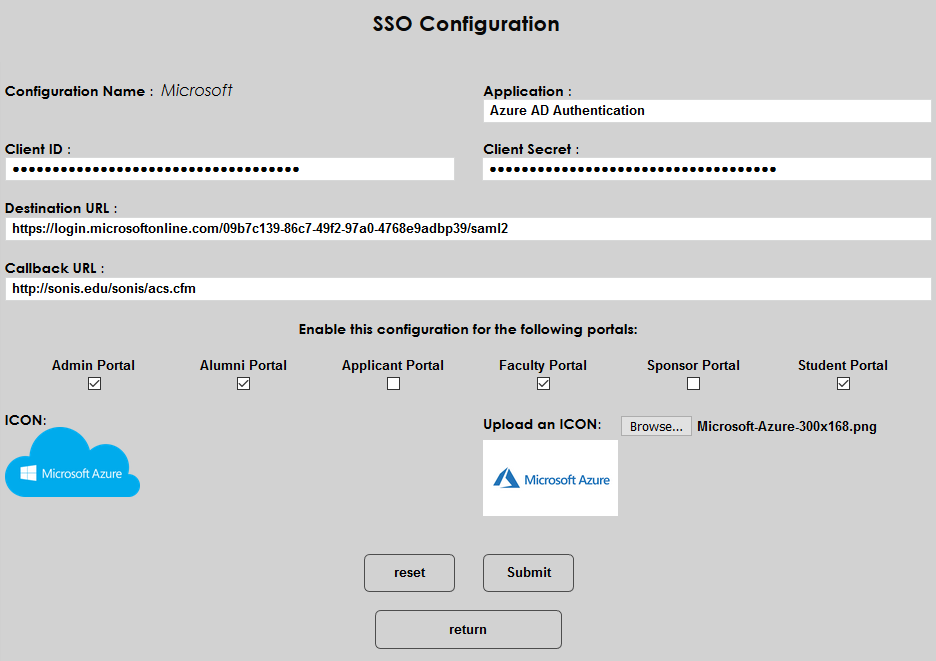
To change the logo that will be displayed to users, click the Browse button and select the file on the local machine.
Click Submit to save the page and activate seamless single sign-on.
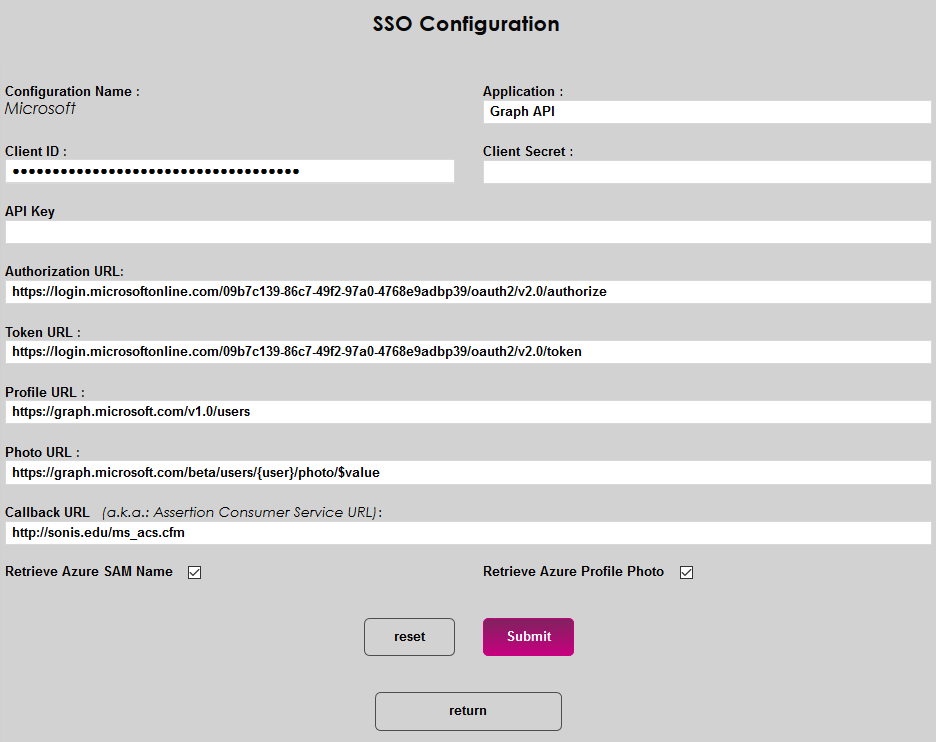
oAuth2
Again, if Azure is only being used for seamless single sign-on, SAML is the only protocol that needs to be activated. However, if the school is using Azure Active Directory Sync, the oAuth2 protocol must be activated as well. Click on the Microsoft link for the Graph API application.
As with the SAML configuration page, multiple fields are prepopulated. The Application is named Graph API by default, but this name can be changed.
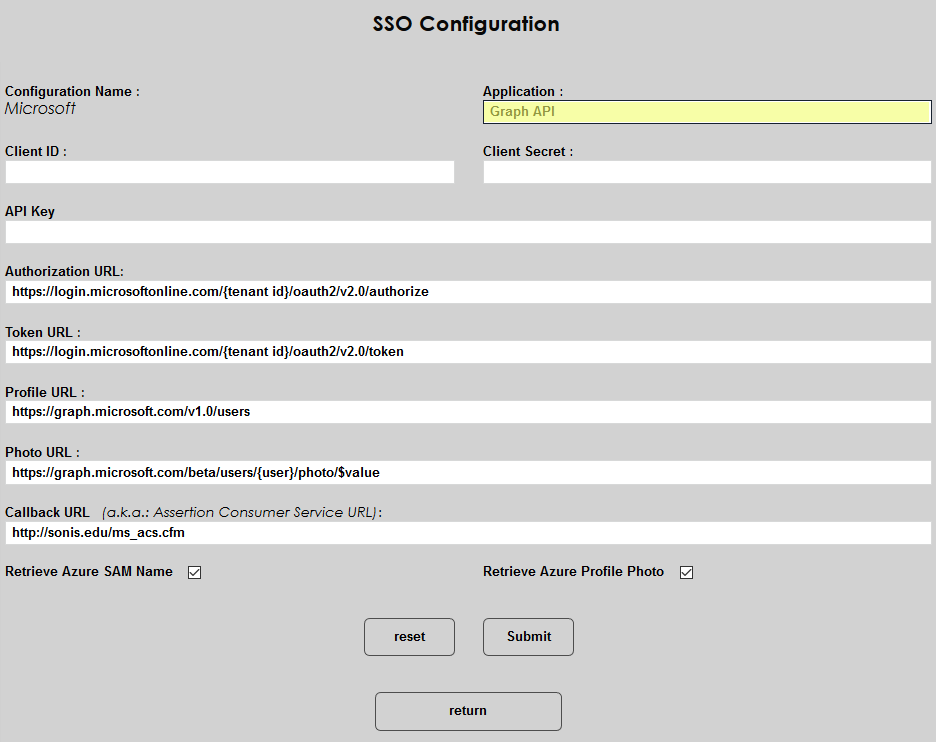
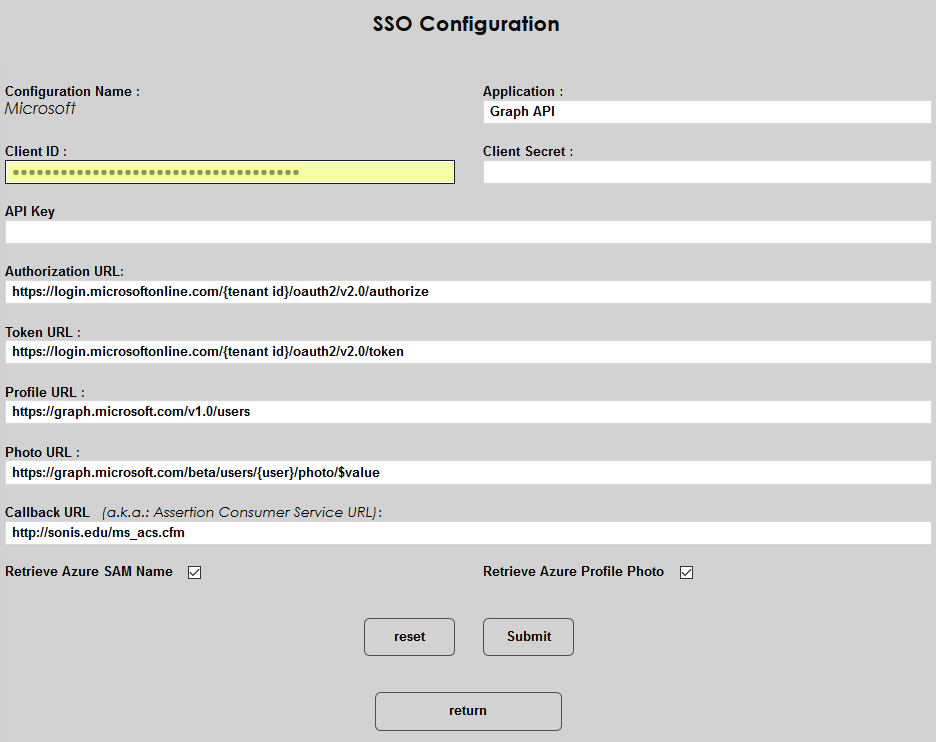
To locate the correct Client ID, log in to Azure, and navigate to the SONIS Enterprise Application. Click Copy to clipboard next to the Application ID field and paste the data into the Client ID field in SONIS.
The Client Secret and API Key fields are not used at this time.
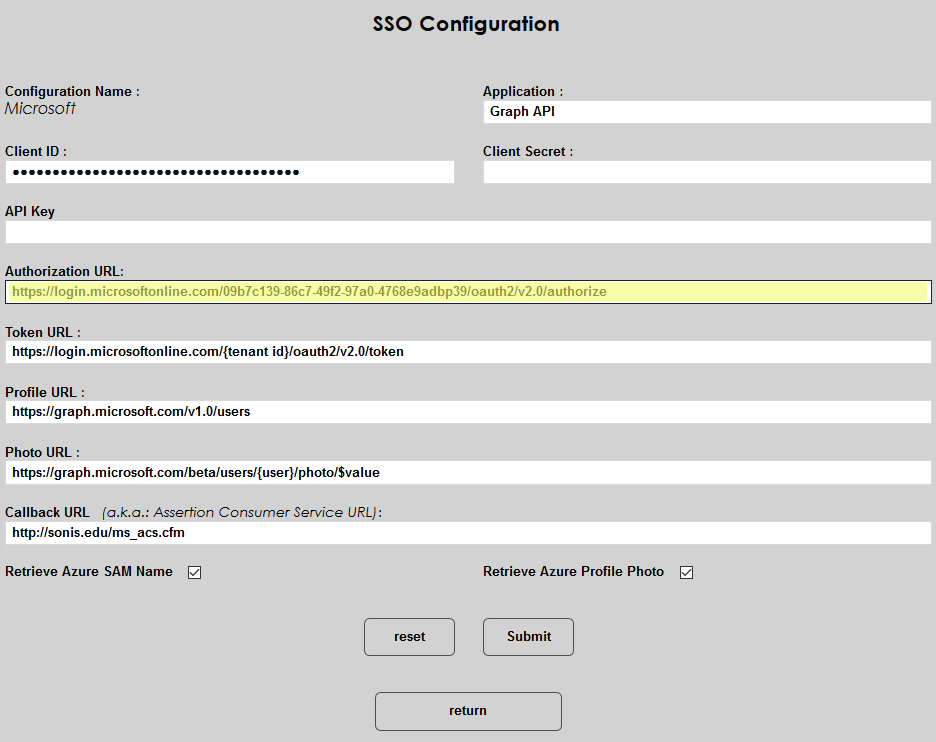
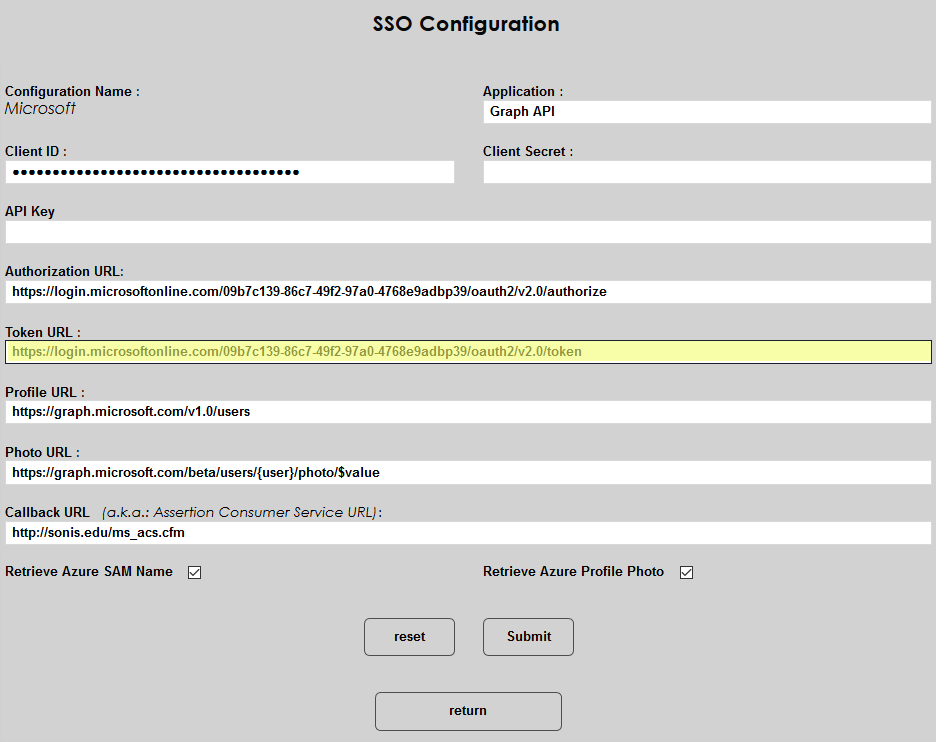
Replace the {tenantid} in both the Authorization URL and the Token URL with the school's actual tenant ID. The Tenant ID is located on the Overview page in Azure AD.
The Profile URL and Photo URL fields should be left as-is, including the {user} text, which is used by the SONIS system and does not need to be replaced.
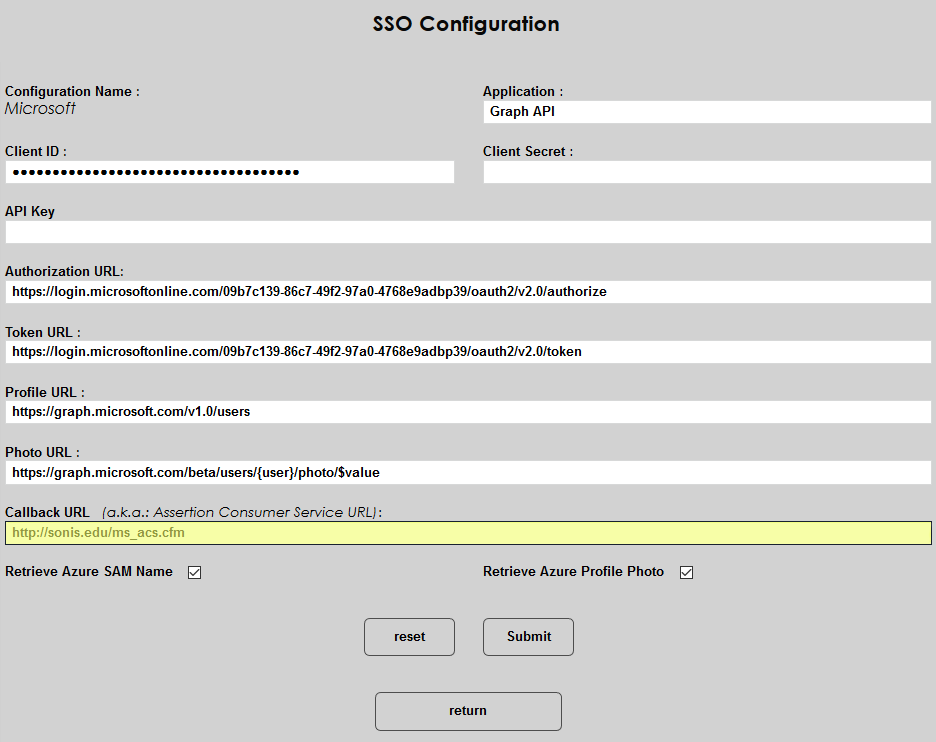
The Callback URL is prepopulated as well. The URL should be http://[domain]/ms_acs.cfm with the [domain] or sonis.edu text replaced by the local domain. The value can be replaced by another address if the school has created a custom URL to redirect students. If SONIS is handling the response from Microsoft, then the field must be left in this format.
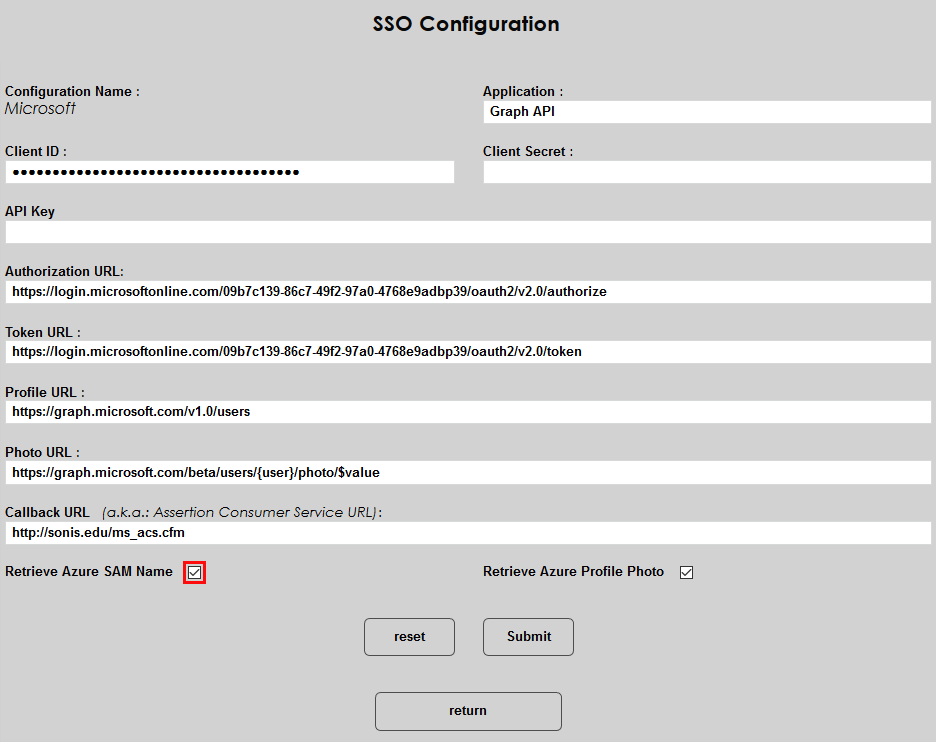
If the Retrieve Azure SAM Name box is checked, SONIS will retrieve the user’s local on-premises account name and store it in the AD User Name field, which can be accessed from the Biographic page. This box must be checked for the synchronization to function properly.
If the Retrieve Azure Profile Photo box is checked, SONIS will retrieve the user's thumbnail photo from the jpegPhoto attribute in Active Directory. For this feature to work, the school must select the jpegPhoto attribute for synchronization with Azure AD through the custom attribute selection. SONIS will also attempt to collect the photo used by the Office 365 profile if the jpegPhoto is not present. Note that this feature can slow down the synchronization process considerably and is not recommended in most cases.
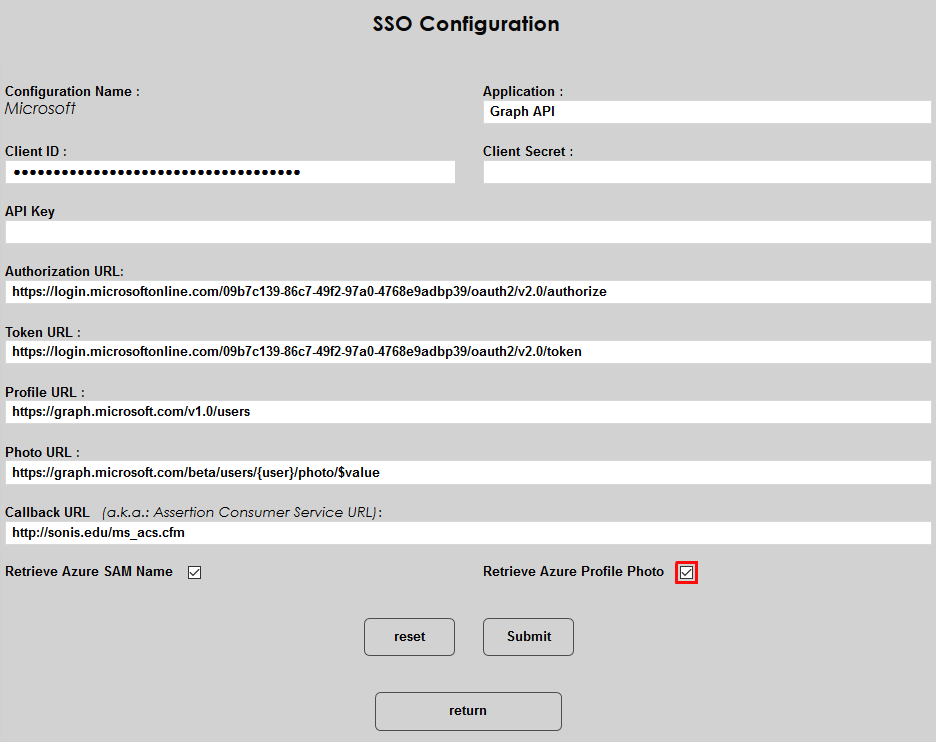
Click Submit to save the setup.
Synchronization
If using the active directory sync option rather than just the seamless single sign-on, navigate to the Azure AD Synchronization utility in the Systems hub. The user performing the sync must be a Global Administrator for the Microsoft account. Click Confirm to continue.

SSO Property
Once SONIS user data has been synced with Microsoft's data, Microsoft sends an email address back to SONIS that's saved in each student's records as their SSO Property. Under most circumstances, this value is static and does not need to be altered. However, if core student data such as the student's name changes in SONIS, it can disrupt their ability to log in with Azure. For this reason, a field has been added to the Biographic page of each user, allowing this data to be updated within SONIS. The field only appears on the page when Single Sign-On has been activated from the Web Options page. Click View to open the field in a pop-up window.

To update the SSO Property, enter a new value in the field and click Submit.


Login
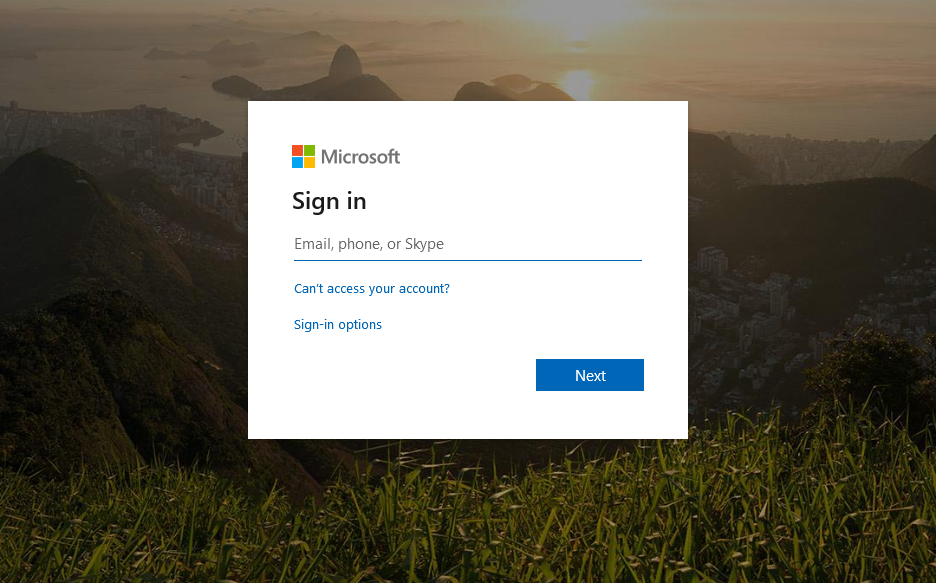
Once the Azure Seamless Single Sign-On setup has been completed, a link will appear on the activated login pages that says Login with Microsoft. Users that are logged in to a terminal or other domain-joined device will be automatically logged in to SONIS upon clicking this button.
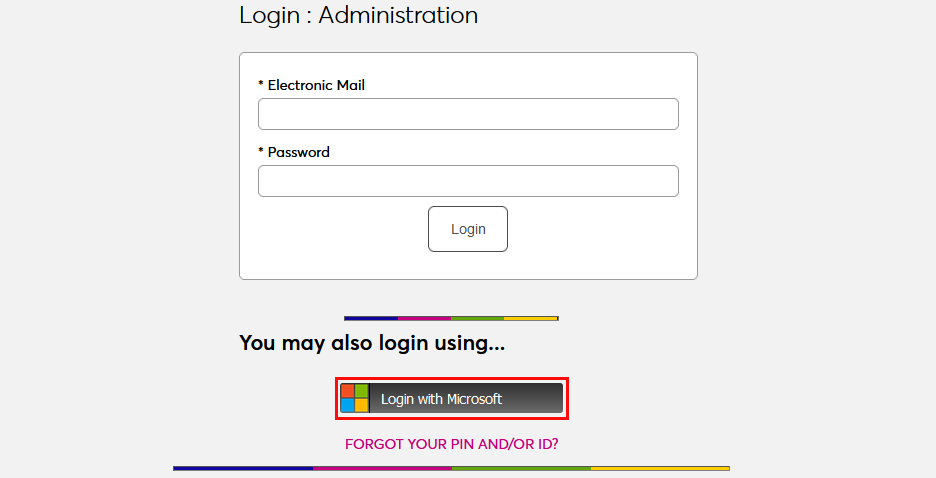
Users who are not on domain-joined devices can use the link as well, but will only be able to use traditional single sign-on rather than seamless single sign-on. These users will be asked to enter their Microsoft account information to link this account to their SONIS account.
For institutions that use email login rather than account login, there are two options. The first option is to allow the user to associate more than one SONIS account with their Microsoft account. If more than one account is associated, the user will be given the choice to select one when logging in.
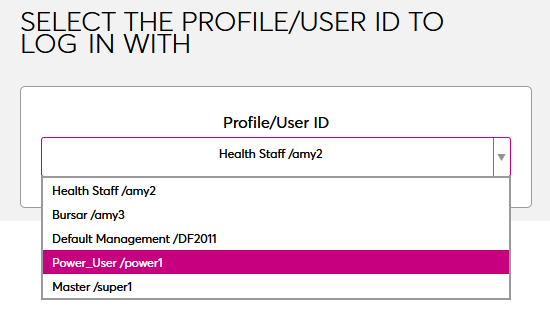
Institutions that do not offer the option to associate more than one SONIS account with a single Microsoft account but do allow users to have more than one account will need to ensure that the Admin Profiles Switch option is turned on in System Variables. Users will log in to the SONIS account associated with their Microsoft account and then use the profile switch in their user menu to switch between accounts.