eValue Import
Overview
Jenzabar SONIS member institutions that partner with eValue for medical program administration and delivery can utilize the eValue Import Utility to bring data from eValue into SONIS. This information can be further analyzed using the eValue Results report.
Setup
No SONIS setup is required to utilize the import utility, but student information that will be imported should match existing students, course enrollment, and clinical rotations.
eValue File Requirements
Prior to importing, a properly formatted Excel file must be obtained from eValue. It can be .csv or .xlsx. The file header, column details, and requirements are defined below. Course ID, Subject External ID, Letter Grade, Final Grade, Site, Time Frame, and Comments on Overall Performance are required column headers in the import file. If they are missing, an error message will display in SONIS upon attempting upload.
Import File Label | SONIS nmcrs Table Column | Description |
|---|---|---|
Program Name | sid | Course Name |
Subject | Student Name in Last First Middle Initial | |
Subject External ID | soc_sec | SONIS Student ID |
Evaluator | Instructor Name | |
Evaluator External ID | Instructor SONIS ID | |
Time Frame | time_frame | Descriptor from eValue |
Activity | N/A | Type of event initiating activity within eValue |
Site | site | Location of student participation |
Course ID | SONIS ID for the Course | |
Final Grade | class_grad | Numerical grade value as assigned in eValue |
Letter Grade | grade | Alpha representation of grade as assigned in eValue |
Comments on Overall Performance | grade_note | Narrative performance comments within eValue |
Importing the File
If a course has already been graded and the grade has been marked as official within SONIS, it will not be changed by the import. The new grade information will display in the import results report. Imported grades will not be automatically marked as official. The Bulk Official Grades process, or manual marking of official status, must still be utilized.
To begin importing an eValue file, navigate to the E-Value Import Utlity from the Systems menu. Click the Browse button to select the file.

After selecting the file, the name will display next to the browse button. Click Upload the File to begin the import.


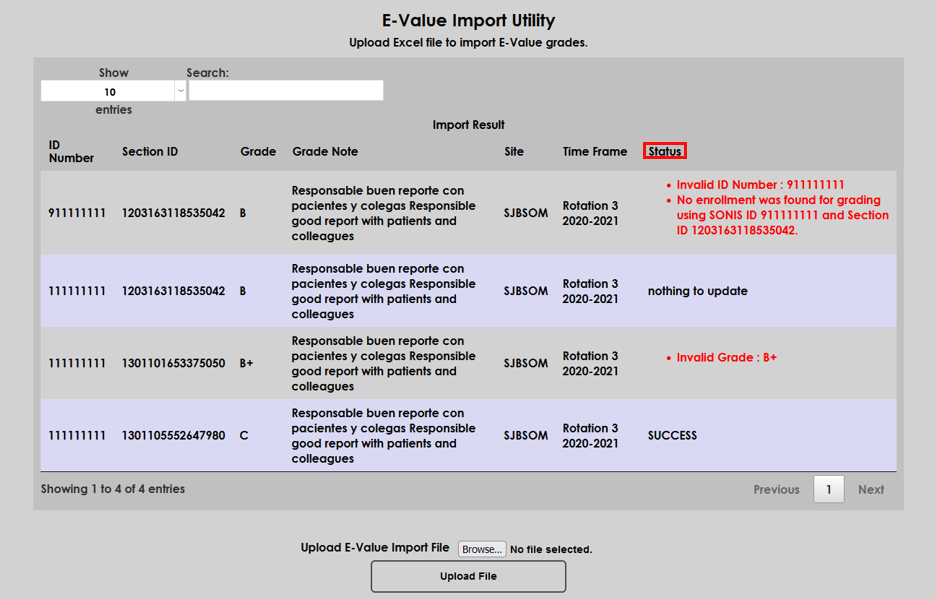
The results of the import display for each record in the file. Success will display in the Status for any record that loaded in full and updated the student record. If the record loaded fully but no new information was included, nothing to update displays. If there were issues encountered in the record, the specific details will display in red.