Import Accounts by XML
Overview
The Accounts by XML Importer is a JenzabarSONIS utility designed to facilitate the easy creation of new user accounts in bulk. Administrators can use it to import an XML file from a third party program such as Slate or another application that allows XML exports.
Jenzabar SONIS can provide a Document Type Definition file that can be used to help convert other export files into the proper XML format for the import. The DTD file servers as a road map for the creation of the XML-formatted import file. It details the data that should be extracted, how it should be XML tagged, and where it should be located in the XML-formatted import file. This file and other support can be acquired upon request.
DTD File
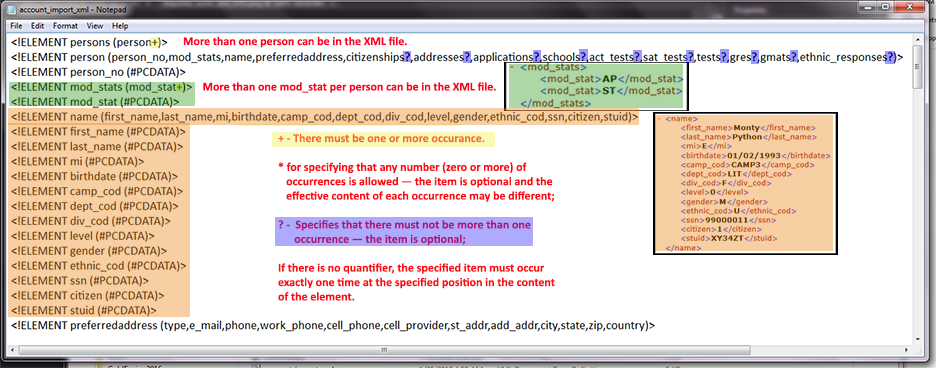
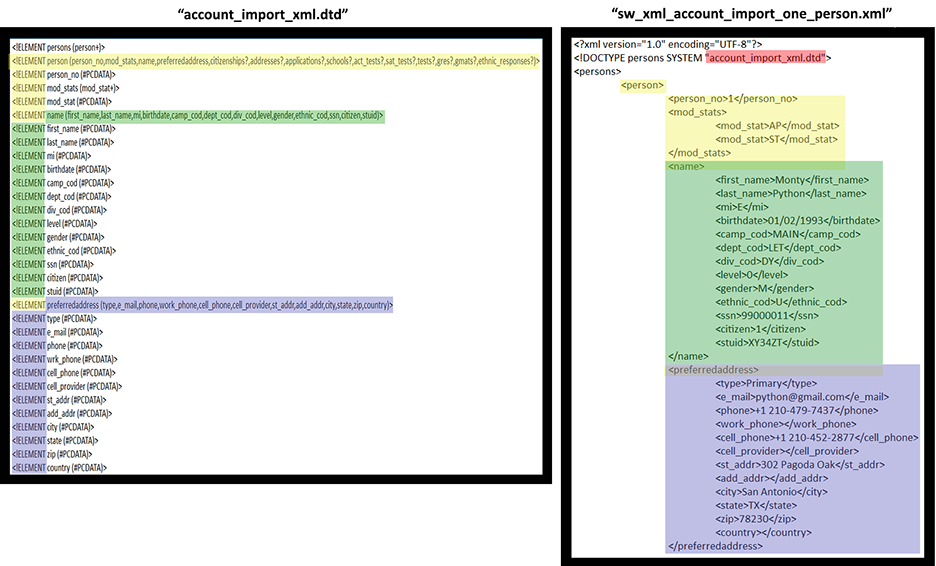
The Document Type Definition (DTD) files contain the blueprint for the XML. In the screenshot below, the left side of the image is the DTD file. Each line begins with the tag, <!ELEMENT Tag Name (header or the 'PDATA')> that is a variable for the actual data.
For example, the <!ELEMENT mod_stats (mod_stat+)> tag indicates that the individual must have at least one mod_stat but is allowed to have more than one mod_stat. This is indicated by the plural mod_stats and the +. The next tag, <!ELEMENT mod_stat (#PCDATA)>, indicates that a single mod_stat tag contains the actual data between the beginning and ending mod_stat tags. The green box to the right shows how the XML file interprets the DTD.
The second example, highlighted in orange, works in the same basic manner as the first example. The difference is that the <!ELEMENT name tag is followed by a series of fields:(first_name,last_name,mi,birthdate,camp_cod,dept_cod,div_cod,level,gender,ethnic_cod,ssn,citizen,stuid). Each of those fields listed in the parentheses must next be listed as a single field and the variable #PCDATA, the variable the value of, for example, <first_name>Monty</first_name>, shown in the corresponding excerpt of the XML file.
XML File
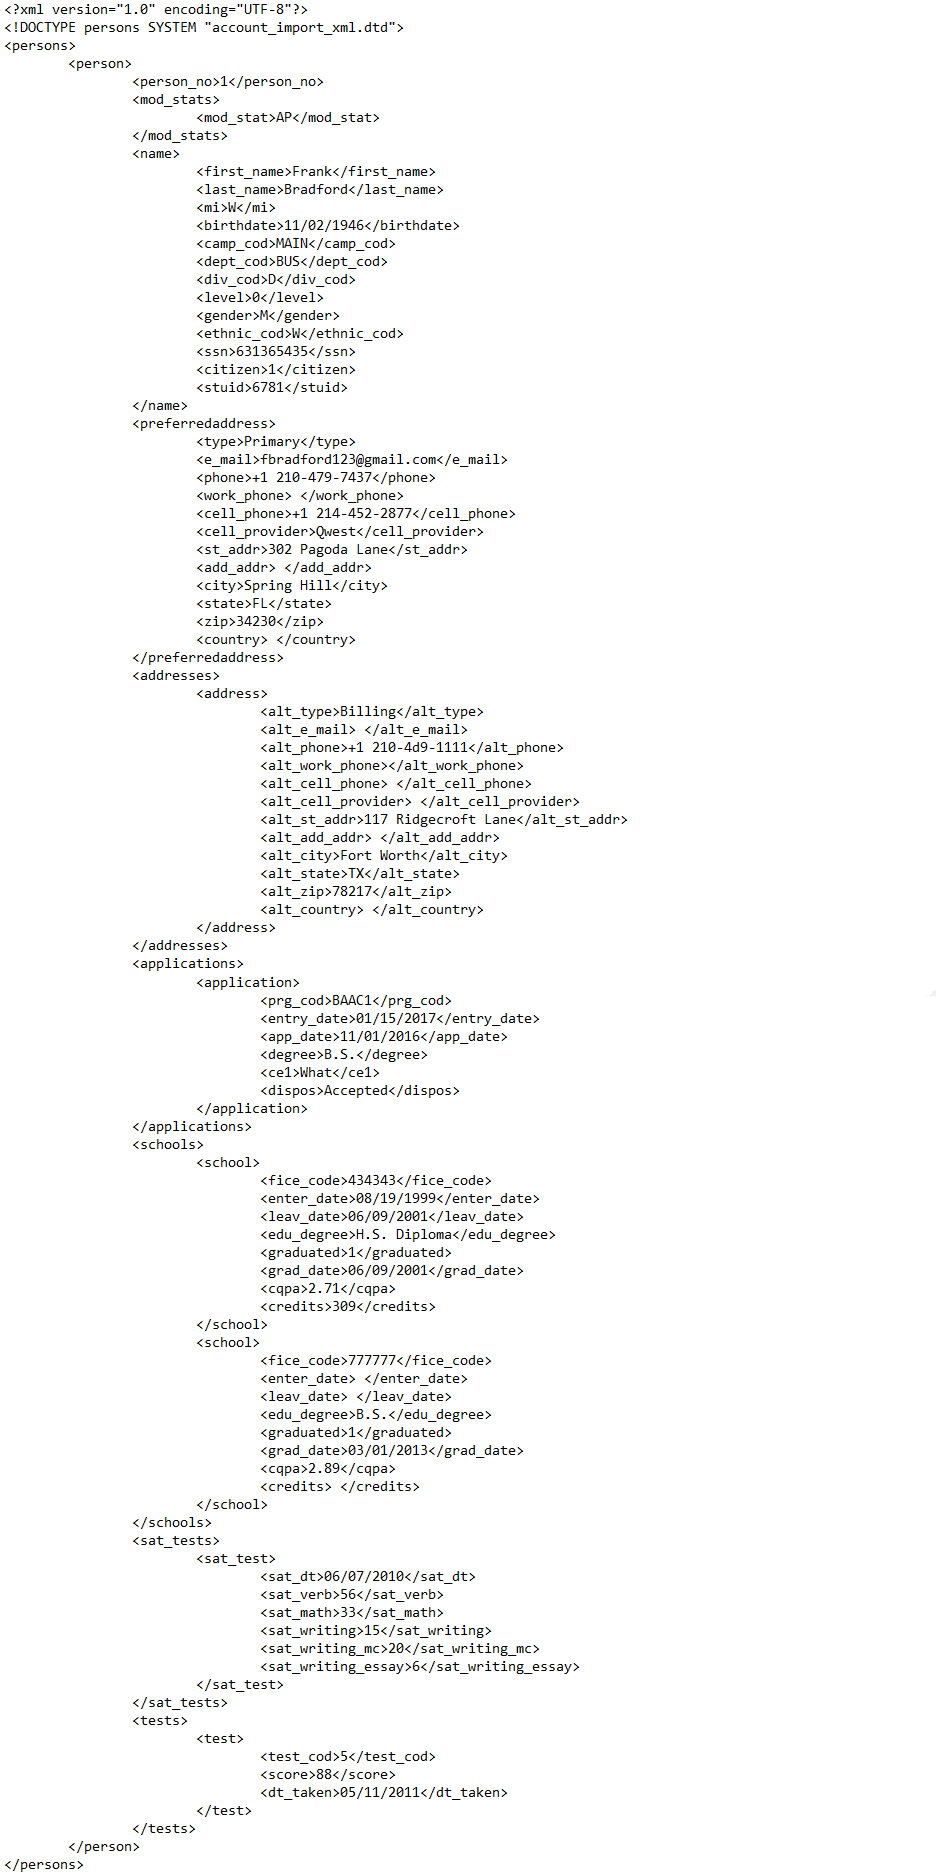
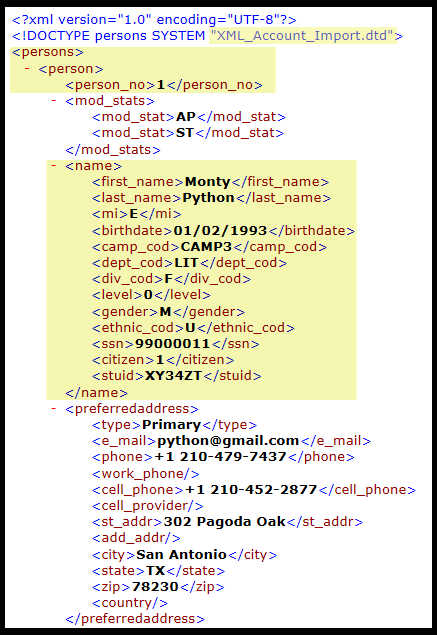
The XML File should have the following format:
While the account_import_xml.dtd file has been created already, and the XML file is provided by a third-party vendor or customer, it is very important to understand how the two files are associated in case there are file format errors that need to be fixed. Additionally, there may be future occasions when a different DTD file needs to be created.
The image below shows the specific relationship between a DTD file and an XML account file.
The file begins with the element persons. This indicates that the tags in both files pertain to data concerning people rather than financial aid, courses, etc. Within the parentheses following the element persons is person +. This element indicates the start of an instance persons (i.e between <person> and </person> is the biographical information of a single person. The + indicates that more than one person tag can be entered between the <persons> and </persons> tags.
In yellow, the element person in the DTD file is followed by, in parentheses, all the sub-elements that must be included under the element person. Note that each sub-element is then listed as a separate element. The XML file also shows, in yellow, the same hierarchy as a set of tags:
<persons>
<person>
<person_id>
</person_id>
</person>
<persons>
Additionally, not only are all of the elements in the parentheses required, but they must be in the correct order. The exception is when they are flagged in some way, like applications?. The ? indicates that the element/tag is optional. So the record does not have to include applications.
1. Tag spelling must be followed exactly, including capitalization. <First_name>Monty included as <first_name> would cause a formatting error. The start and end tags must be identical with the exception of the /, which indicates that it is an end tag.
2. The incorrect order of the tags will also create a formatting error. If the DTD file has the <first_name> tag followed by the <last_name> tag, and the XML has the <last_name> tag before the <first_name> tag, a formatting error will cause the function to shut down.
The data will not import until all formatting is correct.
Import Process
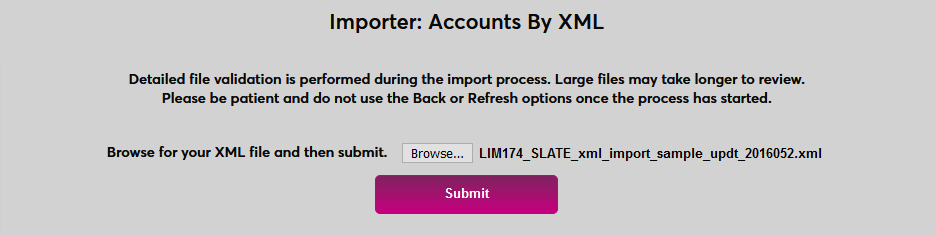
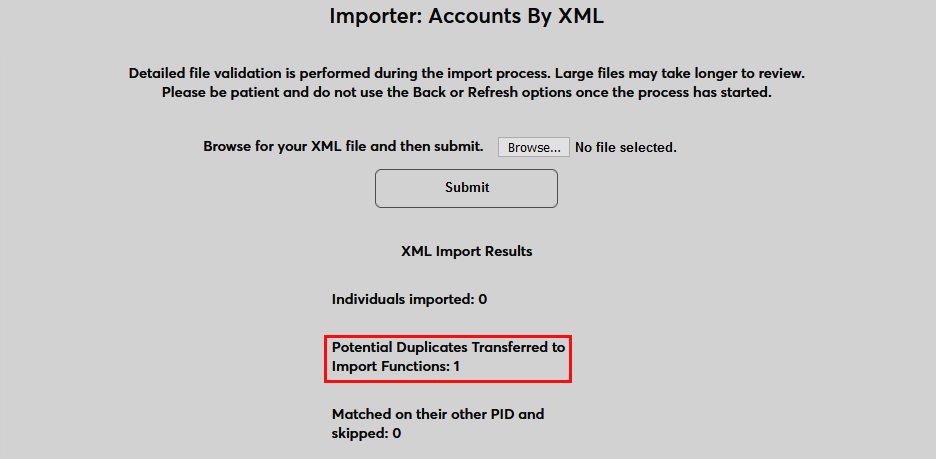
To begin the import process, navigate to Importer: Accounts By XML in the Systems hub. Click the Browse button, locate the XML file to be formatted, and select it.
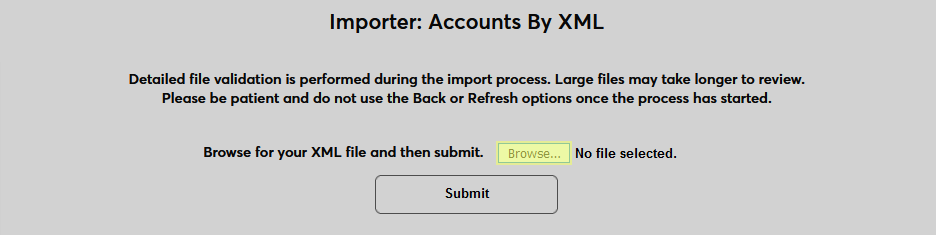
Once the file has been selected, click Submit to begin the import process.
After the file has been imported, the results are displayed below. If there are errors, they will be listed by person and type in the accompanying table.

Typically, the key fields are the most likely to create errors. For example, the student's department is Literature but the file contains <dept>LET</dept> and the SONIS DEPT table does not contain LET, an error will be reported back to the user. The user then will need to find the dept_code LET in the file and change it to LIT. The importer can be rerun repeatedly until no errors are found.
Duplicate Checking
In addition to errors in the file construction, the data to be imported is checked for duplicates. This duplication checking is based on the settings created via the Duplicate Name Search utility.
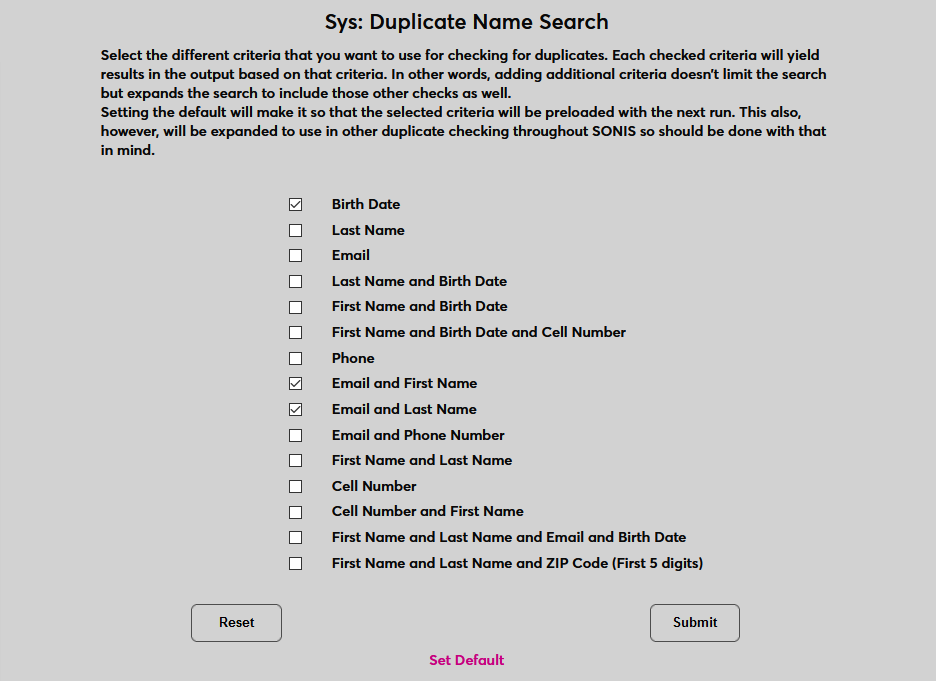
If duplicates are found, they will be noted on the page.
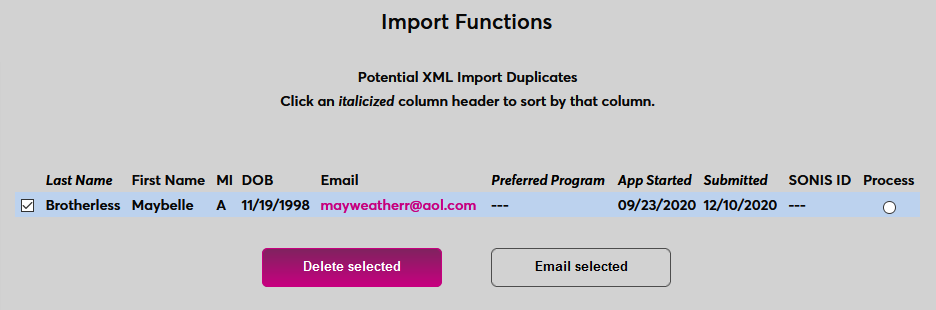
To resolve these duplicates, navigate to Import Functions under the Systems menu. Select Potential XML Duplicates from the list of options.
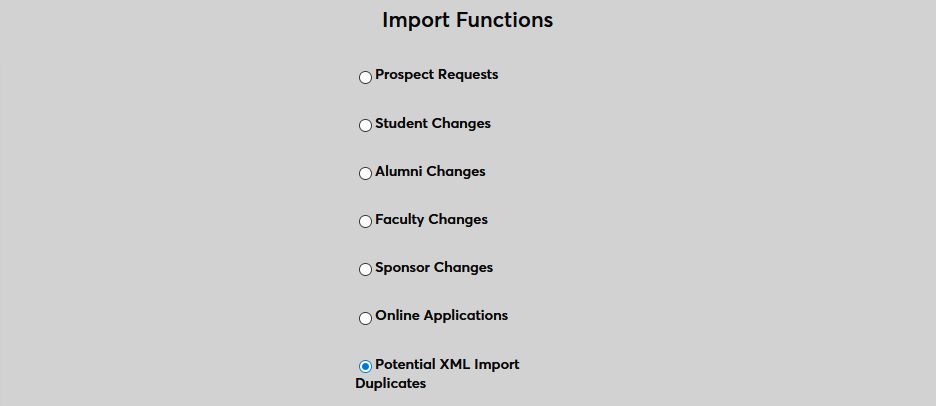
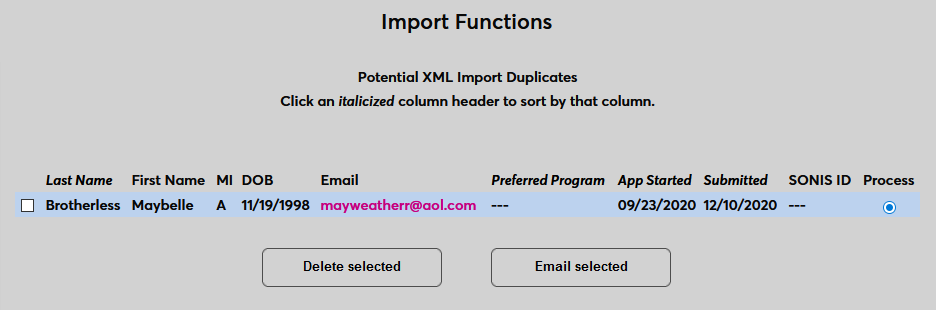
On the following page, check the box on the left side of the screen and click Delete selected to delete the record. Or click Process to process the record as-is.