Registration
Overview
The Registration utility allows administrators to enroll students in courses. Courses are created in the Courses hub. The date and time of each course and the semesters they're offered is based on the Course Section. Course sections from a previous semester can also be copied forward to an upcoming semester using the Bulk Section Copy function. In order for a student to register for classes, they must not have any registration Holds, though administrators with the proper User Security permissions can choose to override holds in certain circumstances.
The primary registration settings are located on the Web Options page under the Systems hub. You can also use the Registration Utility to control when registration is open for different groups.
To access this page, select a student and then navigate to Registration under the Users hub.
Anticipated Charges Display
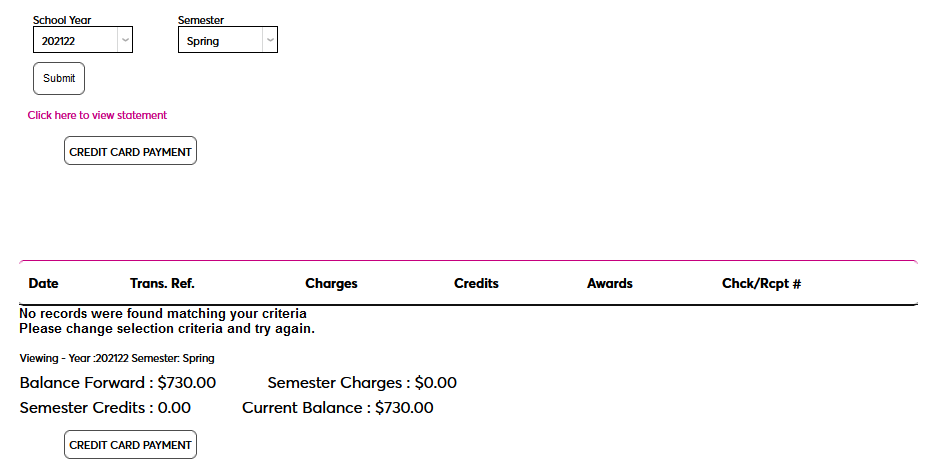
The Basic Registration setting in Web Options does not create any charges as students are registered. However, these charges will still be created in the system using Post to Billing and/or Post to Billing: Pre-Bill after each student has registered. Previously, these anticipated charges would not display in the student portal with the Basic Registration setting selected. Now the default behavior is for these anticipated charges to display as soon as they're created.
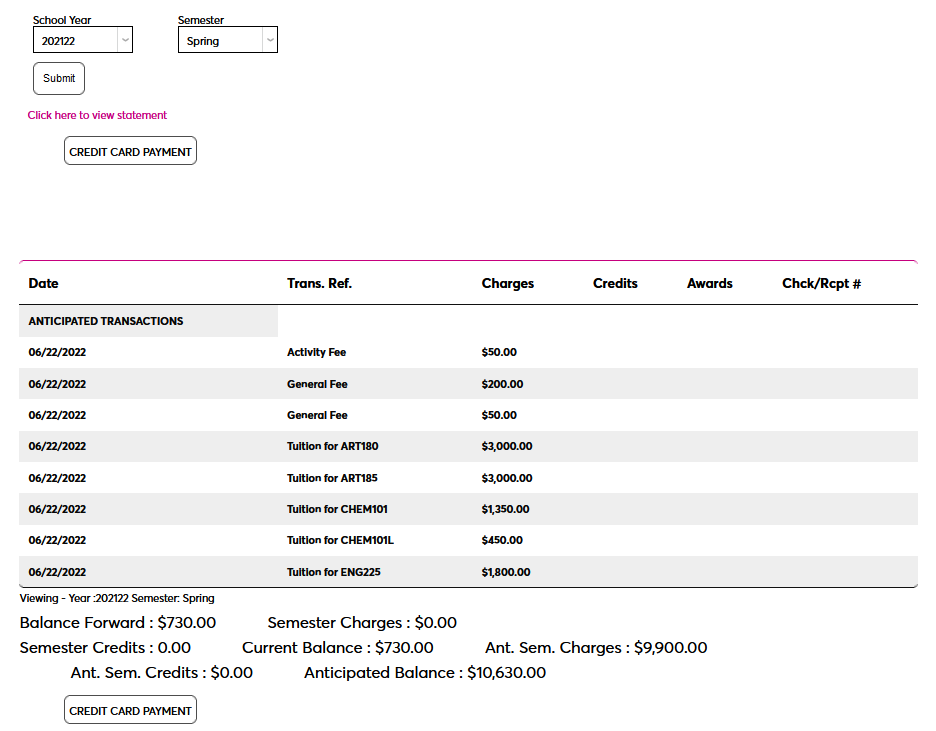
To prevent anticipated charges from showing in the student portal at all and display only charges that have been posted to billing, select the No Anticipated Charges on Portal Billing option on the Web Options page.

Course Removal Memo and Registration History
There are two checkboxes in System Variables that allow schools to better control and audit the registration process.
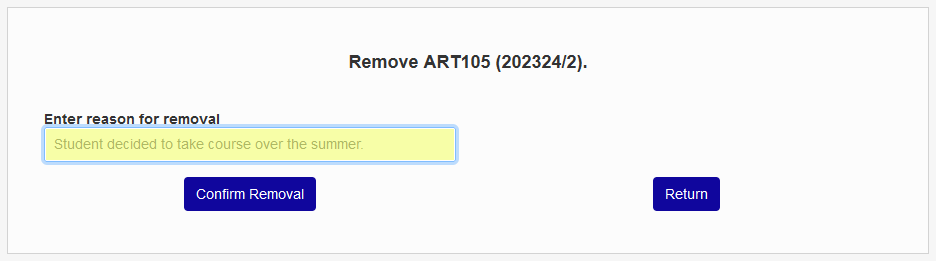
Check the Display Course Remove Memo Reg box to require users to enter an explanatory memo whenever a course is removed during the registration process.

Once this box is checked, staff, faculty, and students who attempt to delete a course using their Registration utility will be taken to an intermediate page with a field labeled Enter reason for removal. Text must be entered in this field before the Confirm Removal button can be used.
Note
The memo requirement only applies when the registration process has been completed. Users can still delete courses from their cart.
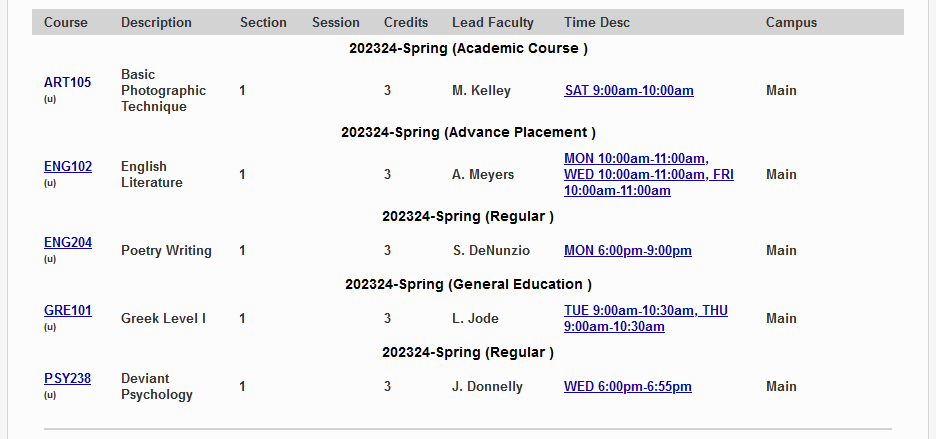
In order for this memo to display, the second System Variables registration option must also be turned on. Check the Display Course History in Registration option to activate a Registration History link on each Registration page.

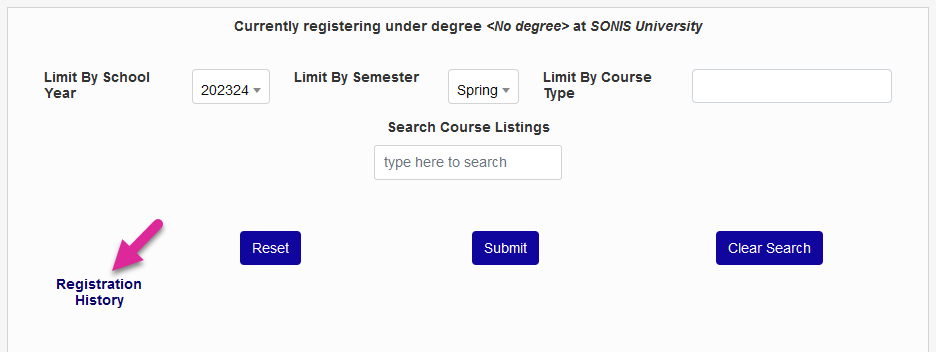
Then ensure that each staff member who will need to access the Registration History page has the Multi-year registration option active in their User Security profile.

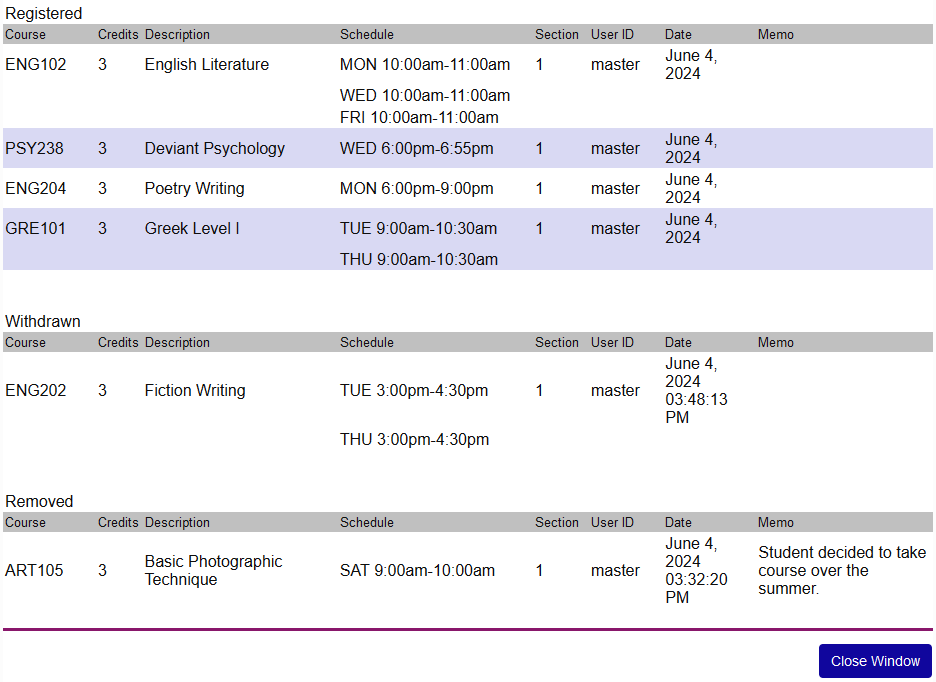
The history opens in a popup window. Users can see the student's registered, withdrawn, and removed courses for previous semesters.
Displays, Navigation, & Filtering
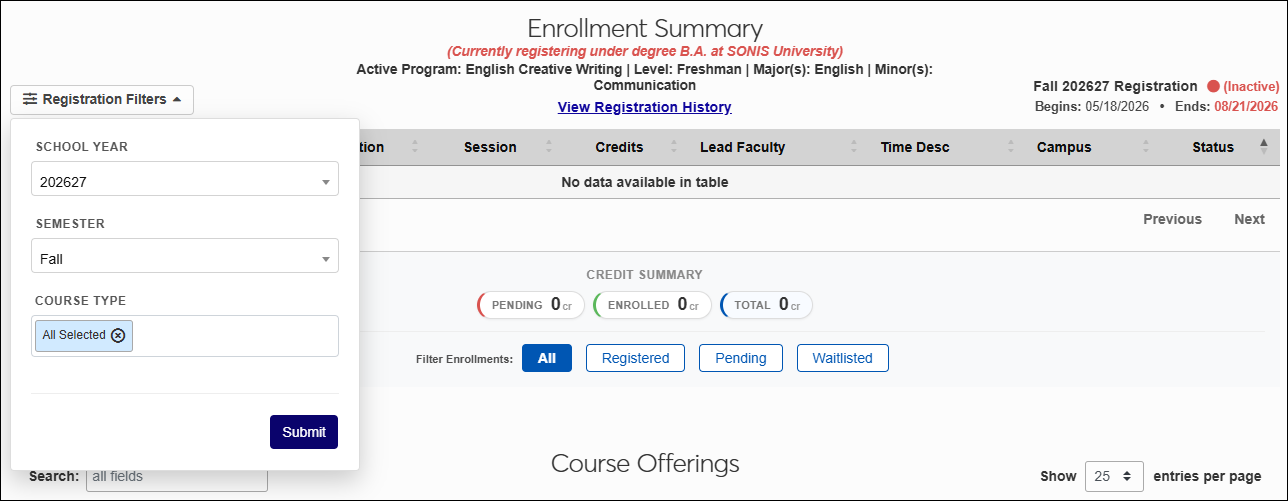
The top section of the Registration page offers an Enrollment Summary. The system lists each student's degree and the institution where they're registering along with their active program, level, major, and minor.
You can also see the semester you're registering for along with the begining and ending dates. You can use the Registration Filters menu to change the School Year and Semester you're registering for and exclude courses using the Course Type filter.
Note
The View Registration History link is optional. See the Display Options section above for information on how to turn this link on and the permissions needed to use it.
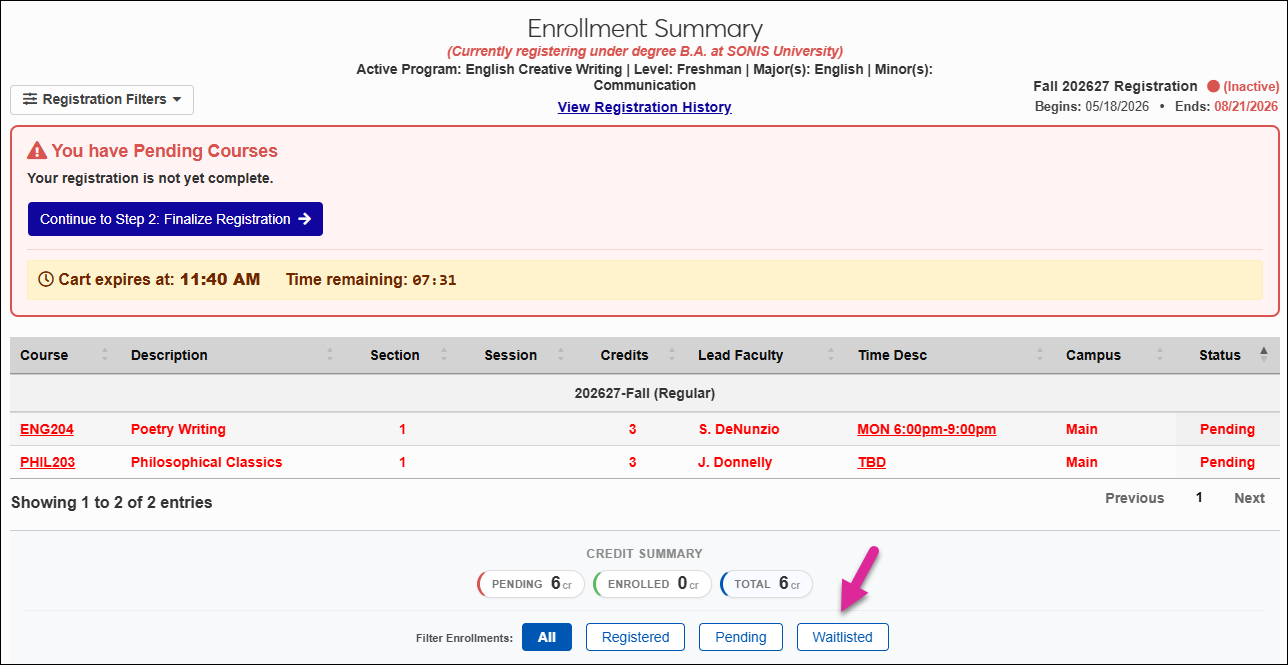
Courses that are pending or already registered also appear in this section. Pending courses appear in red with a timer that expires to keep users from holding courses for extended periods of time. You can sort any column in the table in ascending or descending order using the arrows next to each column header. Use the Previous, Next, and page number links to view additional pages of courses if not all of them display.
The Credit Summary provides a color-coded visual count of the student's Pending, Enrolled, and Total courses. You can click one of the Filter Enrollments buttons to display only Registered, Pending, or Waitlisted courses.
The Course Offerings section displays the courses that are available for registration.
Several different filter options are available to control which courses display in the table.
You can use the Course Availability filters to show only courses that have a certain Program, Level, or Major restriction. Check the Include Unrestricted box to include courses with no restrictions in the list or use the Reset button to return to the original display options.
Note
If there are no courses with a specific restriction offered by your institution at this time, the corresponding filter menu will appear blank with only the No Filter option available.
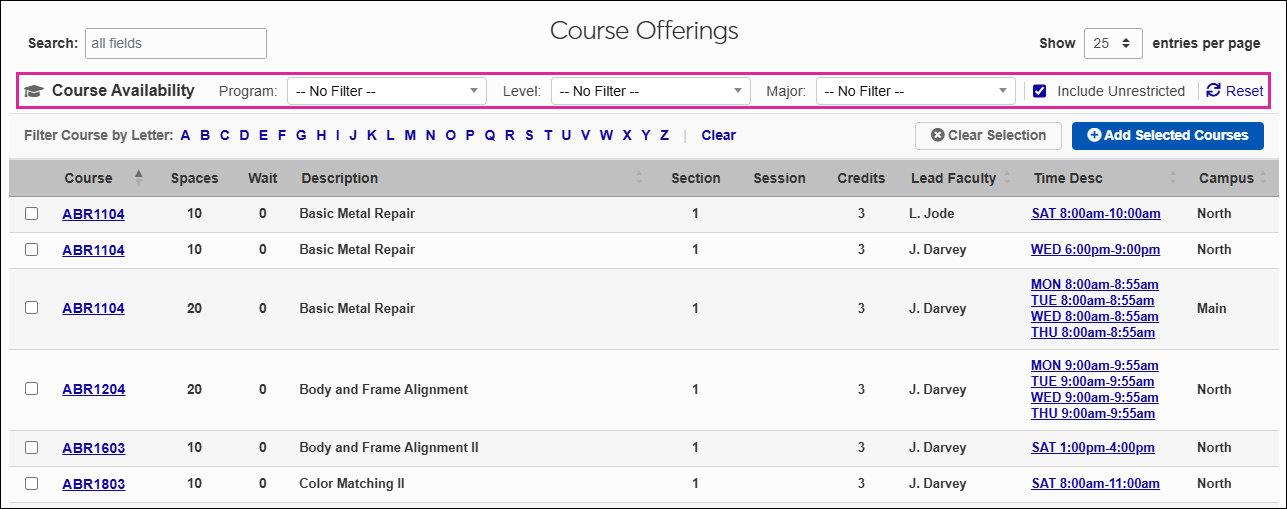
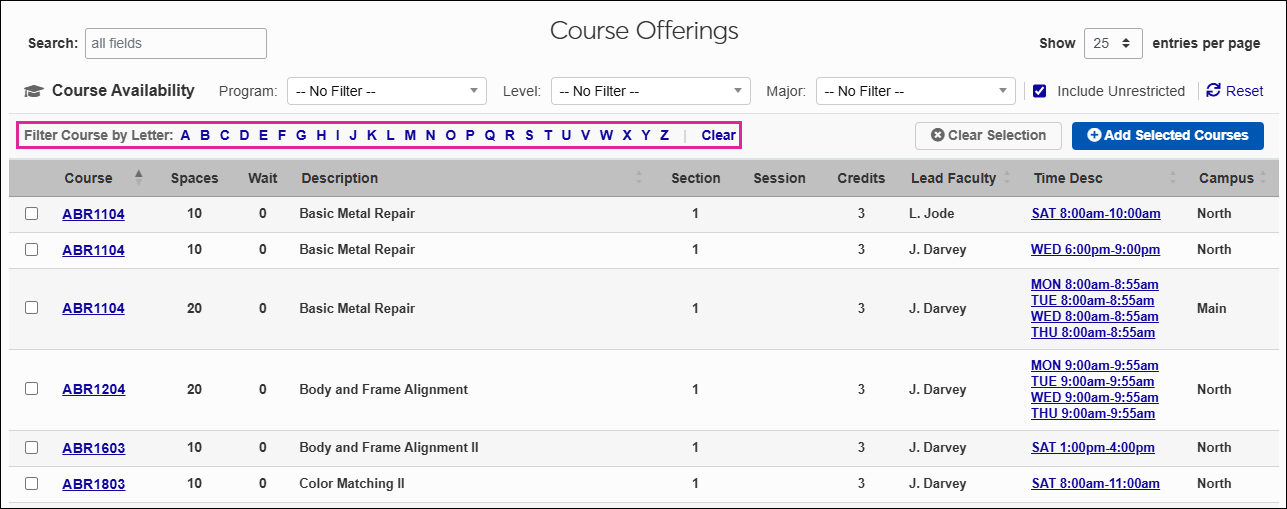
You can also filter courses based on the first letter of the course name. Click Clear to remove this filter and return to the previous list.
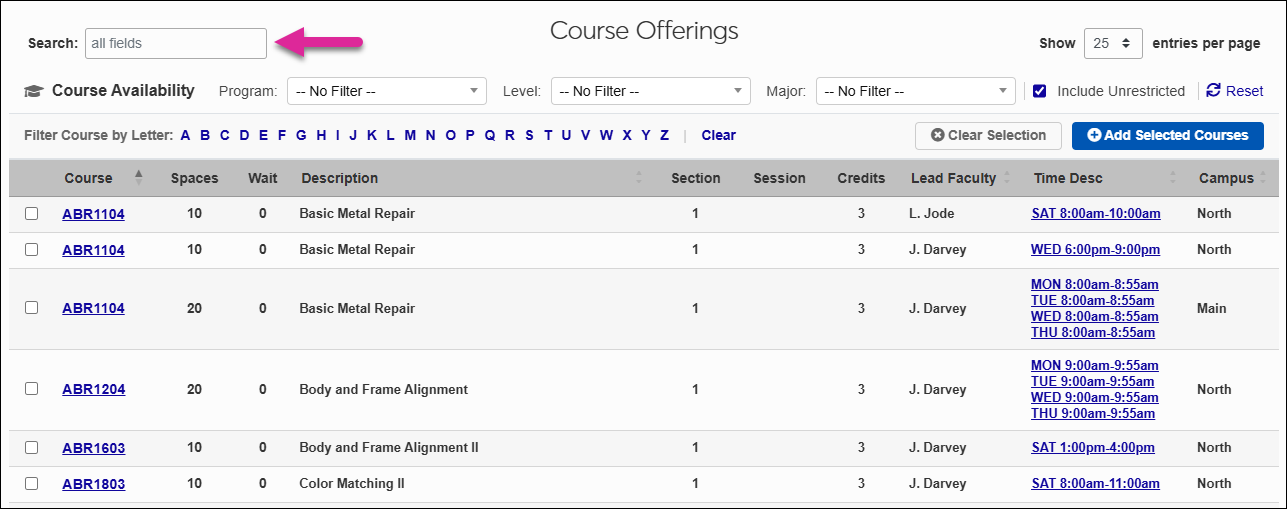
Use the Search box to find a specific course or group of courses. The search box searches all the fields in the table and begins searching as you type.
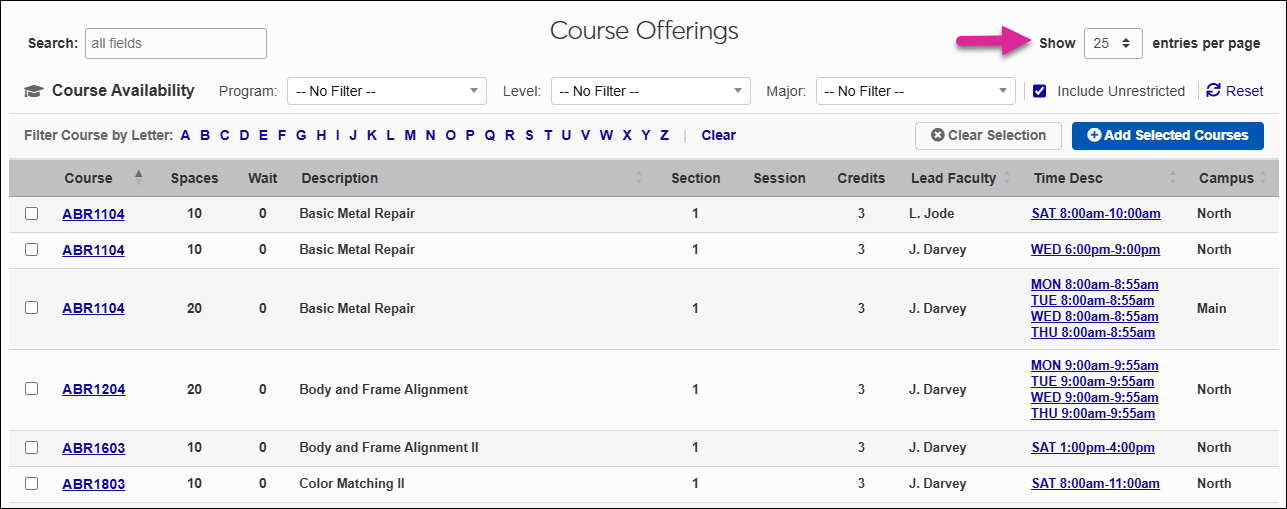
The Show menu controls how many courses are displayed per page. Use the Previous Page, Next Page and number links at the bottom of the page to navigate between pages in the course list.
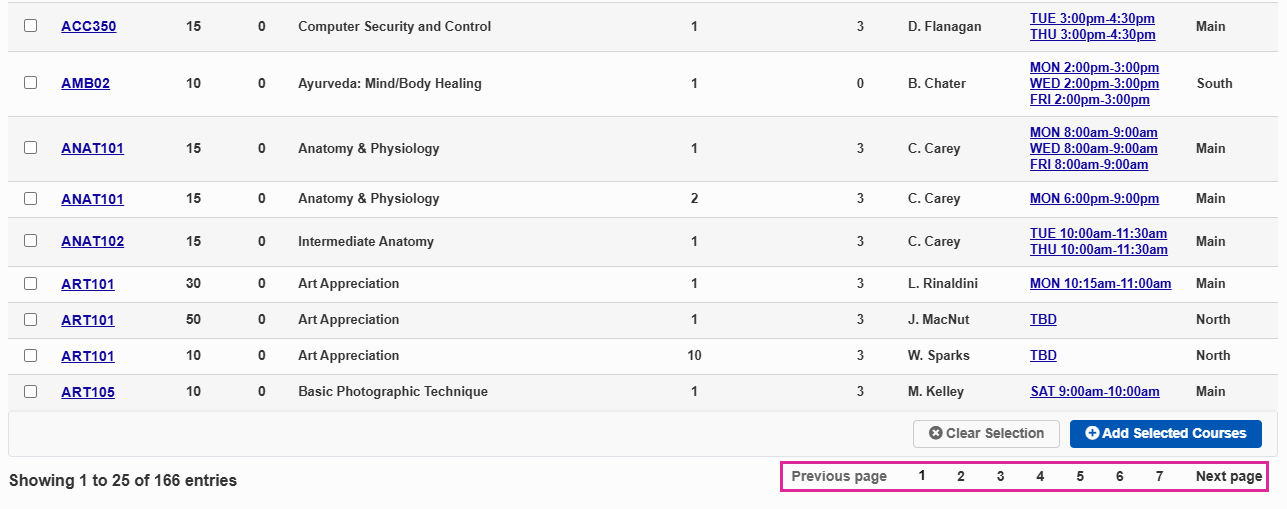
Registering for Courses
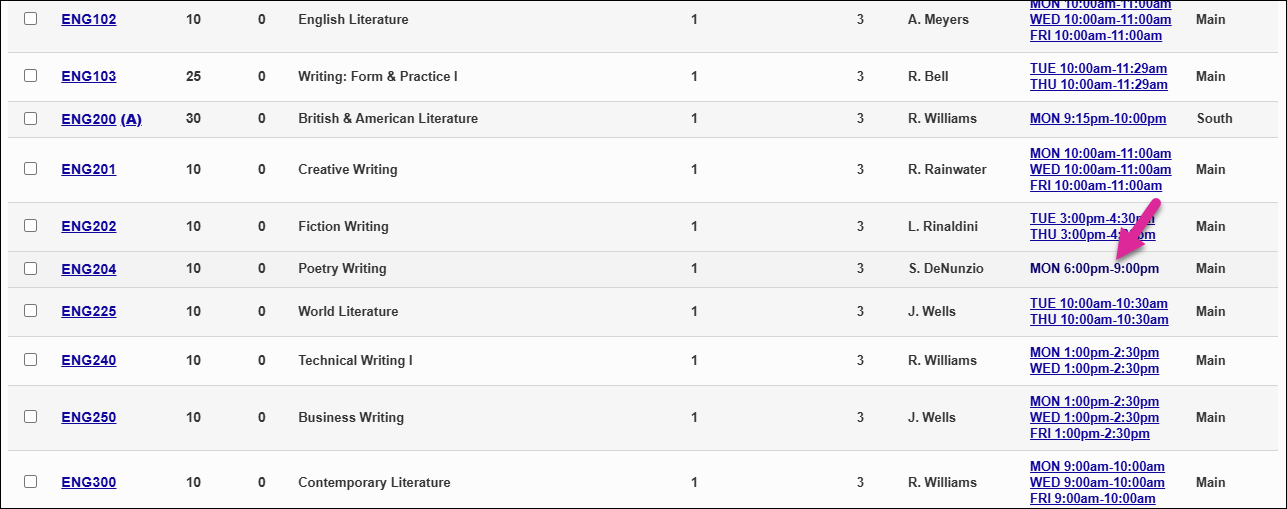
Once you've located the courses you wish to register the student for, you can click on the date and time of the course to view the full course information displays in one table in a pop-up window.

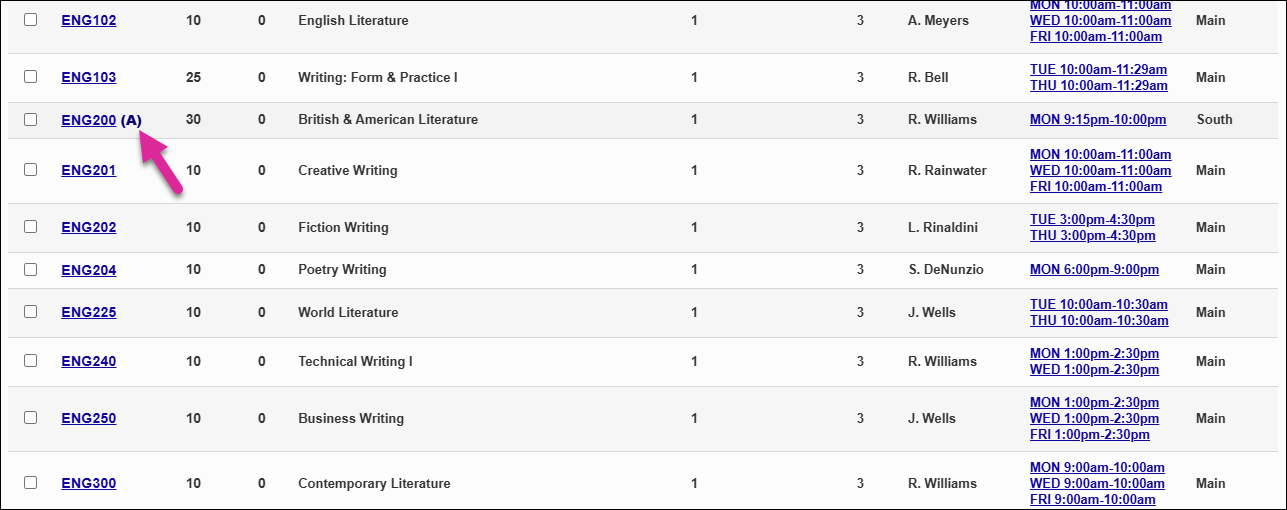
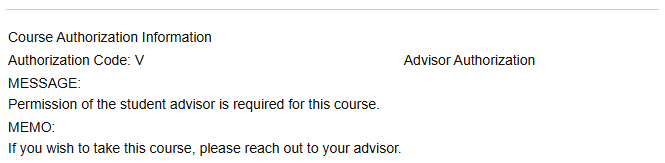
If a course has a letter in parentheses next to the name, this means that the course needs additional authorization of some kind. Click on the letter to open a pop-up window containing information about the required authorization.
To select an individual course for registration, click on the name of the course.
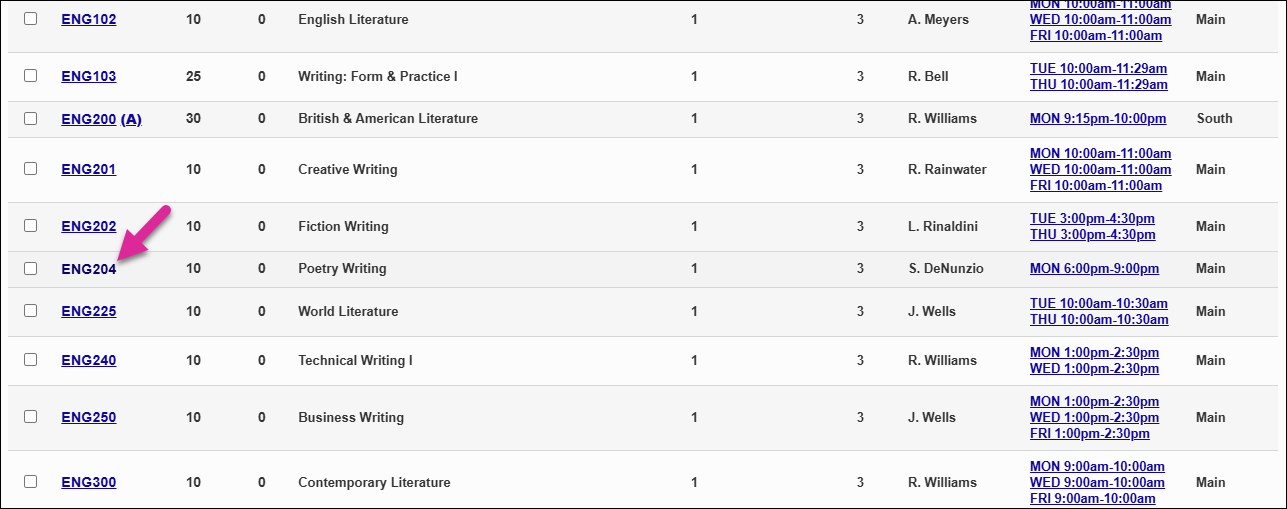
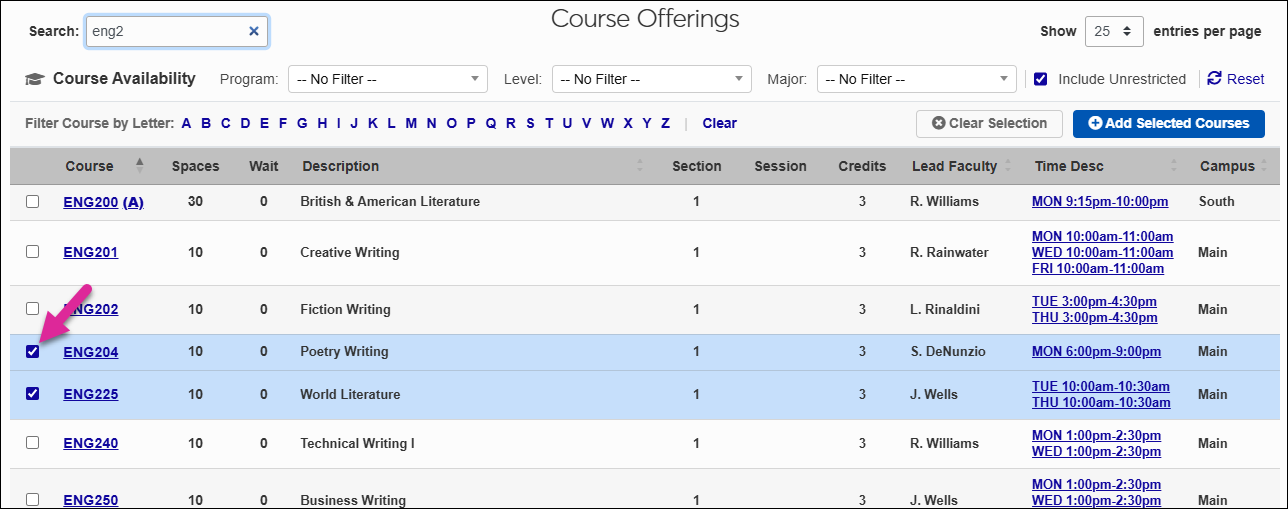
Alternately, you can select multiple courses for registration. Check the box next to each course name you want to select and then click Add Selected Courses.
Note
You can select courses that do not appear on the same page or within the same filter and they will stay selected as you switch between pages or filters. Click Clear Selection if you wish to unselect the boxes you previously checked.
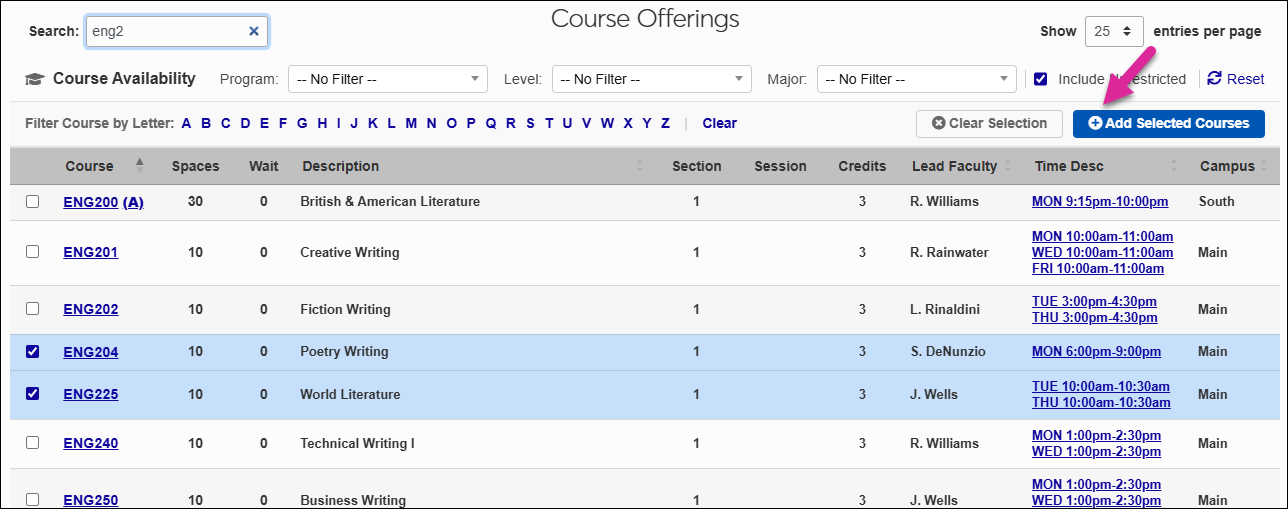
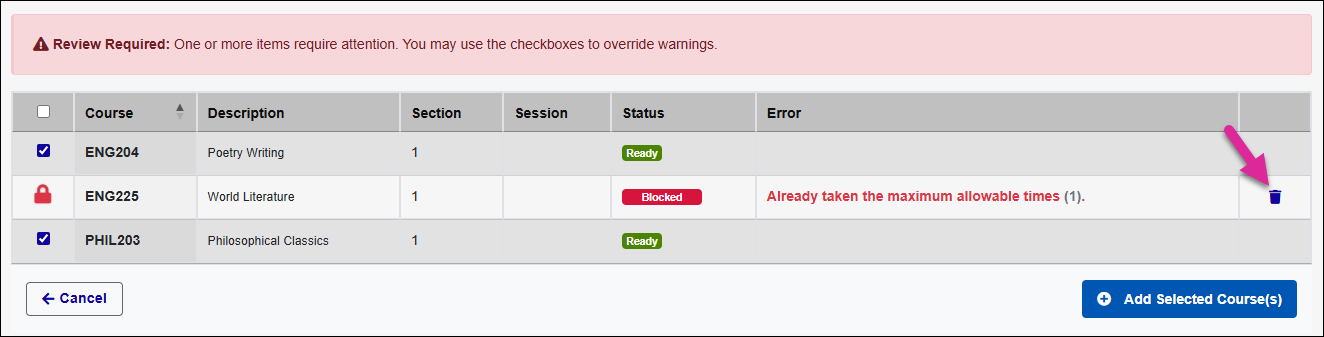
If there are restrictions or conflicts that would prevent the student from taking these courses, you will be taken to a page that displays all the selected courses with the restricted course highlighted. To remove a course that is blocked, click the delete icon  followed by the Delete Selected & Recalculate button.
Note
Some course restrictions and conflicts can be bypassed if you have the right permissions. See the Additonal Privileges section of the User Security Help Hub article for more information.
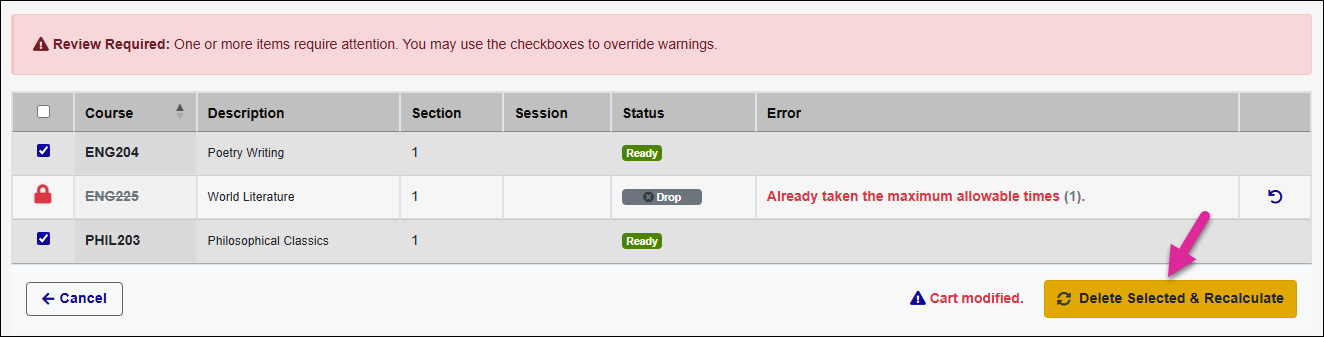
If the courses you've selected have no restrictions or the restricted courses have been removed, the courses you selected are added to the Enrollment Summary.
To remove a course that you've selected, click the course name.
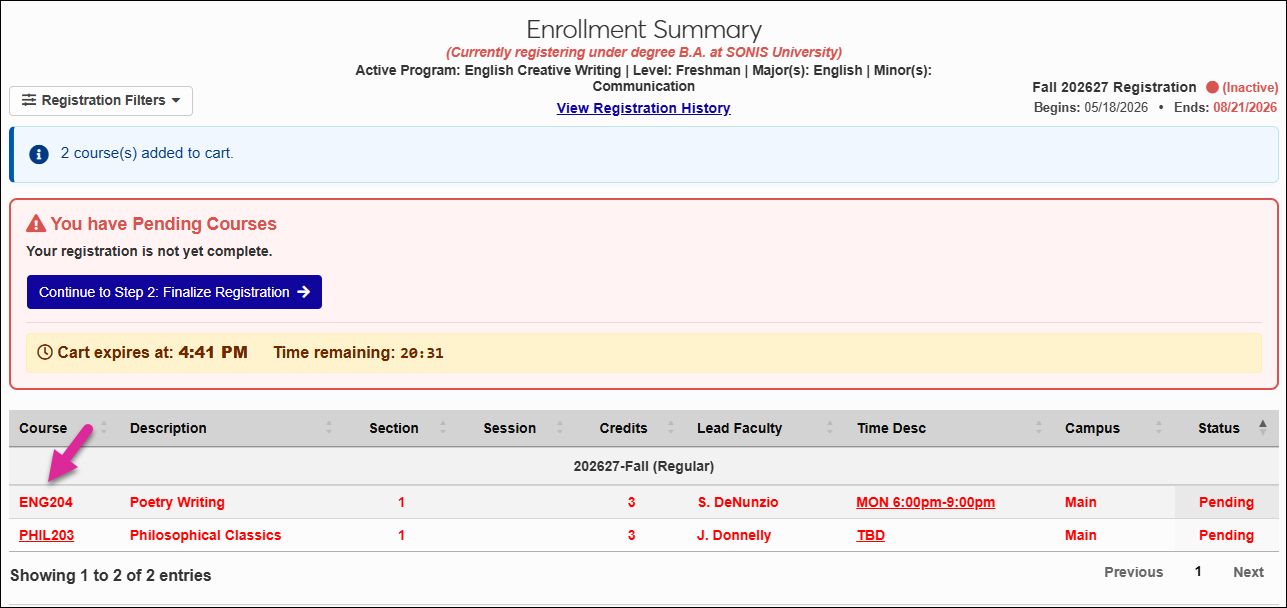
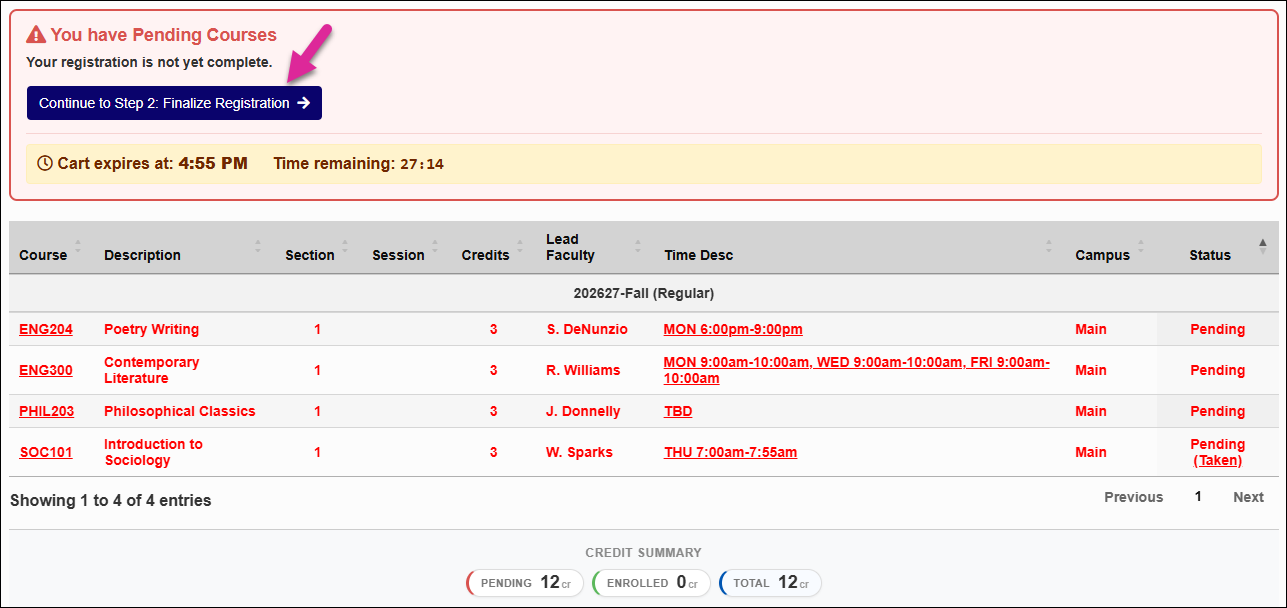
You can add additional courses to the cart and preserve the courses you've already selected. Your cart expiration timer will reset each time you add more courses.
Once you've added all the courses for this student, click Continue to Step 2: Finalize Registration.
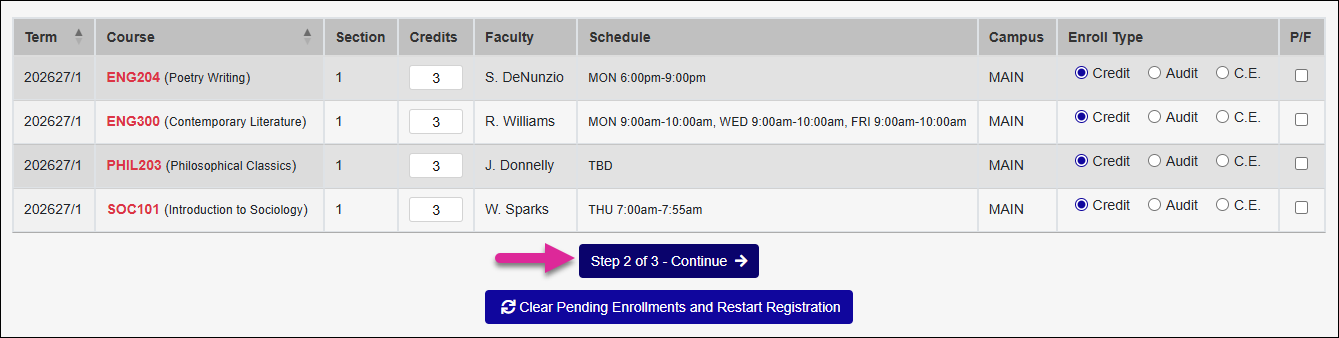
Depending on your school's setup in Web Options, you may be asked to select an Enrollment Type and/or choose whether the course will be taken with Pass/Fail or traditional grading. You may also have the option to edit the number of Credits that each course will be worth.
When you're ready to finalize the registration, click Step 2 of 3 - Continue.
Note
If you need to remove one or more courses, click Clear Pending Enrollments and Restart Registration before continuing.
The next page you see will vary according to your school's registration settings.
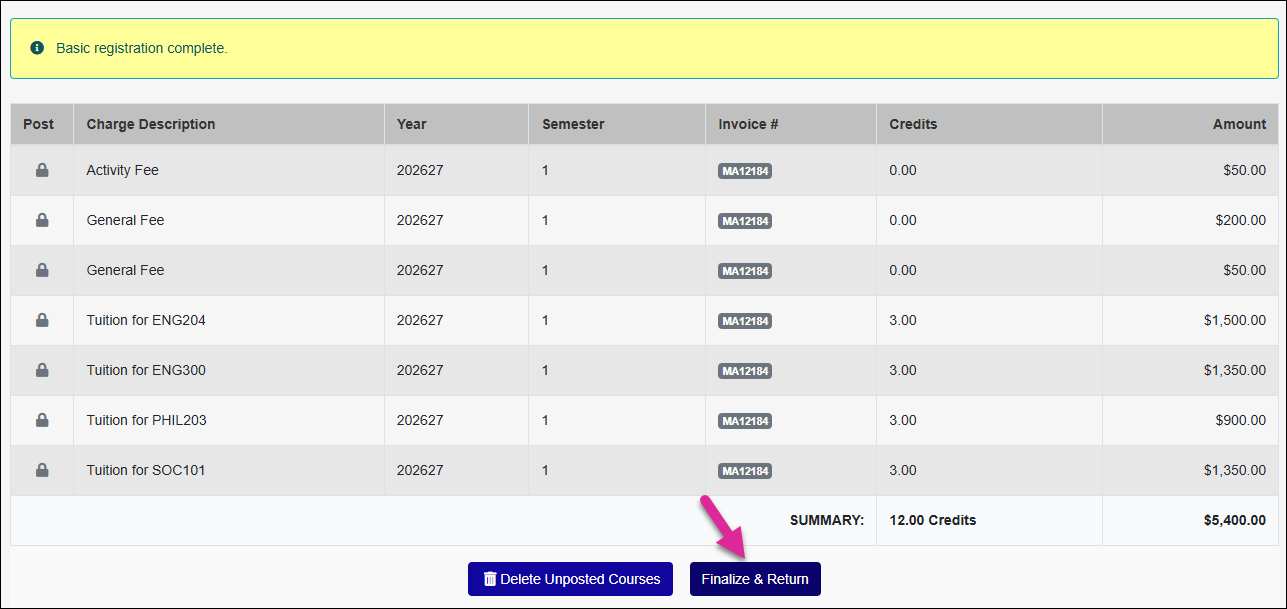
If your school uses Basic Registration, you'll have the option to Finalize & Return, completing the registration process, or Delete Unposted Courses and start over.
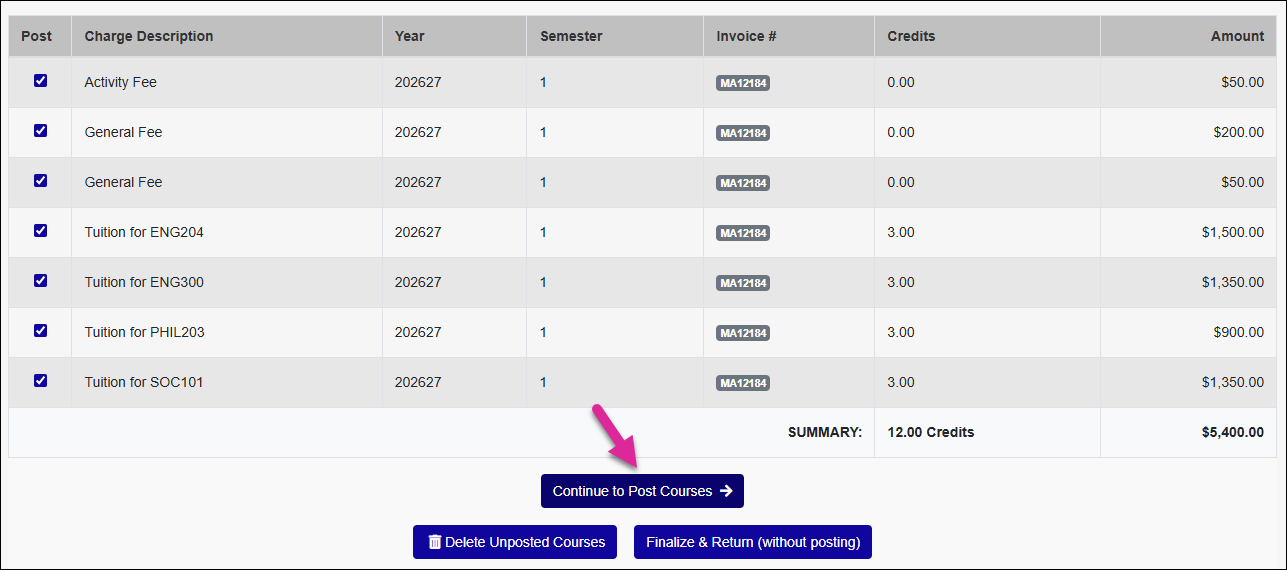
If your school uses the Post to Billing or Post to Pre-Billing option, you'll have the option to remove individual courses and fees by checking the box associated with that course. You can also Delete Unposted Courses and start over.
To finish the process, either click Continue to Post Courses to complete the registration and post these tuition charges to billing or pre-billing or Finalize and Return (Without Posting) to complete the registration but not post the charges.
Note
If your school uses Basic Registration or Post to Pre-Billing, or your school uses Post to Billing but you chose not to post the charges, you'll be able to remove the courses you registered for from the Enrollment Summary section by clicking on the course name. If you or someone else posted the courses to billing, you'll need to use the Reverse Tutition feature to undo the registration.