Major Functions
Overview
The Major Functions utility is used to manage majors, minors, and concentrations. Major, minors, and concentrations are ways to identify a student's course of study. Typically, a major is a student's primary academic goal while their minor is a secondary goal, generally requiring less intense coursework. Concentrations are a focus area within the major. Most institutions set up their majors so that each major falls under a particular program and require that students be enrolled in the program that matches their major and vice versa, but SONIS does not require any direct linkage between programs and majors. This provides SONIS member schools more flexibility and allows for students to have multiple majors and/or minors without a system conflict.
Unlike programs, there is no default way to designate a set number of hours required to complete a major or minor within the SONIS system. However, institutions who wish to create specific requirements tied to their majors can create a Curriculum for each major and assign that curriculum to any student who enrolls in the major. A student's major and minor are directly linked the student's active Education record at the time when they were assigned. Majors and minors are stored in the same table. By default, all majors can be used as minors as well, but this feature can be turned off for any individual major per institutional preferences.
Add/Edit Majors & Minors
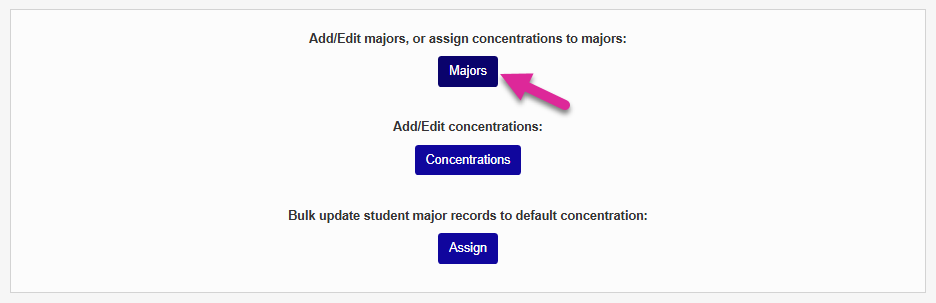
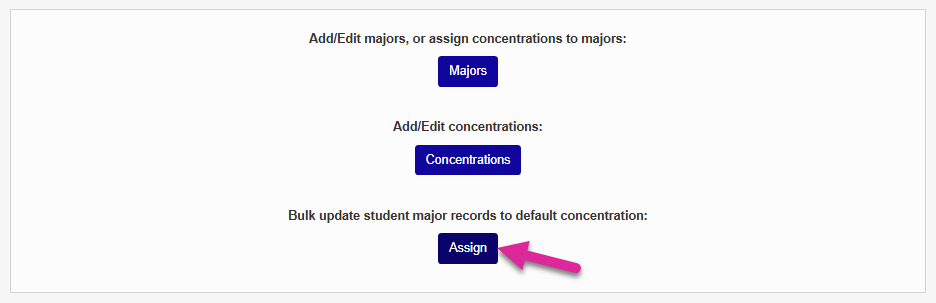
To create a new major or edit an existing major, navigate to Major Functions under the Systems hub. Click Majors.
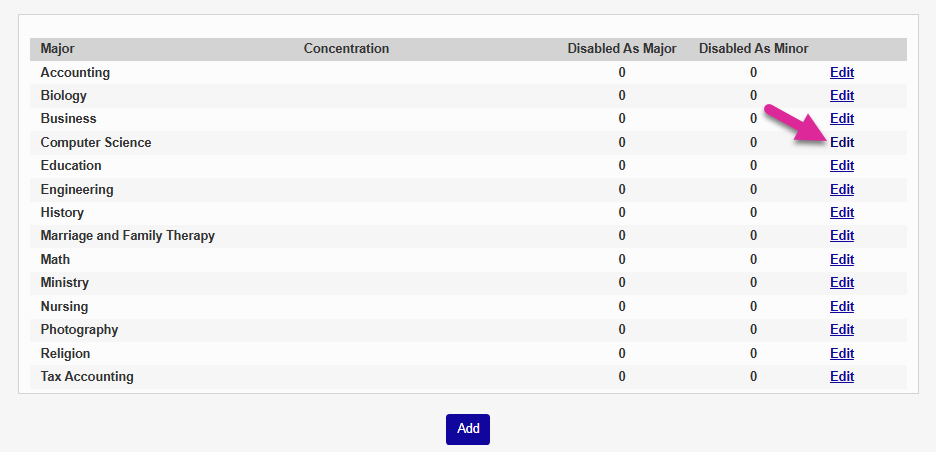
On the following page, click Add to create a new major or minor. If you already have majors added to your system, you can click Edit to make changes to one of them.

If you're adding a new major, give the Major a descriptive name. This field has a 60-character limit.
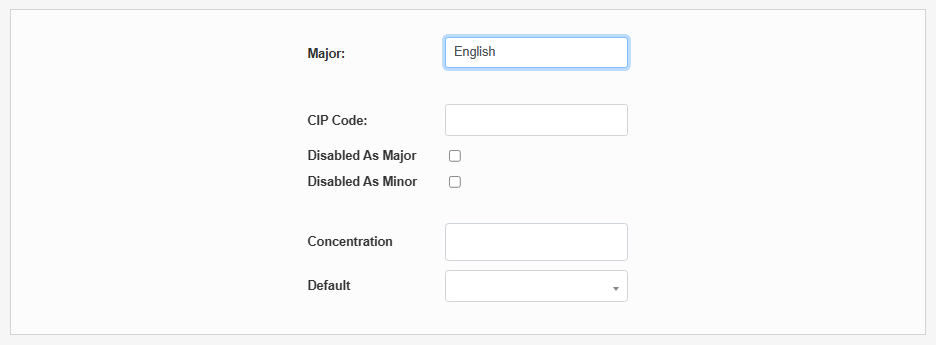
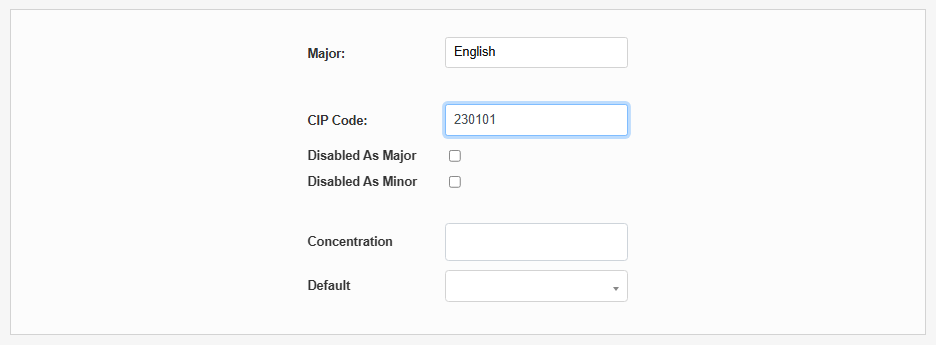
Fill in the CIP Code for the major. The CIP code is used by the National Student Clearinghouse to recognize the major when student data is exported. CIP codes can be obtained through the National Center for Education Statistics website. No punctuation should be included.
Check the Disabled as Major box if this entry should only be used as a minor. Check the Disabled as Minor box if this entry should only be used as a major. Leave both boxes unchecked if it can be a student's major or minor.
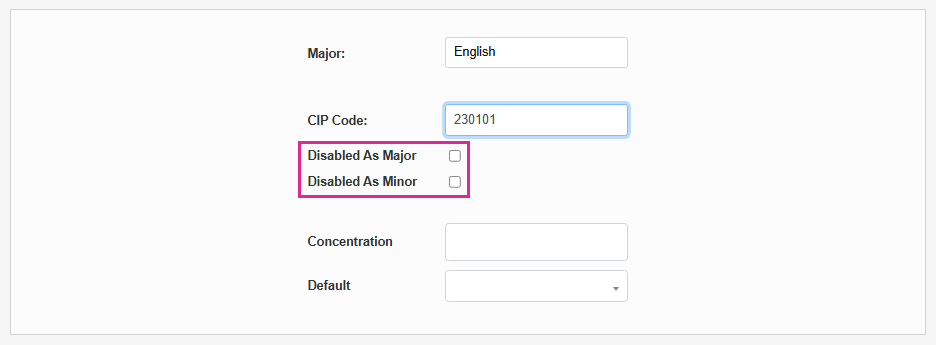
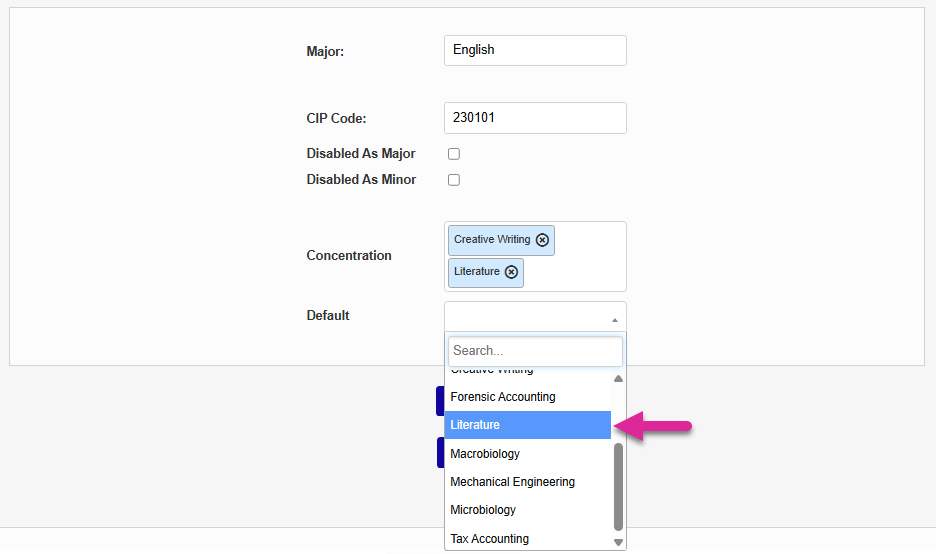
To associate one or more concentrations with the major or minor, select an option from the Concentration menu. Concentrations are also created through the Major Functions utility. Once they've been added to a major, they can be assigned to students enrolled in the major as needed. Concentrations are optional.
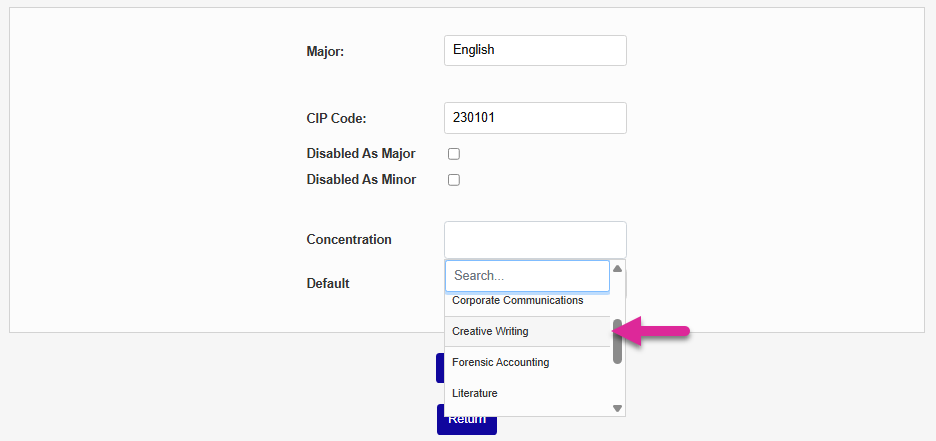
You can also select a default concentration from the Default menu. Once you've set a default, you can assign the default to every student who is enrolled in the major and does not have a concentration already.
Click Submit to save the changes and create or update the major/minor.
Note
When editing an existing major, you cannot change the name since this is the text that the system uses to identify it. If a major has not been added to a user's record and does not have any concentrations associated with it, you can delete it. Otherwise, the Delete button does not appear.
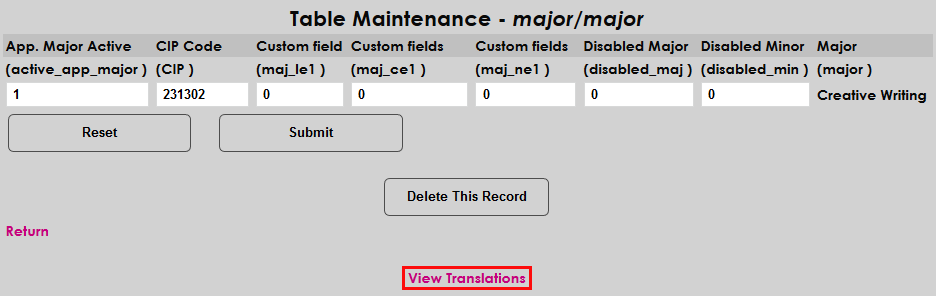
Translations
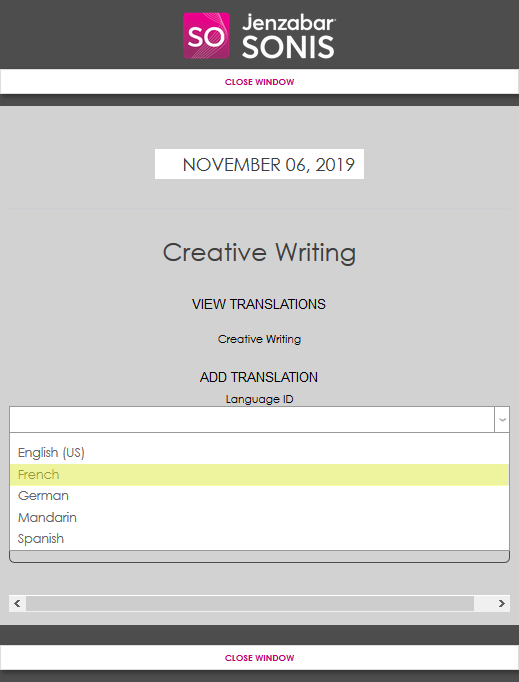
For schools that have the SONIS multi-language function turned on, a View Translations link is available when editing majors in Table Maintenance. Click the link to add a translation for the major. A pop-up window will open.
Select a language from the Language ID dropdown menu. Language IDs are created in the Languages table under Table Maintenance.
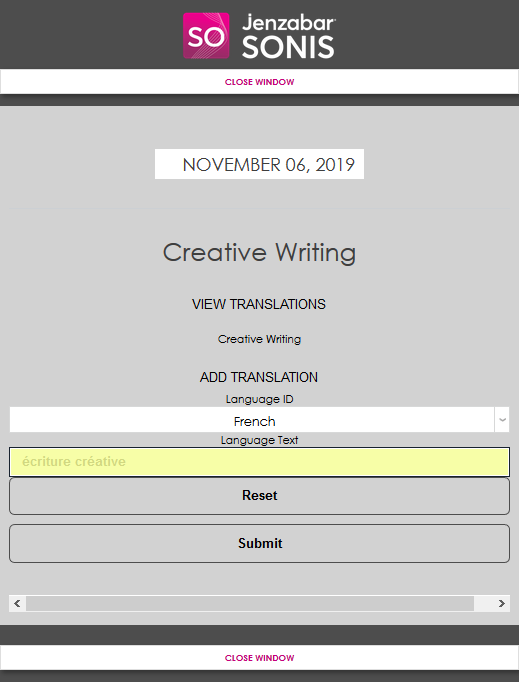
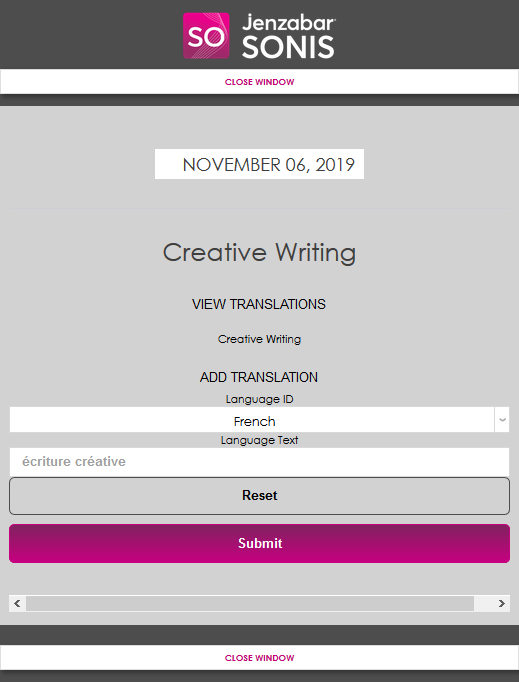
Create a translation for the major in the Language Text field and click Submit to save the translation.
Once translations have been created, click the View Translations link again to view them and click on the language text to make changes.
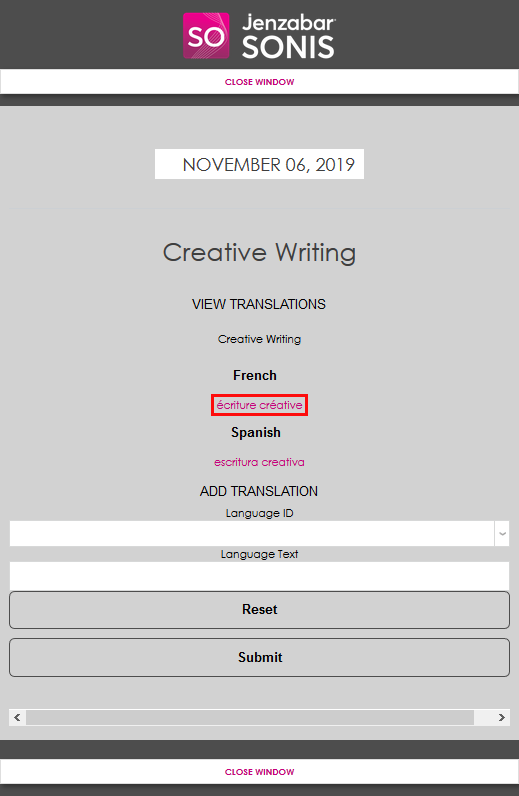
Once activated, translated majors and minors will display based on the users preferred languages in all portals.
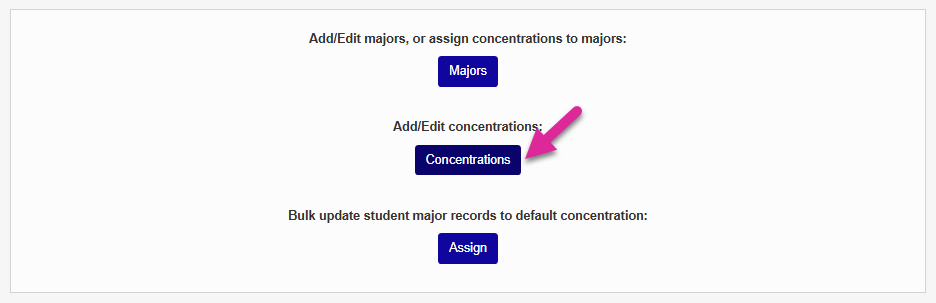
Add/Edit Concentrations
To add a new concentration or make changes to an existing concentration, click the Concentrations button.
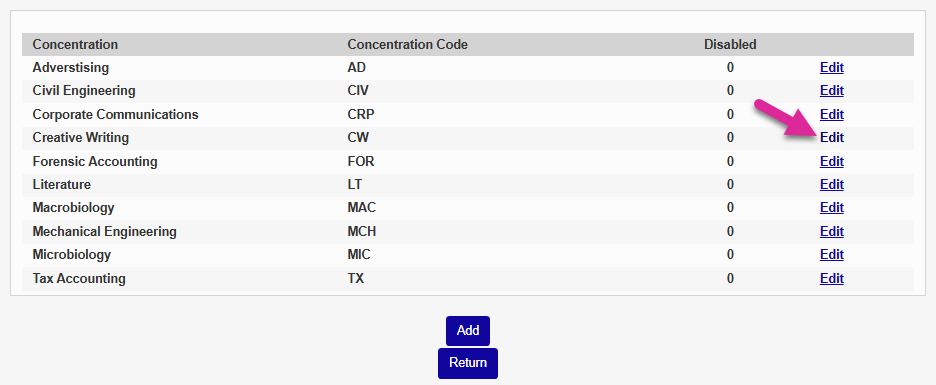
On the following page, click Add to add a new concentration.

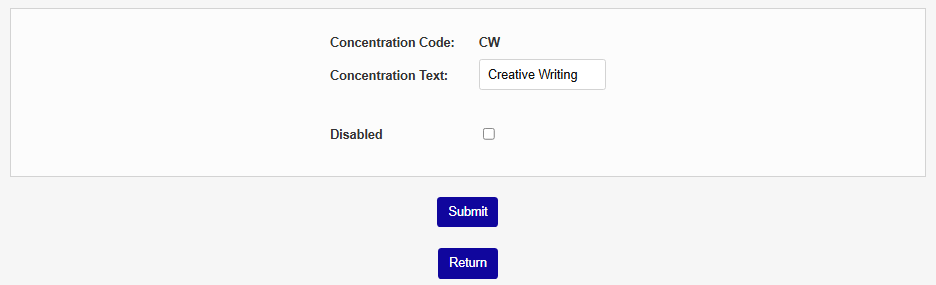
If you're adding a new concentration, begin by creating a Concentration Code. This is the code that the system will use to identify the code behind the scenes. This field has a five-character limit.
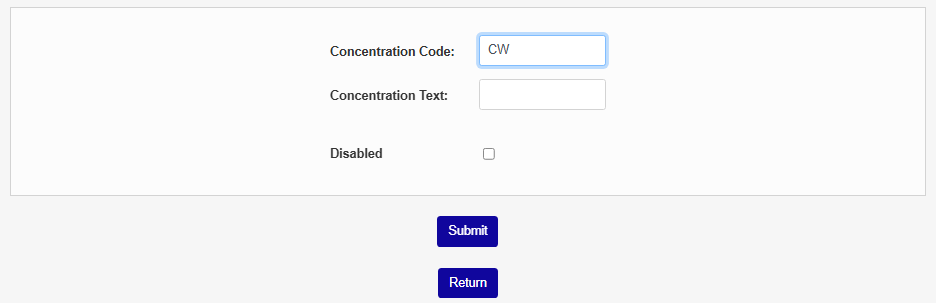
Use the Concentration Text field to name the concentration. This is the name that will appear throughout the system. This field has a 60-character limit.
Check the Disabled box if you want to create the concentration but have it unavailable to assign. Click Submit to add the concentration.
To make changes to an existing concentration, click the Edit button.
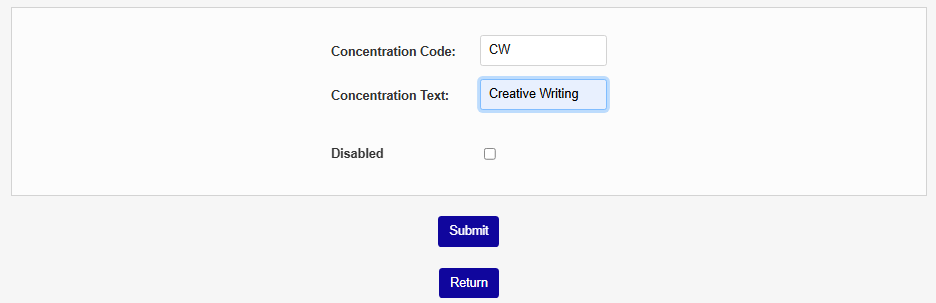
From here, you can change the Concentration Text, the label that appears throughout the system, or Disable the concentration to prevent it from appearing in menus as an option.
Note
If a concentration is not assigned to a major and has not been added to a user's record, you can delete it. Otherwise, the Delete button does not appear.
Assign Majors, Minors, & Concentrations
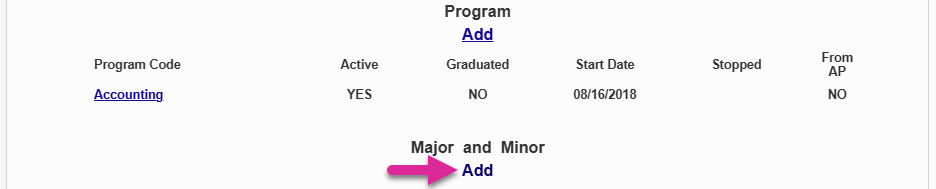
To assign a major, minor, or concentration to a student, navigate to the Majors page under the Users hub. Or navigate to the student's Education page and select the active education record. Click Add under the Major and Minor heading at the bottom of the page.

On the Majors page, select a major from the Major dropdown menu and a minor from the Minor menu, if applicable.
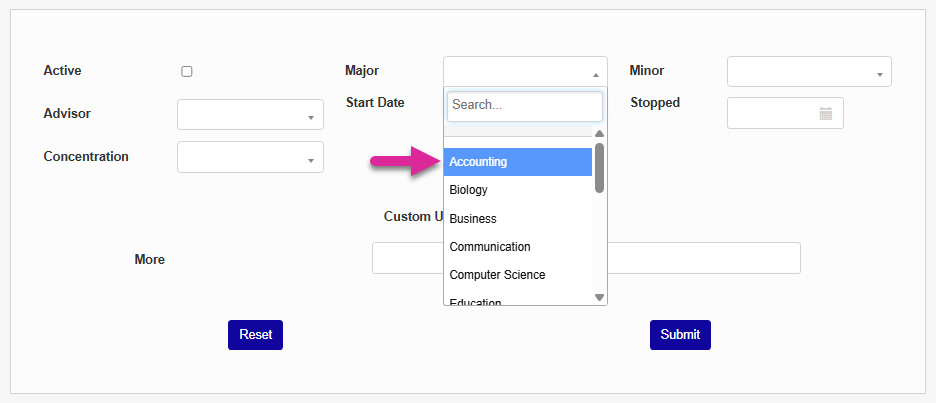
Some schools may offer a major advisor that's separate from the student's primary academic advisor stored in their Advisors record. To set a major specific advisor, select an advisor from the Advisor dropdown menu. Alternately, schools can choose to select the same academic advisor already assigned to the student so it will display on this page as well. The field is optional.
When you select a major, the Concentration drop-down menu will populate with any concentrations linked to the major. Select a concentration, if applicable.
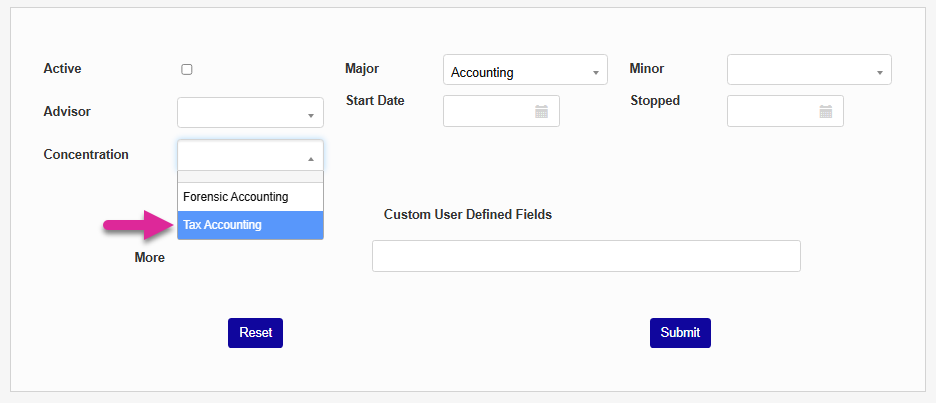
Select a Start Date for the major and set the major as Active.

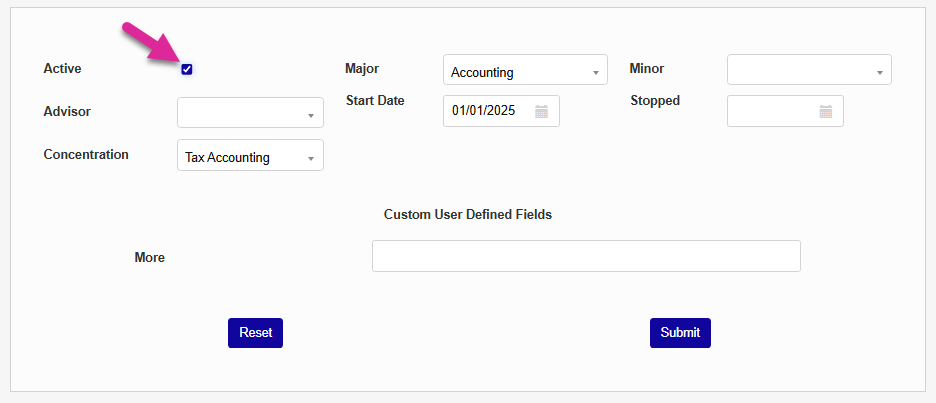
If the major record is no longer active, select a Stopped date and ensure that the Active box is not checked. Click the Submit button to assign the major, minor, and/or concentration.
Assign Concentrations in Bulk
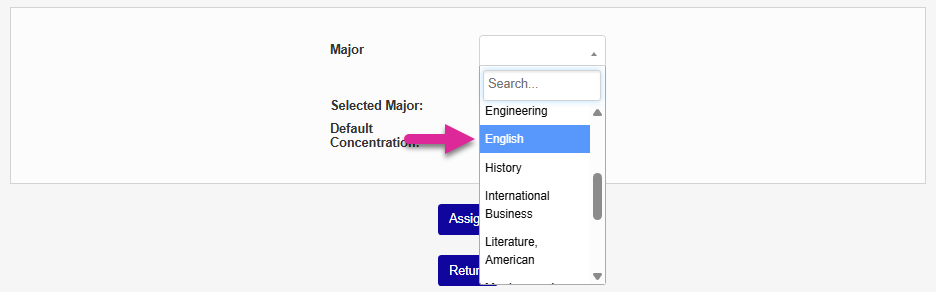
To assign the default concentration to users who already have a major, navigate to Major Functions under the Systems hub. Click Assign.
Select a Major from the drop-down menu. Only majors that have a default concentration
Note
All majors will display, but only majors that have a default concentration can be assigned in bulk.
The default concentration is listed here so you know what you're assigning. Click Assign to complete the process.
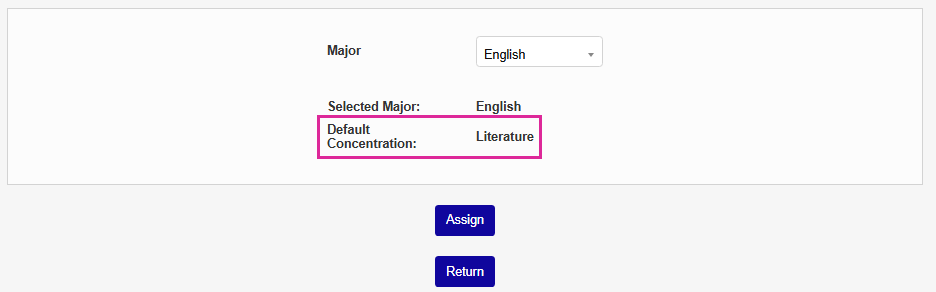
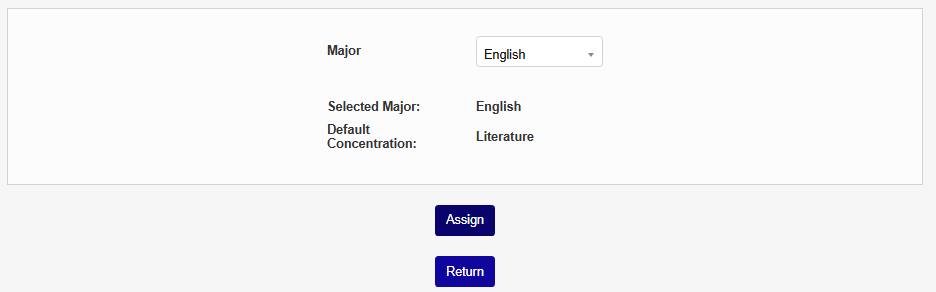
All users who are assigned to the major you selected who did not have a concentration already will now have the default concentration you defined.