Mailchimp Integration
Overview
Mailchimp is an email marketing service that helps clients create custom emails and facilitate ongoing outreach campaigns. Schools use it for tasks such as emailing prospects, donors, alumni, and others. Jenzabar SONIS offers a two-way API integration with Mailchimp that uses the List Management functionality to manage Mailchimp users and both import and export data. The Mailchimp API allows this process to occur seamlessly without continued manual updates.
Mailchimp Setup
The first step to integrating Mailchimp with SONIS is, of course, to create a Mailchimp account. Clients can create an account for free from the Mailchimp website.
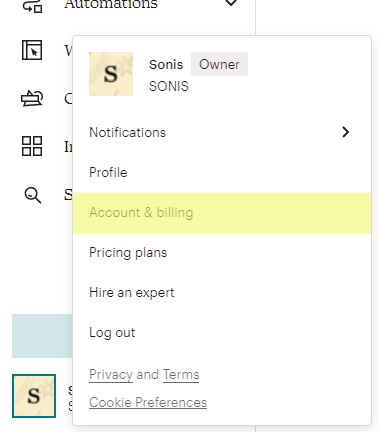
After logging in to Mailchimp, click on the account name in the lower left-hand corner and select Accounts and billing.
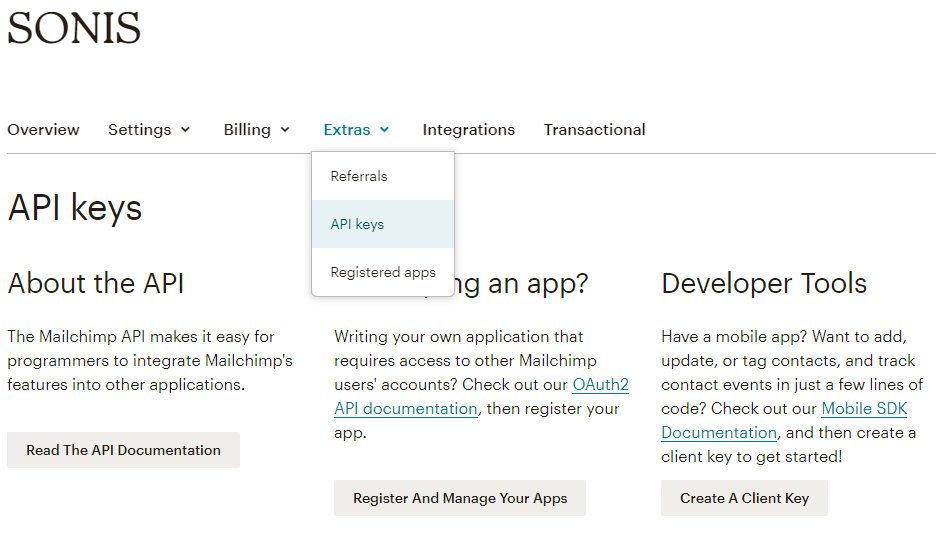
On the next page, select API Keys under the Extras tab.
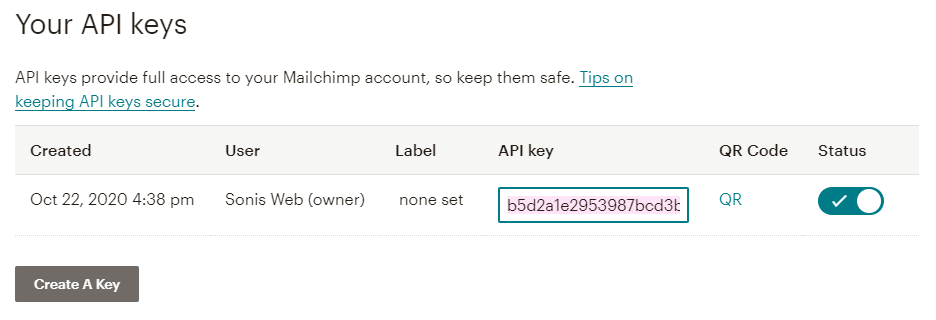
Under the Your API Keys section, click Create a Key.
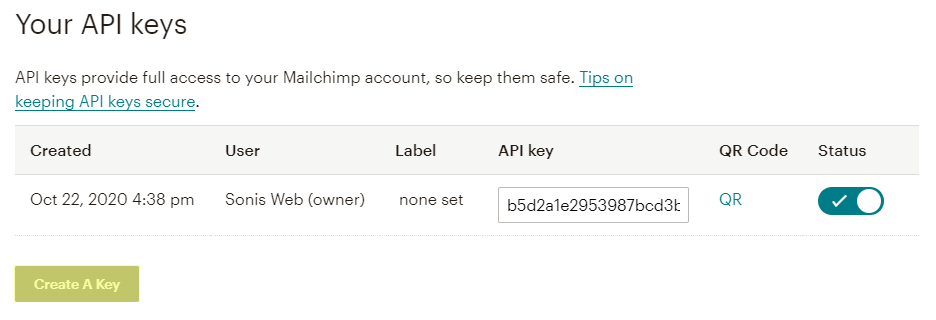
Copy the API Key value for use in the next step of the process.
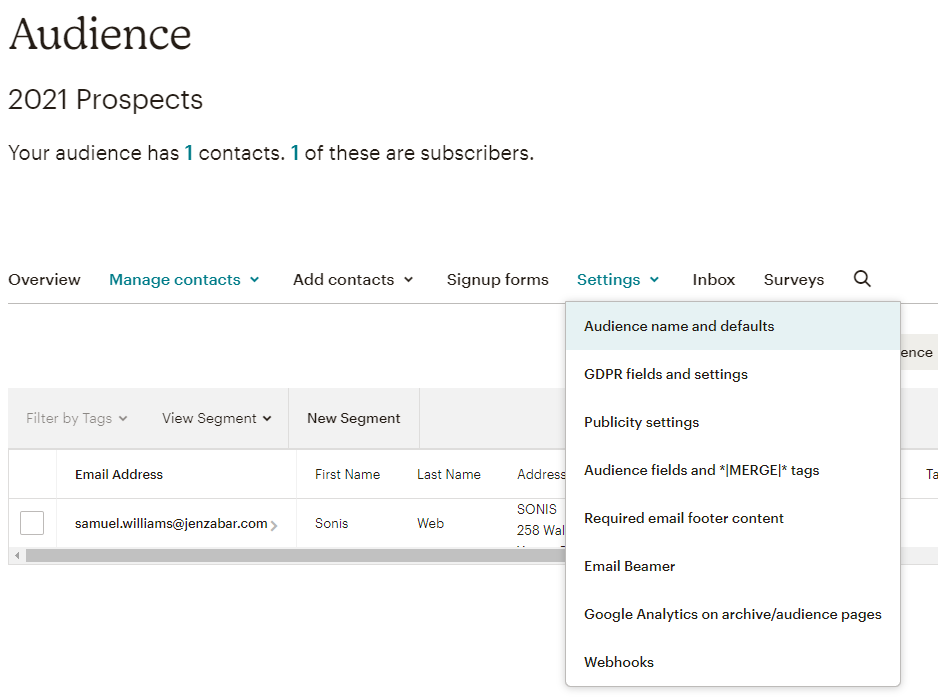
Next, navigate to the Audience tab from the left-nav menu and then select All Contacts. From that page, click on the Settings tab and then Audience Name and Defaults.
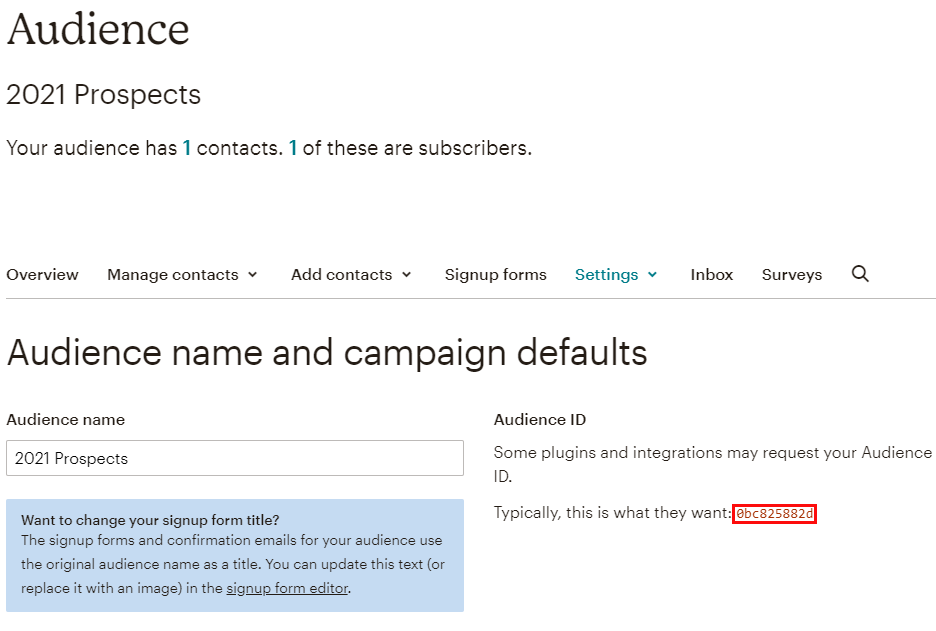
Copy and save the alphanumeric value in the Audience ID column.
Mailchimp Utility Page
Mailchimp Authorization
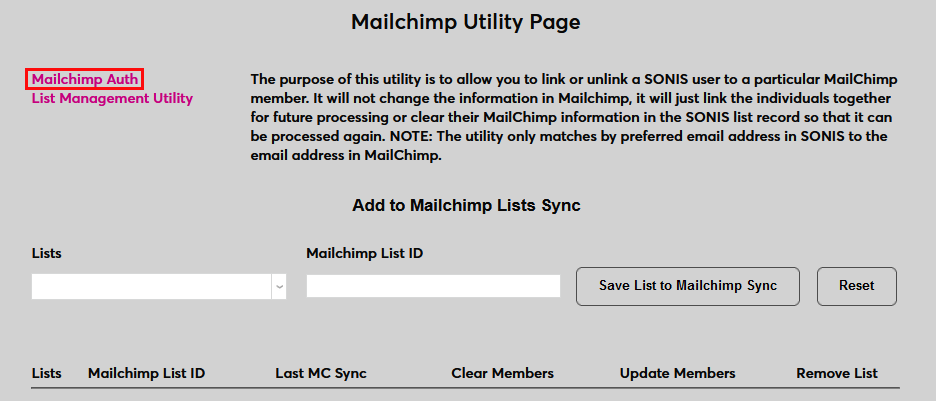
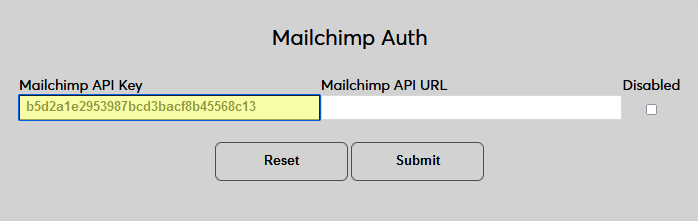
Once the API has been created and the needed values have been saved, navigate to the Mailchimp Utility Page to continue the setup process. Click Mailchimp Auth to begin. A new window will open.
In the pop-up window, enter the API key created earlier in the Mailchimp API Key field. Remove the dash and the final three characters from the end of the key as this section is not used. Remember this value as it will be used in the next step.
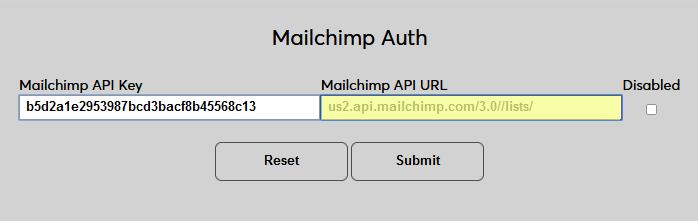
Next, paste the following URL into the Mailchimp API URL field, replacing the xxx with the final three characters of the Mailchimp API key: http://xxx.api.mailchimp.com/3.0//lists/.
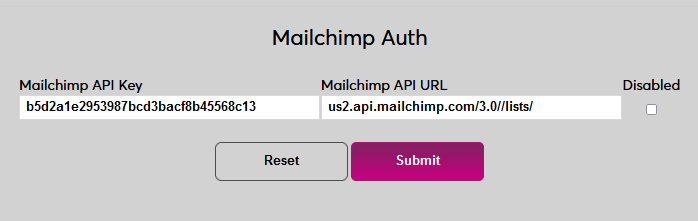
Leave the Disabled box unchecked to keep it enabled. Click Submit to save the changes and create the authorization.
List Management
The page also includes a link to the List Management Utility where administrators can view lists and add and remove members.


Visit the List Management Utility wiki page for more information on this process.
Mailchimp Lists Sync
Adding Lists
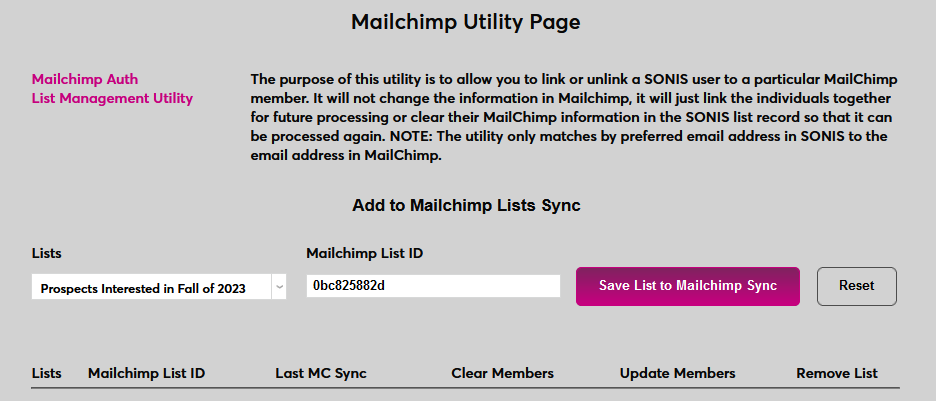
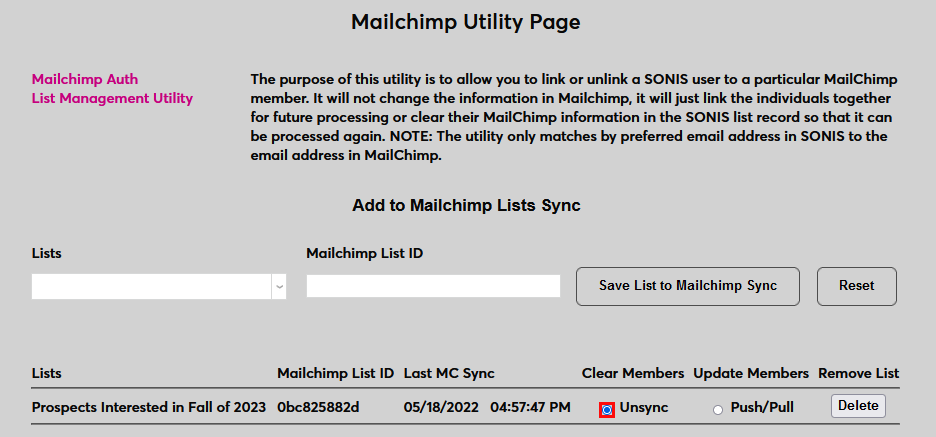
The Mailchimp Lists Sync feature allows for the sending and receiving of user data to and from Mailchimp. To add a new list to be synced with Mailchimp, select the list from the Lists dropdown and enter the Mailchimp List ID copied from the Audience Name and Defaults tab in Mailchimp in the Mailchimp List ID field.
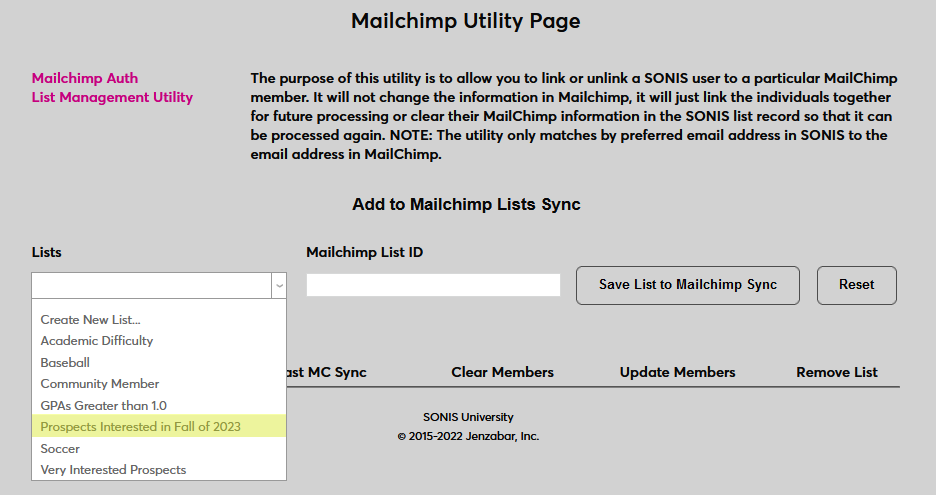
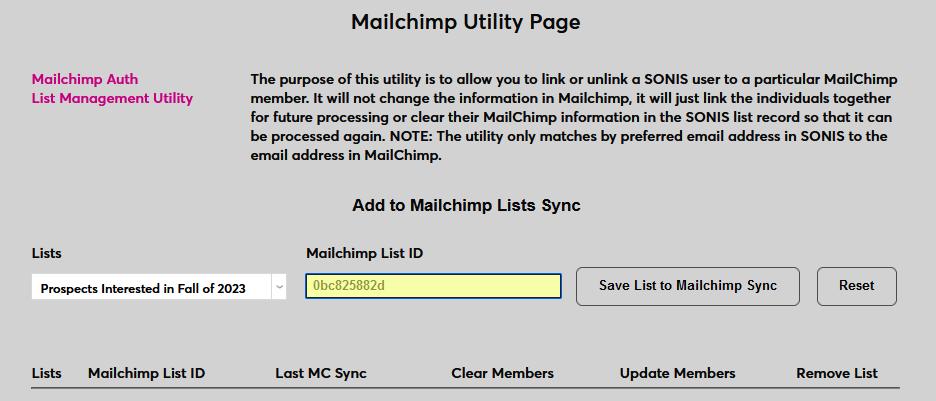
Click Save List to Mailchimp Sync to add the list.
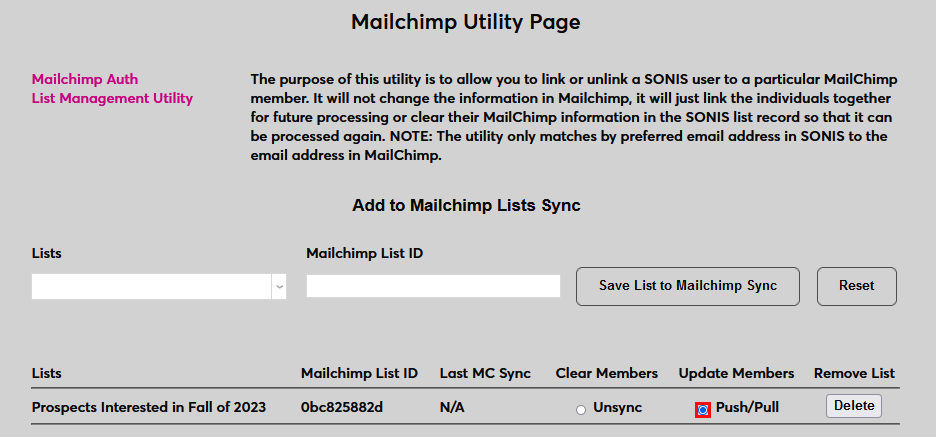
Note that multiple SONIS lists can be linked and synced to a single Mailchimp Audience ID.
Pushing Data to Mailchimp
Once a SONIS list has been associated with a Mailchimp list ID, click the Push/Pull button under the Update Members column to send user data to Mailchimp. Note that only the user's name and email address is sent to Mailchimp. Mailing address data is not included.
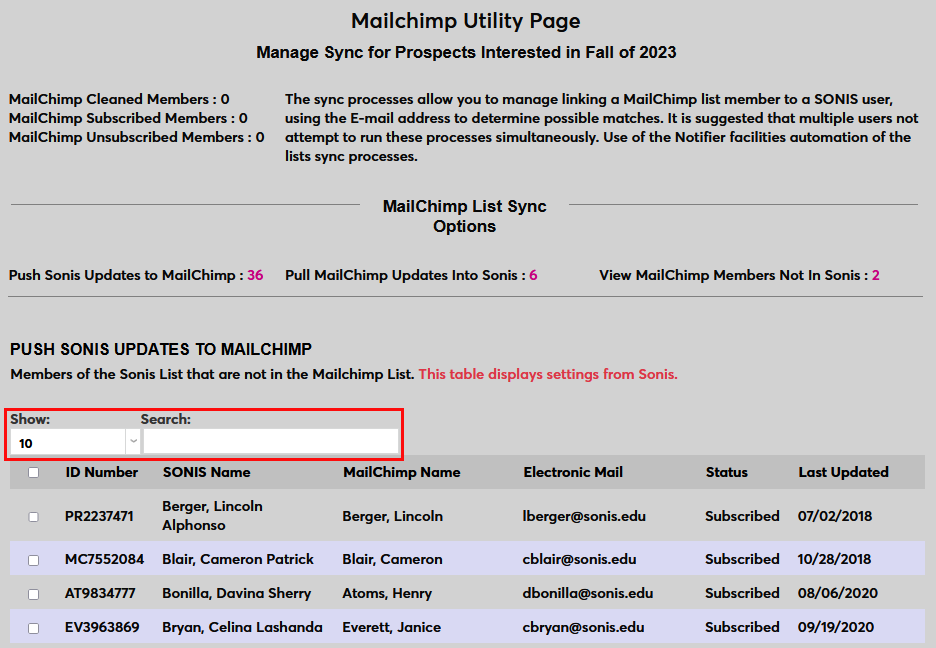
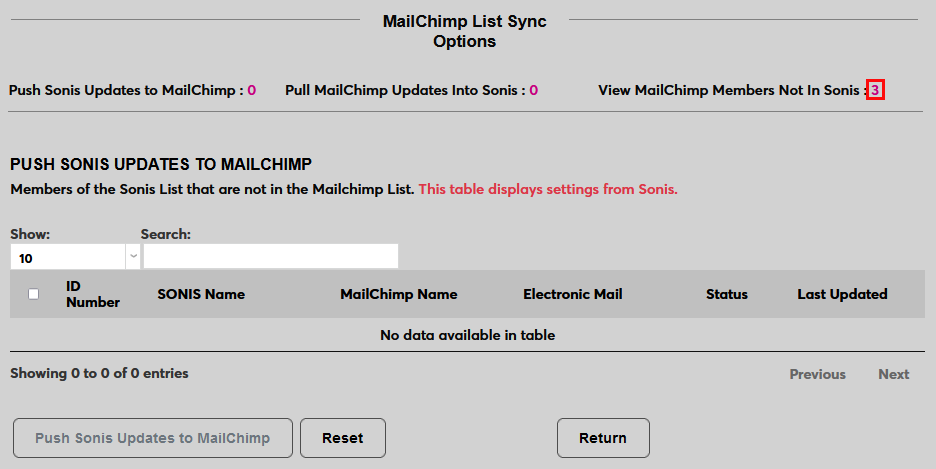
The next page lists all of the members of this list. Click the number after the Push SONIS Updates to Mailchimp label to display only users that are in Jenzabar SONIS and not in Mailchimp if there are additional users displayed.
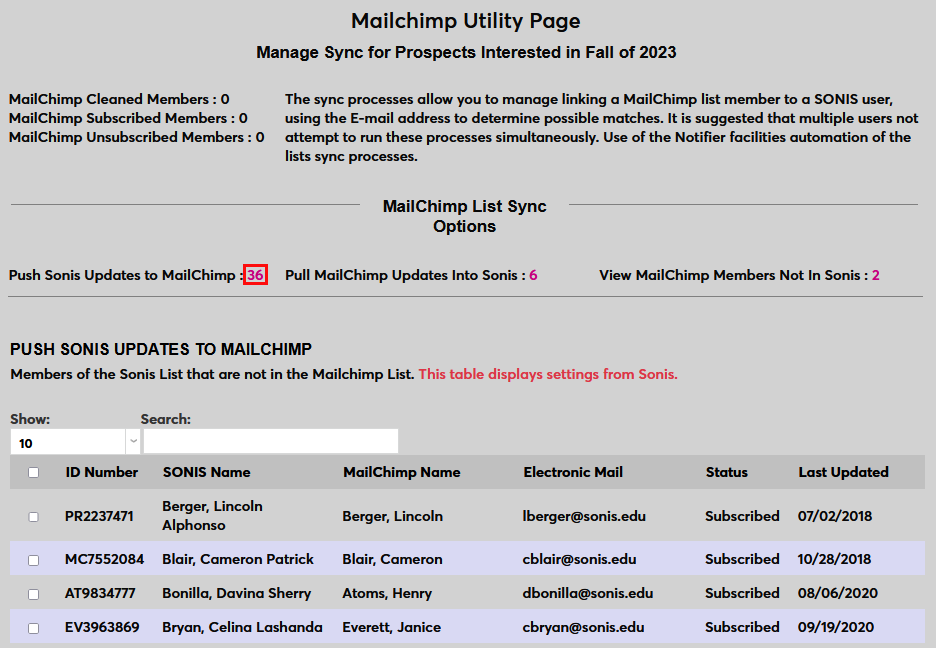
The display can also be altered using the Show Menu and the search bar.
Check the box at the top of the left-hand column to check all users or check and uncheck them individually to send only a partial list.
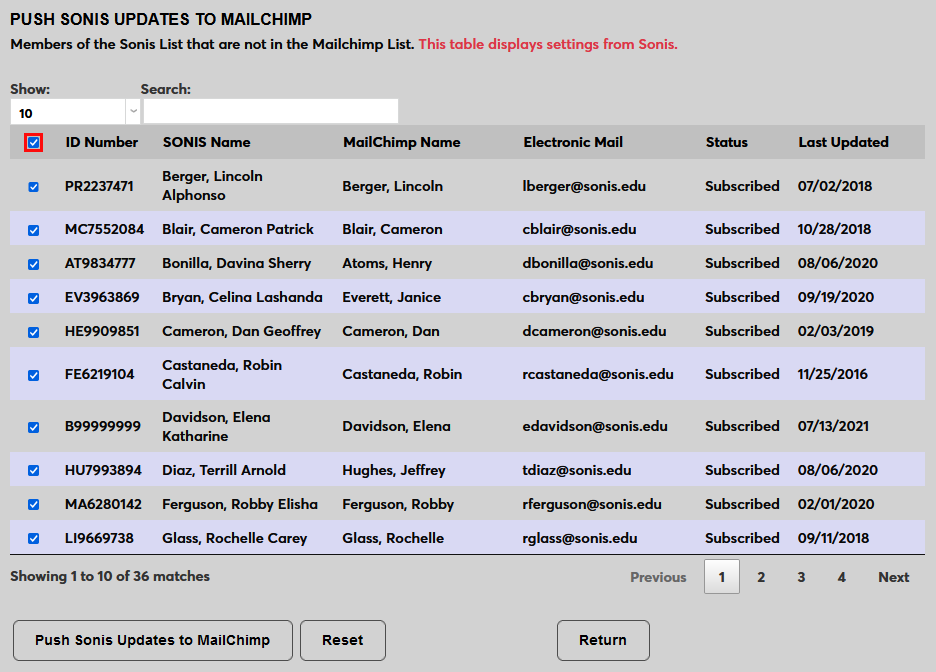
Click the Push SONIS Updates to Mailchimp button to send the user data to Mailchimp.

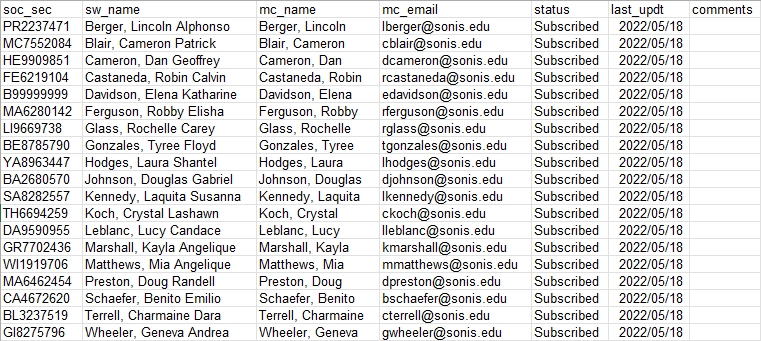
Once the records have been sent, administrators can click the Mailchimp Subscribed Members link to download the user data as an Excel file.
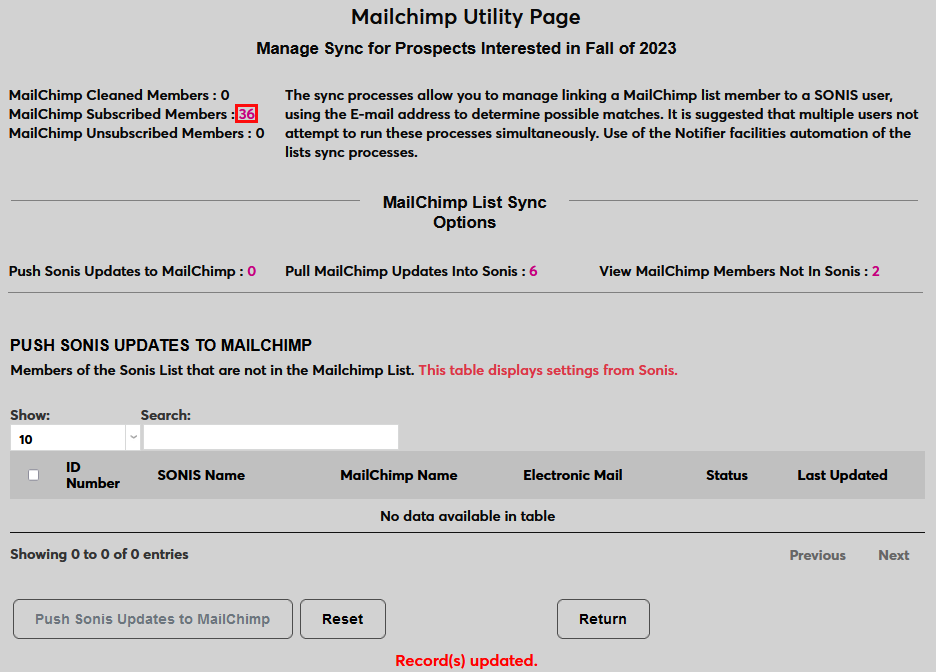
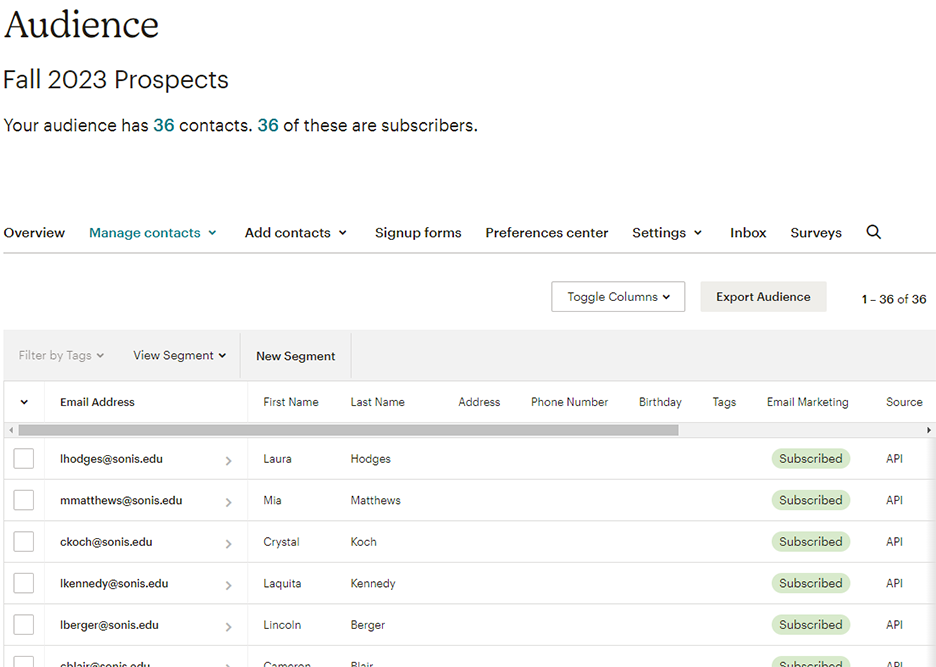
The users from the list will now be available in Mailchimp, listed as Subscribed.
Pulling Data from Mailchimp
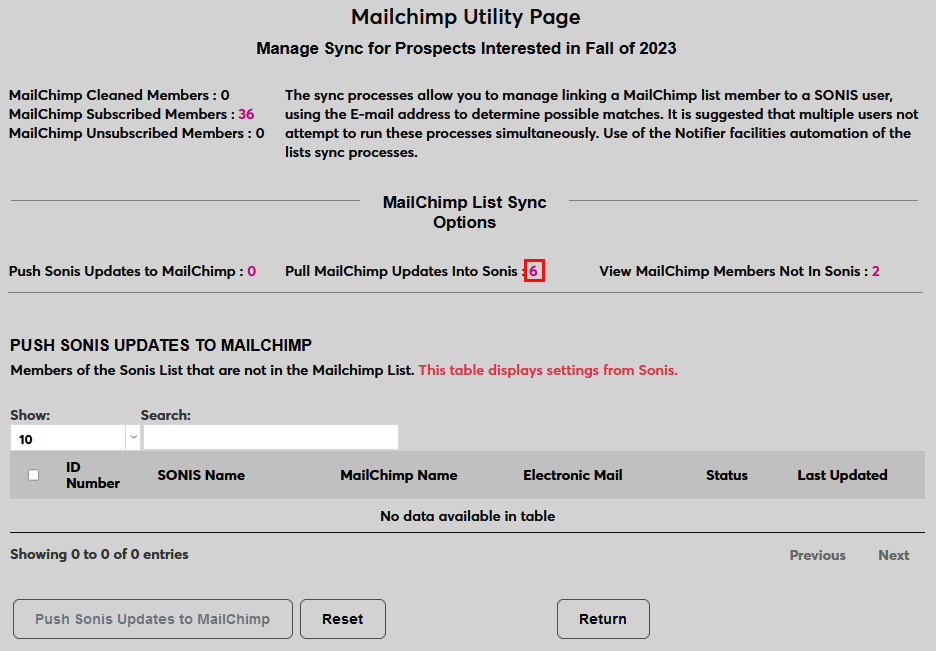
The Mailchimp Utility also offers the ability to pull user data from Mailchimp into SONIS. From the List Sync page, click the number link marked Pull Mailchimp Updates Into SONIS.
There are three things to notice in this Mailchimp Updates list. The first is a set of matching records, all with the same email address. While Mailchimp will not allow the same email address to appear in an Audience more than once, duplicate records can sometimes make their way into SONIS because the user filled out the Prospect Inquiry Card more than once with slightly different information, the same person was inadvertently imported by spreadsheet or added manually more than once, etc.
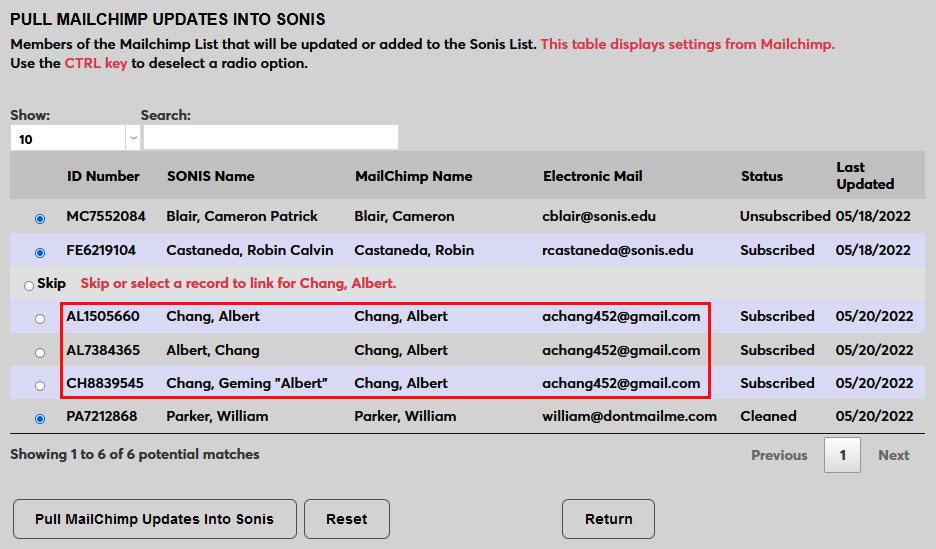
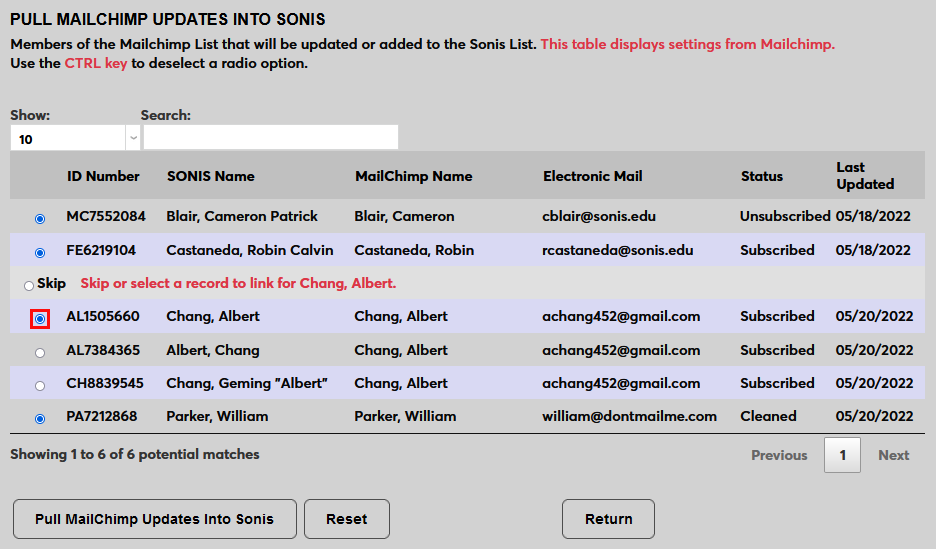
Select one of the users to add to the list. The others will be ignored by this process and should be removed from the SONIS system. The others will be marked No Sync/Mailchimp Error in their Records.
Also take note of the user with the status of Unsubscribed. This user has been unsubscribed from the Audience in Mailchimp. Their Lists record will be updated to reflect this.
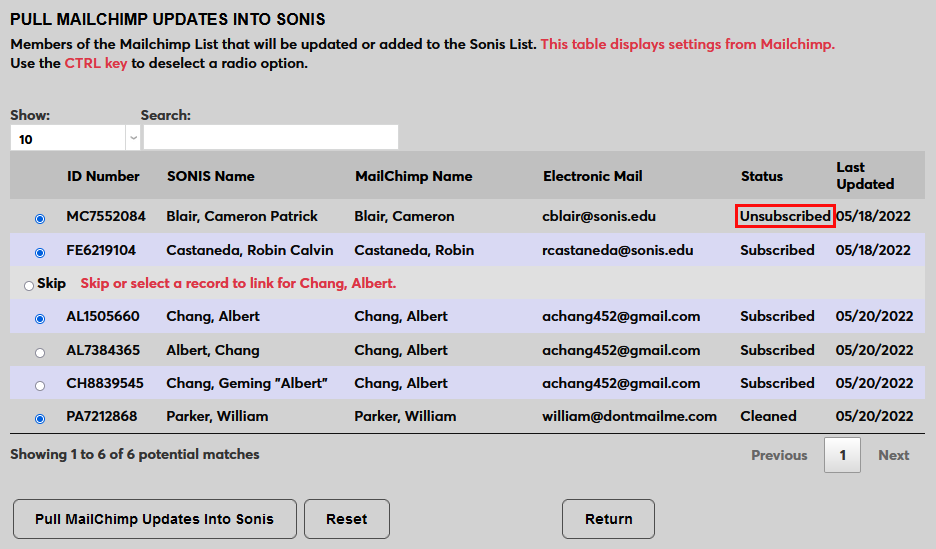
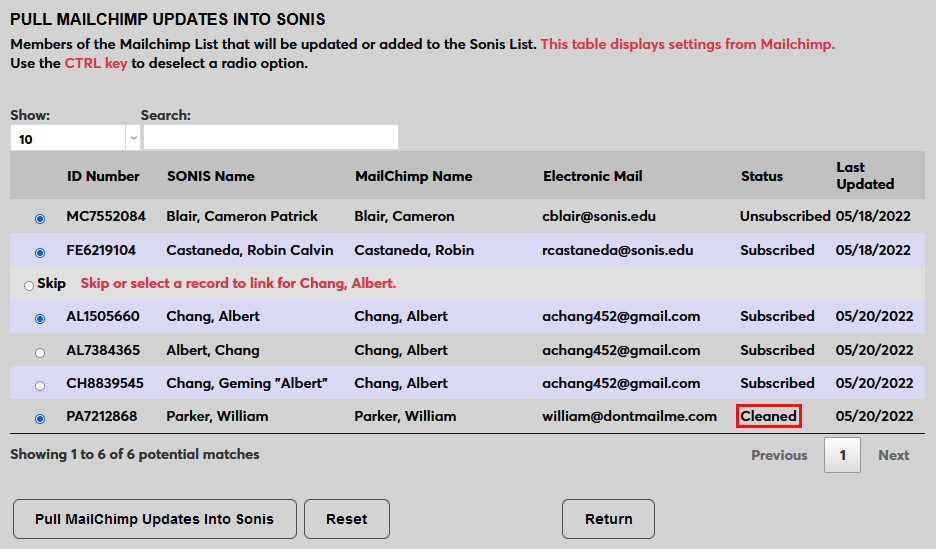
Finally, take note of the user with the status of Cleaned. The Cleaned designation means that Mailchimp has tried and failed to send email to the user and determined that the listed email address is invalid. Cleaned users should be pulled in as normal, but will not be added to the list.
Click Pull Mailchimp Updates to SONIS to complete the process.
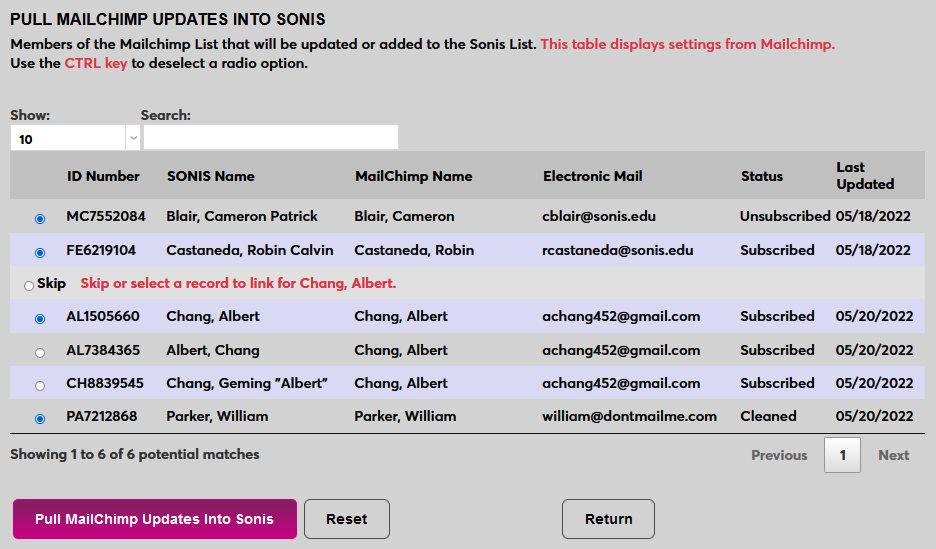
As noted above, duplicate records that are not pulled in are marked with a No Sync/Mailchimp Error flag on their Lists record if one exists. If no Lists record exists, the flag will still appear if one is created at a later date.
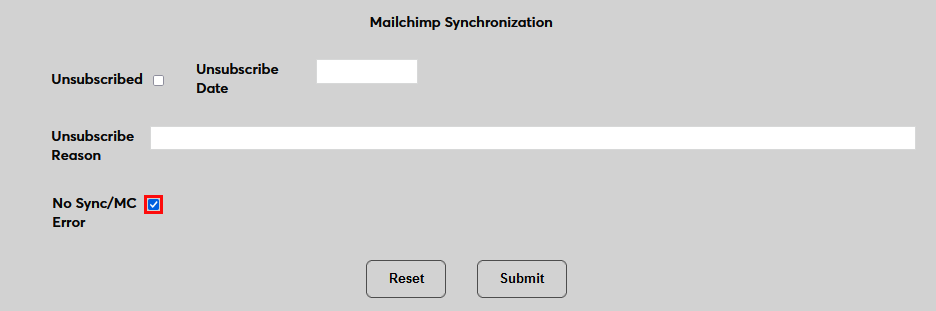
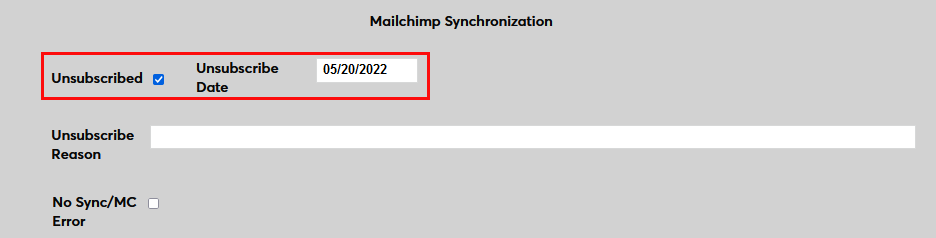
When a user with an Unsubscribed status is pulled into Jenzabar SONIS, that user's Lists record is updated with an Unsubscribed flag and an Unsubscribed Date in the Mailchimp Synchronization section.
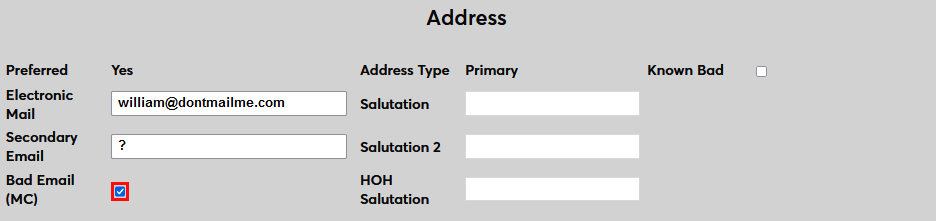
When a user with a Cleaned status is pulled into SONIS, that user's Address record is marked with a Bad Email (Mailchimp) flag and will not be synced with Mailchimp again. If the address is corrected, uncheck the box to allow the user can be synced again.
View Mailchimp Members Not in SONIS
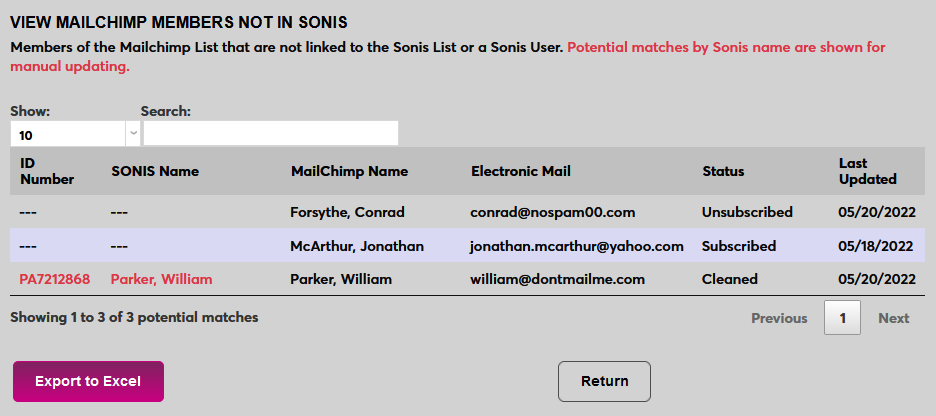
The last option available from the List Sync page is to View Mailchimp Members Not In SONIS. As with the other processes, click the link to view these users in a table below.
We see three users in this list, a user with an obviously fake email address who has been Unsubscribed in Mailchimp, the cleaned user who was pulled in the last import, and a new user who is Subscribed in Mailchimp.
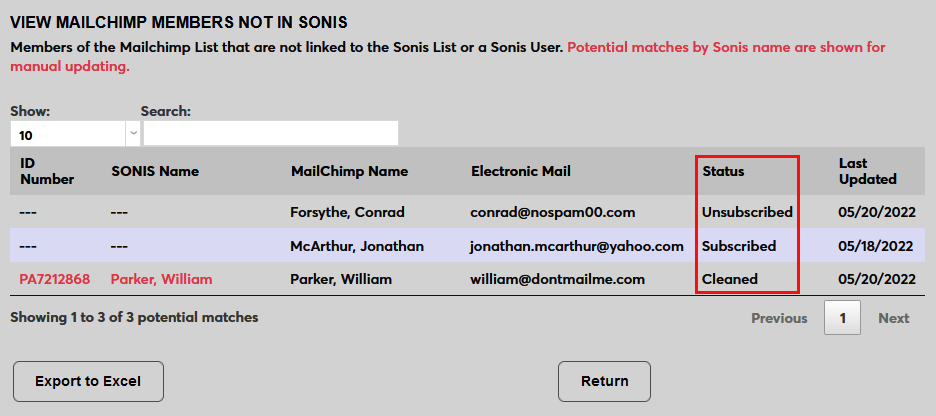
Since Mailchimp does not provide a module status for these users, they cannot be imported directly to Jenzabar SONIS. Instead, click Export to Excel to download this data as an Excel spreadsheet.

Unsync
If users were added to the Mailchimp sync in error or they should not longer be part of the Mailchimp Audience, they can be unsynced by clicking the Unsync button.
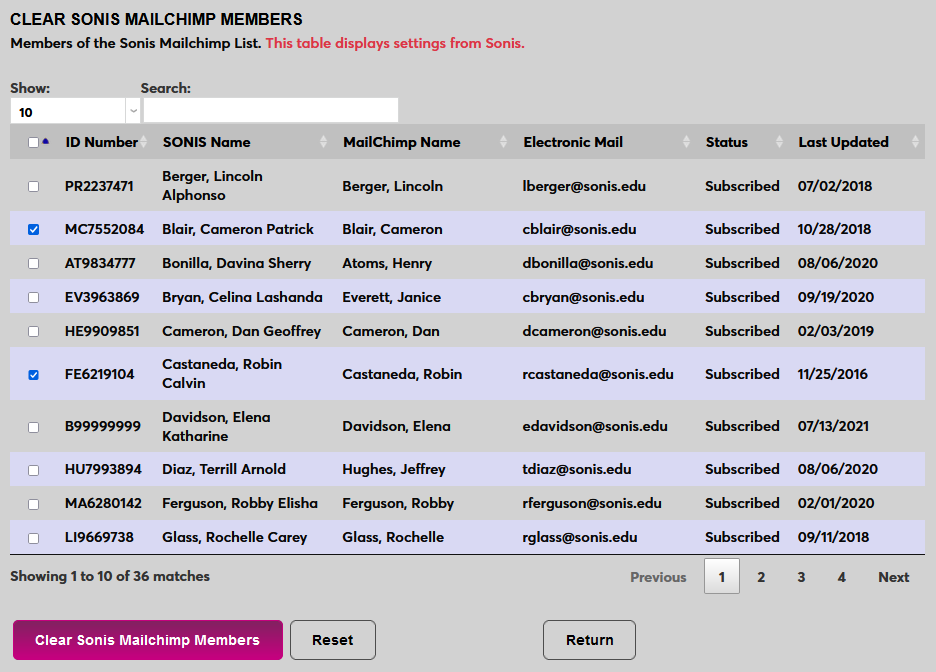
On the follow page, check the boxes that correspond to the records that should be unsynced.

Click Clear Mailchimp Members to continue.
Once these users have been unsynced, their Lists record is updated with a No Sync/Mailchimp Error flag. This flag can be removed to sync the user again.
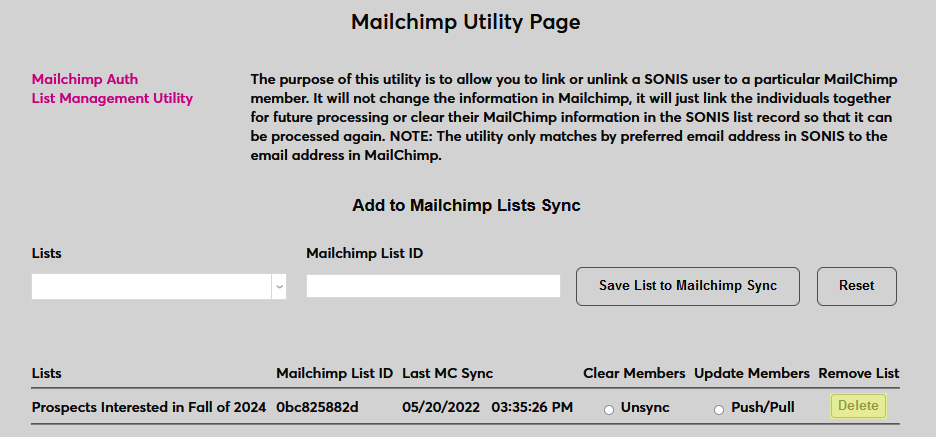
Delete List
To remove a list from the Mailchimp Utility, locate the list on the splash page and click Delete.
Records
Address
When a user with a Cleaned status is pulled into SONIS, that user's Address record is marked with a Bad Email (Mailchimp) flag and will not be synced with Mailchimp again. If the address is corrected, uncheck the box to allow the user can be synced again.
Lists
When a user with an Unsubscribed status is pulled into SONIS, that user's Lists record is updated with an Unsubscribed flag and an Unsubscribed Date in the Mailchimp Synchronization section.
When a user has been unsynced, their Lists record is updated with a No Sync/Mailchimp Error flag. This flag can be removed to sync the user again. The box is also automatically checked when there are duplicate records that are not chosen to be pulled in.
Notification/Timed Task
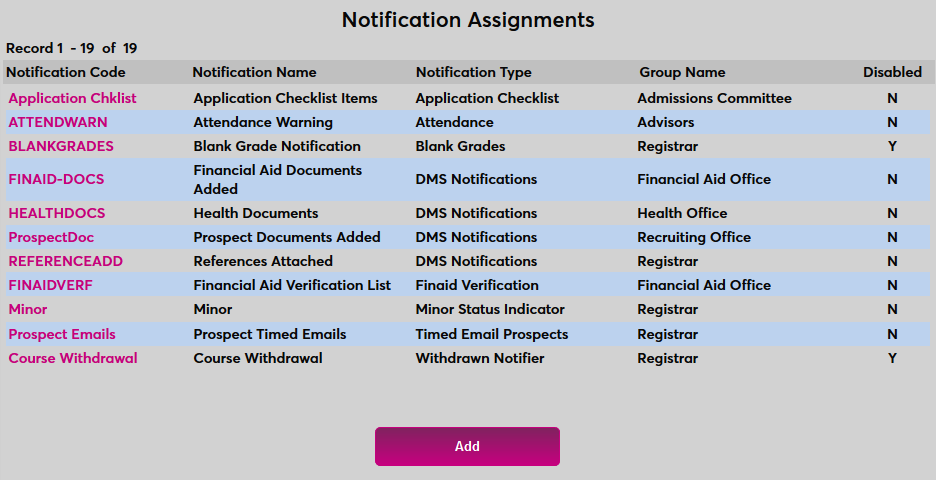
SONIS also offers a notifier and timed task that can be used to automate the push/pull process to and from Mailchimp. To begin setting them up, navigate to Notification Assignments under the Systems hub and click Add. Note that Mailchimp must be set up in the SONIS system before activating the notifier. An error message will appear if the setup has not been completed.
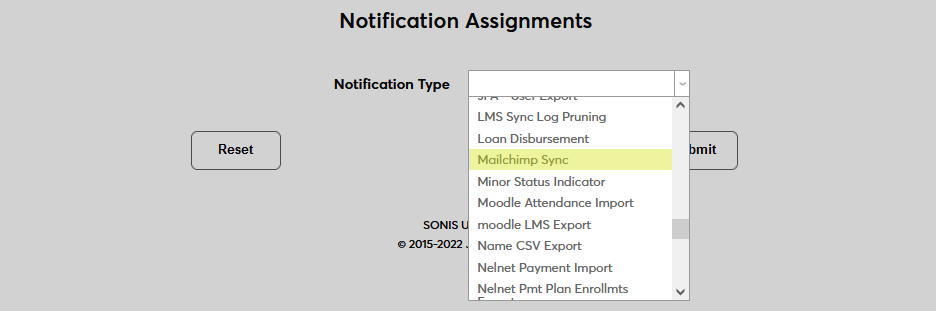
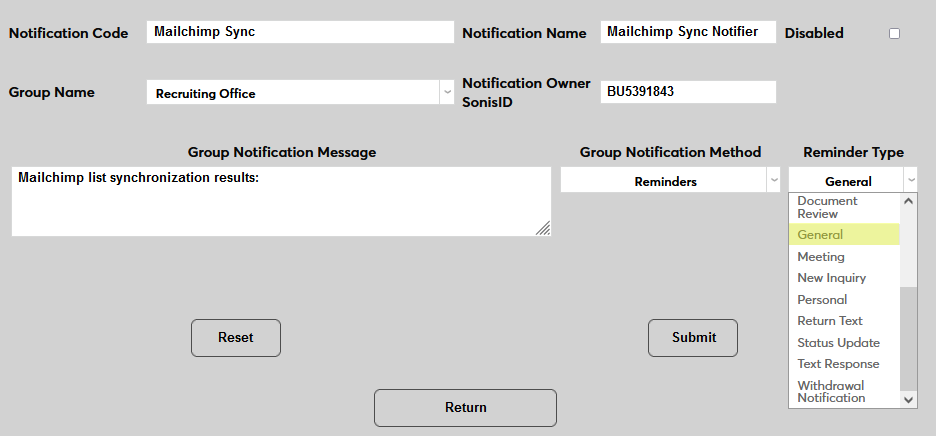
Select Mailchimp Sync from the Notification Type dropdown menu and click Submit.

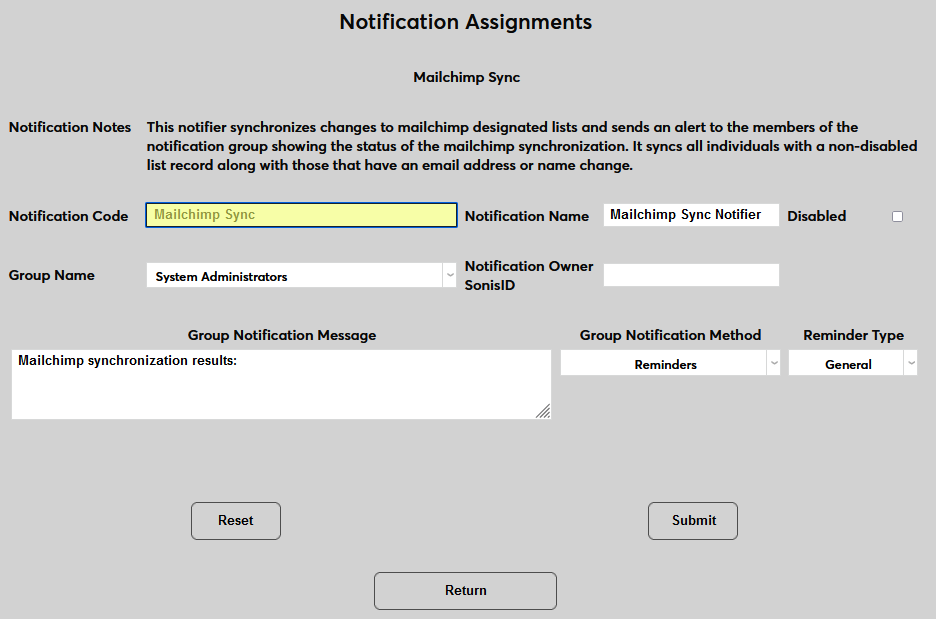
Next, create a Notification Name, a descriptor of the notifier's purpose with a 50-character limit, and a Notification Code, a shorter version of this name with a 20-character limit that the Jenzabar SONIS system will use internally to identify the notifier.
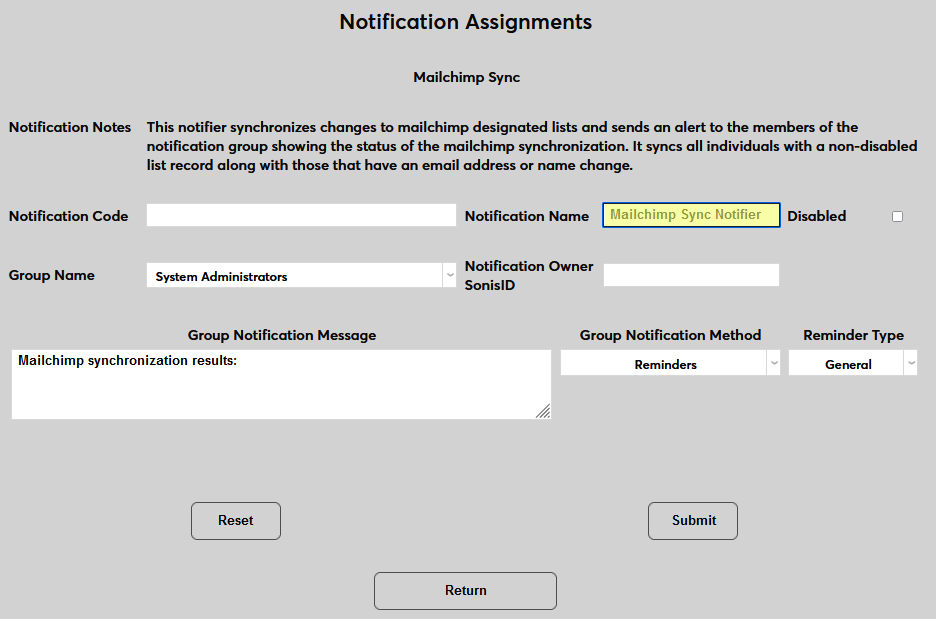
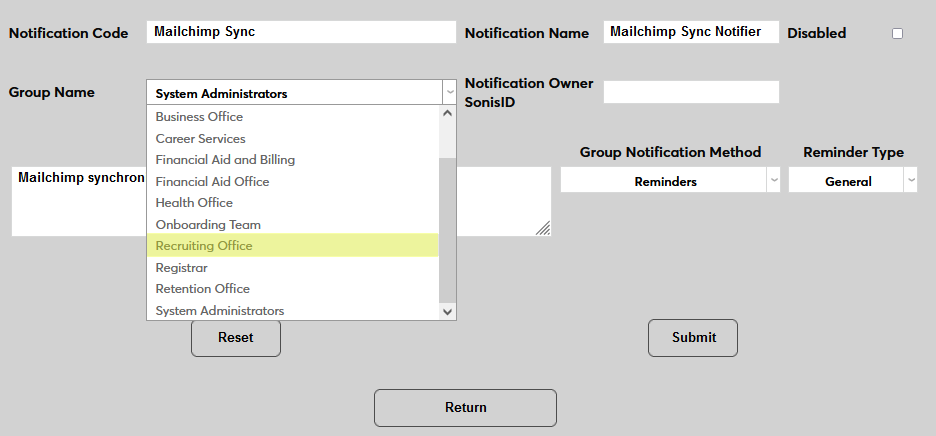
Select a group of staff members to receive the notification from the Group Name dropdown menu. Groups can be added and edited through the Table Maintenance utility.
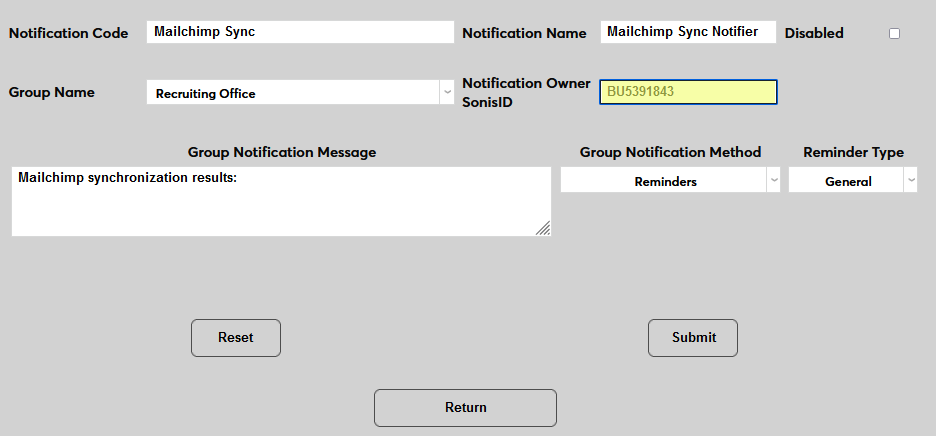
Enter the ID of the faculty or staff member who will be managing this notification in the Notification Owner SONIS ID field.
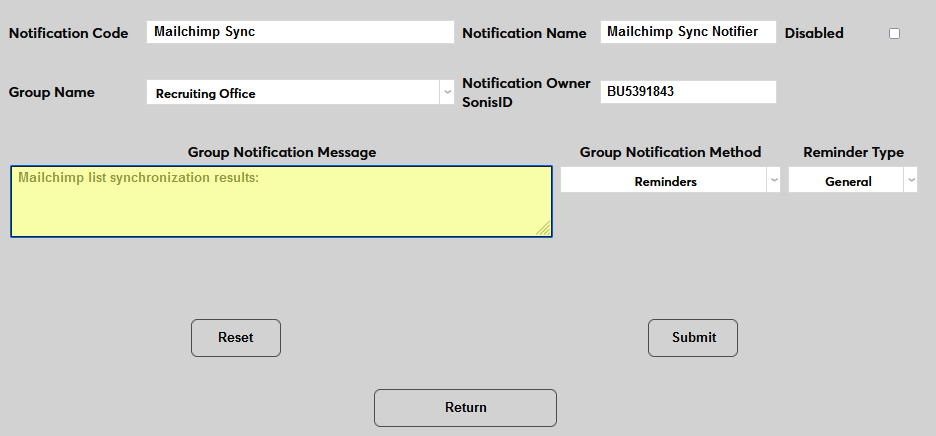
Create a Group Notification Message that will be sent to the group members when the task takes place.
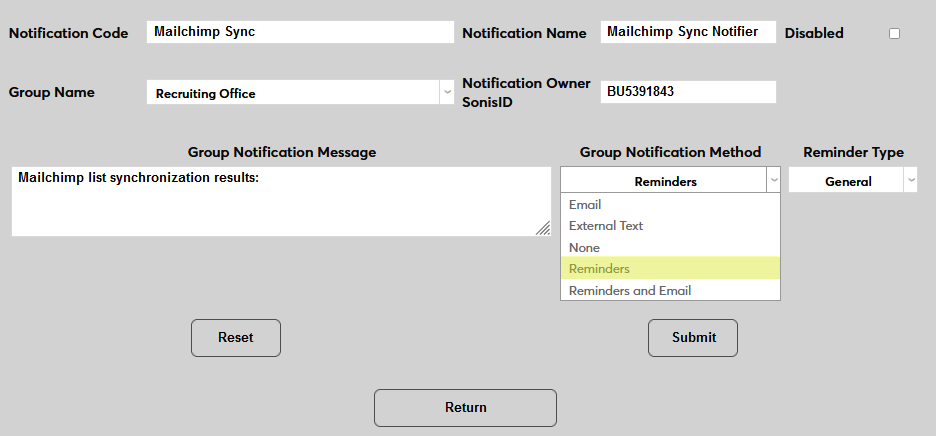
The Group Notification Method dropdown menu designates whether the group and individual users will receive an in-system reminder, an email, a text, or no notification when the process is triggered. The Reminder Type dropdown can change how the in-system reminder displays. This list can be created and edited via the Table Maintenance utility.
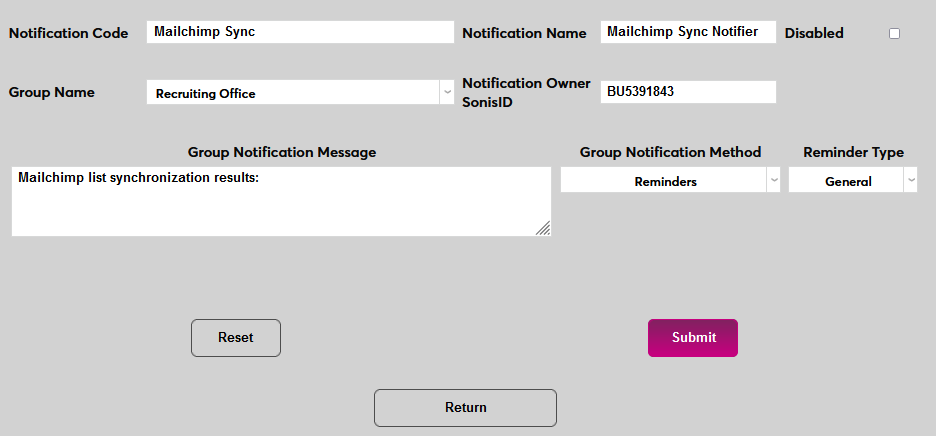
Click Submit to save the changes and create the notifier.
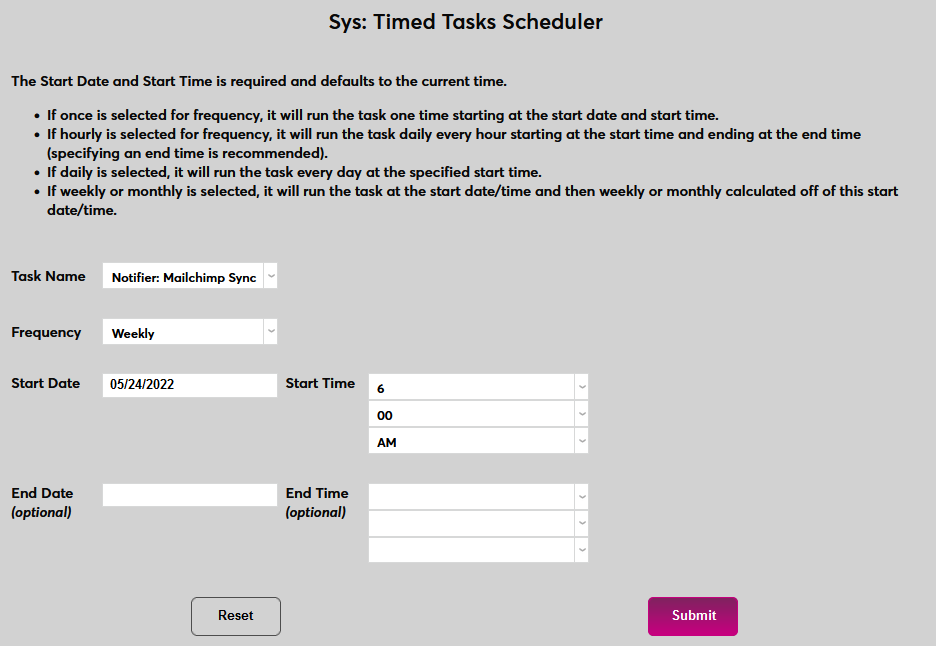
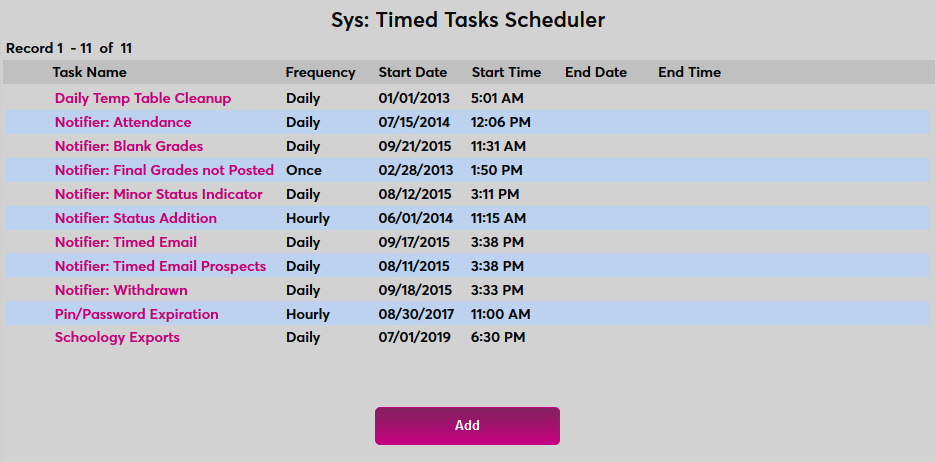
In order for the notifier to run, a timed task must be set up. Navigate to the Timed Task Scheduler under the Systems menu and click Add to create a new task.
Select Notifier: JFA - Import Awards from the Task Name dropdown menu.
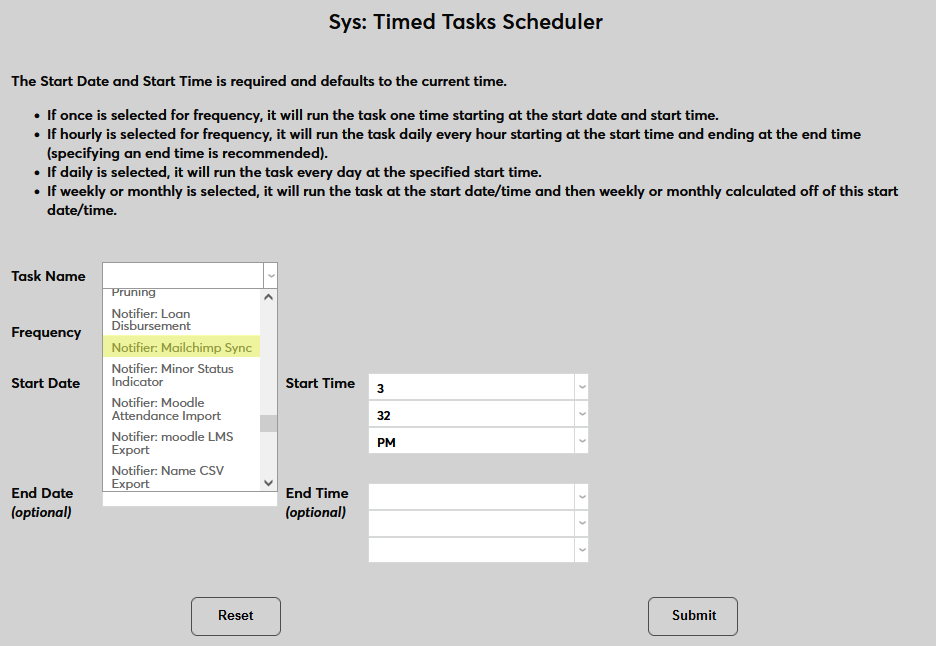
Select how often the task should occur with the Frequency dropdown. This will vary depending on how often Mailchimp marketing materials are being sent and how often changes in user data on in Mailchimp and SONIS are being made.
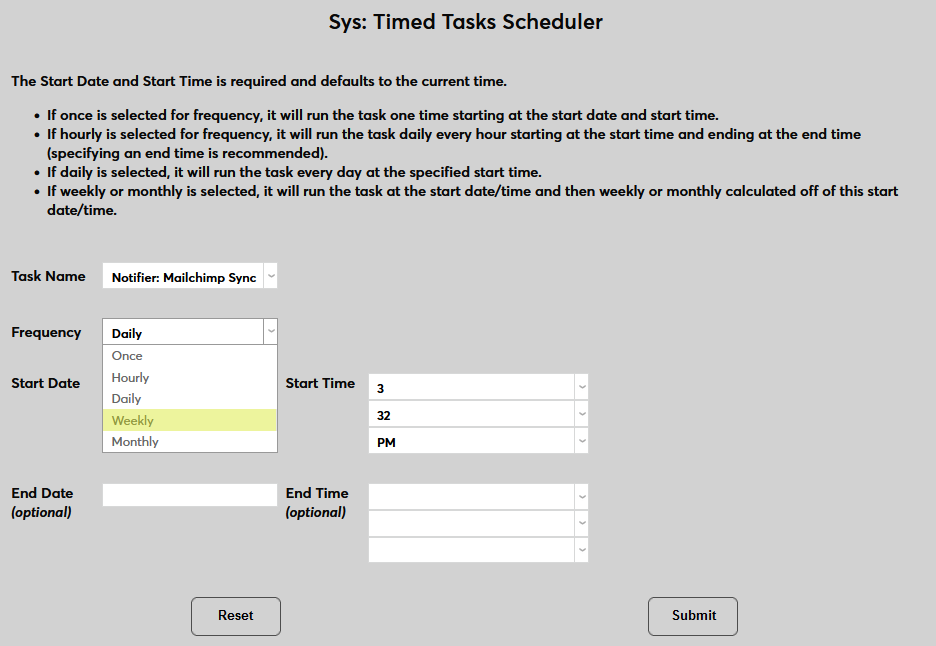
The Start Date and Start Time will automatically be set to the current date and time but can be changed to suit individual preferences. The End Date and End Time are optional.
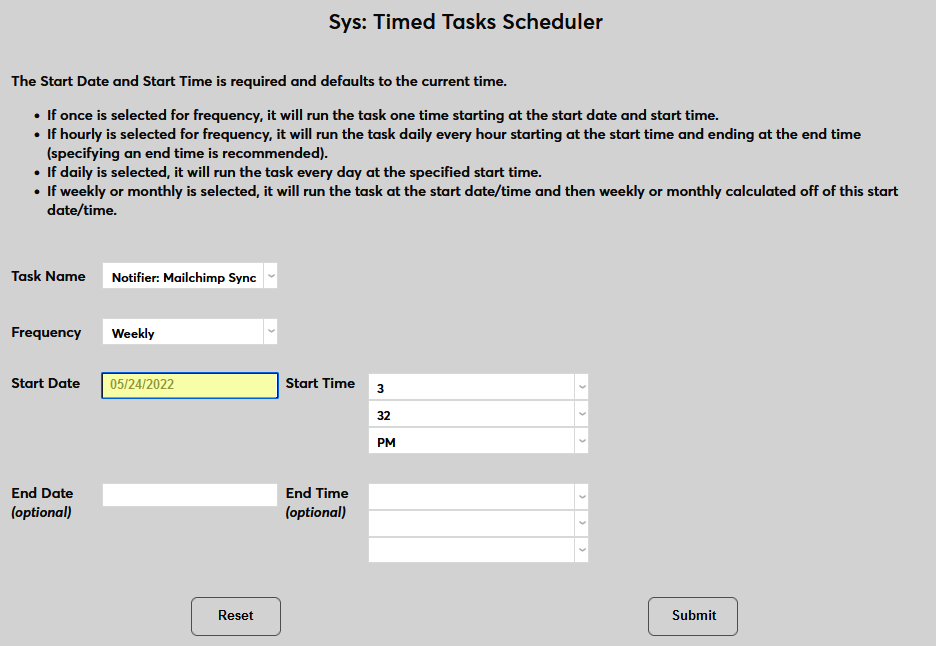
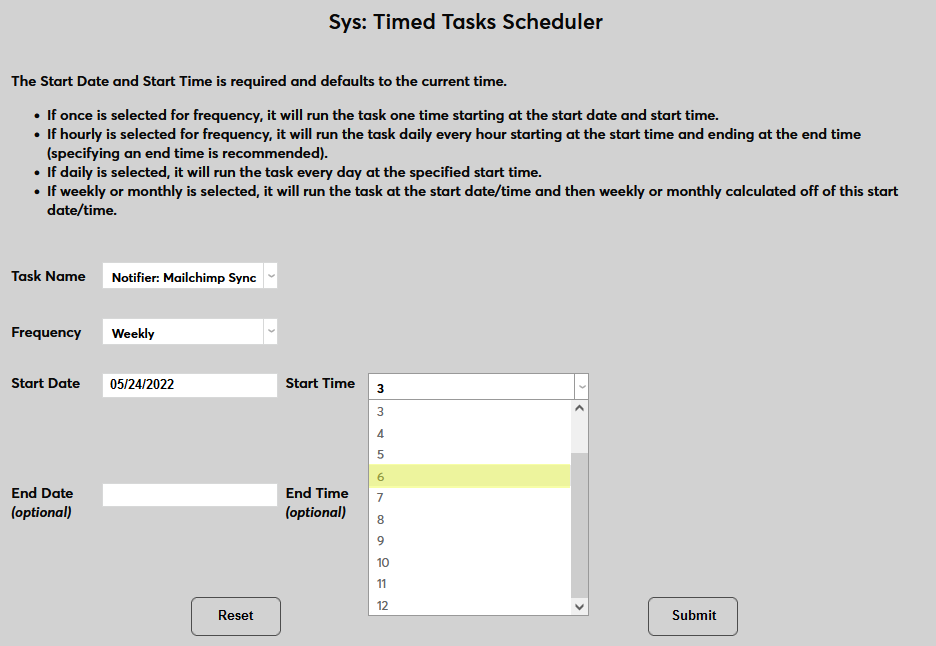
Click Submit to save the changes and activate the timed task.