CE Registration Utility
Overview
The CE Registration Utility allows a school some flexibility in how they want their continuing education functions to work. There are three basic sections to this utility, and each are explained in detail below.
Setup
CE Course Category
The CE Course Category table allows the creation of topic groups allowing similar course offerings to be displayed together. The use of the table is explained in detail on the Table Maintenance page.

There is also a discount feature explained below. There are two settings that must be done in support of this discount feature.
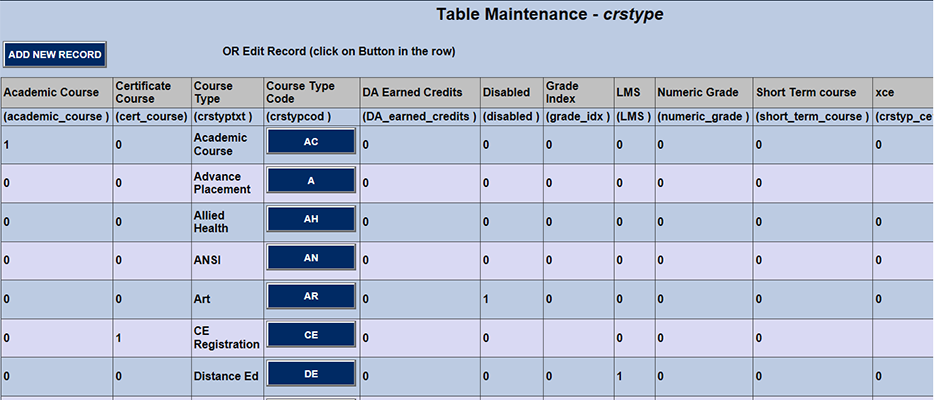
CE Course Type
See Table Maintenance.
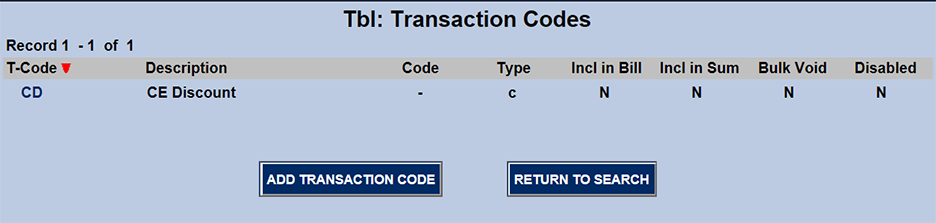
Discount Transaction Codes
There is also a discount feature explained below. There are two settings that must be done in support of this discount feature.
See Table Maintenance.
Display Options
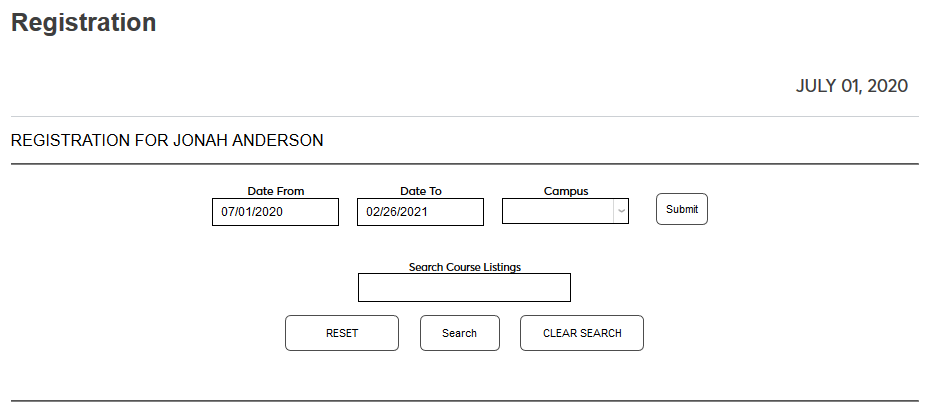
The first section in the CE Registration Utility determines what will and will not display on the list of available CE course sections and/or will or will not appear on the drill down on an individual CE course section.
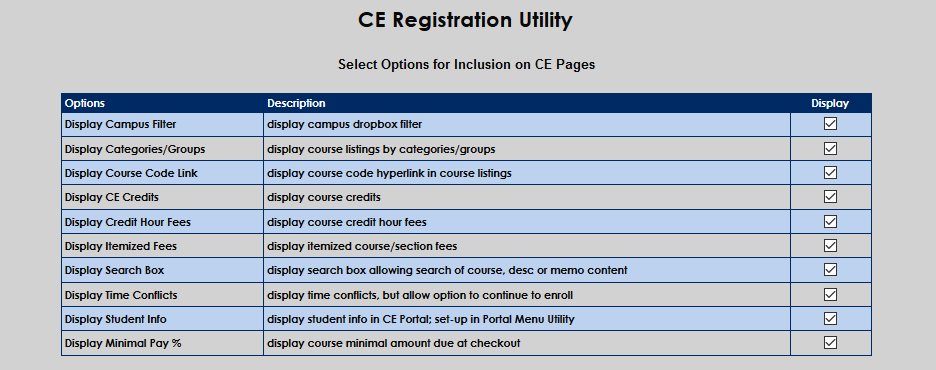
Display Campus Filter
The Display Campus Filter allows registering students to display only classes taking place on a particular campus.
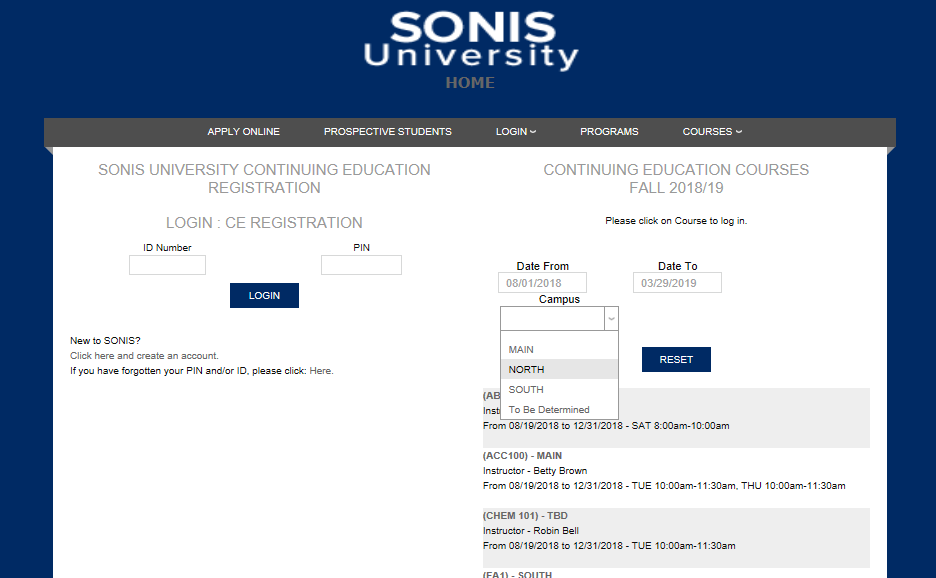
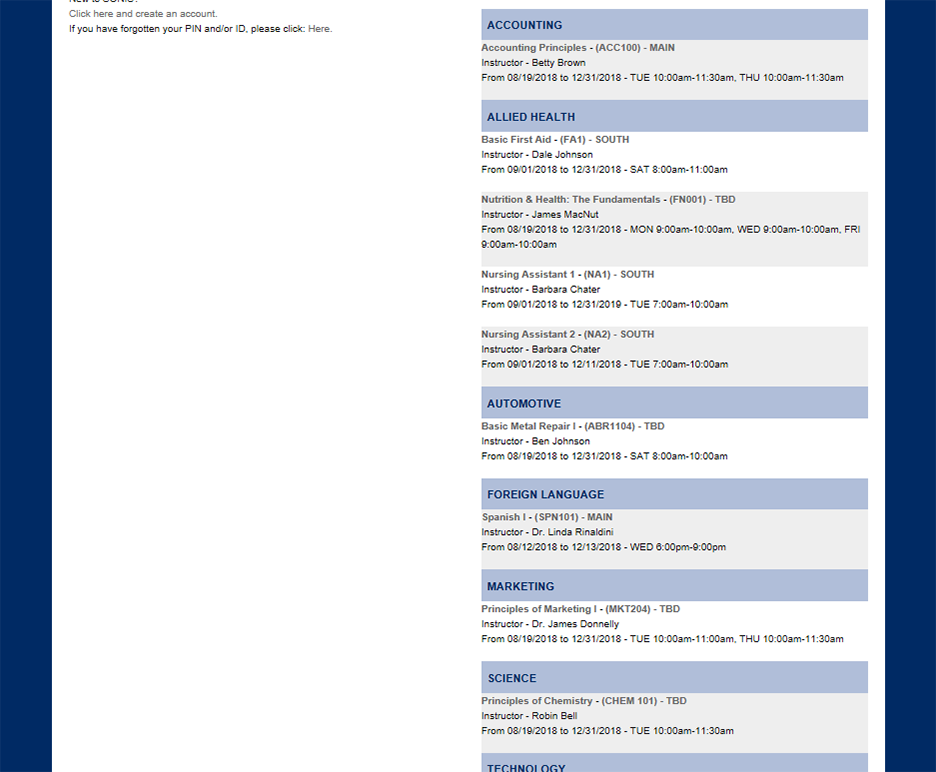
Display Category Groups
When this is checked, the courses by alphabetized categories as shown below.
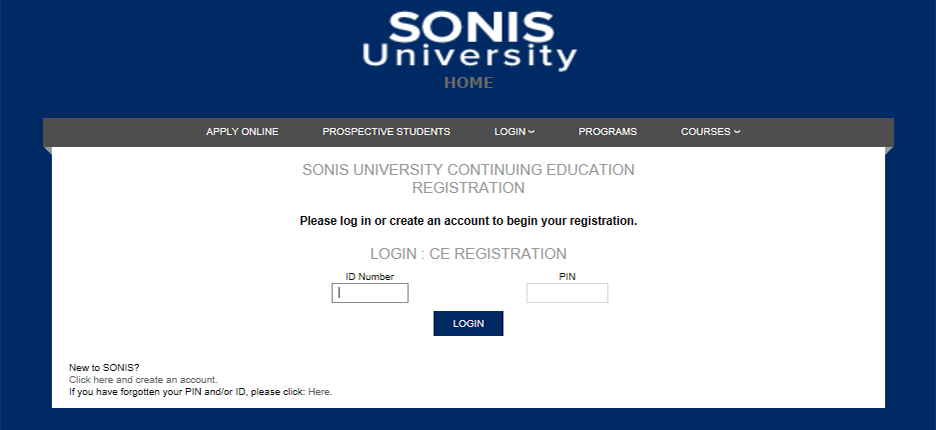
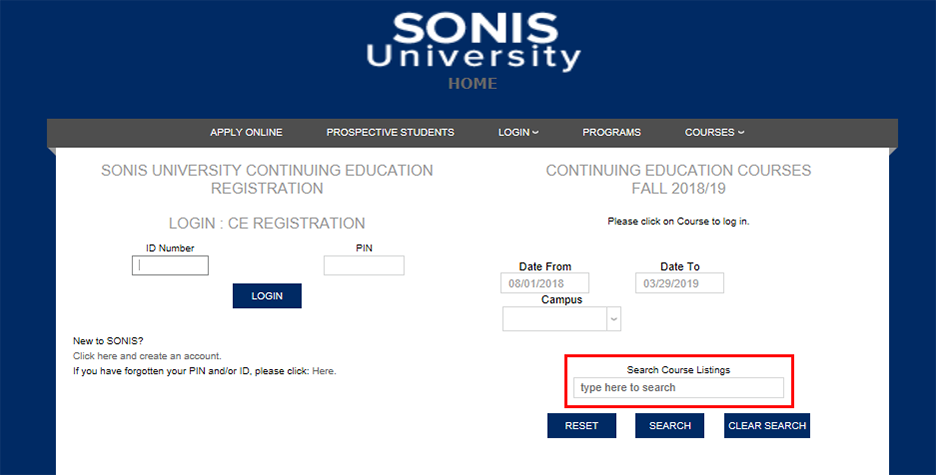
Display Course Code Link
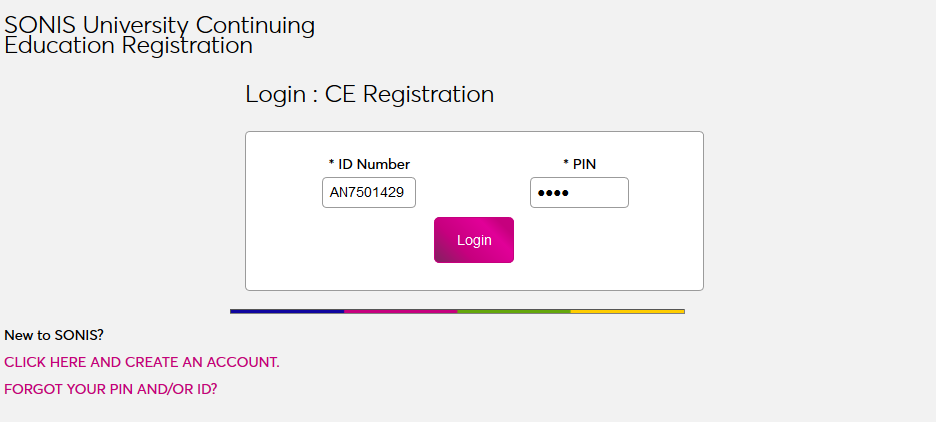
When this option is checked, the course code in the course listing becomes a link that takes the user to a login page. Of course, if the user has already logged in, this link will not be activated.

Below is the login page to which the above link takes the user.
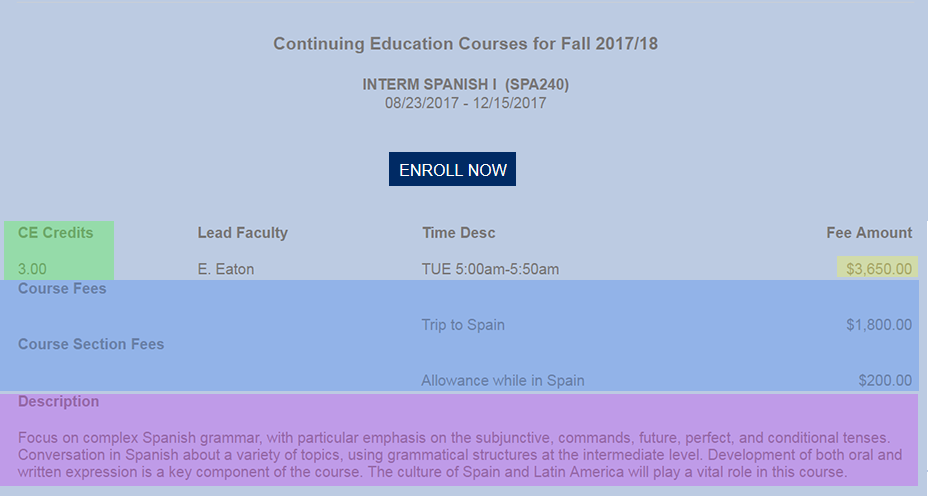
When the user clicks on the Course Description link in the list of available courses, a pop-up open that gives that user more information about the course as well as an "ENROLL NOW" button.

Also see: CE Course Memo Enhancements
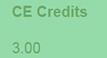
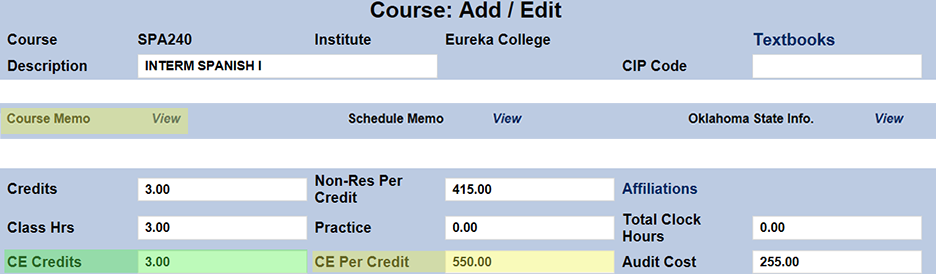
Display CE Credits
The CE Credits refer to that amount entered in the Course Add/Edit page shown below.
Below is the CE course section drill down page "SPA 240" is selected, and on this page the credit hours and the per-credit fee can be included.
Display Credit Hour Fees

The Fee Amount is essentially the grand total of the course.
The "Course Add/Edit" page below indicates that the course is worth 3 credit hours at $550 per credit hour.
Three X $550 is equal to $1650. However, the "Fee Amount" is $3650 NOT $1650. This is because "Fee Amount" displays the total fee amount: per-credit amount and the itemized fees..
Tuition
Fee per CE cred: $550 times 3 credits = $1,650.
Itemized Fees
Course Fees: $1,800
Course Section Fees: $200
Fee Amount
$1,650 + $1,800 + 200 = $3,650
Display Itemized Fees
Itemized fees are things like course and course section, book fees, lab fees, etc.

Display Search Box
Activating the Display Search Box option adds a search box to the page that allows users to locate courses by typing in key words.
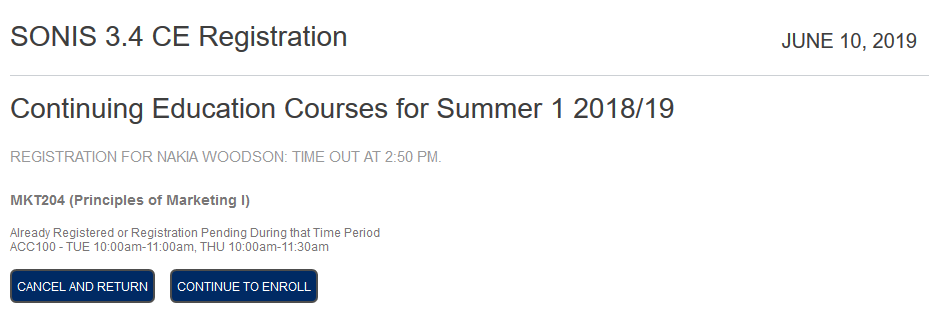
Display Time Conflicts
With the Display Time Conflicts box checked, the SONIS system will notify registering students of time conflicts during the registration process.
When a student attempts to register for a class with a conflict to a class they've already selected, they will be taken to an error page, informing them of the conflict. Students can choose to Cancel and Return to correct the conflict or Continue to Enroll, ignoring the conflict.
Display Student Info
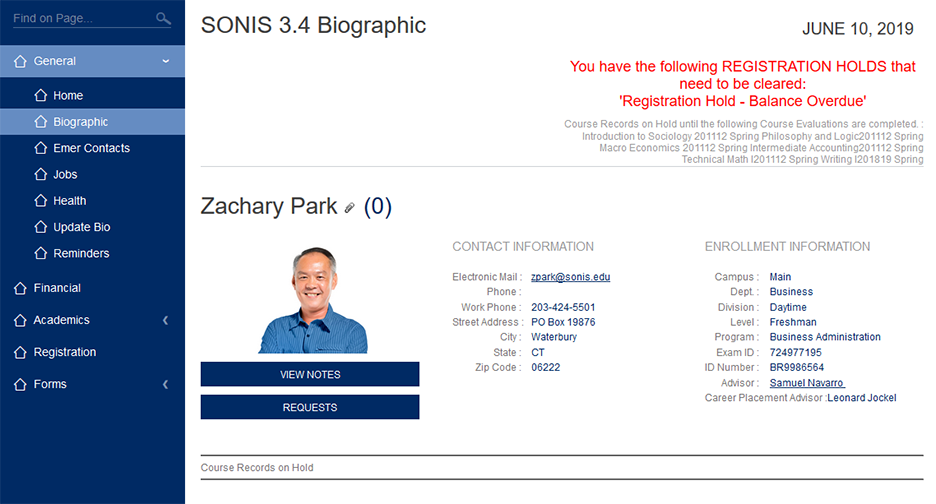
When the Display Student Info option is activated, CE Registration students will be able to access Student portal functions.

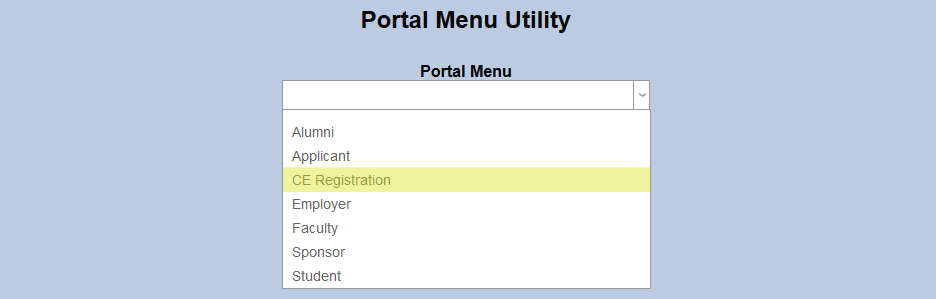
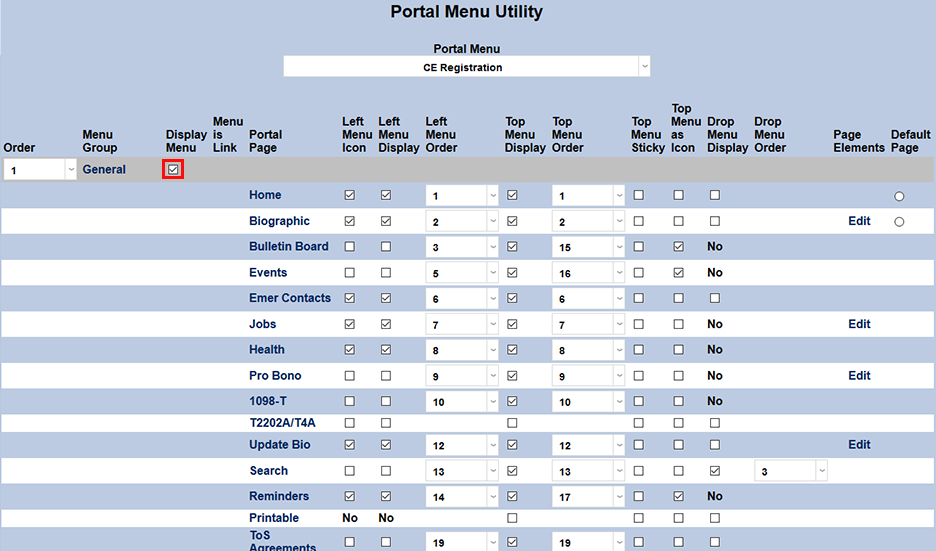
To control which options a CE student sees, navigate to the Portal Menu Utility under the Systems menu. Select CE Registration from the dropdown menu.
Check the box next to each section or page that should appear in the CE Registration portal and click Submit to save the changes. The menu can be reordered according to preference as well. Selected options will appear in the same manner as they do in the Student portal.
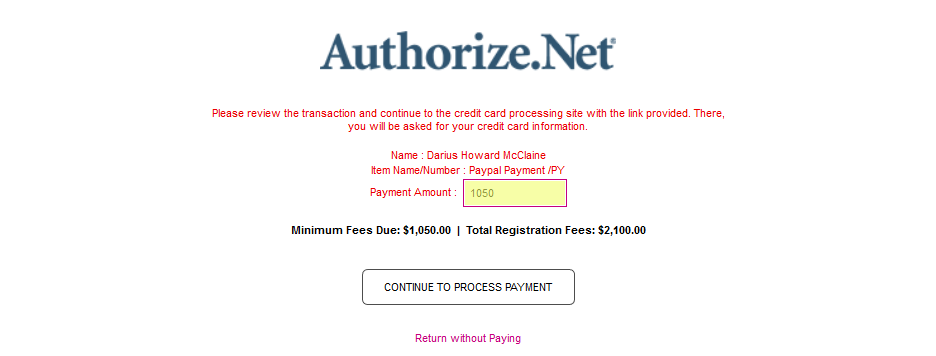
Display Minimum Pay Percentage
Schools can choose to allow students to pay for only a portion of the course when registering. This option is set on the Course Add/Edit page.

The option is included on the Section List page as well, allowing individual sections to be set differently than the course itself.

Alternately, a minimum pay percentage can be set by CE Category under Table Maintenance. When a number is present in the CE Category Minimal Pay % field, all courses with that CE category selected will only require that percentage to be paid. The corresponding fields on the Course Add/Edit page and the Section List page do not need to be altered as the CE Category will override the numbers there.

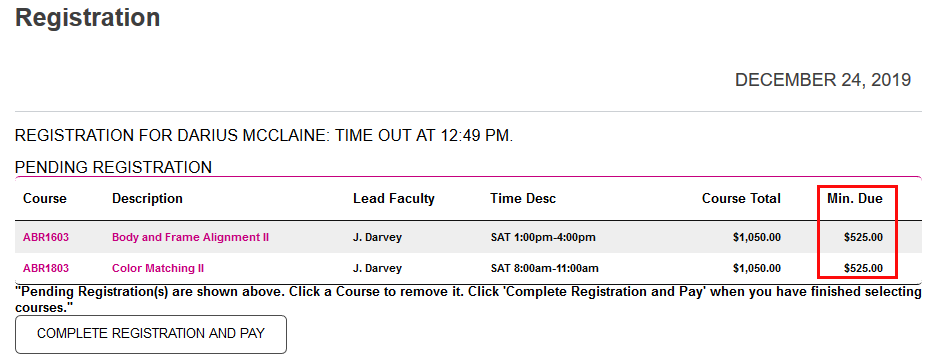
To display the minimum payment required when registering, check the Display Minimal Pay % box.

When the option is activated, a Minimum Due column is added during the CE Registration process and the default payment when completing registration mirrors that amount. Students can, of course, choose to pay more than the minimum.
CE Discounts
Schools can offer two kinds of discounts to students who take their continuing education courses, Volume Discounts and Promotional Discounts.
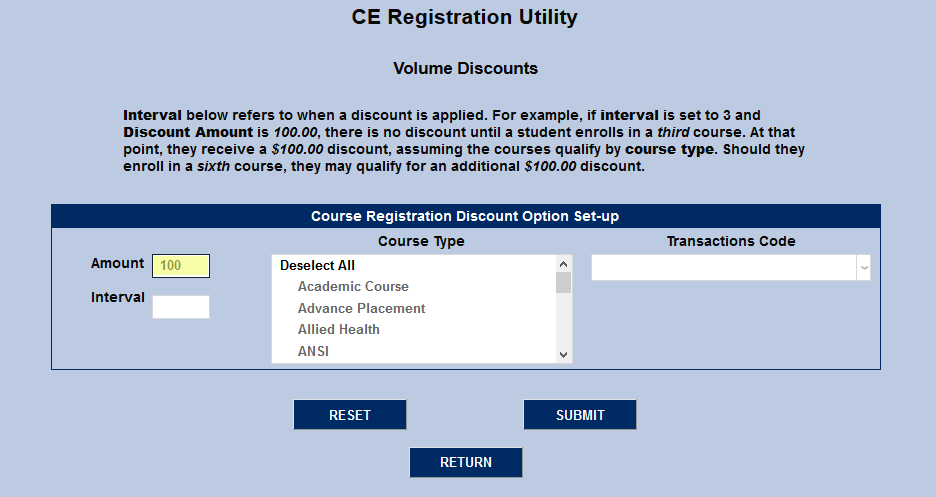
Volume Discounts
The discounts setup table lists how many discounts are currently running in the Active column. Click on the number to set up and edit discounts.

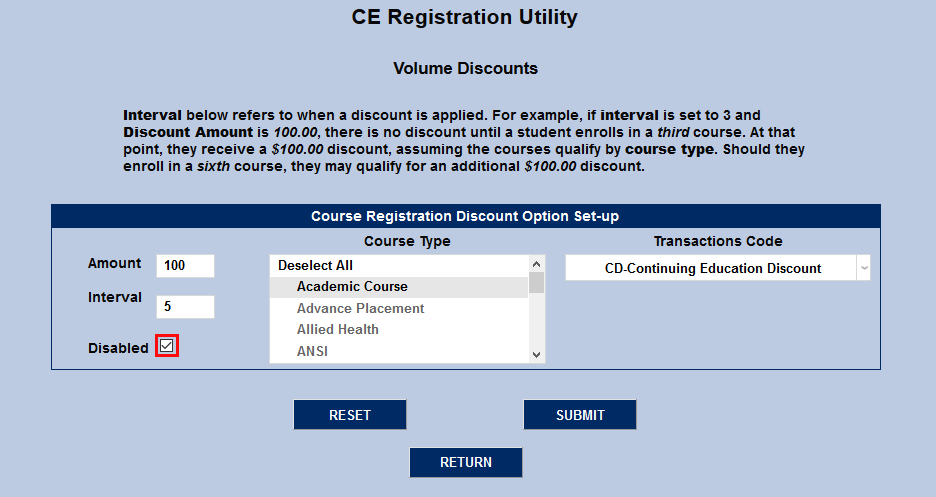
On the next page, click Add to create a new volume discount.

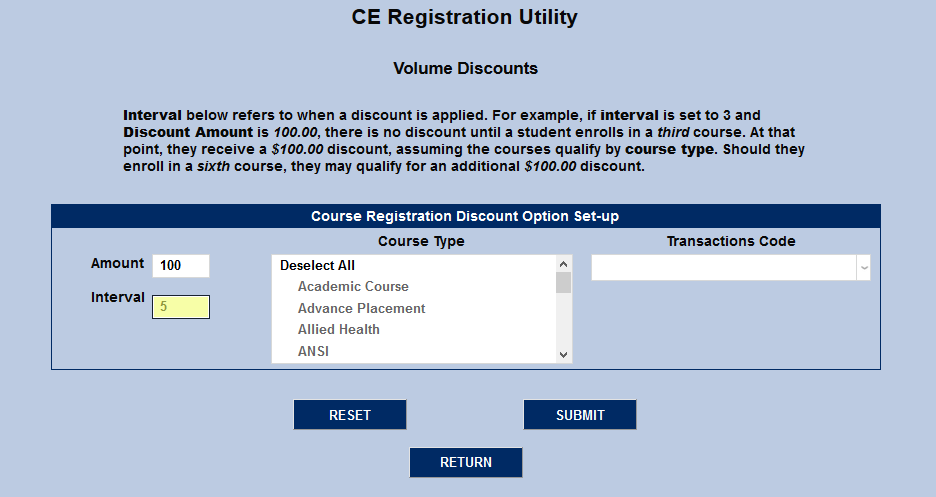
Enter a dollar amount for the discount in the Amount field and an interval for threshold students must reach to activate the discount in the Interval field.
Keep in mind that volume discounts stack, so, for example, if a school has a $25 discount for taking two courses and a student signs up for four courses, they would get a $50 discount off of their total. Similarly, if a school has a $25 discount for a two course interval active at the same time as a $75 discount for taking three courses, students signing up for three courses would receive a $75 discount.
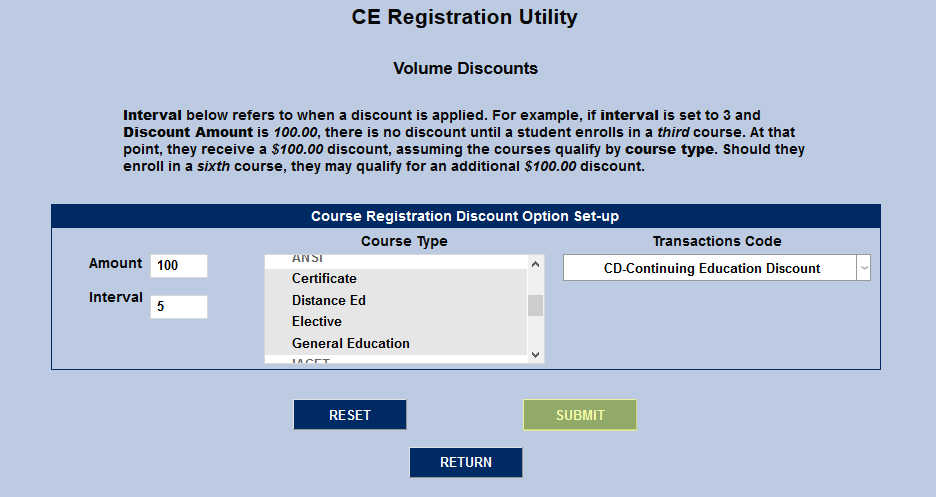
Select one or more course types from the Course Type menu. Course types can be created and edited through Table Maintenance under the Systems menu.

Next, select a t-code from the Transaction Code menu. Most institutions prefer to have a t-code set up specifically for CE course discounts.

Click the Submit button to create the discount. It will be active by default.
Once volume discounts have been created, the primary volume discounts page will list them in a table displaying the amount, interval, course types, and t-code along with whether the code is enabled or not. Click the del button to delete the discount or the edit button to make changes.
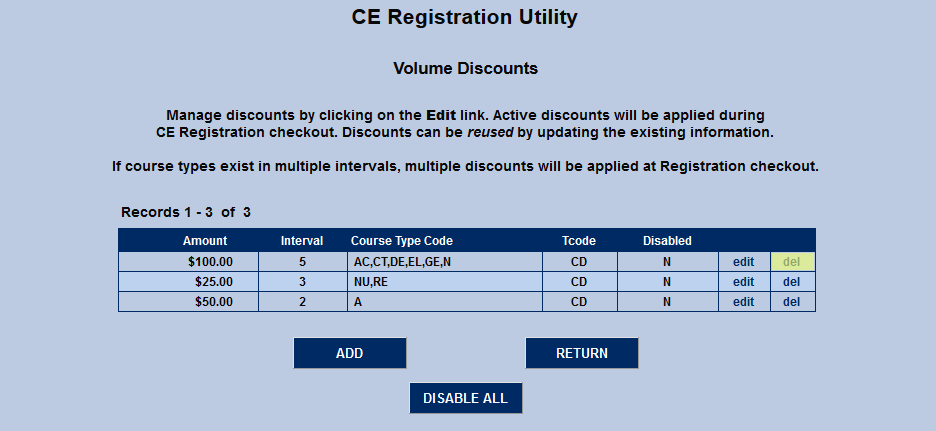

On the edit screen, the previously entered details can be changed. In addition, the discount can be disabled by checking the Disabled box. Click Submit to save any changes made.
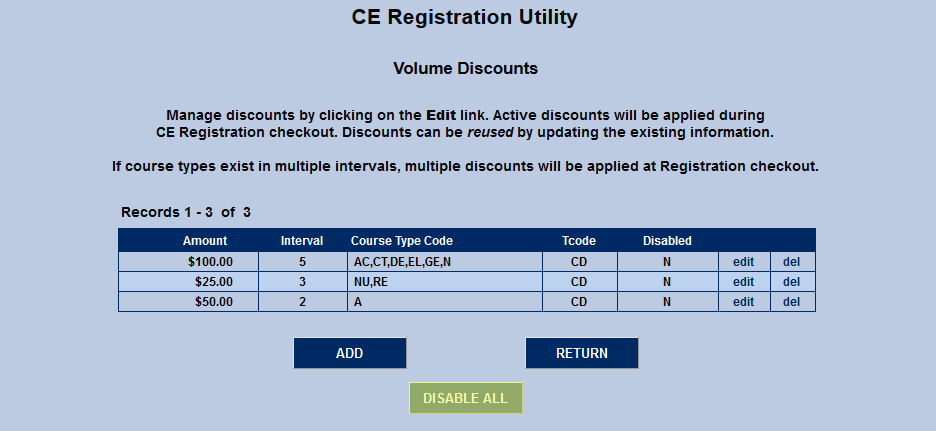
Also available on the summary page is a Disable All button to set all discounts as inactive.
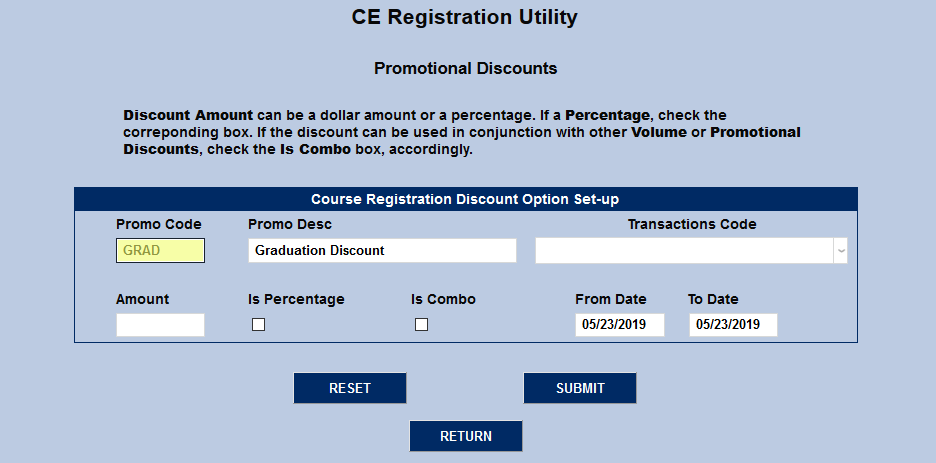
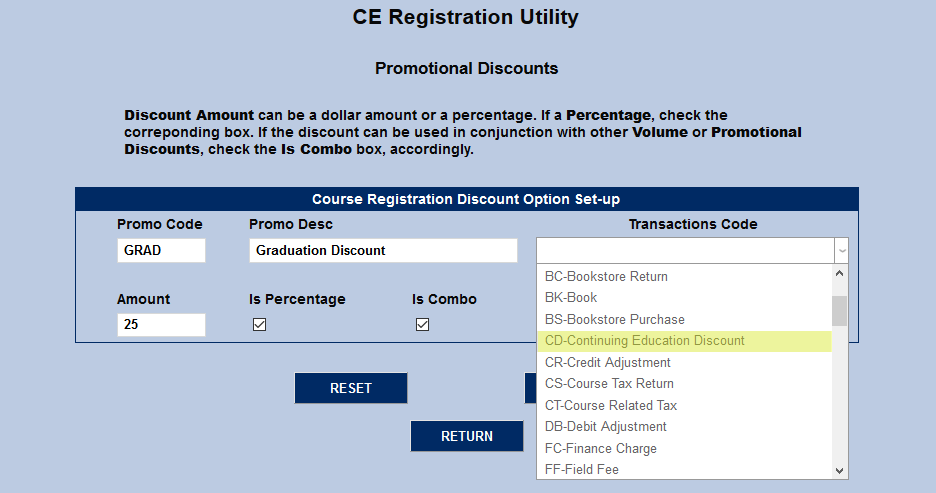
Promotional Discounts
The Promotional Discounts setup page is accessed in the same manner as the volume discounts page. Simply click the link that appears as the number of discounts in the Active column.

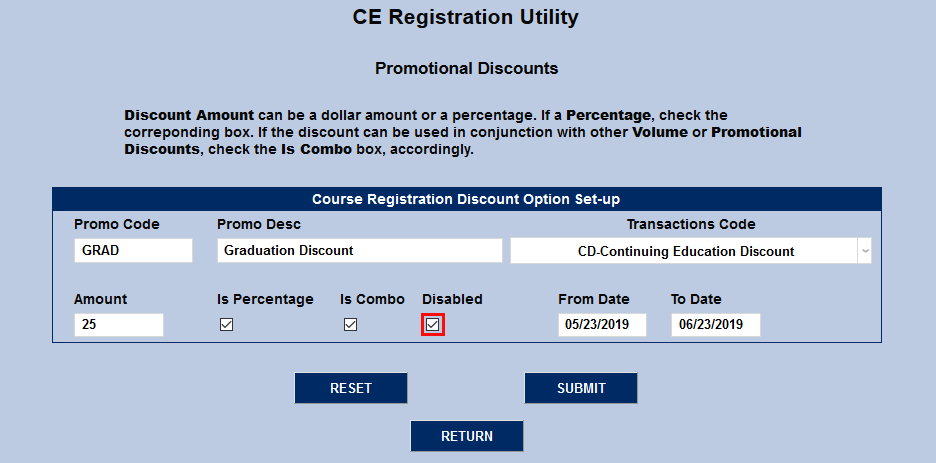
On the following page, click Add to create a new discount.

Promotional discounts differ from volume discounts in that they're designed to run for a limited time period and students must have the promotional code when registering to receive the discount. Begin by creating a description of the promotion in the Promo Description field. Often, these promotions are timed around holidays or events or targeted towards a group of potential students. For example, a school could create a promo that's valid in the months of June and target it towards new graduates. However, keep in mind that, since promotional discounts are not tied to a certain course type or individualized per student, any student who comes across the code will be able to use it and receive the discount.
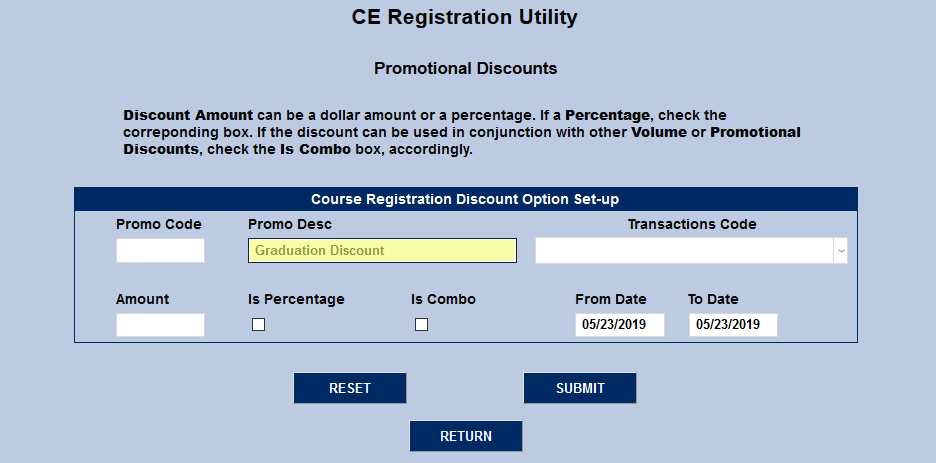
Enter a shortened version of the promo description in the Promo Code field. This field holds up to ten characters.
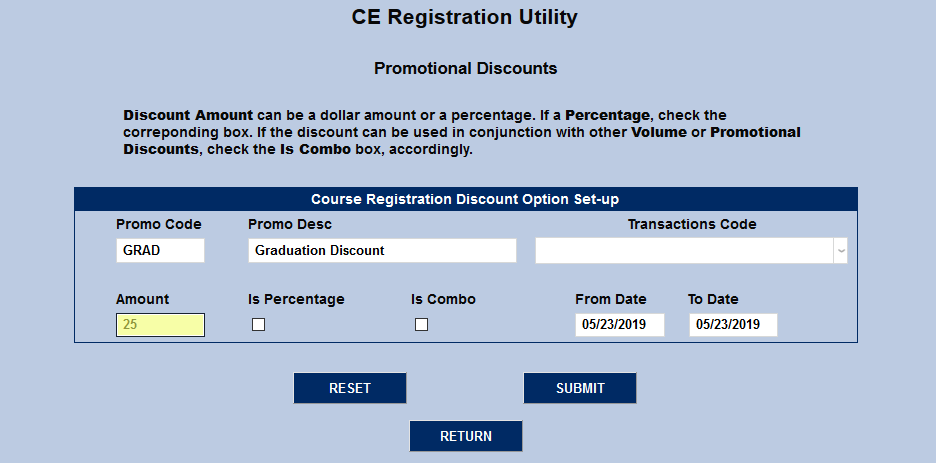
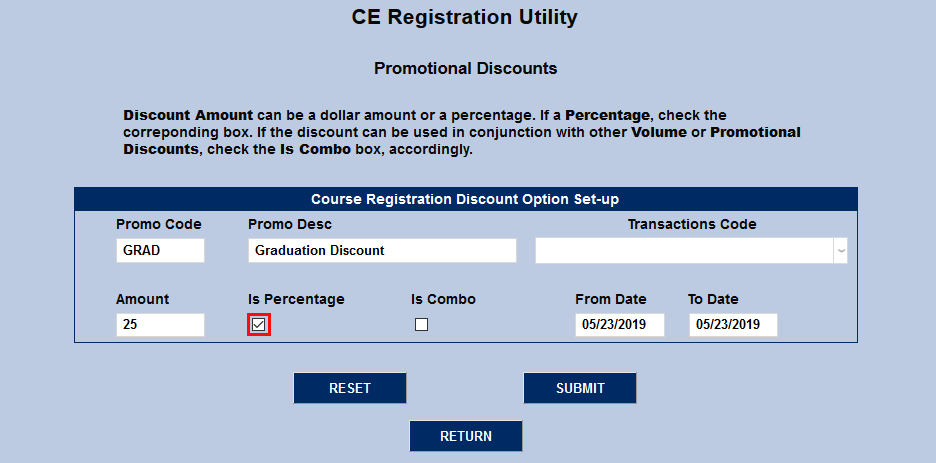
Enter an Amount for the discount. This can be a set dollar amount or, to set the discount as a percentage of the total sale, check the Is Percentage box.
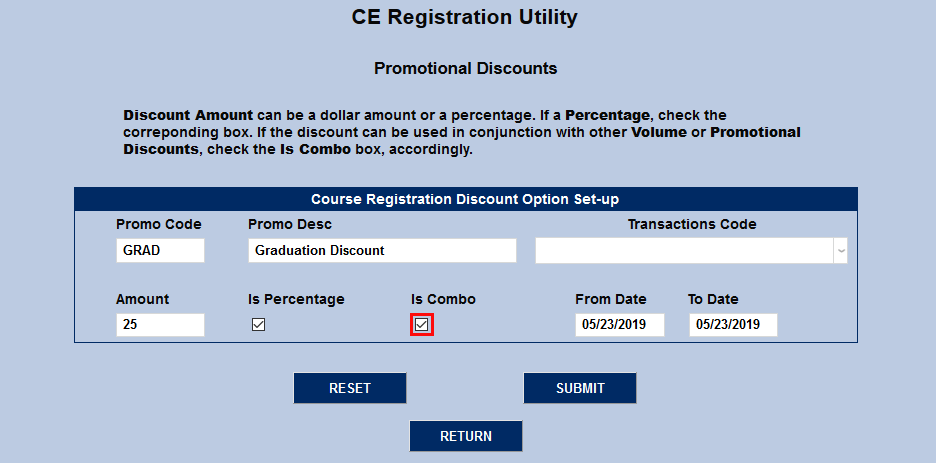
Check the Is Combo box to allow the discount to be used in conjunction with any other promotional discounts that may be active. This does not affect volume discounts. Active promotional and volume discounts are always stackable.
Select a Transaction Code for the discount. As previously mentioned, most institutions prefer to set up a T-code specifically for CE course discounts.
Select a date range for the promo to be active using the From Date and To Date fields.
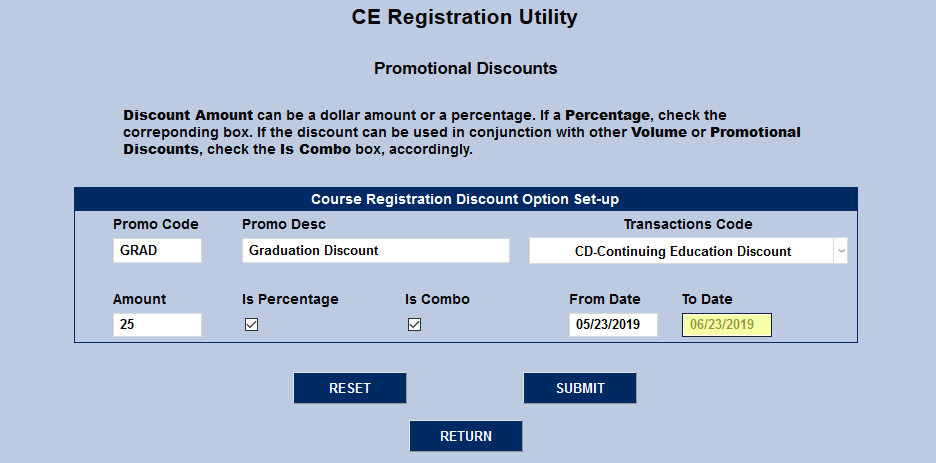
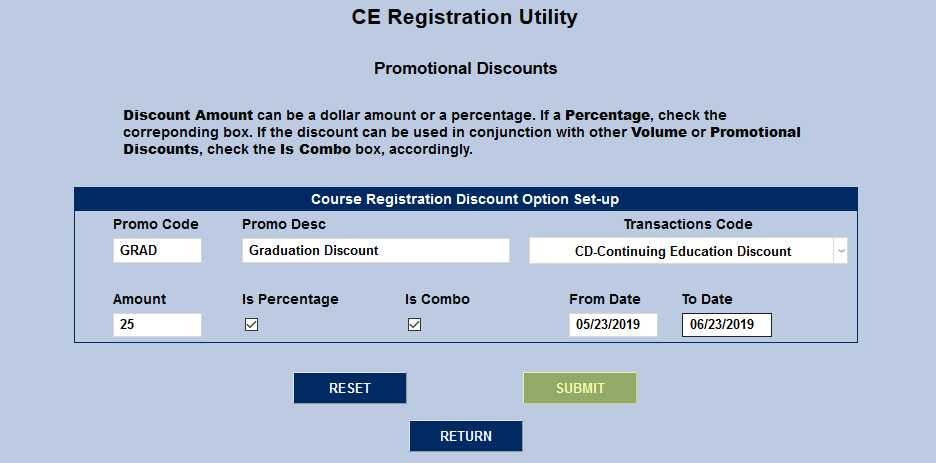
Click Submit to create the promotion.
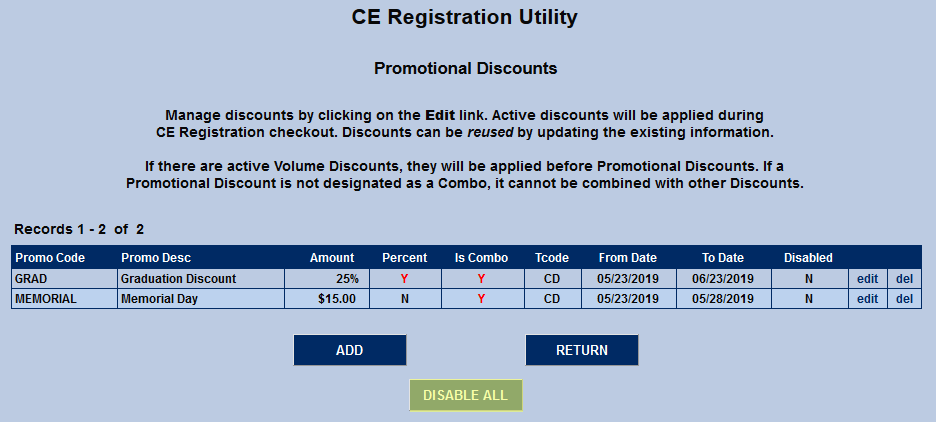
Once discounts have been created, they're listed on the promotional discounts summary page in a table that shows the amount, whether it's a percentage or not, whether it can be stacked as a combo or not, the T-code, and the valid dates. To delete a discount, click the del link or click the edit link to make changes.
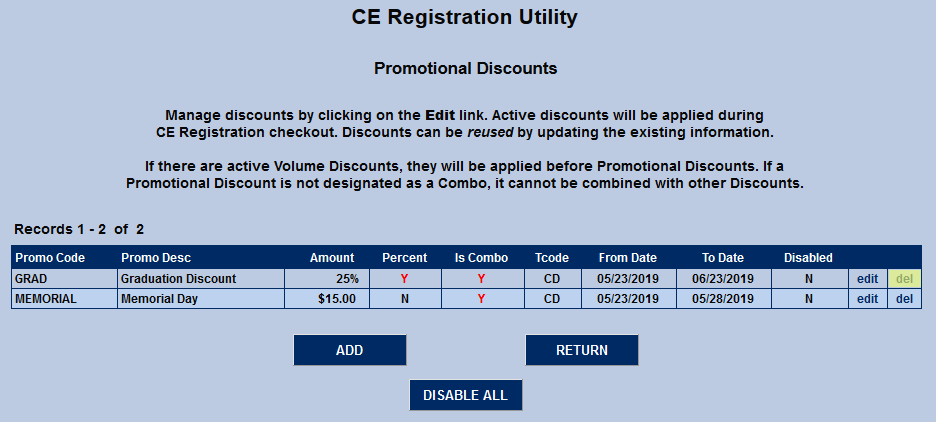
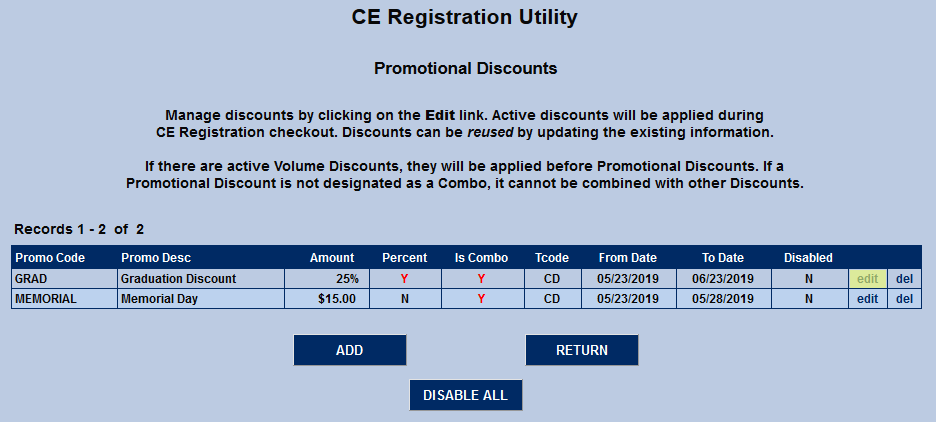
In addition to the other details about the discount, which can all be changed, the discount can be disabled by checking the Disabled box. Click Submit to save the changes.
The summary page also provides the option to Disable All discounts
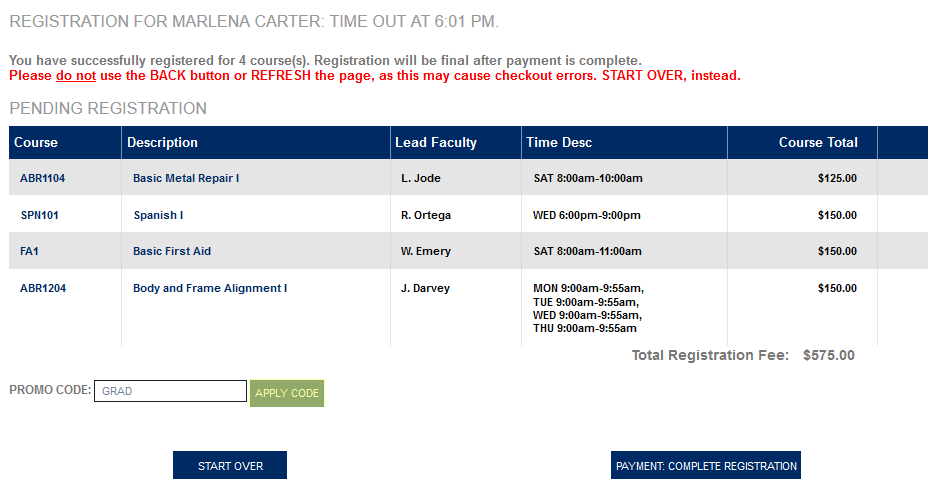
When a student is registering for CE courses, the a Promo Code field will appear during checkout. Students should enter their promo code and click the Apply Code button to add it.
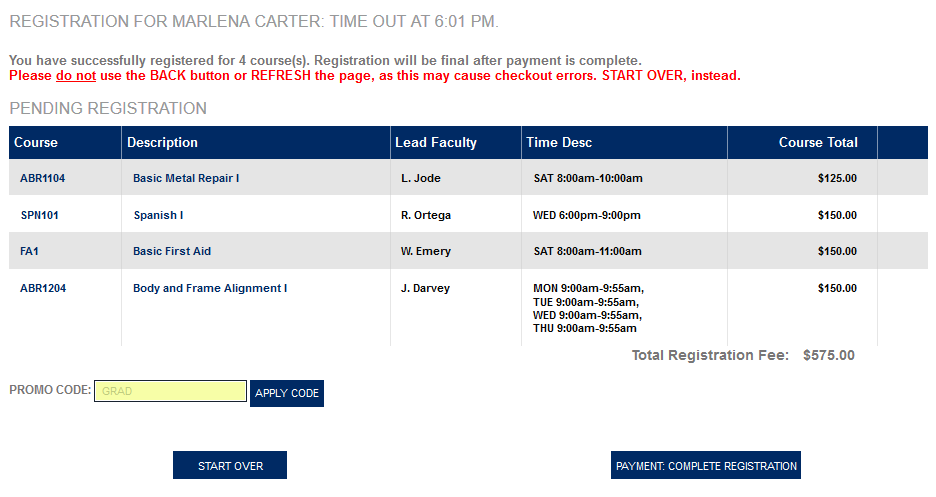
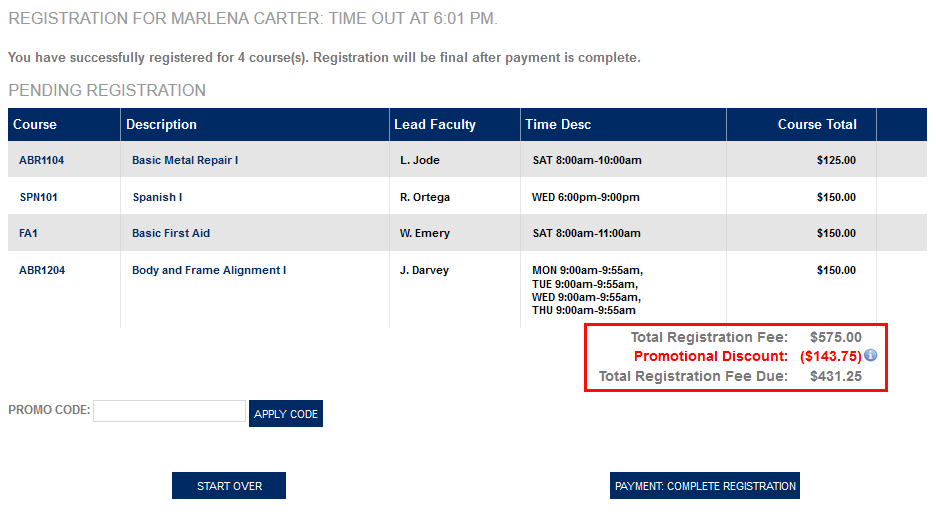
The promotional discount is listed in the student's total in the lower right-hand corner. Clicking the info icon opens a pop-up displaying a breakdown of the discount.

Account Options
There are three account options: Add Employment, Add LMS Account and Add as Student. Each is discussed below.

Add Employment
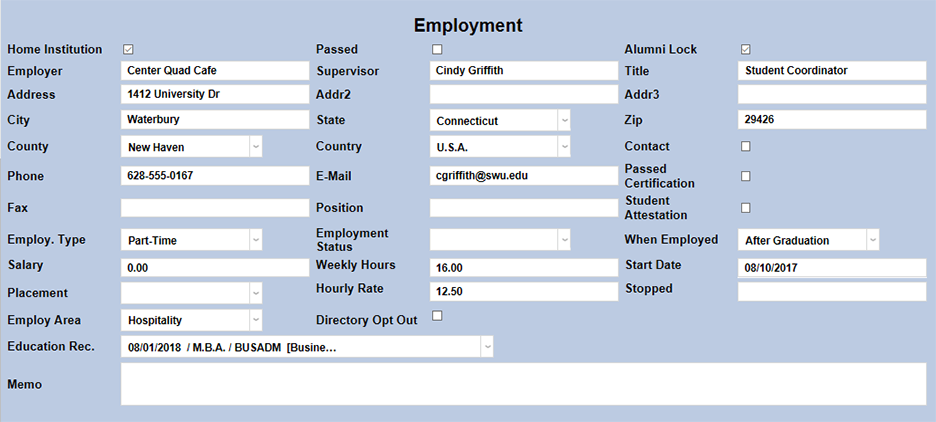
When the above Add Employment is checked, an Employment record is created as part of the CE student's new account creation process. The template for creating a new account will include an "Employment" section.

The data captured above is then used in the creation of the new NAMES "Employment" record (below).
Add LMS
If the Add LMS Account Info is checked, CE students creating their account will be prompted to enter the username and password they use to access Blackboard, Moodle, Canvas, or another LMS used by the school.

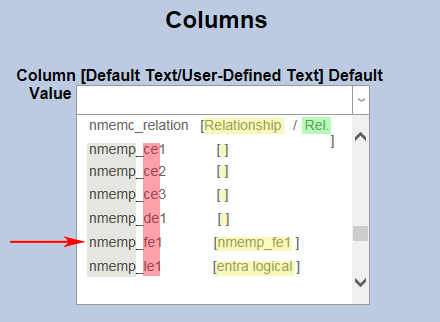
By default, the system will label these fields LMS User ID and LMS Password. The fields can be edited to specify a specific LMS (Blackboard, Moodle, Canvas, etc.) by editing them in the Columns table under the Systems tab. The fields are named nmemp_ce1 and A nmemp_ce2 and can be relabeled in the manner explained below under Activating Extra Fields.

NOTE: "Years in Agency" is an extra field that will not appear until activated. Extra fields exist in most Jenzabar SONIS tables so that schools can add data specific to them.
Allow Registration by Non-CE Users
Some institutions may wish to allow CE registration by users who do not have a preexisting CE Student account. To open up CE registration to these users, scroll down to Select Options to Allow Registration by non-CE Users and check the Alumni, Faculty, Staff, and/or Student boxes to allow users with one or more of the listed module statuses to access the CE Registration portal.

Once a module status has been activated, all users with that module status will be able to log in to the CE Registration portal using their existing SONIS username and PIN/password and register for CE courses.
When a SONIS user logs in to the CE Registration portal for the first time, a \CE Student record for the user is created.

Activating Extra Fields
Note
If, after following the instructions below, the fields do not appear at the bottom of the selected page, it may be that the selected page has not been setup to use extra/custom fields. If this issue occurs, please contact Support and let them know the extra fields that won't activate. Support will follow-up and make those extra fields available whenever possible.
Extra or custom fields are special fields that can be used by a school to store data that is not otherwise stored by Jenzabar SONIS. These fields are simply used to save data. No functionality involves these fields beyond saving their headers and values for display on a specific page near the bottom of that page.

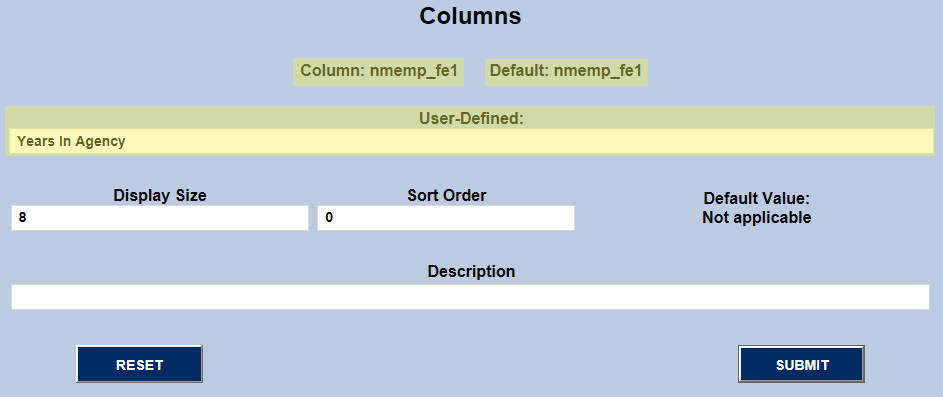
A custom/extra field (Ex. "Years In Agency") is activated by first finding the name of the field (ex. nmemp_fe1) and submitting it.
Extra/custom fields are named after the tables in which they can be found. The "Education" page under "Names" is stored in the NMEMP table (i.e. "NM" for "Name" and "EMP" for "Employment". Each of its extra/custom fields, therefore, begin "nmemp_" and then the datatype and number of the field:
"nmemp_" + "ce" (character, extra) + "1" (first of type) . . . "nmemp_ce1" (Ex. "Smith")
"nmemp_" + "de" (date, extra) + "1" (first of type) . . . "nmemp_de1" (Ex. "04/15/2017")
"nmemp_" + "fe" (float, extra) + "1" (first of type) . . . "nmemp_fe1" (Ex. 7.25)
"nmemp_" + "le" (logical, extra) + "1" (first of type) . . . "nmemp_le1" (Ex. 0, 1 / N, Y)
"nmemp_" + "ne" (numeric, extra) + "1" (first of type) . . . "nmemp_ne1" (Ex. 1, 2, 3 . . . )
After the field names are brackets ([ ]) within which are the fields' default column headers (dname) followed by the user's column headers (uname). If there is a "uname", it is used. If not, the "dname" is used.
In the first row below, Relationship is the "dname" and Rel. is the "uname". Because a "uname" exists, when the field "nmemc_relation" appears on a page, it's heading is "Rel." For example:
Rel. father
"[ ]" indicates that the field has no "dname" or "uname". Therefore, if the field displays, only its value would appear. This would likely result in the columns on the page misaligning because the header column would be NULL.
"[nmemp_fe1]" indicates that "nmemp_fe1" is the default header (dname) of field and there is no "uname" value.
When the name of the field is found and submitted, the template for adding a user-defined name (i.e. "uname") displays on the page. Typically an administrator needs only to enter the "uname" of choice. The "Display Size" is changed only if the header displays as a font size out of sync with the rest of the text on the page. "Sort Order" is typically not used, and if the "uname" header is descriptive enough, "Description" can be left blank. "Description" does not appear on the action page but rather is only used in "Columns" as additional information about the column.
Once the user-defined name is submitted, it is recommended that the administrator then call up the page on which the field displays to make sure the extra/custom column appears and that it appears with the correct header.