Single Sign-On Configuration
Overview
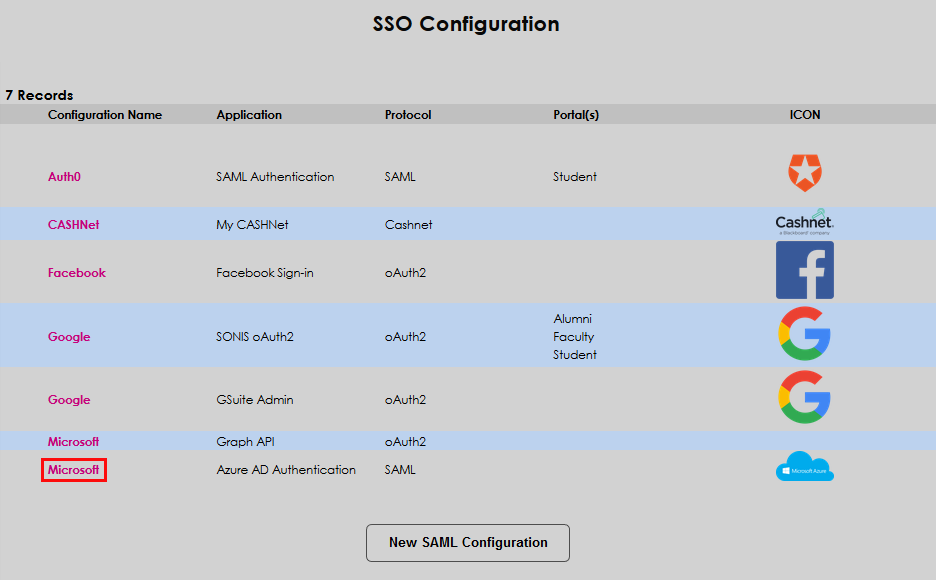
Jenzabar SONIS Single Sign-On allows users to sign-in through third party applications and stay logged in while maintaining system security. SONIS utilizes SAML protocol to interface with integration service Auth0 and OAuth protocol for single sign-on through Facebook and Google. Additionally, SONIS clients can setup single sign-on through the proprietary protocol used by the Transact refund service and through Microsoft Azure, which utilizes both SAML and oAuth protocols.
In conjunction with Google single sign-on, SONIS provides tools for institutions who use the G Suite line of products, including the ability to provision Google accounts through SONIS. For more about this process, visit the G Suite Integration page.
Note
A third party consultant may be needed for some SSO setup as the setup process outside of Jenzabar SONIS can be challenging.
Web Options
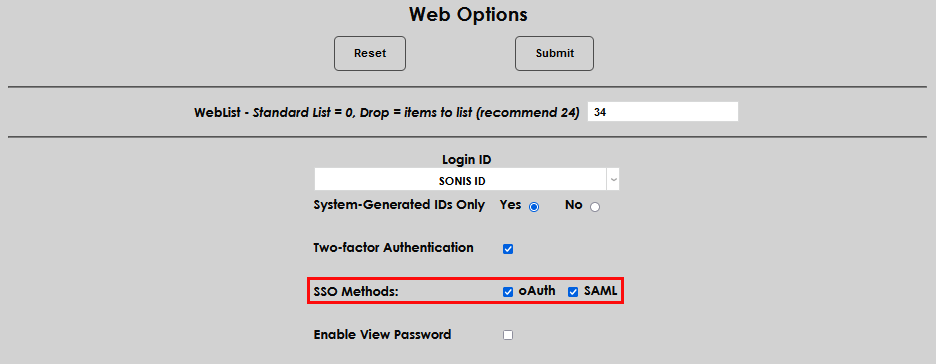
Before using SAML or Auth0 authentication, they must be turned on in Web Options in the Systems hub. Check one of both boxes and click Submit.
SAML
The SAML protocol has been configured and tested with Auth0 but should work with other SAML authenticators. In order for a SONIS user to be authenticated with SAML, they must use either their Primary or Secondary email to access the authentication provider.
Auth0
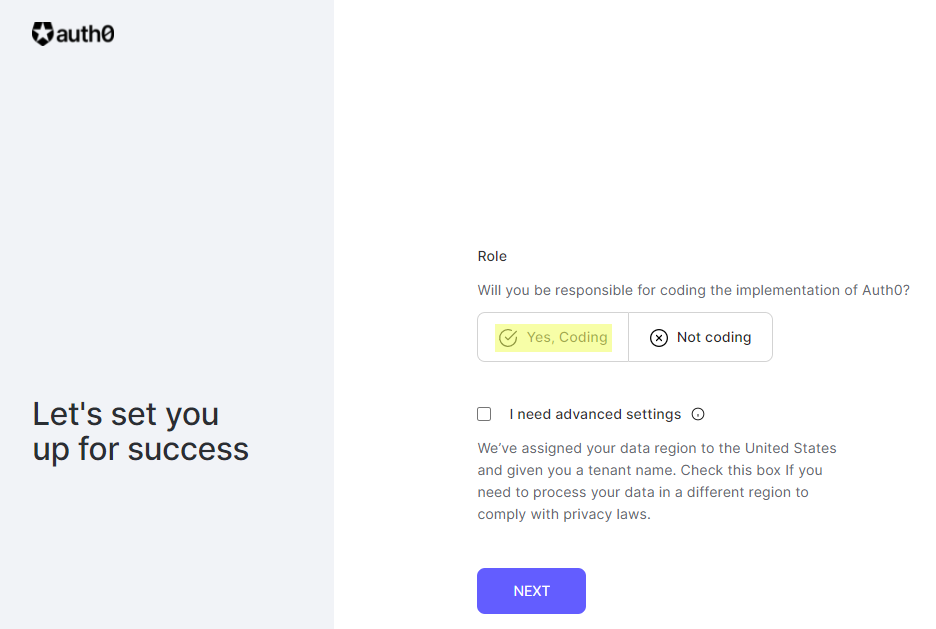
To use Auth0 for SONIS single sign-on, begin by creating an Auth0 account. This will require an email and password. Auth0 will send an email to validate the account. Follow the link in the email, answer Yes, Coding to the Role question, and click Next.
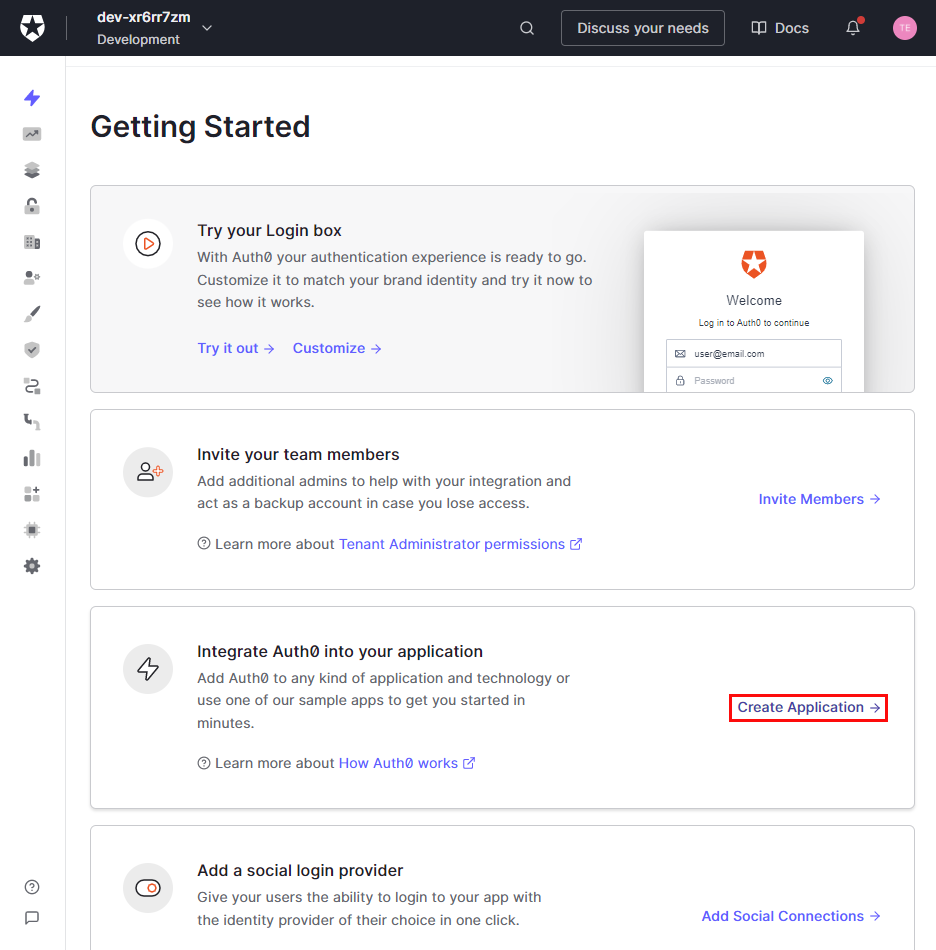
Once the account is created, select Create Application in the integrate Auth0 into your application section.
Enter a Name for the application, click on the Regular Web Applications box, and click Create.
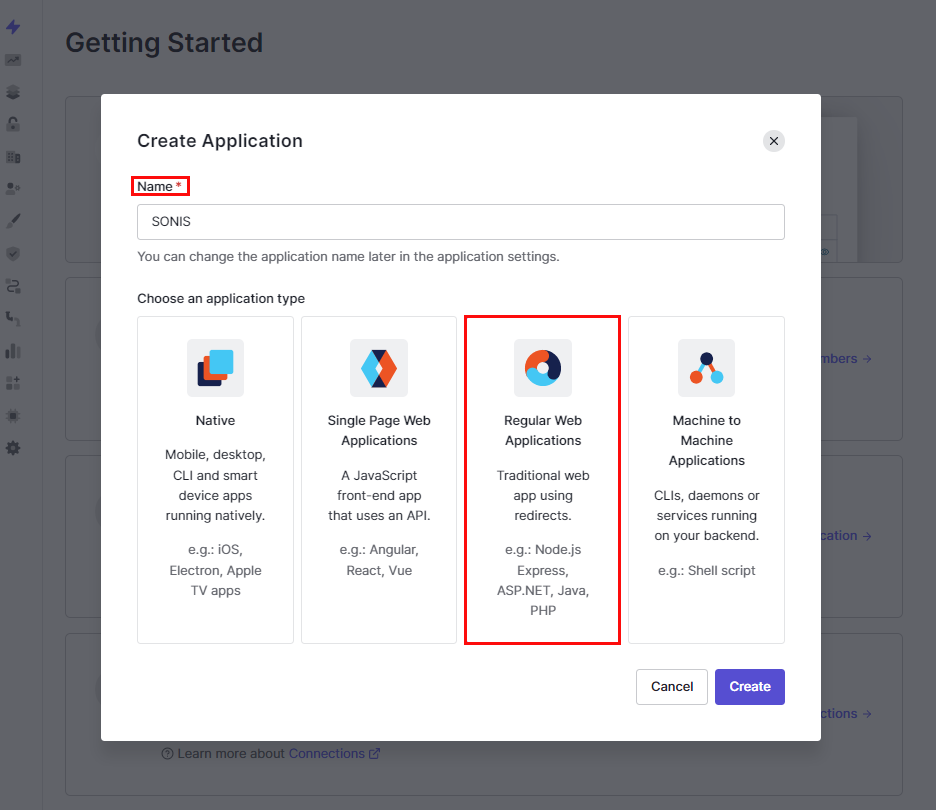
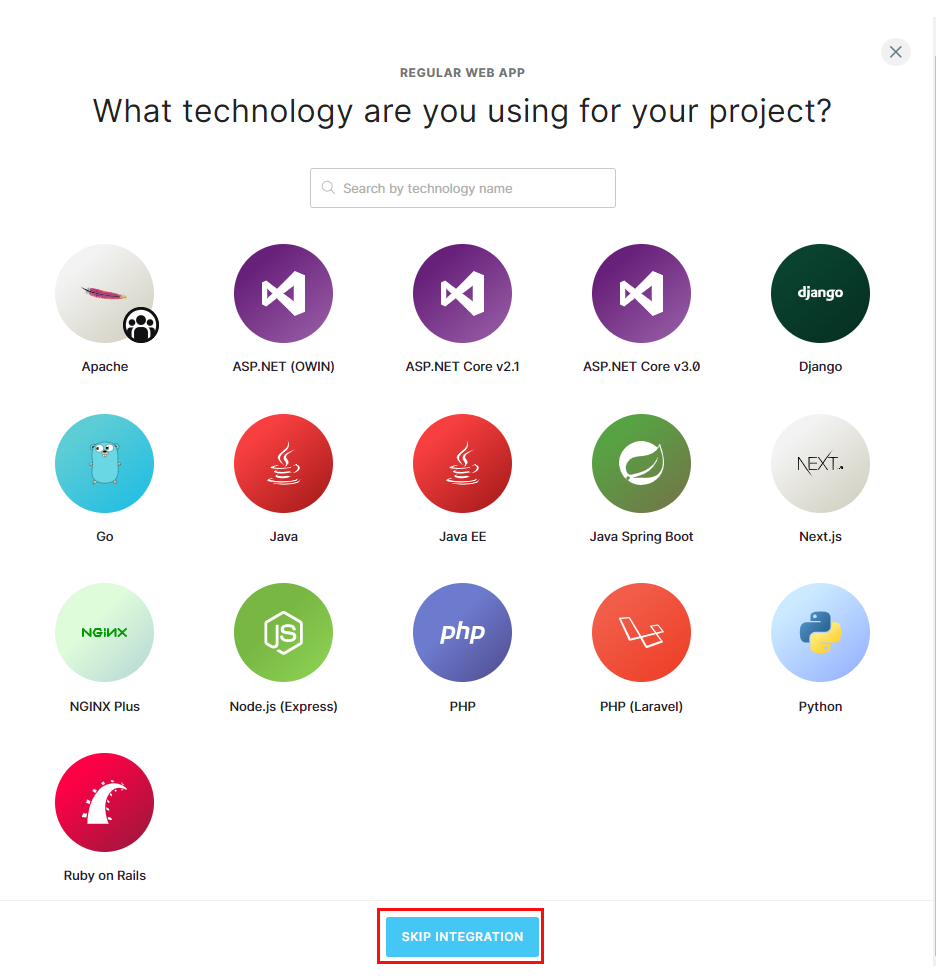
On the next page, click Skip Integration. The application will display, defaulted to the Settings page.
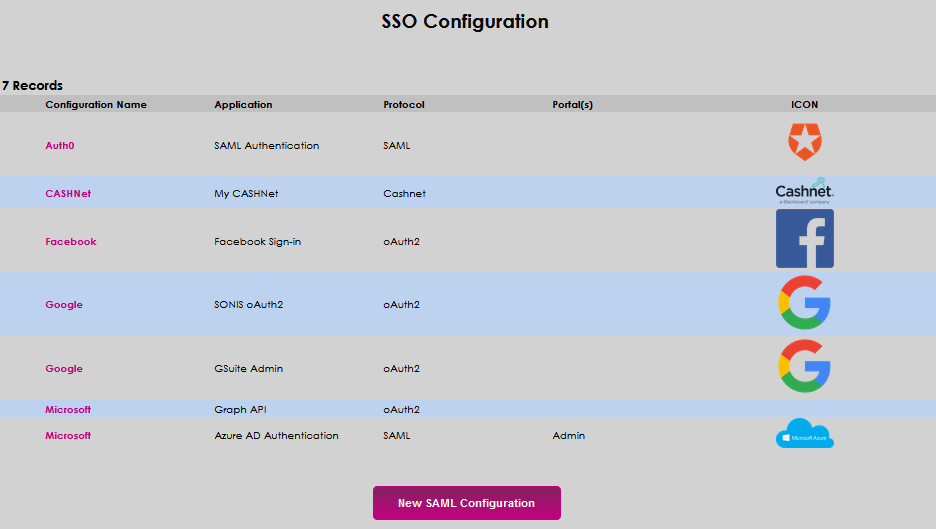
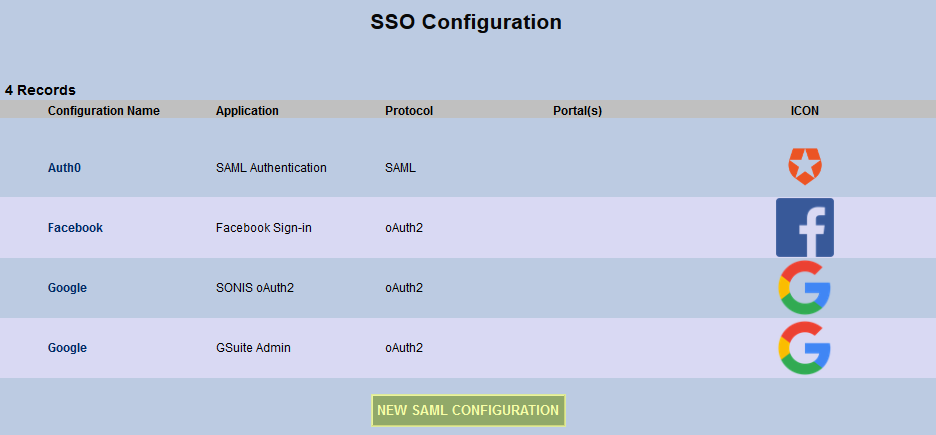
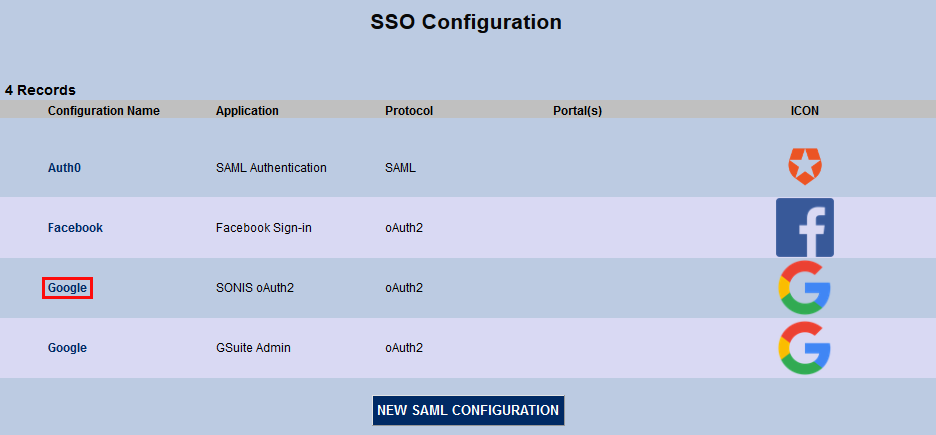
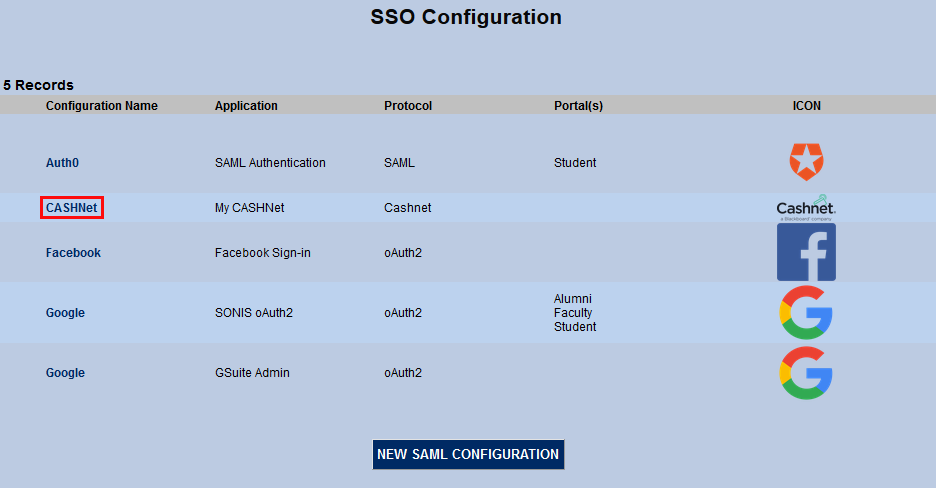
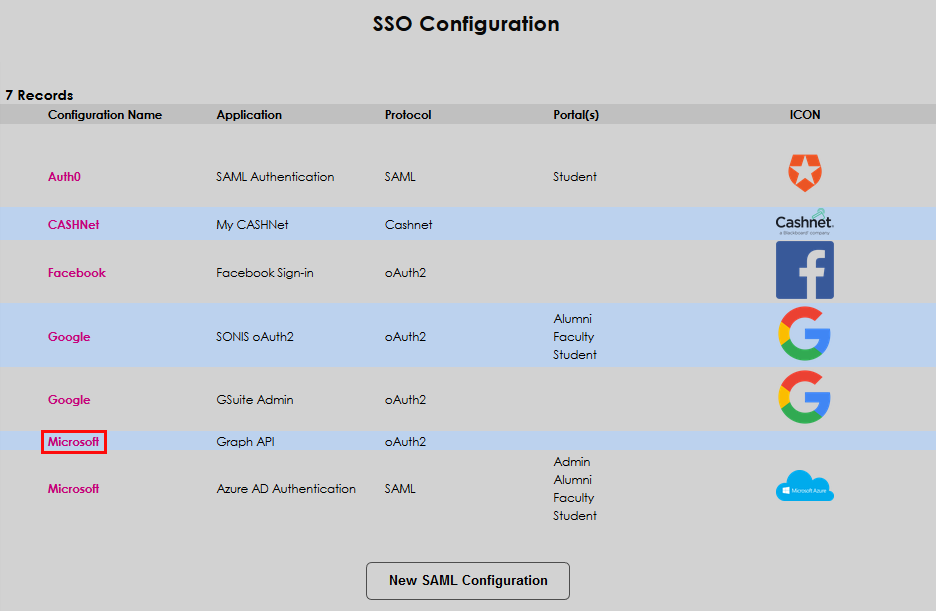
Navigate to the SSO Configuration page from the SONIS Systems hub. Two options are available: editing the default Auth0 example delivered with SONIS or creating a new configuration. Select the one that meets institutional goals for SONIS management best.
Creating a New Configuration
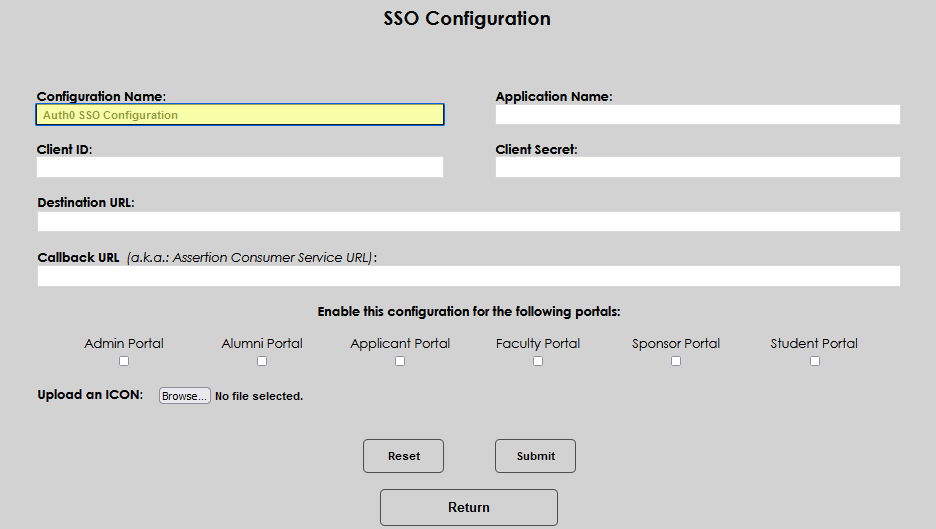
Click New SAML Configuration.
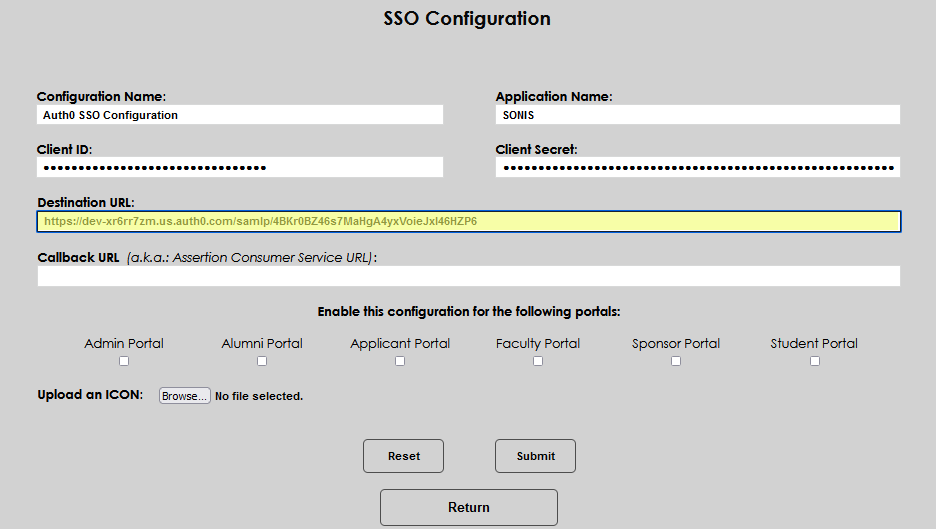
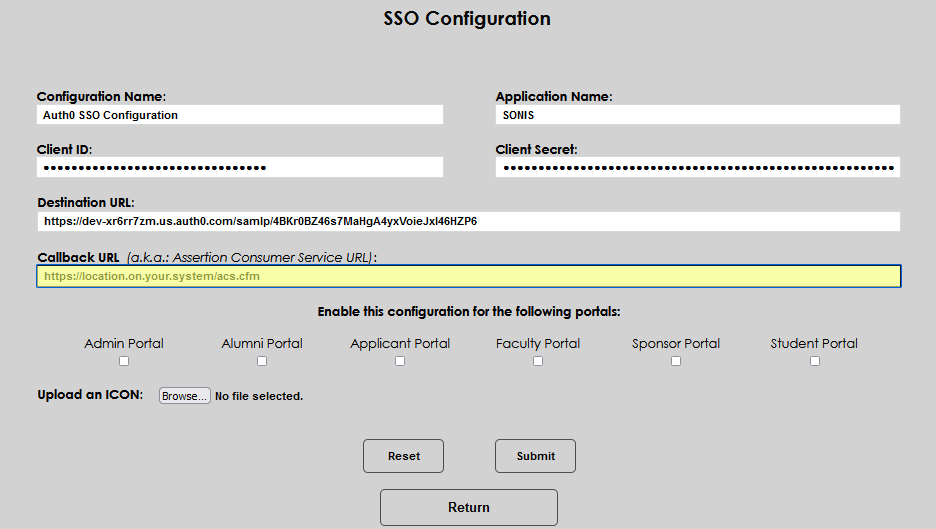
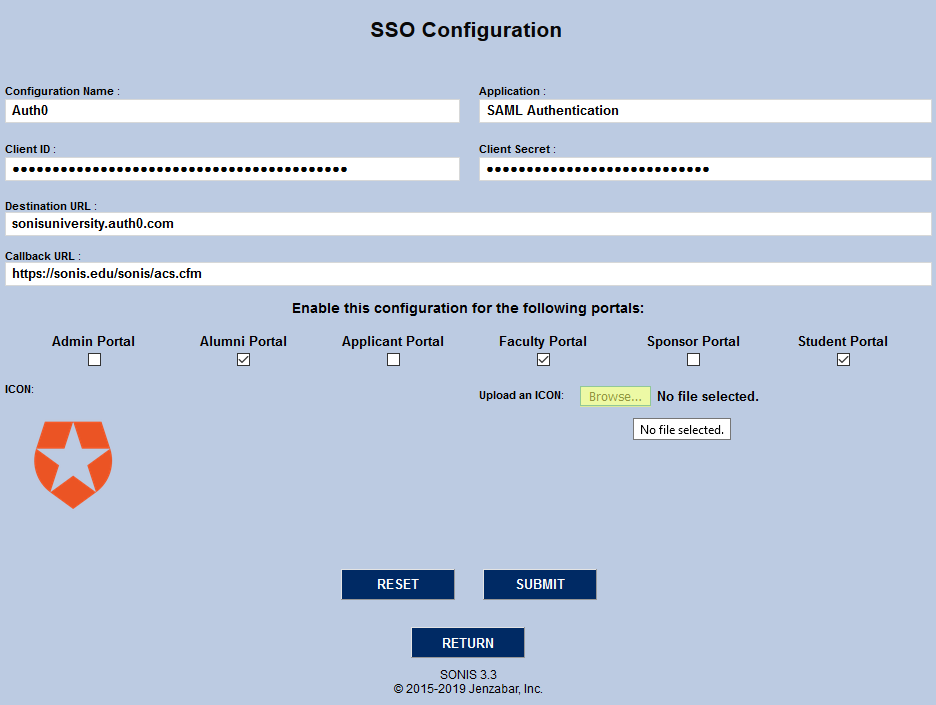
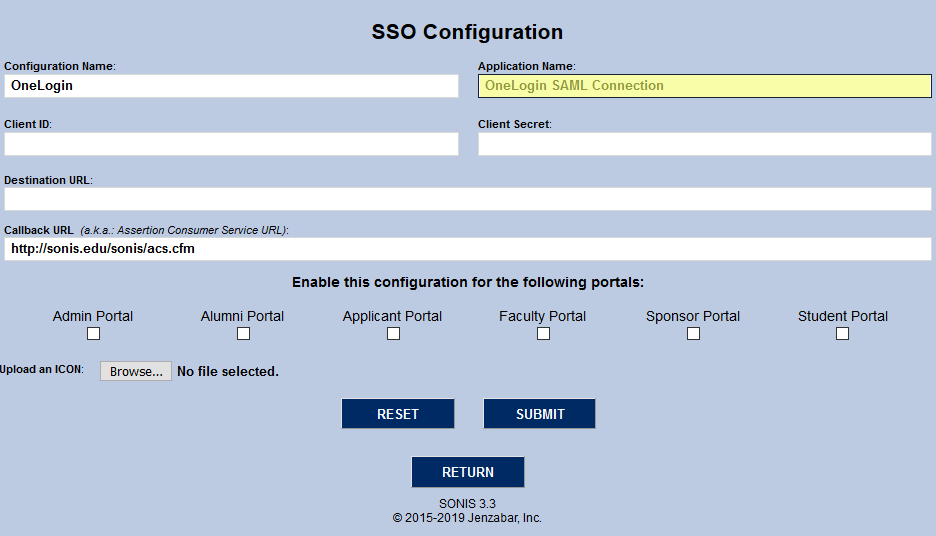
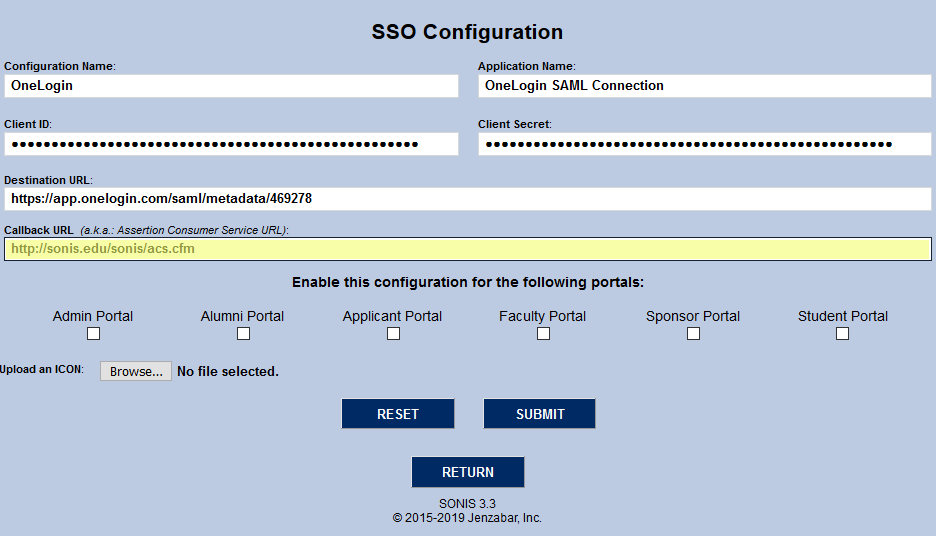
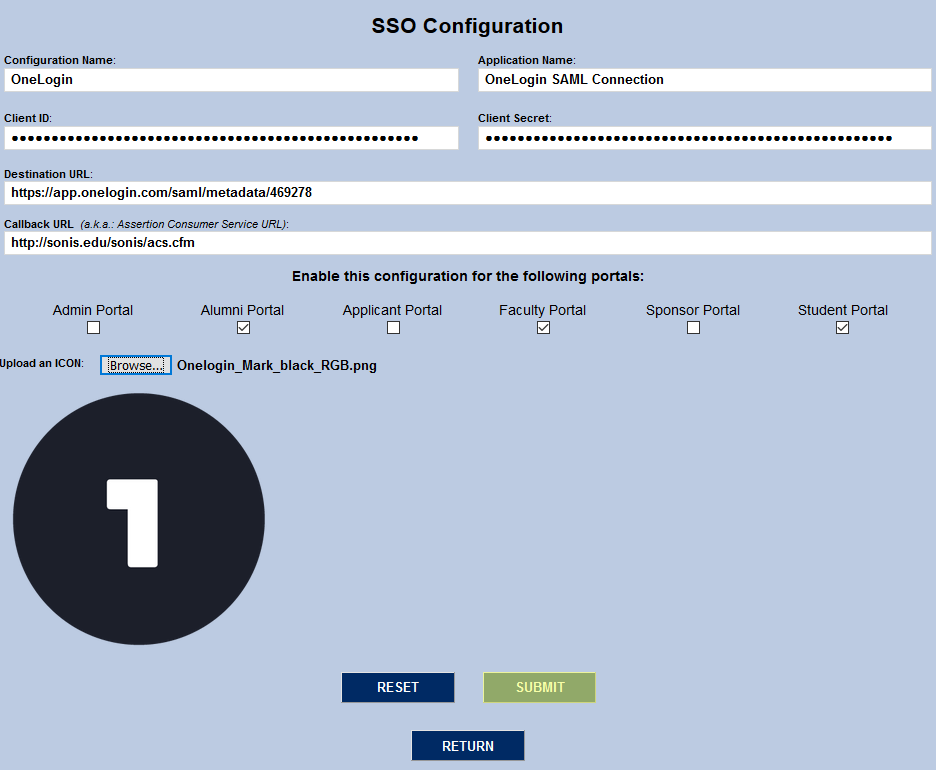
Enter a title for configuration in the Configuration Name field. This name may be up to 127 alphanumeric characters and will display on the SSO Configuration page.
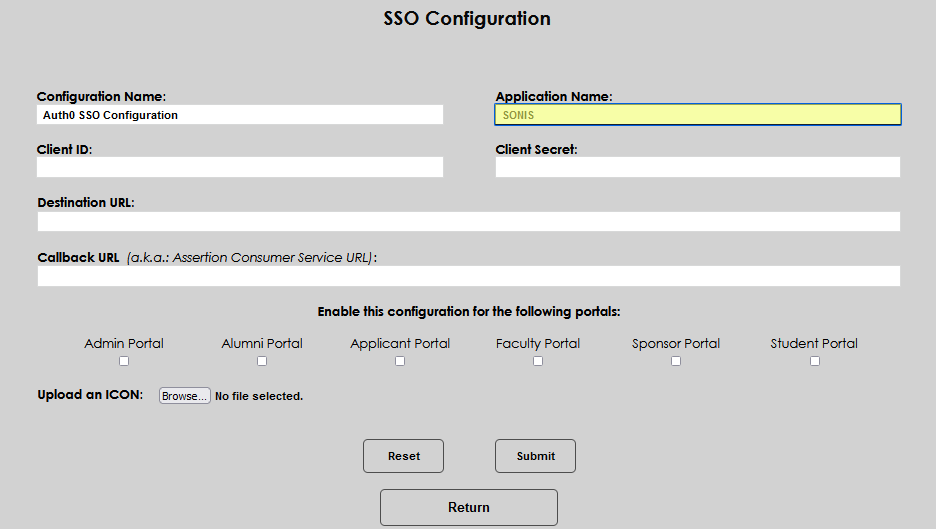
Enter the name used for the application in Auth0 into the Application Name field.
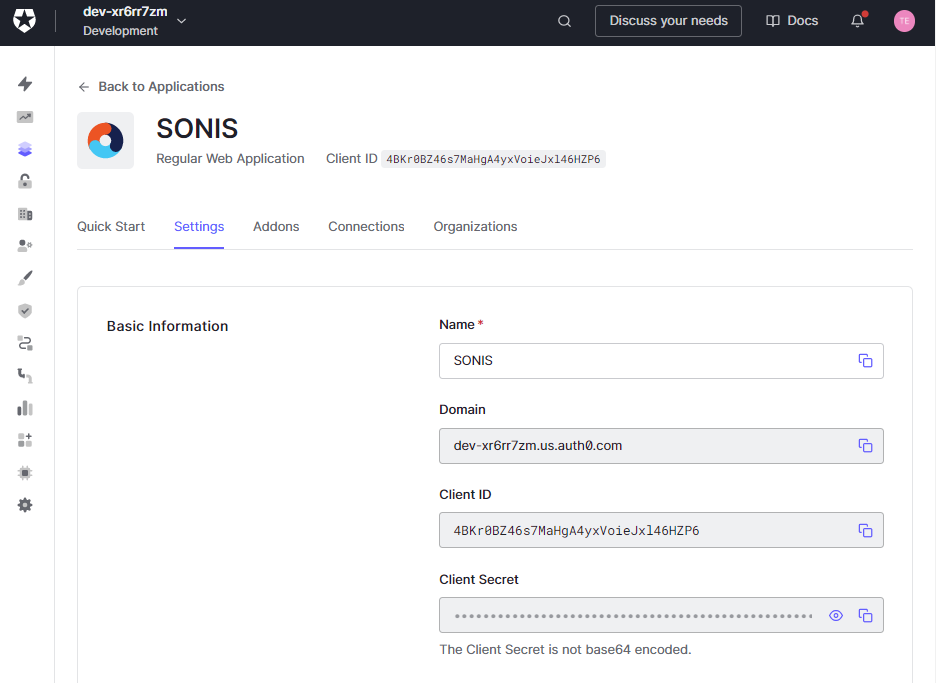
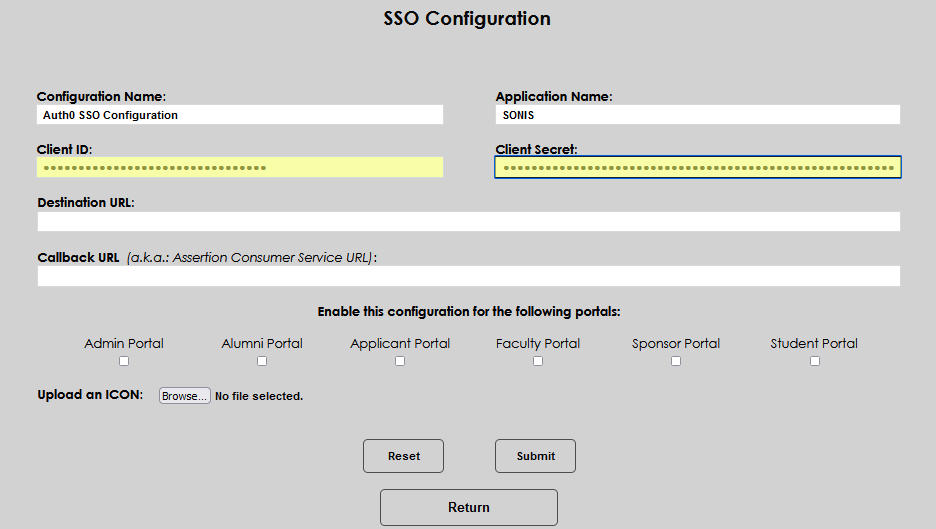
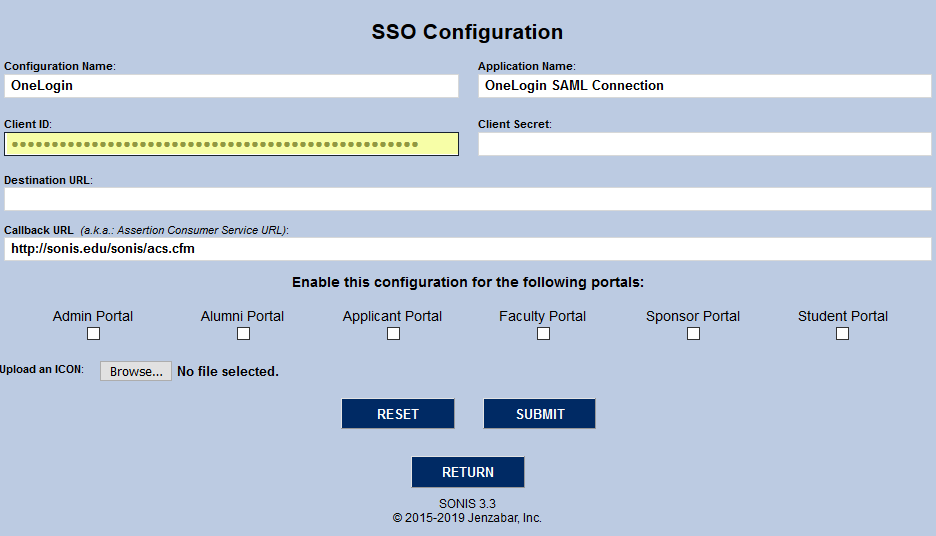
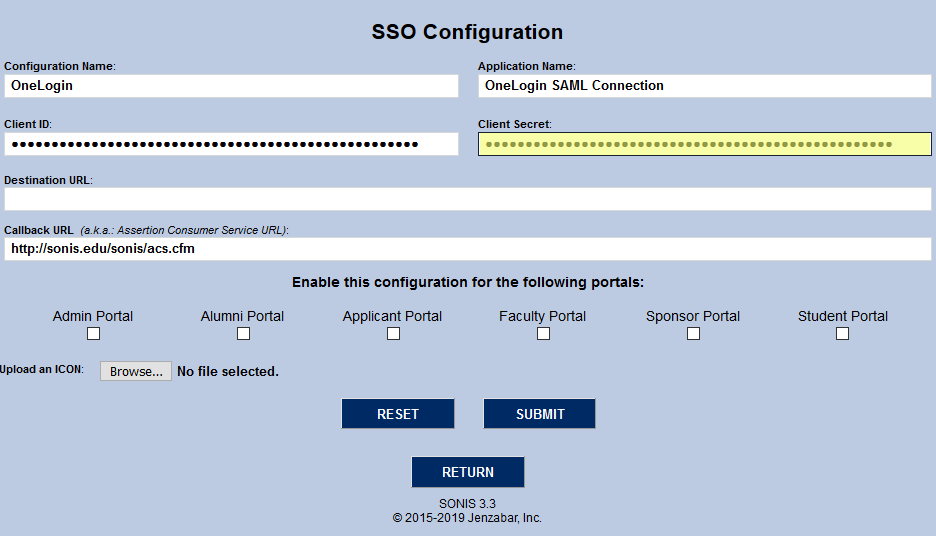
Copy and paste the Client ID and the Client Secret from the Auth0 Application into the corresponding fields in SONIS.

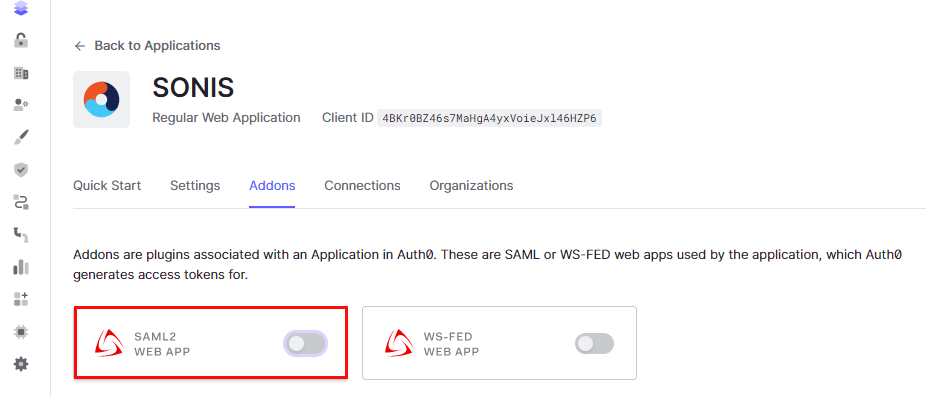
Click on the Addons tab on the Auth0 application page.
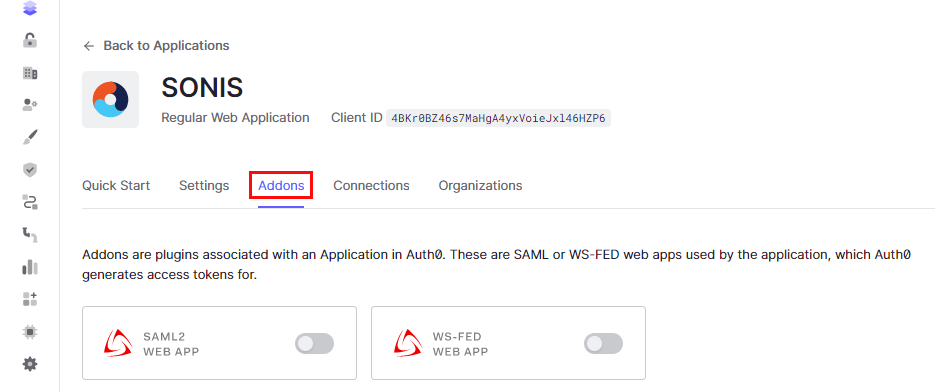
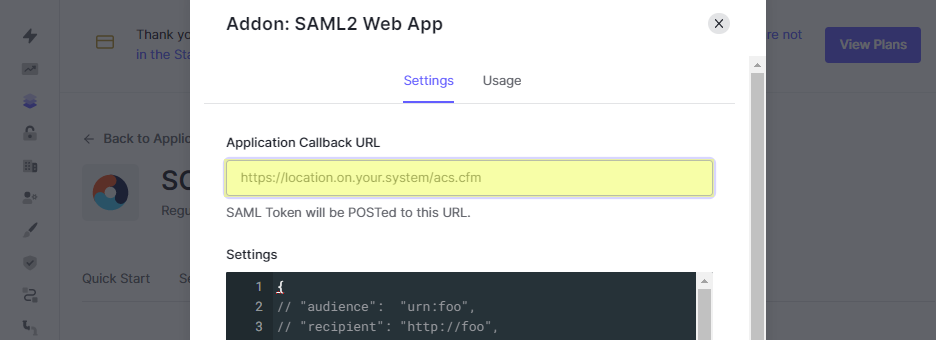
Enable the SAML2 Web App option by clicking on the slider button.
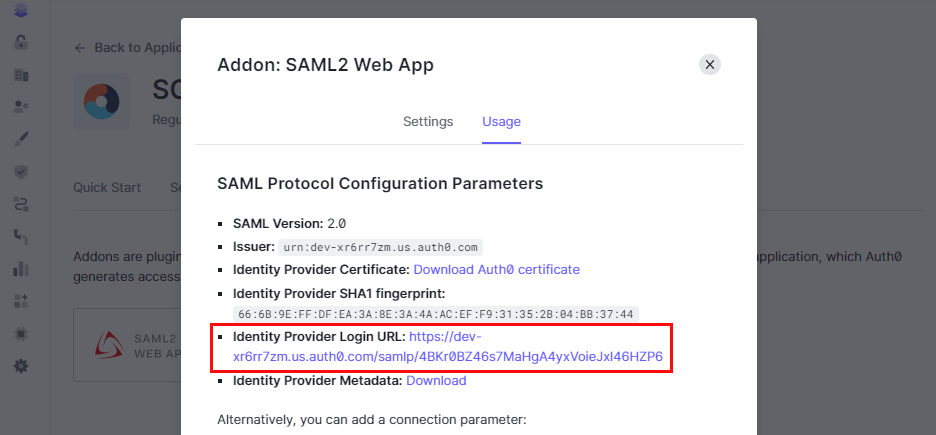
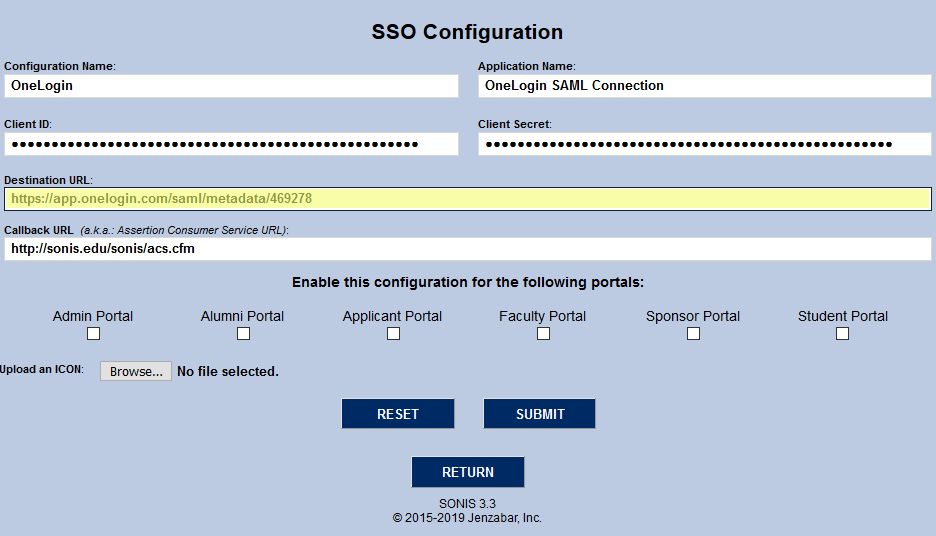
When the slider button is clicked, a page will display with details about the SAML Protocol Configuration. Copy and paste the Identity Provider Login URL value into the Destination URL field in SONIS.
Select the Settings tab in the Auth0 application SAML Protocol Configuration page.
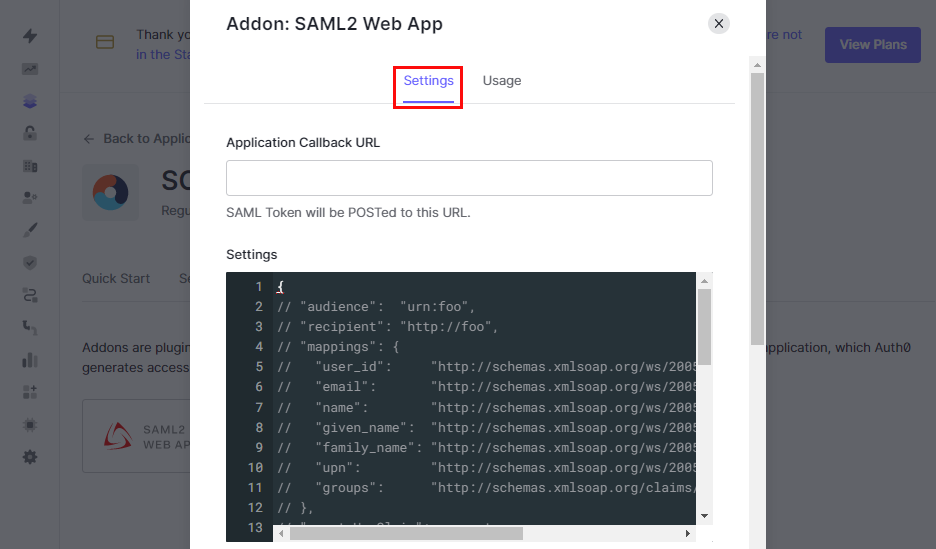
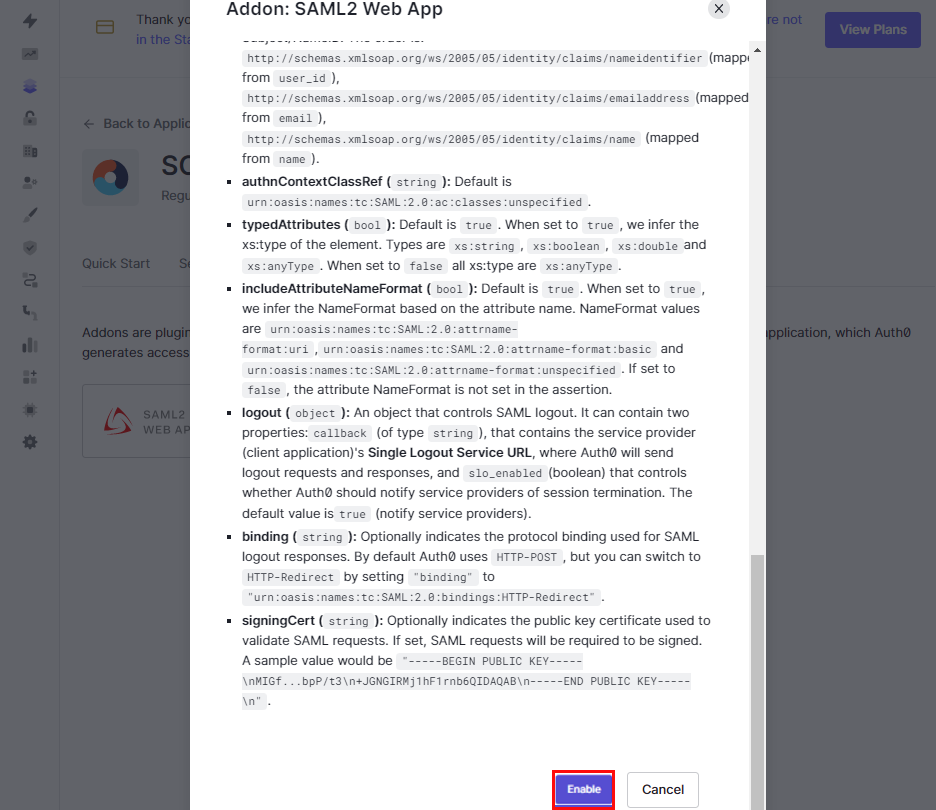
Enter the Application Callback URL which will be the location of the acs.cfm form from SONIS. Scroll to the bottom of the page and click Enable.
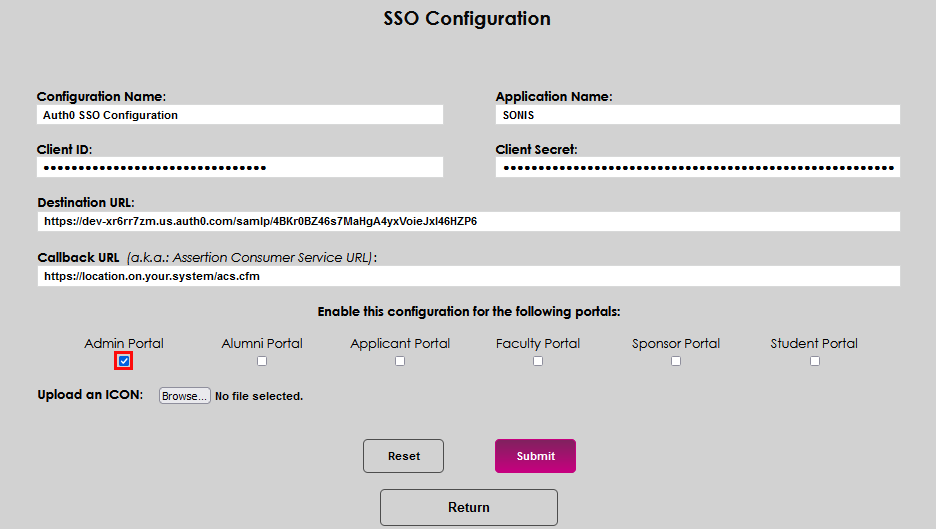
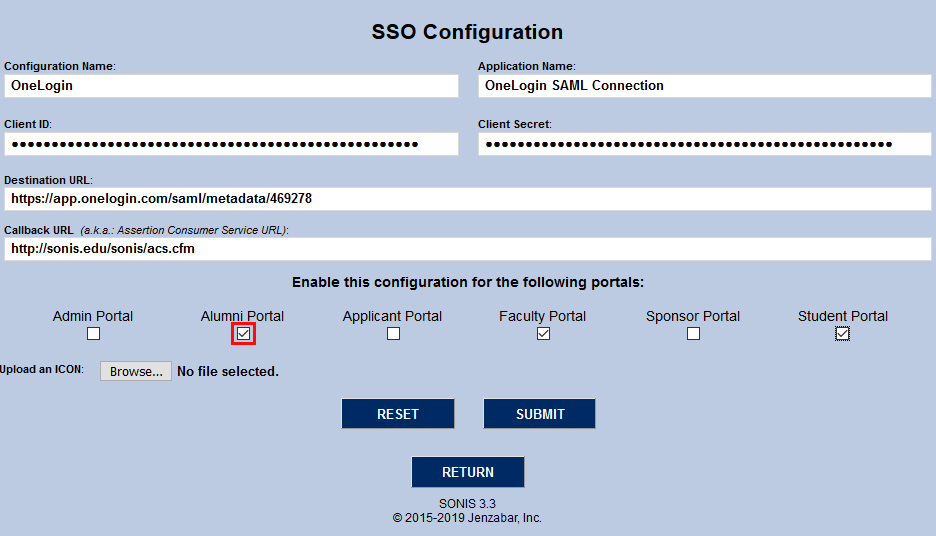
Enter the Callback URL in SONIS with the same value entered in Auth0. Check the appropriate checkbox for each portal that should have this SS0 Configuration enabled and click Submit in SONIS.
Changing the Logo
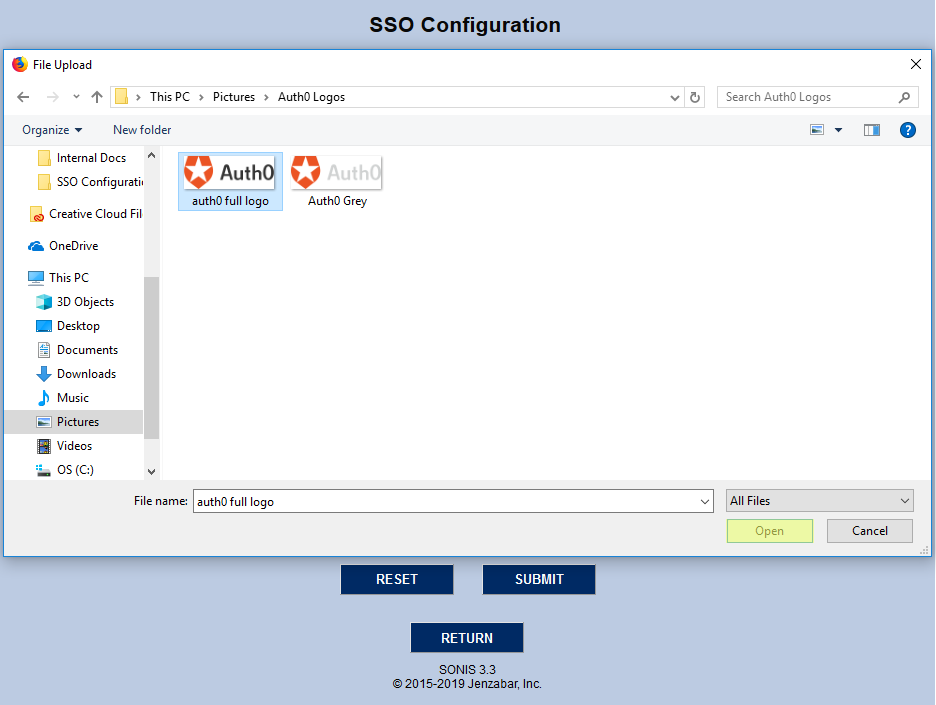
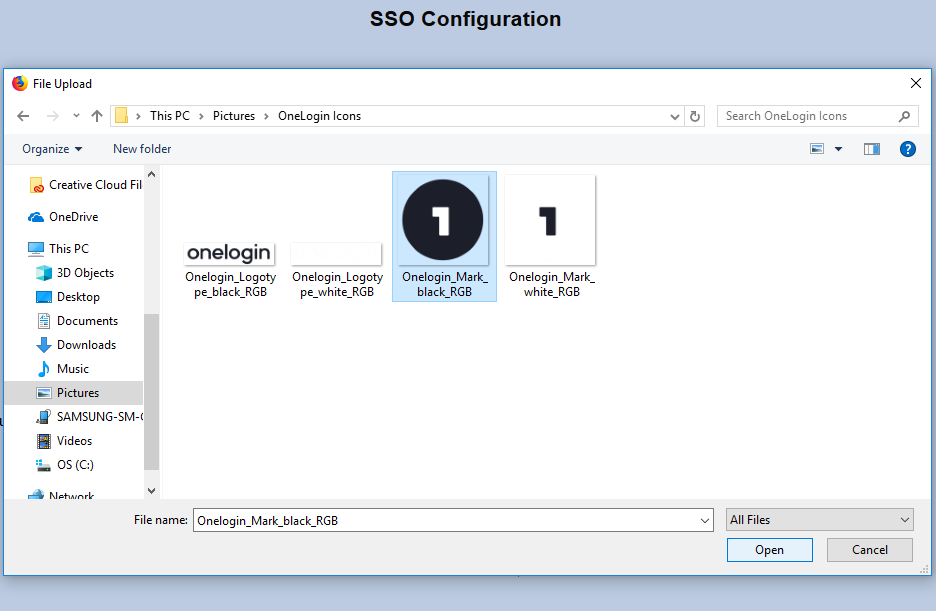
Jenzabar SONIS provides an Auth0 logo by default. To change the logo, click the Browse button, locate the file on the local computer, and either double-click it or click it once and click Open. Click Submit to save the updated logo.
New SAML Configuration Using Another Authenticator
Institutions that wish to use another SAML authenticator other than Auth0 can do so by configuring Jenzabar SONIS as shown in the following steps. Begin by clicking the New SAML Configuration button at the bottom of the page.
On the following page, create a Configuration Name and an Application Name. The configuration name is a short name of no more than 16 characters. It will allow you to identify the configuration quickly. The Application Name can be up to 32 characters and is a more descriptive label.
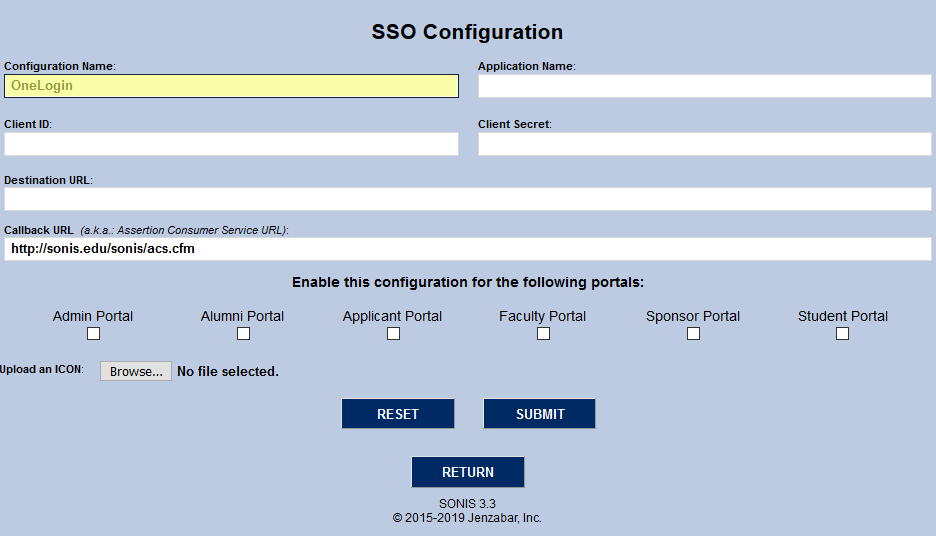
The Client ID and Client Secret will both be provided by the SAML identity provider. These are masked when entered and encrypted in the database.
The Destination URL will be listed in the setup with the identity provider as well.
The Callback URL is the page where the user logging in should return after being directed to the SSO provider. The field should automatically populated and should be left as filled if SONIS will handle the redirect. If students should be sent to another site, replace the pre-filled value with the correct URL.
Choose which portal or portals should have the SAML login active and check the corresponding box or boxes.
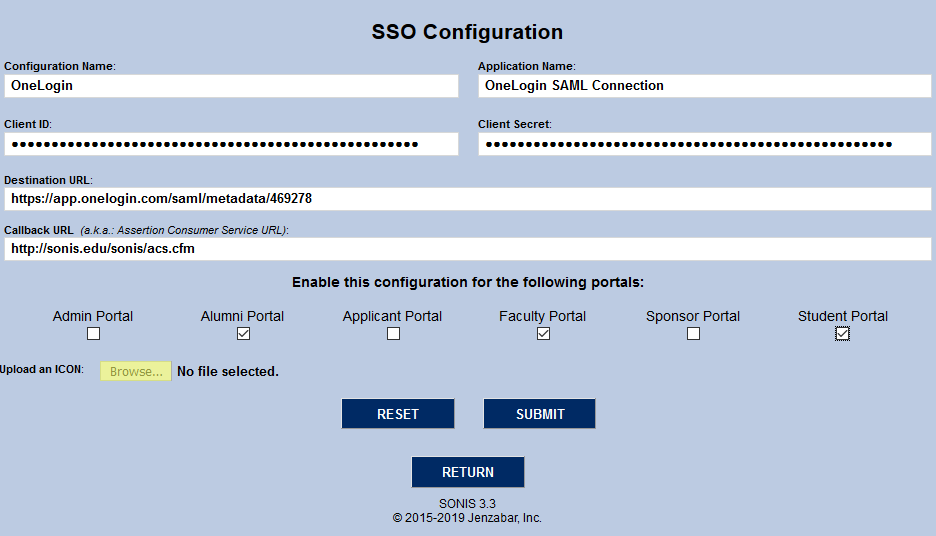
To upload a logo for the connection that will appear on the SONIS sign-in page, click the Browse button, locate the file on the local computer, and either double-click it or click it once to select it and click Open.
Click Submit to save the changes. The SAML login will be active within Jenzabar SONIS.
Setup Within Provider Application
Each SAML or SSO provider has different set up requirements, but most will need a similar type of information. The details provided here may be used to configure the provider connection within the provider's system or application.
* SAML Subject NameID Format: Ideally, this would be a nmeid-format:emailAddress. If this is not possible, Jenzabar SONIS has been coded to expect an email address in other areas of the response.
* Redirect Endpoint: The Jenzabar SONIS redirect is the acs_saml.cfm with the relaystate returned to SONIS from the SSO provider. A form field called relaystate is included in the request and the relaystate needs to be returned as a form variable called relaystate.
* Signature Algorithm: No specific signature algorithm is required.
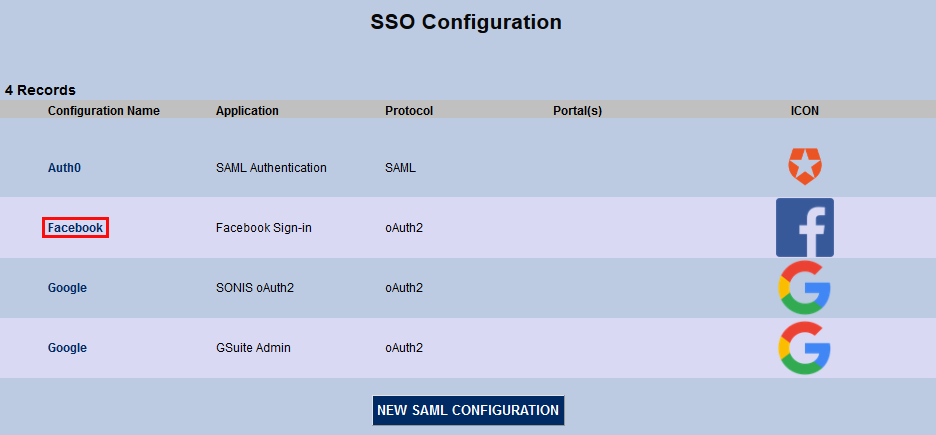
OAuth
The OAuth protocol is used by both Facebook and Google. In both cases, the first step is to acquire a free developer account. Create a Login API in the Facebook and/or Google system. Once the application has been created, Facebook and Google will provide the values that are needed for SONIS configuration.
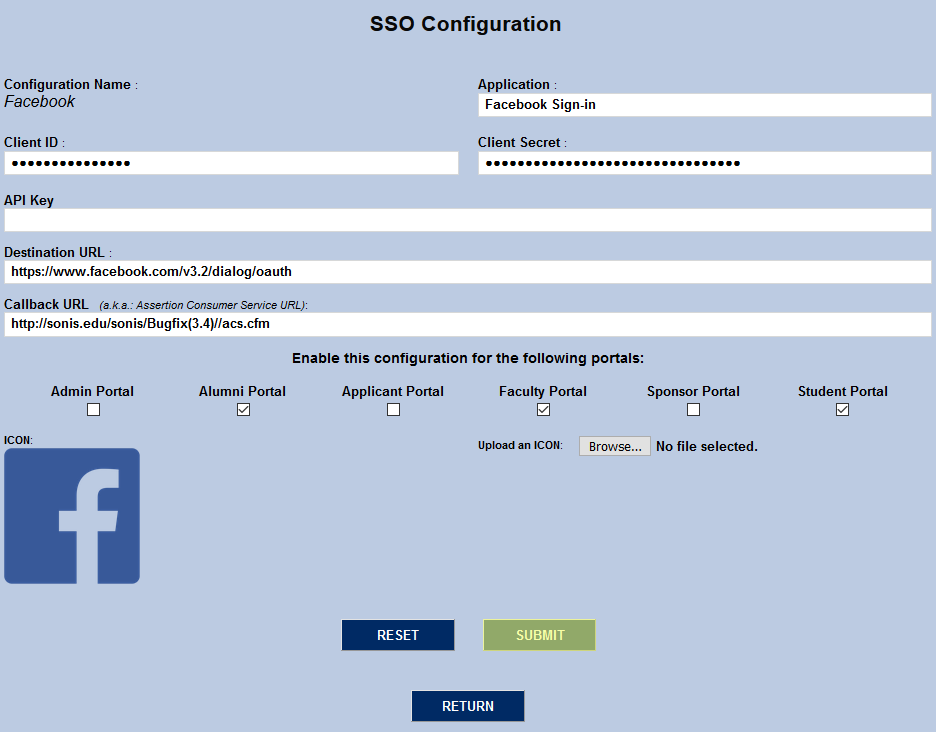
To set up Facebook single sign-on, click the Facebook link in the Configuration Name column.
The Configuration Name is locked in and can not be changed. The Application Name field is automatically populated as well, but can be edited to suit individual needs.
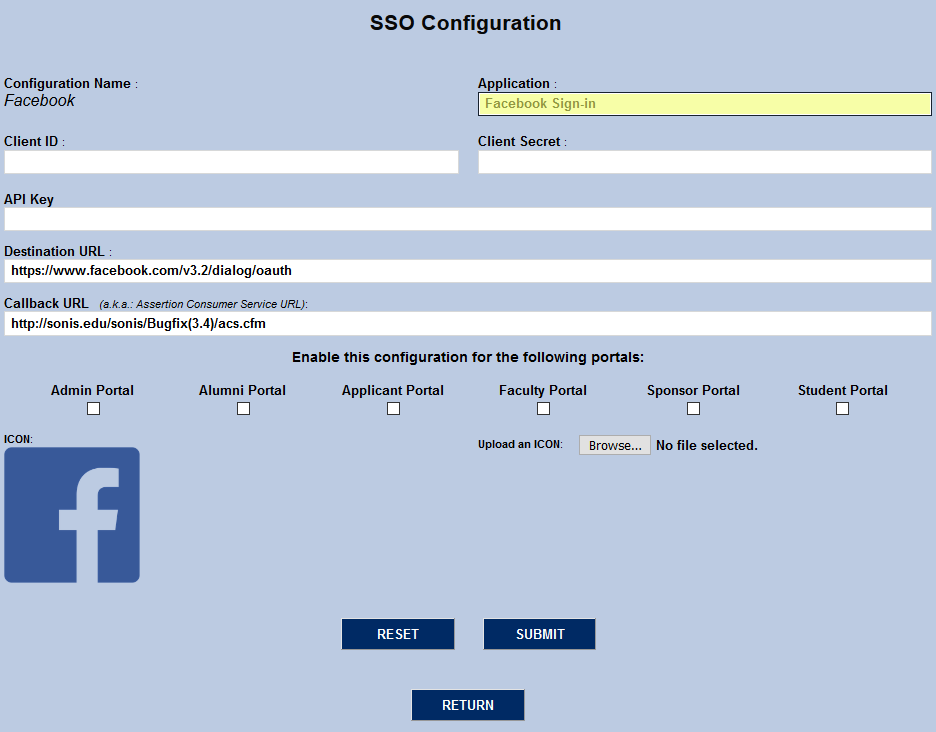
The Client ID and Client Secret values are provided by Facebook under the Basic Settings tab as the App ID and App Secret. Copy and past them into the corresponding SONIS fields.
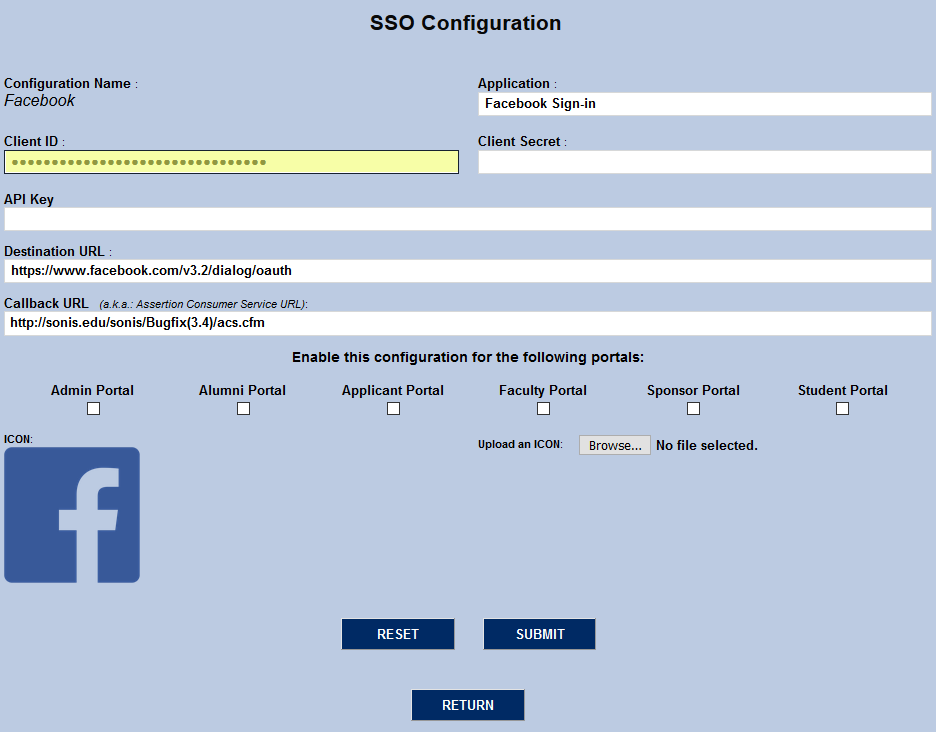
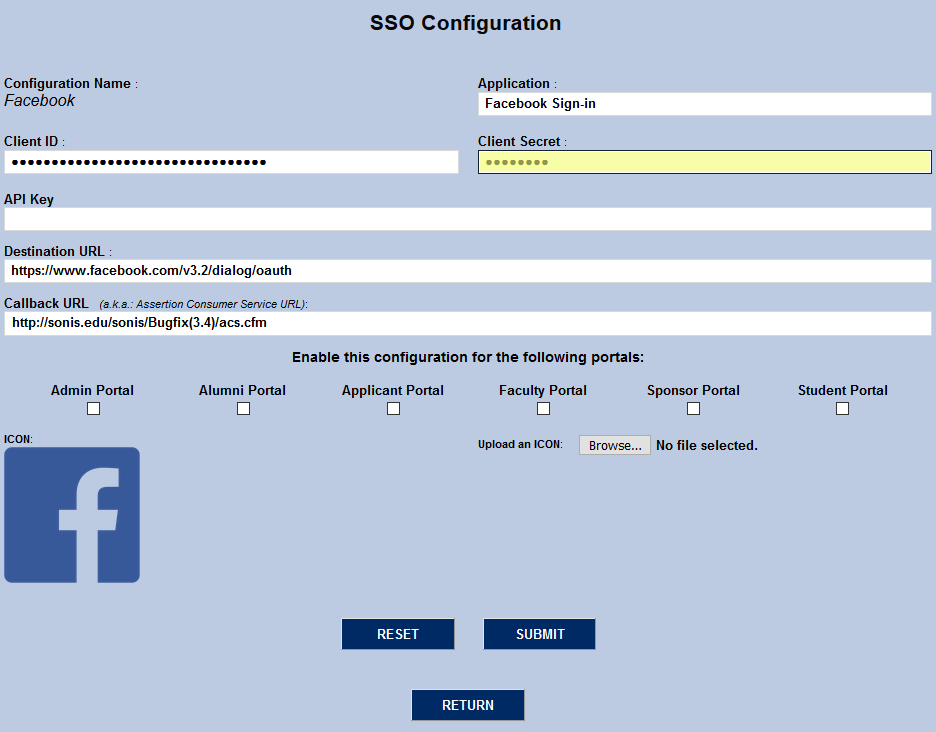
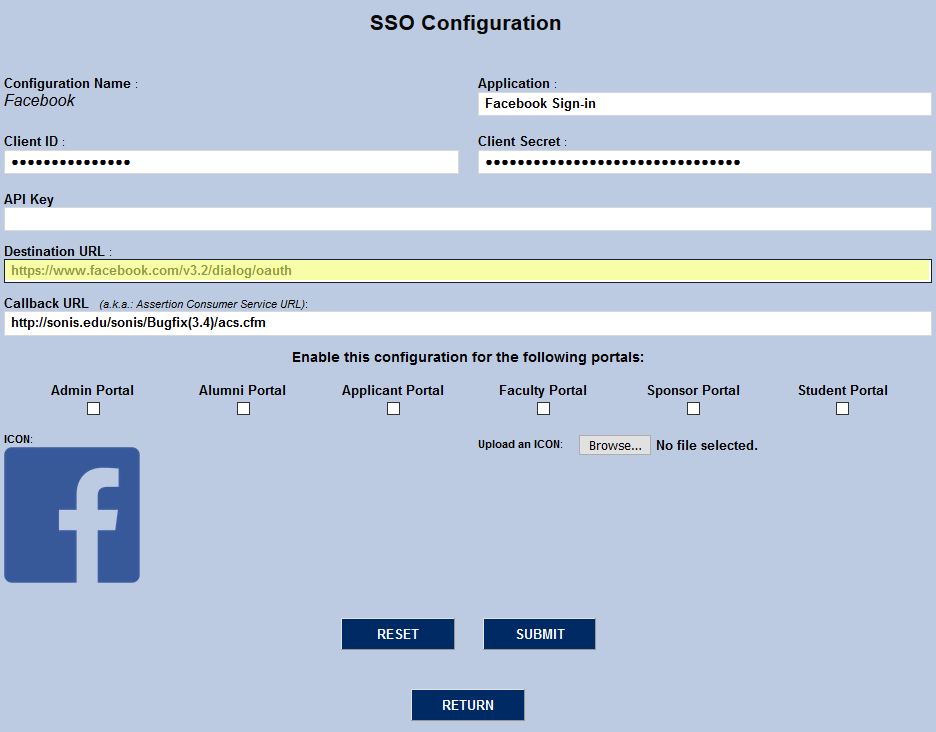
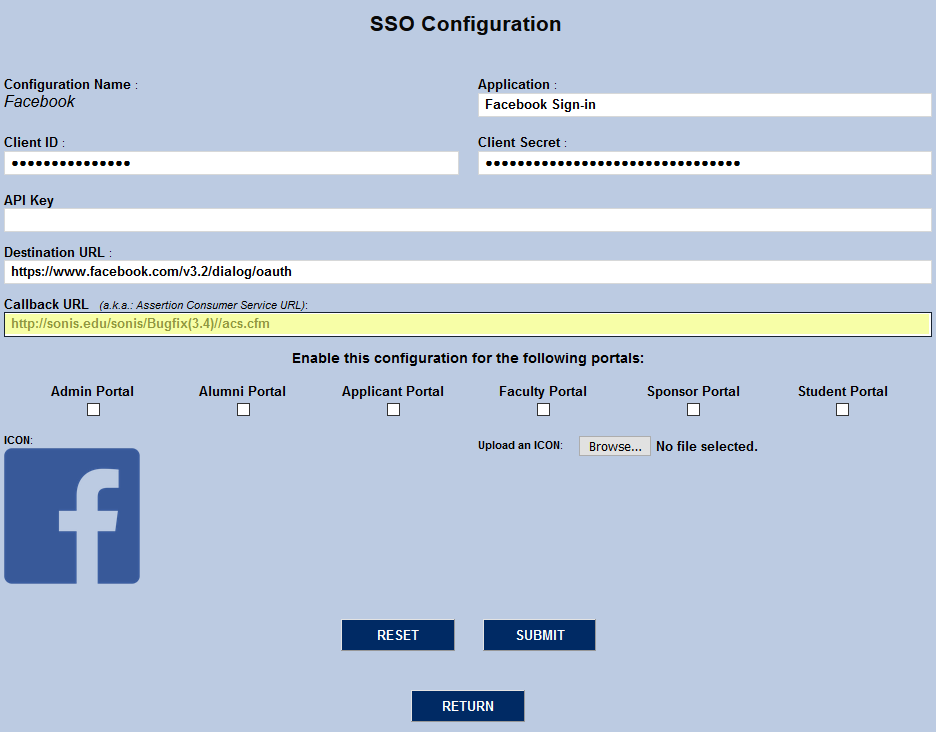
The API Key field is unused at this time and can remain blank. The Destination URL is Facebook's published destination URL for OAuth2 at the time of this release. It should not be changed unless this value changes in the future. The Callback URL is automatically filled in based on the institution's system setup and should also be left unchanged unless the institution needs to direct the users to a different page for some reason.
Choose which portal or portals should have the Facebook login active and check the corresponding box or boxes.

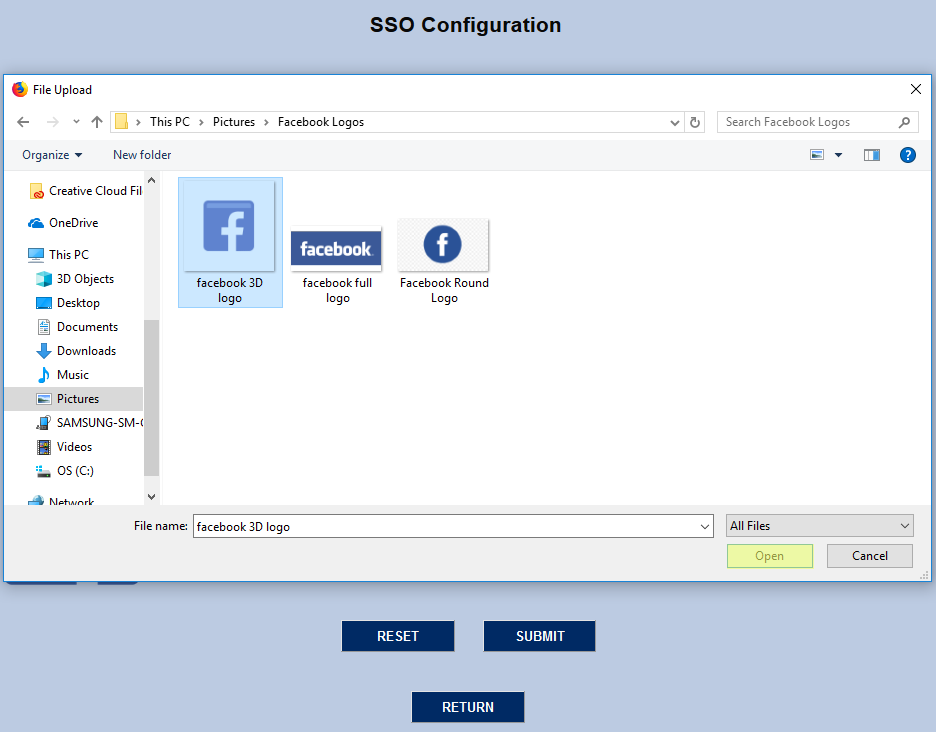
SONIS provides a Facebook icon, but it can be changed to suit user preferences. Click the Browse button, locate the file on the local computer, and either double-click it or click it once to select it and click Open.
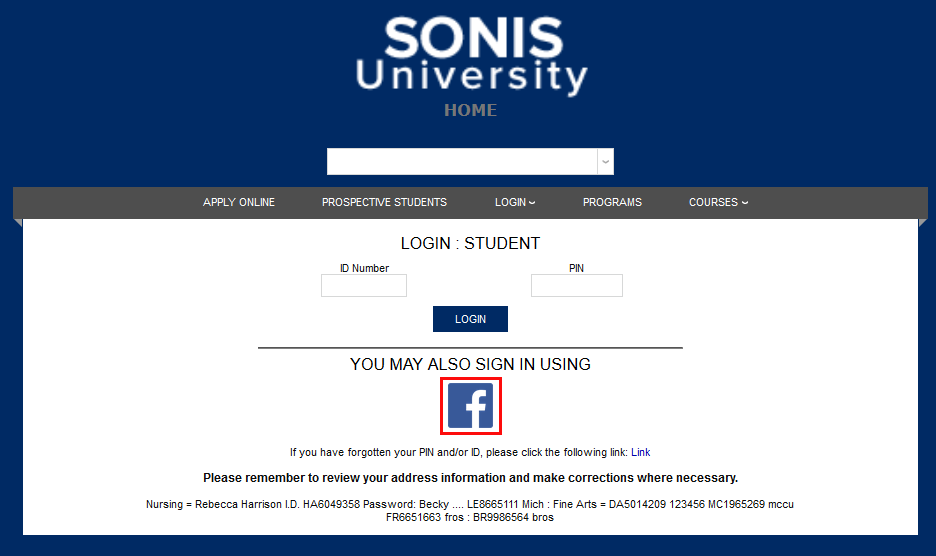
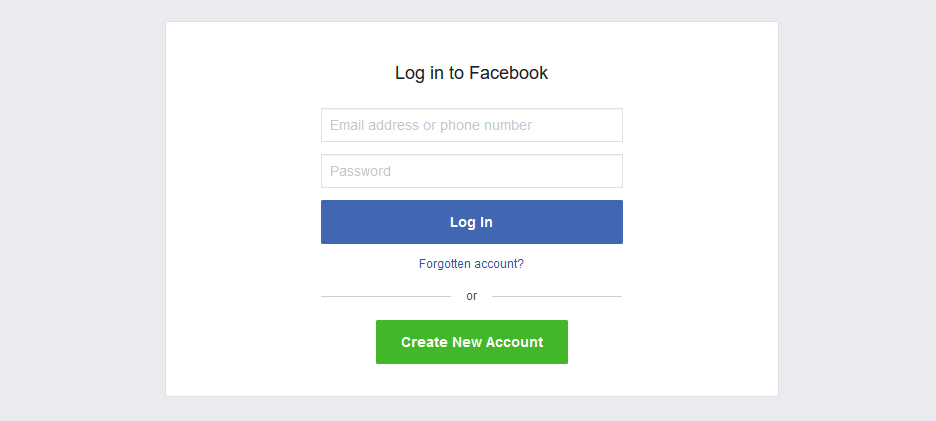
Click the Submit button to save the changes. Facebook login will be active on all selected portals. Users should click the Facebook logo and log into their personal Facebook account. Once the user is logged in to Facebook, they will stay logged in to SONIS as long as their browser window is open.
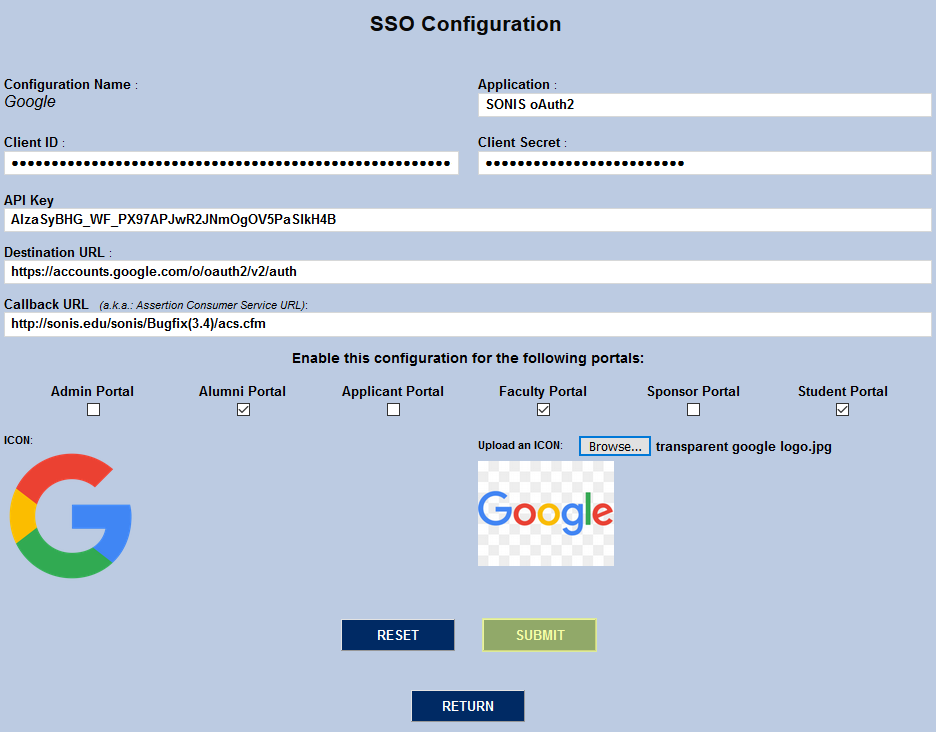
To set up Google single sign-on, click the first Google link in the Configuration Name column.
The Configuration Name is locked in and can not be changed. The Application Name field is automatically populated as well, but can be edited to suit individual needs.
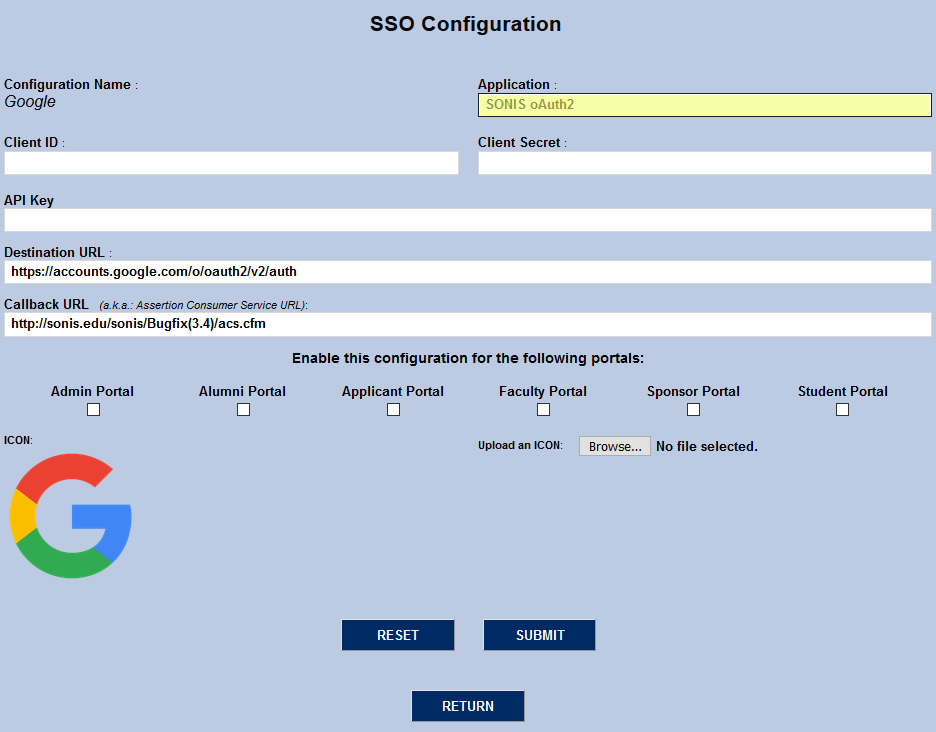
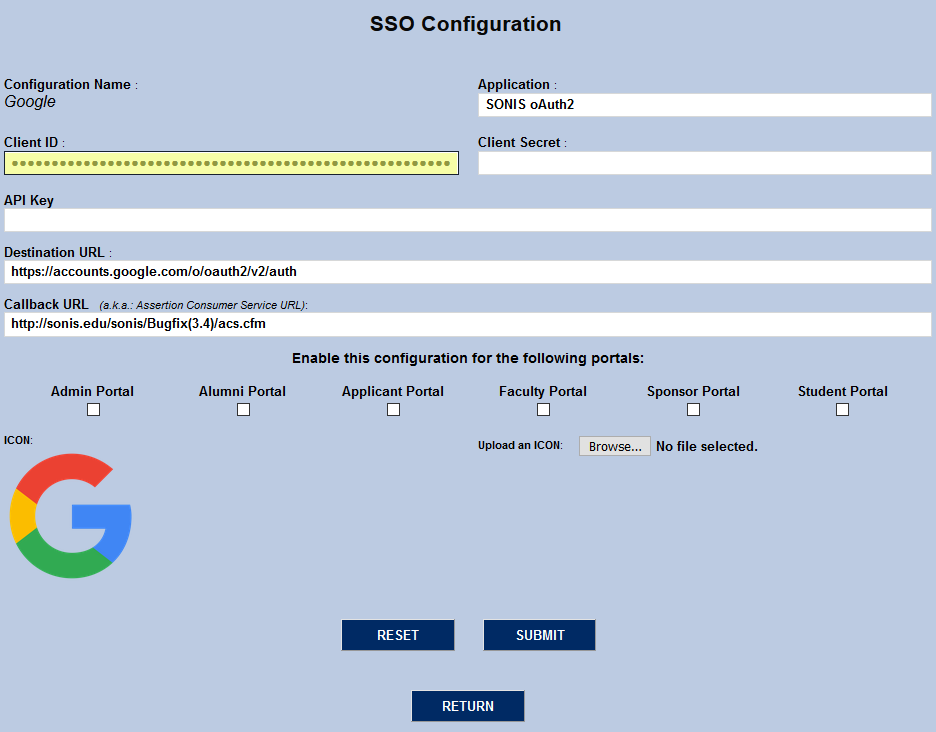
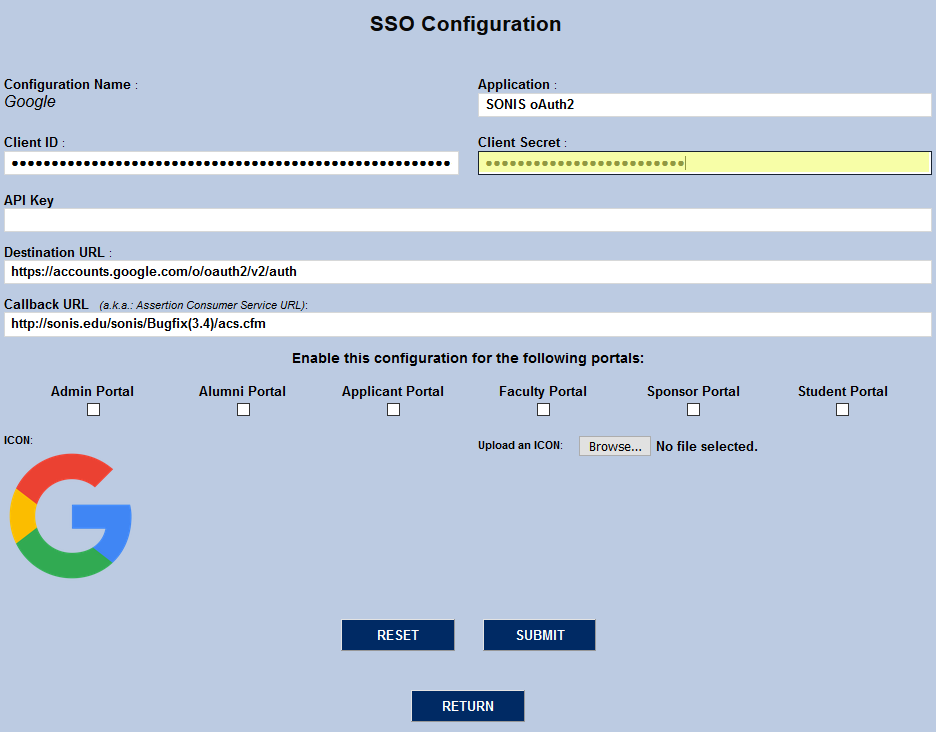
The Client ID and Client Secret values are provided by Google under the Basic Settings tab as the App ID and App Secret. Copy and past them into the corresponding SONIS fields.
The API Key comes from Google. It's located under the Credentials tab.
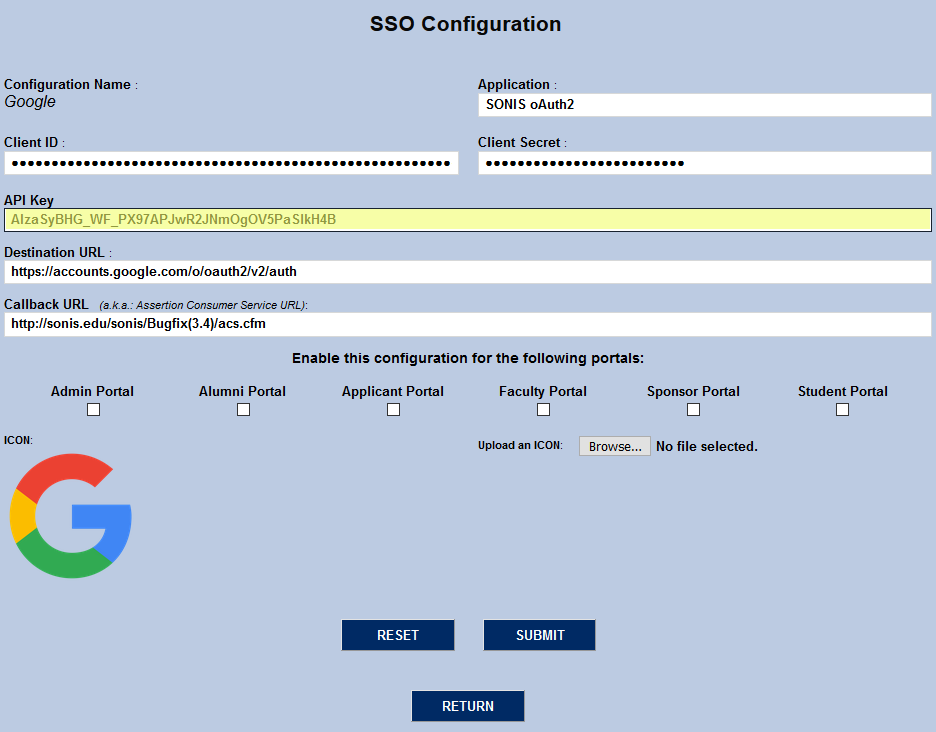
The Destination URL is Google's published destination URL for OAuth2 at the time of this release. It should not be changed unless this value changes in the future. The Callback URL is automatically filled in based on the institution's system setup and should also be left unchanged unless the institution needs to direct the users to a different page for some reason.
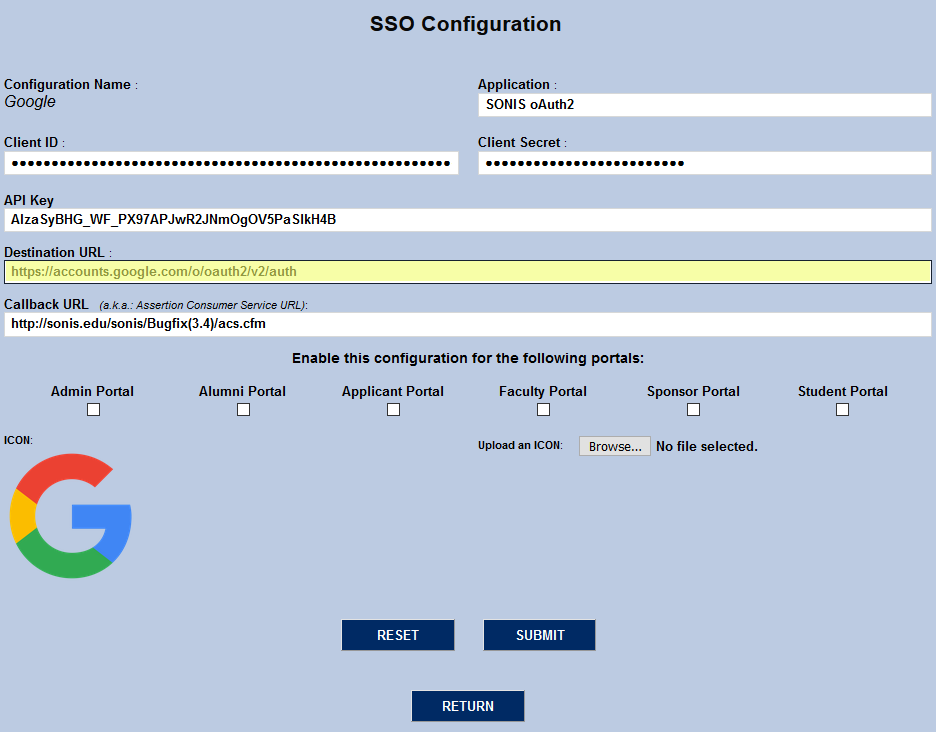

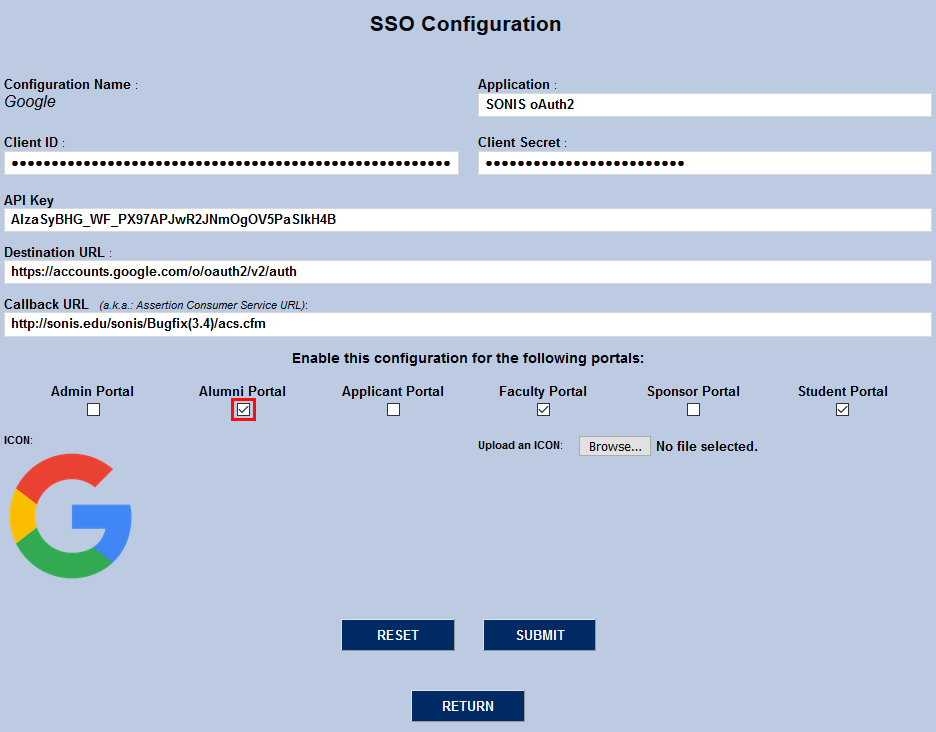
Choose which portal or portals should have the Google login active and check the corresponding box or boxes.
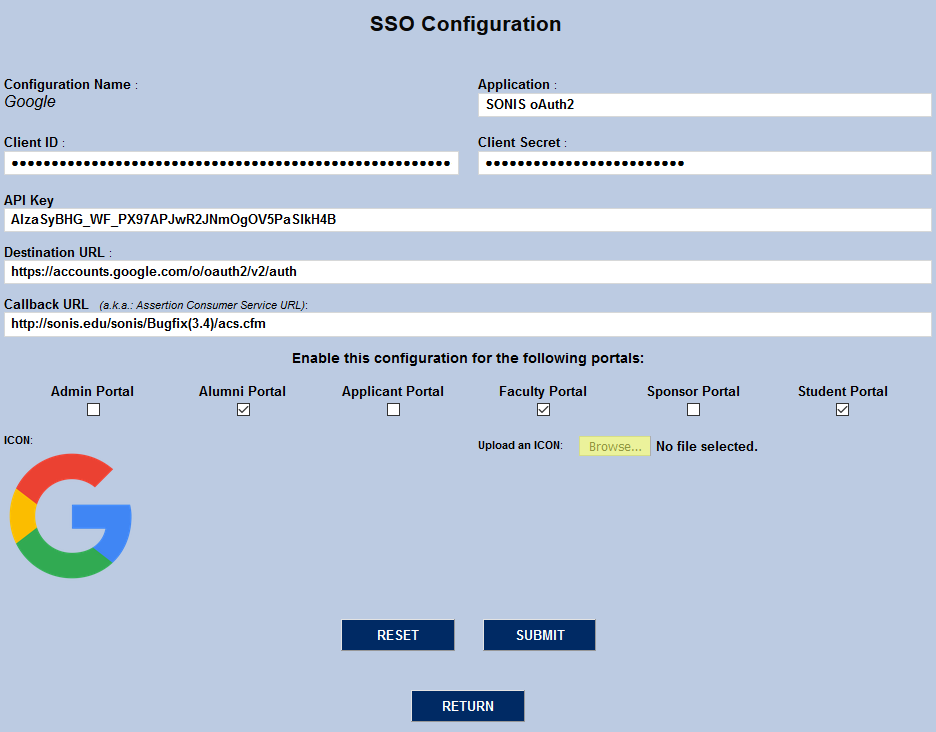
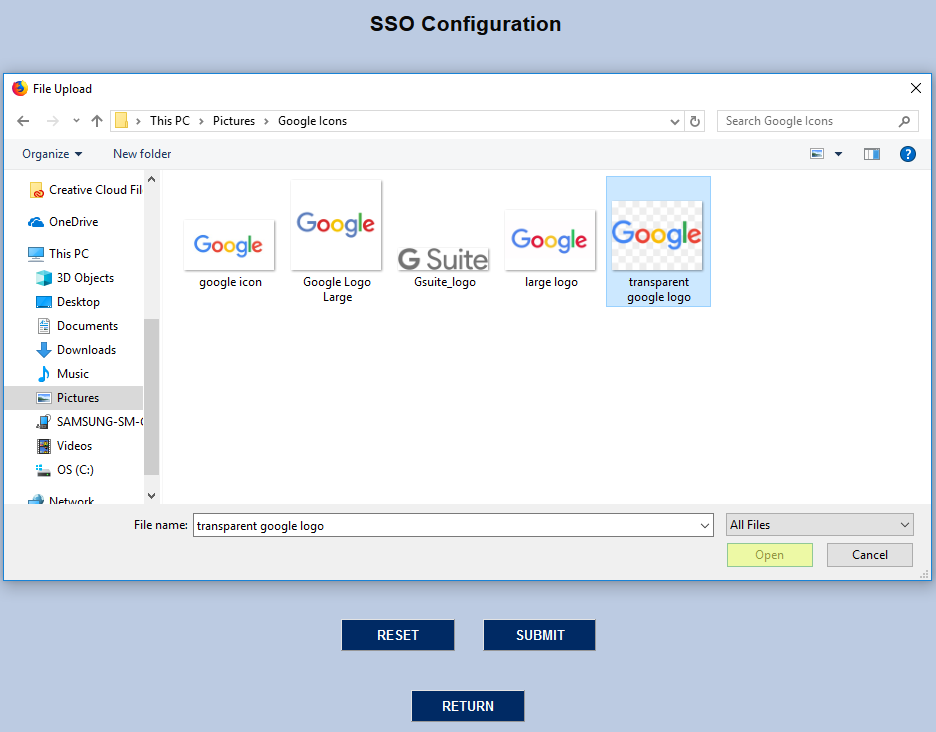
SONIS provides a Google icon, but it can be changed to suit user preferences. Click the Browse button, locate the file on the local computer, and either double-click it or click it once to select it and click Open.
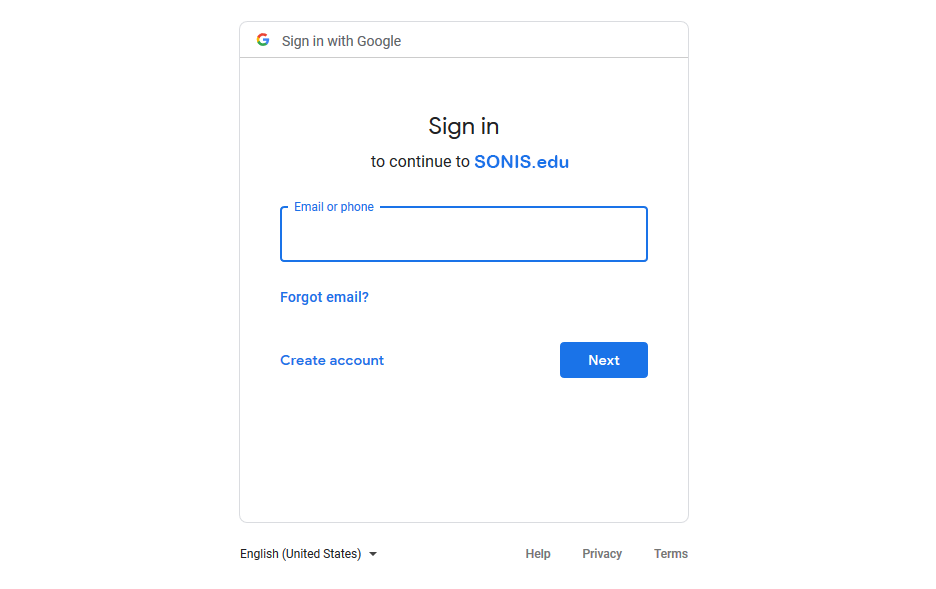
Click the Submit button to save the changes. Google login will be active on all selected portals. Users should click the Google logo and log into their personal Facebook account. Once the user is logged in to Google, they will stay logged in to SONIS as long as their browser window is open.

Transact
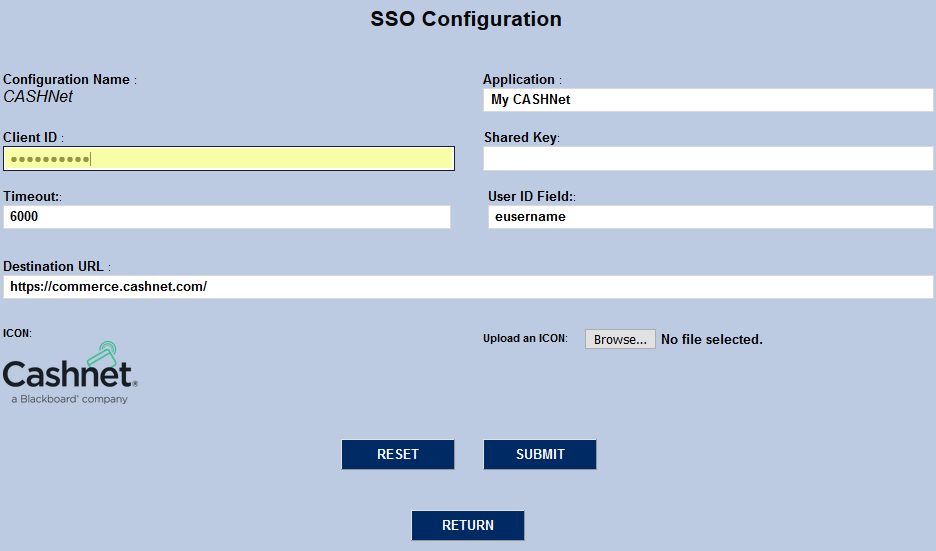
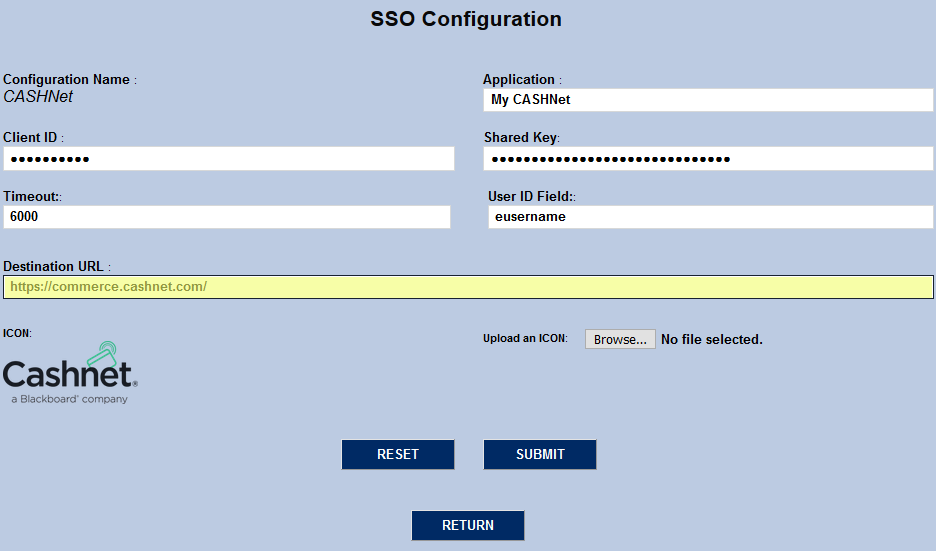
To set up Transact single sign-on, click Transact under the Configuration Name column. Note that Transact was formerly known as CashNet.
On the following page, the Application field is filled in as My Transact Payments by default, but this can be changed to suit individual preferences. This name is used internally only as a means to identify the configuration.
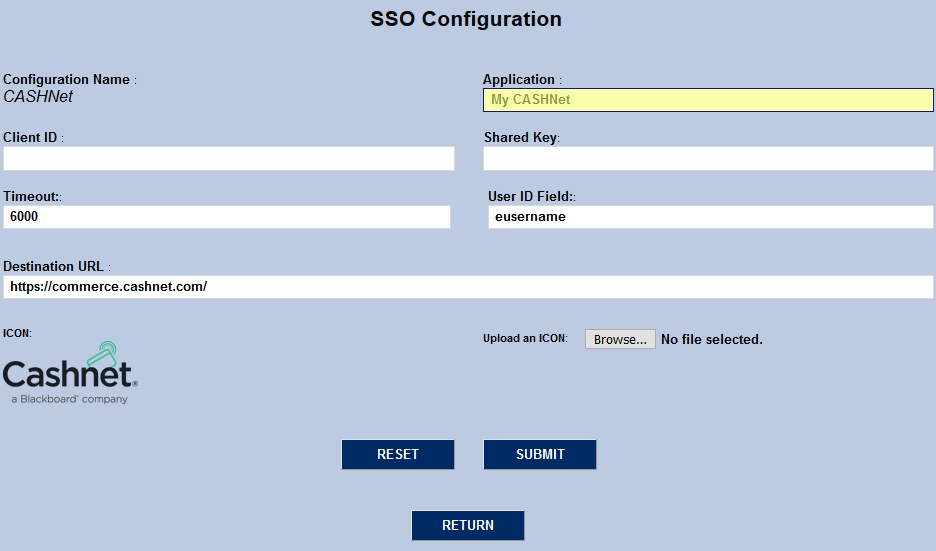
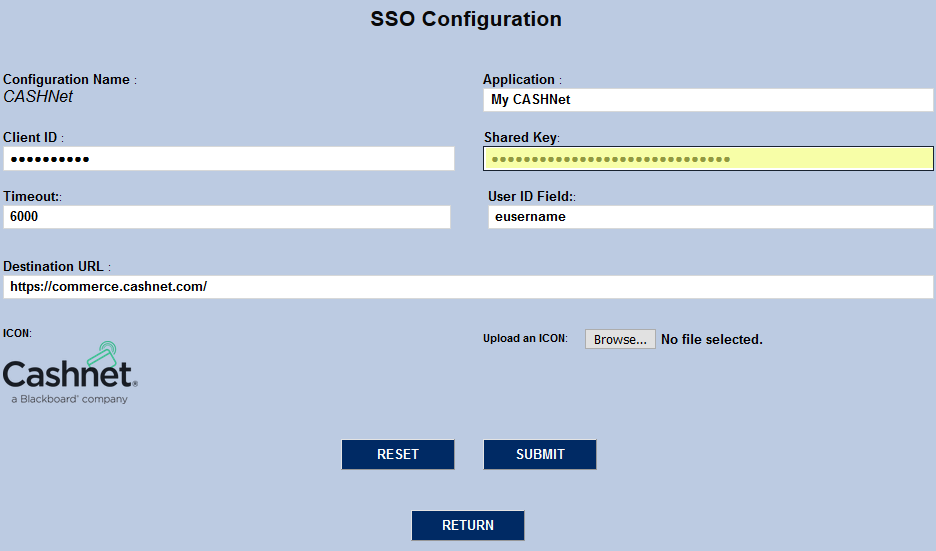
The Client ID is the school's Transact username. The Shared Key is provided by Transact as well. Both fields are protected to keep these values from being acquired by unauthorized users.
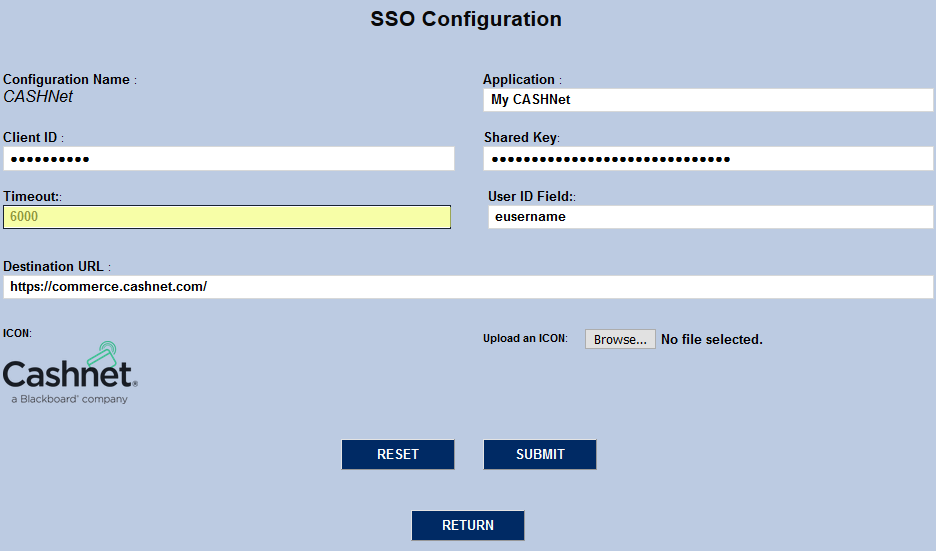
The Timeout field controls how long the SONIS system will attempt to connect to Transact during a login attempt before halting and displaying an error message. The value is in seconds and can be changed to suit administrator preference.
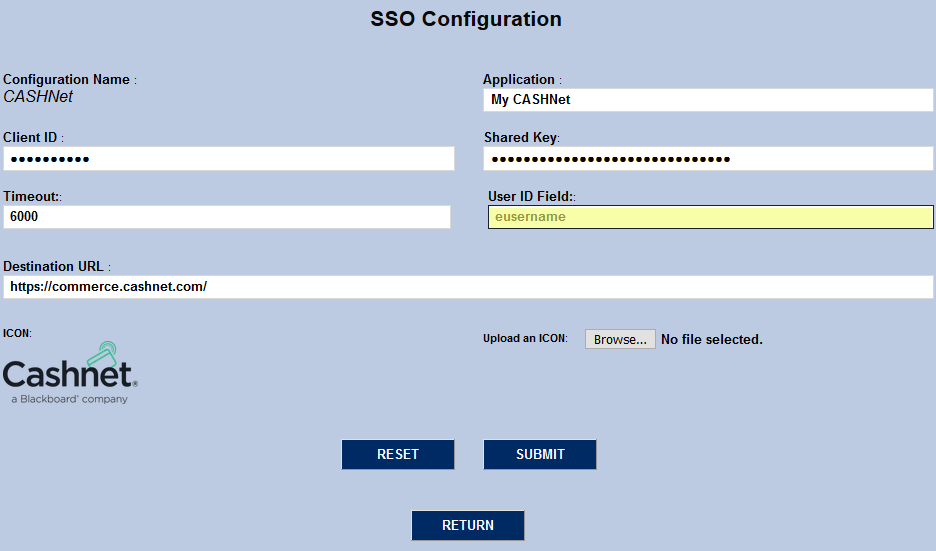
The User ID field tells Transact which user identification attribute will be used. Based on the current Transact, the value should always be eusername.
The Destination URL tells the SONIS system where to send the login information. This value must be https://www.transactcampus.com/ for the single sign-on to function as long as the current configuration is in place.
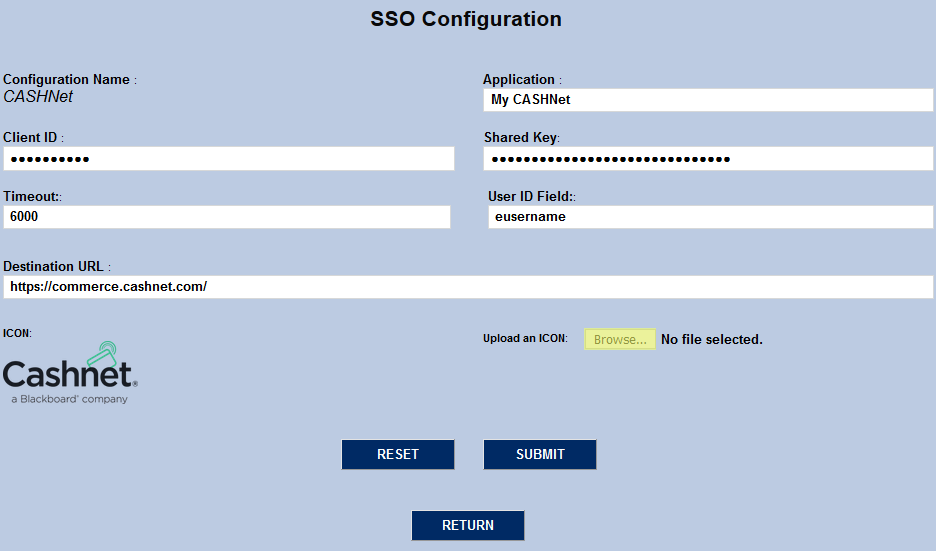
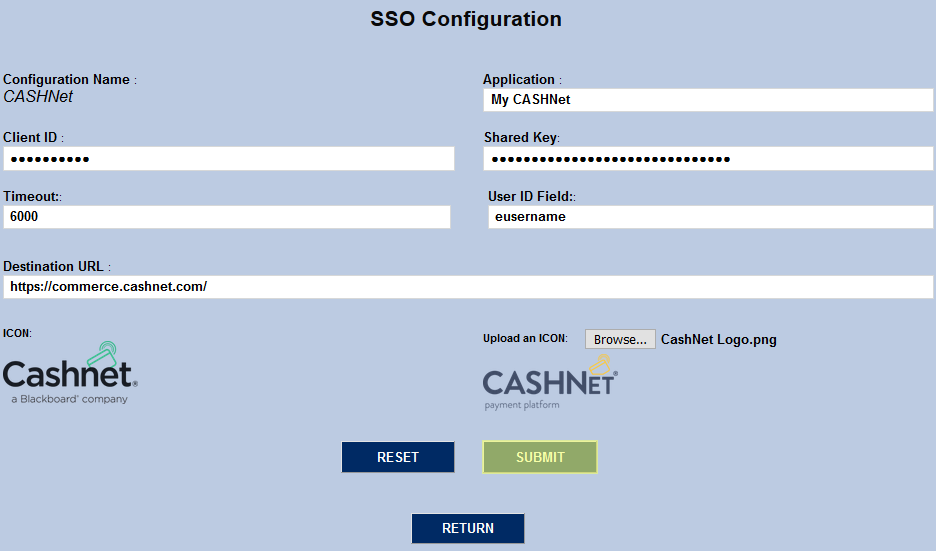
To change the Transact logo being used internally by SONIS, click the Browse button and select a new icon.
Once the configuration has been completed, click Submit to save the changes and activate the ability for students to log in to Transact.
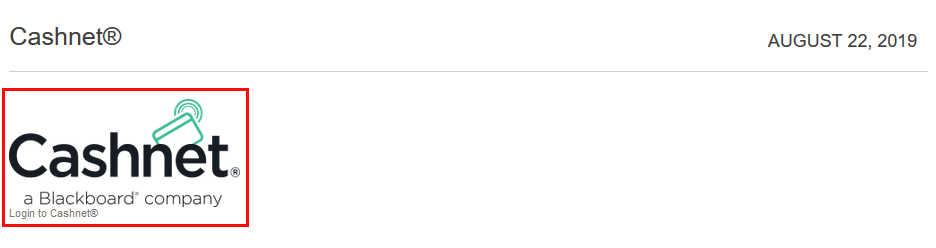
Once the Transact single sign-on has been set up, students can log in through their portal page. Simply, click on Transact under the Financial tab. The Transact logo will appear. Clicking on the Transact logo will open the Transact interface in a new window.
Microsoft Azure
Jenzabar SONIS uses both SAML and oAuth to pass information back and forth with Microsoft. SAML is used for authentication, passing credentials for the logged-in user to Microsoft via an XML formatted AuthN request. oAuth is used to provide SONIS with additional information about the user—the user's Microsoft login name and their profile photo. The second is only needed for the Azure Active Directory Sync.
For more information on the Microsoft side of the setup process, visit the Azure Integration page.
SAML
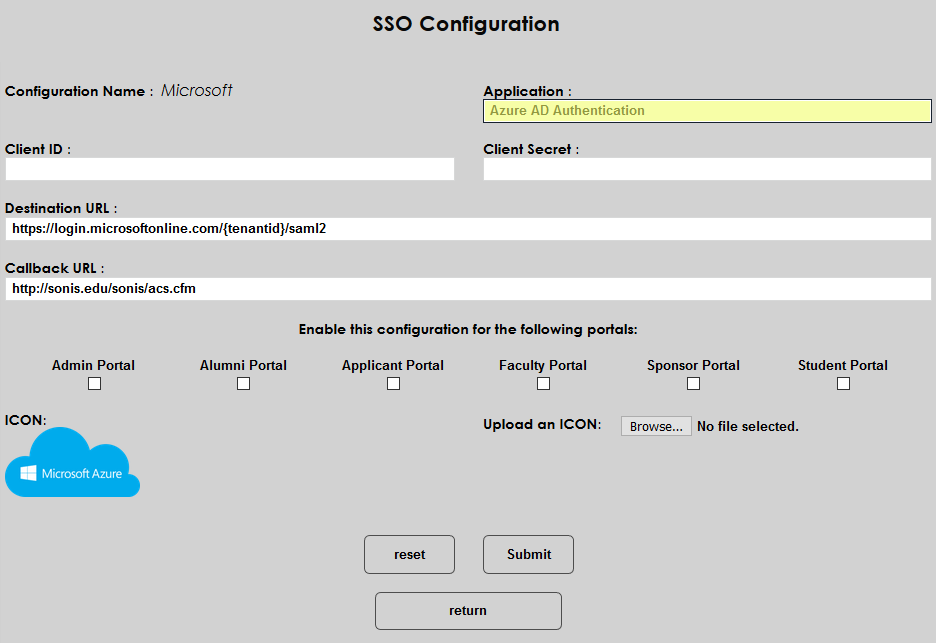
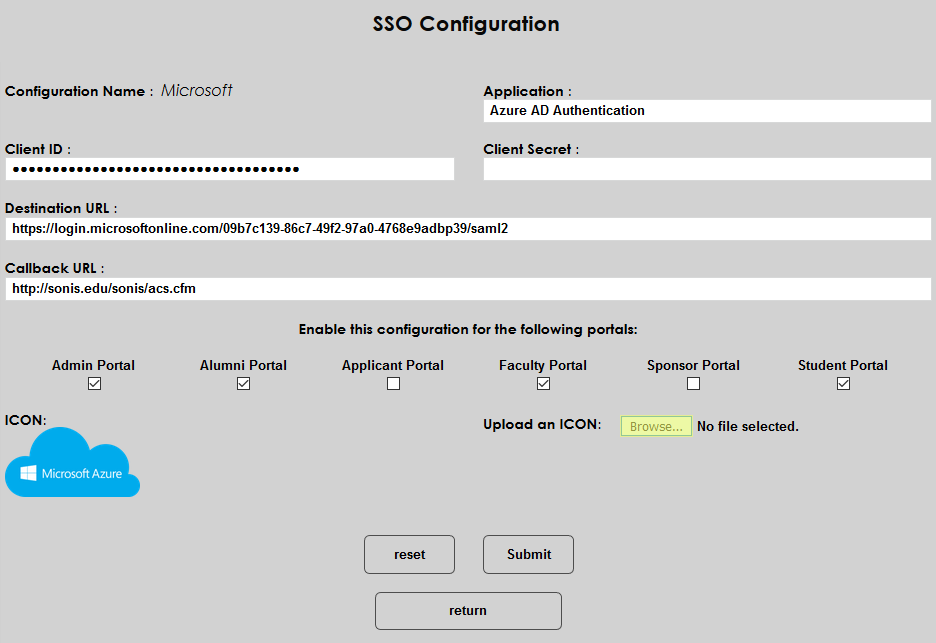
To use the seamless single sign-on feature, begin by clicking the Microsoft link for the Azure AD Authentication application with the SAML protocol.
On the following page, three of the fields are prepopulated, including the Application field. By default, the application is called Azure AD Authentication, but this can be changed to suit client preferences.
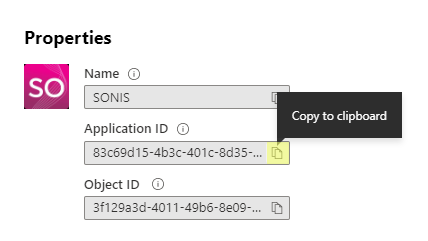
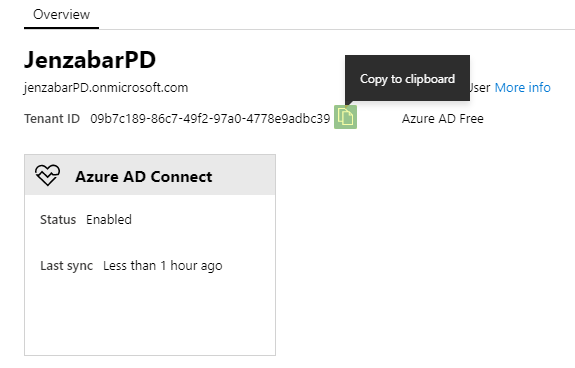
To locate the correct Client ID, log in to Azure, and navigate to the SONIS Enterprise Application. Click Copy to clipboard next to the Application ID field and paste the data into the Client ID field in SONIS.
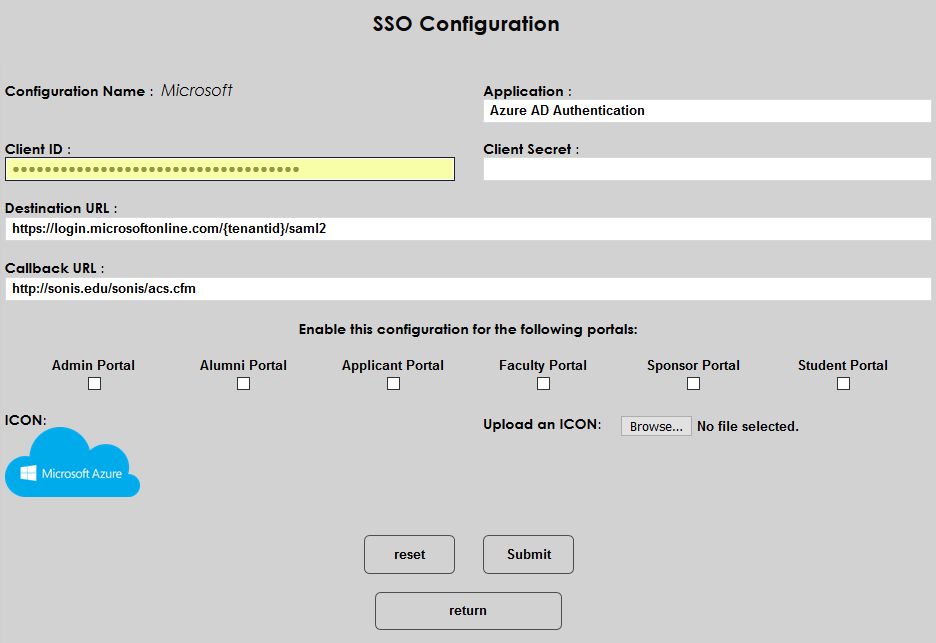
The Client Secret field is not used at this time.
The Destination URL is another prepopulated field. To locate the Tenant ID, navigate away from the application-specific data to the the Overview page in Azure AD. Replace the section labeled {tenantid} with the school's actual tenant ID.
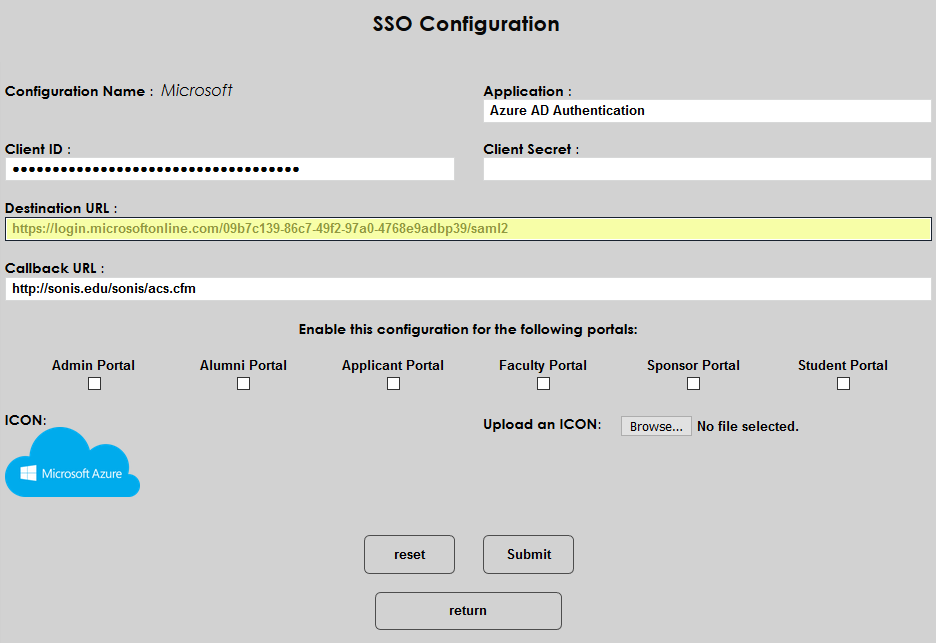
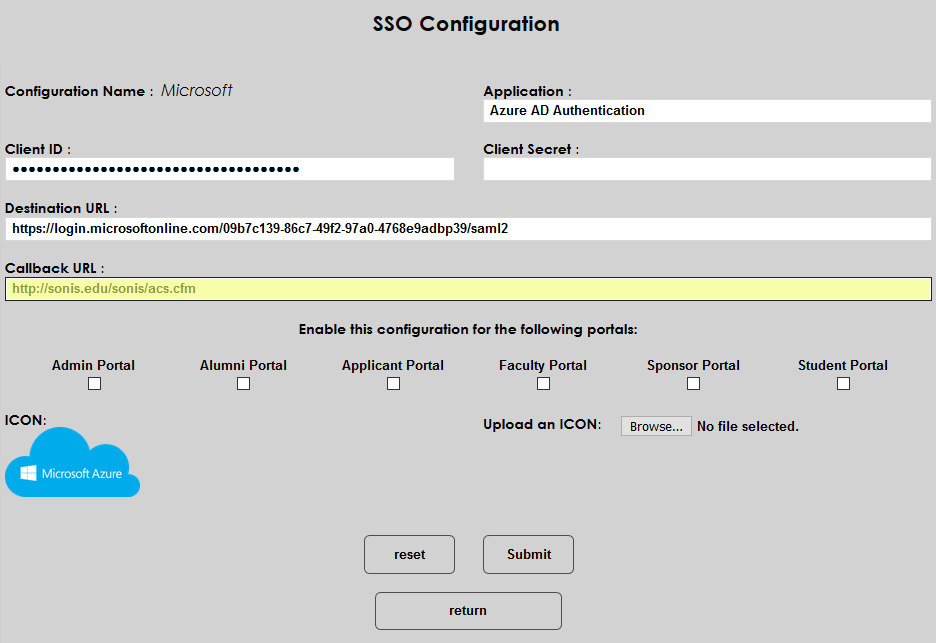
The Callback URL is prepopulated as well. This can be changed to another address if the school has created a custom URL to redirect students. If SONIS is handling the response from Microsoft, then the field must be left as-is.
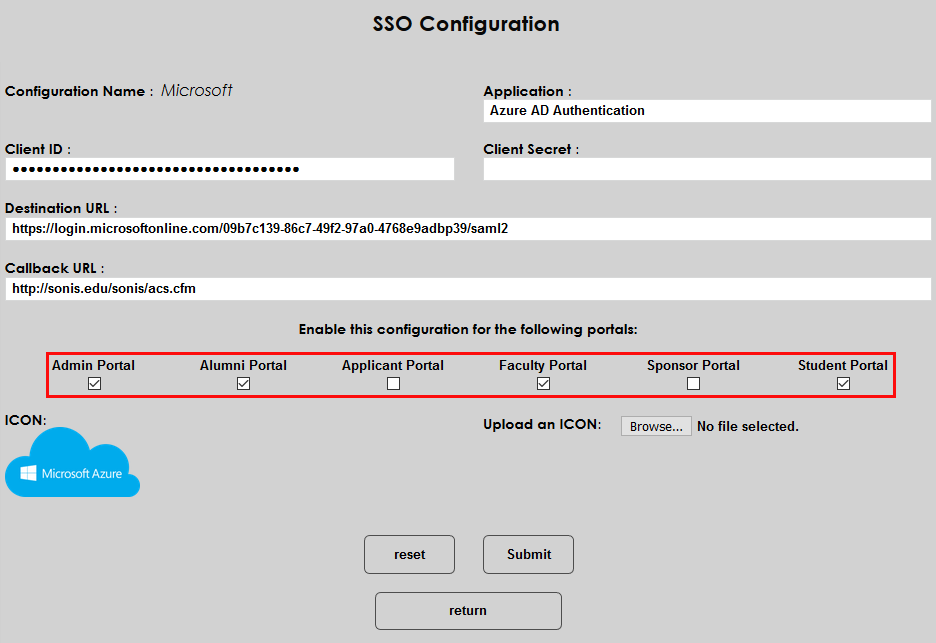
Choose a portal or portals to enable and check the corresponding boxes.
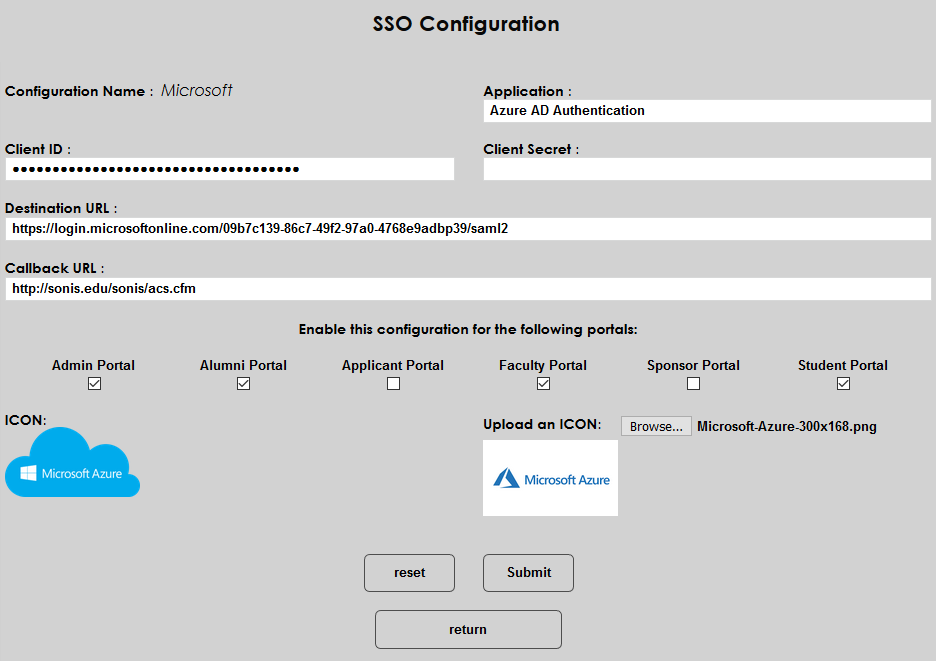
To change the logo that will be displayed to users, click the Browse button and select the file on the local machine.
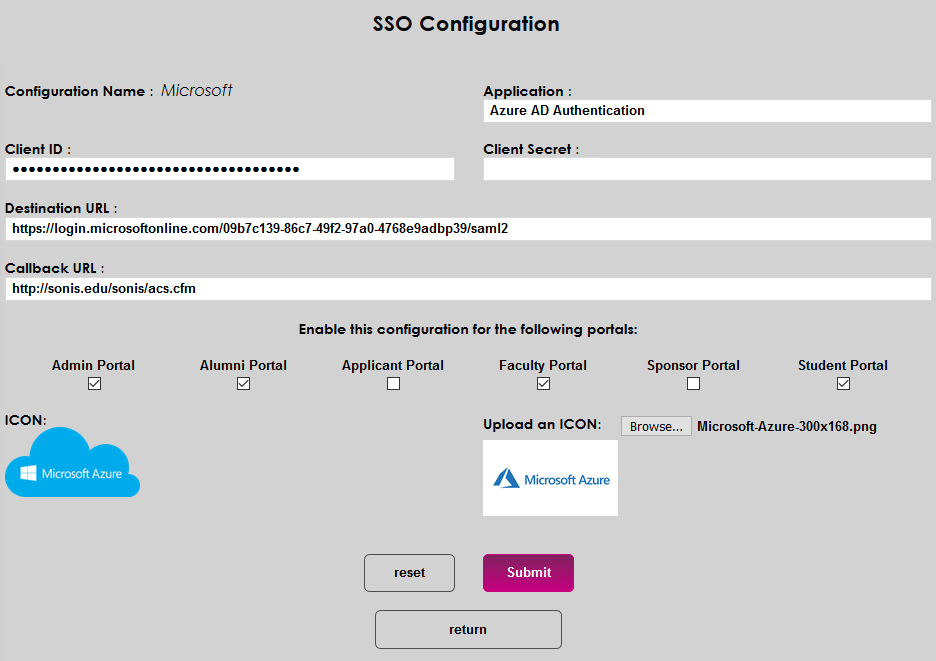
Click Submit to save the page and activate seamless single sign-on.
oAuth2
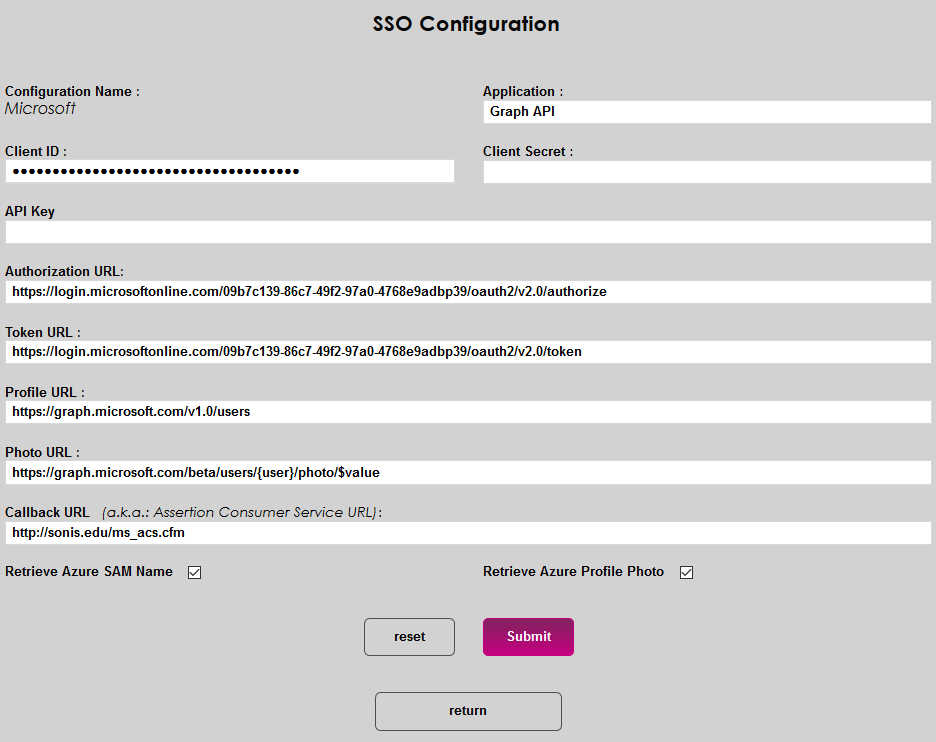
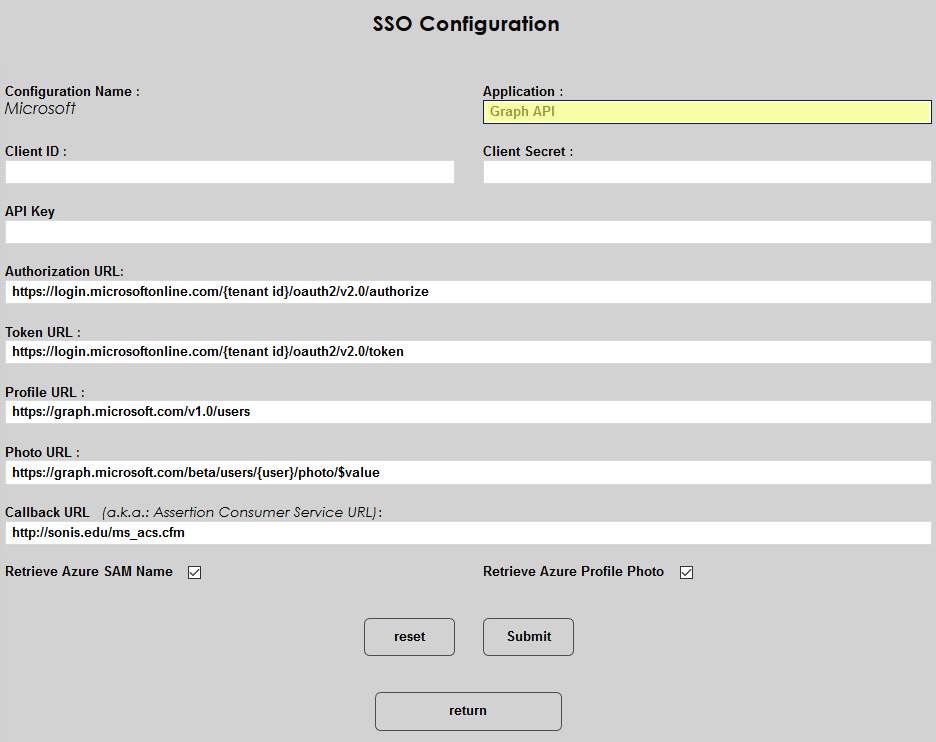
Again, if Azure is only being used for seamless single sign-on, SAML is the only protocol that needs to be activated. However, if the school is using Azure Active Directory Sync, the oAuth2 protocol must be activated as well. Click on the Microsoft link for the Graph API application.
As with the SAML configuration page, multiple fields are prepopulated. The Application is named Graph API by default, but this name can be changed.
To locate the correct Client ID, log in to Azure, and navigate to the SONIS Enterprise Application. Click Copy to clipboard next to the Application ID field and paste the data into the Client ID field in SONIS.
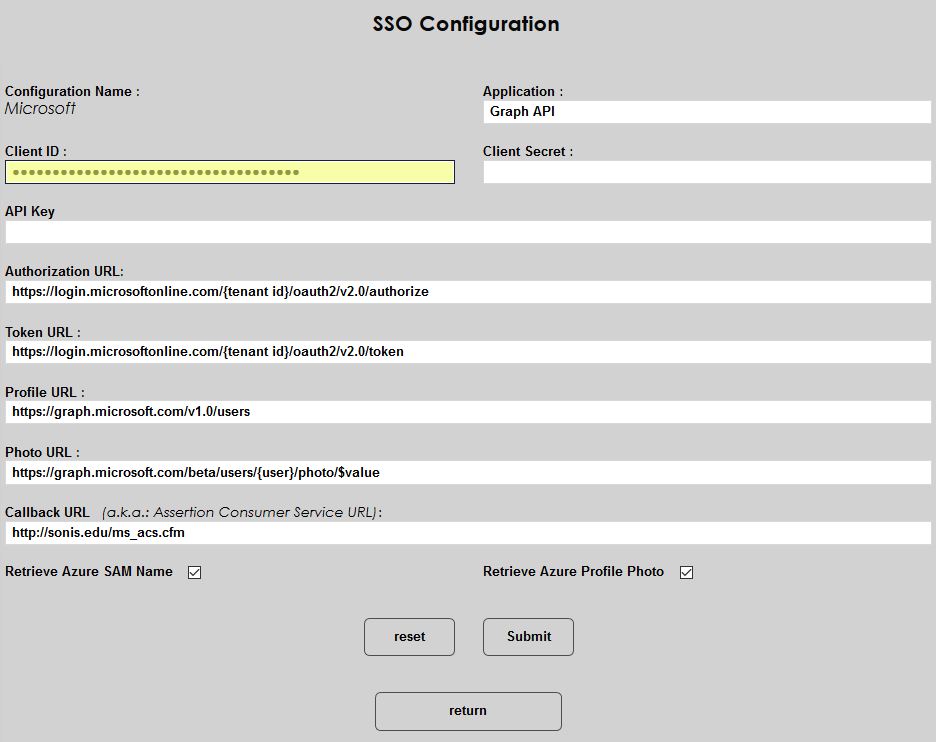
The Client Secret and API Key fields are not used at this time.
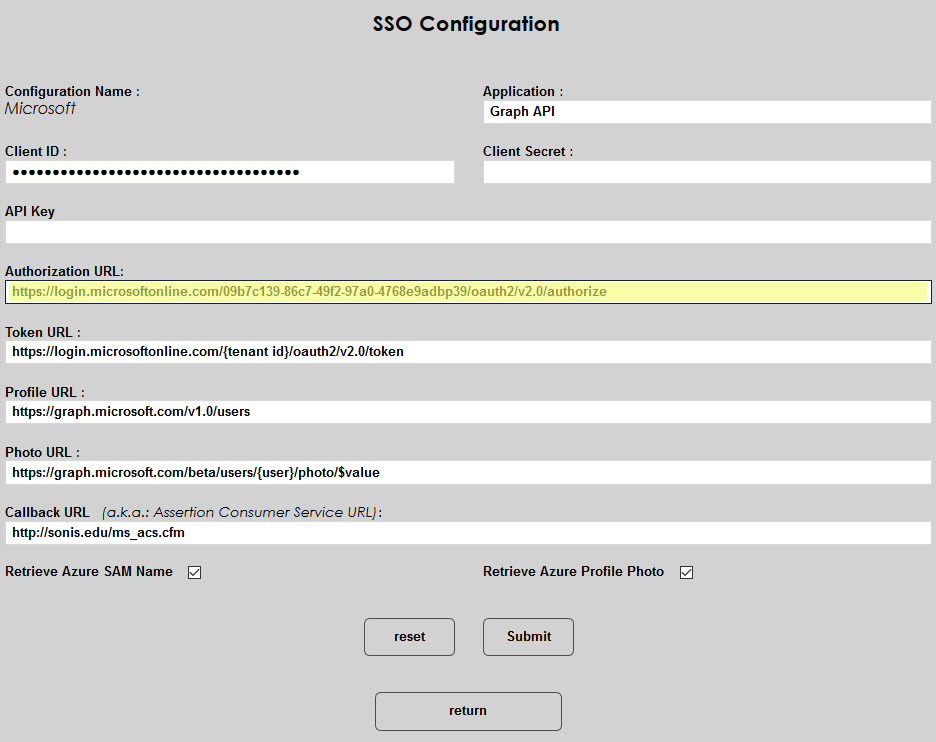
Replace the {tenantid} in both the Authorization URL and the Token URL with the school's actual tenant ID. The Tenant ID is located on the Overview page in Azure AD.

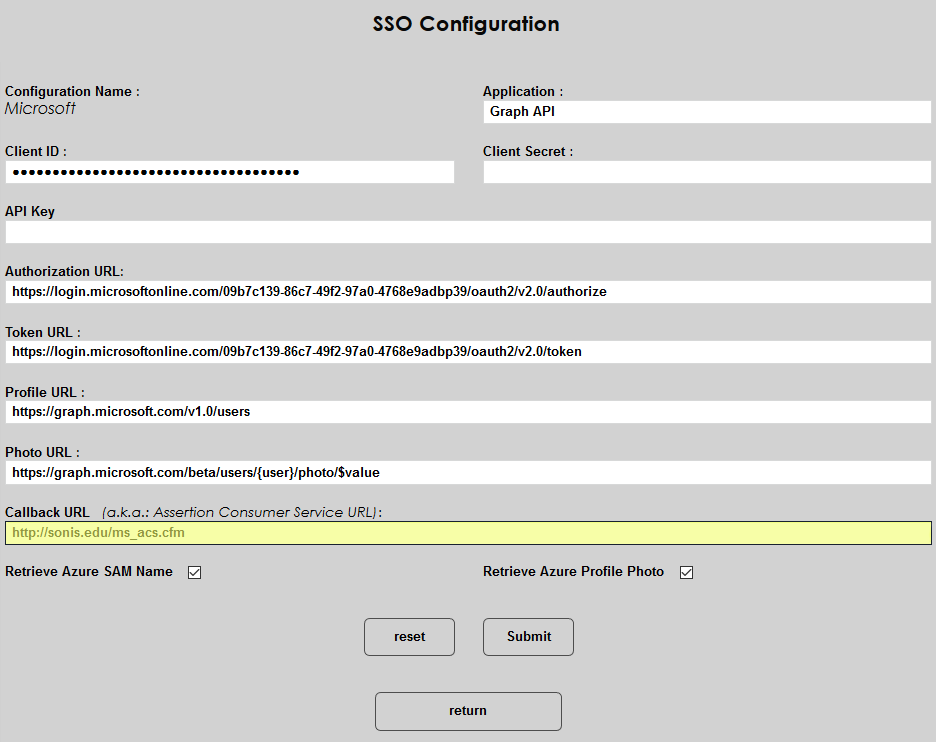
The Profile URL and Photo URL fields should be left as-is, including the {user} text, which is used by the SONIS system and does not need to be replaced.
The Callback URL is prepopulated as well. The URL should be http://[domain]/ms_acs.cfm with the [domain] or sonis.edu text replaced by the local domain. The value can be replaced by another address if the school has created a custom URL to redirect students. If SONIS is handling the response from Microsoft, then the field must be left in this format.
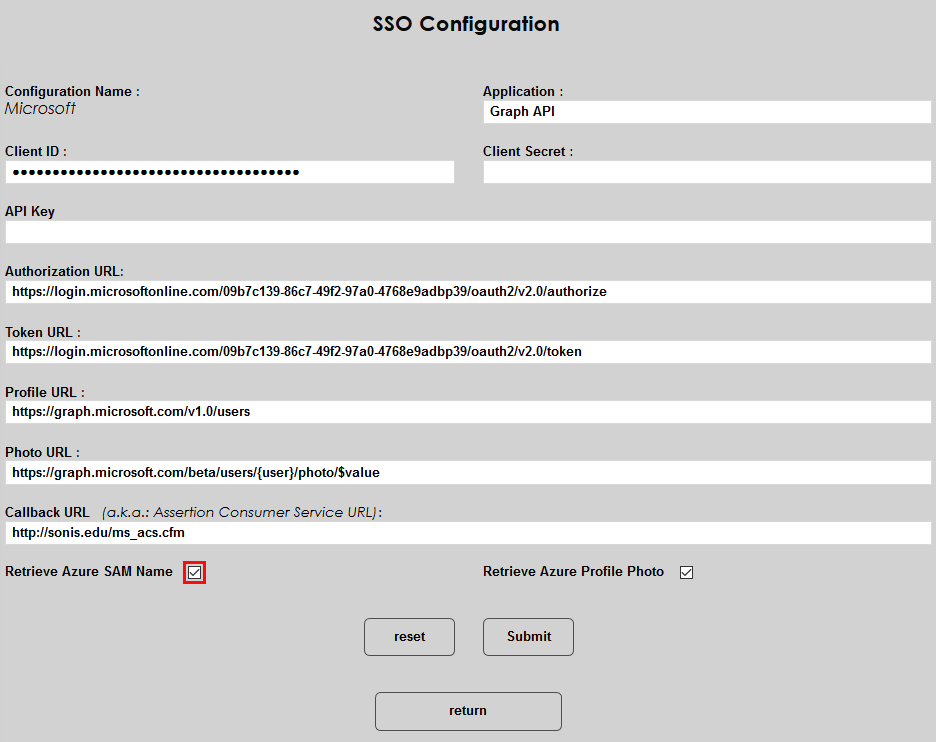
If the Retrieve Azure SAM Name box is checked, SONIS will retrieve the user’s local on-premises account name and store it in the AD User Name field, which can be accessed from the Biographic page. This box must be checked for the synchronization to function properly.
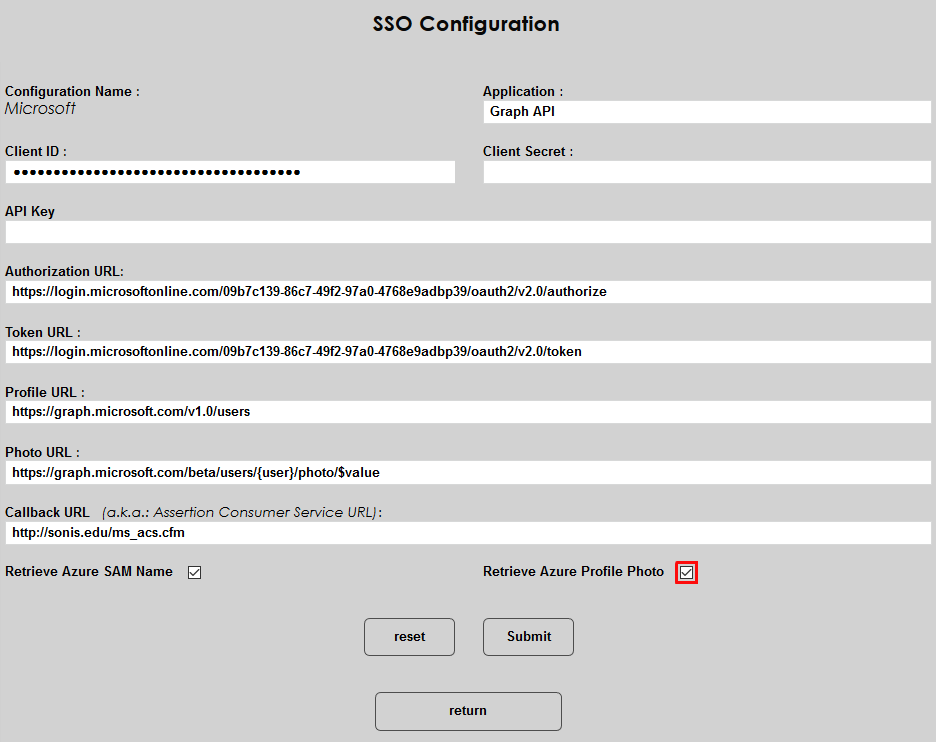
If the Retrieve Azure Profile Photo box is checked, SONIS will retrieve the user's thumbnail photo from the jpegPhoto attribute in Active Directory. For this feature to work, the school must select the jpegPhoto attribute for synchronization with Azure AD through the custom attribute selection. SONIS will also attempt to collect the photo used by the Office 365 profile if the jpegPhoto is not present. Note that this feature can slow down the synchronization process considerably and is not recommended in most cases.
Click Submit to save the setup.