Career Major Courses & Competencies
Overview
This page is designed to provide an overview of Career Major Courses, also known an CMCs or competencies, and the various ways they interact with the Jenzabar SONIS system. CMCs provide a way for schools to certify that a student is now competent in a particular skill or technique. Attaining these competencies can be required to graduate with a certain degree or certificate or required of all students that matriculate through the school as a way to ensure that graduates have a broad base of knowledge. In many cases, schools may choose to do both, creating core competencies that apply to all students as well as specific competencies that are tied to a particular degree or certificate program.
Creating CMCs
To create competencies navigate to the Table Maintenance page in the Systems hub and select Competency.
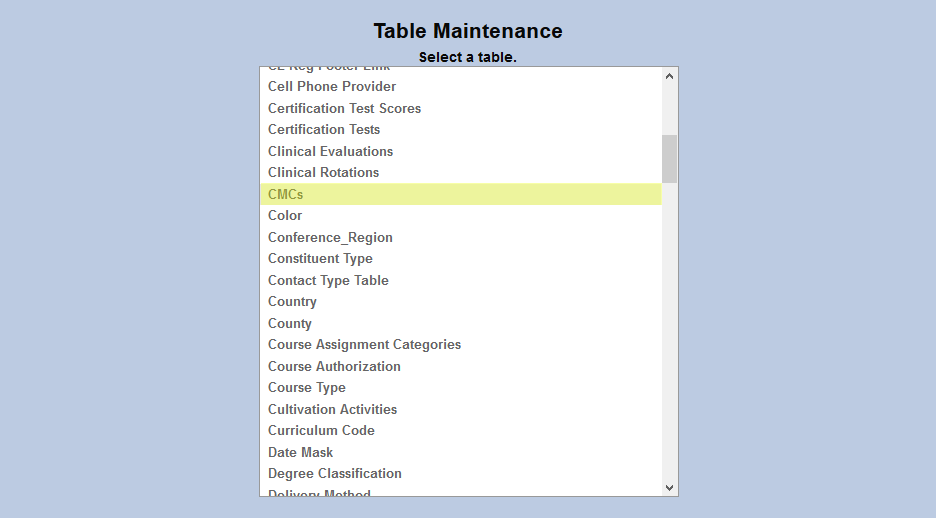
If competencies have already been created, click the Competency ID to make changes. To add a new competency, click Add New Record at the top of the page.

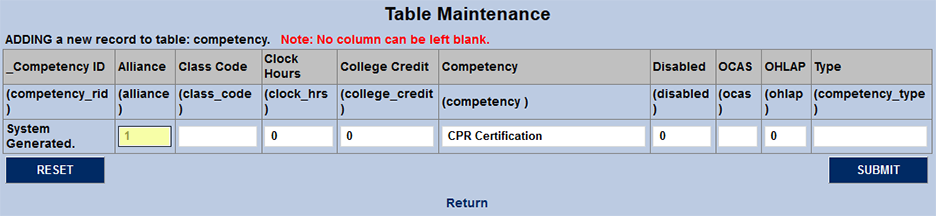
On the following page, create a name for the competency in the Competency field (100-character limit).
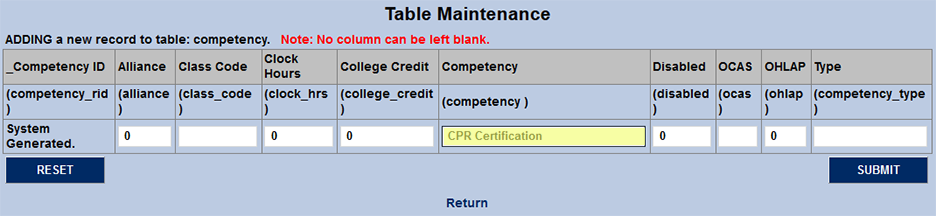
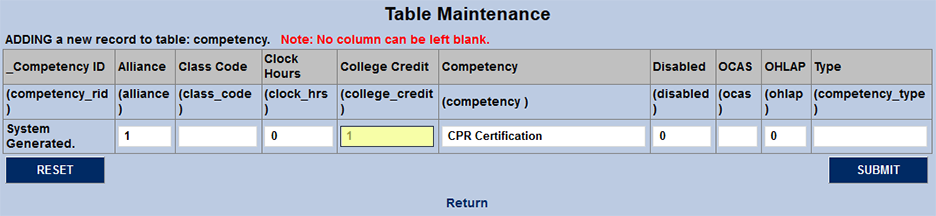
The Alliance column is used for competencies that can be fulfilled at an alliance institution. Place a 1 in this column if the competency fits this criterion. Otherwise, leave a 0 to turn the bit off. Place a 1 in the College Credit field if the competency is an alliance CMC that can be taken for credit. The number of credits the CMC is worth can be set in the Alliance utility.
The Class Code field is used to designate the course code equivalence for state reporting. Type a space or a 0 in this field if it does not apply.

The OCAS and OHLAP fields are used by Oklahoma schools for Plan of Study state reporting. Schools that do not fill out these reports should place a 0 or a blank space in both fields.
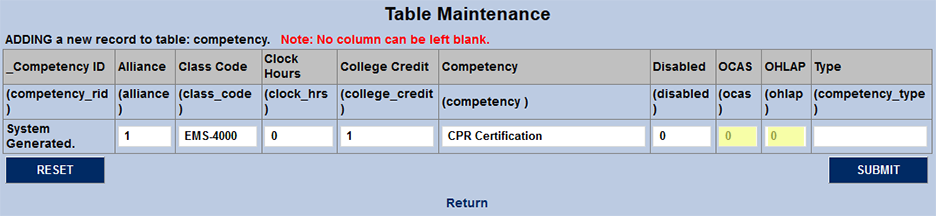
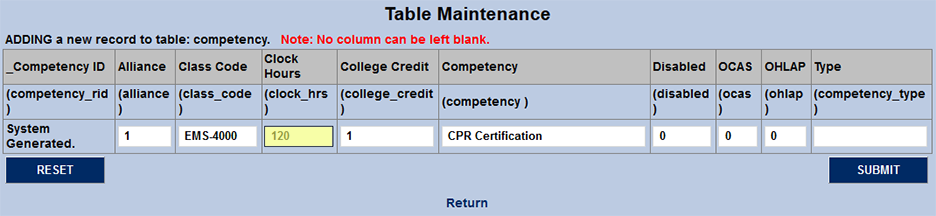
Enter the clock hours needed to acquire the CMC in the Clock Hours field. Leave the 0 if it's not applicable to this competency.
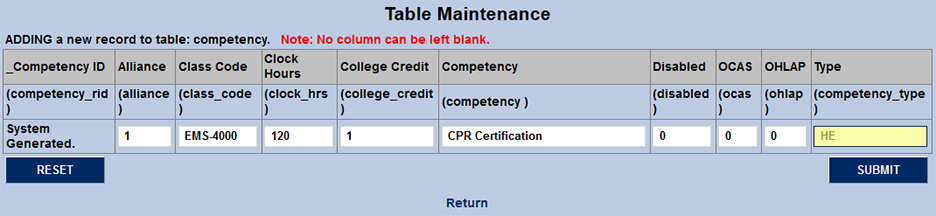
The competency Type is used to group competencies that have commonalities. For example, schools could create a type for codes related to Health Science courses or one for Business-related CMCs. The field holds two characters.
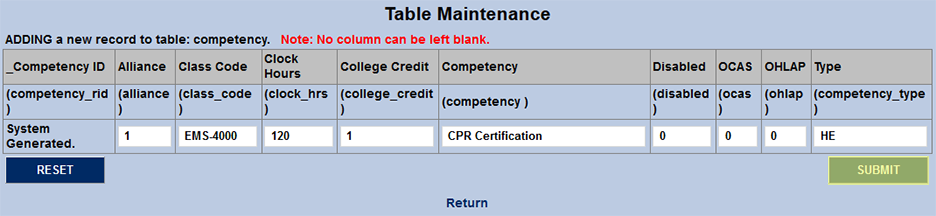
Click Submit to save the changes and create the competency.
Grouping CMCs
The CMC Grouping feature allows SONIS administrators to group competencies and assign them to students in bulk or individually. To learn more about this process and the features offered in the CMC Grouping utility, visit the CMC Grouping guide.
Merging CMCs
If a CMC was created in duplicate, has been renamed, or will continue as a new program, it can be merged with another CMC using the CMC Merge Utility available in the Systems hub. For detailed information on merging CMCs, visit the CMC Merge Utility page.
Assigning CMCs to Courses
In order for students to complete CMCs, the competencies must be attached to courses. This is done using the CMC Assignment utility in the Systems hub. For a step-by-step breakdown of this process, visit the CMC Assignment page.
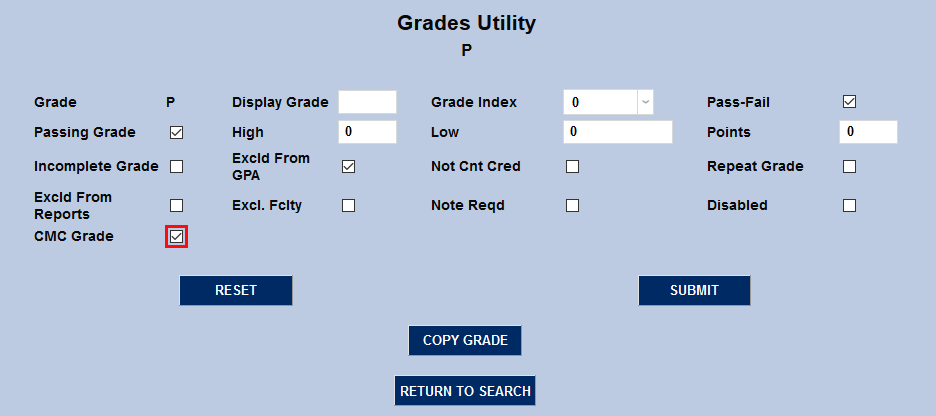
Defining CMC Grades
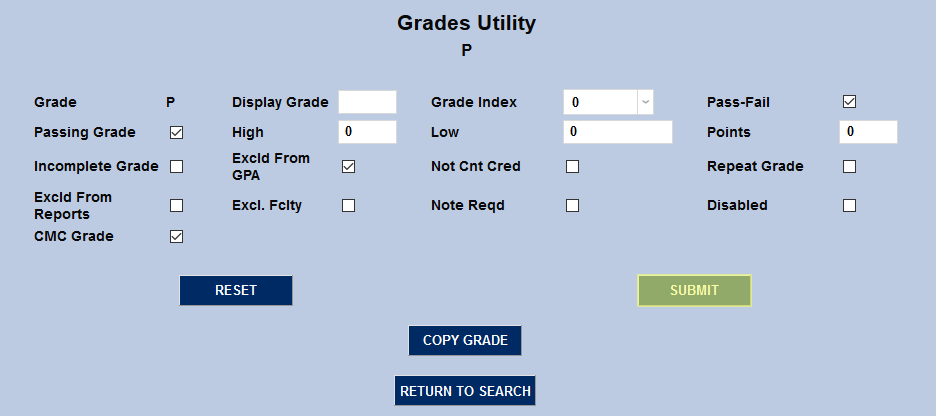
Competencies can be manually marked as completed, but students who complete them can also be assigned grades based on the completion. Some institutions may wish to grade competencies with a pass/fail system while others may wish to use letter grades. To define grades as assignable to competencies, navigate to the Grade Utility under the Systems menu and select a grade to edit. Check the CMC Grade box and click Submit to save the changes.
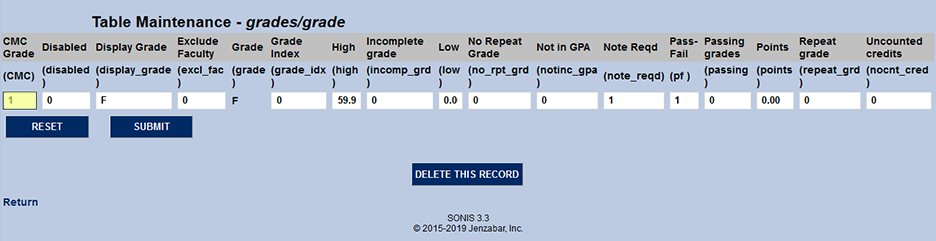
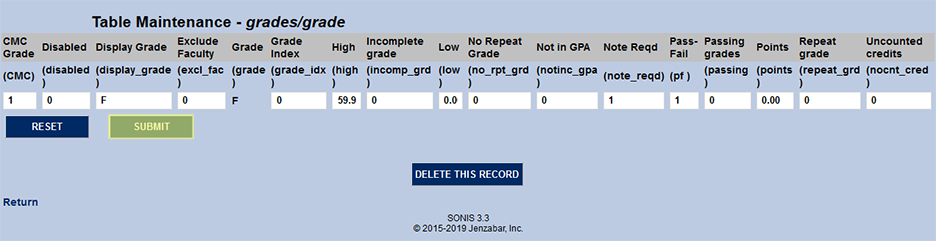
Alternately, grades can be edited by navigating to the Grades table under Table Maintenance, also located in the Systems menu. Replace the 0 in the CMC Grade field with a 1 to make the grade eligible to be used for grading competencies. Click Submit to save the changes.
Grading CMCs
Faculty Grading
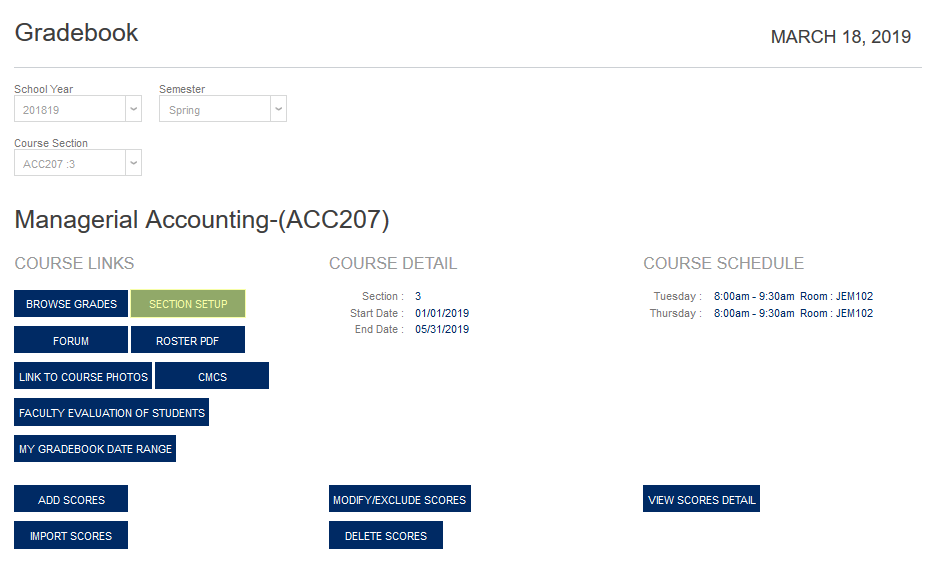
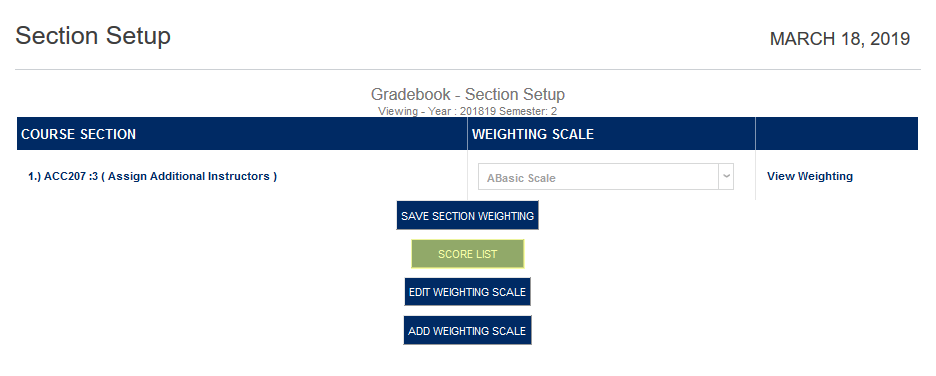
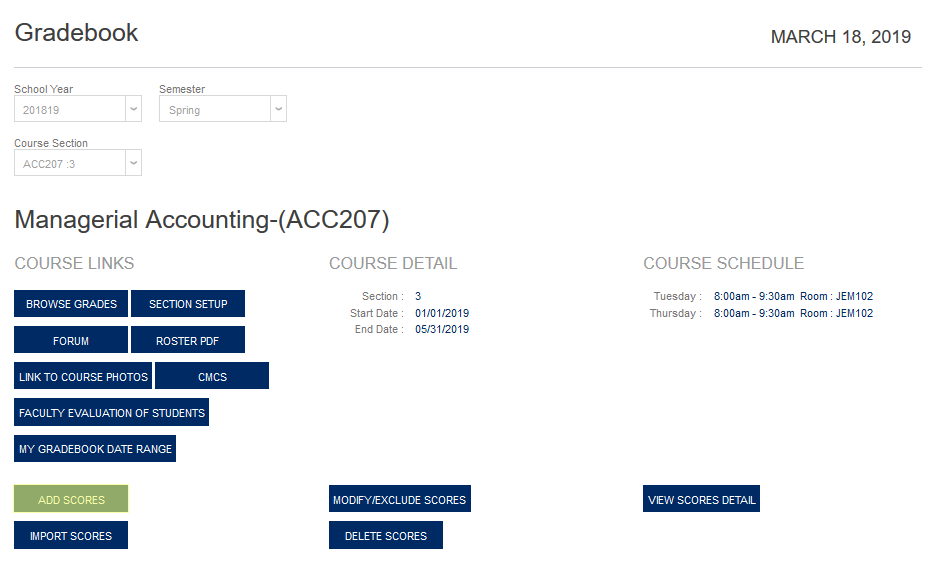
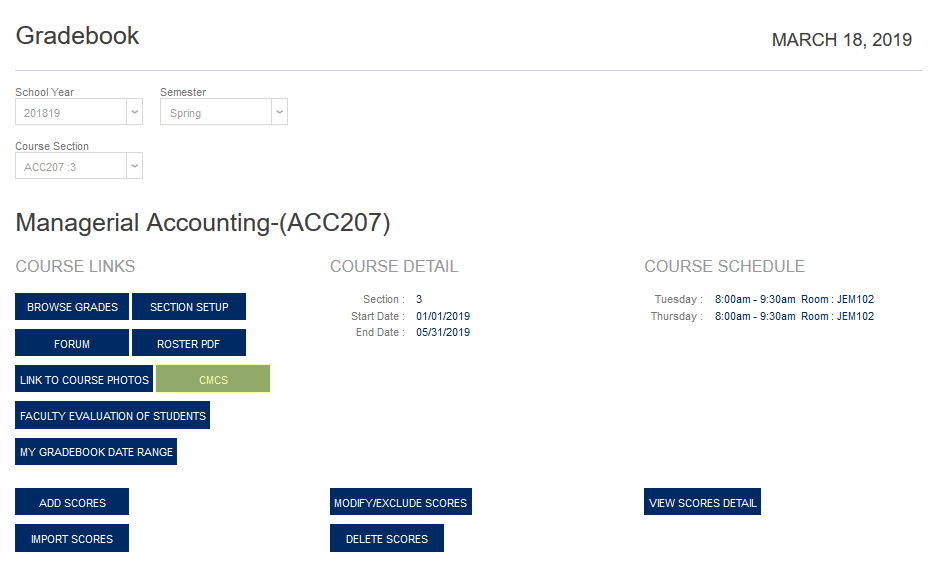
Course instructors can grade CMCs while entering the standard grades for their courses. Before entering grades, instructors must ensure that they have a Weighting Scale selected. Navigate to the Gradebook page under the Course Management section and ensure that the proper course is selected. Then, click on Section Setup to create CMC assignments.
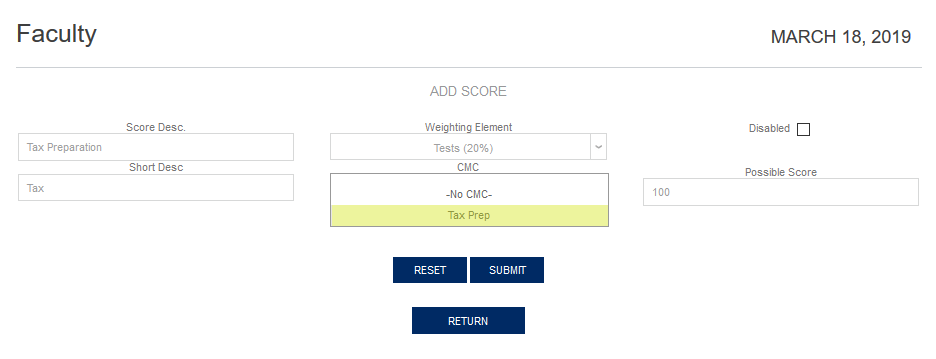
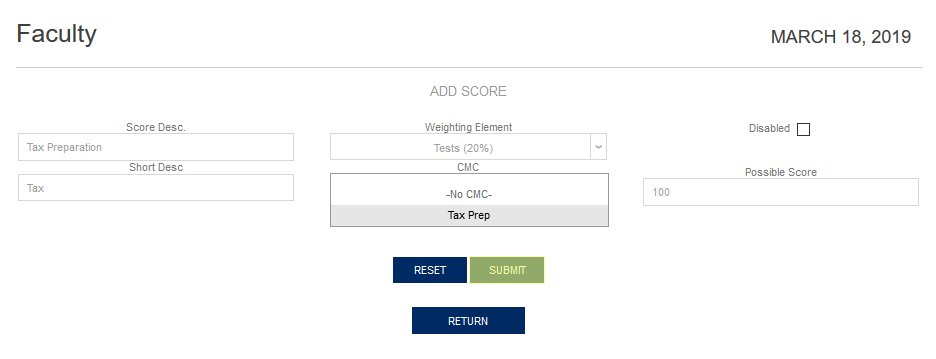
A new window will open to allow editing. Click the Score List button to assign CMC scores. On the following page, click Add Score to continue. If CMC scores have already been created, instructors can select the CMC and click Apply Filter to view only those scores in the table at the bottom of the page.
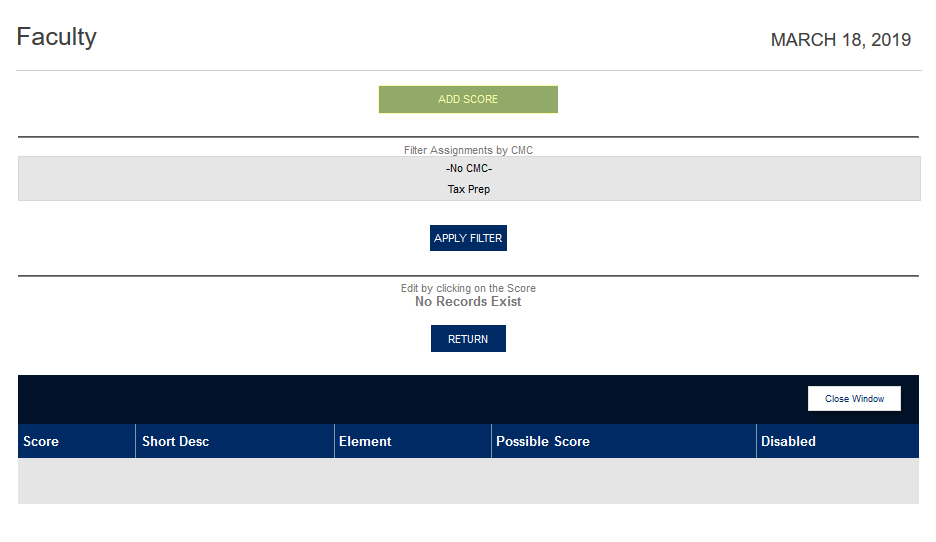
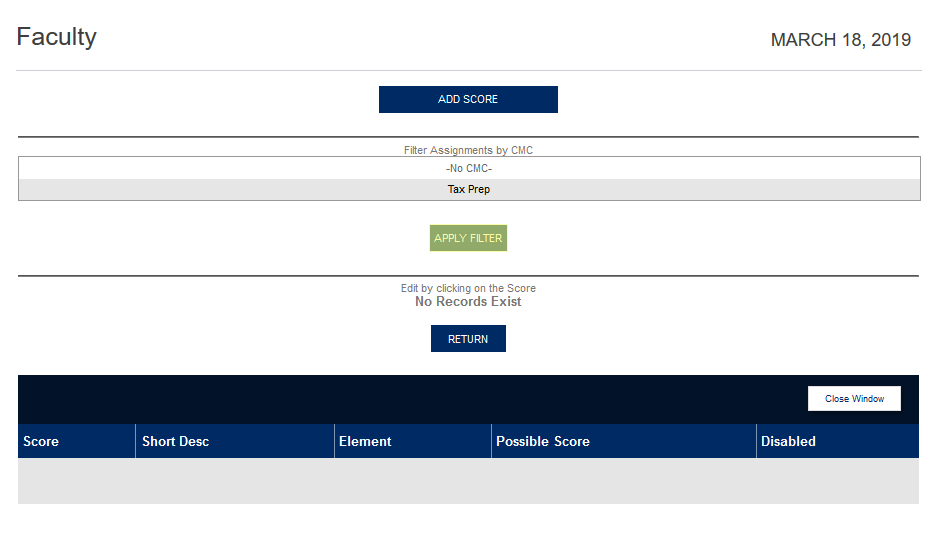
To add a score, create a Score Description (75 character limit) and a Short Description (six character limit) as well. Select a Weighting Element from the dropdown menu and enter a Possible Score . Students will be graded based on how close their actual score was to the possible score. Once the standard score fields have been filled out, select the appropriate CMC to associate the score with from the CMC list and click Submit . Note that CMCs can be graded based on one score of multiple scores depending on the needs of the institution.
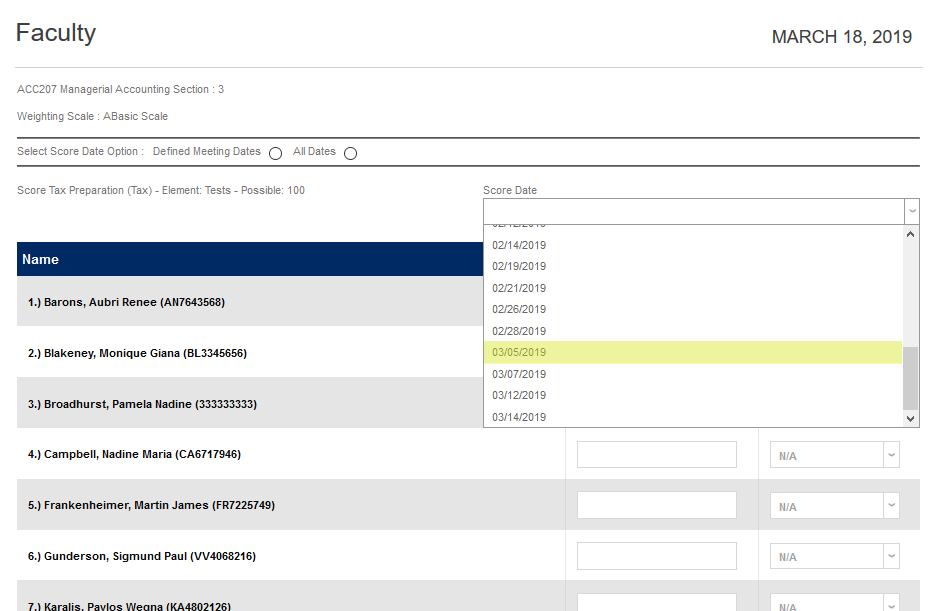
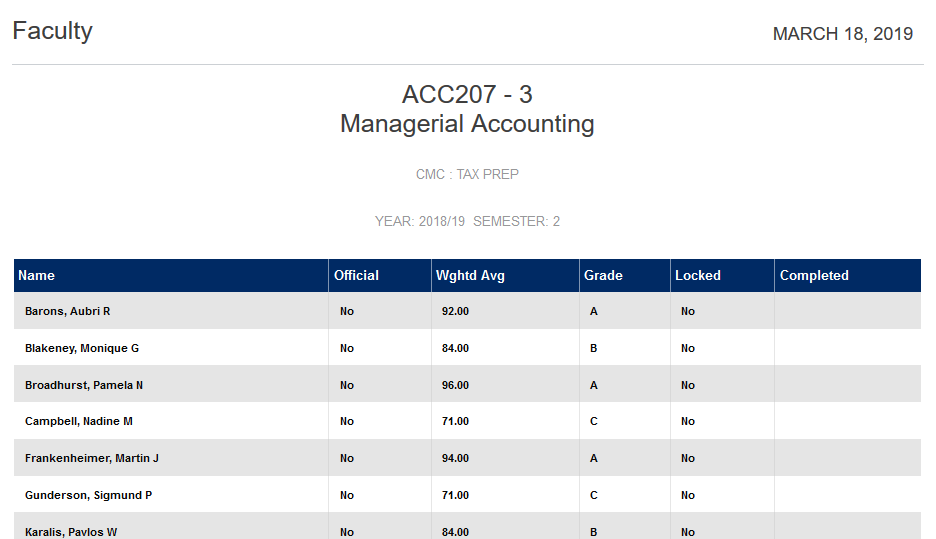
Once a score of scores have been associated with a CMC, return to the Gradebook to assign scores to students. Click the Add Scores button to begin.
Select the assignment previously attached to the CMC from the Score dropdown menu at the top of the page and the date when the assignment was completed from the list of available Score Dates . Then, give each student who completed the CMC assignment a numerical score in the Score field.
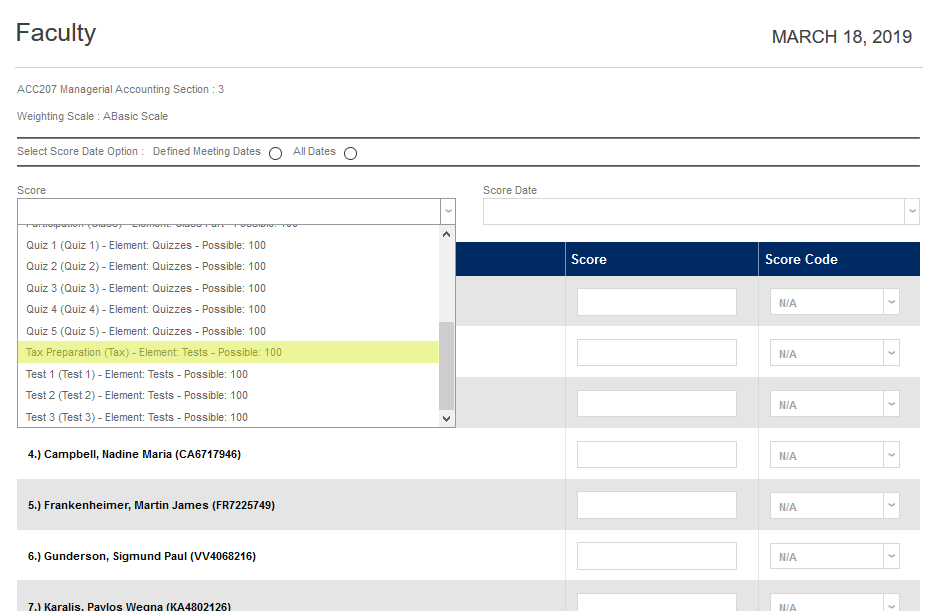
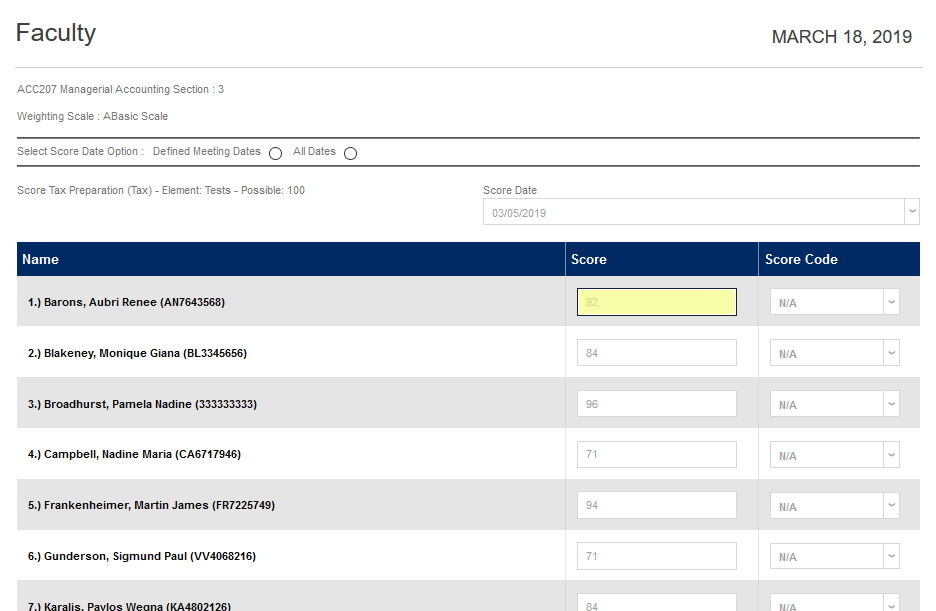
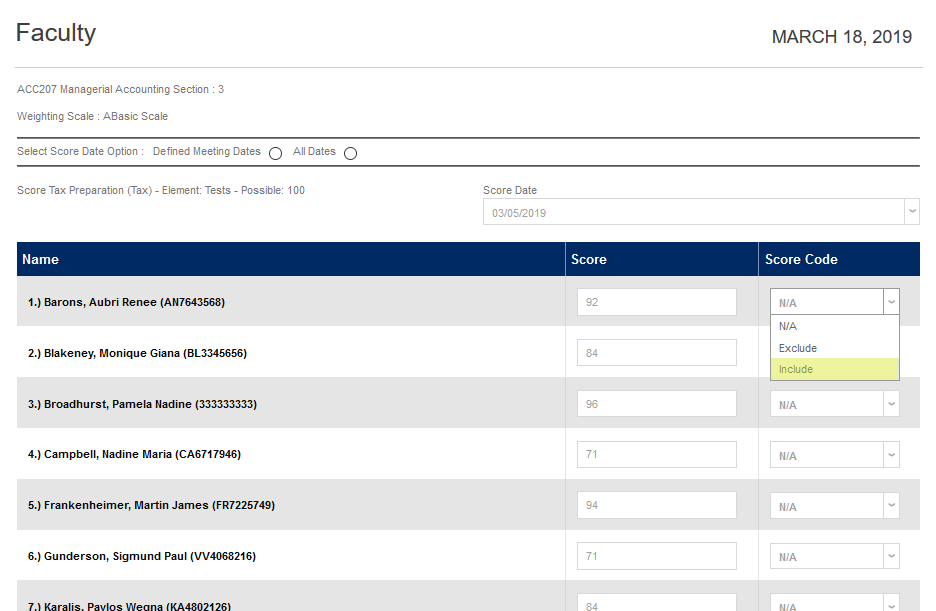
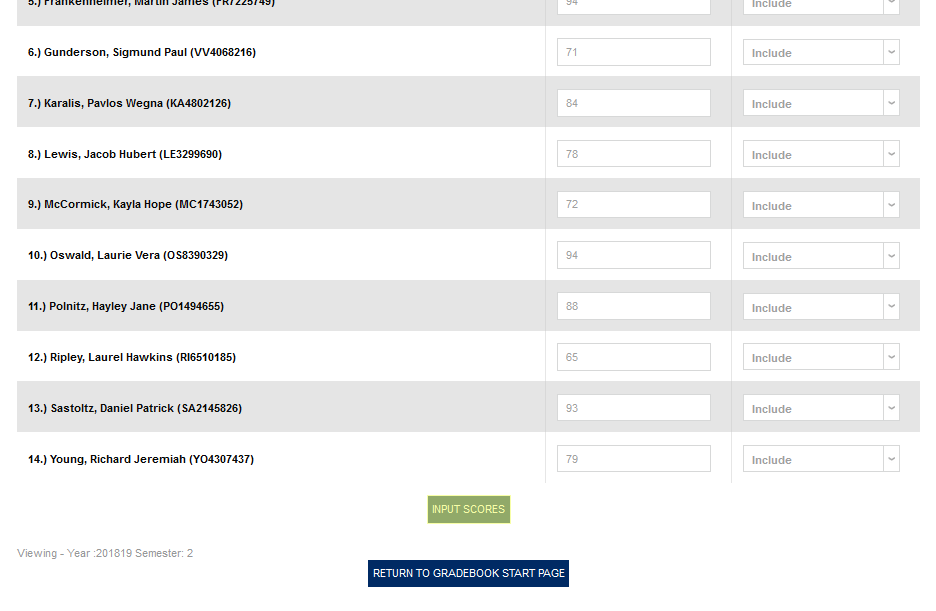
Select a Score Code for each score. Score codes are set up in Table Maintenance under the Systems menu and control whether a score is included in the student's weighted average or not. Once these elements are in place, click Return to Gradebook Start Page to save the scores.
Locking Grades
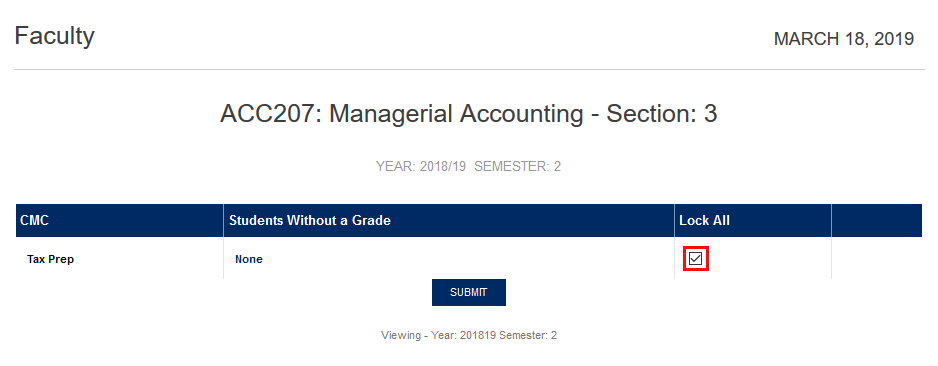
Once CMC grades have been assigned, instructors can lock those grades to keep them from being changed. To do so, click the CMCs button on the Courses page or the Gradebook page. A new window will open listing the competencies associated with the course and the number of students without a grade. The number (or "None") is also a link. Clicking on the link will list every student in the course and their CMC grade(s).

To finalize the grades, check the Lock All box and click Submit . Once grades have been locked, the Completed column will be filled in the student CMCs table. The grades can only be unlocked through the administrator portal.
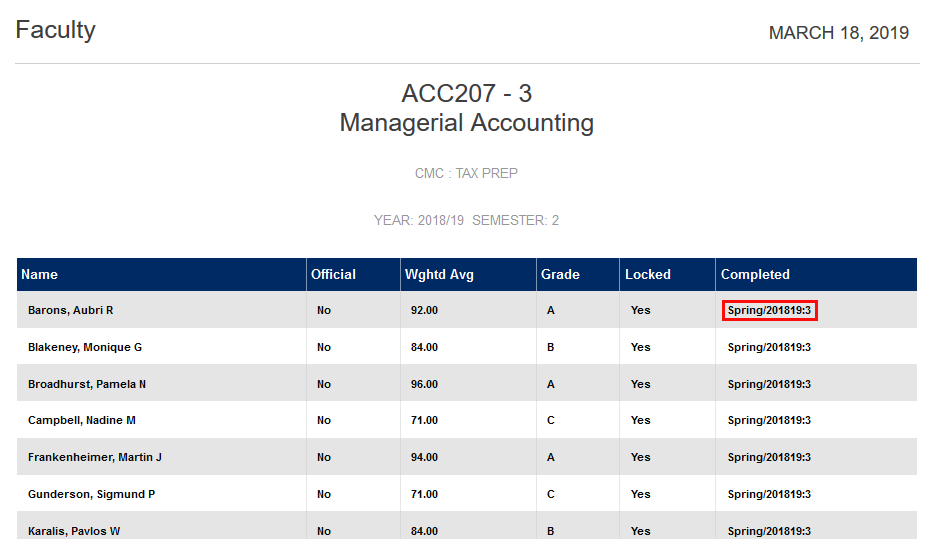
Administration Grading
When a course has a competency attached, a Competencies option is available in the left-nav menu once a Course Section has been selected. The initial summary page lists the available CMCs along with the number of students without a grade and the lock status. If the grades have been entered but are not locked, they can be locked from this page by checking the Lock All box and clicking Submit.


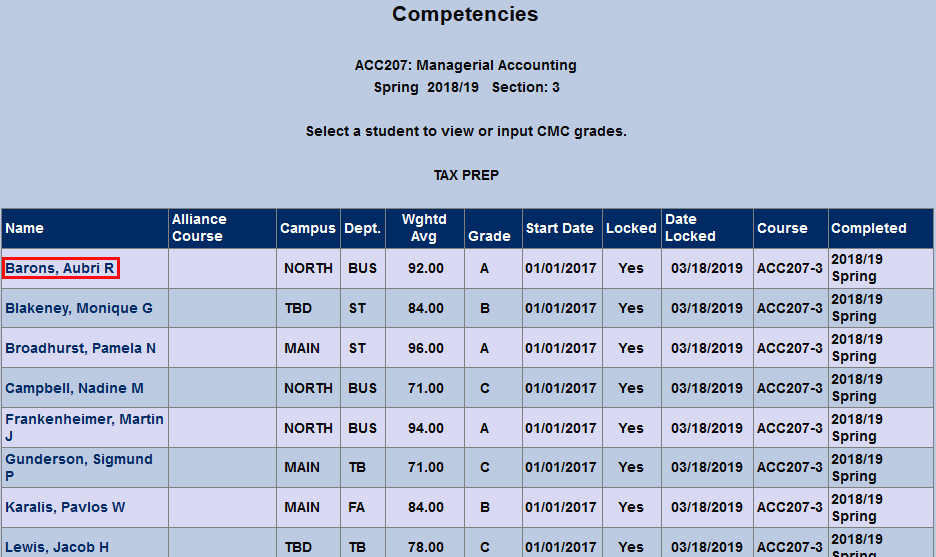
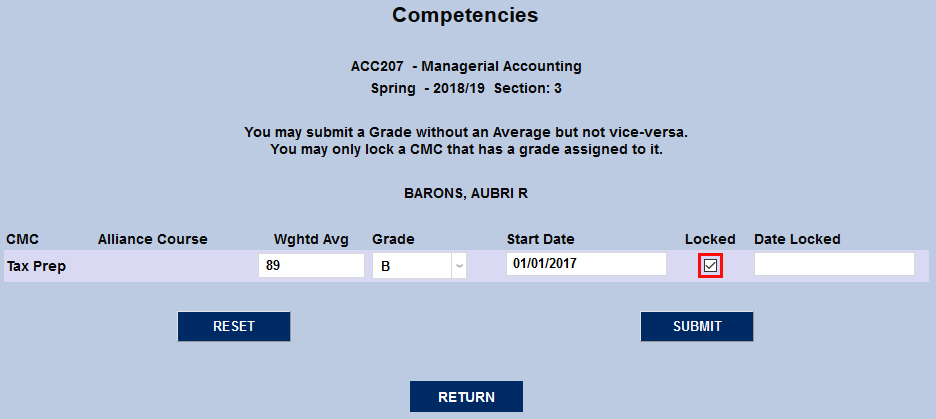
To view individual students' CMC grades, click on the number under Students Without a Grade . The following page lists each student in the course along with their campus, department weighted average for the competency, grade, start date, locked status, date locked, course, and date completed. To assign or edit a grade, click on the student's name.

Before a locked grade can be edited, it must be unlocked. To do so, uncheck the Locked box and click Submit


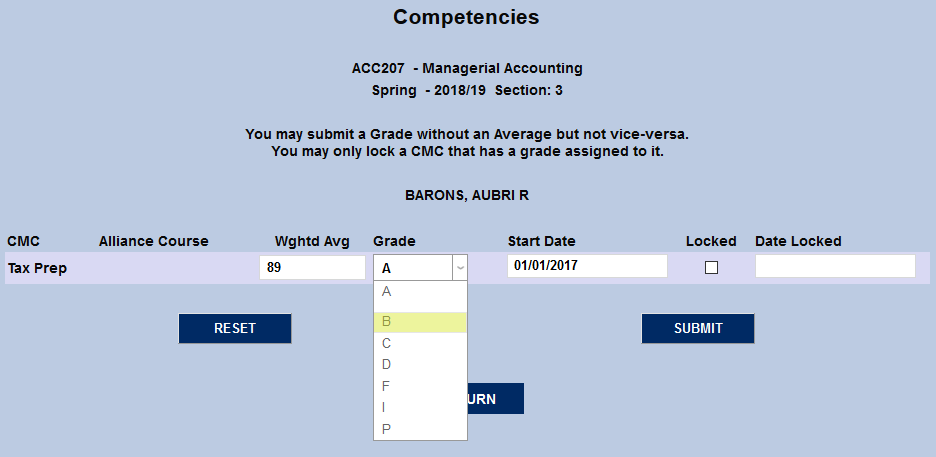
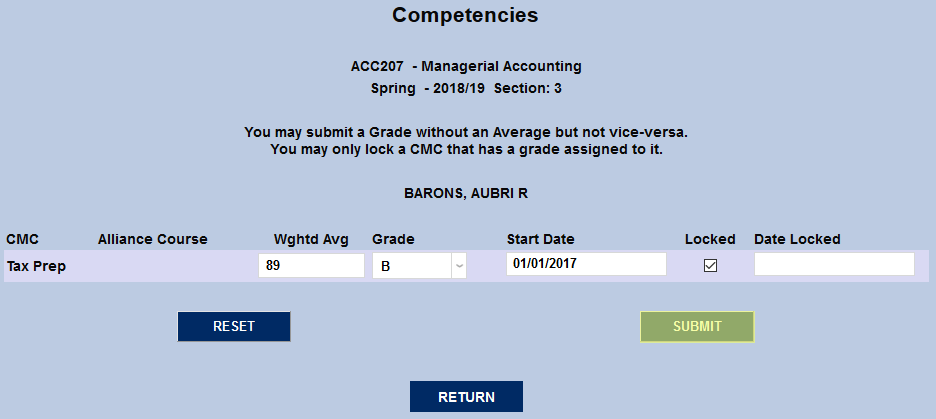
Once the grade has been unlocked, the Weighted Average , Letter Grade , and Start Date can all be changed.
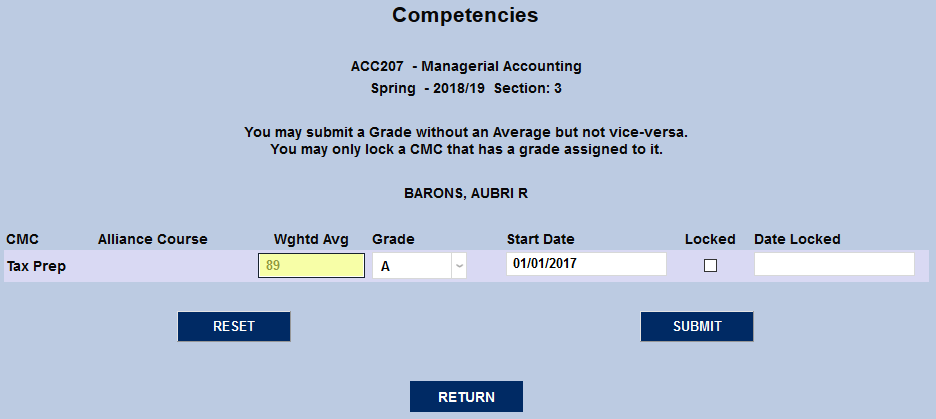
Once the fields have been changed, check the Locked box and click Submit .
Transfer Registration Grading
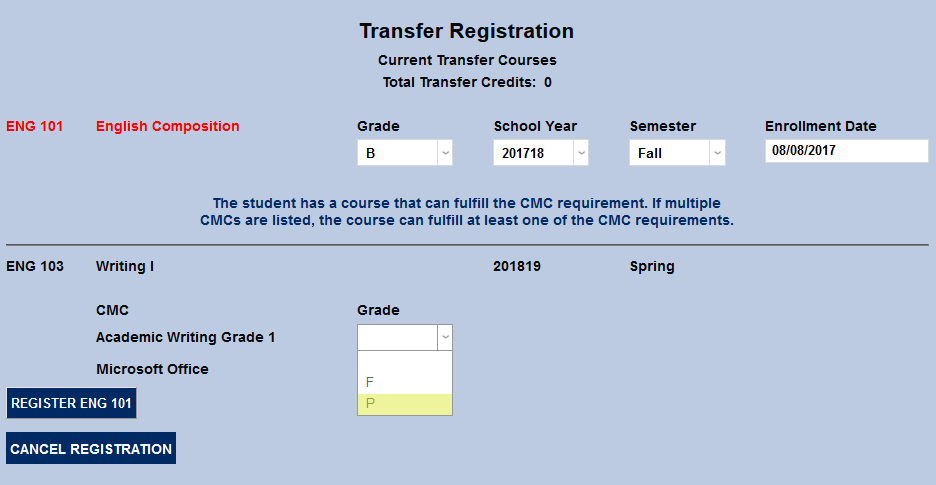
When a student transfers a course they've taken at another institution for credit, that course must replace a course offered at the member institution. If the member institution course has a CMC associated with it, SONIS will recognize the CMC and offer the option of giving the student credit for completing the CMC as well. Schools can choose to accept the CMC along with the course or require it to be completed via another course if they so choose.
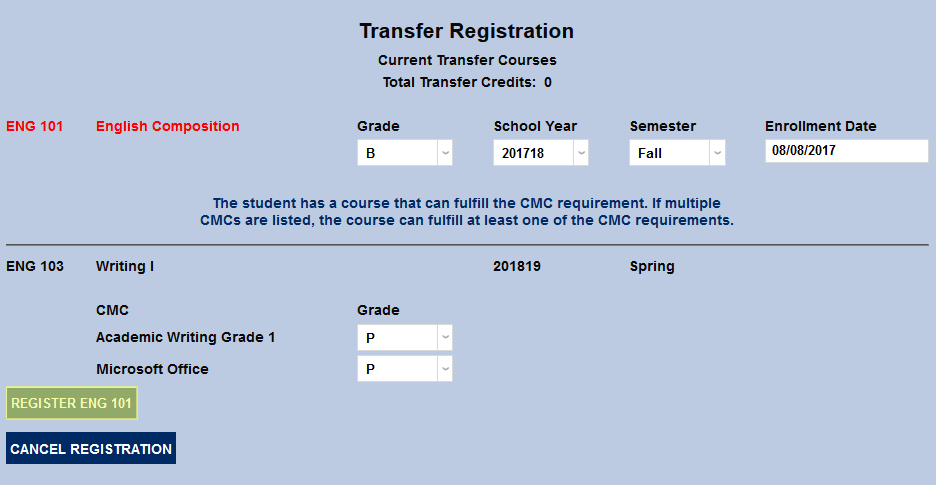
Once a course with a CMC has been selected using the Transfer Registration utility, SONIS will display a message saying "The student has a course that can fulfill the CMC requirement. If multiple CMCs are listed, the course can fulfill at least one of the CMC requirements." To accept a CMC for this course, simply choose a grade from the dropdown menu and finalize the registration. Only grades designated in the Grades Utility will be shown.
Viewing CMCs
Summary Pages
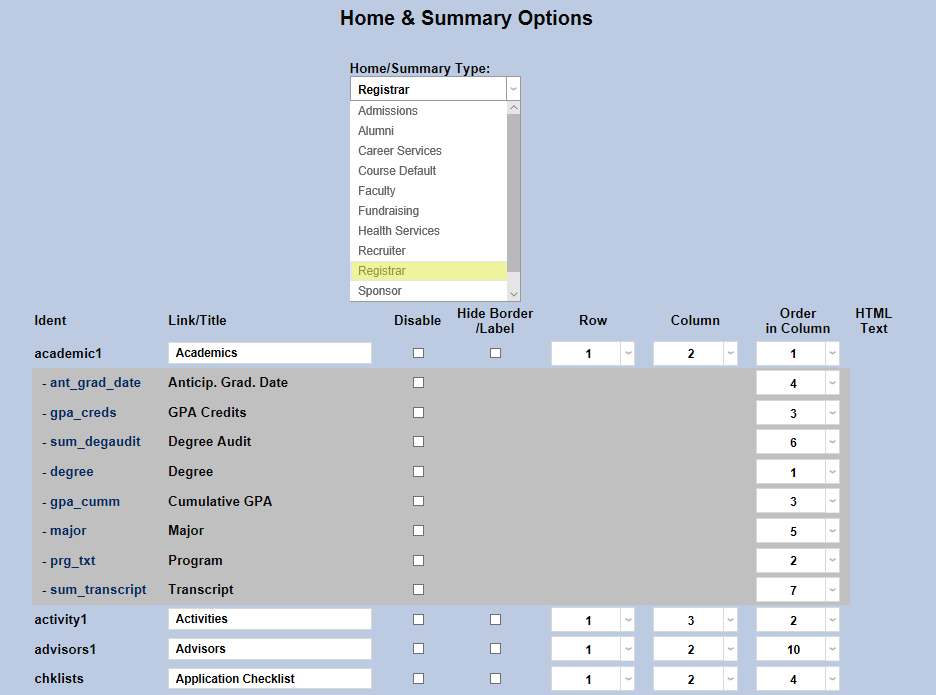
To view CMCs on summary pages, that option must be turned on in the Home & Summary Options utility under the systems tab. To add the CMC information to the student's Admissions Summary page, select Admissions from the dropdown menu and click the Select Home/Summary Type button.

Find competencies 1 in the Identity list to the left of the page. Ensure that the disabled box is unchecked. The name that will be displayed and the order in which it appears can also be modified from this screen. Click Submit Options when finished making changes.
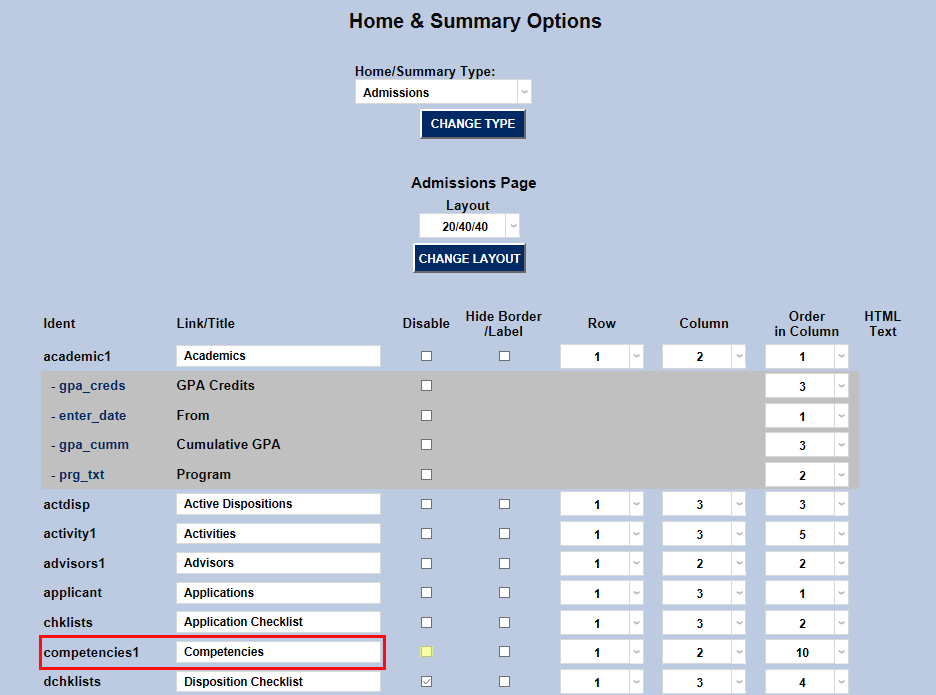
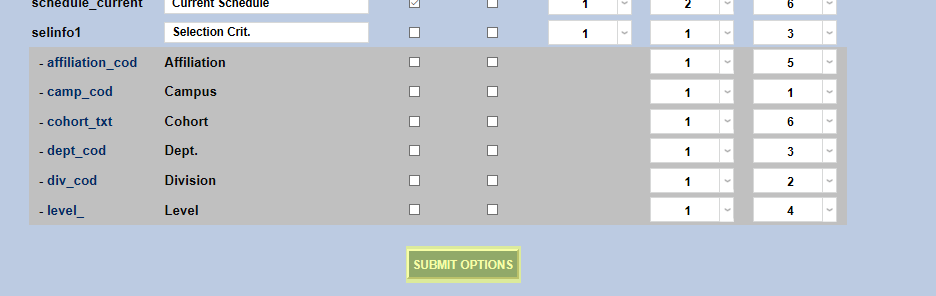
To allow viewing of CMC Groupings on the Registrar Summary page as well, select Registrar from the dropdown menu at the top of the page and repeat the process.
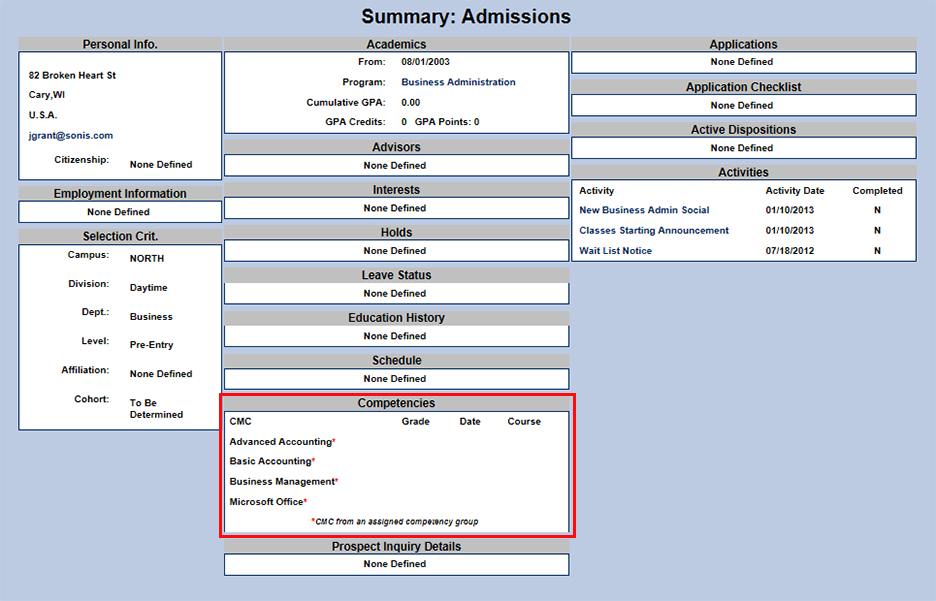
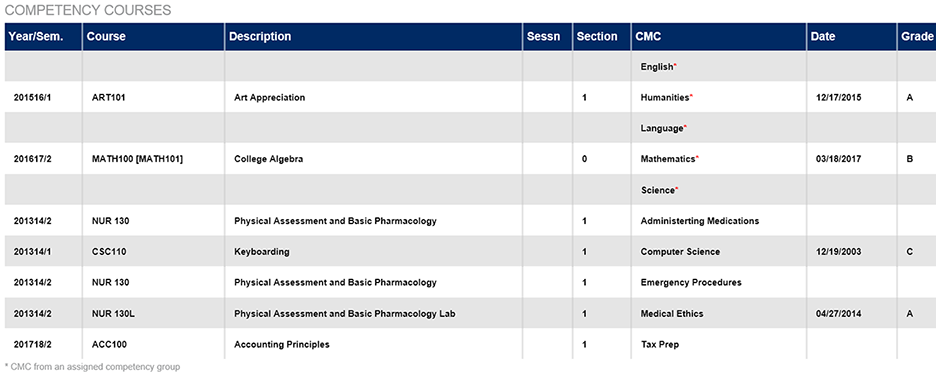
Visit the Summary: Admissions and Summary: Registrar pages after selecting a student with the Names function to view the competencies. Group competencies are marked with a red asterisk to set them apart. As students fulfill required competencies, the course used to meet the CMC and the school term in which the course was completed will be displayed. If a student completes multiple courses that satisfy a CMC, only a single course will be displayed indicating completion of the requirement.
Student & Faculty Portals
CMCs are also visible in the Student and Faculty portals. Students can view their competencies from their Bio page or on their grades pages. Faculty can view the competencies for their advisees on those students' grade pages.
Degree Audit
Each student's CMC information has been incorporated into their Degree Audit page as well. In order for it to display, administrators must first turn the option on in the Web Options utility under the Systems tab. Find Display CMC in Degree Audit in the list of options and check the box next to it. Click Submit to save changes.

The Degree Audit can be accessed through the student portal or through the administrator portal by visiting the DA: Report utility under Systems . The student's CMC requirements and courses taken to fulfill those requirements will be listed at the bottom.
