Payment Plans
Overview
The Jenzabar SONIS Payment Plans function—located in the Systems hub but touching many other parts of the SONIS system—allows customers to set up payment plans for students and monitor those students' progress through those plans. Payment plan records can be accessed through the Payment Plans page of the student portal. Students can access their plan through the Student Portal or it can be hidden from them.
Payment Plan Setup
Payment Plan Code
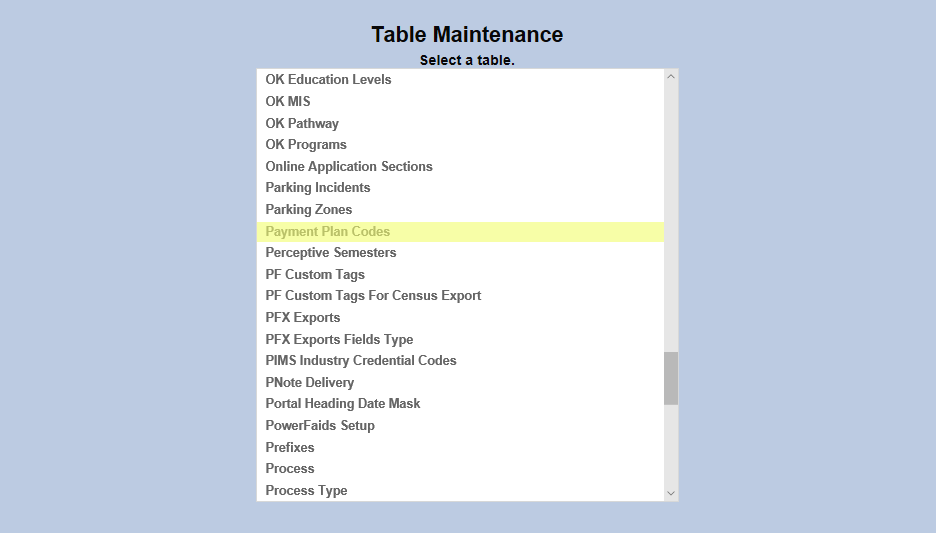
To create or edit a payment plan code, select Payment Plan Codes.
To add a new payment plan code, click on the Add New Record button or click on an existing code to edit it.
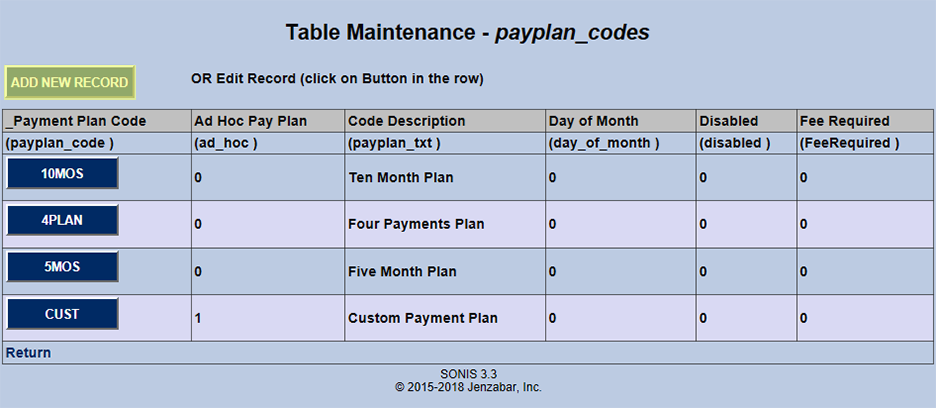
On the following page, enter a longform description of the code to be created in the Code Description field and an abbreviated version of the code in the Payment Plan Code field. The Code Description field has a 35 character limit and the Payment Plan Code has a five character limit.
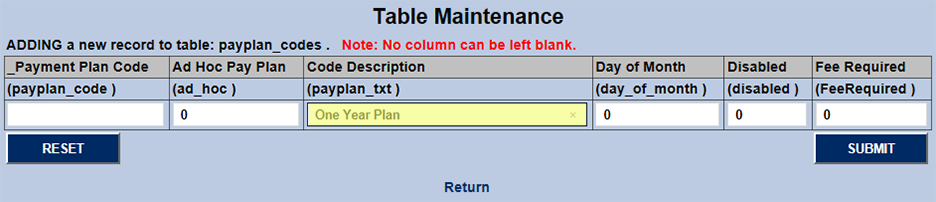
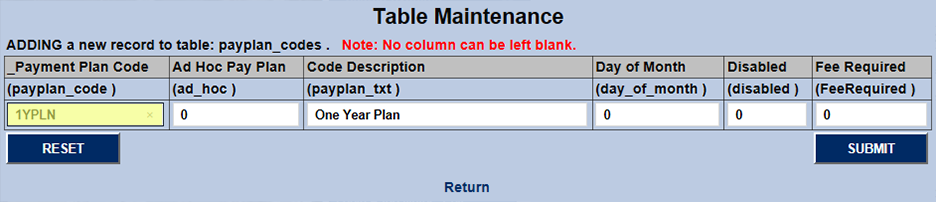
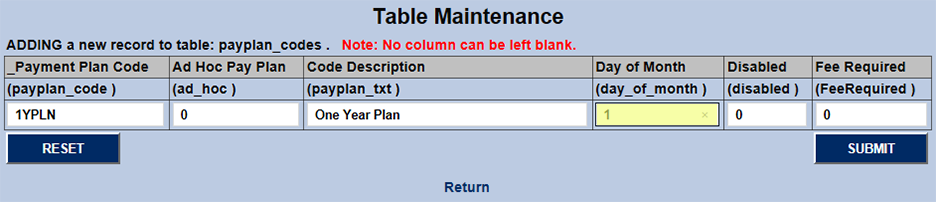
The Day of Month field controls whether the payment will be set to come in on a specific day of the month or not. If the Day of Month setting should be turned on, type a "1" in the field.
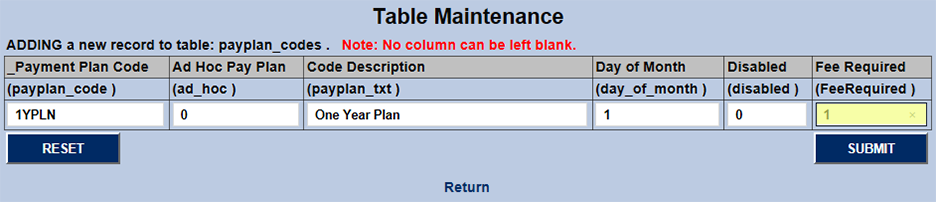
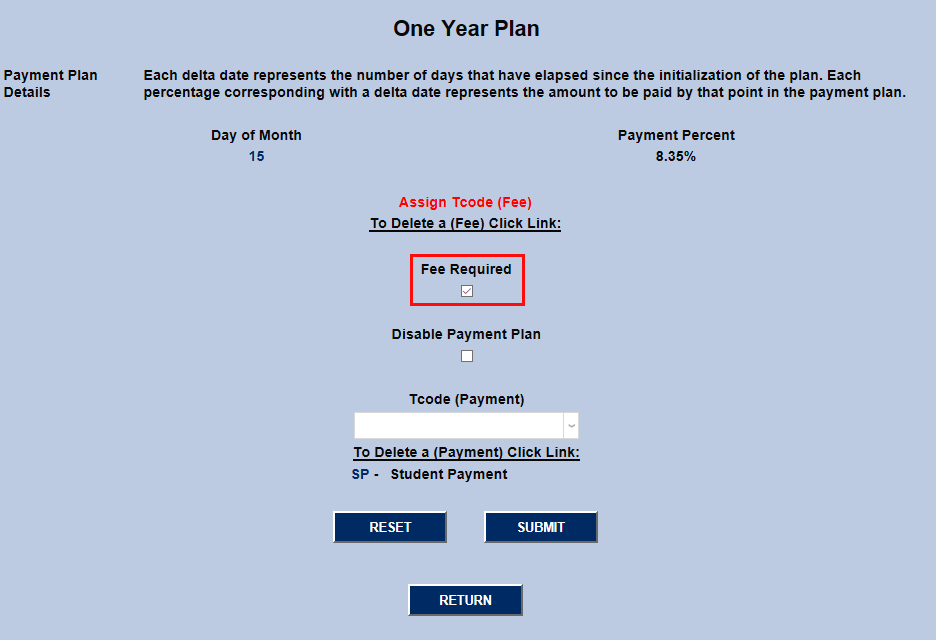
The Fee Required field is also an on/off bit. Place a "1" in the box if the payment will have a set fee attached. Leave a "0" if it should not.
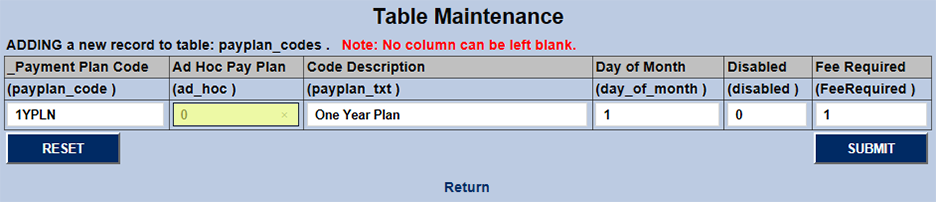
The Ad Hoc Pay Plan field controls whether the payment plan is customizable for each individual student or takes place over a set increment. Place a "1" in the field for custom/ad hoc plans or leave the "0" for fixed plans.
The final on/off bit field is the Disabled field. Place a "1" in this field to disable the plan code or leave a "0" to enable the field.
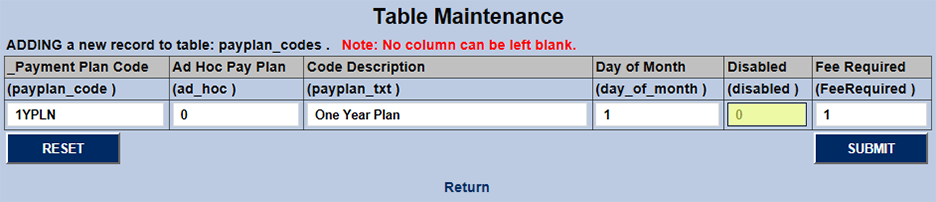
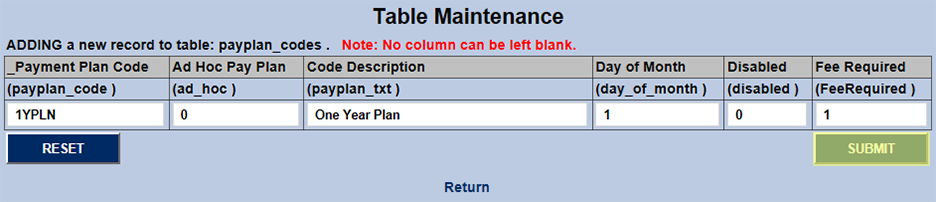
Once every field has been filled, click Submit to saves the changes and create the payment plan code.
Payment Plan Details
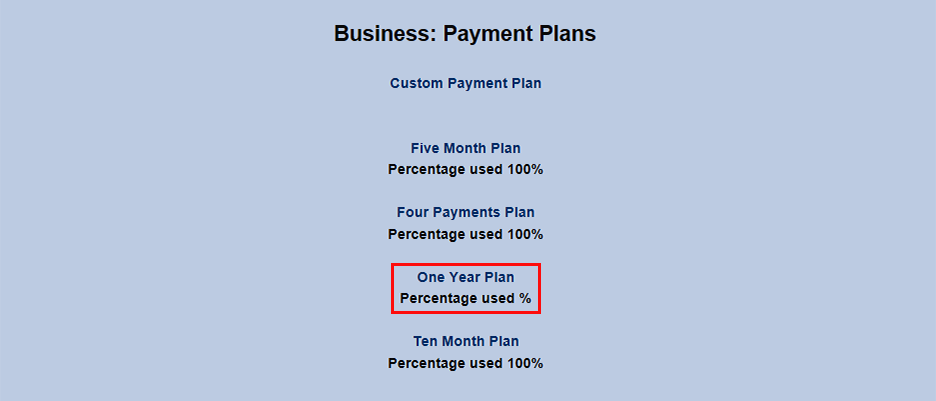
To continue setting up payment plans, navigate to the Payment Plans utility under the Systems tab. Only plans with an enabled Payment Plan Code will be displayed.
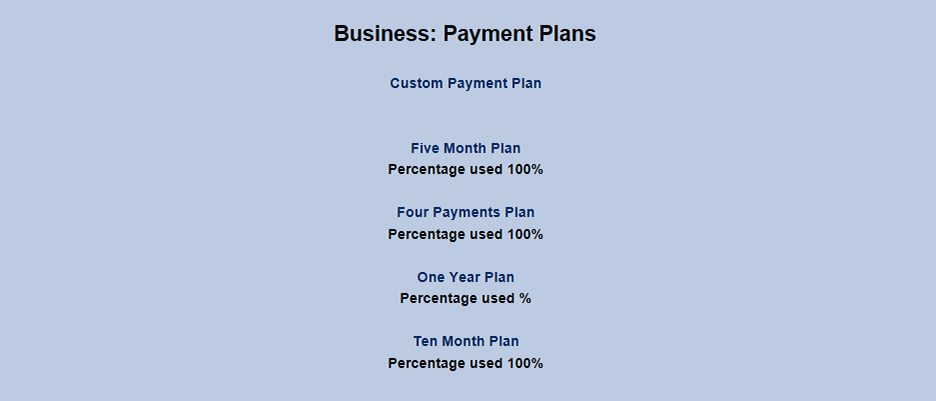
To begin editing payment plan details, click on the name of the plan.
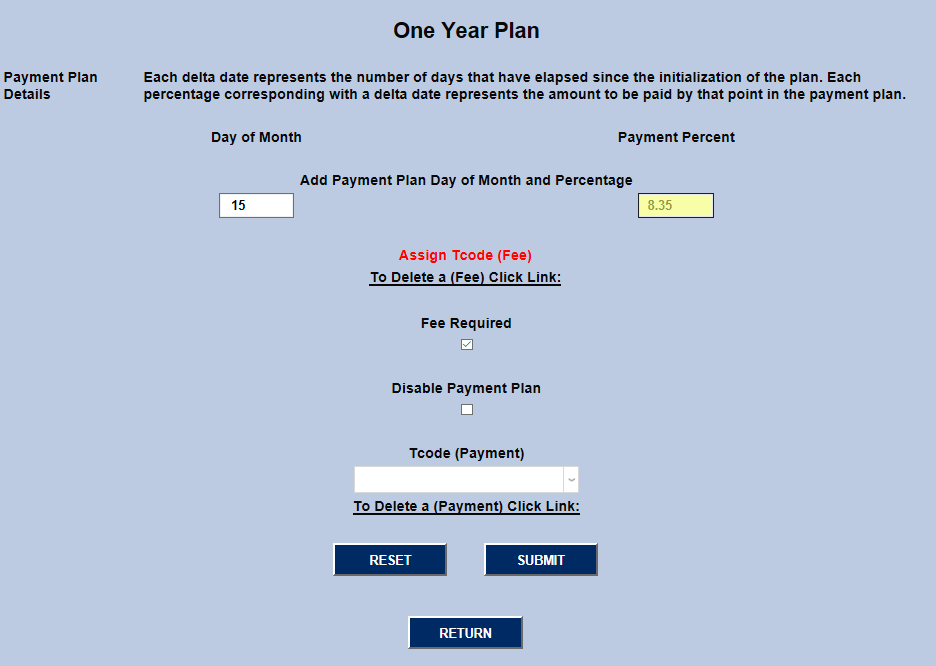
Fixed Day of Month
If the Day of Month options was enabled on the Payment Plan Code page, fill in the Day of Month field with a whole number below 29.
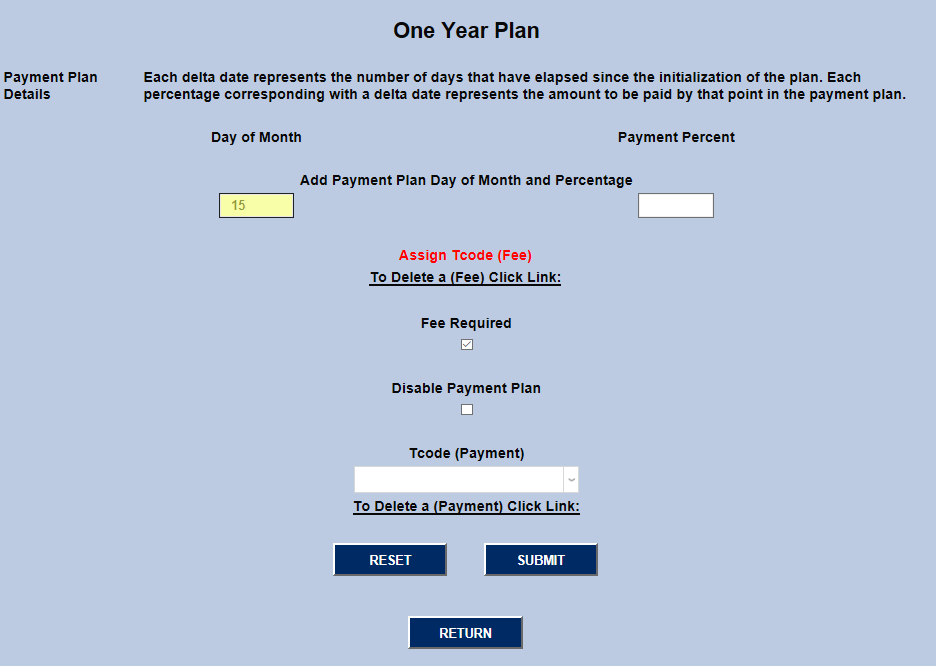
The Payment Percent is the amount of the total that the student pays off each time they make a payment. It must be a whole number less than 100 and should correspond to the intention of the plan. For example a four-payment plan would have a 25% payoff each time.
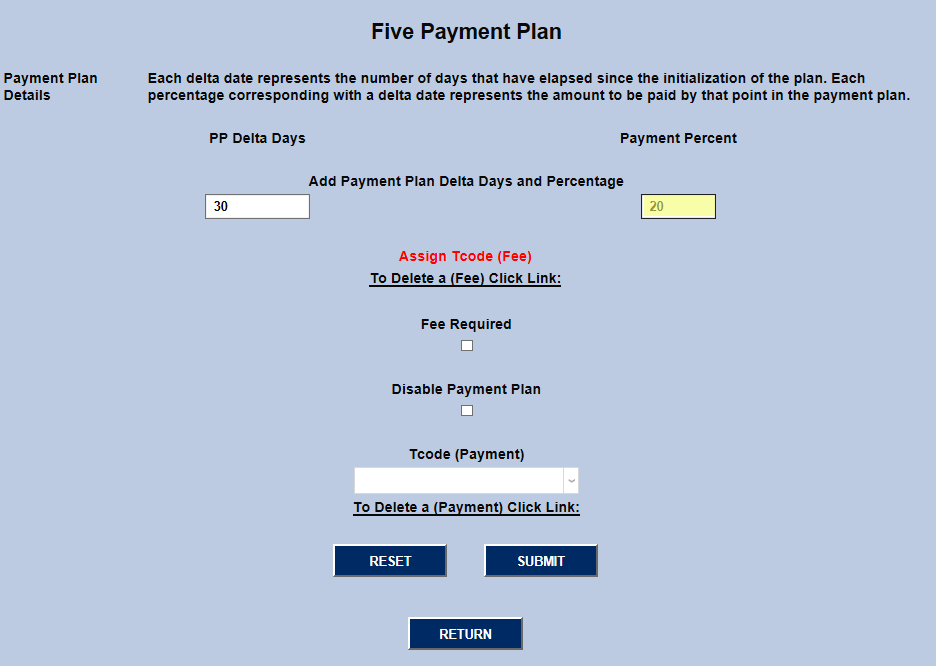
Delta Days
If the Day of Month bit was turned off when setting up the Payment Plan Code, the system will ask for a number of Delta Days. Delta Days are the number of days between payment due dates.
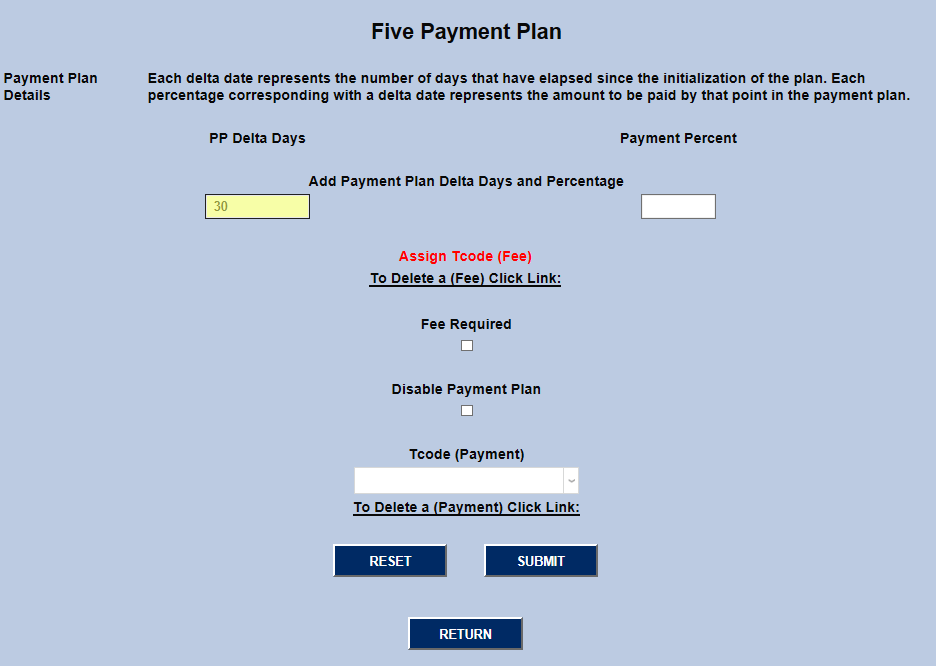
The Payment Percent field should be filled out with the percentage of the full amount that is paid each time. This number should correspond with the number of payments the plan requires.
Additional Details
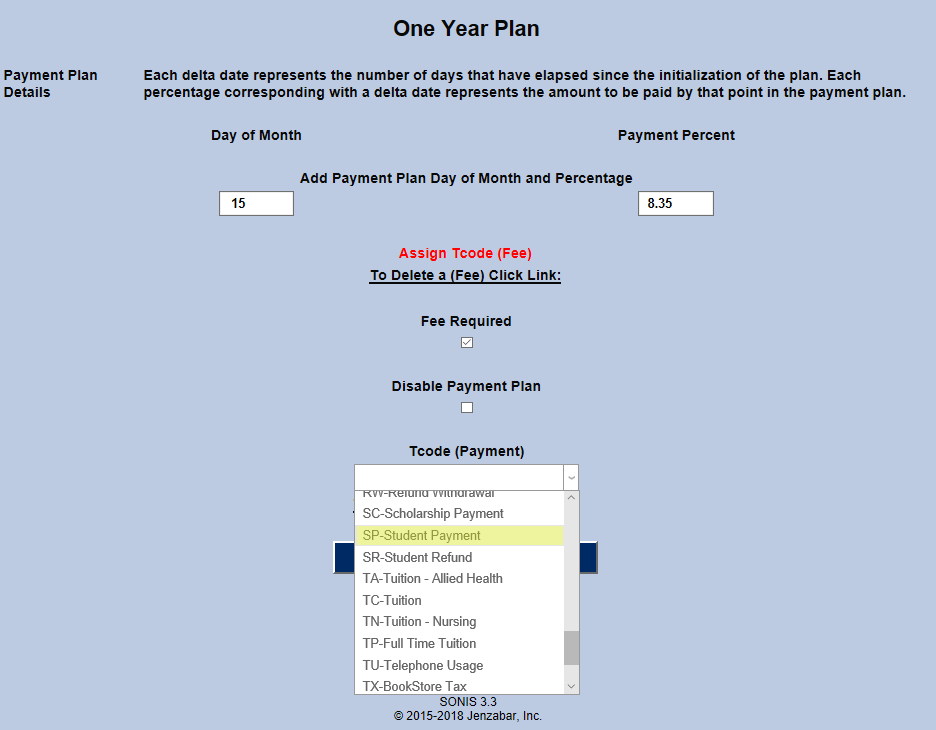
After entering the day and payment percentage information, select a transaction code for the payment from the T-code (Payment) dropdown menu and click Submit to save the changes made so far.
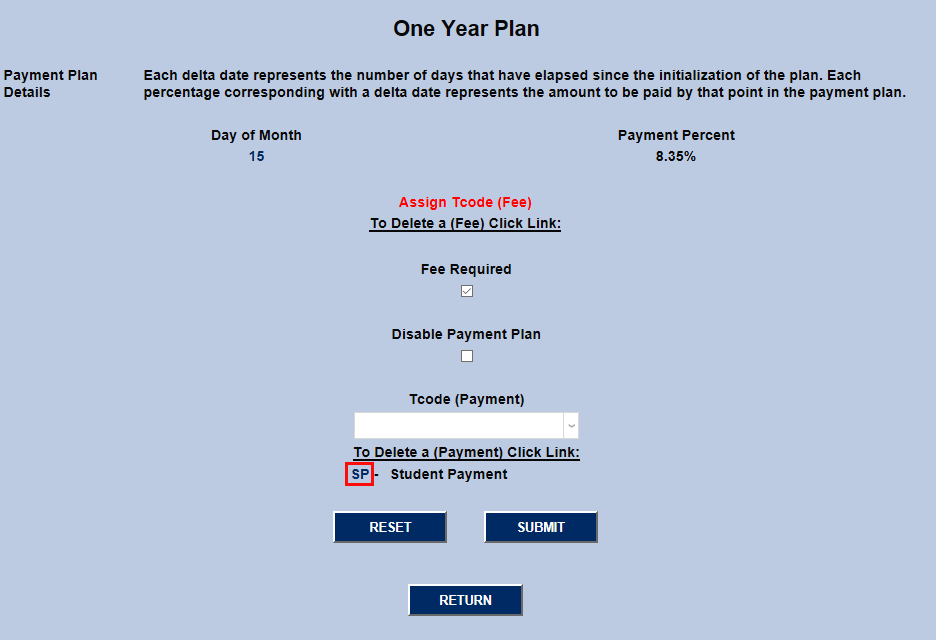
Transaction codes assigned in error can be removed by selecting a new transaction code and clicking on the T-code abbreviation.
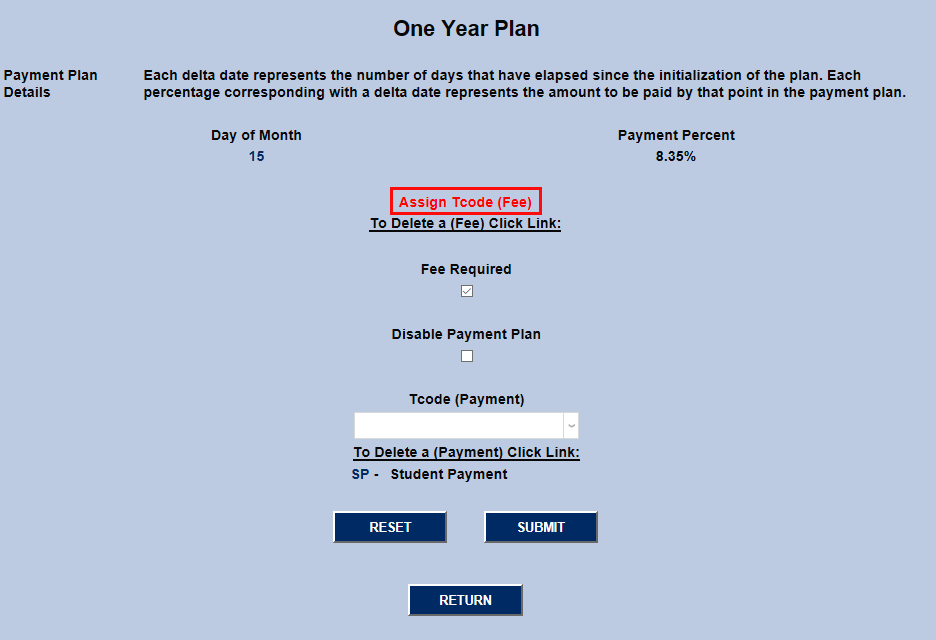
If an additional fee should be charged with each payment, ensure that the Fee Required box is checked and click on the Assign T-code (Fee) link to set it the amount of the fee and assign a transaction code.
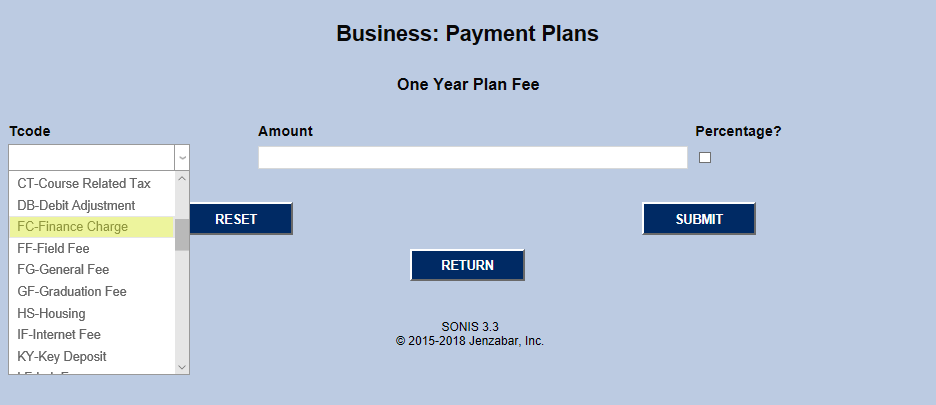
Payment T-Code
On the fee setup page, select a transaction code for the fee from the T-code dropdown menu.
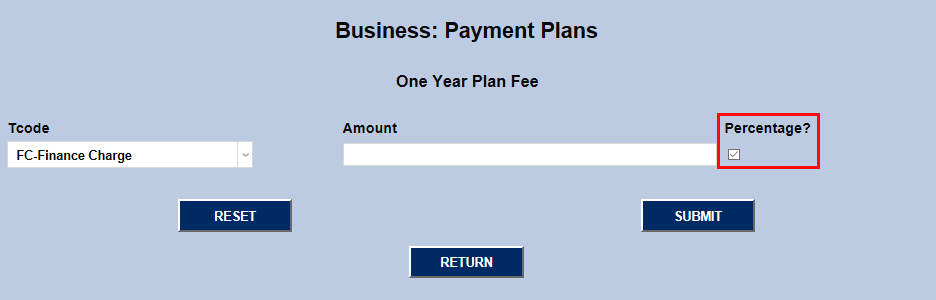
Enter a dollar amount to be charged with each payment in the Amount field.

Alternately, users can check the Percentage box and enter a percentage of the original loan amount to be charged with each payment.
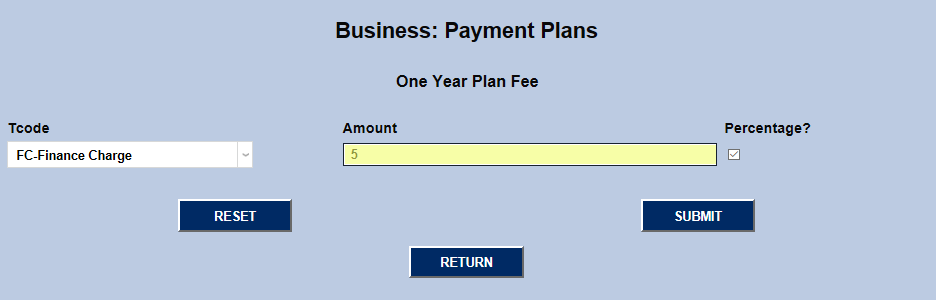
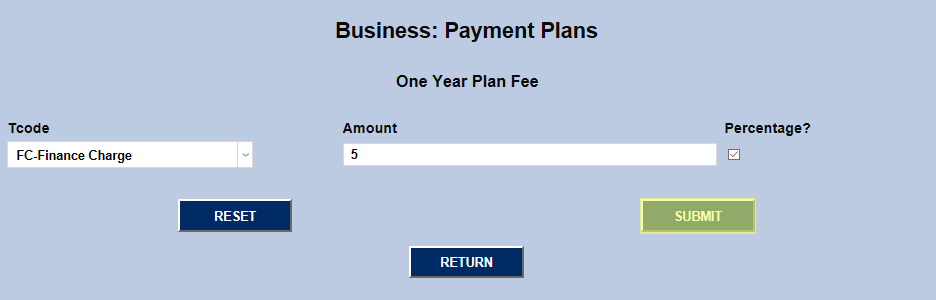
Once the T-code and Amount fields have been filled out, click Submit to save the changes.
Assigning Plans
To assign a plan to a student, select the student's information from the Names tab and navigate to their Payment Plans page.
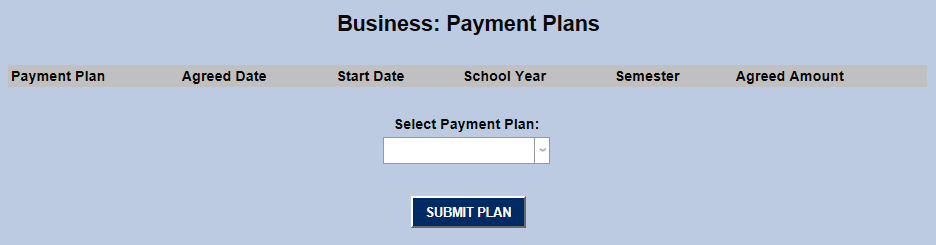
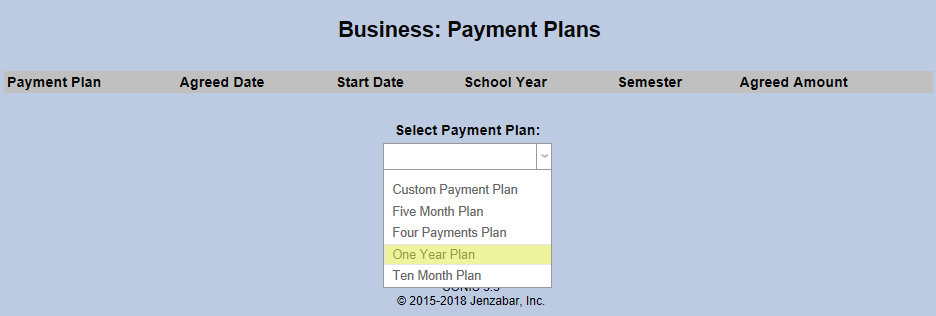
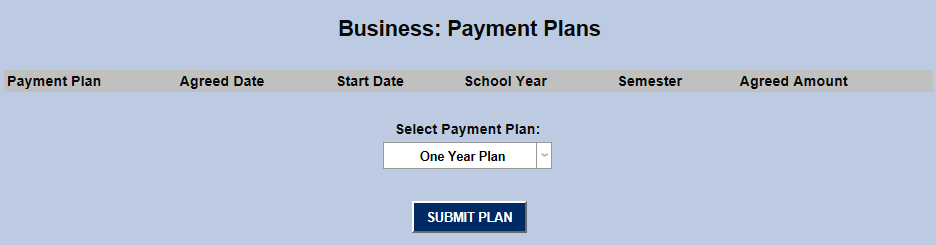
Select a payment plan from the dropdown menu and click the Submit Plan button.
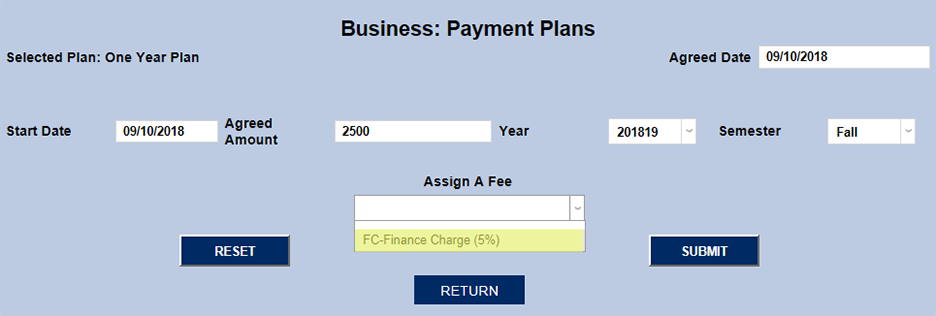
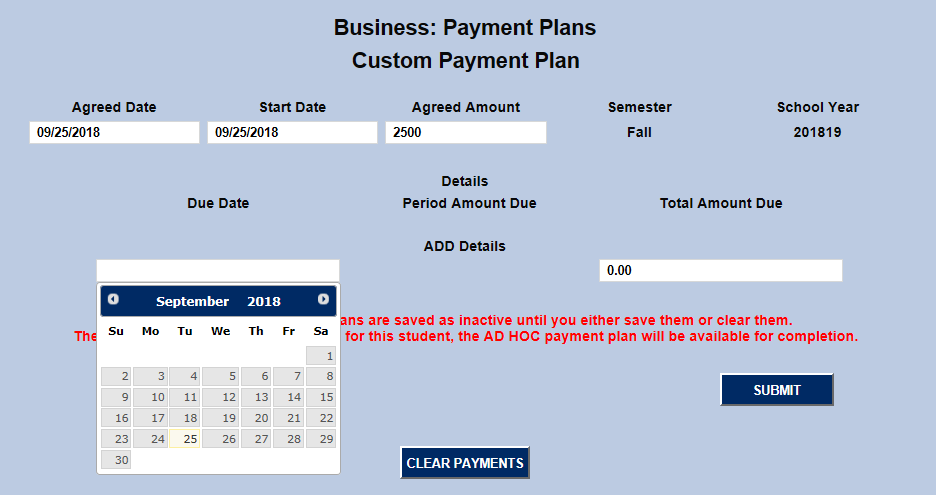
On the following page, set the Agreed Date, the date that the student agreed to the payment structure, and Start Date, the date that the first payment occurs.
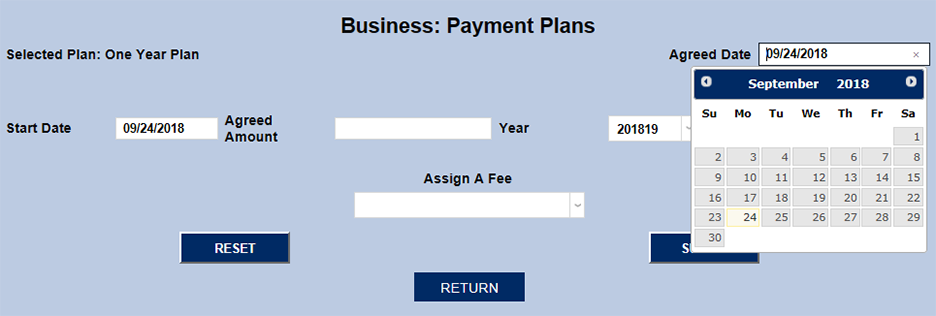
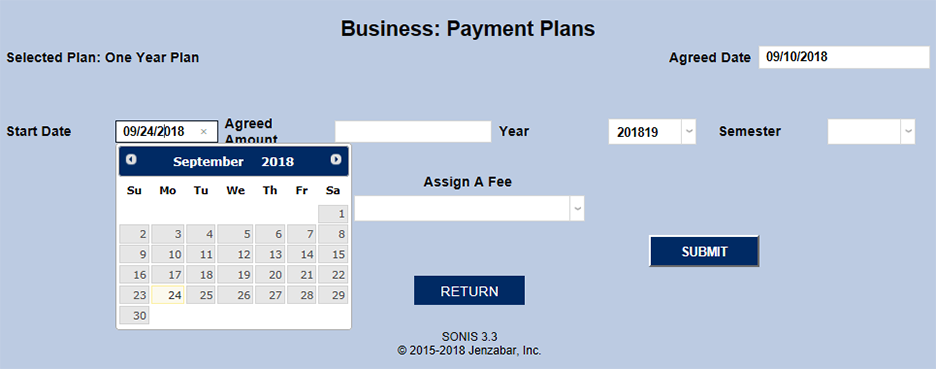
Next, fill out the Agreed Amount field with the total amount being borrowed.
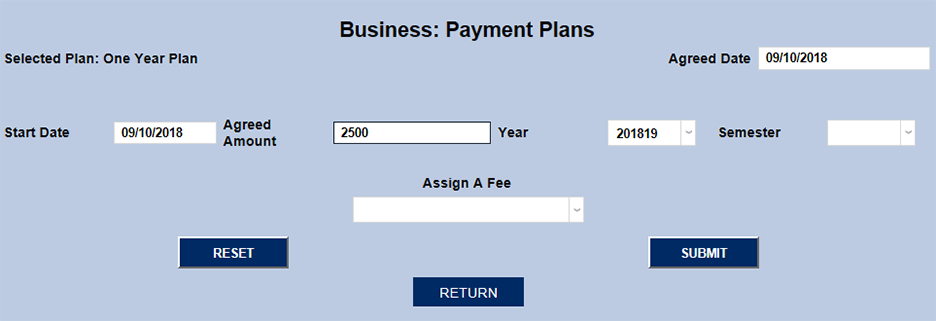
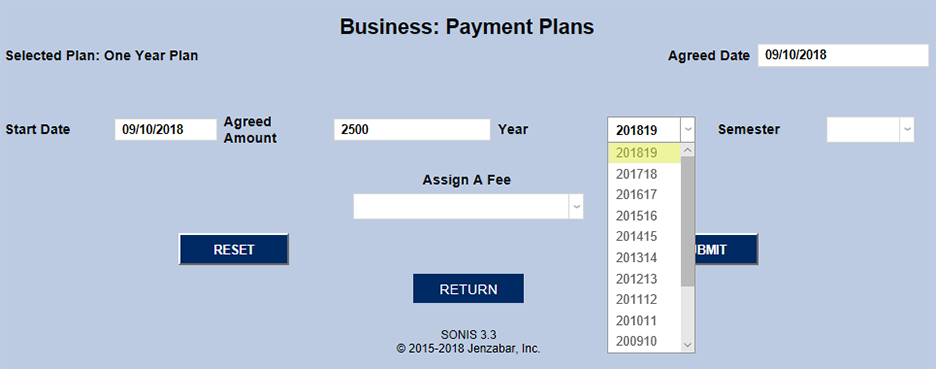
Select the school year of the loan from the Year dropdown menu.
Note: Only one payment plan can be assigned to a student per term chosen. If a semester is chosen from the Semester dropdown menu, the student can have additional payment plans in subsequent semesters. If no semester is selected, the payment plan will have a term of the entire school year and no additional payment plans can be created for that school year.
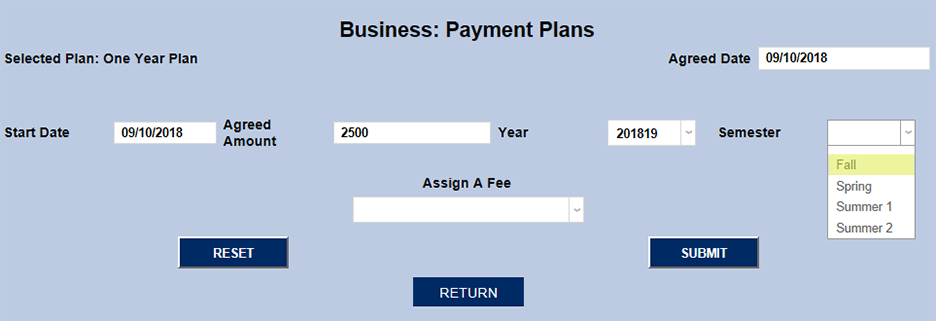
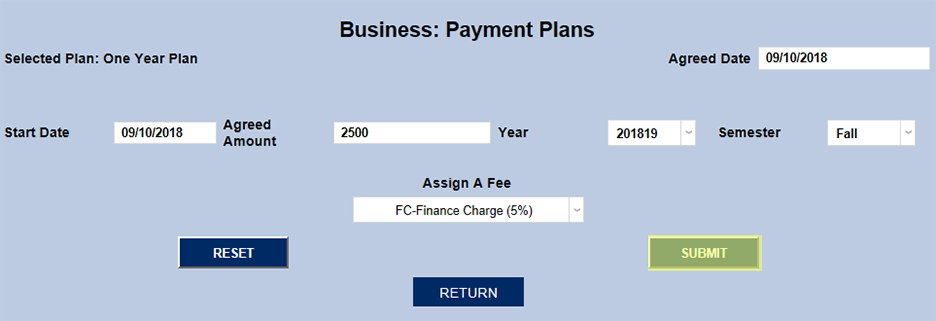
Choose a fee amount from the Assign a Fee dropdown if a fee should be assigned to this payment plan. The list will only include the fee that was set up previously.
Click the Submit button to save the changes and continue.
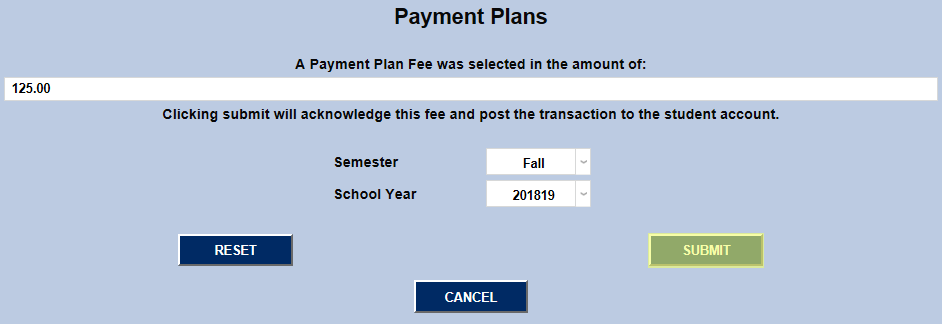
The following page allows the administrator to confirm the plan. The fee being charged has been calculated based on the plan setup and the amount being borrowed. The initial payment can be altered if the student paid a different amount and the semester and school year can be changed as well. Click submit to acknowledge the payment and post the transaction to the student's account.
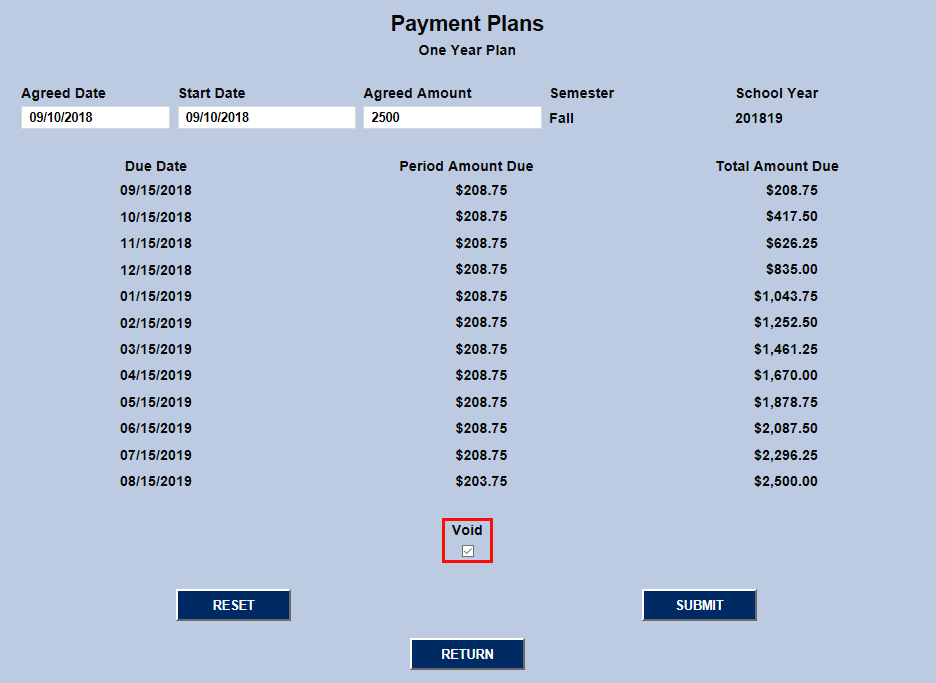
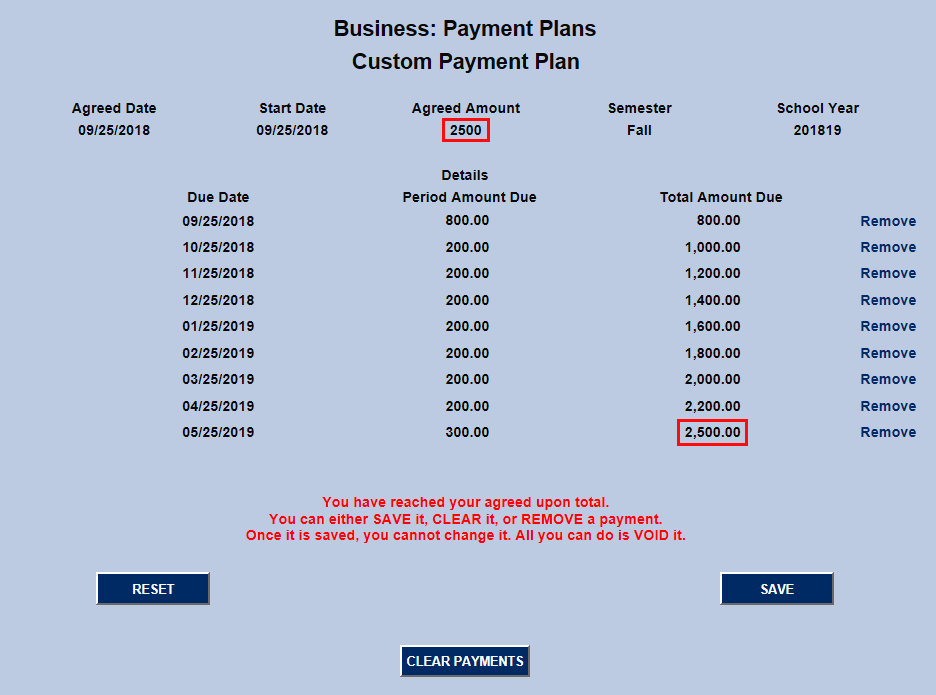
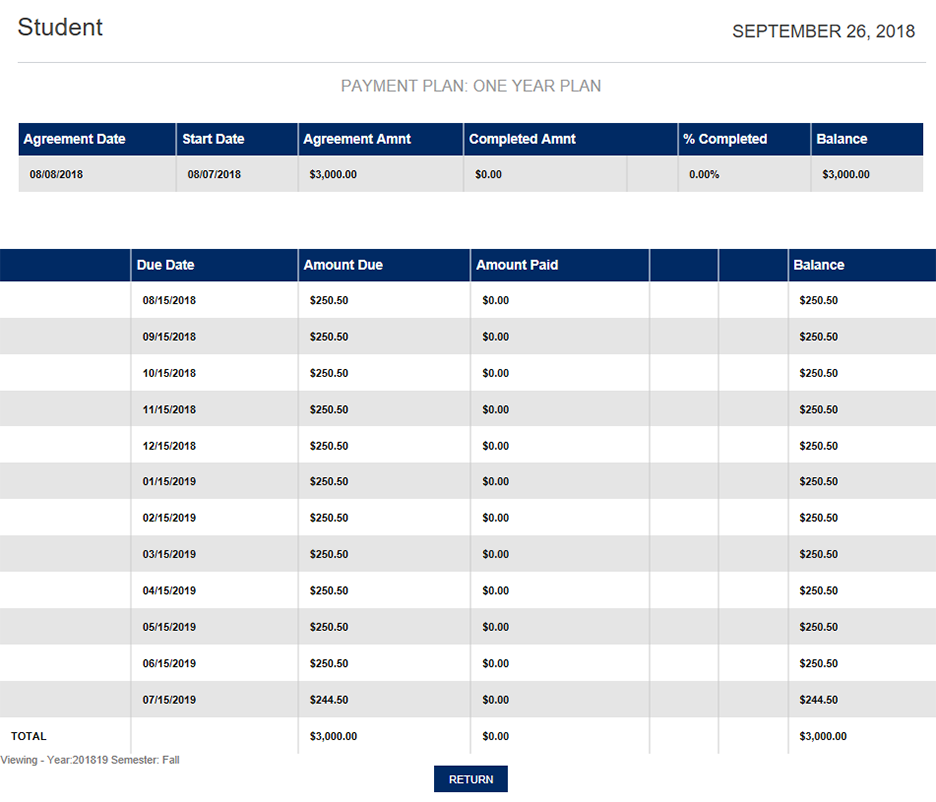
Once the plan has been confirmed, the SONIS system will list the payment schedule. The Agreed Date, Start Date, and Agreed Amount can all be edited from this screen and the plan can be voided by checking the Void checkbox and clicking Submit.
Custom Plans
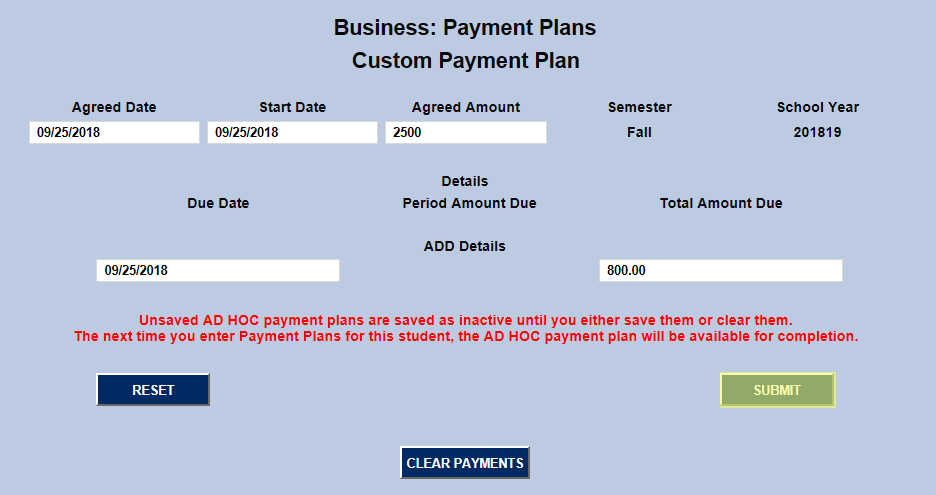
The initial setup for Custom Plans is the same as other plan types, but after the first setup page, the user is taken to another page to designate a date and dollar amount for each payment. The administrator must continue adding these payments by clicking Submit until the full amount borrowed is reached. Only then will the plan save.
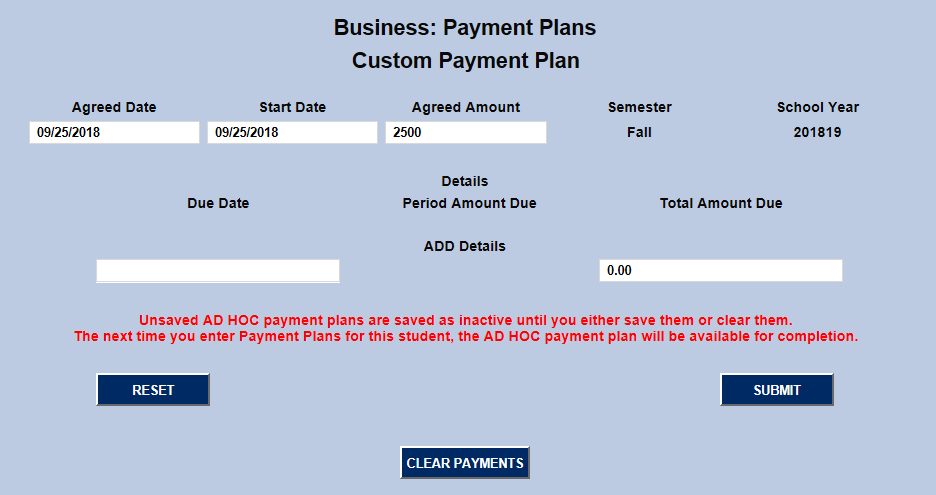
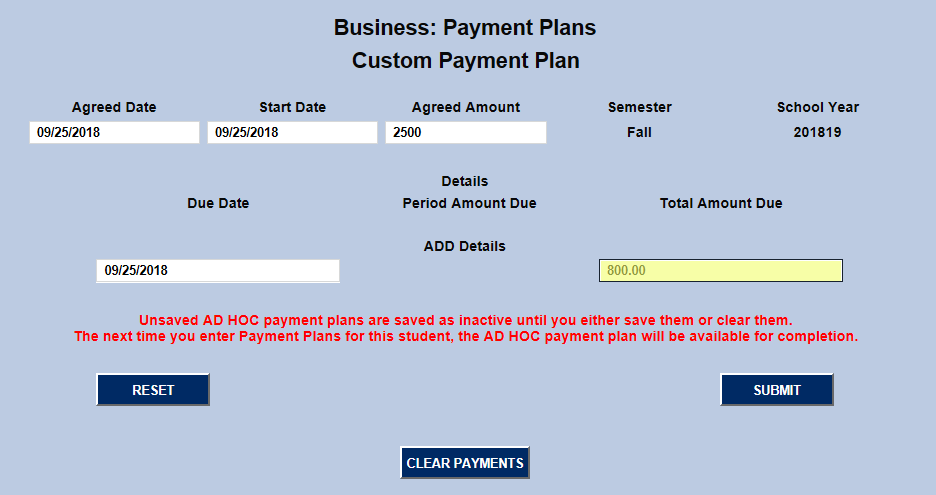
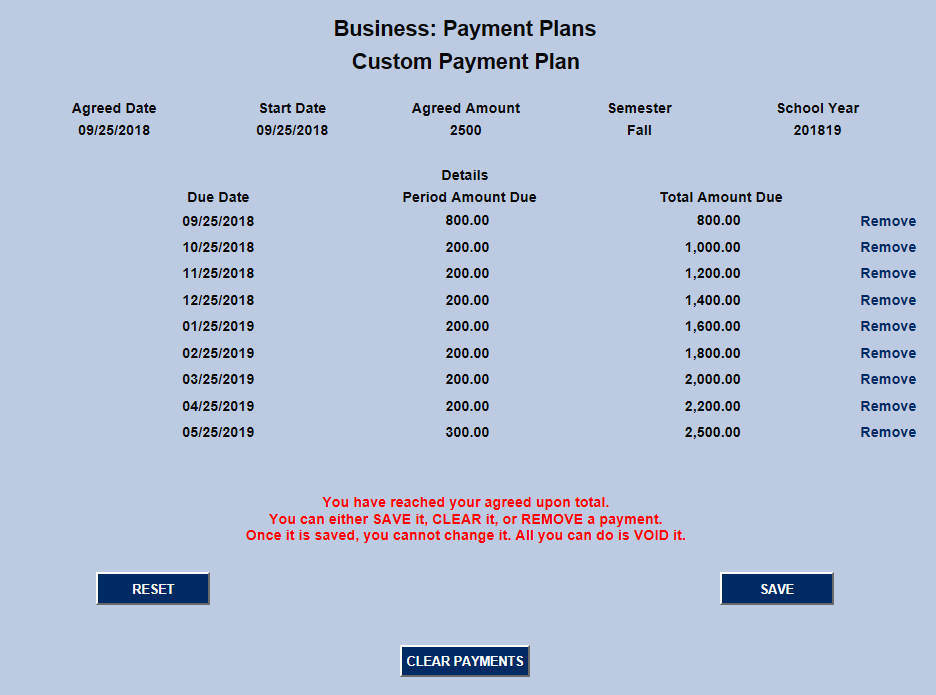
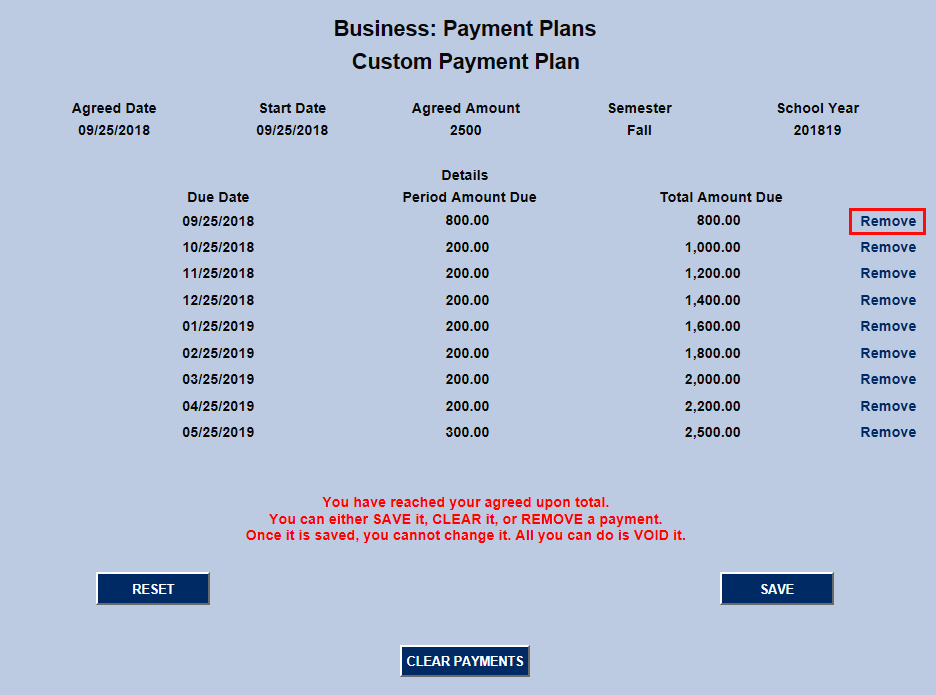
Payment amounts added in error can be removed with the Remove link to the right of the row.
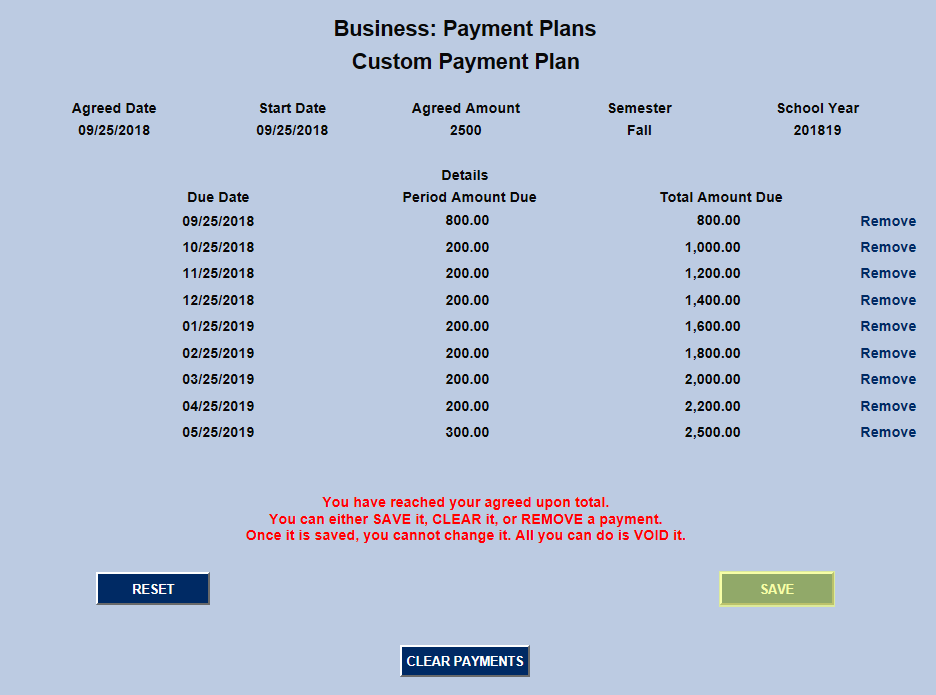
Once the total amount owed has been reached, click Submit again to finalize the plan. Once it is saved, it can not be edited and can only be voided.
Reports
Payment Plans
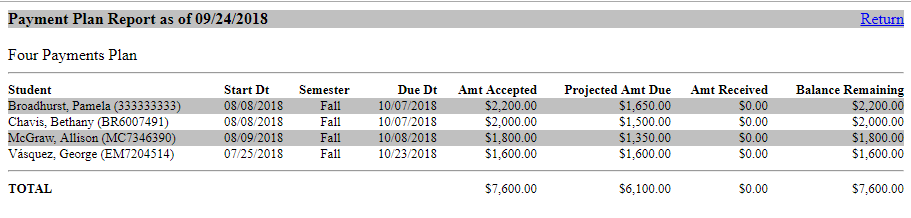
The Payment Plans report provides a summary of payment plans one particular School Year. These reports can be narrowed down using the Payment Plan, Campus, Division, Department, and Semester menus. An individual's SONIS ID can be entered as well to display only their payment plan information.
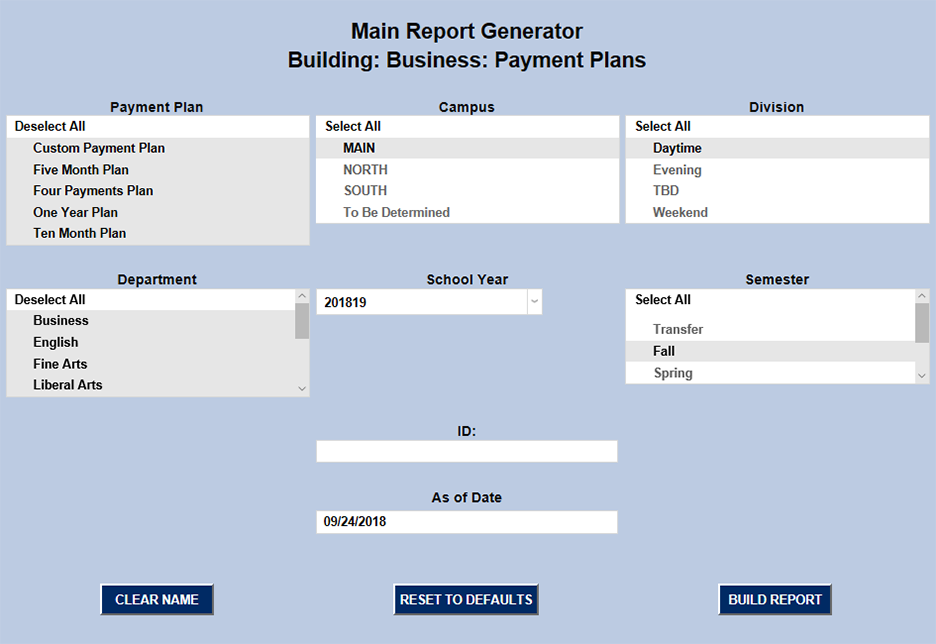
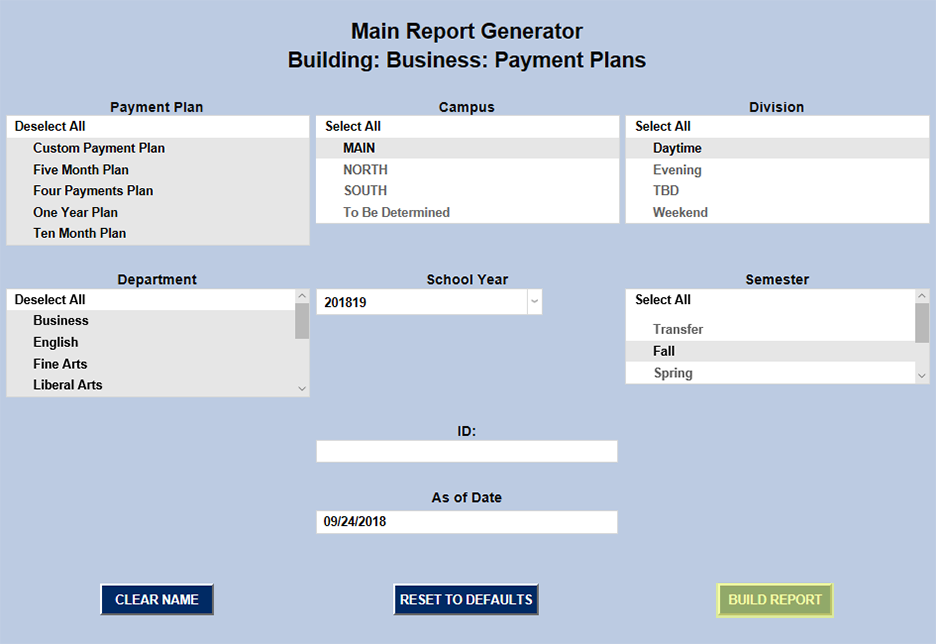
Once the report has been limited to the right categories, click Build Report. The report will open in as a pop-up window.
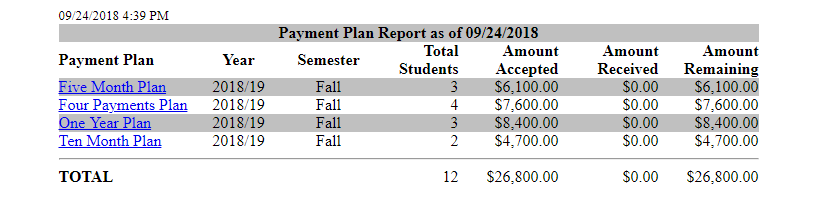
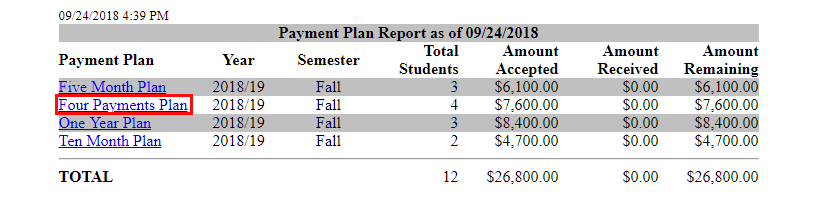
If no specific student or payment plan type was selected, the report will display the total amount owed for each type of plan. Click on a plan type to "drill down" and view the list of students enrolled in that plan.
Payment Plan Due Dates
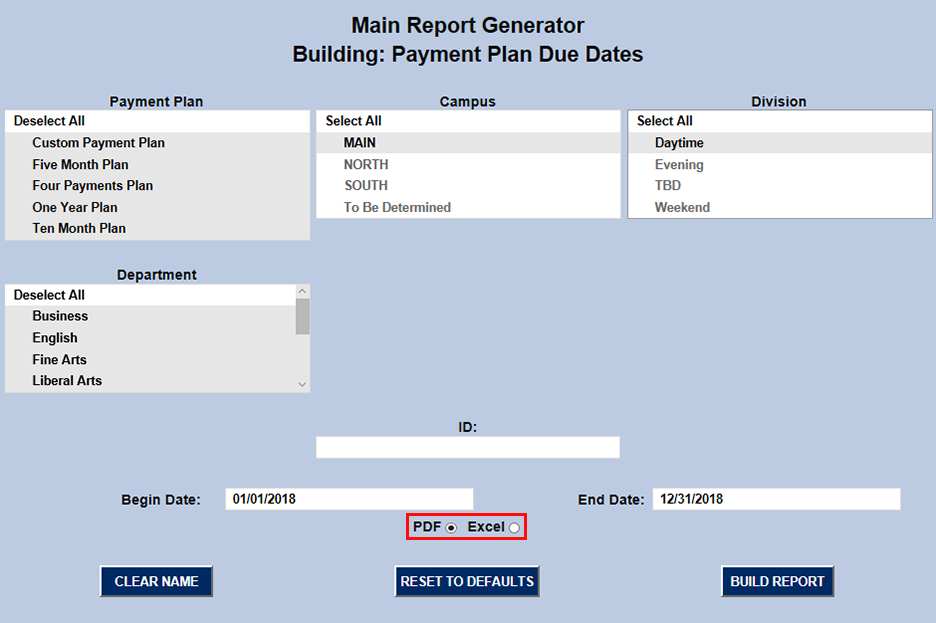
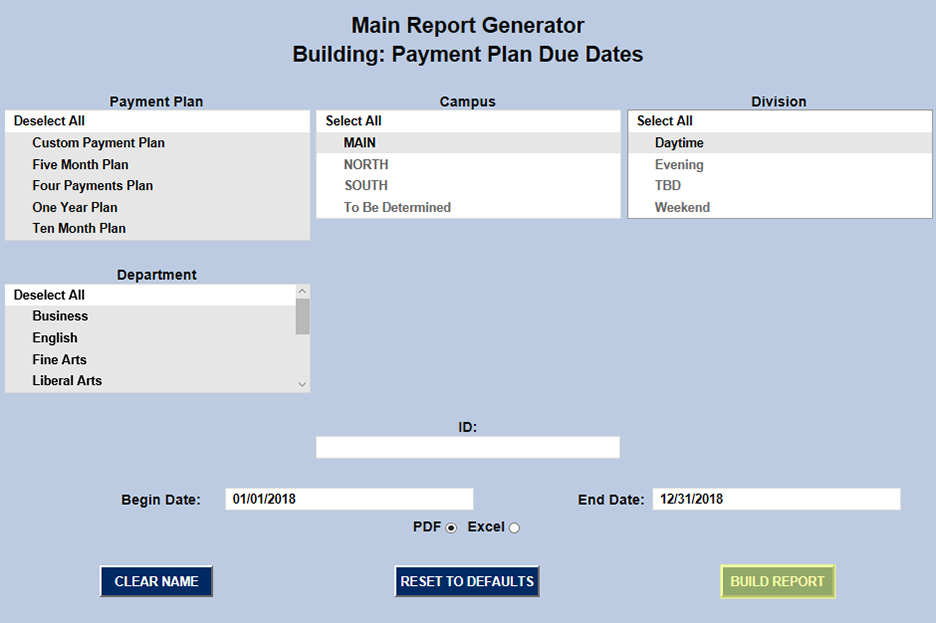
The Payment Plan Due Dates report, as the name suggests, lists the due dates for payments students have been assigned under their payment plans. The report can be filtered by the type of Payment Plan as well as the Campus, Division, Department, and date range. Alternately, a report can be created using a single student's SONIS ID.

The report can displayed in either PDF or Excel format. Once the report filters have been set up properly, click Build Report and then Preview Report on the following page.

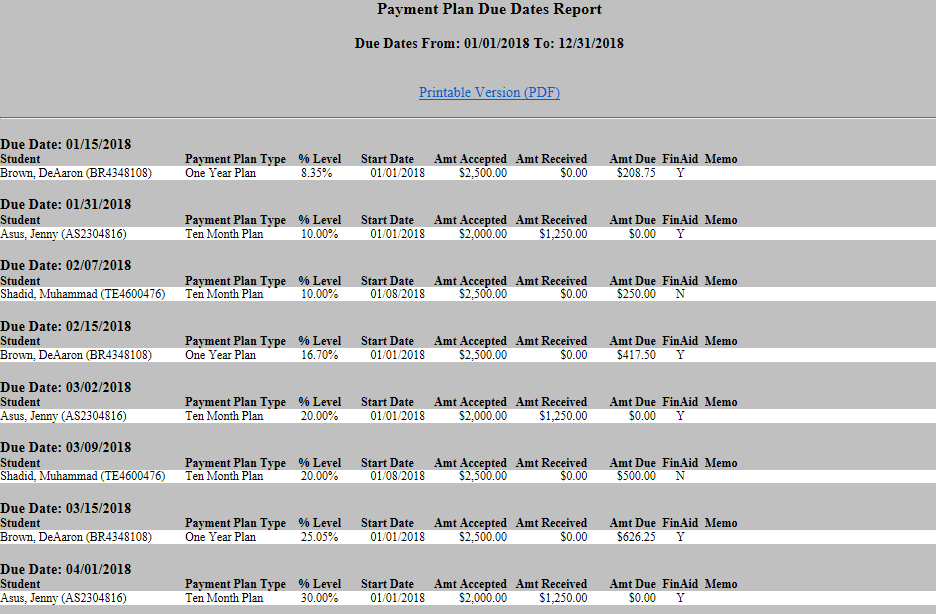
The report displays the date when each payment is due. The row below the due date displays: the student and their SONIS ID number, the payment plan type, the percentage of the loan that will be paid off when that payment is received, the start date, the total amount accepted, the amount received so far, and the amount due. The final two columns list whether the student is receiving financial aid in addition to the payment plan and any memo that has been appended.
Payment Plan Due Dates by Year/Semester
The Payment Plan Due Dates by Year/Semester report is the same as the Payment Plan Due Dates report, but only displays one school year and semester at a time. Like the Payment Plan Due Dates report, it can also be additionally filtered down by the Payment Plan type, Campus, Division, Department, and date range as well as the student's SONIS ID.
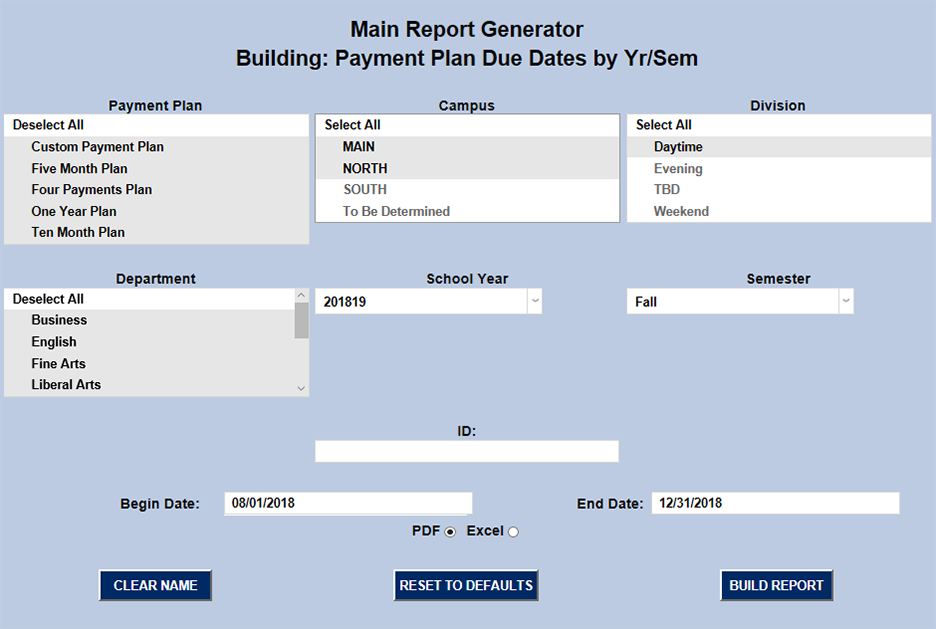
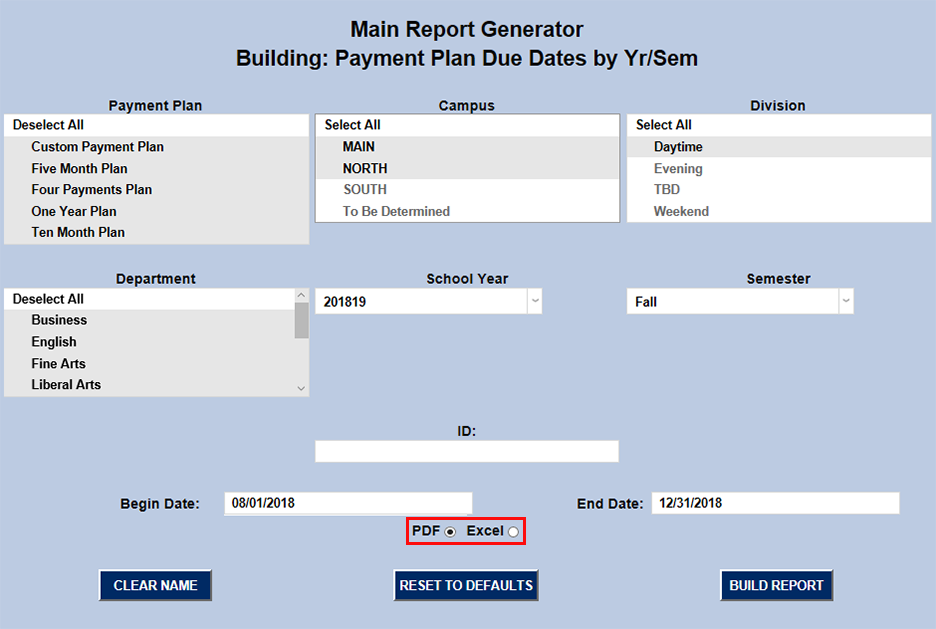
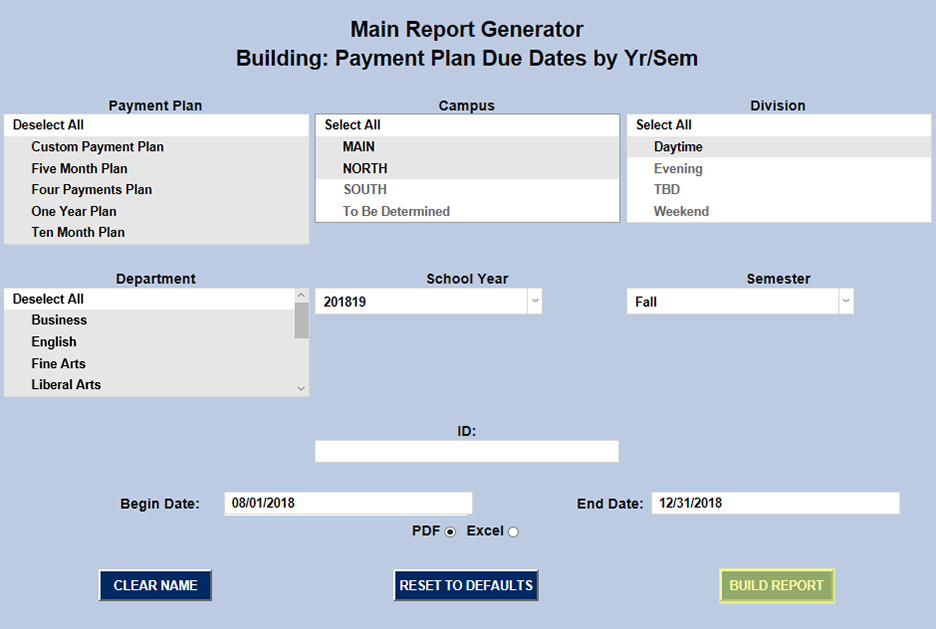
The report can displayed in either PDF or Excel format. Once the proper filters are in place, click Build Report and then Preview Report on the following page.
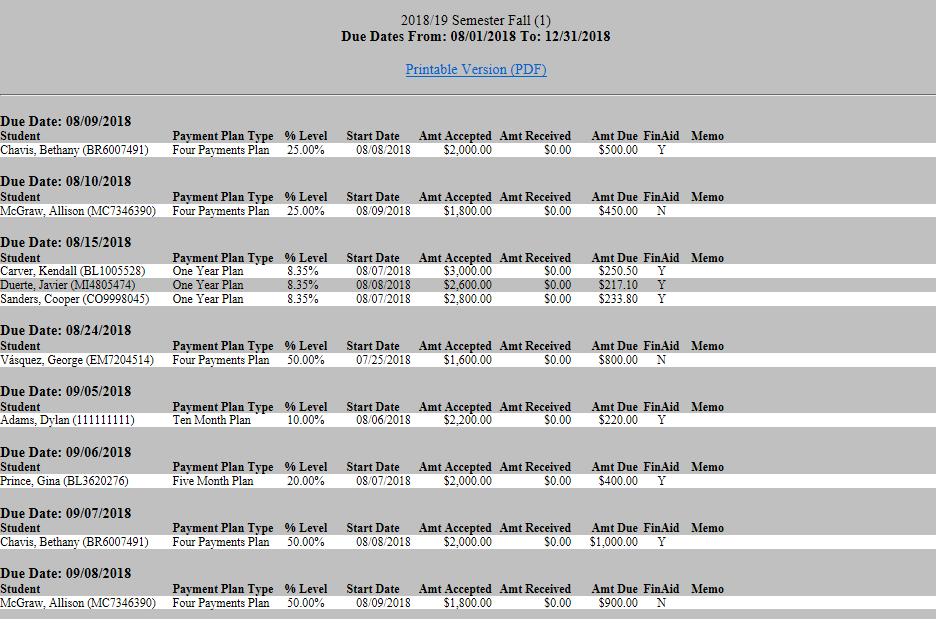
The report displays the date when each payment is due. The row below the due date displays: the student and their SONIS ID number, the payment plan type, the percentage of the loan that will be paid off when that payment is received, the start date, the total amount accepted, the amount received so far, and the amount due. The final two columns list whether the student is receiving financial aid in addition to the payment plan and any memo that has been appended.
Student Portal
Students can access their payment plan schedule through the Student Portal. To access the plan, navigate to Billing under the Financial menu and then click Payment Plan Status.
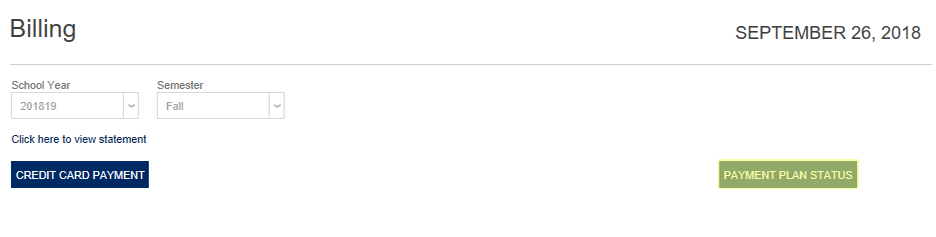
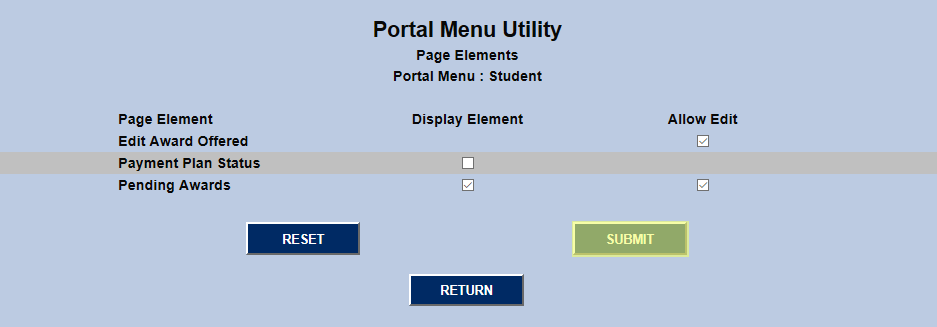
Suppressing Portal Access
Administrators can choose to suppress student access to their payment plan information through the Portal Menu Utility in the Systems hub. Select Student from Portal Menu Utility dropdown and scroll down to the Billing row under the Financial section. Click Edit to change student billing options.


On the following page, uncheck the Payment Plan Status box and click Submit. Once this is done, students will no longer be able to access payment plan information from their portal.