Currency Conversion Utility
Overview
The Jenzabar SONIS Currency Conversion Utility allows institutions to offer more than one currency as a payment option for their students. The utility uses APIs to connect SONIS to online conversion calculators. Schools can specify their home currency and any additional currencies that they accept.
The conversion process was developed for PayPal, though more payment gateways may be integrated in the future. Before accepting any currency, schools must ensure that PayPal accepts the selected currency. At this time, PayPal does not accept the Chinese Yuan. For a list of the currencies that PayPal does support, click here.
Setup
Locale Codes
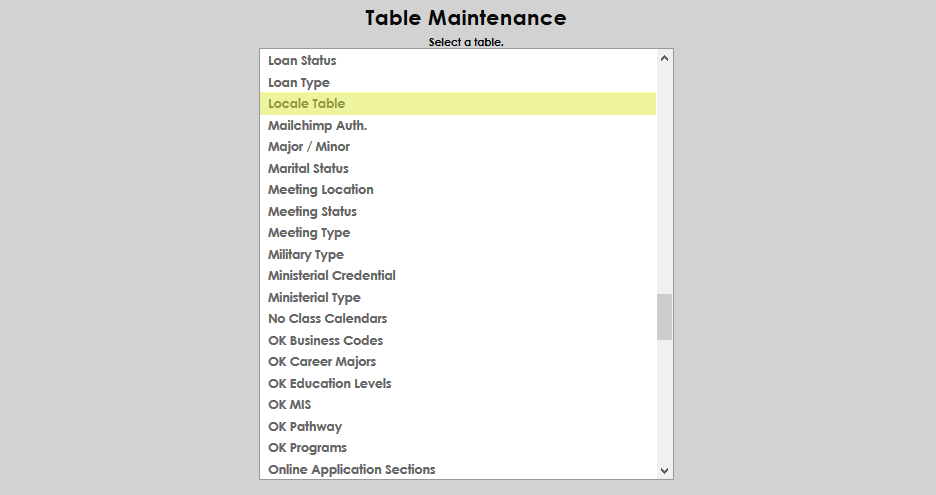
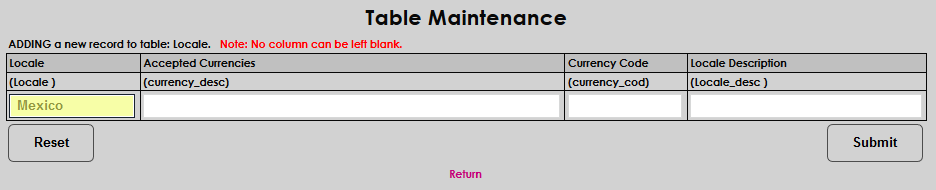
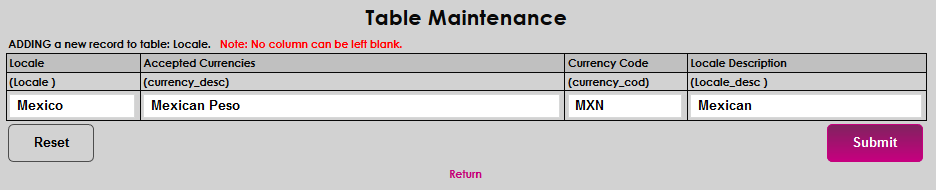
In order to pass the correct currency information to payment gateways, SONIS utilizes a Locale table. To view the table, edit existing entries, and add new entries, navigate to Table Maintenance in the Systems hub.
The Locale table is pre-populated with a variety of international currencies. SONIS administrators can add more currencies with the Add New Record button or edit an exist currency by clicking on the code in the Locale column.
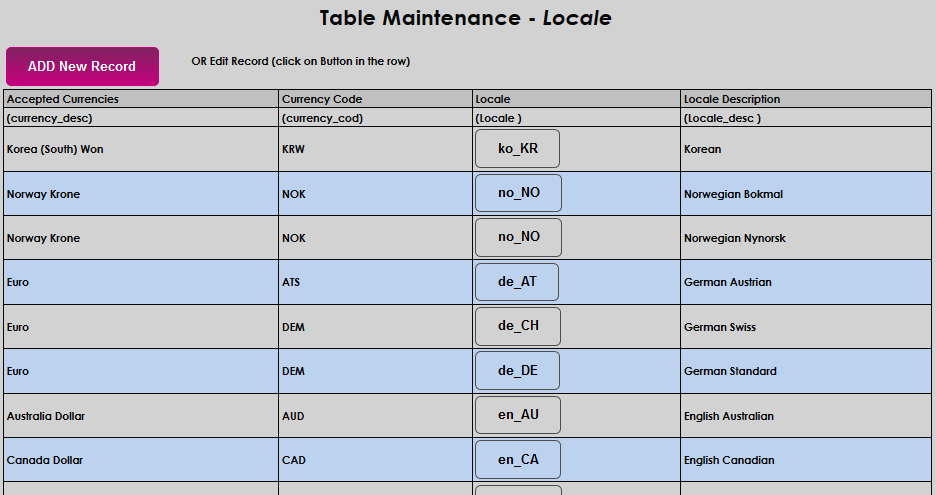
To add a new currency locale, first name the locale in the Locale field.
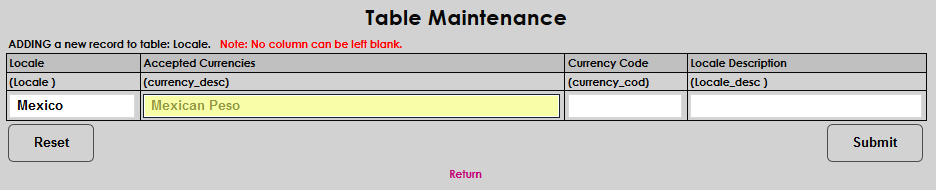
The Accepted Currencies field should be filled in with the name of the currency being accepted.
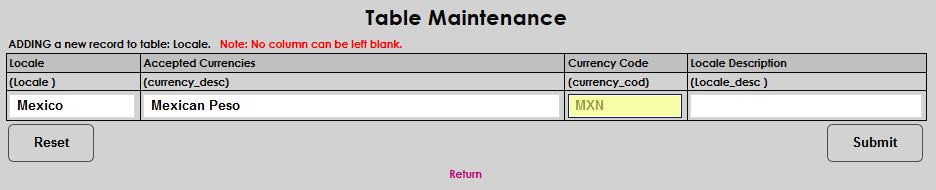
The Currency Code is passed to the payment company and must be specific to their specifications. SONIS uses three character codes currency codes. To find more codes and see the list of the currencies that PayPal currently accepts, click here.
The Locale Description is another informational field that can be filled out to each customer's specifications. This is the field that will display when selecting a currency to offer.
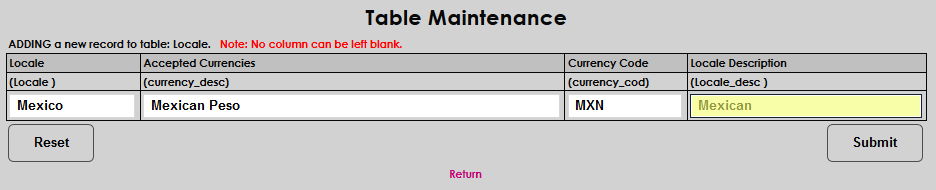
Click Submit to create the currency.
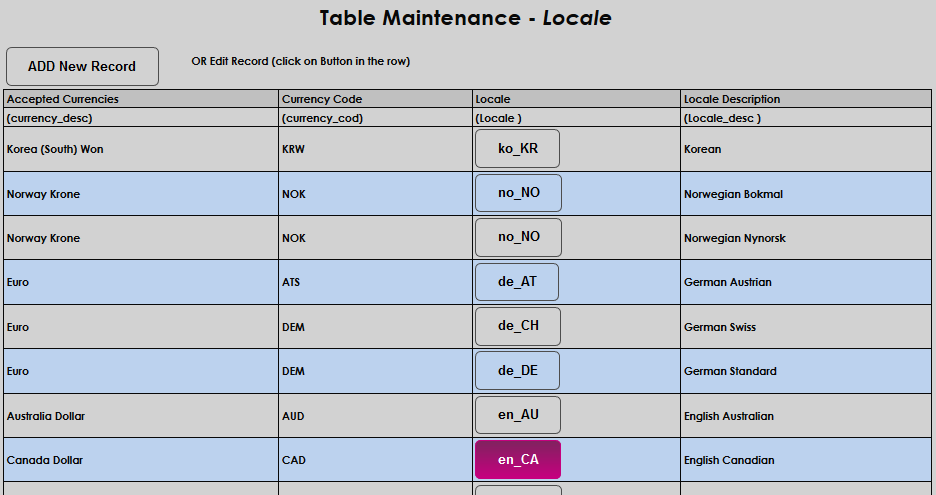
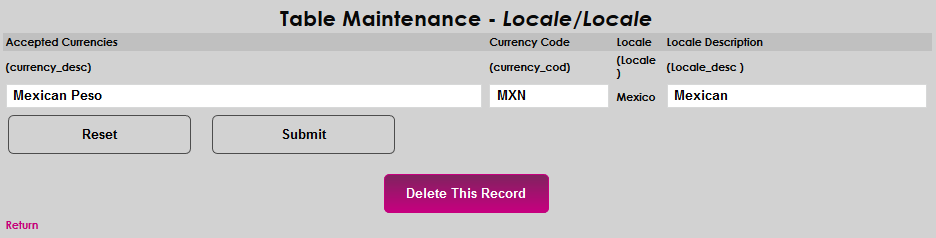
When editing a locale, the locale name can not be edited because this is the value that Jenzabar SONIS uses to recognize the locale. The other fields can be edited or the locale can be deleted altogether.
System Variables
Once the locale codes have been verified, navigate to the System Variables page in the Systems hub to enable multiple currency functionality and designate the accepted currencies. Scroll down to the Enable Accepted Currencies option and check the box.

Next, select a currency or currencies from the Accepted Currencies menu.

Click the Submit button to save the changes and activate multiple currency functionality.

Conversion Utility
To set up the conversion, navigate to the SONIS Currency Conversion Utility. Select a conversion API from the Currency Convert Description dropdown menu.

At this time, there are four currency conversion APIs available:
Currency Converter API – Free account. Allows up to 100 requests per hour. Pay options available for more requests, faster updates, and additional supported countries.
Exchange Rate API – Free account. Unlimited requests, exchange rate refresh is once every 24 hours.
Fixer IO API – Free account for European-based customers only. Allows up to 1000 requests per month. Pay options available for more requests, faster updates, and additional supported countries.
Open Exchange Rates API – Free account for US based only. Allows up to 1000 requests per month. Pay options available for more requests, faster updates, and additional supported countries.
The Free URL and Paid URL for each converter is predefined. Do not alter these values unless the sites change their URL in the future.
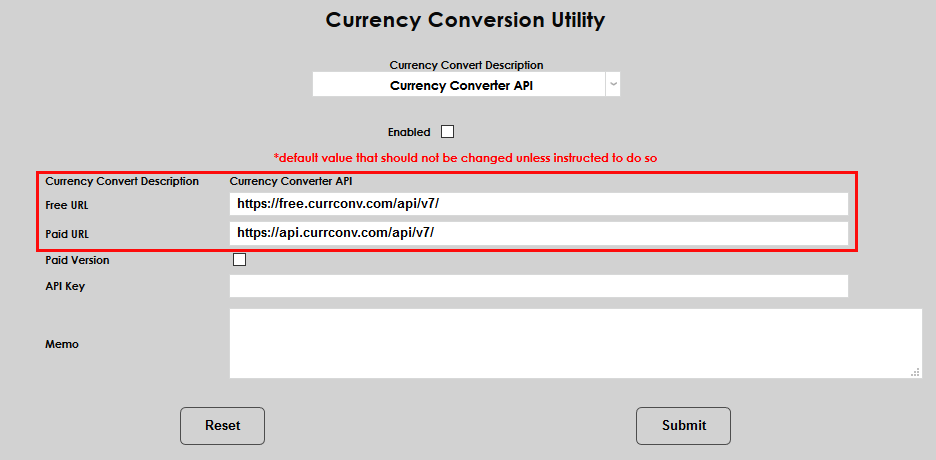
If using a paid account rather than a free account, check the Paid Version box.
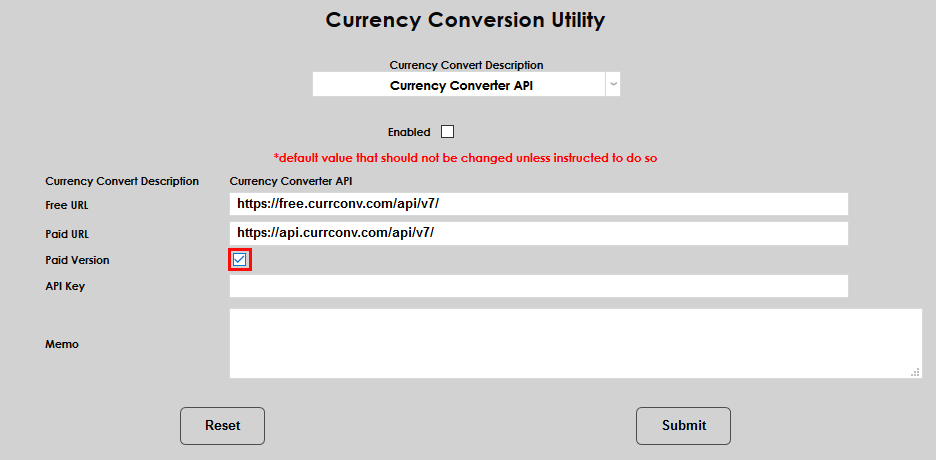
Three of the four converters also require an API Key. The key is individualized and provided by each conversion company.
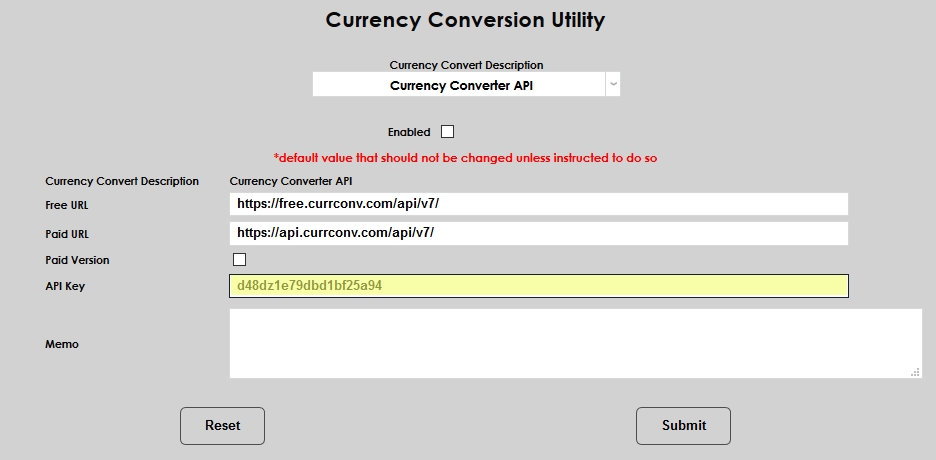
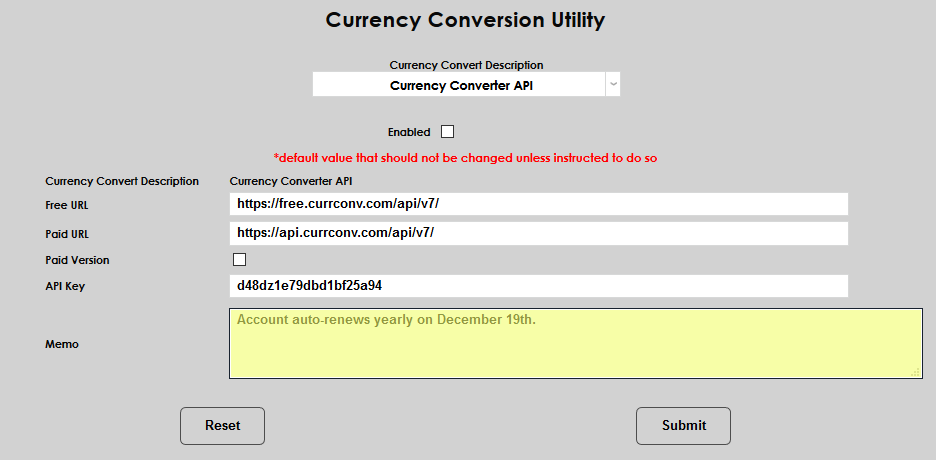
Use the memo field to make notes.
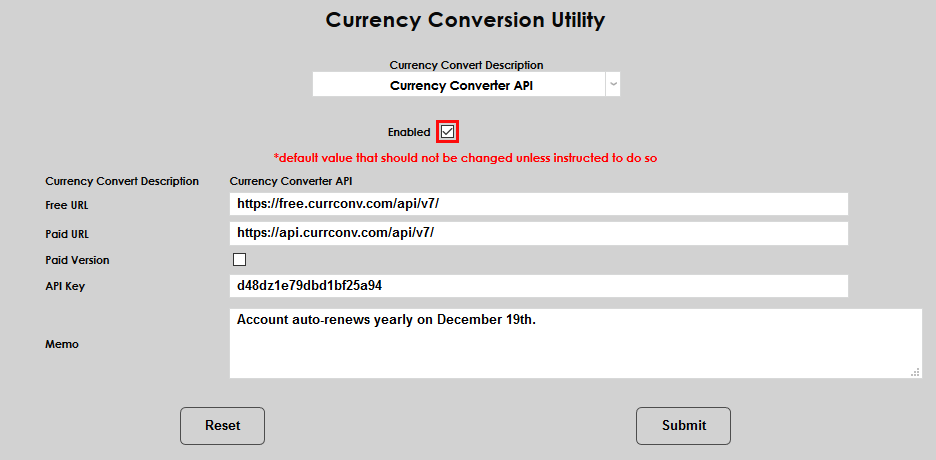
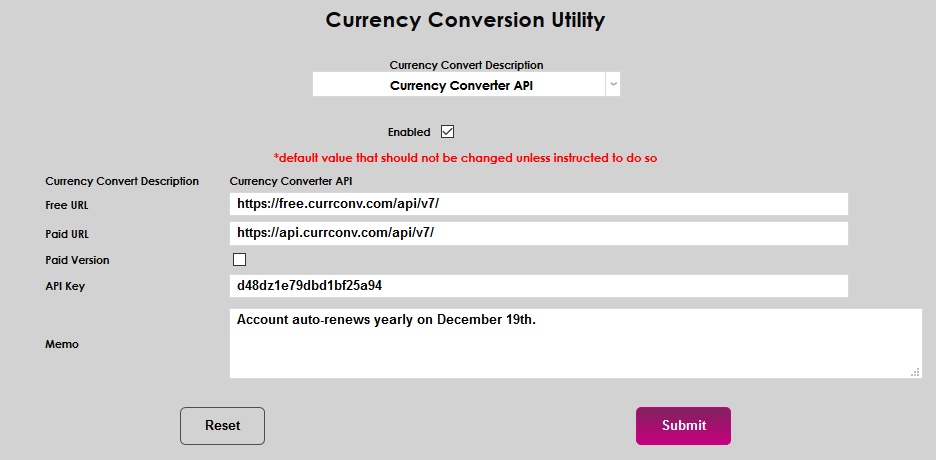
Check the Enabled box and click Submit to save the setup.
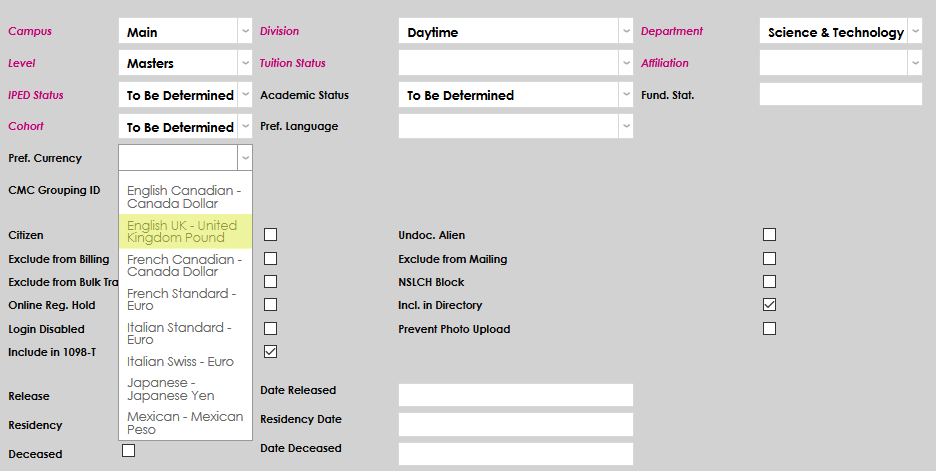
Biographic
Each SONIS user can have a Preferred Currency that will be their default display currency throughout the system. For students, total amounts at the bottom of the Ledger and Billing will display in the preferred currency. A user's preferred currency is set on their Biographic page.
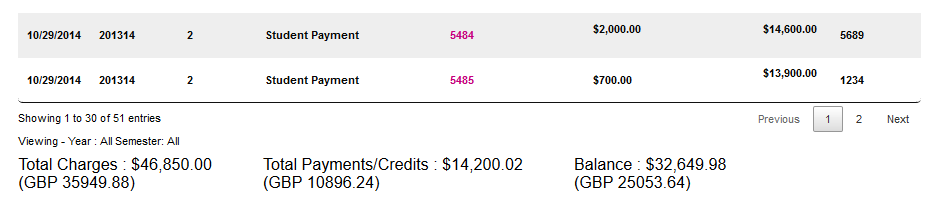
Once a preferred currency has been selected, the totals on each student's Ledger page under their Financial tab are displayed in the preferred currency.
Transactions
Portal Payments
Once multiple currency functionality has been enabled, students will have the option to select from the list of Accepted Currencies.
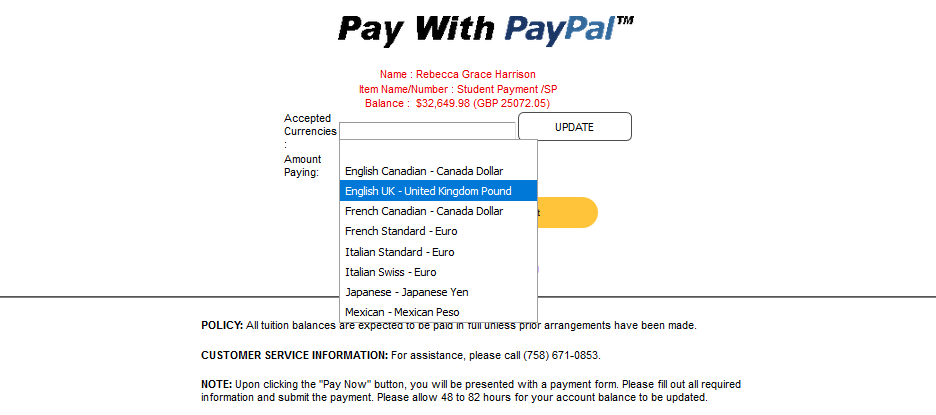
Once a currency has been selected, click Update to update the Amount Paying to the selected currency.
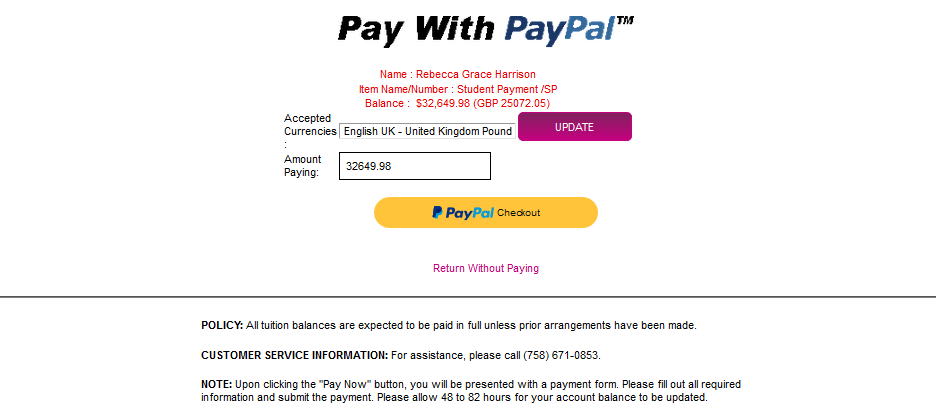
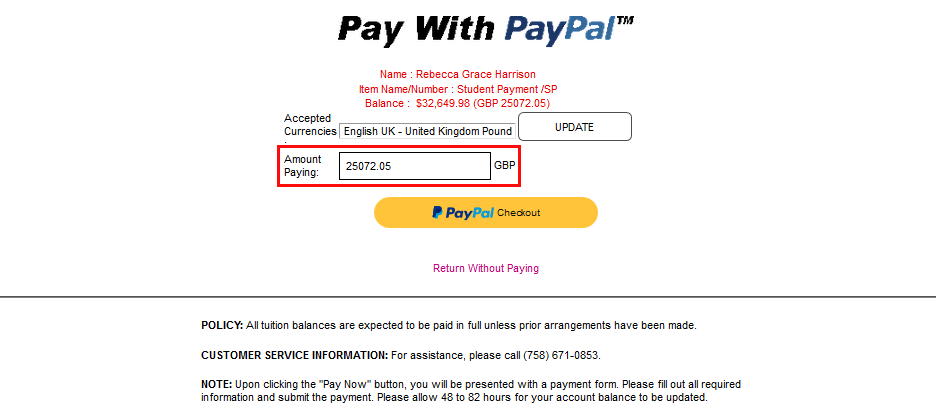
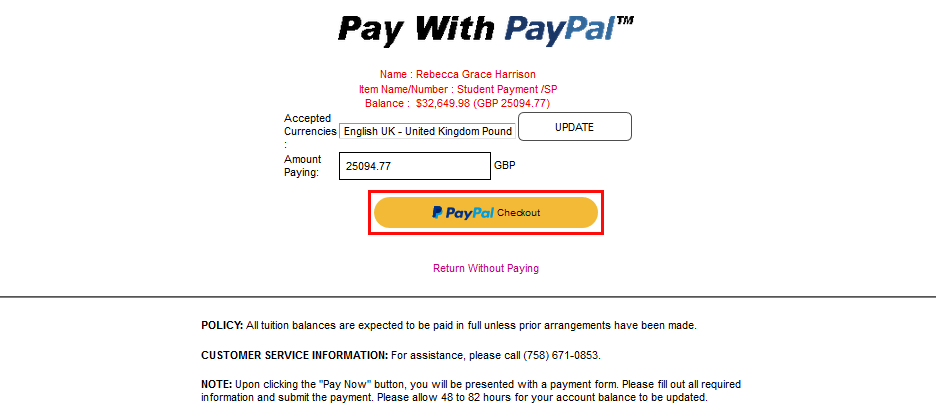
Click the Checkout button to continue and pay in the selected currency.
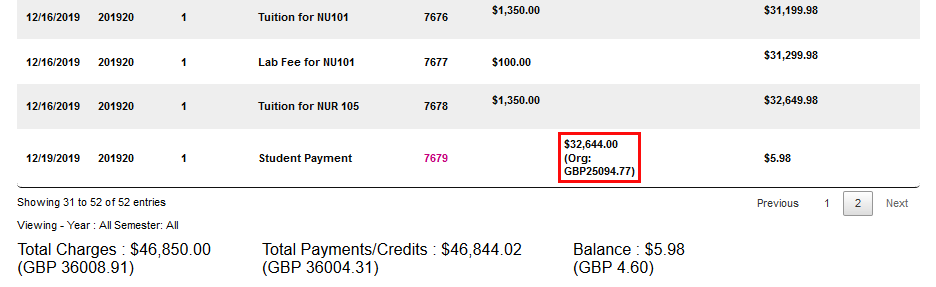
When payments have been made in a secondary currency, they will display in both currencies on the student's Ledger.
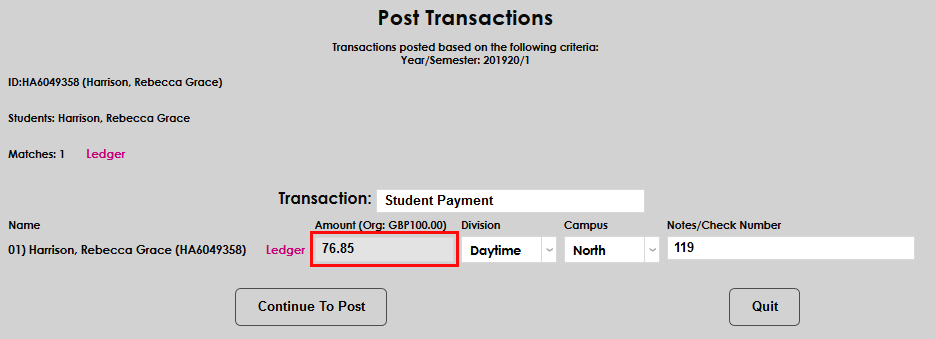
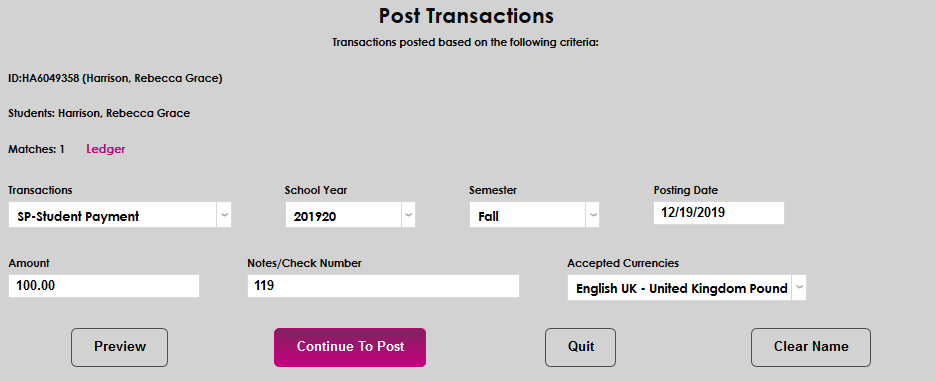
Post Transactions
The Post Transactions page under the Financials menu is used to create a record of financial transactions that occurred outside of the Jenzabar SONIS system. Once multiple currency functionality has been activated, currencies can be selected through this utility as well. The option appears once a payment Transaction Code has been selected.
Select a currency and continue posting the transaction as normal.
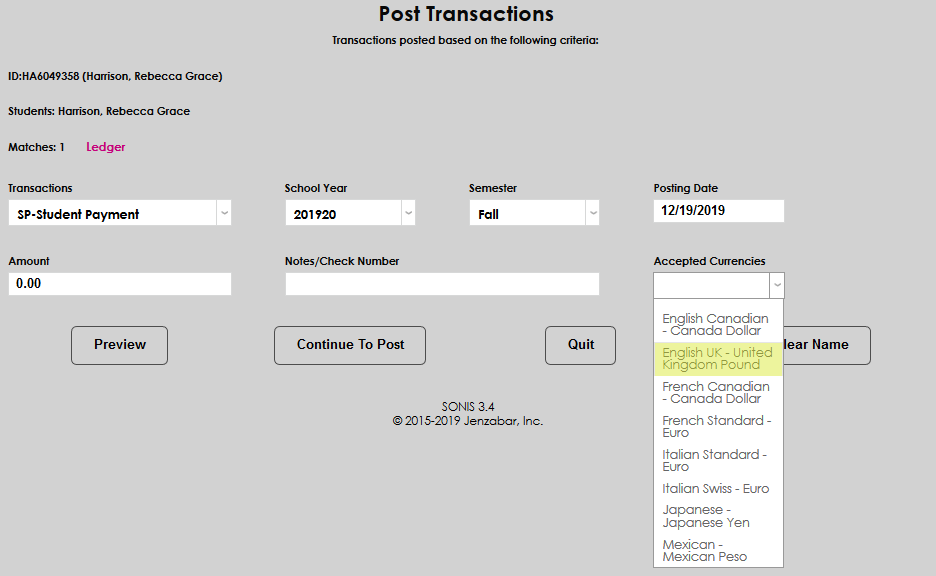
If the Preview button is used, the total will be locked in to ensure that the conversion occurs correctly.