PharmCAS Integration
Overview
The Pharmacy College Application Service (PharmCAS) is a centralized application service that allows users apply to multiple pharmacy programs with one simple interface. The Jenzabar SONIS integration with PharmCAS allows the import of applicant name records, addresses, and education records from files generated by PharmCAS. The utility allows you to upload one-to-three files at-a-time. Additionally, with proper configuration, the utility can be used for applicant imports from other third party software.
File Formats
To ensure that the school's PharmCAS system is set up properly or reconfigure files from another system to import with this process, download the sample files. There are three files included in the zip: Applicant Import, Education Import, and Local Address Import. Click here to download all three files.
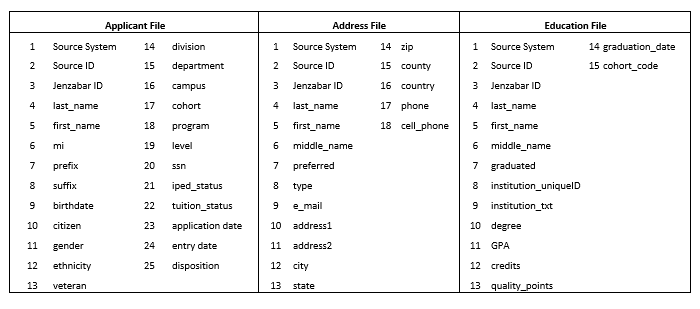
The following SONIS fields are included in the files:
Uploading Files
Administrators can choose to upload one, two, or all three types of files simultaneously. If two or all three files exist for the same group of students, they should be uploaded at the same time so the SONIS system can error-check the data.
Accepted Students: The file downloaded from PharmCAS that has the name record, which includes the campus, division, level, etc. The Applicant file will also generate application, disposition, and program records.
Addresses: This is the file downloaded from PharmCAS which contains any address record type (local, mailing, permanent, etc.) and the corresponding addresses for those listed in the Accepted Students file. At least one address file must be identified as the preferred address.
Education Records: This is the file downloaded from PharmCAS which contains data such as GPA, credits, cohort, etc. and corresponds to the Accepted Students file. This file also imports education records from other institutions.
Note that the Applicant file import will automatically generate a basic home-institution education record and make it active. The Applicant file also creates a generic address record for the default address type, with a blank email address record. A subsequent Address file import for that same address type will update the generic record. If the Cohort record in SONIS is completed with the appropriate fields, the Applicant file will update that info on the home-institution record if the cohort is included.
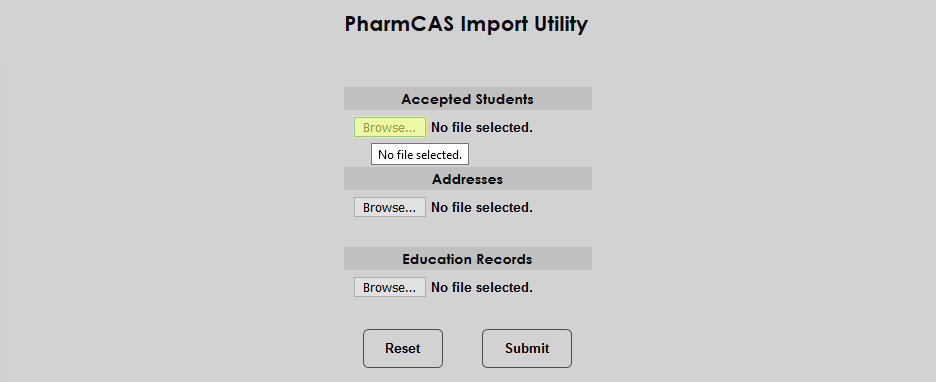
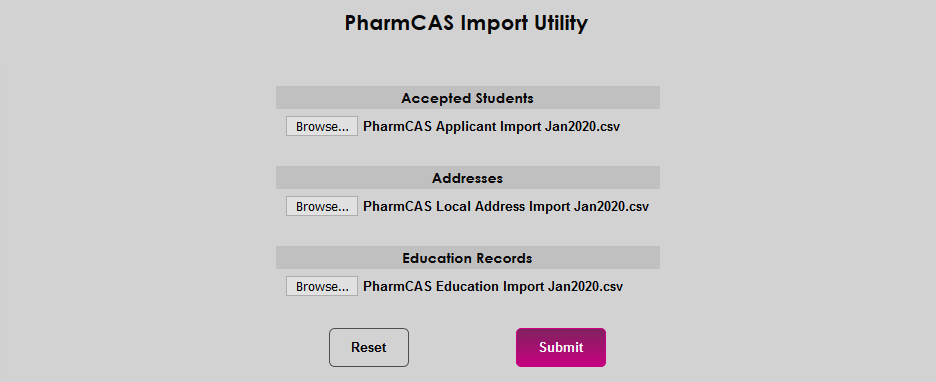
To upload a file, navigate to the PharmCAS Import Utility and click Browse under the proper file type label. Locate and select the file or files and click Submit to start the import.
Once the file or files have been submitted, a dialog appears on screen to show that they're being validated.

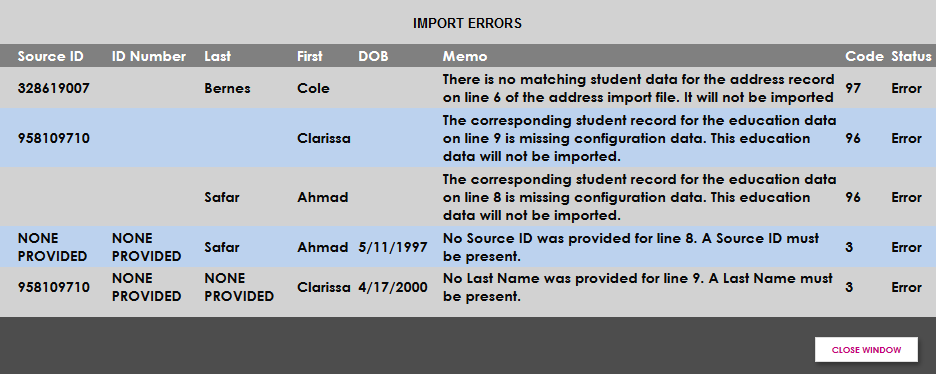
After validation, the results are displayed. To view any errors that may have occurred due to missing or unmatched data, click Errors. The number display to the right is the number of errors that were found in the file(s). The list of errors will open in a new window, allowing for administrator to correct the files and start over by clicking the Reset Process button.


Once the errors have been corrected and the files have been reuploaded (or, alternately, to continue without correcting the files and ignore the errors), click Continue Import.

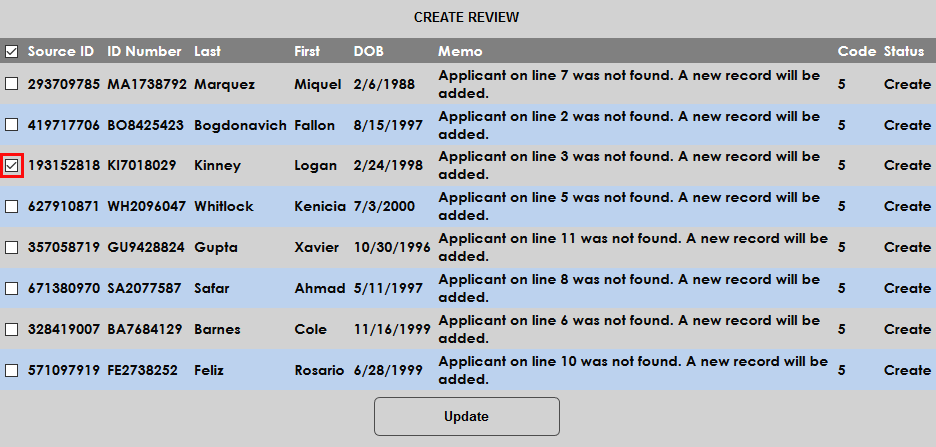
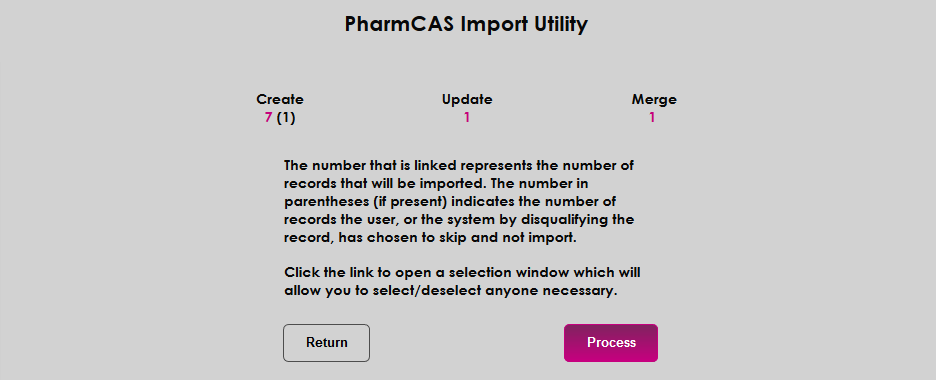
On the following page, the data is divided into three potential outcomes. Applicants who are completely new to the SONIS system are listed under the Create heading. Applicants who are already in the SONIS system but have updated information (address, phone number, program, etc.) are listed under the Update heading. Applicants that appear to be a match to an existing record but have some differences that need to be resolved are listed under the Merge heading.
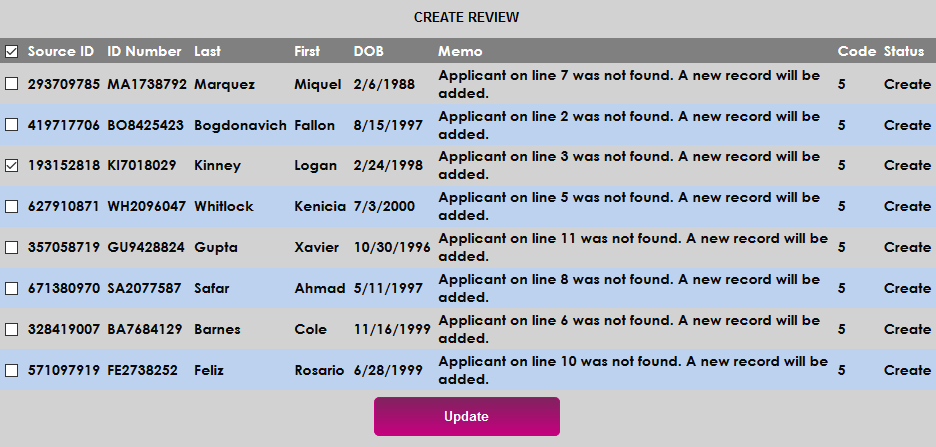
Click on the number link below each heading to display a list of applicants in the category in a new window. To remove an applicant from the list and prevent their data from being processed, uncheck the box in the far-right column and click Update to save the change.

Once the lists have been updated, click Process to finalize the upload.
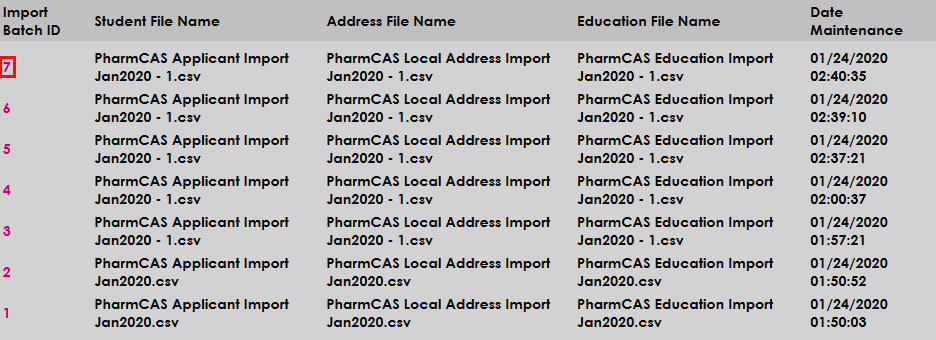
The PharmCAS Import Utility home page logs all uploads, including aborted attempts. Click the Import Batch ID to view additional details about the upload.