Early Alert Form
Use the Early Alert form to create alerts so the Student Success team can assist students who are facing challenges.
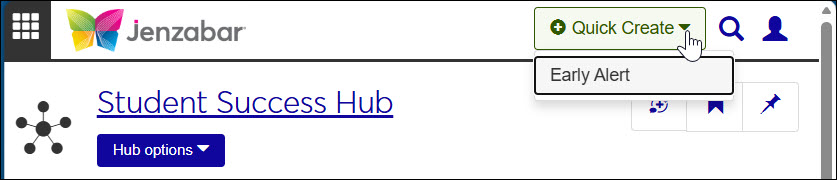
You can submit an alert from anywhere in J1 Web by using the Quick Create button in the page header.
 |
Note
Your school can customize the title of the form on the Student Success Settings page. The default title is Early Alert.
How to Submit an Early Alert Form
From anywhere in J1 Web, click the Quick Create drop-down, and select Early Alert. The Early Alert pop-up opens.
Note
Or from anywhere on the Student Success hub, click the Hub options drop-down, and select Early Alert Form. The Early Alert pop-up opens.
In Alert Type, select a type from the drop-down.
If the alert should be marked as confidential, select the checkbox for This alert contains sensitive student information.
Select one or more students:
Under Search student by, select either Name / ID or Course.
To search by Name or ID, begin typing in the Student Name / ID field. Select a student from the results. You can select multiple students.
Tip
Select the Include inactive students checkbox if you want them included in search results.
To search by Course:
Note
The course search allows instructors to search for course sections they teach. The results show only sections the logged-in instructor teaches. If you're not an instructor submitting alerts about students in your courses, then search by Name / ID.
Begin typing a year in the Year / Term field, and select the year / term from the results.
In the Course field, begin typing the name of a course you teach in the selected year / term. Select the course from the results.
Begin typing a section name in the Section field, and select the course section.
In the Student Name / ID field, begin typing a name or ID, and select from the results. (The results are limited to students registered in the selected course section.) You can select multiple students.
Tip
Select the Include inactive students checkbox if you want them included in search results.
In the Connection Type drop-down, select an option.
Note
This is the relationship of the alert submitter to the student. If your school allows submitting on behalf of someone else (such as a teaching assistant submitting on behalf of the instructor), it's the relationship of the "submit as" person to the student.
Note
Connection Types are defined on the Relationship Type Definitions window in the Campus-wide Definitions hub. They're assigned to Student Success on the Setup Connections pop-up on the Connections page.
Tip
You can select multiple students to add to the list at one time, but you'll apply the same Connection Type to all of them, so select students in batches of the same relationship to the submitter.
Click the Add students to alert button. The selected students are now on the list.
To remove anyone from the list, click the Remove icon
 on their row.
To add more students to the list, repeat the search steps and click the Add students to alert button. The extra students are added to the list.
Enter the alert details:
Is additional follow-up needed? Select Yes or No.
If No, the form asks How did you address the concern? Select all options that apply: Meeting, Phone Call, Email, and/or Other. If you select Other, enter a comment to explain (required). Up to 50 characters.
Enter an Alert Description. Required. Up to 1000 characters.
In What specific actions or support strategies do you recommend for this student? enter up to 500 characters.
Optional: Attach supporting documents:
Click the Select file button. Your computer's folder system opens.
Navigate to the PDF or TXT file or files you want to attach, and select them. Click Open. The files are attached.
Select the submitter: If your school allows it, the Submit As field is available with the logged-in user's name selected. To submit as someone else:
In the Submit As field click the Remove icon
to remove your name.Begin typing the name or ID of the person you want to be the point of contact, and select them from the results.
Click either the Submit and start another alert button or the Submit button. Your alert is submitted. It now appears on the Alert Tracking page.