Session Summary Page
Important
Information and features vary according to the roles to which you belong and the permissions associated with those roles. For more information, contact your module manager or your campus support team.
The session summary page is the dashboard for this session. All of the settings and controls relevant to this session can be accessed from this page.
Overview Block
This block shows the basic details of the session. You can edit everything except the session code by clicking the Edit overview button.
Staff Assignment Block
Housing Application Block
Check-In and Check-Out Block
Occupancy Dashboard Block
Session Options
Navigate to the Manage Session Definitions page and use the Session Filter to find the session you want to work with. You can search by check-in and check-out date range, session date range, keywords, or session type.
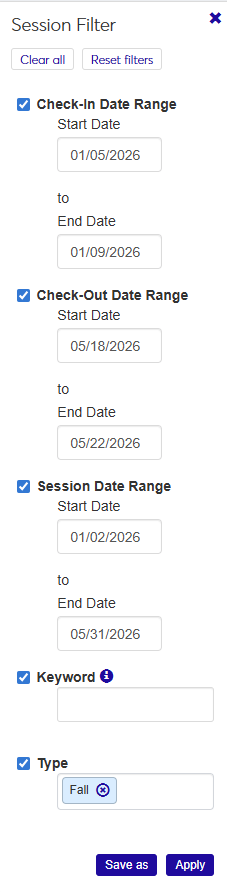
To search by a date range (check-in, check-out, or session), select the checkbox for the range you want to use, then click in the date field and use the pop-up calendar to select a date. You can select more than one date range.
If you select a start date but not an end date, the search returns all sessions that start or have a check-in/check-out start date after the date you selected.
If you select an end date but not a start date, the search returns all sessions that end or have a check-in/check-out end date before the date you selected.
If you select both a start and end date, the search returns all sessions or check-in/check-out periods that start and end within the selected dates.
To search by keyword, select the Keyword checkbox and enter a word or two that you expect to be in the title or description of the session overview. The search returns all sessions that include the keyword in the code, description, or session name.
To search by session type, select the Type checkbox, click in the field, and select an option from the list.
Click Apply. The Session Definitions list is narrowed to include only those sessions that match your filter criteria.
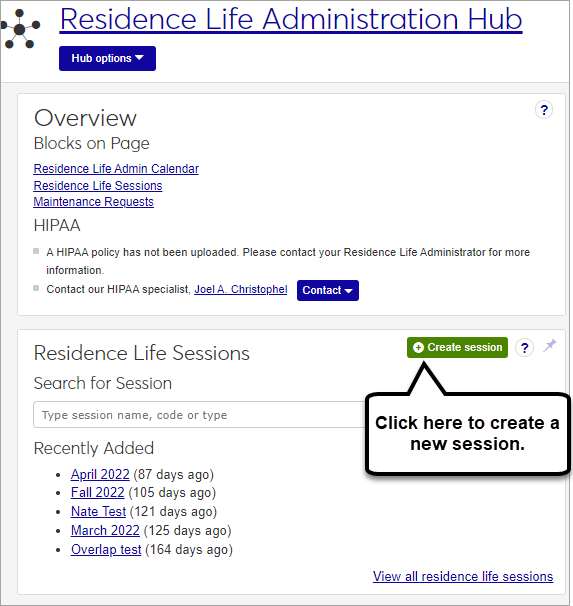
To create a new session, click the Create session button in the Residence Life Sessions block on the Residence Life Administration Hub. You can also find this button on the Manage Session Definitions page.
The Create Session Definition pop-up opens.
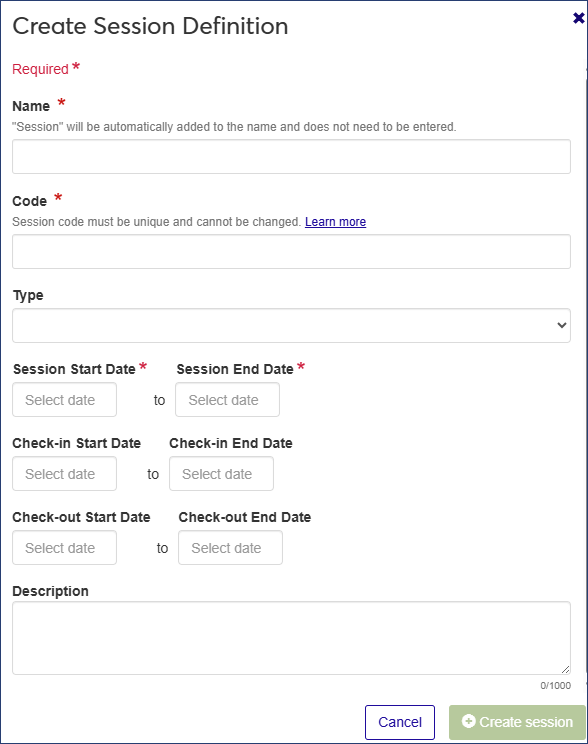
Enter a Name for your new session (required). The word "session" will be added to the end of the name automatically. If you enter "Summer 2024," for example, the name of the session will be "Summer 2024 Session."
Enter a unique session Code (required).
Tip
Your institution may have an established pattern for assigning codes, for example, Q32016 or FALL2018. Check with your administrator before setting a code, as this value is not editable and cannot be changed later.
Choose a Type from the drop-down menu (optional).
Tip
If there are no session types defined, this field will not appear. To attach a session type to a session, first define session types on the Manage session types page.
Click in the Session Start Date and Session End Date fields and use the pop-up calendars to select the start and end dates for the session. Both date fields are required.
If students need to be able to check in before the session starts, click in the Check-in Start Date and Check-in End Date fields and use the pop-up calendars to select start and end dates for the check-in period.
If students need to be able to check out after the session end date, click in the Check-out Start Date and Check-out End Date fields and use the pop-up calendars to select start and end dates for the check-out period.
Note
Setting check-in and check-out dates allows students to check in and check out outside of the session time frame. For example, if the session starts on September 1 but football players need to check in a week early to start practice, you can select a check-in start date of August 25.
Enter a Description (optional).
Click Create session.
On the Residence Life Admin Hub summary page, locate the Residence Life Sessions block.
Click the View all residence life sessions link. The Manage Session Definitions page opens.
Use the Session Filter as needed to narrow down the list of sessions.
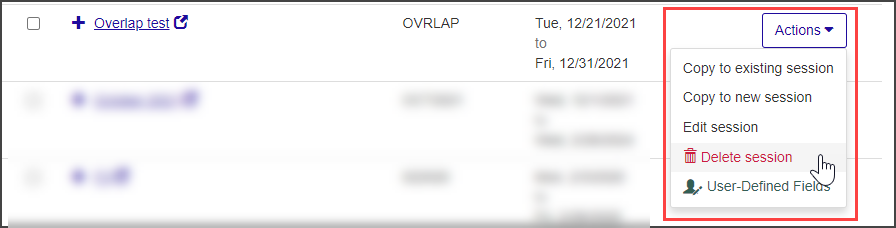
Sessions cannot be deleted if students have been added to the session.
If the session can be deleted, the Delete session option is available from the Actions drop-down menu on the Manage Session Definitions page. To access this page, click the View all residence life sessions link on the Residence Life Sessions block in the Residence Life Administration Hub.
 |
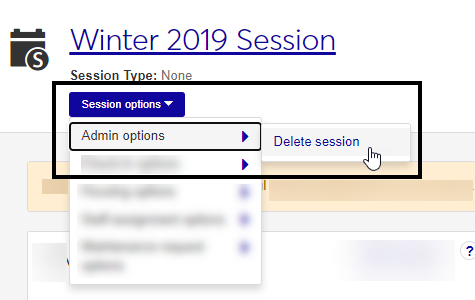
You can also delete a session from the Session summary page by clicking the Session options drop-down and selecting Admin options, then Delete Session. If the session has applicant groups associated with it, it can no longer be deleted and this menu option is not available.
 |
When you initially create a Residence Life session, you may not have all of the details about the session. Many of the details may be decided later, and possibly even added by other people. To create a session, the only information required is the Name of the session, the Code, and Type of session.
The session code is a unique value associated with a session. It may be no longer than eight characters and is required.
Create, edit, and manage session types from Manage Session Types, under the Residence Life Admin Hub Options drop-down.