Resolution Timelines Block
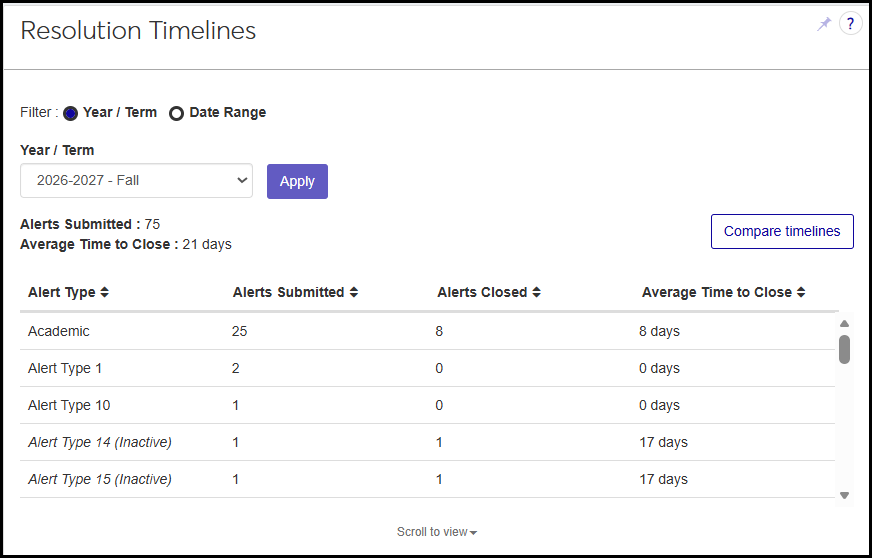
The Resolution Timelines block on the Student Success hub Summary page lets administrators compare the volume and speed of alert resolutions across different alert types. Administrators can use the information to identify patterns, monitor team efficiency, and adjust workloads as necessary.
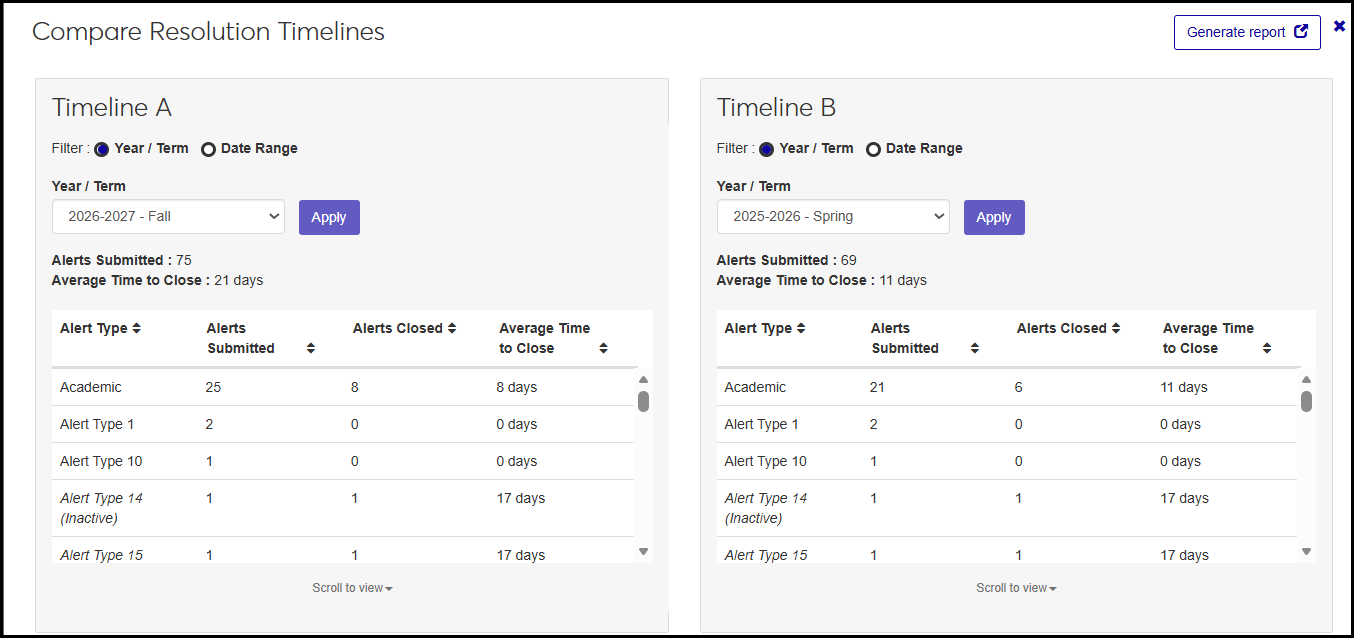
The block shows resolution timelines for specific year/terms or date ranges, and you can compare several timelines to each other.
Permissions
The "Can view Resolution Timelines block" permission is available in the Student Success Administrator role and roles made from it.
Filter by Year/Term or Date Range
Use the filter to select a year/term or a date range. The block then shows how many alerts were submitted during the selected period and what the average time to close an alert was.
Fields
After you apply the filter, the block lists all alert types used during the period and the following information for each:
Alert Type: Defined on the Alert Type Definitions page
Alerts Submitted: The number of alerts of that type that were submitted during the selected year/term or date range. Excludes alerts whose "Is additional follow-up with the student needed?" value is "No".
Alerts Closed: The number of that type's alerts that were submitted during the selected period and that are already closed.
Average Time to Close: The average number of days it took for the closed alerts of that type to get closed during the selected period.
How To
In the Navigation panel, click the Student product to expand it.
Click Student Success, and select Summary. The Student Success hub opens to the Summary page. The Resolution Timelines block is visible.
Select the radio button for a filter: Year / Term or Date Range.
Depending on the radio button you selected, select either a year/term or a date range.
Click the Apply button. The list of alert types and their resolution information appears.
To sort the list by a column, click the column heading. To reverse the order, click the column heading again.
On the Resolution Timelines block, click the Compare timelines button. The Compare Resolution Timelines pop-up opens. The timeline you were viewing is in the left panel as Timeline A.
In the right panel, called Timeline B, select a the radio button for a filter: Year/Term or Data Range.
Depending on the radio button you selected, select either a year/term or a date range.
Click the Apply button. The list of alert types and their resolution information appears.
To add another timeline to compare, click the Add timeline button, and repeat steps 2, 3, and 4.
To generate a PDF report of the timelines, click the Generate report button. The report opens in a new tab. To print or download, use your browser's controls.