Manage Forms
Important
Information and features vary according to the roles to which you belong and the permissions associated with those roles. For more information, contact your module manager or your campus support team.
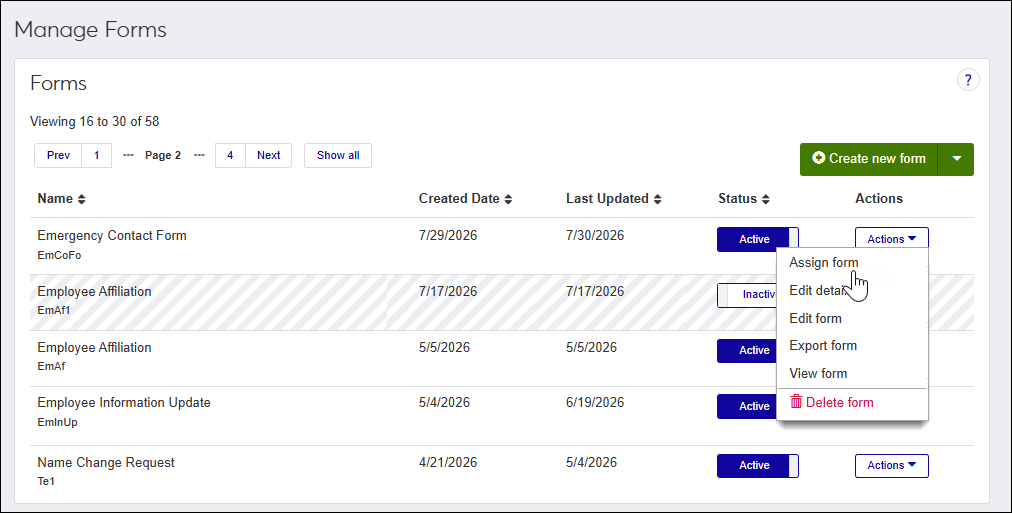
The Manage Forms page provides a centralized location where you can view, create, import, export, update, delete, and assign forms you have permission to access.
Note
Permissions to forms are controlled by module access codes, which are loosely based on Desktop's Module Code Stamp.
Module access codes determine who can work with items such as forms, data sets, workflows, emails, text messages, and To Dos.
Users can have access to multiple codes through one or more assigned roles.
Schools can import Campus Portal Forms or import and export J1 Web forms between environments (e.g., Test/Play and Live/Production). Imported forms include all components, however, environment‑specific configurations such as data sets, workflows, and module access codes must be reviewed and updated before the form can be activated and used.
File types:
Campus Portal forms are imported using .cfproj files.
J1 Web forms are imported and exported using .j1cmfm files.
To import forms between J1 Web environments, the target environment must be running the same version or a later version than the source environment. For example, if your Test/Play environment is on version 2026.1.1 and you want to import a test form into your Live/Production environment, your Live/Production environment must be running version 2026.1.1 or later.
To access the Manage Forms page, users must belong to a Forms role with permissions to manage forms permissions enabled.
Access the Connect hub, Forms module, Manage Forms.
Any page where the Forms feature is added.
How To
If filter options aren’t appearing, click the No filters applied link. You can filter forms in several ways:
Using a filter or combination of filters to view forms (e.g., name, status, created date, last updated, and setup required).
Note
Setup required lets you see imported forms that need setup configurations completed before they can be used.
Using the column headings to sort forms.
Access the Connect hub, Forms module, Manage Forms page.
Click Create new form. The Create New Form window appears.
In the Name field, enter a recognizable name for the form.
In Code field, a unique code is generated for you or you can choose to enter your own unique identifier. Codes cannot be more than 15 characters.
Note
The Code cannot be edited once it has been created.
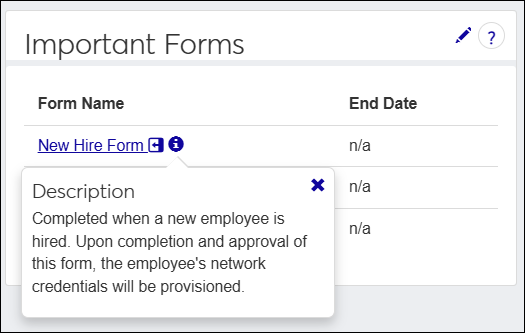
In the Description field, enter detailed information about what the form is for. The information appears when a user hovers over the information icon on the Forms block.
From the Owner Access Code drop-down, select the department/module access code that owns the form. This option serves as a reporting mechanism and does not control access to the form.
From the Modules Allowed Access to Submit drop-down, select the module access codes permitted to complete and submit the form. Multiple access codes can be selected. Selecting Common makes the form available to all users.
From the Modules Allowed Access to Review, select who can view and review the submissions. Multiple access codes can be selected.
From the Tab Orientation drop-down, select how you want your form tabs to appear: Horizontal tabs appear across the top of the form. Vertical tabs appear along the left side of the form. Select None if you want the form to appear as a single page.
If you want a PDF copy of the form to be stored in document storage and associated with the submitter, select how you want the PDF to be categorized using the Document Storage and Document Type drop-downs. This controls how it is categorized and who can access it.
Note
Category and type options are determined by Document Storage settings managed in the Desktop.
Only users with permission to a selected category will be to view the PDF that gets generated.
If you don't want every submission to be saved to doc storage, you don't have to pick anything here. Submissions can also be saved to Document Storage ad hoc from the Manage Submissions page.
Click Save & continue. The Build options appear.
To add a new tab:
Note
Each form has at least one tab even if your form is only one page long.
Click Add tab. The New Tab window appears.
In the Name field, enter a recognizable name for the tab.
Click the Save button.
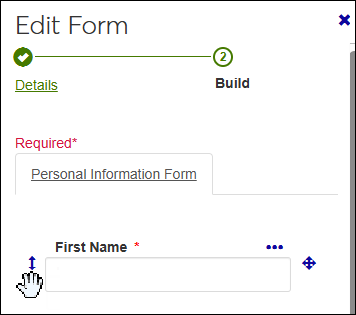
To reorder the tab, click on the top and drag it to the preferred location.
To add a row:
Click on the tab where you want to add the row.
Click Add row. The new row appears at the bottom of the form.
To move the row, click and hold the drag and drop icon
 to move it to your desired location.
To add a question, click Add Item. The New Item pop-up window appears.
Select the type:
Question/Field Type
Description
Commonly used for cause and effect. When the form completer clicks the button, they cause something to occur. Common form buttons include navigation buttons that save progress and move them through the form, save buttons, and submit buttons to finalize and send the form to the appropriate location. To add functionality to buttons, you need to set up rules for each button on the Rules tab.
Lets completers select one or more answers from a list of choices.
Lets completers choose a date and time using a pop-up calendar.
Lets completers select an answer from several choices. This question type is ideal for presenting a long list of options without cluttering your form.
Lets completers enter multiple lines of text. For example, people can respond to essay questions or enter open-ended comments/feedback.
Lets the form builder add information to the form that only other form builders can see. For example, instructions for setting up the form.
Standalone text typically used for providing instructions to form users. It does not collect information; it only displays information to the form completer.
Adds blank space to the form; this question doesn't collect information.
Lets completers select one answer from several choices.
Lets completers enter a single line of text. For example, they can enter responses to simple questions.
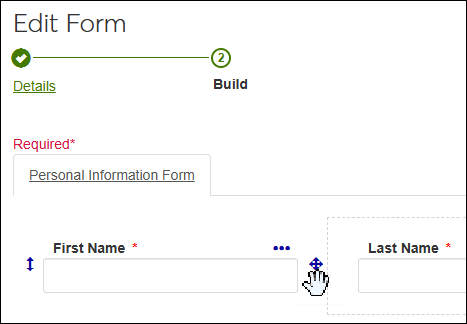
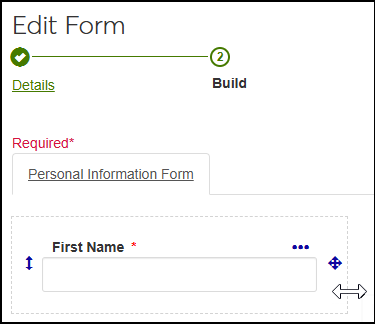
To move an item/field, click on the plus icon on the right-hand side and move it to the preferred location. You can put items side by side in the same row.
To change an item's width, hover over the faint border around the question until a left-right arrow appears. Then extend or shorten the question.
Configure the item. Each item has unique settings. Click on a link below for detailed information about each tab and the settings available with it.
Click Update.
Access the Connect hub, Forms module, Manage Forms page.
Find the form you want to activate/deactivate.
To activate, click the Inactive option.
To deactivate, click the Active option.
Warning
When a form is deactivated, users cannot open or submit. Jenzabar recommends not deactivating currently assigned forms as this could confuse the person assigned to the form.
Access the Connect hub, Forms module, Manage Forms page.
From the Create new form drop-down button options, select Import form. The Import Form window appears.
Click Choose file. Locate and select the .j1cmfm or .cfproj file you want to upload. The form is imported, put in an inactive status, and shown in the Forms list.
Note
A "Setup required" icon indicates that environment-specific configurations, such as data sets, workflows, or access codes, must be reviewed before the form can be activated.
Find the imported form and from the Actions menu, select Edit details.
Review and update environment-specific configurations, such as data sets, workflows, and module access codes.
Once all required updates are complete, activate the form.
Access the Connect hub, Forms module, Manage Forms page.
Find the form you want to export.
From the Actions menu, select Export form. The system downloads a .j1cmfm file.
Tip
Only active forms can be assigned.
Access the Connect hub, Forms module, Manage Forms page.
Find the form you're assigning and from the Actions menu, select Assign form. The Assign Form window appears.
Select when the form should be assigned.
Now immediately sends the assignee a To Do to complete the form.
Schedule lets you specify when the form will be assigned.
Select who should be assigned it.
Note
Forms can only be assigned to active J1 Web users.
People lets you manually select recipients by name. Start typing their name and select the correct one from the options that appear.
To remove an individual/organization, click the x icon next to their name.
Data Set selects recipients using a Person/Organization List data set. Start typing the name of the data set and select it from the options that appear.
Click View recipients. A list of individuals that will be assigned to the form appears.
Note
To view more information about a recipient, click on their name. You can view general information and any associated workflows.
If you are assigning the form immediately, click Save and assign now.
If you are scheduling when the form will be assigned, click Save and queue.
The system assigns a To Do that includes a link to the form.
Note
Forms that are active and have submissions can be edited.
Form codes cannot be changed.
If you delete an item/field from the form, the previous submissions will still show the item in the submission report, but new submissions will not show it.
If you edit an item/field, the changes take effect across past and future submissions (i.e., changing the label or requirement settings).
If you add a new item/field, previous submission reports will not show the new item on the submission report, but future submissions will.
Access the Connect hub, Forms module, Manage Forms page.
Find the form you want to update.
To update:
Form settings, select Edit details from the Actions menu.
Form items, select Edit form from the Actions menu.
Make the needed changes.
Click Save & finish.
Access the Connect hub, Forms module, Manage Forms page.
Find the form you want to preview.
From the Actions menu, select View form. A form preview window appears.
Note
To delete a form, you must deactivate it and if there are any form submissions associated with it, delete those as well.
Access the Connect hub, Forms module, Manage Forms page.
Find the form you want to delete.
From the Actions menu, select Delete form. The confirmation pop-up window appears.
Click Delete.
FAQ
Yes, forms that are active and have submissions can be edited
If you delete an item/field from the form, the previous submissions will still show the item in the submission report, but new submissions will not show it.
If you edit an item/field, the changes take effect across past and future submissions (i.e., changing the label or requirement settings).
If you add a new item/field, previous submission reports will not show the new item on the submission report, but future submissions will.
The form can still be filled out, but no new assignments can be made.
No, you must delete the submissions and then you can delete the form.