Manage Roommate Groups
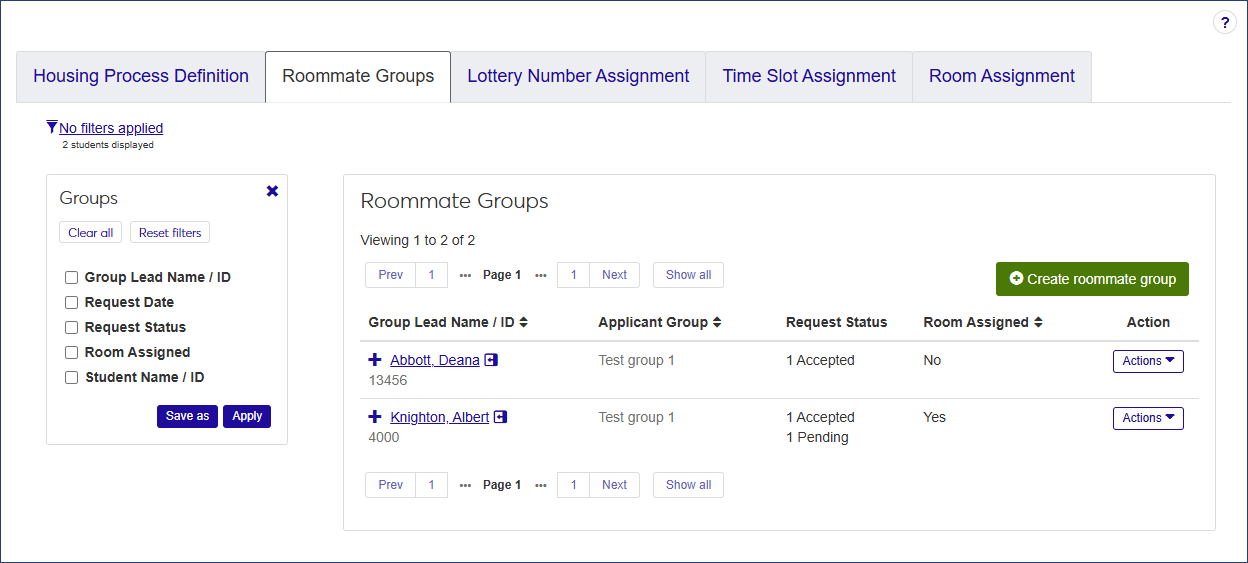
The Roommate Groups tab on the Manage Housing Application and Assignment page allows administrative users to manage roommate groups for residents before they are assigned to a bedroom or suite. The tab lists all the roommate groups that have been created, listed by the Group Lead's name. From here, you can view the students in the roommate group, including accepted, pending, and denied requests; create new roommate groups; edit or remove roommate groups; and send communications to members of a roommate group.
If the user is in a Residence Life Administrator or Student Life Module Manager role (or a role copied from one of them) and has permissions to manage housing and check-in/check-out processes, the Roommates Group tab is available.
The Roommate Groups tab displays a list of all roommate groups for the session, ordered alphabetically by Group Lead.
The list provides the following information for each roommate group. Click the plus sign to expand the row and see all columns.
Column | Description |
|---|---|
Group Lead Name / ID | The name and ID of the Group Lead. |
Applicant Group | The applicant group the Group Lead belongs to. |
Request Status | The number of accepted, ending, and denied roommate requests. |
Room Assigned | Displays Yes if at least one person in the roommate group is assigned to a room. |
Action | The Actions drop-down in this column enables users to:
|
Accepted Requests | Displays the name and ID of each student who has accepted the roommate request. |
Request Accepted Date | For each accepted roommate request, the date the request was accepted is displayed. |
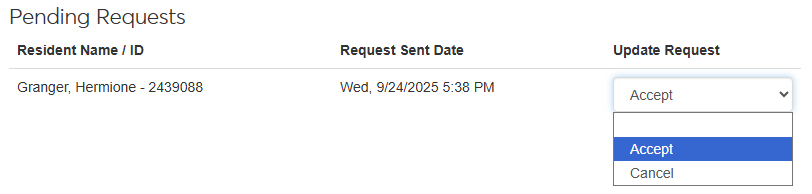
Pending Requests | Displays the name and ID of each student who has a pending roommate request. NoteIf the student has pending roommate requests from multiple groups, a warning symbol appears next to the name along with the text Multiple requests. |
Request Sent Date | For each person listed, the date the roommate request was sent is displayed. |
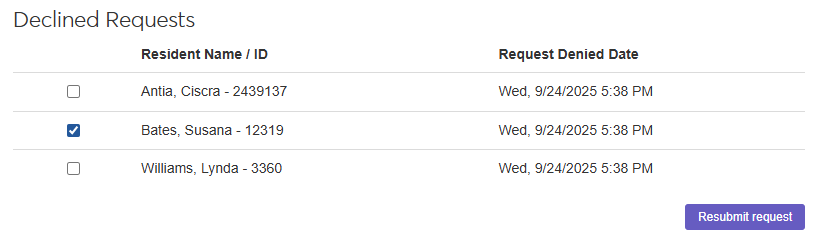
Denied Requests | The name and ID of each student who denied a roommate request. |
Request Denied Date | For each person listed, the date the roommate request was denied is displayed. |
How To
On the Manage Housing Application and Assignment page, select the Roommate Groups tab.
Click the Create roommate group button. The Create Roommate Group pop-up opens.
Click in the Group Lead Name / ID field and begin typing the name of the student who will be the designated group lead.
Select the correct name when it appears in the list. You can only select one group lead. After you select a group lead, the Applicant Group that student belongs to is displayed.
Note
The list includes any student in the group lead's applicant group except those who are already a Group Lead, have accepted another roommate request, or have already been assigned a room.
Click in the Resident Name / ID field and begin typing the name of a student who will be part of the roommate group, then select the name when it appears in the list.
Note
Only students in the same applicant group as the group lead are available for selection. The list does not include students who are already a group lead or those who have accepted another roommate request or have already been assigned to a room.
The number of roommates you can add to the group is limited to the largest maximum capacity for a bedroom or suite in the session minus 1. For example, if the suite with the largest maximum capacity can hold 6 students total, you can add 5 students to the roommate group (one group lead and five roommates).
Repeat step 5 to add more residents to the roommate group.
When you are done, click Save and create another if you want to create another roommate group, or Create and close to save the group and close the pop-up.
With the Edit roommate group function, users can select a different group lead from the list of students who have accepted the roommate request; decline roommate requests for one or more students; accept or decline pending requests; and add roommates to the group, as long as the maximum size of the group has not been met.
Note
If the group lead has already been assigned a bedroom, the Edit roommate group option is not available.
On the Manage Housing Application and Assignment page, select the Roommate Groups tab and locate the group you need to edit.
Select Edit roommate group from the Actions drop-down. The Edit Roommate Group window opens.
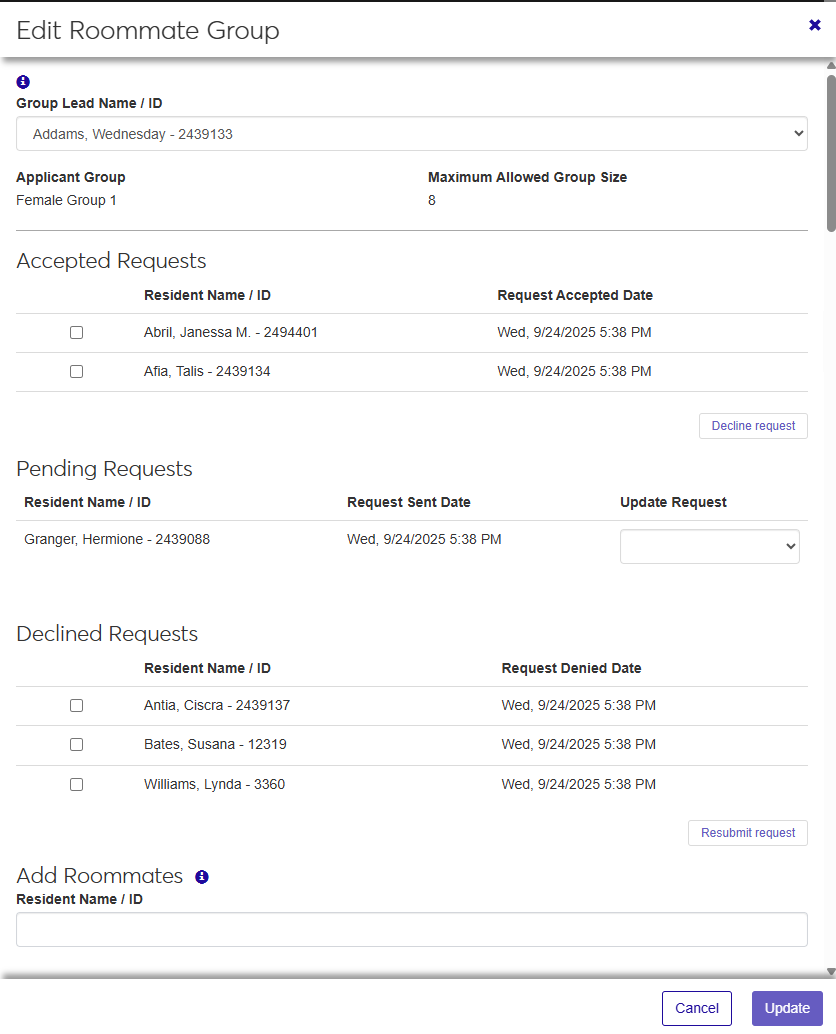
The top of the window displays the current Group Lead, the Applicant Group the group lead belongs to, and the Maximum Allowed Group Size. Applicant Group and Maximum Allowed Group Size are not editable. The window also displays a list of students who have accepted the roommate request, any pending requests, and those who have declined the request. If there are no requests in a category, that section is not displayed.
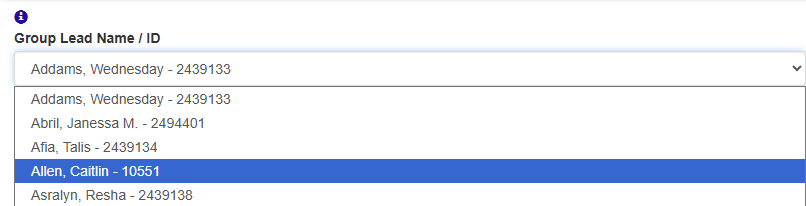
To change the Group Lead, select a name from the Group Lead Name / ID drop-down. The available names include the current group leader and any students in the group who have accepted a roommate request. If there are no accepted requests, the drop-down is unavailable.
Note
If you select a new group leader, the previous group leader is moved to the Accepted Requests list. In addition, the Applicant Group changes to reflect the new leader's group. Most of the time the Applicant Group will be the same, but on occasion it might be different.
If a resident who has accepted a roommate request needs to decline it, select the checkbox next to the resident's name in the Accepted Requests section. When you do this, the Decline request button turns blue to indicate that you have made changes.
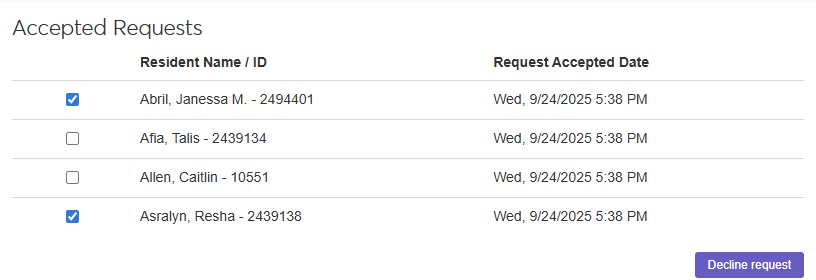
Note
The Decline request button is not an active button; it simply shows you that changes have been made. The changes do not take effect until you click the Update button.
If you need to change the status of any of the pending requests, select either Accept or Cancel from the drop-down next to the name in the Pending Requests section. The change will take effect when you click the Update button.
To resubmit a roommate request that has been declined, select the checkbox next to each student in the Declined Requests section that you want to resend the request to. The Resubmit request button changes from white to blue, but the changes will not take effect until you click the Update button.
To add a roommate to the group, click in the Resident Name / ID field in the Add Roommates section, begin typing the name or ID of the student you want to add, and select the name when it appears in the list. Only students in the same applicant group as the group leader who have not accepted another roommate request are available to select.

You can remove a roommate group unless the group leader has already been assigned to a bedroom.
On the Roommate Groups tab, find the group leader of the group you need to remove.
Select Remove group from the Actions drop-down. The Remove Roommate Group? pop-up opens, displaying a list of the members of the roommate group.
Note
Removing the group does not remove the residents from the applicant group.
If you are sure you want to remove the group, click Yes, remove.
You can send a communication to all the residents in the group with an accepted or pending request.
Note
To receive text messages, the residents must have a phone number on file.
On the Roommate Groups tab, find the group leader of the group you need to send a communication to.
Select Send communication from the Actions drop-down. The Create New Communication window opens.
The Communication Type defaults to "Email." If you have Communication Plus, you can also send a text message.
To send an email communication:
If you need to change the Interaction Code, Name / Description, delete the existing default value, click in the field, and select a new value from the list. The interaction code classifies the content of the communication. You can only select one code.
Note
Only the active codes you have access to are available to select. For more information about permissions, contact your campus support team.
The From field defaults to the logged-in user's email address. If you need to change it, delete the existing address, click in the field, begin typing the email address of the preferred sender, and select the address when it appears in the list.
Double-check the recipients' email addresses in the To section. If any of the members of the group are missing an email address, you see an alert message.
Enter the Subject of the email.
Type your message in the Body text field. Use the formatting toolbar to format the text.
To attach a file, click the Attach file button, locate the file you want to add, and select it. The file format must be DOTX, HTML, PDF, or WAV.
When you are done, click Send. Separate but identical emails will be sent to the students listed in the To section.
To send a text message:
Note
To send text messages, you must be assigned to a phone number in the system. To receive text messages, recipients must have a valid, verified SMS number in the system.
Select Text from the Communication Type drop-down.
The Interaction Code, Name / Description defaults to "General Student Life Text." If you need to change it, delete the default value, click in the field, and select a new value from the list. The interaction code classifies the content of the communication. You can only select one code.
Click in the Select 'From' Number field and select the number you want the message to be sent from.
The To section lists all the students who have accepted the roommate group request.
If you need to change the Contact Type, delete the existing value, click in the field, and select a new contact type from the list.
Type your message in the Body field.
To add an emoji to the text, click the emoji icon.
To use AI to generate the message, click the Generate Content icon
 and follow the instructions in the Generate Content pop-up.
Note
Messages can be up to 1,600 characters, but be aware that long texts will be broken up into multiple 160-character messages.
When you are done, click Send or Send and close timed session.