GL Transactions
Important
Information and features vary according to the roles to which you belong and the permissions associated with those roles. For more information, contact your module manager or your campus support team.
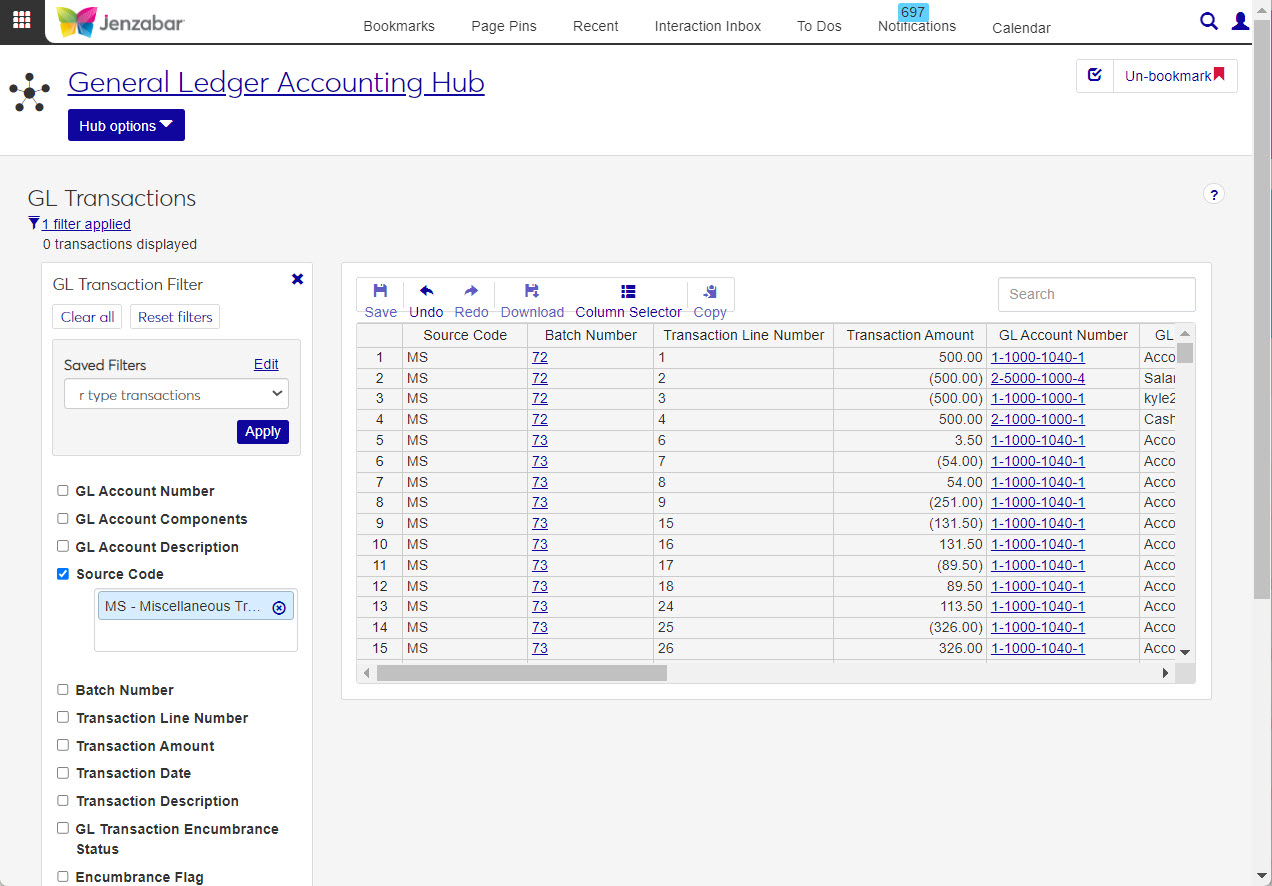
The GL Transactions page lets you review individual transaction activity. The Column Selector button on the toolbar lets you add or remove columns, and the Download button lets you save the transaction information in an Excel file.
To view and work with transactions in the General Ledger Accounting hub, users need some combination of the following:
Roles | Role Permissions |
|---|---|
General Ledger Accounting GL Transaction Access | Can view GL transactions Can edit GL transactions Can download to Excel Can calculate balances |
In addition to the General Ledger Accounting GL Transaction Access role and permissions, users also need some of the other Common and General Ledger roles, permissions, and associations to work with the correct accounts, transactions, vendors, students, and projects that make up General Ledger. For more information see the J1 Web Finance Permissions Overview and Setup guide on MyJenzabar.
You can use the GL Transaction Filter to find specific transactions, then click the Batch Number links to view details about the batch the transactions were in.
GL Account Number
GL Account Components
GL Account Description
Source Code
Batch Number
Transaction Line Number
Transaction Amount
Transaction Date
Transaction Description
GL Transaction Encumbrance Status
Encumbrance Flag
Subsidiary Transaction Status
Transaction Type
Folio
Project Code
Project Description
Student ID
Student Name
AR Subsidiary Code
Vendor ID
Vendor Name
AP Subsidiary Code
Use the Transaction List page to quickly view all transactions, regardless of batch status, that are currently posted or posted in a month/year that's already closed. From this page, you can link to a batch or to the account number associated with the transaction.
Every transaction goes through a series of status codes that identifies its stage.
Status Code | Description | Explanation |
|---|---|---|
S | Requires Review | Transactions with the S status are incomplete or incorrect and do not contribute to any of the balances on the G/L Master table. |
U | Ready to Post | Transactions with the U status are error-free transactions that have not yet been posted and contribute to the unposted balances in the G/L Master table. |
C | Posted to GL | Transactions with the C status are those that are error-free, have been posted, and contribute to the posted balances in the G/L Master table. |
How To
Filtering results in J1 Web allows you to choose the results you want to see in a specific worksheet and can be helpful when dealing with large amounts of data.
Click the Filter icon
 to open the filter.
Select a saved filter, or select criteria and enter search phrases.
Click Apply to run your filter, or click Save as to save your criteria.
Click Reset filters to remove criteria you've selected or search phrases you've entered, and then click Apply.
Click Clear all to remove all filters, and then click Apply.
Tip
To make a specific filter the default for viewing content on a J1 Web page, when saving or editing a filter, click Default next to the filter name.
Sometimes, even with filtering you may want to have the information sorted to keep similar information together and more organized. Using the Sort feature allows you to do this. By clicking on a column header, the content in the worksheet sorts alphabetically or numerically in ascending or descending order.
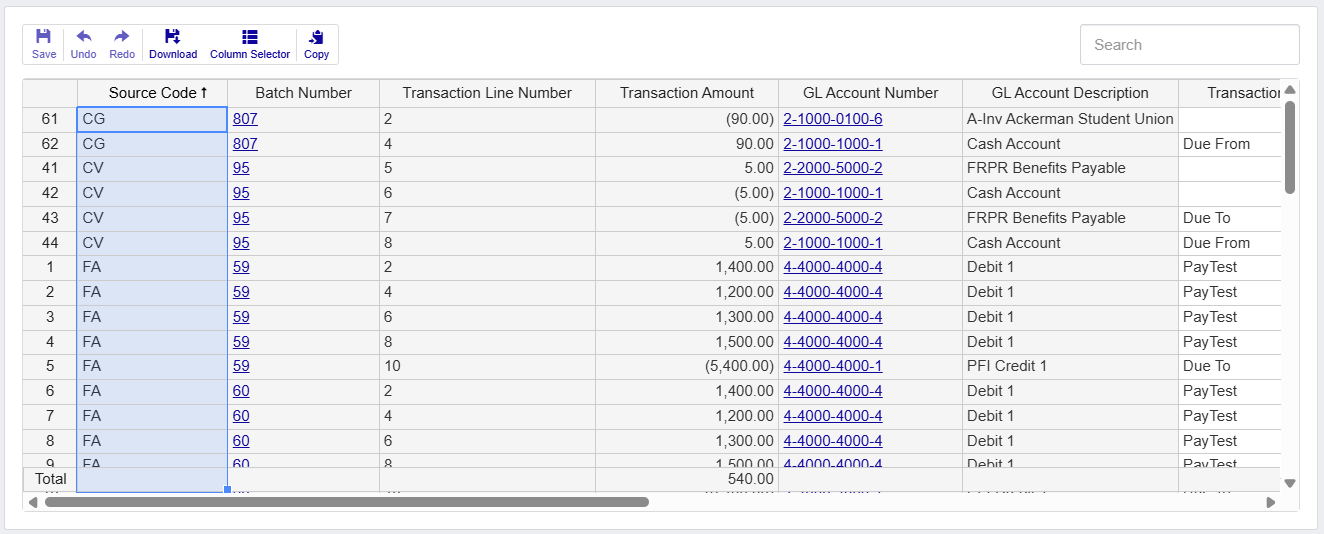
When clicked, the column is initially highlighted showing a change was made. Next to the Column Name, the Arrow icon  indicates the column is sorted.
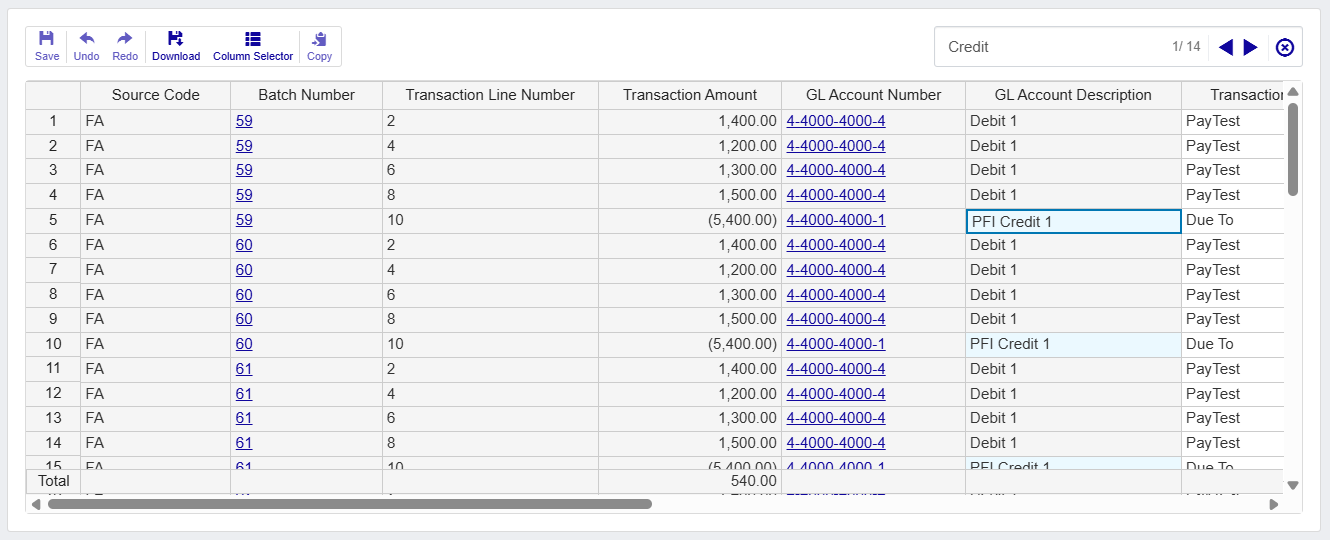
If you are looking for a specific detail, you can use the Search feature at the top right of the worksheet. Type an account number, batch number, description, source code, etc. in the Search field and press Enter.
 |
The Search field changes to show what you searched for, how many times it was found in the worksheet below, and allow you to switch between the instances.

In the worksheet, the instances found are highlighted to help you find the content you're looking for. When you are finished, you can click the Close icon  in the Search field to remove highlighted instances.
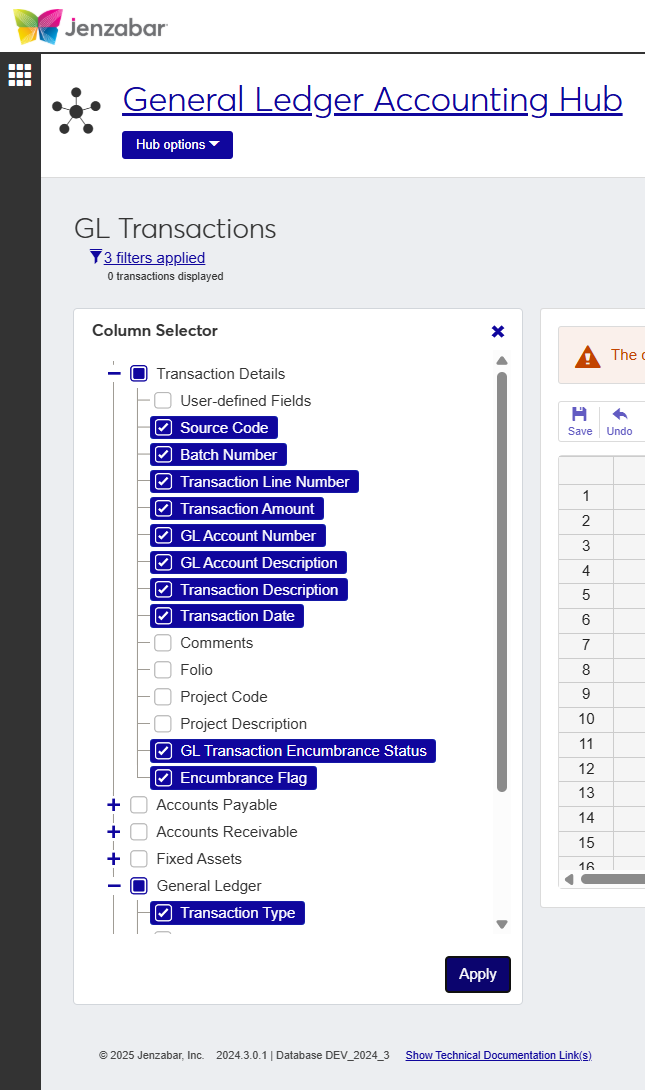
Most worksheets used in J1 Web provide the option to show or hide content related to the data being viewed. When viewing a details worksheet in J1 Web Finance, the Column Selector allows you to choose which columns and information should be shown on the worksheet. By default, the worksheets show the most relevant information, but you can choose the information you want to view.
Click the Column Selector icon
 above the worksheet details.
 The column selector appears on the right side of the page, in place of the filtering options. Worksheets may differ slightly depending on the columns and information available. Select the checkboxes of the columns to be added, and deselect the checkboxes of the columns you want removed.
The columns are automatically added or removed from the worksheet when you click Apply.
Column Selector options do not persist, so if you leave the page after customizing the columns, you need to make your selections again.
While you can select columns to include when you click the Download option, if you customize the columns on your worksheet prior to downloading the worksheet, the columns appear preselected on the Download to Excel pop-up.
When you are finished, close the Column Selector menu.
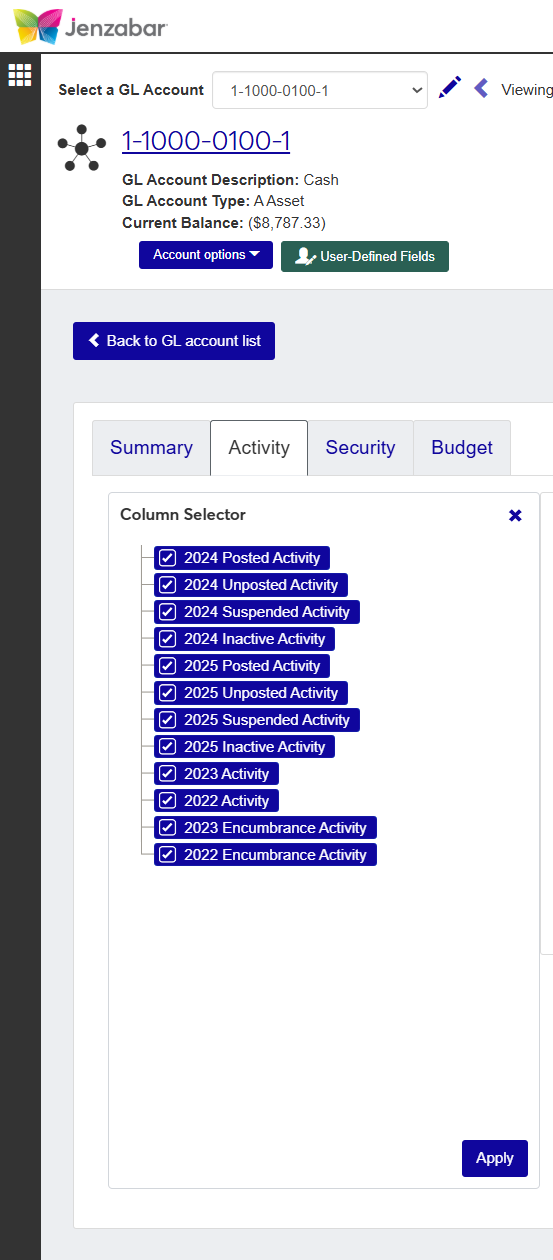
While column selectors may differ for each worksheet, their function remains the same. Select or deselect checkboxes next to the columns to determine which ones appear in the worksheet.
For example, the images below show two different pages in J1 Web Finance and the column options available. When working with the GL Transactions feature, the column selector shows several sections of information that can be viewed, while on the GL Account Activity tab, there's a more limited list of available columns.
FAQ
All transactions must be edited (checked for accuracy) prior to posting them into the general ledger. Once posted, they can only be canceled out, edited, and re-posted Editable transactions can only be done on transactions that have not yet been posted. These transactions will have a status of S (Suspended) or U (Unposted).
Yes. In the GL Transaction Filter use the Transaction Amount filter to locate a specific transaction with a dollar amount.
No. The Transaction Date field is not editable on the GL Transaction or Calculate Balance pages.
Transaction groups have been renamed "Batches" in J1 Web. With the correct permissions, you can access batches from the General Ledger Batches page.
Unfortunately, they do not currently persist to the next time you come to the page but that is something that is planned for a future release.
A journal entry is the recording of financial data in the form of transactions. These transactions provide an audit trail and help maintain an institutions financials once posted to the General Ledger.
Each journal entry consists of at least one credit and debit entry, however, it can have multiple entries. While the number of entries for debits and credits does not have to match, the total amount of the debits must equal the total amount of the credit within a journal entry or batch.