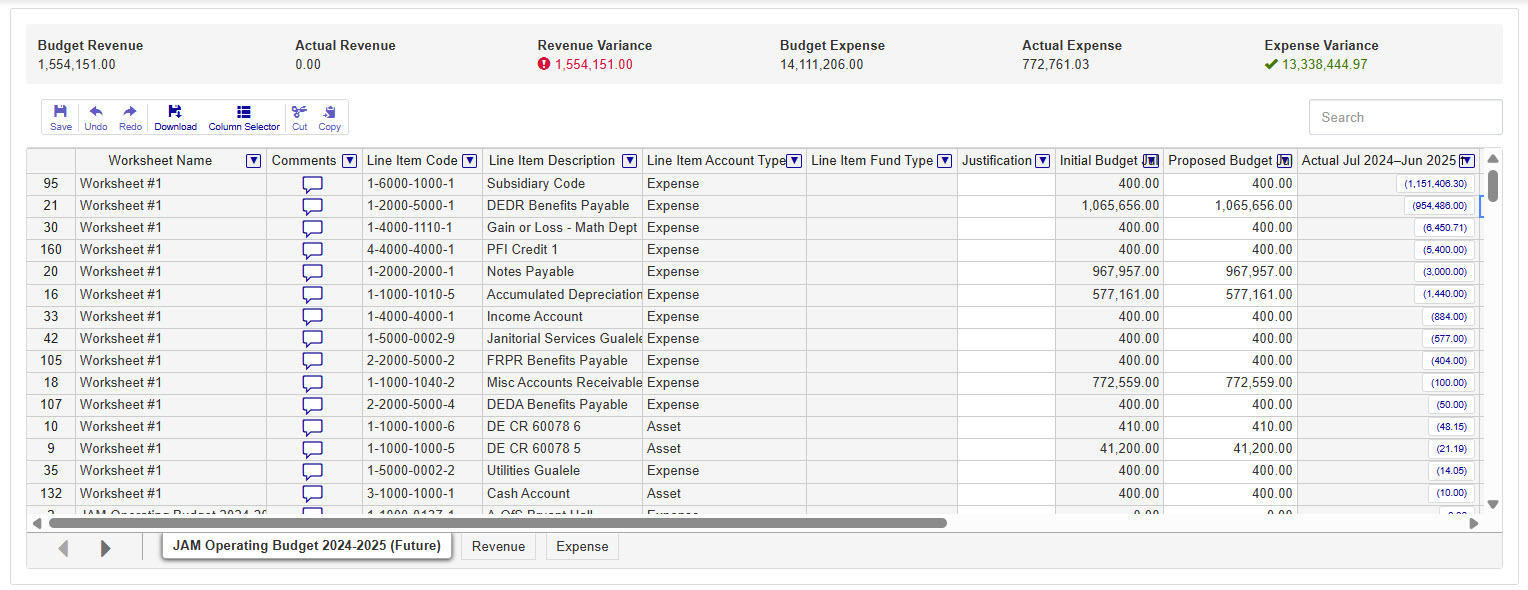
Enter Budget Tab
This tab is used to review worksheets, enter proposed preliminary amounts as a baseline, enter or update proposed amounts, quickly see your budgeted, actuals, and variance amounts for revenues and expenses at the top of the worksheet, and review amounts for budgets.
 |
Tip
By default, the only columns visible will be Worksheet Name, Comments, Line Item Code, Line Item Description, Line Item Account Type, Line Item Fund Type, Justification, and Initial Budget. To add the Proposed Budget and Actual Budget you'll need to click the Column Selector button and add the content you want to see on the worksheet using the checkboxes.
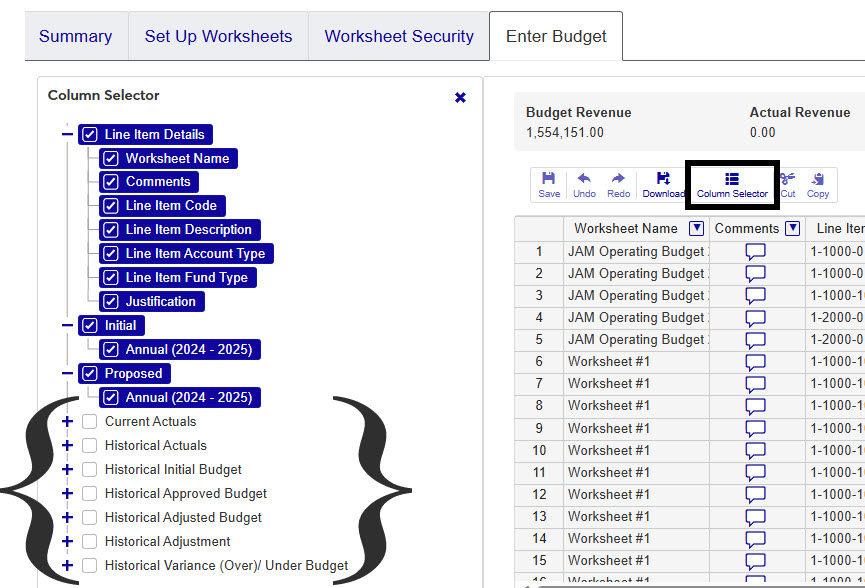
Current & Historical Details
Tip
Historical budget data is only available if it was related during the copy budget process.
If historical budget information exists, you can add or remove columns with details from previous budget years. Reviewing historical information can aid in determining what caused spending to be over or under budget in previous years, what a budget should be in a future year, or whether to approve a current year budget. You can choose to view the following:
 |
Note
Budget information shown in the Current and Historical actuals sections varies according to your school's GL configuration year and not the budget's start or end dates.
How To
Worksheets and line items are added to the Enter Budget datasheet from the Set Up Worksheets tab. There you can add or remove from the worksheets.
Click the Comments icon
 .
. From the Comment pop-up, you can read the existing comments, mark them all as read, and add your own comments.
Click New comment and enter your text.
If you want to upload an attachment, click Attach, locate the file, then click Open.
Click Add to save your text and/or attachment.
Most worksheets used in J1 Web provide the option to show or hide content related to the data being viewed. When viewing a details worksheet in J1 Web Finance, the Column Selector allows you to choose which columns and information should be shown on the worksheet. By default, the worksheets show the most relevant information, but you can choose the information you want to view.
Click the Column Selector icon
 above the worksheet details.
 The column selector appears on the right side of the page, in place of the filtering options. Worksheets may differ slightly depending on the columns and information available. Select the checkboxes of the columns to be added, and deselect the checkboxes of the columns you want removed.
The columns are automatically added or removed from the worksheet when you click Apply.
Column Selector options do not persist, so if you leave the page after customizing the columns, you need to make your selections again.
While you can select columns to include when you click the Download option, if you customize the columns on your worksheet prior to downloading the worksheet, the columns appear preselected on the Download to Excel pop-up.
When you are finished, close the Column Selector menu.
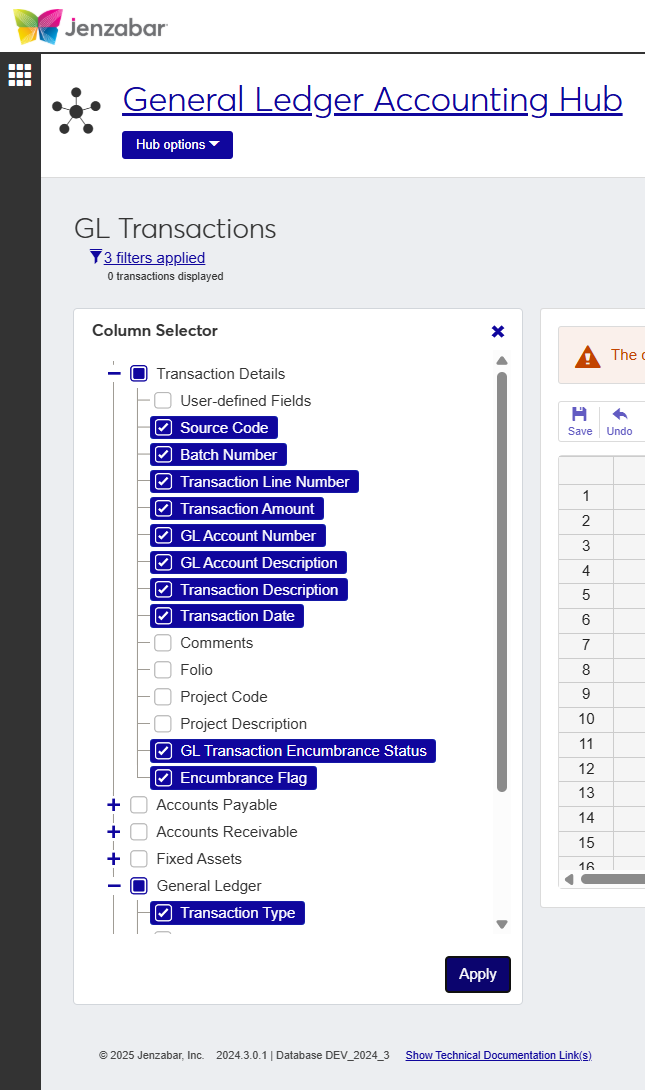
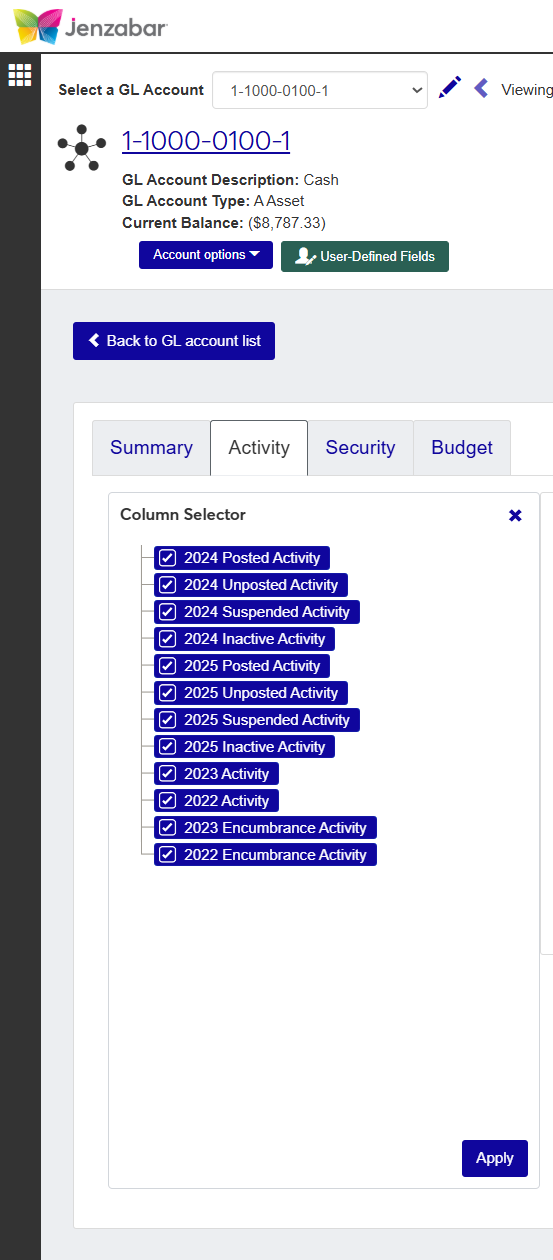
While column selectors may differ for each worksheet, their function remains the same. Select or deselect checkboxes next to the columns to determine which ones appear in the worksheet.
For example, the images below show two different pages in J1 Web Finance and the column options available. When working with the GL Transactions feature, the column selector shows several sections of information that can be viewed, while on the GL Account Activity tab, there's a more limited list of available columns.
Select the checkboxes next to the rows you want to export.
From the Options drop-down, select Download to Excel. The Download to Excel pop-up opens.
Select options for the Excel format and data columns.
Click Download. Your .xlsx or .zip file is saved in the file location that you have set in your browser settings.