User Self-Registration
Users can create a new JICS account without IT assistance when self-registration features are enabled.
User Self-Registration Tab and Page
In Site Manager, Administrators can click the User self-registration tab near the bottom of the left sidebar to view the User self-registration page. The feature's details are described in a text box at the top of the User self-registration page:
These settings allow you to turn on a link for new users to create a new account in the portal by themselves. When the user's new account is added, the user will be automatically assigned to a specified role. You can specify the user's role in the "Default roles for new users" section below.
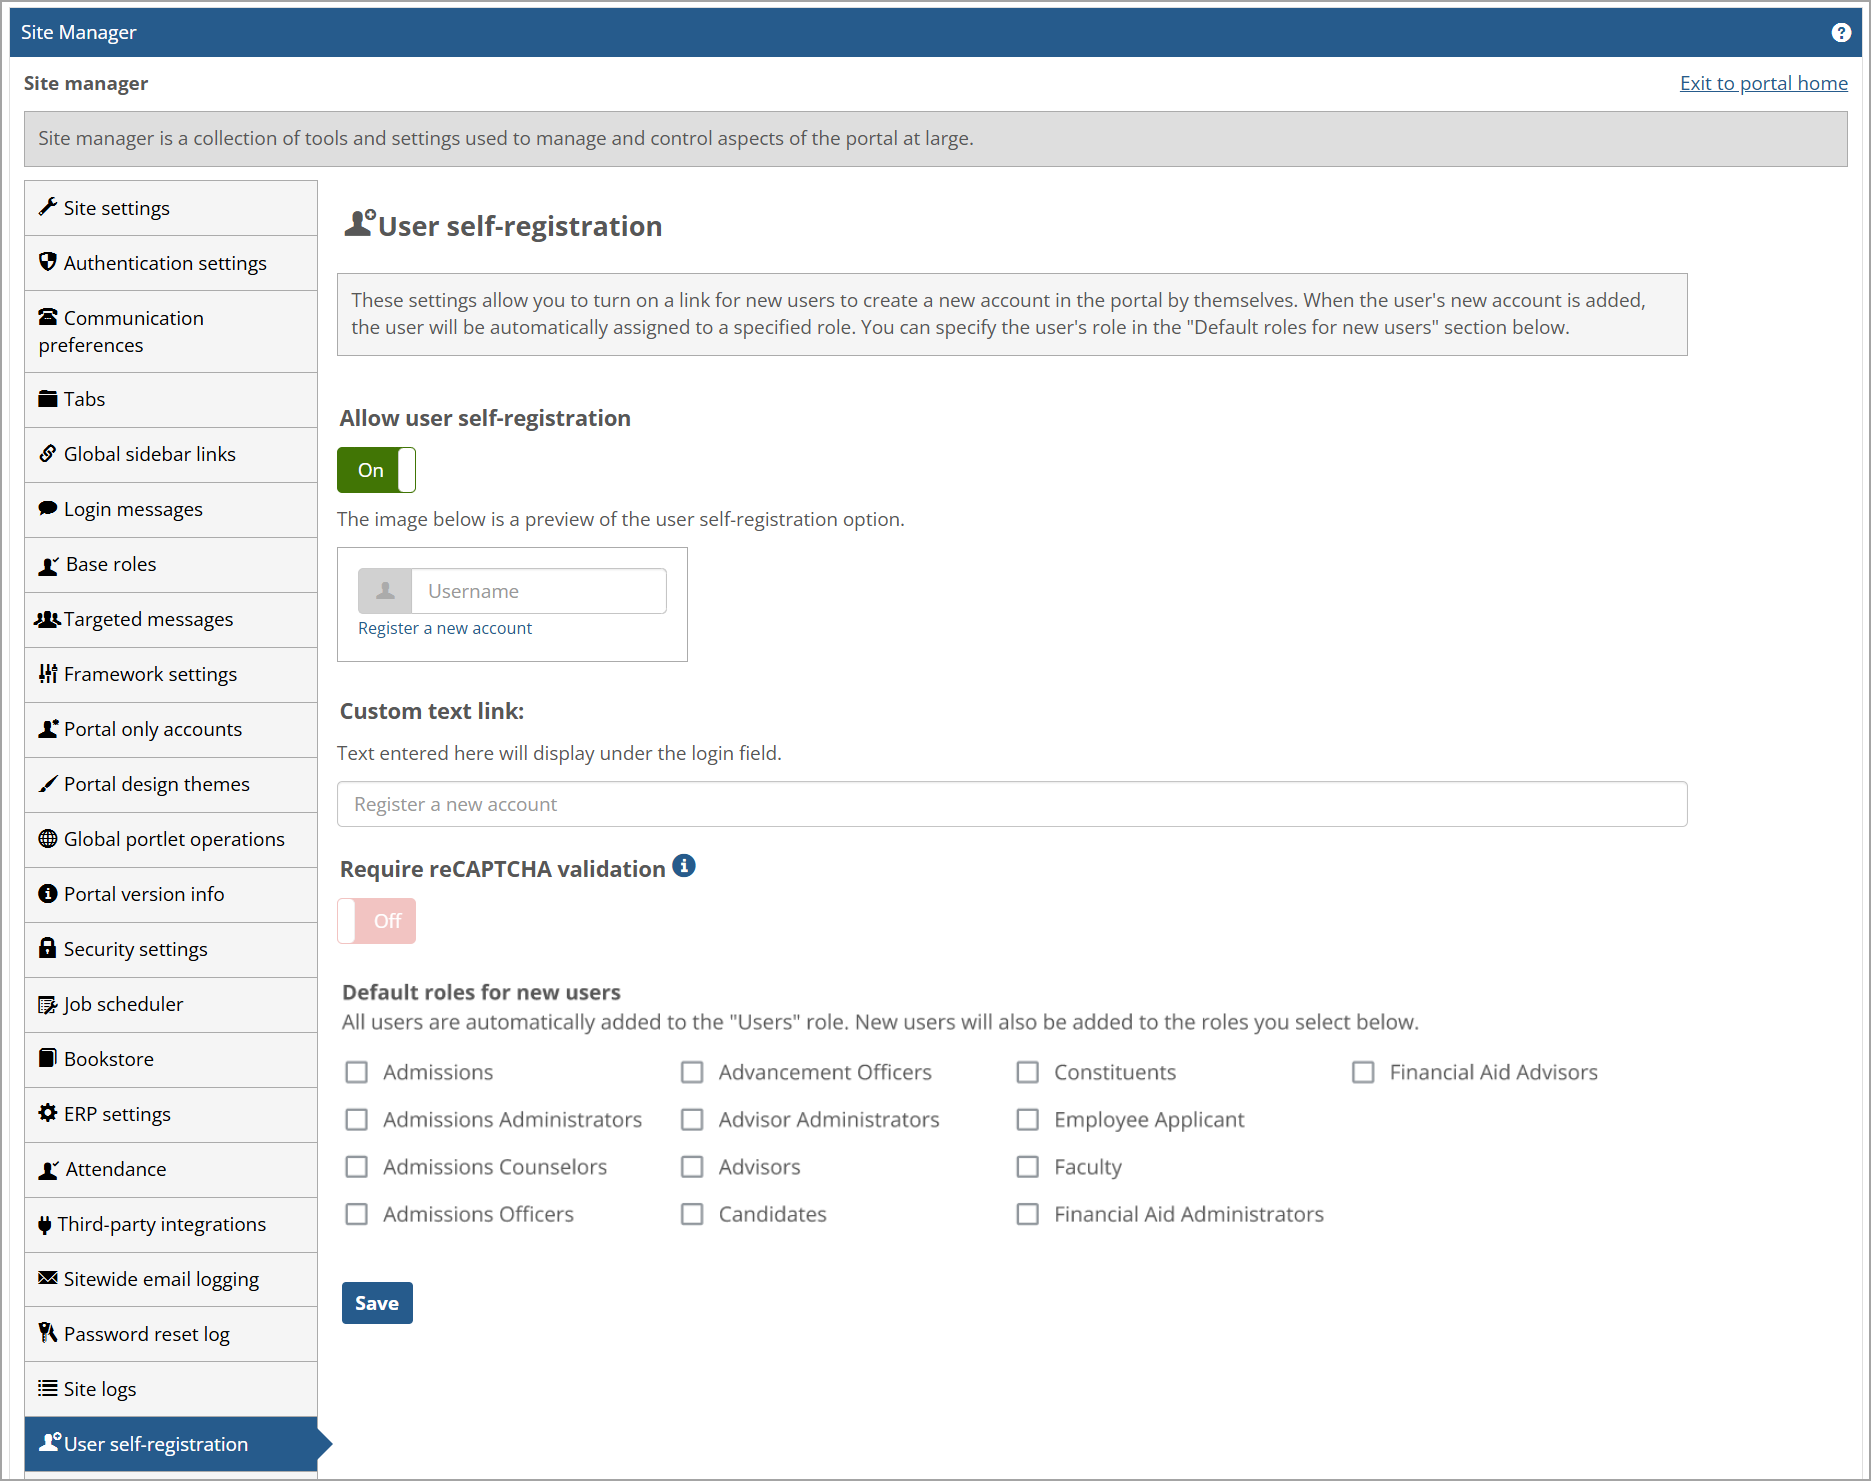
By default, the Allow user self-registration option is set to the red Off and the feature is disabled. If you want to allow user self-registration, click this option to change it to the green On, and other settings for the feature appear as shown in the following image.
 |
Caution
After making any changes on the User self-registration page, you must click Save to save them. (A green success message appears at the top of the page to confirm the changes were saved.) Otherwise, if you leave the page without saving, the changes you made are cancelled.
Below the Allow user self-registration option is an image with an explanation: "The image below is a preview the user self-registration option." If you want to change the default text for the "Register a new account" link, enter your custom text in the optional Custom text link field. Text entered in this field replaces the default text and displays as a link under the login field.
The Require reCAPTCHA validation setting is set to the red Off by default. To enable this function, you must first set up the reCAPTCHA integration in the Third-party integrations page in Site Manager. Although requiring reCAPTCHA validation is optional, Jenzabar recommends it to prevent spam and abusive bot attacks.
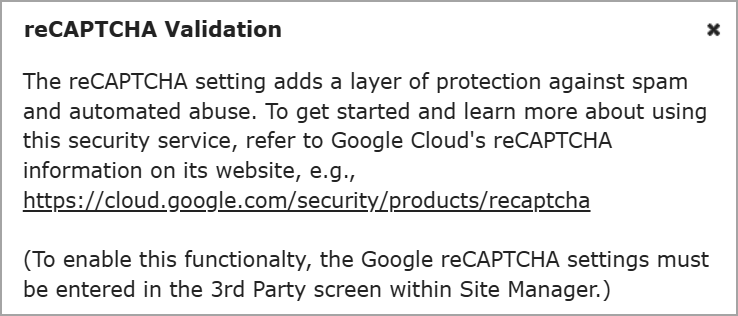
To learn more about the reCAPTCHA setting, click the blue information i icon  , which displays the reCAPTCHA Validation pop-up window as shown after this paragraph. For more details about setting up the integration, refer to Enable reCAPTCHA Third-Party Integration.
 |
After you have set up the reCAPTCHA integration, click the Require reCAPTCHA validation option to change it to the green On and enable this function.
In the Default roles for new users section, you can assign a default role for the new user by selecting the applicable role checkbox, such as the "Faculty" role. By default, the new user is automatically assigned to the "Users" role (which is not displayed as a role checkbox because it can't be changed). If you don't select a role checkbox, the new user will have only the "Users" role. If your organization has more than 20 user roles, they will display on separate clickable "A-F" and "G-Z" sections at the bottom of the page.
If the User self-registration feature is enabled in Site Manager, a Register a new account link is displayed in the Login area. "Register a new account" is the link's default name, but you can customize it on the User self-registration page in Site Manager.
 |
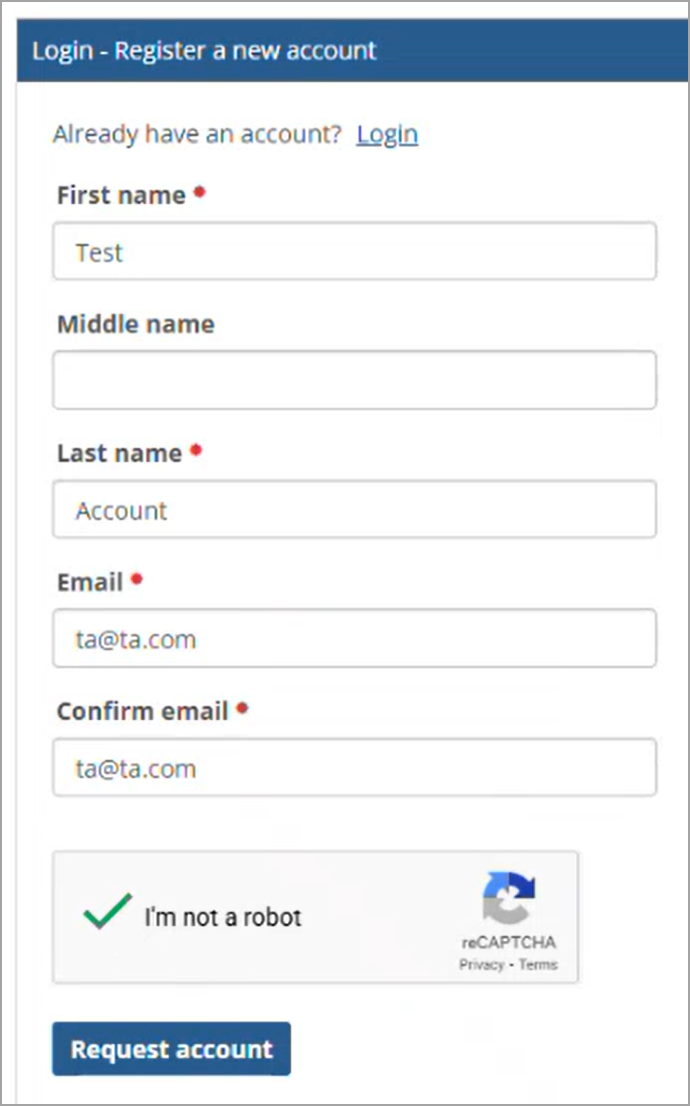
When a user clicks the new account link, the Login - Register a new account screen appears. The user enters data in all required fields (indicated by a red asterisk). If the reCAPTCHA setting was enabled on the User self-registration page, then the user must select the I'm not a robot checkbox. Finally, the user clicks the Request account button.
Note
When the user selects the I'm not a robot checkbox, reCAPTCHA runs a risk analysis in the background and may ask the user to identify images to verify that the user is human.
 |
A green success message appears stating: "A verification link has been sent to the email address provided. Follow the instructions in the email provided to continue the registration process. If you do not see the email, you may need to check your spam folder."
The email provides the user's username (which is the email address they entered in the new account screen) and a link to set up a password. After the user clicks the link and sets up a password, another email notifies the user: "You have successfully set your password. You can now return to the home page to log in." The user can click the "return to the home page" link to go to their Portal home page and log in.