Setting Up Course Evaluations
This chapter explains how to integrate JICS with the third-party tool Course Evaluations.
Overview of Course Evaluations
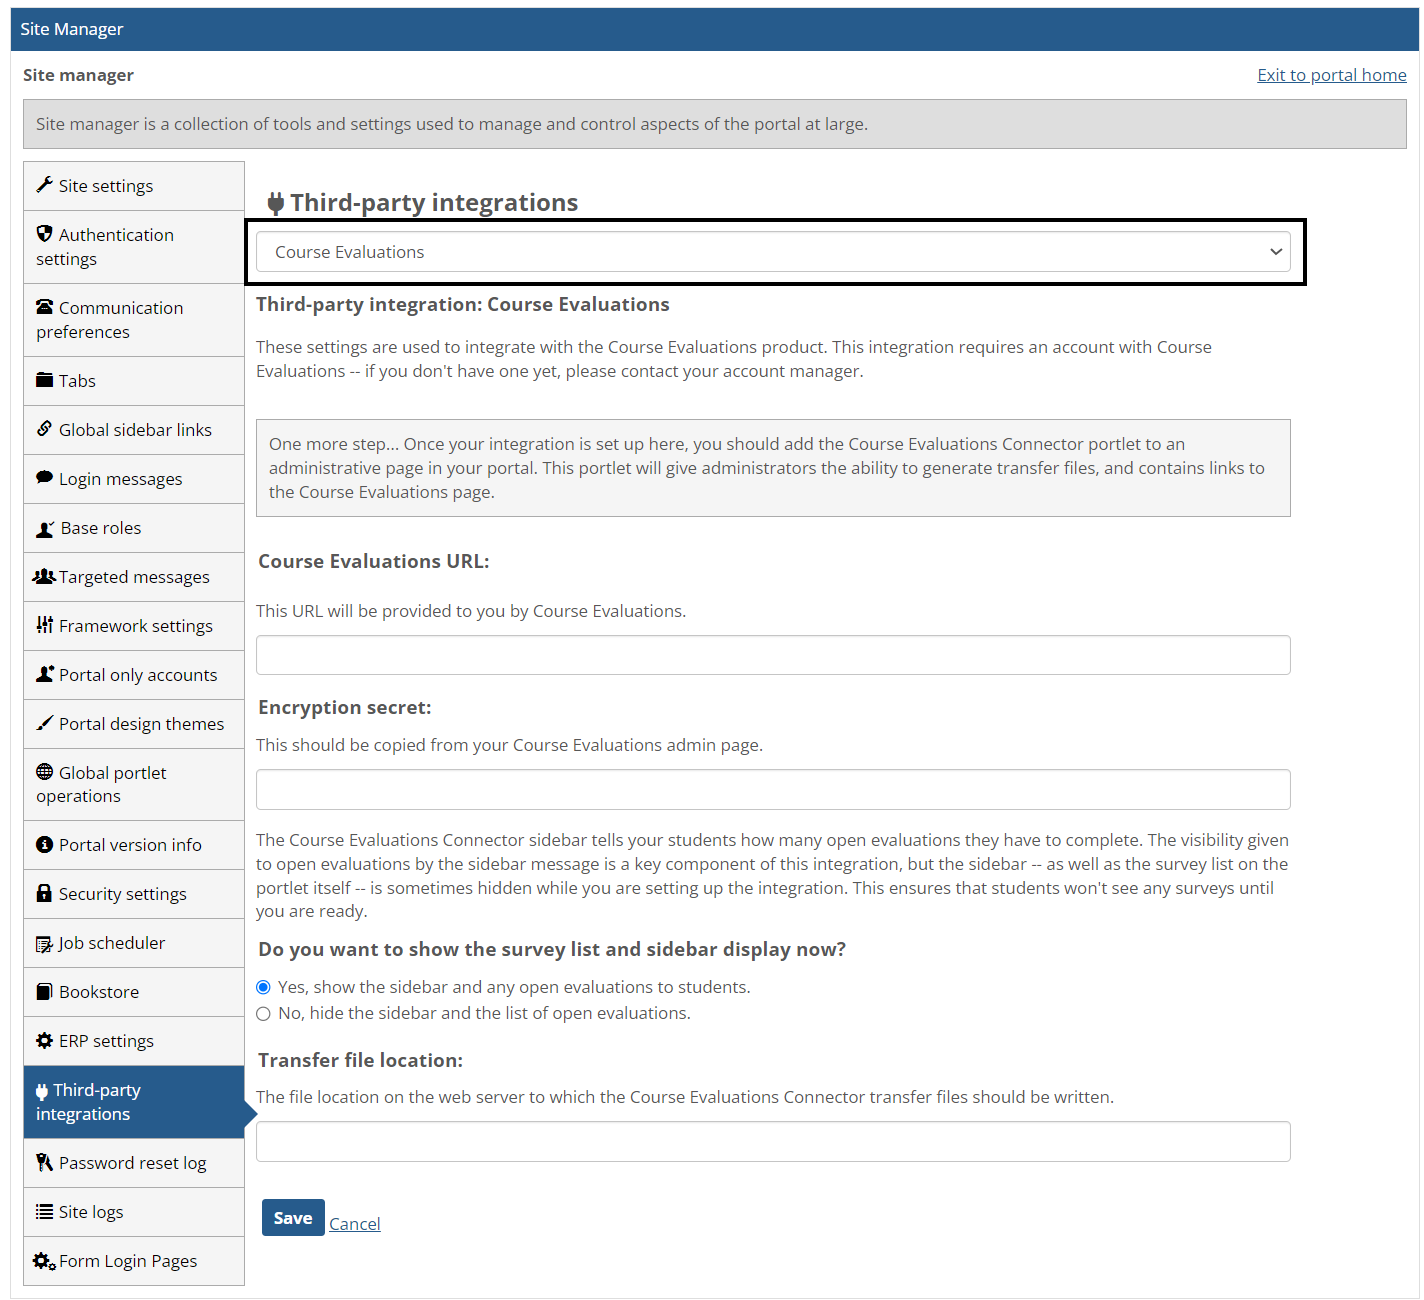
An administrator can manage settings related to integrating the third-party product Course Evaluations with JICS. This is done on the Third-party integrations screen.
This integration requires a Course Evaluations account. If you don't have one yet, please contact your account manager.
Once your institution has set up a Course Evaluations account, your administrator can enter the URL and encryption secret provided by Course Evaluations. You can also choose to hide or show the Course Evaluations Connector Sidebar from students while you are setting up the integration and specify the location on your web server to which transfer files from Course Evaluations will be written.
Once your integration is set up in LMS Manager, the administrator can then add the Course Eval Connector feature to an administrative page in your portal to allow administrators the ability to generate transfer files and provide a link to the Third-party integrations screen.
 |
How To
Make sure your institution has a Course Evaluations account. You will need the URL and encryption secret provided by Course Evaluations.
Log in to the portal as a member of the Administrators role.
Click the user icon and select Site Manager.
The system displays the Site Manager screen, with the Site settings tab selected.
Click the Third-party integrations tab.
The system displays the Third-party integrations screen.
In the top drop-down list, select Course Evaluations.
Enter the URL and encryption secret provided to you by Course Evaluations.
Select the appropriate option to indicate whether you would like to show or hide the survey list and sidebar from students for now. It may be a good idea to hide it while you are setting up the integration.
In the Transfer file location field, enter the path for the location on the web server to which the Course Evaluator Connector feature should write the transfer files that it creates.
Click Save.
Navigate to the portal page on which you want the Course Evaluator Connector feature to reside and add the feature to the page. For assistance, see the Add a Feature Instance to a Page section.