Setting Up the Campus Groups Directory Feature
The Campus Groups feature offers users the ability to browse groups, join groups, and much more.
The Setup Options
For each instance of the feature, you choose a default view—My Groups, Browse Groups, or New Group Application.
Note that Campus Groups feature instances located in a user’s My Groups context will always show the My Groups View.
The My Groups view lists the groups to which the currently logged-in user belongs.
From this view the user can click the name of any group to go directly to the context for that group. Next to each group listed is a label that says either Drop Group or Sole Leader.
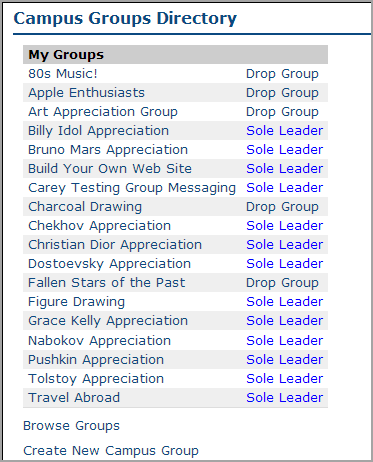 |
If the Drop Group link is displayed, that means that the logged-in user is either a member of the group or one of multiple leaders (in either case, the user can drop the group, if desired).
If the Sole Leader label is displayed, the user is the only leader of the group, and dropping the group is not allowed.
Note that this view also includes a link to the two other views (Browse Groups View and New Group Application View).
The Browse Groups View lists all public groups.
From this view, the user can click the name of any group to go directly to the context for that group. If the group is currently open to new members, a link for joining is provided.
 |
When on-screen messaging in JICS mentions the “Campus Groups Directory,” this is typically the view that is being referred to.
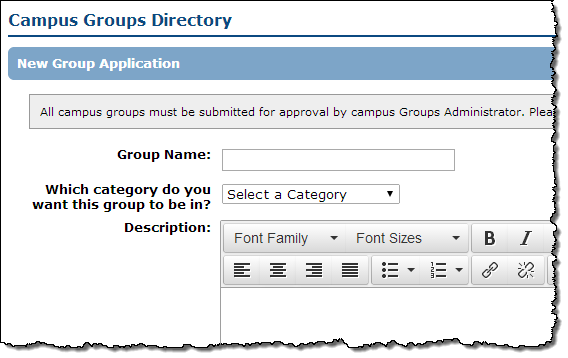
The New Group Application View shows the application form used by people who want to propose new groups.
This view is intended to be used either on a page of its own, or within a wide column. This is because with this view, the feature instance extends to a broader width than it would otherwise.
 |
How To
This procedure explains how to set up the Campus Groups feature with a particular view.
Navigate to the page that contains the Campus Groups feature instance.
Click the wrench icon in the upper-right corner of the page.
The admin bar displays.
Click the Settings link in the admin bar.
The system displays the Settings screen.
Select the Campus Groups feature from the drop-down list of features. (Note: If the feature is on a page of its own, this drop-down will not appear, and you can skip this step.)
The screen updates to show settings for the Campus Groups feature.
Select the appropriate view.
Click Save changes.