Activating a Tool
The purpose of activating a tool is to make it available in a specific feature instance. To do this, someone—either you or another authorized user—must have already added details about the tool to JICS.
The process of activating a tool is sometimes called “adding a tool to page.” Also, when a tool is active in a feature instance, that occurrence of the tool may be referred to as a “placement” of the tool.
To activate a tool, deactivate a tool, or modify activation settings in a particular feature instance, a user must belong to a role that has the instance-specific Can Set Up Tools permission.
Any time a tool is active, you or another authorized user has the opportunity to save activation settings that affect that specific placement of the tool. At a high level, these settings let you do either of the following:
Override the tool’s basic settings (for this one occurrence of the tool).
Customize the launch link text for the tool.
When you set the activation settings for a tool, you can override many, though not all, of the settings that were saved as part of the tool’s basic settings. Basically, you can override any of the fields listed in the following table.
Field | For more details |
|---|---|
Name | See the Name section. |
Description | See the Description section. |
Tool display | See the Tool display section. |
Any of the Shared information options | See the Advanced Setup section. |
Default locale | See the Advanced Setup section. |
The field labeled Send these additional custom parameters | See the Advanced Setup section. |
Certain basic settings cannot be customized. These include the following:
The tool’s Category—because this value is unrelated to activation.
The tool’s Shared settings—because these values are unrelated to activation.
The tool’s Connection information (its Location and Security details).
The Contact email for the tool.
You can also use the activation settings to make one choice that is not specifically customizable on the basic settings screen—the launch link text for the tool.
 |
If you do not customize this on the activation settings screen, the link text will say Launch the name of tool. Otherwise, your custom text is used for the link.
 |
Every Learning Tools feature instance includes an activation screen. You might use this screen for any of the following reasons:
To activate a tool (make it available in the feature instance that you’re currently using).
To review a list of the tools that are available for you to activate. This list should be consistent regardless of which feature instance you are using. That is, the tools you see on this screen are available for you to activate in any Learning Tools feature instance or in any Coursework assignment, if your site uses e-Racer 1.6.3 or later.
To drill down to a screen that shows more information about any particular tool (its summary screen) and lets you take other actions.
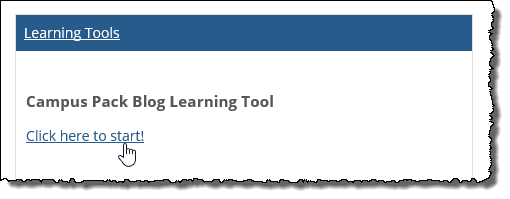
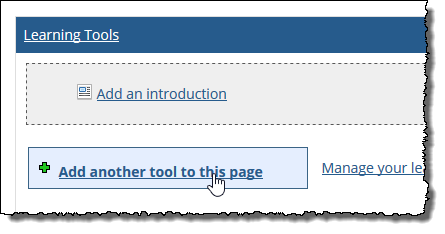
You get to the activation screen by going to the main feature view and clicking Add a tool to this page or Add another tool to this page. (The exact wording reflects whether any tools are already active here.)
 |
Once you click this link, the system displays the activation screen, which is described in more detail below.
The activation screen shows all the tools that are available to you for activation. Note that this will not include tools that another user added, unless that user specifically shared the tool. This is true even if you have full administrative privileges. (However, you do have the ability to edit the user’s tool to make it shared. You do this by choosing Manage all tools on the main feature view and opening the tool’s basic settings for editing.)
On the activation screen, if the name of a tool shows up in black text, that means that the tool is currently active in the feature instance (you cannot add it twice). If the tool shows up as a hyperlink, that means it is not currently active in your feature instance and is available to be added.
Tools are listed in three groups, as described in the following table.
Heading | Lists tools that |
|---|---|
Your learning tools | Were added by you. This list includes all tools that you added, regardless of which feature instance you were working in at the time. |
Featured tools | Were designated as featured tools at the time they were added. |
Portal name shared tools* | Were designated as shared tools at the time they were added. |
*Portal name is the value set in the Advanced site settings > Portal Name field.
Note that if you have added a tool and shared it, that tool will show up on this screen twice—once under Your learning tools and once under Portal name shared learning tools. Featured tools that you added will also show up twice.
Note that, under shared tools, you can filter according to category and according to the tool creator.
If you want to view a screen summarizing details about the tool—with links that let you edit the tool’s basic settings, delete the tool, or launch the tool—hover your pointer over the tool. Doing this displays a More details icon and link.
Clicking this link to takes you to a summary screen of details about the tool.
In some cases, you might want a tool to automatically load as soon as the user visits the feature instance. When you do this, the tool will load automatically when the user maximizes the feature.
If you created an introduction for the feature instance, note that when a tool loads automatically, the system will not show the introduction.
How To
When a tool has been added to the system for the first time, by default it is automatically activated in the feature instance where it was added—if the user creating the tool has permission to place tools. Otherwise, the tool is not automatically activated.
Therefore, you might need to manually activate a tool in any of the following situations:
If the tool was added (and shared) by someone who did not have permission to activate it. In these cases, you or another authorized user might want to go ahead and activate the tool.
If the tool was activated but then removed (deactivated)—in this case, you might want to reactivate it.
If you want to activate the tool in a different instance of the Learning Tools feature (other than the one where it was created).
If you want to activate a tool that someone else created and shared.
To activate a tool in a Learning Tools feature instance:
Navigate to the appropriate instance of the Learning Tools feature.
Click Add a tool to this page or Add another tool to this page.
If a particular tool is already active on the page, then it will show up in plain black text, which means you cannot add it again. If it has not yet been activated in this feature instance, then it will show up in blue hypertext, indicating that you can add it.
Locate the tool you want to add and click the name of it.
The system activates the tool.
After a tool has been activated, you can modify its activation settings.
Navigate to the appropriate instance of the Learning Tools feature.
Locate the tool placement whose activation settings you want to modify.
Click the corresponding Activation settings link.
The system updates the screen to show the fields you can modify. For help understanding any of these fields, see the About the Activation Settings section.
Make any changes that are appropriate.
Click Save your settings.
After a tool has been activated in a particular feature instance, you might want to deactivate it, or remove it.
Navigate to the appropriate instance of the Learning Tools feature.
Locate the tool placement that you want to remove.
Click the corresponding Remove this tool link.
The system displays a dialog asking if you are sure you want to proceed.
Click OK.
To make a tool load automatically, do both of the following:
Edit the tool’s activation settings so that Tool display is set to Show tool within the JICS page.
Deactivate any other tools are currently placed in the feature instance.
As soon as you do both these things, the tool will automatically load whenever the feature instance is maximized.
To make sure the tool loads all the time, you can also optionally make sure the feature instance is the only one on the page (that way, it will always be maximized).
To stop a tool from loading automatically, do one of the following:
Edit the tool’s activation settings so that Tool display is set to Show the tool in a new pop-up window.
Activate another tool in the feature instance.
As soon as you do one of these things, the tool will stop loading automatically.
If the feature instance is the only one on the page, and you simply want to reduce the frequency with which the tool automatically loads, you can add another feature to the page. In this case, when users first visit the page, they will see the default view of the feature (the smaller view), and in this view the tool will not automatically load. It will automatically load only when the user maximizes the feature.