Working With Pages
You may want to add pages to tabs or to subsections. You may also need to rename pages, delete them and so forth.
Modifying a Page's Layout
When you modify a page’s layout, you can make two types of changes:
Modifying the column layout
Arranging features
How To
Log in to the portal as a member of the Administrators role or someone with Can Admin privileges for the appropriate context. Navigate to the tab or subsection where you want to create a page.
In the sidebar, click Add a Page.
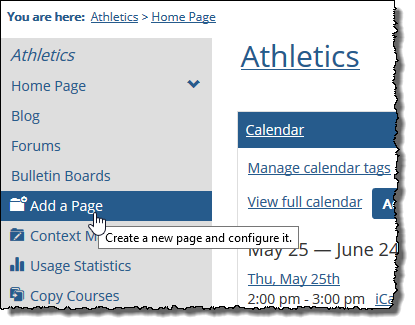
The system displays the Add a new page screen.
Select a feature to include on your new page. (Every new page must have at least one feature. You may add additional features after creating the page, as described in “Adding a feature to a page” on page 29.)
The system creates and displays your page. Note: The system gives the page a default name based on the feature you selected. You can change this name by from the Options screen. For more information see Rename a Page.
Note
By default the feature title bar will not appear when only one feature is on a page. You can override this setting by selecting the Show feature title bar in addition to page title bar checkbox on the Options screen.
Your new page now appears in the sidebar.
Warning
When you rename a page, the system will automatically update the page’s URL to reflect the change. This could result in external links to the page being broken and existing links no longer working.
Log in to the portal as a member of the Administrators role or as someone with Can Admin privileges for the appropriate context. Navigate to the page you want to rename.
Click the wrench icon in the upper-right corner of the page.
The admin bar displays.
Click the Options link in the admin bar.

The system displays the Options screen.
In the Rename the page field, enter the new name. You may need to scroll down to see this field.
Click Use this name.
The system changes the name of the page and refreshes the screen.
If you want to make a page the home page displayed when users select the parent tab or subsection, use the following procedure.
Log in to the portal as a member of the Administrators role or as someone with Can Admin privileges for the appropriate context. Navigate to the page that you want to make a home page.
Click the wrench icon in the upper-right corner of the page.
The admin bar displays.
Click the Options link in the admin bar.
The system displays the Options screen.
Click the Make this the home page link.
The system makes the page the home page and refreshes the screen.
Each page uses one of several preconfigured column layouts. These preconfigured layouts let you choose the number and relative size of the columns the page will use.
Log in to the portal as a member of the Administrators role or as someone with Can Admin privileges for the appropriate context. Navigate to the page whose layout you want to modify.
Click the wrench icon in the upper-right corner of the page.
The admin bar displays.
Click the Layout link in the admin bar.

The system displays the Layout screen, which lists all available page layouts. Options are as follows.
Name of layout option
Description
One Column
Features are stacked vertically in a single column.
Side by side with header
Side by side, but with a full-width header across the top.
Side by side
Features are arranged into two even columns.
Blog style
Features are arranged in a wide content column and a thin supplement column.
Blog style with header
Blog style, but with a full-width header across the top.
Dashboard style
Features are arranged into any of three equal columns.
Newspaper style #1
Features are arranged in a wide content column on the left or one of two thin supplement columns.
Newspaper style #2
Features are arranged in a wide content column on the left or one of two thin supplement columns.
Use an existing CSS Class to create a custom layout
Use this to specify your own CSS class for page layout. To do so, enter a name for the custom layout and click Use this.
Click Save.
When you rearrange feature instances on a page, you can move them up or down or from one column to another.
Log in to the portal as a member of the Administrators role or as someone with Can Admin privileges for the appropriate context. Navigate to the page whose features you want to arrange.
Click the wrench icon in the upper-right corner of the page.
The admin bar displays.
Click the Rearrange link in the admin bar.

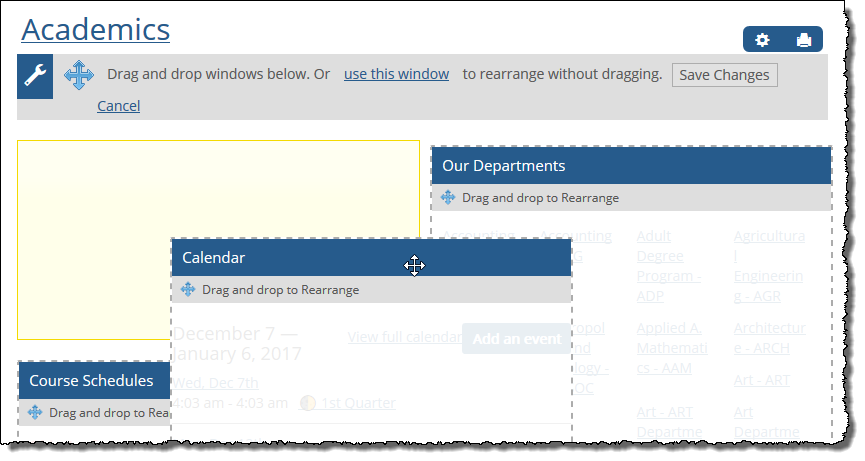
The page refreshes, and the features on the page appear grayed out with dotted borders to indicate that you can now drag and drop them into new locations.
Rearrange the features by dragging and dropping them to the desired locations. As you drag a feature, a yellow box will appear to indicate where the feature will be dropped when you release the mouse button.
Note
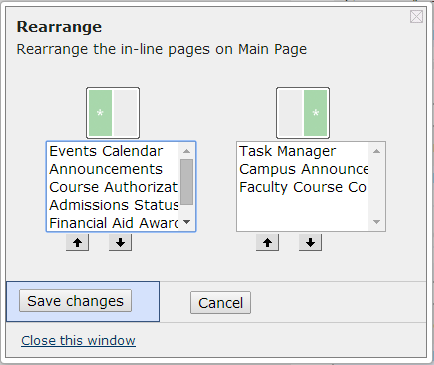
Alternatively, you can rearrange the features by clicking the use this window link. The Rearrange window displays. To move a feature to a different column, click the feature name and then click the column to which you want to move it. To move a feature up or down, click its name and then use the up or down arrows. Click Save changes when you are done.
Click Finished rearranging.
If you need to delete a page, use the following procedure. Note that if a page is the default for its parent tab or subsection, it cannot be deleted. Further, when you delete a page, you also delete all features on that page, as well as the content they contain.
Warning
When you delete a page, you delete all of its features and their content. So do not proceed unless you are certain you don’t need this content.
Log in to the portal as a member of the Administrators role or as someone with Can Admin privileges for the appropriate context. Navigate to the page you want to delete.
Click the Options link in the admin bar.
The system displays the Options screen.
Click the Delete this page button at the bottom of the page.
The system displays a dialog explaining that a deleted page cannot be recovered and that another option would be to hide the page so that it is visible only to you and other administrators. To do so, click Hide the page from everyone.
If you are sure you want to delete the page, click Delete the page name page.