Calendar
This chapter offers an overview of the Calendar feature. This process typically includes managing permissions and certain other setup options.
Key Concepts of the Calendar Feature
The Calendar feature lets users display and post information about calendar items. Your portal probably includes multiple instances of the Calendar feature. Key capabilities offered by this feature include:
Manage one or more calendars within a single Calendar feature instance.
Search for related calendar items across the campus.
Easily keep track of calendar items that matter to you via My Calendar, a configurable feed that overlays your course calendars, subscriptions and personal calendar items on top of other calendars you are viewing in JICS.
Import external calendars by subscribing to them via their iCAL links.
Externally subscribe to your My Calendar feed and other JICS calendars by entering their iCAL links in a calendar application on your smart phone, tablet or PC.
A calendar is essentially a collection of calendar items. Within each instance of the Calendar feature, an authorized user can create multiple calendars. For example, a football coach might be in charge of a Calendar feature instance called Football. Within that feature instance, the coach might create two calendars—one called Varsity and one called Junior Varsity. They can be displayed simultaneously on the same calendar within the feature instance by anyone with permission to display the instance.
Further, people viewing a Calendar feature instance can display as many (or as few) of the available calendars as they want. The user can do this by clicking on the search drop-down arrow, selecting the Included Calendars checkbox, adding calendars to the field, then clicking Search. The user has done this in the following image.
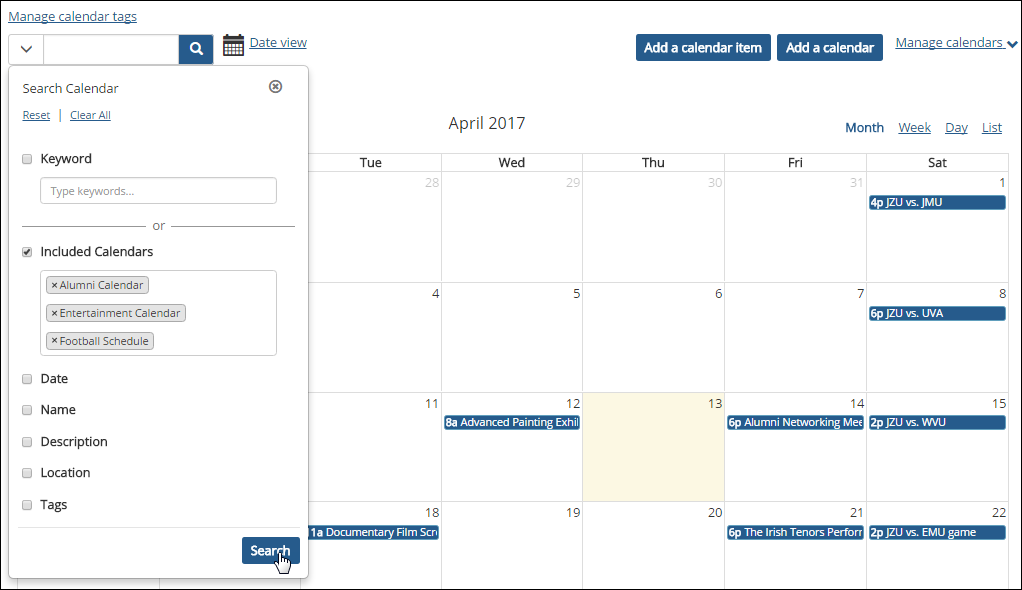 |
Feature Instance Level Subscriptions
A user charged with maintaining an instance of the Calendar feature might want the feature instance to reference calendars created in other instances of the feature or even a calendar located outside of JICS. This can be done via the Import calendar function.
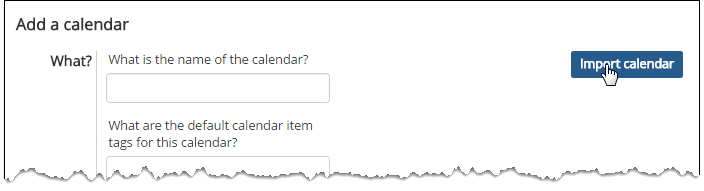 |
For example, suppose there is a Calendar feature instance called Athletics that includes a calendar titled Entertainment Calendar. The owner of the Football feature instance might want his instance to display the upcoming fundraising events shown on the Entertainment Calendar. He can make this happen by subscribing the Football feature instance to the Entertainment calendar. Subsequently, people with access to the Football instance can display the Entertainment events.
 |
Note, however, that not all calendars will be available for you to subscribe to. If a user maintaining an instance of the Calendar feature wants to make one or more of their calendars available for subscription, he or she can do so by selecting the Publish share feed checkbox when creating or editing the calendar.
Similarly, not all people have the permission to subscribe the feature instance to calendars. This is controlled by a feature-level permission called "Can Administer Calendars."
Personal Subscriptions
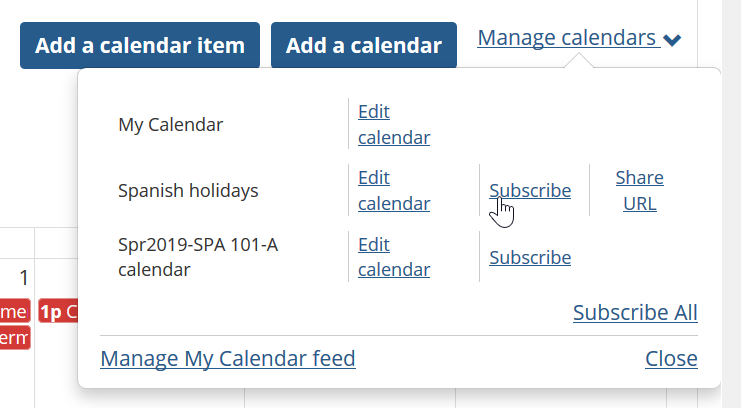
A personal subscription allows a user to add a calendar to their My Calendar feed. This is done via the Subscribe function found on the Manage calendars drop-down menu. Users may also click Subscribe All to subscribe to all calendars in the feature instance.
 |
My Calendar is a component of the Calendar feature that allows you to see your course calendars, subscriptions and personal calendar items overlaid on top of other calendars you are viewing within JICS.
The My Calendar feed includes the following items:
Schedules for your course sections.
Due dates for assignments. (You can choose to hide this from My Calendar when creating the assignment.)
Items from JICS calendars to which you have subscribed.
Items from external calendars to which you have subscribed.
Calendar items from your personal calendar (the instance of the Calendar feature found within the My Pages context).
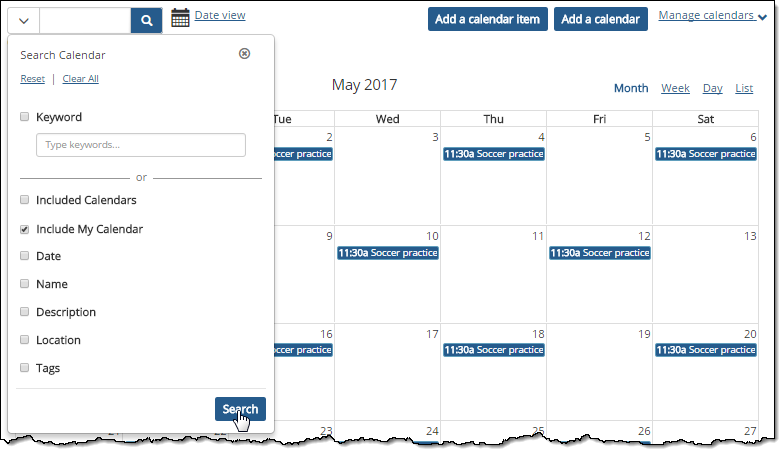
By default, My Calendar appears overlaid on top of every calendar you view in the portal. Items in your My Calendar feed are shaded red to distinguish them from the items that belong to the Calendar instance you are viewing, which are shaded blue.
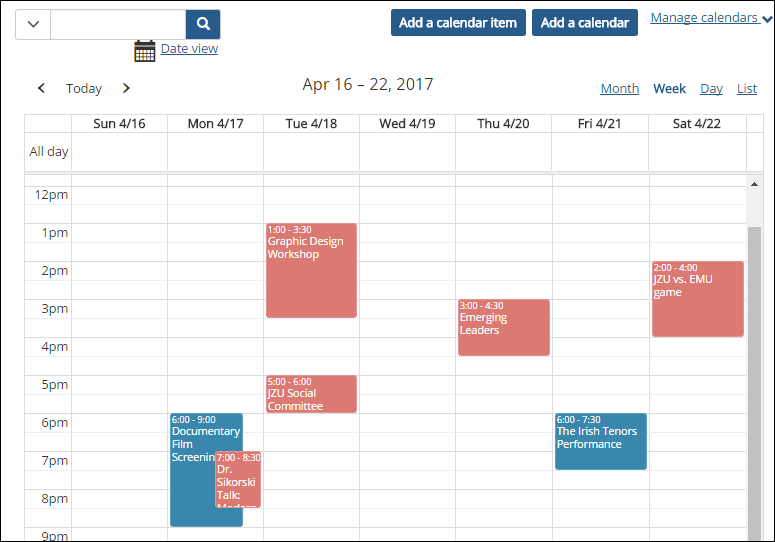 |
You can choose to hide your My Calendar feed from a particular calendar by clicking the filter function, deselecting the Include My Calendar checkbox and clicking the Search button. If you do not have the Include My Calendar checkbox on your filter, the Calendar instance you are on is set to display your My Calendar feed by default. If your My Calendar feed is showing by default and you wish to hide it, click on the filter function, select the Included Calendars checkbox, select the calendars you wish to view excluding My Calendar, and click Search.
|
When a course context is created, the system automatically creates a calendar for the course section. This calendar includes the meeting times of the course section. The calendar is hosted by the Calendar feature instance on the default page of the course context.
Further, all users associated with the course section—for example, all enrolled students and all assigned faculty members—are automatically subscribed to this calendar, which means that it will appear in their My Calendar feeds.
In most aspects, a course calendar is similar to any other calendar in the portal. Note, however, that it is not possible to delete a course calendar.
The Calendar feature has two different color schemes: items in the My Calendar feed are shaded red, and items in the calendars that make up the Calendar instance you are viewing are shaded blue.
Because both calendars are handled differently internally, there are two different approaches for changing these colors.
The colors of normal calendar items—those that belong to the Calendar instance rather than the My Calendar feed—are defined by CSS. To modify them, add the following rules to custom.css or the theme CSS, and use the desired values for the colors (default colors are shown here):
.calendar-portlet .fc-event {
border-color: #619fbd;
background-color: #3a87ad;
color: #ffffff; /* Text color of event. */
}
Note
The text color value you specify for a calendar item in the CSS will also be used for My Calendar items unless you specify a My Calendar item text color as explained in Colors of the My Calendar Text in the Manage Calendars Drop-Down.
You can modify the following colors with respect to the My Calendar feed:
The colors of My Calendar items that appear on the calendar
The color of the My Calendar text in the Manage calendars drop-down menu
Colors of My Calendar Items on the Calendar
Because the colors of calendar items from the My Calendar feed are defined programmatically, you must modify the FWK_ConfigSettings table to change them. You can do this by running the following SQL commands using different values for the colors (the default colors are shown here):
INSERT INTO FWK_ConfigSettings ([ID], [Category], [Key], [Value], [DefaultValue])
VALUES (newid(), 'Calendar', 'MyCalendarEventBorderColor', '#e2948e', '')
INSERT INTO FWK_ConfigSettings ([ID], [Category], [Key], [Value], [DefaultValue])
VALUES (newid(), 'Calendar', 'MyCalendarEventBackgroundColor', '#db7972', '')
INSERT INTO FWK_ConfigSettings ([ID], [Category], [Key], [Value], [DefaultValue])
VALUES (newid(), 'Calendar', 'MyCalendarEventTextColor', '#ffffff', '')
Colors of the My Calendar Text in the Manage Calendars Drop-Down
To sync the color of the My Calendar text in the Manage calendars drop-down menu with the calendar item background color used on the calendar, you must add the following to the custom.css file:
.calendar-portlet .enabled-calendar.my-calendar { color: #db7972;
Several permissions are granted at the feature-instance level. This section explains the available feature-level permissions.
Can Administer Calendars
The Can Administer Calendars permission allows the user to do the following:
Create calendars in this feature instance.
Edit calendars that were created in this feature instance (their names and descriptions—but not their calendar items).
Delete calendars that were created in this feature instance.
Subscribe the feature instance to a particular calendar that was created elsewhere. (This does not pertain to the user’s ability to add a personal subscription to their My Calendar feed. Users do not need a special permission for personal subscriptions.)
Though this permission is called Can Administer Calendars, it does not give users access to the admin bar and its administrative options (Access, Options, Settings, Layout and Rearrange). If you want to give a role access to the options on the admin bar, this can only be done by giving the role the Can Admin privilege for the context, which is a much bigger privilege overall (as described in the Allow a Role to Administer a Context section).
Can Administer Calendar Items
The Can Administer Calendar Items permission allows the user to do the following:
Add calendar items to existing calendars in this feature instance.
Edit and delete calendar items that belong to the calendars in this feature instance.
How To
By default, a Calendar feature instance will display in month view whenever a user opens it. As administrator, you can change this setting. Regardless of the default view that you select, users will still have access to all four views (month, week, day, and list) via the links in the upper-right area of the calendar.
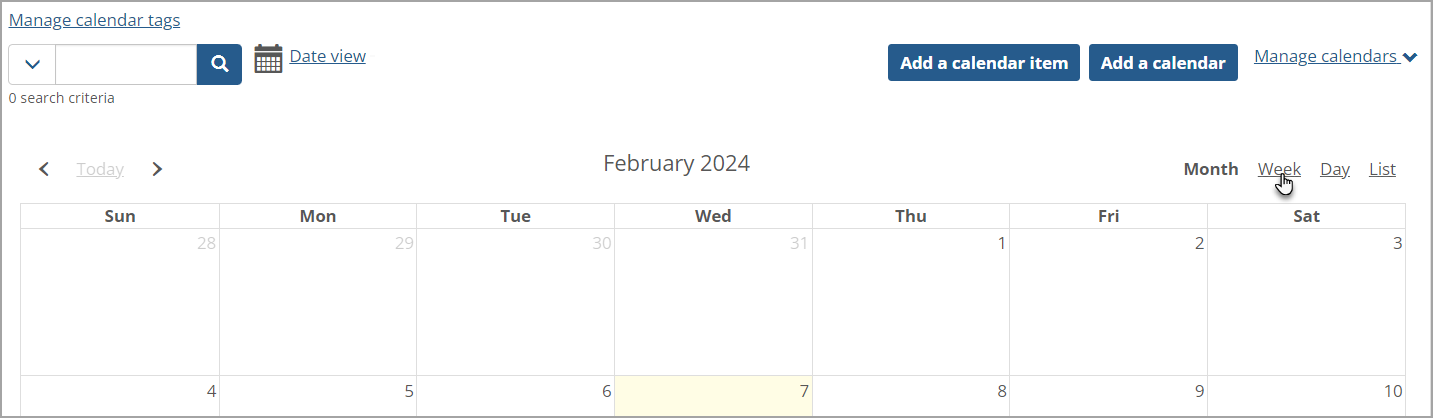 |
Log in to the portal as a member of the Administrators role or someone with Can Admin privileges in the appropriate context and navigate to the page that contains the Calendar feature instance.
Click the wrench icon in the upper-right corner of the page.
The admin bar displays.
Click the Settings link in the admin bar.
The system displays the Settings screen.
Select the Calendar feature from the drop-down list of features. (Note: If the feature is on a page of its own, this drop-down will not appear, and you can skip this step.)
The screen updates to show settings for the Calendar feature.
Under the Default View Type heading, choose one of the following options:
Month view
Week view
Day view
List view
Click Save Changes.
By default, a user’s My Calendar feed will appear overlaid on top of all other calendars in JICS. As an administrator, you can change this setting. If you choose to hide My Calendar by default, users will still be able to turn on their My Calendar feed from the Search Calendar filter.
 |
Log in to the portal as a member of the Administrators role or someone with Can Admin privileges in the appropriate context, and navigate to the page that contains the Calendar feature instance.
Click the wrench icon in the upper-right corner of the page.
The admin bar displays.
Click the Settings link in the admin bar.
The system displays the Settings screen.
Select the Calendar feature from the drop-down list of features. (Note: If the feature is on a page of its own, this drop-down will not appear, and you can skip this step.)
The screen updates to show settings for the Calendar feature.
Under the Show “My Calendar” by default heading, choose either Yes or No.
Click Save Changes.
To grant a role any of the instance-level permissions for the Calendar feature, use the following procedure.
Navigate to the appropriate feature instance.
Click the wrench icon in the upper-right corner of the page.
The admin bar displays.
Click the Access link in the admin bar.
The system displays the Access page, which lists all the roles defined for this context as well as all the global roles. Roles that have access to the page are highlighted in green. Roles that do not have access to the page are shaded gray.
Locate the role that should be allowed to post items or administer the feature instance, and take one of the following steps:
If the role is highlighted in green, this means the role already has permission to view the page. Click the role to display a dialog that lists the permissions available in each of the features found on the page.
If the role is shaded gray, this means the role does not have access to view the page. You must first grant the role access to the page before you grant permissions. To do so, click the role and then click the Hidden button to change it to Visible. Now that the role can view the page, the screen refreshes to list the permissions available in each of the features found on the page.
Under the list of permissions for the Calendar feature, click the button next to a permission to change its setting to Yes.