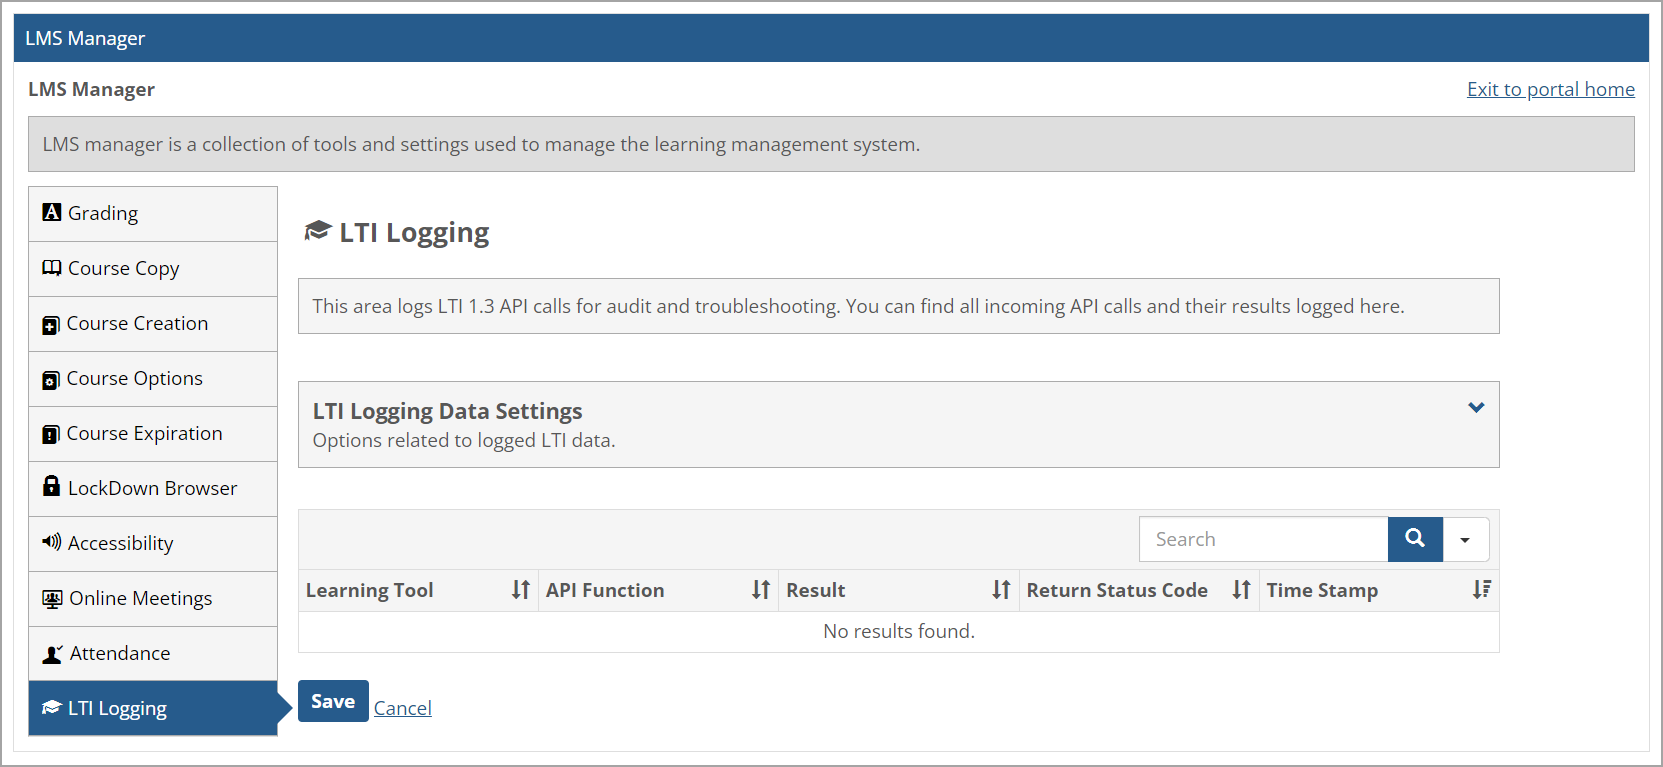
Learning Tools Interoperability (LTI) Logging Page, Data, and Setup
To assist with auditing and troubleshooting, the LTI Logging page in LMS Manager shows the results of all incoming API calls made by LTI 1.3 learning tools. The following sections explain how to work with LTI logging data and how to set up LTI for JICS and eLearning.
 |
How To
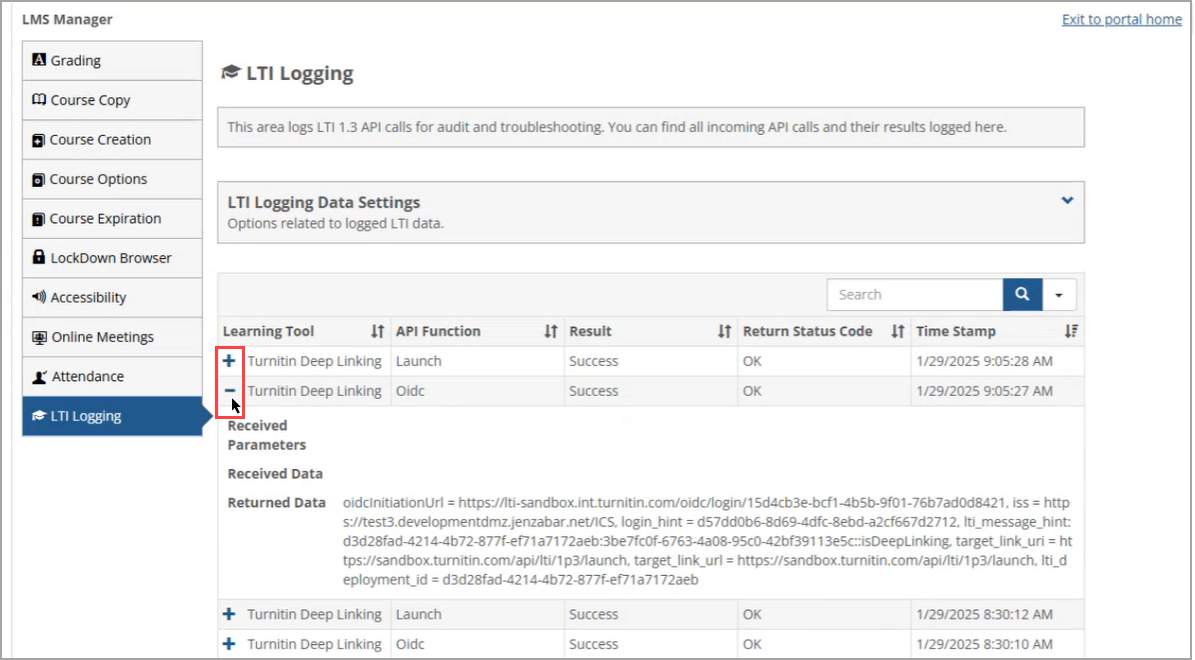
Initially, LTI logs are displayed in collapsed rows in a data table. Clicking the Plus icon (+) on the left of a collapsed row expands the data as shown below. Clicking the Minus icon (-) on the left of an expanded row collapses the data.
 |
In the Search field above the data table, you can enter a keyword and click the Search button (magnifying glass icon) or press Enter on your keyboard to search for specific data. After entering a keyword and searching for it, the Search button becomes a Reset button (X icon), which you can click to delete the keyword and enter a new one in the Search field.
To search a large number of logs, clicking the drop-down arrow on the right of the Search field provides Advanced Search capabilities. You can click the checkbox next to a column heading, such as API Function, type a keyword, and then click Search.
You can also sort the data by clicking the Sort button (up and down arrows icon) on the right of the desired column heading. Clicking the Sort button once in the column heading sorts the data in ascending order by that column, and the Sort button's right arrow in the changes to show the ascending order. Clicking the Sort button again in the same column heading sorts the data in descending order by that column, and the Sort button's right arrow changes to show the descending order.
In the following example, "Get" is used as the keyword in the API Function column, and the data is sorted by the Learning Tool column in ascending order.
 |
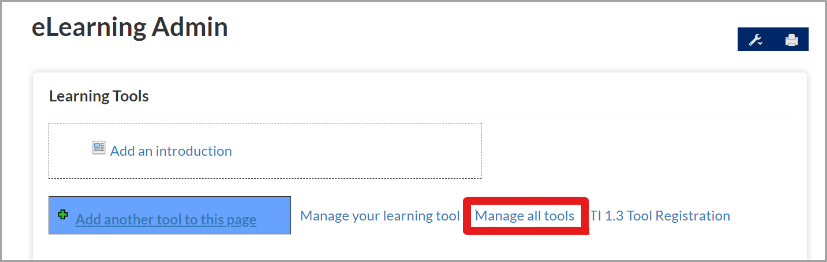
Visit the Learning Tools portlet after logging into your JICS site with administrative rights.
Notice
A typical location would be .../ICS/Admin/eLearning_Admin.jnz?portlet=Learning_Tools
Select the option to Manage all tools.
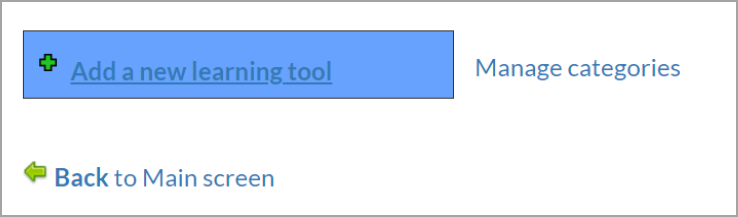
Select the option to Add a new learning tool.
Enter an appropriate name, category, and description for the tool.

Select the appropriate options for sharing the tool. If you intend to have other domain-level users access the tool, this option will save them from having to set up their own.
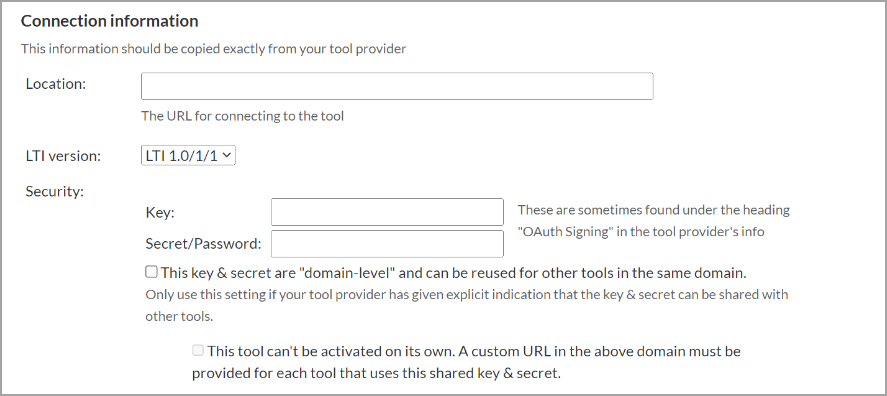
LTI 1.1
Ensure that the LTI version in the drop-down displays “LTI 1.1”.
Enter the parameters provided by the tool provider, including Location (URL), Security Key, and Secret/Password, along with other selections as directed by the tool provider.
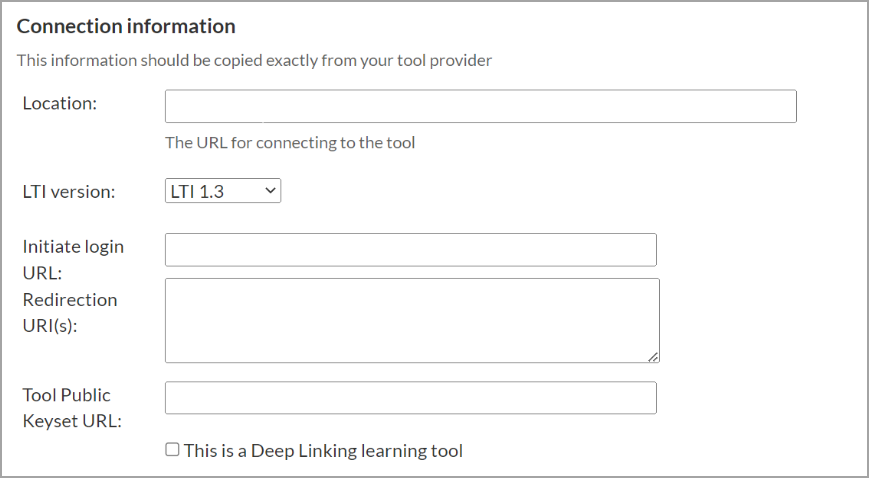
LTI 1.3
Ensure that the LTI version in the drop-down displays “LTI 1.3”.
Enter the Location URL, Login URL, Redirection URI(s), and Keyset URL.
If this is a deep linking tool, select the appropriate box.
Note
Selecting this option will limit the tool’s availability as a selection in Step Two of the assignment creation process. Otherwise, the tool will launch as a standalone tool and import as an assignment once certain parameters are entered.
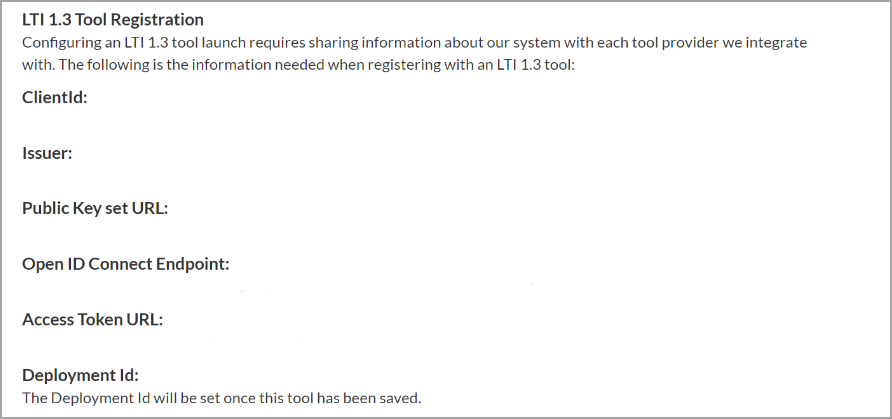
Provide the ClientID, Public Keyset URL, Open ID Connect Endpoint, and Access Token URL to the tool provider.
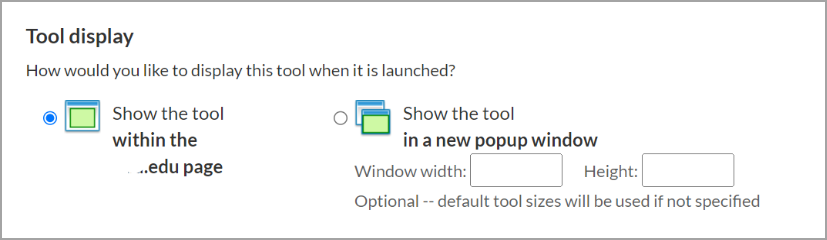
Select the default display option for the tool.
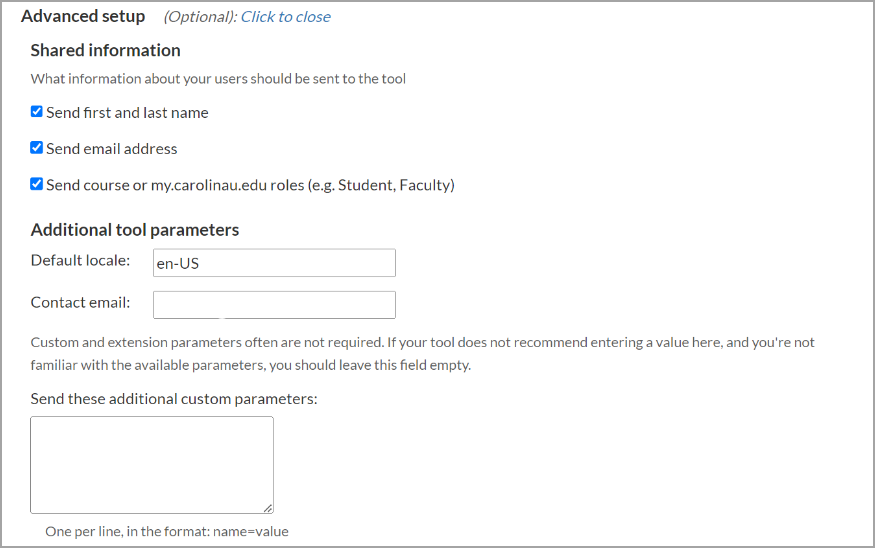
If applicable, provide advanced setup information (optional).
Click Save your new tool.
Clicking the LTI Logging Data Settings drop-down arrow on the right displays options related to logged LTI data. LTI Logging data can be automatically deleted from the system if it was timestamped a certain number of days in the past. The number must be 180 days or higher. If you enter nothing at all, or the number zero, then LTI data logs will never be automatically deleted.
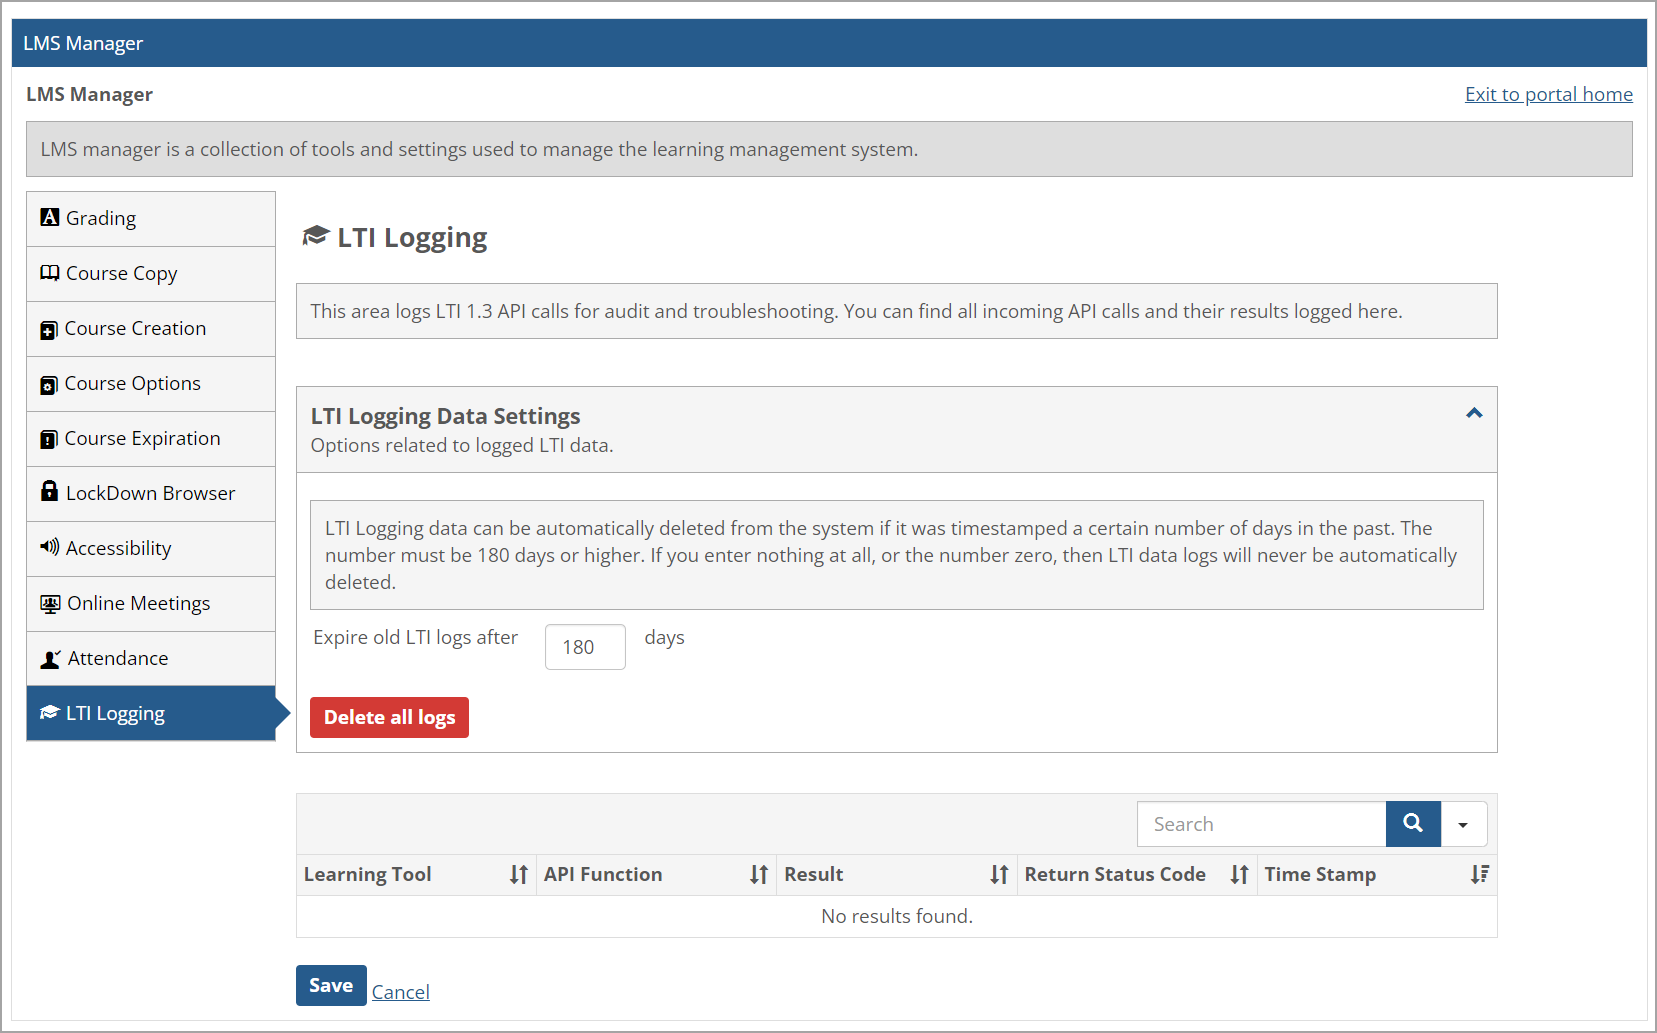 |
To expire old LTI logs after a certain number of days, enter the number of days, such as 180. The number must be 180 or higher. Then click Save.
To delete all logs, click Delete all logs. A confirmation popup message displays, and you can click OK to confirm deletion or Cancel to cancel it.