Email Settings
Microsoft Graph Option for Email in Framework Settings
The Framework settings page provides a Microsoft Graph option for email. You can access it by selecting the Email option on the top drop-down list to display the Implementation field. Clicking this field's drop-down arrow displays the Simple Auth (default) and Microsoft Graph options. The Microsoft Graph option is selected in the following image.
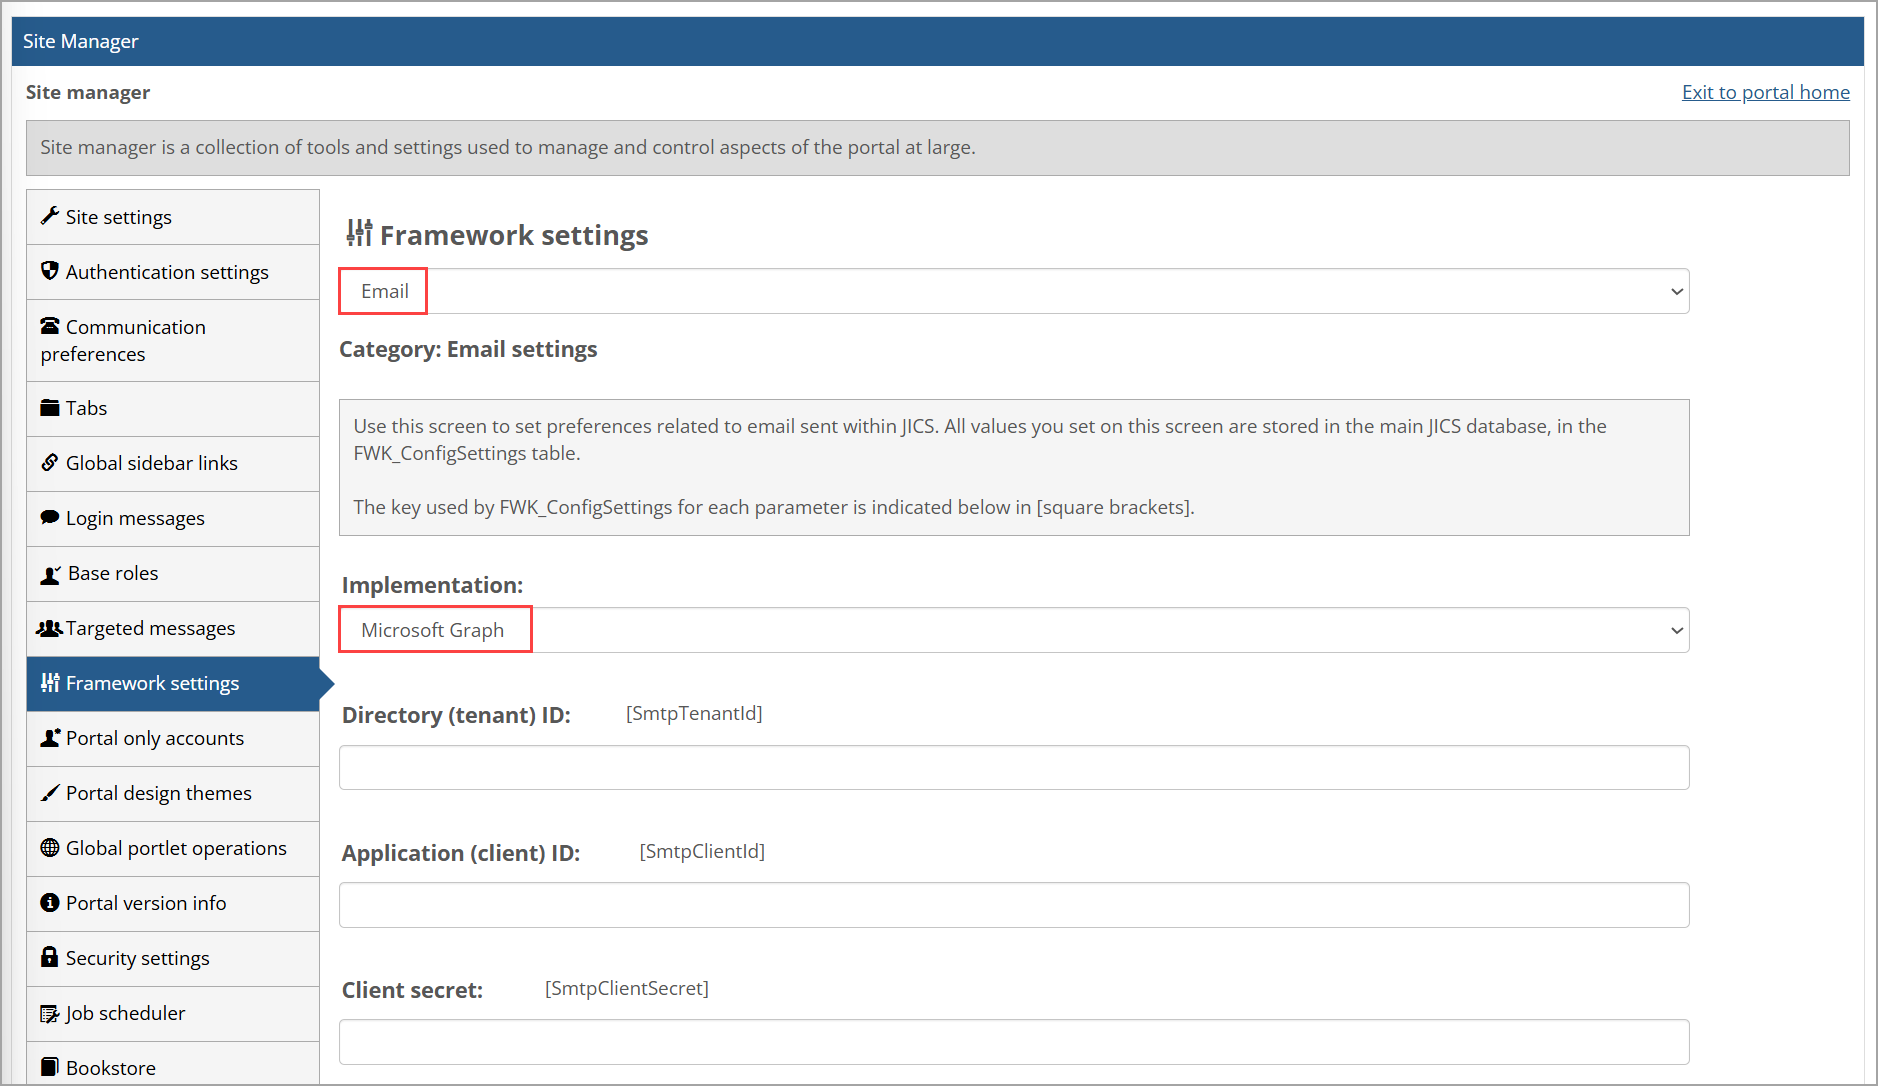 |
Simple Auth is a lightweight authentication method that uses a username and password login with minimal setup. Microsoft Graph is part of MS Office 365, and an application can use it to read or manage data from MS Outlook/Exchange and other MS applications. If the Microsoft Graph option is selected, the screen elements will change in these ways:
The SMTP password field and its description are no longer shown.
Three new required fields are shown, and each field has a maximum of 100 characters:
Directory (tenant) ID [SmtpTenantId] with its associated text box
Application (client) ID [SmtpClientId] with its associated text box
Client secret [SmtpClientSecret] with its associated text box
If any of these three fields are left blank and you click the Save button at the bottom of the page, then an error message appears at the top stating, "We couldn't save the settings with the information you used. Please look for any highlighted fields or error messages below, fix the issues, and try saving again." Another message appears above the fields that states: "Please enter the Directory (tenant) ID, Application (client) ID, and Client secret." If you configure a server to use the new Microsoft Graph SMTP Email setting, then emails will be sent using that server.
How To
As an administrator, you manage the email types available for selection when users are adding or editing emails in the My profile and settings feature. (For more information, see the Email Addresses section.)
Log in to the portal as someone with administrative privileges.
Click the user icon and select Site Manager from the drop-down menu.
The system displays the Site Manager screen, with the Site settings tab selected.
Click the Communication preferences tab.
The Communication preferences screen displays.
Click Add email type.
The Add email type screen displays.
Enter a name and description for the email type.
Click Save.
The Primary email label setting in Site Manager > Framework Settings > Email allows you to customize the label used in user profiles for the primary email address imported from the ERP system.
Do one of the following:
Set the value using Site Manager, as follows:
Log in to JICS as someone with administrative privileges.
Click the user icon and select Site Manager from the drop-down menu.
The system displays the Site Manager screen, with the Site settings tab selected.
Click the Framework settings tab.
Select Email from the drop-down list at the top of the screen.
In the Primary email label field, enter the label you would like to use.
Use SQL Server Management Studio to update the setting in the FWK_ConfigSettings table. The key is PrimaryEmailLabel.
The Emails per batch setting allows you to specify the maximum number of emails that will be sent at one time by the Scheduled Email Job. This setting is found in Site Manager at Framework settings > Email.
The acceptable range of values is 1 to 1000. If you do not specify a value, the default value of 30 will apply.
You can also modify this setting by using SQL Server Management Studio to edit the EmailsPerBatch field in the FWK_ConfigSettings table.
Do one of the following:
Set the value using Site Manager, as follows:
Log in to JICS as someone with administrative privileges.
Click the user icon and select Site Manager from the drop-down menu.
The system displays the Site Manager screen, with the Site settings tab selected.
Click the Framework settings tab.
Select Email from the drop-down list at the top of the screen.
In the Emails per batch field near the bottom of the screen, enter the maximum number of emails that will be sent at one time.
Click Save.
Use SQL Server Management Studio to update the setting in the FWK_ConfigSettings table. The key is PrimaryEmailLabel.