Working with Sets
Sets are like categories into which you can group similar readings. By default, each instance of the Required Reading feature has one set called Ungrouped. By default, a new reading will be placed into this set, but you can create and populate additional sets.
Note that by default the system will not display an empty set unless the user chooses to display it manually. So if you add a set and don’t see it, you probably have your preferences set to hide empty sets. To display empty sets, follow the steps described in Display Empty Sets.
How To
You can add as many sets as is appropriate for your course. Note that a set is used only by the instance where you create it. If you have multiple instances of the Required Reading feature, you create different sets for each one.
Navigate to the appropriate feature instance and maximize it.
Select Manage > Add set. (Note: If you do not see this link, select Manage > Show Editing Tools to display the editing tools.)
The system displays the Required Reading - Manage Set View screen.
In the Name field, enter a name for the set.
If appropriate, enter text in the Description field. The description can be no more than 2,000 characters. This text will be displayed in main feature view both when the feature is maximized and when it is not.
Use the Position drop-down list to specify where the set should be placed in relation to other sets. Note that the choice you make at this juncture will not be seen by students who choose to display sets in alphabetical order, as described in Order Sets Alphabetically.
Do one of the following:
To finish, click Save.
To save and start creating another set, click Save and add another.
At any time after you create a set, you can do any of the following:
Change its name.
Change its description.
Change the position of set relative to other sets. (Note that the sequence will not be seen by students who choose to display sets in alphabetical order, as described in Order Sets Alphabetically.)
Reorder the readings within the set. (Note that the sequence will not be seen by students who choose to display sets in alphabetical order, as described in Order Sets Alphabetically.)
Delete a reading.
Move or copy a reading to a different set.
To modify a set:
Navigate to the appropriate feature instance and maximize it.
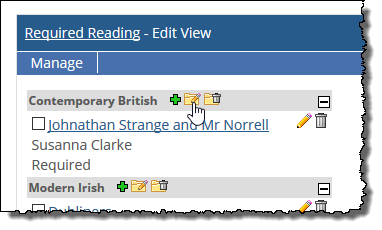
Locate the set that you want to modify and click the corresponding Edit icon, which looks like a folder with a pencil on it. (Note: If you do not see this icon, select Manage > Show Editing Tools to display the editing tools.)
The system displays the Required Reading - Manage Set View screen.
Do any of the following, as appropriate.
Modify the text in the Name and Description fields.
Change the value in the Position drop-down list. This will change the position of the set relative to other sets, for those users who are not displaying the sets alphabetically.
Use the list at the bottom of the screen to reorder the readings in the set. Doing this will change the order for those people who are not displaying the readings alphabetically.
If you want to delete any reading, click the trash icon that corresponds with that reading.
If you want to move or copy a reading from this set to another, choose Move or Copy from the last drop-down list on the screen. In the corresponding drop-down list at the right, select the set to which the reading should be copied or moved.
Click Save.
This option allows you to place sets in a specific order. Note, however, that any sequence you create using this technique will not be seen by students who choose to display sets in alphabetical order, as described in Order Sets Alphabetically.
Navigate to the appropriate feature instance and maximize it.
Select Manage > Order sets.
The system displays the Required Reading - Order Sets View screen.
Use the text boxes at the left to specify the desired order of the sets.
Click Save.
When you delete a set, you also delete all of its readings. If you definitely want to delete a set and its readings, use the procedure below.
Navigate to the appropriate feature instance and maximize it.
Locate the set you want to delete and click the corresponding delete icon, which looks like a folder with a trash can on it. (Note: If you do not see this icon, select Manage > Show Editing Tools to display the editing tools.)
The system generates a dialog asking if you are sure you want to delete the set.
Click OK.
The system removes the set and its readings.