Managing Authentication
This chapter describes how to manage authentication.
Note
Several portions of this chapter reference the DIS, or Data Import Service. The DIS is a utility that brings details into JICS from the ERP system. For more details, see the Working with the DIS section.
In JICS Release 2024.1, password requirements were strengthened to make passwords more secure for the JICS authentication process. Passwords are required to meet length and composition standards. Passwords that do not meet the requirements cannot be saved.
On a new JICS installation:
The default minimum password length will be 8 characters.
The default maximum password length will be 100 characters.
On upgrades to JICS:
If the minimum password length is set to anything less than 8 characters, then it will be set to 8.
If the maximum password length is set to anything less than 100, then it will be set to 100.
On all JICS installs (including new installations and upgrades) and when a user changes their password:
Trying to set a password that contains the word "password" anywhere within it (including any type of capitalization) will result in a validation failure and the following error message: "The password cannot contain the word "password" in any form." For example, a password of "123PaSsWoRd123" would never be allowed.
Trying to set a password that contains the current user's username anywhere within it (including any type of capitalization) will result in a validation failure and the following error message: "The password cannot contain your username in any form." For example, for a user with the username "ajones", a password of "123aJoNeS123" would not be allowed.
Trying to set a password that does not meet the requirements in another way, such as entering only 7 characters, will result in a validation failure and the following error message: "The password you entered does not meet requirements."
Note
Along with the requirements above, all existing password validations continue to be in effect. These validation standards are all cumulative.
Changing these requirements did NOT affect any previously entered passwords and will only trigger validation when you enter or change existing users' passwords.
Authentication settings are located in Site Manager on the Authentication Settings page. In the Manage Authentication Methods section, each authentication method consists of a fully configured authentication type (SAML, LDAP/Active Directory, or internal) as well as a name, description, and a set of base roles to which the method applies. This page also provides settings related to the portal's default login behavior.
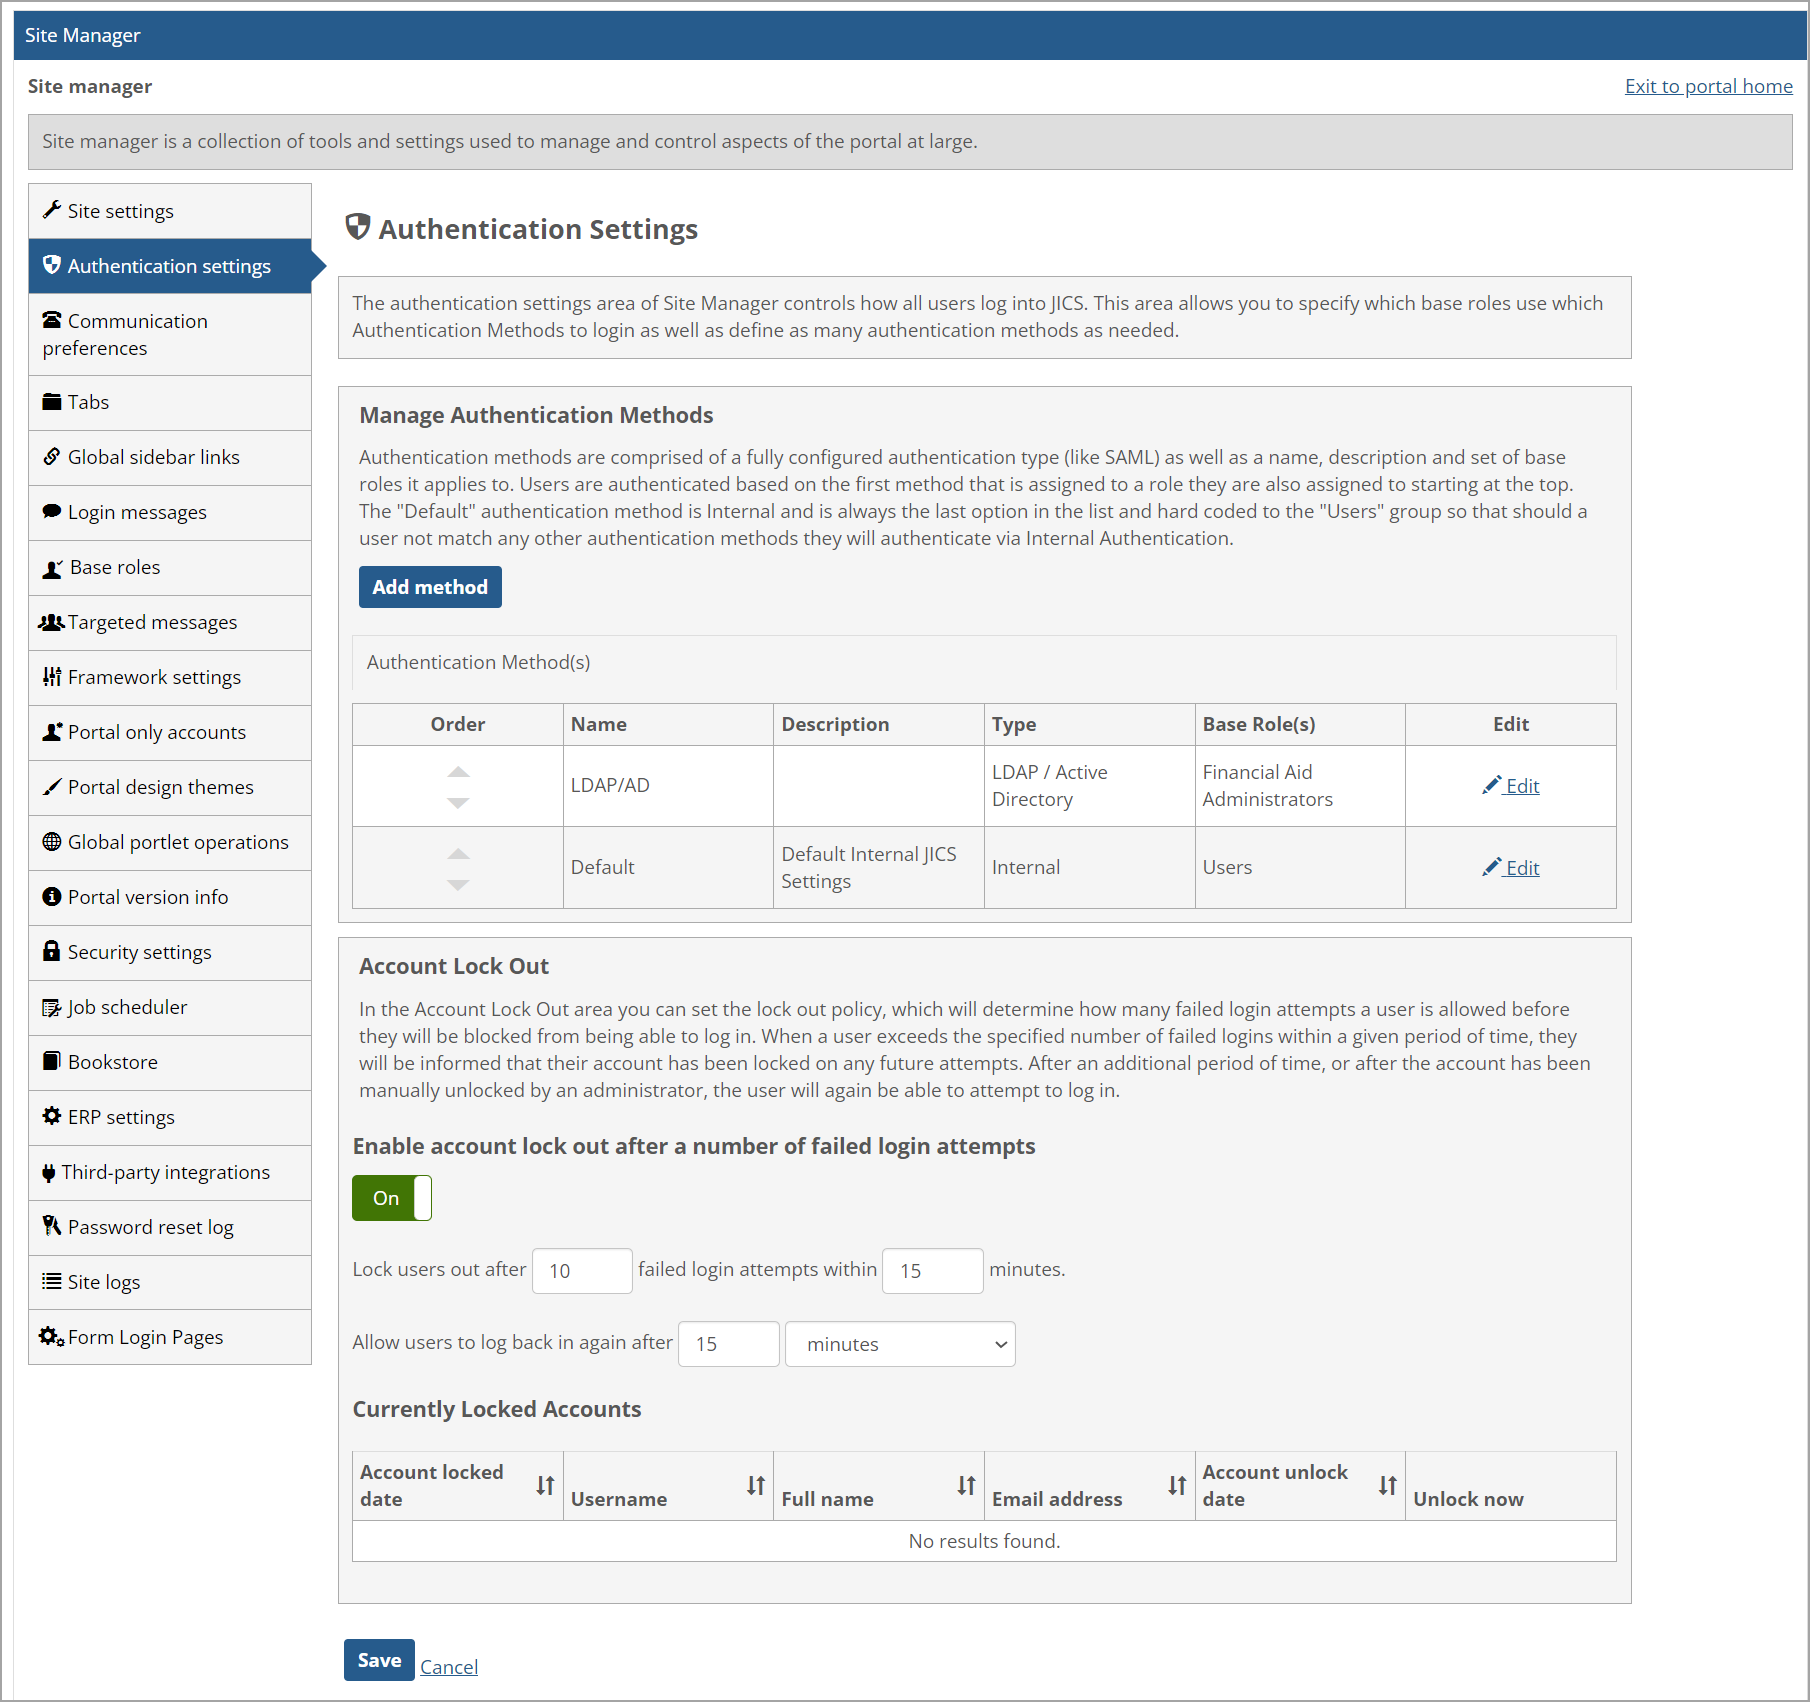 |
On the Authentication Settings page, you can define multiple authentication methods, each of which can be assigned to one or more base roles. When attempting to authenticate a user, JICS will look at the methods in the list one by one starting at the top. If it finds a method that is assigned to the base role to which the user belongs, it will attempt to authenticate using that method. If a method has not been configured for the user’s base role, JICS will attempt to authenticate using the internal authentication method, which will always be at the bottom of the list.
If you have set up one or more SAML authentication methods, the Default Login Display setting also affects how the user is authenticated. For more information, see the Default Login Display for SAML Authentication section.
On the Authentication Settings page in Site Manager, a site administrator can edit the "Default" authentication method in the Manage Authentication Methods section. To correspond to the more secure password standards that require a minimum of 8 characters and a maximum of 100 characters that were introduced in JICS Release 2024.1, when the site administrator saves the settings, the following validations occur:
If the Minimum Password Length value is less than 8, a validation message displays under the text box stating, "The minimum password length must be at least 8 characters."
If the Maximum Password Length value is less than 100, a validation message displays under the text box stating, "The maximum password length must be at least 100 characters."
Internal Authentication
Internal authentication is the usual method of logging in the user with their password via the AD LDS data store. This method is set up in JICS by default and assigned to all users. It will remain at the bottom of the list to serve as the “catch-all” method to be used when all others have been ruled out. This method cannot be deleted or reordered. For more details, see the Configuring the Internal Authentication Method section.
With internal authentication, each time a user logs in to JICS, the system uses AD LDS or ADAM to verify their username and password. After the user successfully authenticates, whenever they take an action that requires a certain privilege, the system consults AD LDS or ADAM to find out if the user has that privilege.
SAML
With SAML authentication, each time a user logs in to JICS, the system passes their details to the SAML identity provider for authentication. If the user entered a valid username and password, the identity provider communicates back to JICS that the user’s credentials are valid. After that, whenever the user takes an action that requires a certain privilege, the system consults AD LDS or ADAM to find out if the user has that privilege.
LDAP and Active Directory
When setting up an LDAP or Active Directory authentication method, you can define multiple servers for the method and specify how to look up users within each data store. When attempting to authenticate a user, JICS will try to log the user in to each server in order until one is successful. If JICS is unable to log the user in to any of the servers, authentication fails.
With LDAP and Active Directory authentication, each time a user logs in to JICS, the system passes the details provided by the user to the first external server in the server list. If authentication is not successful, JICS passes the user’s details to the next server in the list, and so on. If the user successfully authenticates on one of the servers, the server communicates back to JICS that the user’s credentials are valid. After that, whenever the user takes an action that requires a certain privilege, the system consults AD LDS or ADAM to find out if the user has that privilege.
Tip
When JICS is configured to use an Active Directory/LDAP server for external authentication in Site Manager, and that external server is Windows Server 2025, then the external server is required to have SSL certificates configured. The URL pointing to that server from JICS must include the port number.
Regardless of the authentication type, the JICS instance of AD LDS (or ADAM) always stores important data about each user, as described below.
Details about User Privileges
AD LDS or ADAM stores details about each user’s privileges, including the following:
Each user’s role assignments. In ADSI Edit, these can be viewed by looking at the memberOf property for the user.
The privileges that each role (and therefore each user) has in regard to working with pages and features. Essentially, AD LDS or ADAM stores details about all global feature operations and all privileges assigned through Context Manager or the Access screen. Note, however, that these details cannot actually be viewed in ADSI Edit.
Retrieval of this information is an important part of the login process, as it determines exactly how the individual can use the portal.
Note
Many types of feature-instance-level privileges are stored in the main JICS database and are retrieved only when the user navigates to that feature instance. This includes those permissions set through a menu other than the Access screen—for example, the ability to moderate a topic in a Forums feature instance or the ability to view a particular announcement in the Announcements feature.
Hashed Password Values
Even if AD LDS or ADAM is not used to authenticate users, for each individual it still stores a password—or more precisely, a hashed value derived from the user’s password, as follows:
If the individual is an ERP user, the hashed value is created when the individual’s username and password are imported from the ERP system by the DIS (Data Import Service).
If the individual is a portal-only user, the hashed value is created when the user account is created (or modified) using the Site Manager > Portal only accounts screen.
With internal authentication, each time a user logs in, the system takes the password the user enters, calculates the same type of hash value, and compares that with what is stored.
Note that because these hashed password values are stored for all users, if you ever change a base role’s authentication method from some form of external authentication to internal authentication, the system can begin authenticating those users immediately.
This section describes authentication features that are optional.
If desired, you can allow users to log in by entering email addresses (the email address they have stored in JICS) instead of their usernames. For more information, see Allow Users to Log in with Their Email Addresses.
If desired, you can configure the system to use JICS as a SAML 2.0 identity provider to which other systems can authenticate. (This setting does not apply to users who are authenticated via SAML.) This is described in Using JICS as a SAML Provider.
JICS allows you to enable two-factor authentication via integration with the third-party tool Duo. You can also configure a custom two-factor authentication method. For more information, see Two-Factor Authentication.
JICS allows multiple connections simultaneously with the same authenticated user account. Prior to the JICS 2024.2 Release, the user would not be notified when a concurrent user login occurred. With the JICS 2024.2 Release, when a login occurs, and a user is already logged in with that username, a warning message pop-up is shown:
"Your username has been used to authenticate in another browser. If you are not responsible for this login, your account may be compromised! Contact an administrator for assistance."
If desired, a hidden configuration setting (not shown in the user interface) can be set manually in the ICS_NET database to disable the "Concurrent User Login" warning message for all users. (This message is explained in the "Warning Message Shown When Concurrent User Login Occurs" subsection above.)
The following SQL code can be run by a site administrator on the ICS_NET database to disable the message. Otherwise, the message will be enabled by default.
INSERT INTO FWK_ConfigSettings VALUES (NEWID(), 'Security', 'DisableConcurrentLoginMessage', 'true', 'false')