Understanding the Main Views
The default view of the feature will vary depending on the permissions of the user. This section describes the general views that are typical for people with no permissions contrasted with those seen by administrators.
Views for Users with No Permissions
For a user with no permission in the Learning Tools feature, the main view of the feature typically will include the following:
The feature introduction, if one has been created.
A link (or links) for launching the tool(s) that have been activated in the feature instance. (Note that this can vary slightly—for example, if the feature includes only one active tool, it can be set up to launch automatically when the feature is maximized, without the user having to click a link.)
In the default view of the feature, which you see when the feature is not maximized, each tool will be represented by its name, a link that the user can click to launch the tool and, optionally, a description.
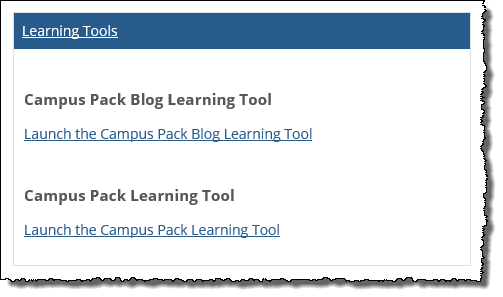 |
With this setup, each tool can be configured so that the tool opens in one of the two following ways:
Within the feature window
Within a separate pop-up window
In general, the maximized view of the feature is the same as the default view, although you have one additional choice: If there is only one tool in the feature instance, you can configure it to automatically load in the feature window as soon as the feature is maximized. With this setup, the user doesn’t have to click a link—the user only has to maximize the window.
This behavior occurs when the following are true:
There is only one tool in the feature instance.
The tool is configured to launch within the feature window (not within a pop-up window).
This section describes the general view that a member of the Administrators role will see. The administrative view will show the same content as the view for users without any privileges (that is, it will show any active tools that exist and the introduction, if one has been created). But, more important, the administrative view will show various links that take you to screens that let you add, activate and manage tools.
Typically, these links are placed above any active tools that have been made available.
 |
If the feature is maximized and configured to launch a tool automatically, then the feature window will show whatever content the tool contains—and the links move to an action bar (shown below) that is displayed across the top of the window. Note that in this case, the link for working with an introduction is not included because it’s not possible to show an introduction when a tool is configured to launch automatically.
 |
The links that show up in the default view, and their destinations, are summarized below.
The Add an introduction link lets you add introductory text and images that might be helpful to students or other users who will visit the feature. If an introduction already exists, the link changes to Edit this introduction. Introductions are described in more detail in Working with an Introduction.
The Add an introduction/Edit this introduction link displays only if the user has the instance-specific Can Set Up Tools permission.
The link labeled Add a tool to this page (or Add another tool to this page) takes you to the activation screen, where you can easily activate an existing tool. This screen is described more fully in the About the Activation Screen section.
The Add a/another tool to this page link is shown only if the user has the instance-specific Can Set Up Tools permission.
The Manage your learning tools link takes you to a screen that lists all tools that you personally have configured. From here you can click the name of any tool to display a screen that summarizes the tool’s details and offers more options. (This summary screen is described in The Tool Summary Screen.)
The Manage your learning tools link is shown only if the user has either the Can Add Tools or the Can Manage All Tools global feature operation.
The Manage all tools link takes you to a screen that lists all of the tools that exist in the system, in a grid view that shows the creator of each tool, its category, the number of places where it is active and the date it was created. This screen, which is labeled All learning tools, also flags each tool with an icon that indicates how the tool may be used. These icons are described in the following table.
Icon | Indicates that the tool ... | |
|---|---|---|
| Exists solely for the use of the person who created it. | |
| Has been shared and is available for activation by anyone with the Can Set Up Tools permission. | |
| Has been featured and is available for activation by anyone with the Can Set Up Tools permission. |


From here you can click the name of any tool to display a screen that summarizes the tool’s details and offers more options (this summary screen is described in The Tool Summary Screen). You can also open an administrative screen that les you create and modify categories (these tasks are described more in Working with Categories).
The Manage All Tools link is shown only if the user has the Can Manage All Tools permission.
If active tools exist, you will see a link labeled Activation settings next to each tool. This link takes you to a screen that lets you modify the tool’s activation settings for this placement of the tool. For details on activation settings, see the About the Activation Settings section.
The Activation settings link is shown only if the user has the instance-specific Can Set Up Tools permission.
If active tools exist, you will see a link labeled Remove this tool next to each tool. Clicking this link lets you deactivate the tool, making it unavailable for use in the feature instance.
The Remove this tool link is shown only if the user has the instance-specific Can Set Up Tools permission.
Other Administrative Screens
This section lists other screens that you will come across as you delve deeper into the feature.
For every tool in the system, there is a summary screen that lets authorized users review the values that were saved in the tool’s basic settings, along with a link for previewing the tool. Depending on the permissions of the user, links may display that allow the tool to be edited or deleted. These two links will also be shown to the creator of the tool. They are also shown only if the user has the Can Manage All Tools global feature operation.
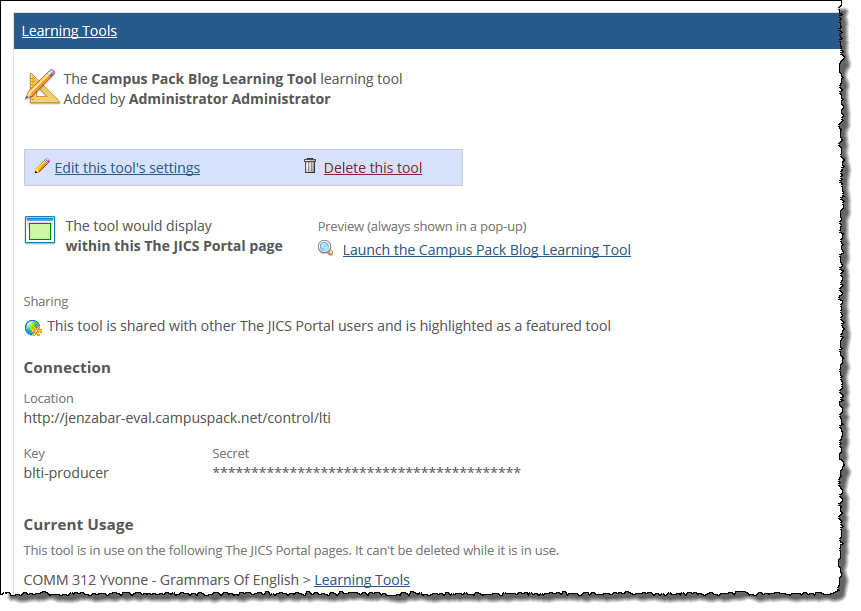 |
You can get to this screen in a few different ways.
To navigate to a tool’s summary screen using the activation screen:
Navigate to any instance of the Learning Tools feature.
On the main feature view, click Add a tool to this page or Add another tool to this page, whichever is available.
On the next screen, which is the activation screen, hover your pointer over the appropriate tool.
A More details link appears.
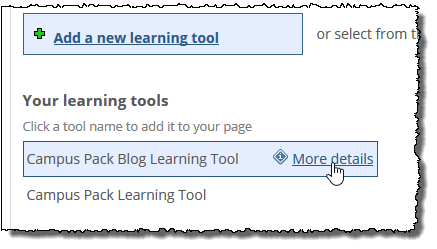
Click the More details link.
The system displays the summary screen for the tool you chose.
To navigate using the "Manage your learning tools" or "Manage all tools" link:
Navigate to any instance of the Learning Tools feature.
On the main feature view, do one of the following:
Click Manage your learning tools (to display tools that you personally have added).
Click Manage all tools (to display a list of all tools in the system). The system displays the appropriate screen.
Click the name of the tool.
The system displays the summary screen for the tool you chose.
When you add a tool or edit an existing tool, you view a screen that lets you modify the tool’s basic settings. These processes and settings are described in the Adding and Maintaining Tools section.