Site Manager Overview
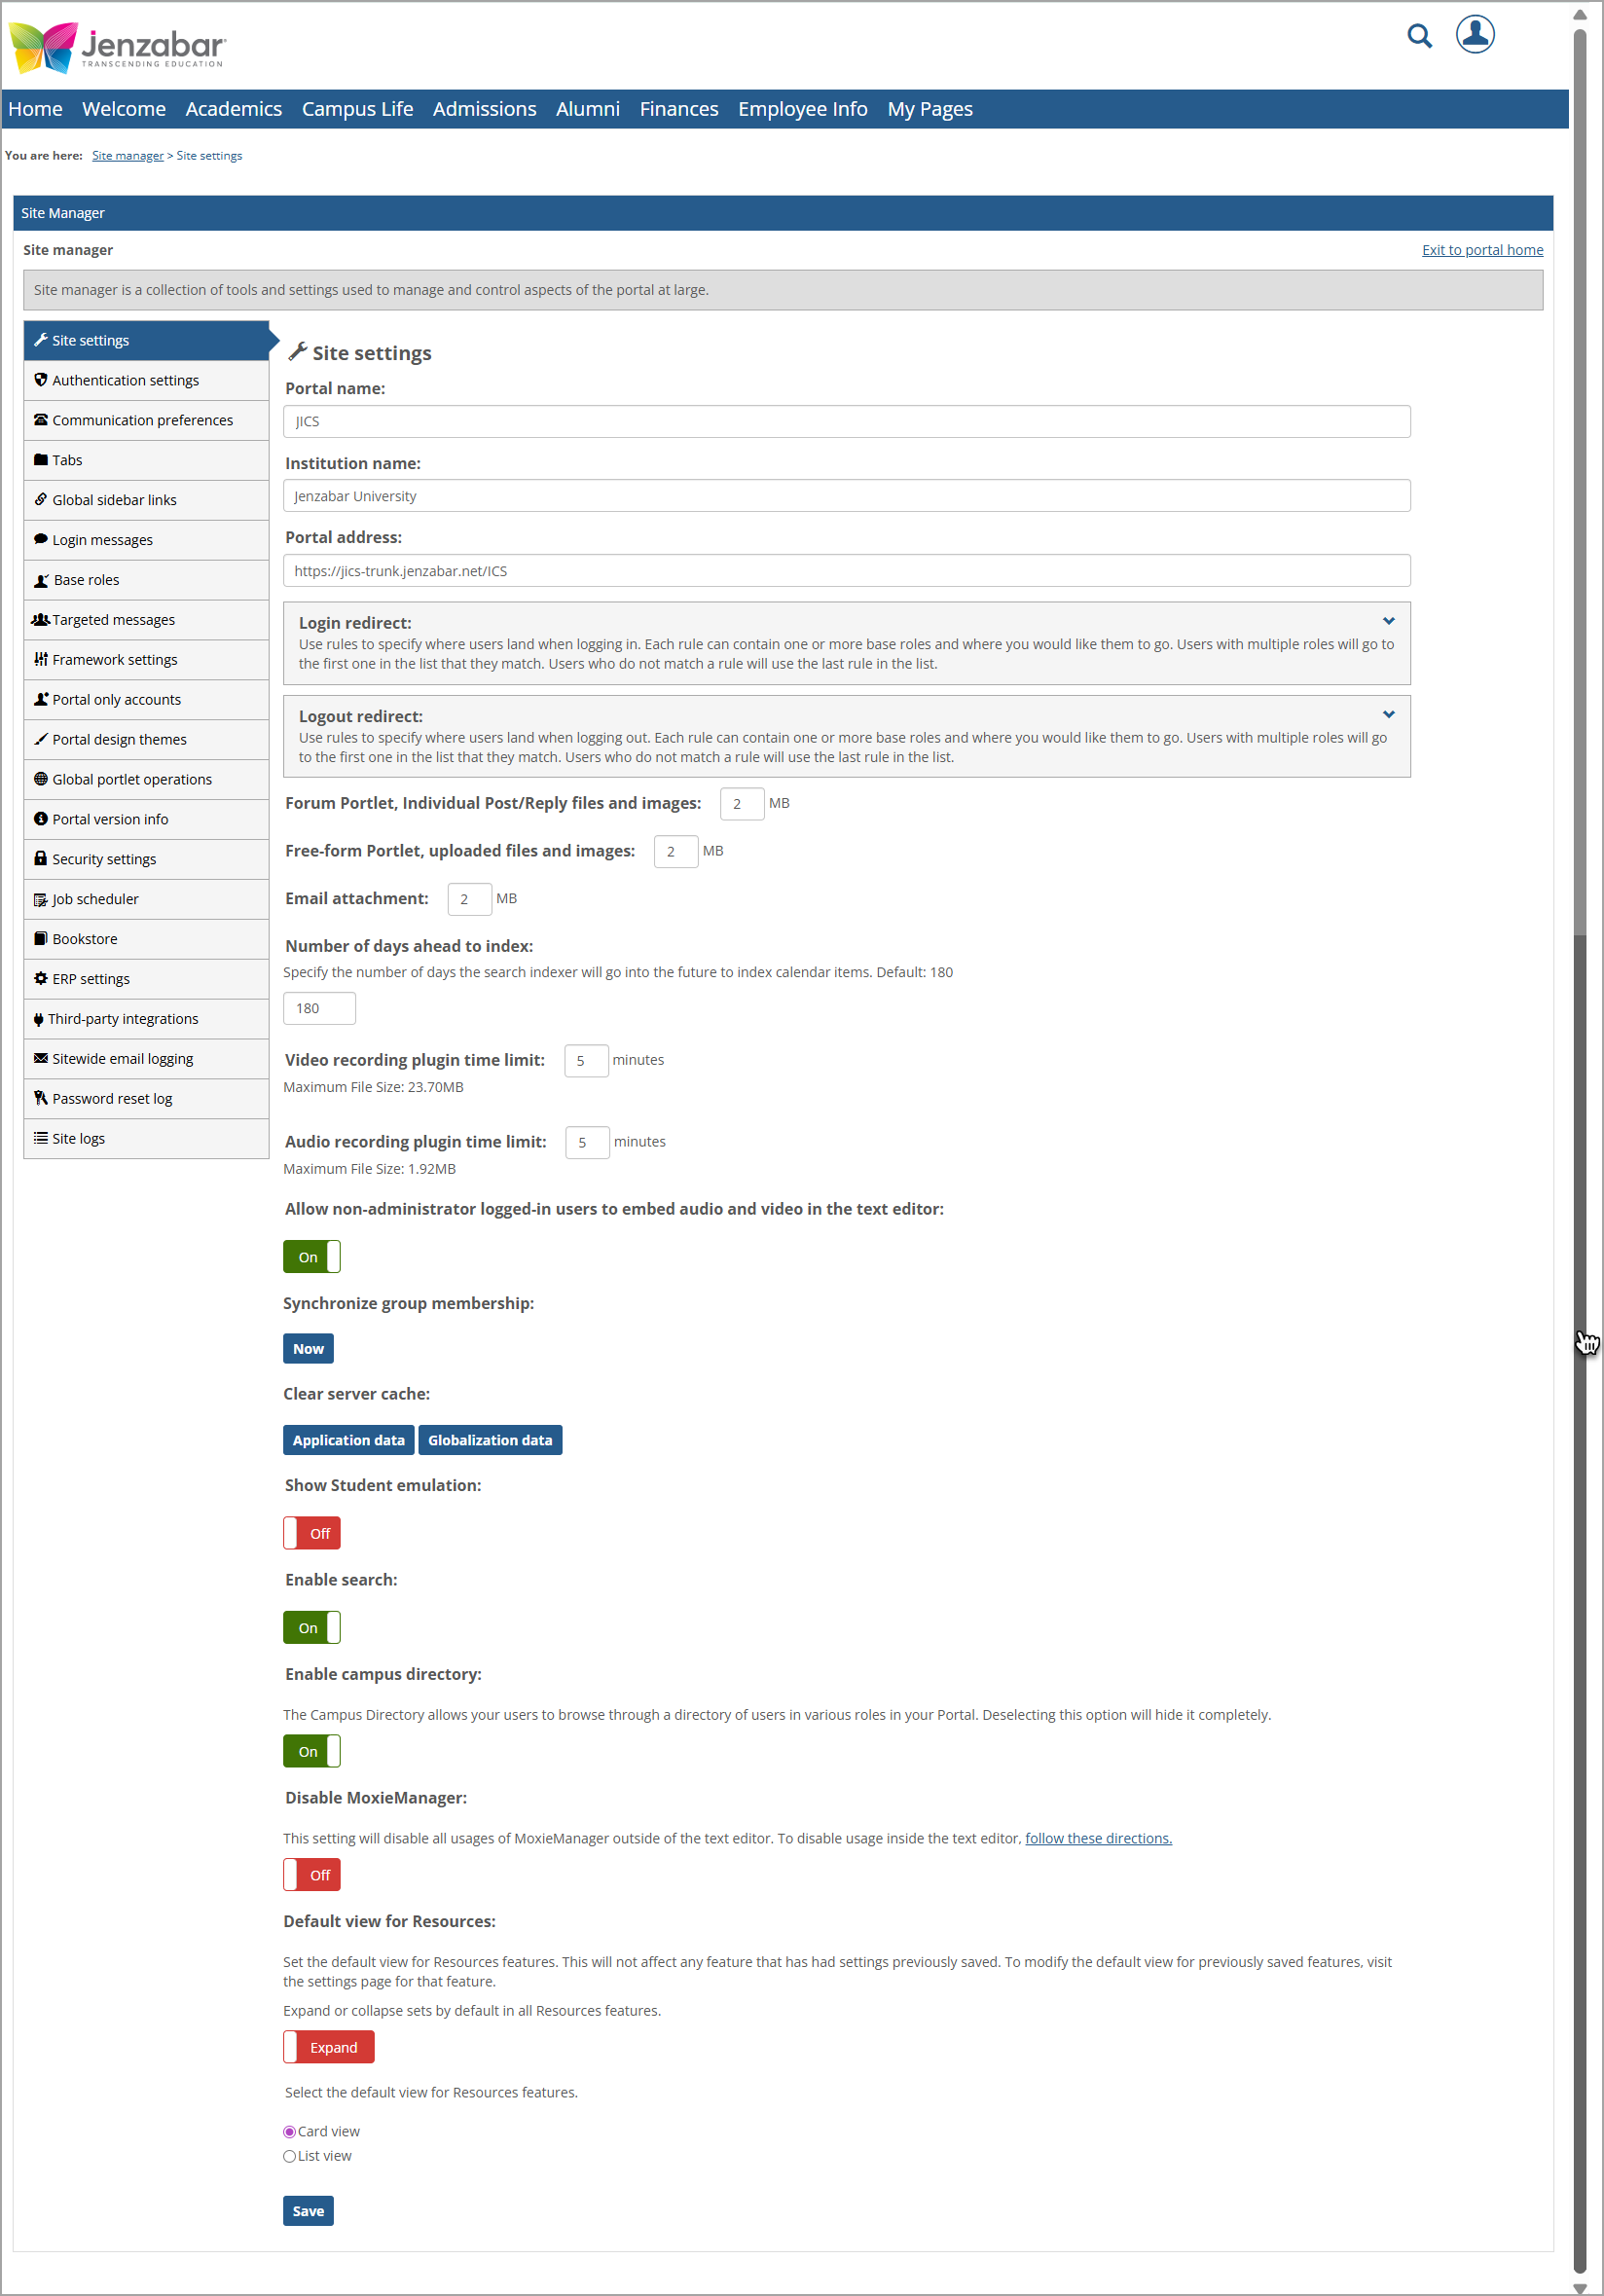
Site Manager is a collection of tools and settings used to manage and control aspects of the JICS portal at large. Administrators access this feature by logging in, clicking the user icon on the top right, and selecting Site Manager. Initially, the Site Manager page displays the Site settings screen and various sidebar options on the left. Scrolling down the screen shows the different settings for the site. The source of information for this topic is the JICS 2025.1 Admin Guide.
 |
The following table briefly explains the options in the left sidebar of the Site Manager page. Click the applicable link in the Description column to learn more details about a specific sidebar option.
Sidebar Option | Description |
|---|---|
Site settings | Controls various aspects of the site, such as portal name and address; institution name; login and logout redirects; file and image size restrictions for Forum and Free-form Portlets (such as 2 MB); etc. For more details, refer to Naming Your Portal and Managing Sitewide Content, Select the Pages Displayed upon Login and Logout, or search for the applicable portlet or feature information in the Admin Guide. |
Authentication settings | Controls how all users log into JICS. This area allows you to specify which base roles use which Authentication Methods to login as well as define as many authentication methods as needed. For more details, refer to Managing Authentication. |
Communication preferences | User's phone numbers and email addresses can be sorted into types. You can manage those types and the ability for your users to manage their own phone numbers and email addresses here. Desktop notifications can be enabled and a default push icon can be added in this screen. For more details, refer to Managing Communications. |
Tabs | The tabs that display across the top of the site and their order. The Home, Academics, Campus Life, and My Pages tabs are shown by default and cannot be deleted. The Home tab is automatically the first tab on the far left and cannot be moved. The My Pages tab is automatically the last tab on the far right and cannot be moved. You can add, edit, or reorder tabs (except for the ones mentioned above). For more details, refer to Working with Tabs. |
Global sidebar links | You can add new links here. These links will be displayed in the sidebar in the "Quick Links" section on all pages in the portal. For more details, refer to Working with Global Sidebar Links. |
Login messages | Any login message that you want your users to view when they log in can be added here, such as a system maintenance timeframe. For more details, refer to Working With Login Messages. |
Base roles | Base roles for users, such as Administrators, Advisors, Faculty, Staff, Students, etc. You can edit existing roles or add new ones here. For more details, refer to Working with Roles. |
Targeted messages | This area enables you add and edit a targeted message template and/or targeted message and select the base roles, enter the content of the template/message, determine the display time period of the message, etc. For more details, refer to Working With Targeted Messages. |
Framework settings | This area has Email, Globalization, Location, Site stats, and Validation category options in a drop-down list at the top of the screen. Selecting a category option displays fields for settings and parameters for that option. All values set in these fields are stored in the FWK_ConfigSettings table in the main JICS database. For example, if you select the Email option, the following information is shown for the Category: Email settings: "Use this screen to set preferences related to email sent within JICS. All values you set on this screen are stored in the main JICS database, in the FWK_ConfigSettings table. The key used by FWK_ConfigSettings for each parameter is indicated below in [square brackets]." For more details about Email settings, refer to Email Settings. For details about Site stats settings, refer to Setting Up Logging for Usage Statistics. |
Portal only accounts | Portal only accounts are created here in the portal and are not tied to a user account in your ERP. This allows you to give access to the portal to people who do not have or need a record in your ERP (though if you think the individual may eventually need an ERP account, it's best to create the account there now to avoid any conflicts or confusion that might arise from having two accounts for the same person). For more details, refer to Working with Portal-Only User Accounts. |
Portal design themes | You can upload or create a theme, make basic theme modifications (such as adding a logo), view the current theme, or activate an existing theme for your portal here. For more details, refer to Portal Design Themes. |
Global portlet operations | This area lists the portlet names. Click a portlet name on the list to edit its global operations. For more details, refer to Managing Global Feature Operations. |
Portal version info | This area lists component details (such as Base JICS Portal, Jenzabar eLearning, and various CRMs) and their version number. It also lists any customizations and hotfixes. To add details about your customizations on the Portal version info screen, refer to Adding to the Portal Version Info Screen. |
Security settings | This area has Direct linking, Forgot my password, Make JICS SAML provider, Additional authentication settings, and Developer settings category options in a drop-down list at the top of the screen. Selecting a category option displays settings for that option. For example, selecting the Direct linking option (default) lets you enable the Allow direct linking to portlets option and save the change. For more details, refer to Security Settings. |
Job scheduler | This area lists the various jobs that can be run. If you enable notifications for any of the jobs, you will receive an email whenever that job fails. A Preferred email must be set in Site Manager. For more details, refer to The JICS Scheduler. |
Bookstore | This area has fields for Bookstore information, such as its homepage, link text, optional message text, etc. |
ERP settings | Use this screen to set preferences related to ERP settings within JICS. All values you set on this screen are stored in the FWK_ConfigSettings table in the main JICS database. The key used by FWK_ConfigSettings for each parameter is indicated in [square brackets] on this screen. For more details, refer to Modifying the Web Services Settings. |
Third-party integrations | This screen enables JICS's integration with multiple third-party applications, such as Google, ProctorFree, Twilio, and SmartEvals. For more details, refer to Third-Party Integrations and Enable SMS. |
Sitewide email logging | This sidebar option displays when the Sitewide email logging setting is set to Yes (Framework settings > Email settings). All emails sent throughout the site are saved to this log, which will also include information on emails that failed to send for any reason. Only site administrators will be able to view this log. The Sitewide email log cleanup setting on the Email settings screen shows that the log will be purged after the specified number of days. For more details, refer to Sitewide Email Logging Page in Site Manager. |
Password reset log | This log screen shows a password reset data table with columns such as the Reset request date and Reset status. The table can be sorted in ascending or descending order by clicking the column heading. For more details, refer to Password Reset Log Data. |
Site logs | This screen displays a list of site logs and web.config log4net appender log files that can be downloaded by clicking the applicable link. Examples include JICSSchedulerLog_ICS.txt, PortletAttributeCleanup.txt, and Search.txt. For more details, refer to Site Logs Page to Download Log Files from Server. |