Working with Calendars
This section explains calendar attributes and procedures.
In the Calendar feature, a calendar has the following attributes:
Attribute | Description |
|---|---|
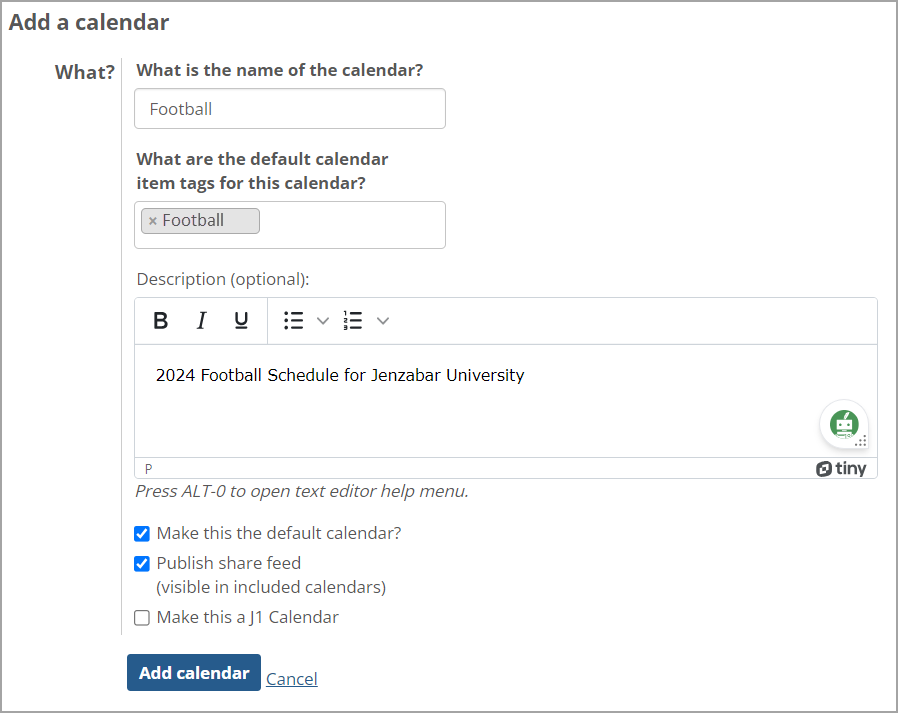
Name | Name of the calendar. This is a required field. |
Default calendar items tags | Any default calendar item tags added to this calendar will be automatically applied to each calendar item added to this calendar. Users can choose to keep or remove these tags for individual calendar items added to the calendar. The tags help calendar users search for related calendar items. |
Description | Description of the calendar. |
Make this the default calendar? | When this checkbox is selected, the calendar will be the default calendar for the Calendar feature instance. This is the calendar that will be selected by default when you are creating calendar items. |
Publish share feed (visible in included calendars) | When this checkbox is selected, the calendar’s iCAL link will be made available to users who have permission to view the calendar so that they may use it to subscribe to the calendar from a different Calendar feature instance or from an external application. The iCAL link is available via the Share URL link in the Manage calendars drop-down menu. |
Make this an EXi Events Calendar/ Make this a J1 Calendar | One of these options will display only if your school has EXi or J1, has connected your Campus Portal to your EXi or J1 server, and if you have global permission to manage EX or J1 calendars. When this checkbox is selected, event coordinators will be able to publish events created in EXi or J1 to this calendar. This setting cannot be changed later. In the field that appears below, enter in a unique calendar name that EXi or J1 Events users will see. TIP: Keeping the EXi or J1 Events Calendar name the same as the original calendar name will make it easier to distinguish which JICS calendar the EXi or J1 users are adding their events to. |
The following screen capture shows these attributes on the Add a calendar screen:
 |
In the Calendar feature, a calendar item has the following attributes:
Attribute category | Attribute | Description |
|---|---|---|
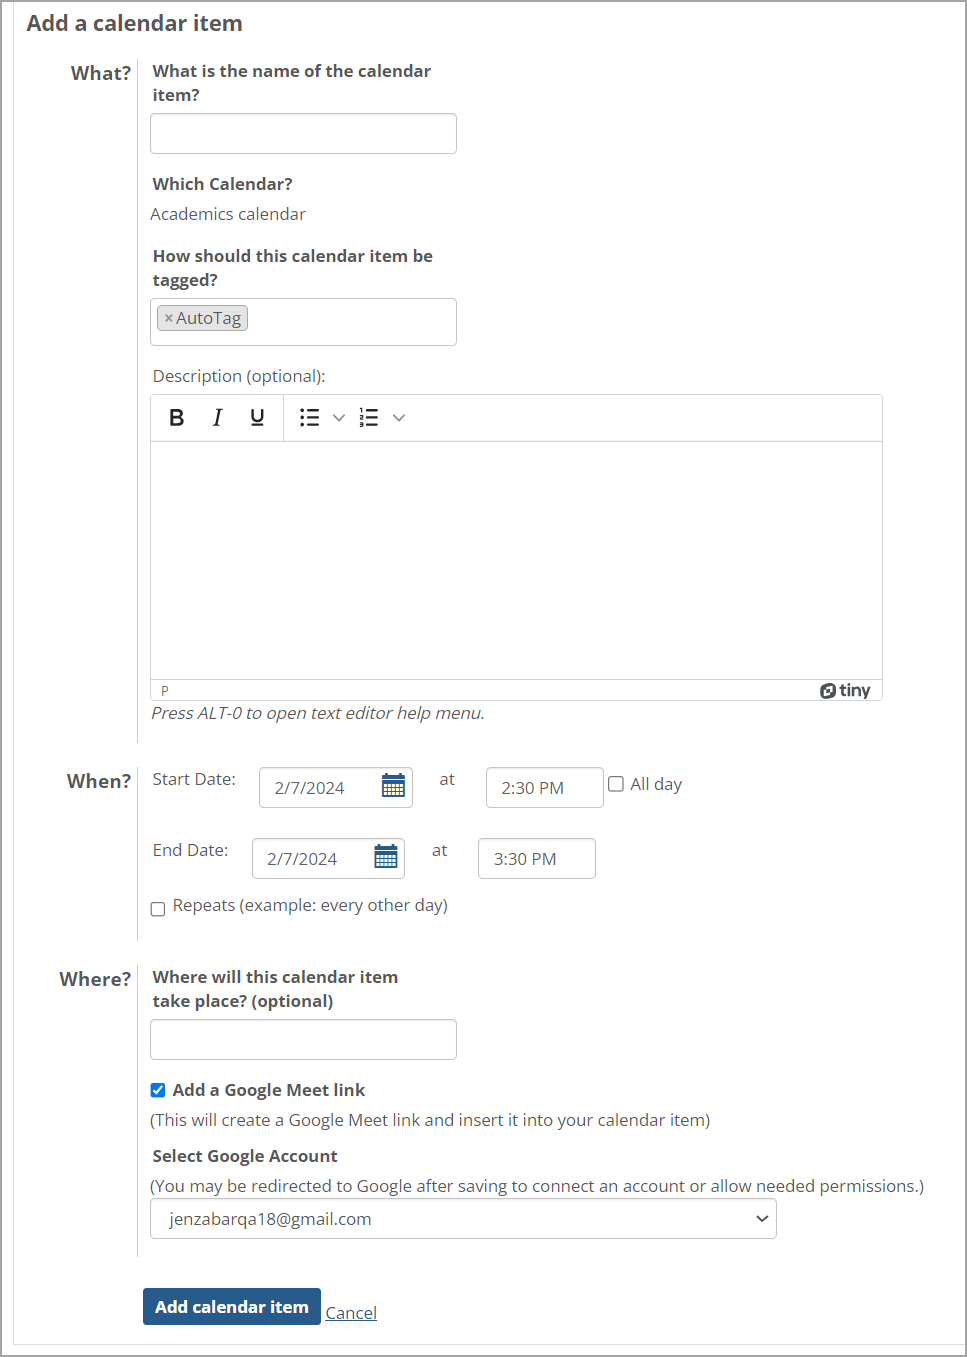
What? | Name of the calendar item | Name of the calendar item. This is a required field. |
Calendar | The calendar to which the calendar item will belong. If the feature instance includes multiple calendars, you can select one from this drop-down list when creating or editing a calendar item. | |
Tags | Tags help calendar users easily search for related calendar items. When a calendar item is added to a calendar, any default tags associated with the calendar will be automatically applied. Users can choose to keep or remove these tags or add other tags to the calendar item. | |
Description | A description of the calendar item. | |
When? | Start Date | Start date and time of the calendar item. This field will not be visible if the All day checkbox is selected. |
End Date | End date and time of the calendar item. This field will not be visible if the All day checkbox is selected. | |
All day | When this checkbox is selected, it marks the item as an all-day calendar item. | |
Repeats | When this checkbox is selected, it marks the calendar item as a repeating item. When you select this checkbox, additional fields will display to allow you to set the frequency and end date of the recurring calendar item. | |
Where? | Location | Where the calendar item will take place (optional). To create a Google Meet link and insert it into your calendar item, select the Add a Google Meet link checkbox. The Select Google Account drop-down menu appears for you to select an existing account or create a new account. |
The following screen capture shows these attributes on the Add a calendar item screen:
 |
A Calendar feature instance can comprise multiple calendars. Users who have the Can Administer Calendars permission may add calendars to a feature instance in any of the following ways:
Create a new calendar, as explained in Add a New Calendar.
Import a calendar from another Calendar feature instance within JICS using the calendar’s iCAL link, as explained in Import a JICS Calendar.
Import a calendar external to JICS using its iCAL link, as explained in Import an External Calendar.
The Calendar feature provides month, week, day, and list views, which you can access via the links in the upper-right corner of the calendar. You can also click the Date view link on the top left.
 |
Some functions are available only in certain views. For example, in the week and day views, you can quick-add a calendar item by clicking its start time and dragging to its end time, whereas in the month view, you can quick-add a calendar item only by clicking once on the calendar (because times are not shown in the month view).
How To
Navigate to the Calendar feature instance to which you wish to add a calendar.
Click Add a calendar.
The Add a calendar screen displays.
Enter a name for the calendar. This field is required.
Add default calendar item tags to the calendar if desired. The default calendar item tags that are added to this calendar will be automatically applied to each calendar item that is added to this calendar. These tags help calendar users easily search for related calendar items.
If you do not see a tag that you want to use, you will need to add that tag using the Manage Calendar Tags function. For more information, refer to the Managing Calendar Tags section.
Complete the other fields as desired. For descriptions of these fields, see Working with Calendars.
Click Add calendar.
The Add a calendar screen closes, and the calendar redisplays. The new calendar is now part of the Calendar feature instance.
You can also add a calendar to a feature instance by importing it from another feature instance using the calendar’s iCAL link. When you import a calendar, you are subscribing the feature instance to the calendar, as explained in Calendar.
Navigate to the Calendar feature instance that includes the calendar you wish to import.
Click the Manage calendars link.
The Manage calendars drop-down menu displays.
Click the Share URL link next to the calendar you wish to import.
The calendar’s iCAL link displays in a popup dialog. The link is highlighted so that you can copy it easily.
Copy the iCAL link.
Navigate to the Calendar feature instance into which you wish to import the calendar.
Click Add a calendar.
The Add a calendar screen displays.
Click Import calendar.
The Import calendar dialog displays.
Paste the copied calendar’s iCAL link into the Import calendar dialog.
Click Import.
The dialog closes, and the calendar redisplays with the imported calendar now included in the feature instance.
You can also add a calendar to a feature instance by importing it from a source external to JICS using the calendar’s iCAL link. When you import an external calendar, you are subscribing the feature instance to the calendar, as explained in Calendar.
Note
When you import an external calendar into JICS, the calendar will be read-only.
Copy the external calendar’s iCAL link.
Navigate to the Calendar feature instance.
Click Add a calendar.
The Add a calendar screen displays.
Click Import calendar.
The Import calendar dialog displays.
Paste the external calendar’s iCAL link into the Import calendar dialog.
Click Import.
The dialog closes, and the Add a calendar screen redisplays with the iCAL link appearing in the Feed URL field.
Enter a name for the calendar. This field is required.
Complete the other fields as desired. For descriptions of these fields, see Working with Calendars.
Click Add calendar.
Take the following steps to edit a calendar’s attributes.
Note
You can edit a calendar only within the feature instance to which the calendar belongs. You cannot edit a calendar in a “subscription” view. That is, if you have a personal or feature-instance-level subscription to a calendar, you cannot edit it from within My Calendar or from within the feature instance that is subscribed to the calendar.
Navigate to the Calendar feature instance that contains the calendar you wish to edit.
Click the Manage calendars link.
The Manage calendars drop-down menu displays.
Click the Edit calendar link next to the calendar you wish to edit.
The Edit calendar screen displays.
Edit the fields as desired. For descriptions of these fields, see Working with Calendars.
Click Update.
The Edit calendar screen closes, and the calendar redisplays.
Each Calendar feature instance has a default calendar. Here are some notes on the behavior of default calendars:
When you quick-add a calendar item, it is added to the default calendar.
When you add a calendar item from the Add a calendar item screen, the default calendar will be selected in the Calendar drop-down by default. You may switch to a different calendar if desired.
You can also designate the default calendar for a feature instance when creating a new calendar or editing an existing one. For more information see Working with Calendars.
Note
An imported calendar—one to which the feature instance is subscribed—cannot serve as the default calendar for the instance.
To designate a calendar as the default calendar:
From an instance of the Calendar feature, take either of the following actions:
To create a new calendar to function as the default calendar, click Add calendar. The Add a calendar screen displays.
To make an existing calendar the default calendar, click the Manage calendars drop-down menu and click Edit calendar next to the calendar you wish to make the default. The Edit calendar screen displays.
On the Add calendar or Edit calendar screen, select the Make this the default calendar? checkbox.
If necessary, edit or complete the other calendar fields as you see fit. For descriptions of these fields, see Working with Calendars.
Click Add calendar or Save.
You can temporarily hide or show any of the calendars included in a Calendar feature instance.
Note
If you want to permanently delete a calendar from a feature instance, refer to Delete a Calendar. If you want to remove an imported calendar from a feature instance, refer to Remove an Imported Calendar from a Feature Instance.
To hide a subscribed calendar included in a feature instance:
From an instance of the Calendar feature, click the Manage calendars link in the upper-right corner of the calendar.
The Manage calendars drop-down menu displays.
Click the Manage My Calendar feed link. The My calendar feed page displays.
In the list of calendars Added by you, click the name of the calendar that you wish to hide.
The calendar is grayed out and the calendar’s calendar items are hidden from the calendar.
To show a subscribed calendar included in a feature instance:
From an instance of the Calendar feature, click the Manage calendars link in the upper-right corner of the calendar.
The Manage calendars drop-down menu displays.
Click the Manage My Calendar feed link. The My calendar feed page displays.
In the list of calendars Added by you, click the name of the hidden calendar that you wish to show.
The color of the calendar changes from gray to blue to indicate it is no longer hidden, and the calendar’s items display on the calendar.
You can remove an imported JICS or external calendar from a feature instance via the Remove calendar link found in the Manage calendars drop-down menu.
Navigate to the Calendar feature instance from which you wish to remove an imported calendar.
Click the Manage calendars link in the upper-right corner of the calendar.
The Manage calendars drop-down menu displays.
Click Remove calendar next to the imported calendar that you wish to remove.
The calendar is removed from the feature instance. That is, the feature instance is no longer subscribed to the calendar.
You can delete a calendar from the Edit calendar screen.
Note
You can delete a calendar only if you have the Can Administer Calendars permission for the context.
When you delete a calendar, all of the calendar’s items are removed from the feature instance. Furthermore, the calendar will no longer appear in any My Calendar feeds or feature instances that were subscribed to it.
Navigate to the Calendar feature instance that contains the calendar you wish to delete.
Click the Manage calendars link in the upper-right corner of the calendar.
The Manage calendars drop-down menu displays.
Click Edit calendar next to the calendar that you wish to delete.
The Edit calendar screen displays.
Click Delete.
The system displays a dialog asking you to confirm the deletion.
Click Confirm delete.
The calendar redisplays with the deleted calendar and its related calendar items removed from the feature instance.