Notifications Settings and Alert Functionality
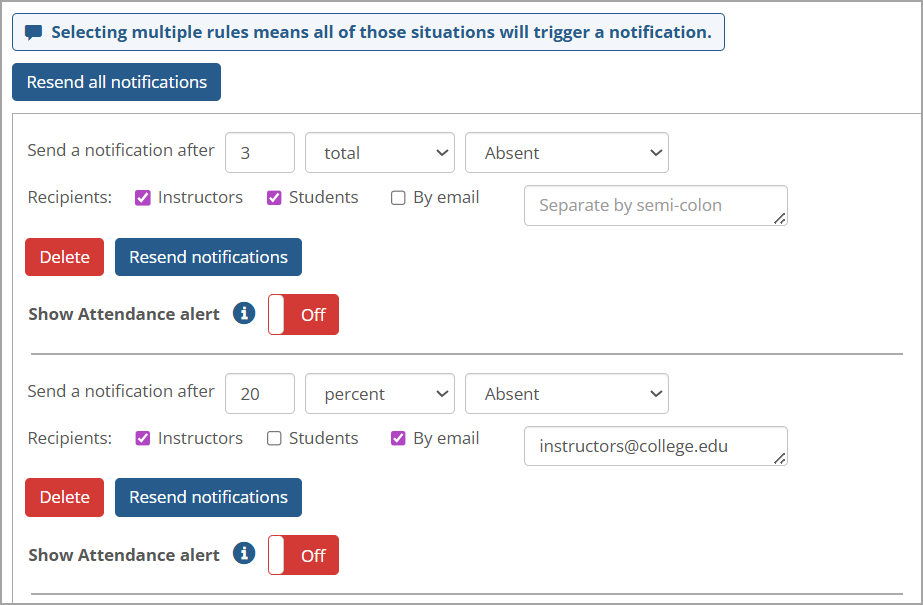
The Notifications screen in Attendance Settings enables users to create multiple notifications of different types. A user with the appropriate permissions can create, send, and resend as many total, percent, and consecutive notifications as desired.
A user with the "Can Admin Attendance" permission on the main Attendance screen can access the Notifications screen by following these steps:
Click the Attendance Settings option on the top right.
Click the Notifications option on the left sidebar.
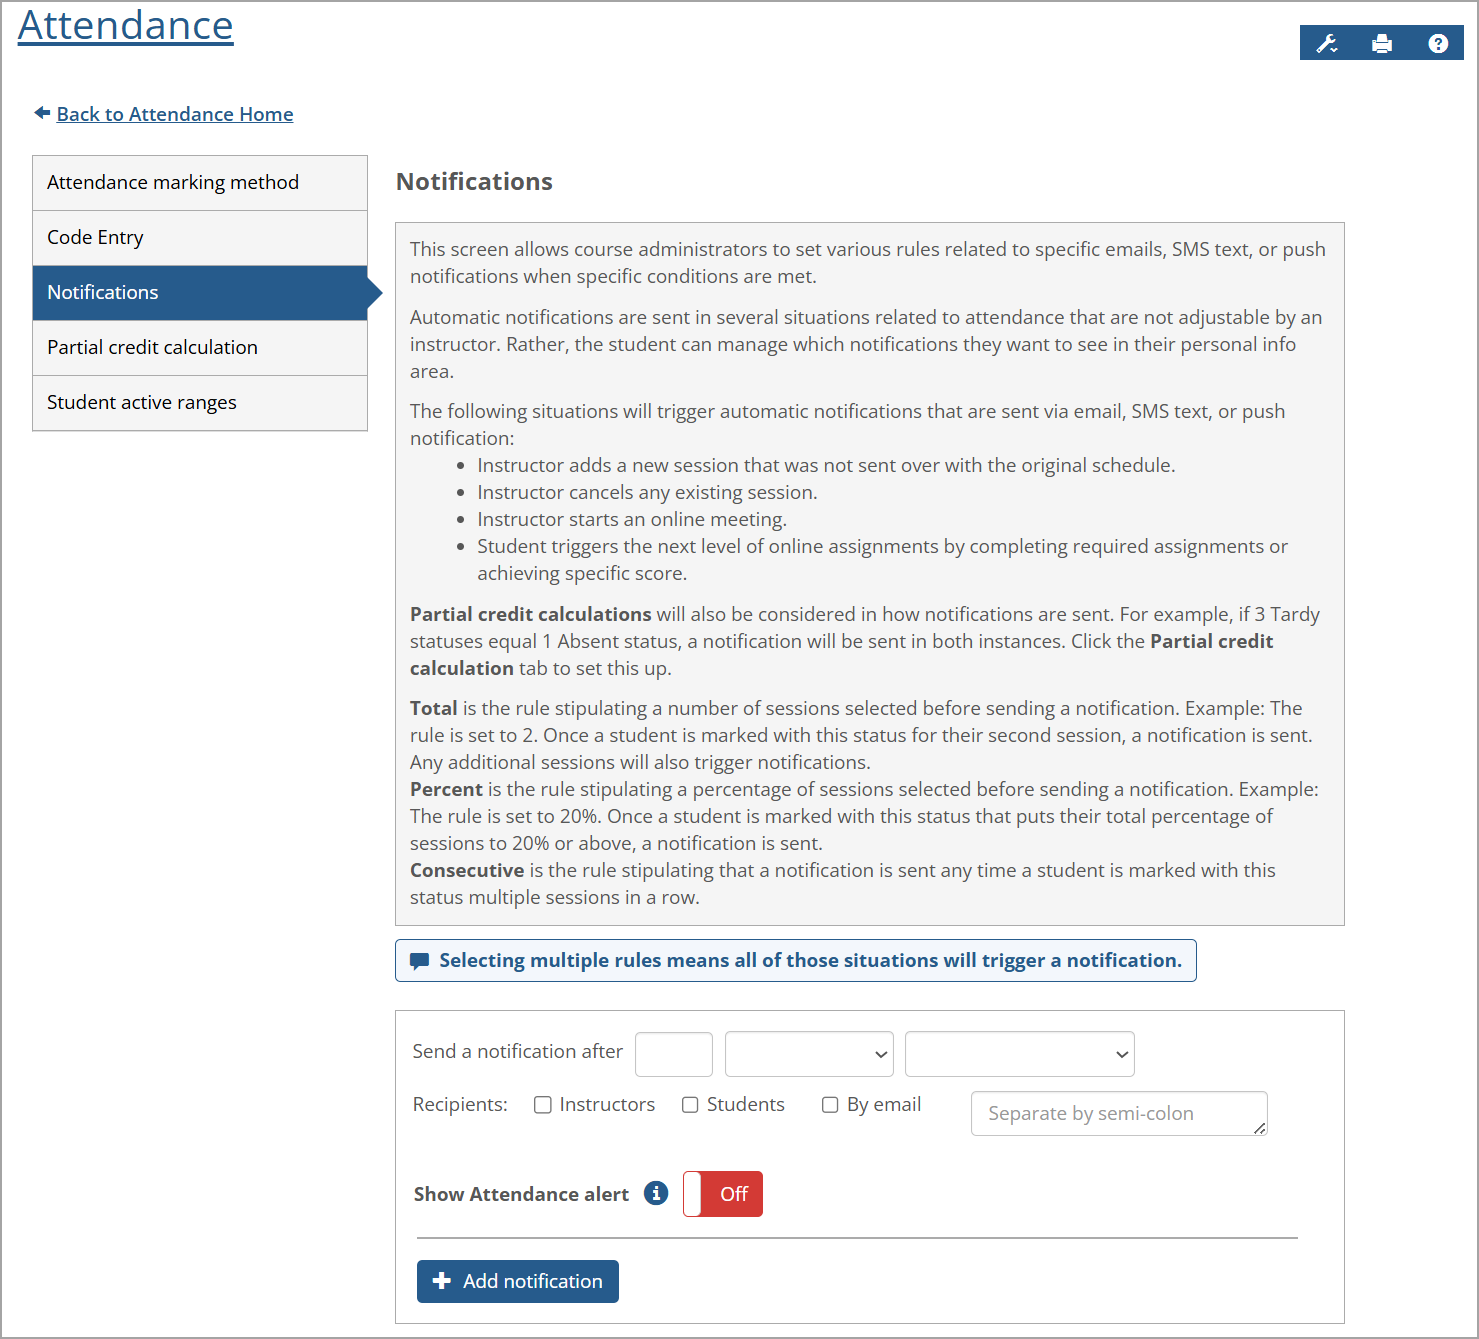
The Notifications screen provides instructions in the gray-shaded area, and a blank Notification template appears below it. Information for creating, editing, and deleting notifications are in the following sections.
How To
A Show Attendance alert option is available for each notification created on the Notifications screen in Attendance Settings. By default, this option is set to the red Off value. Users with the appropriate permissions can click the button and change the value to the green On, which enables the Attendance alert for the specific notification to appear on several Attendance screens.
 |
When the Show Attendance alert option is set to On and the Attendance notification criteria are met, the Attendance alert is triggered and appears on the screen. The Attendance alert icon  is displayed in the far-left column and in the Legend above the table on the main Attendance screen.
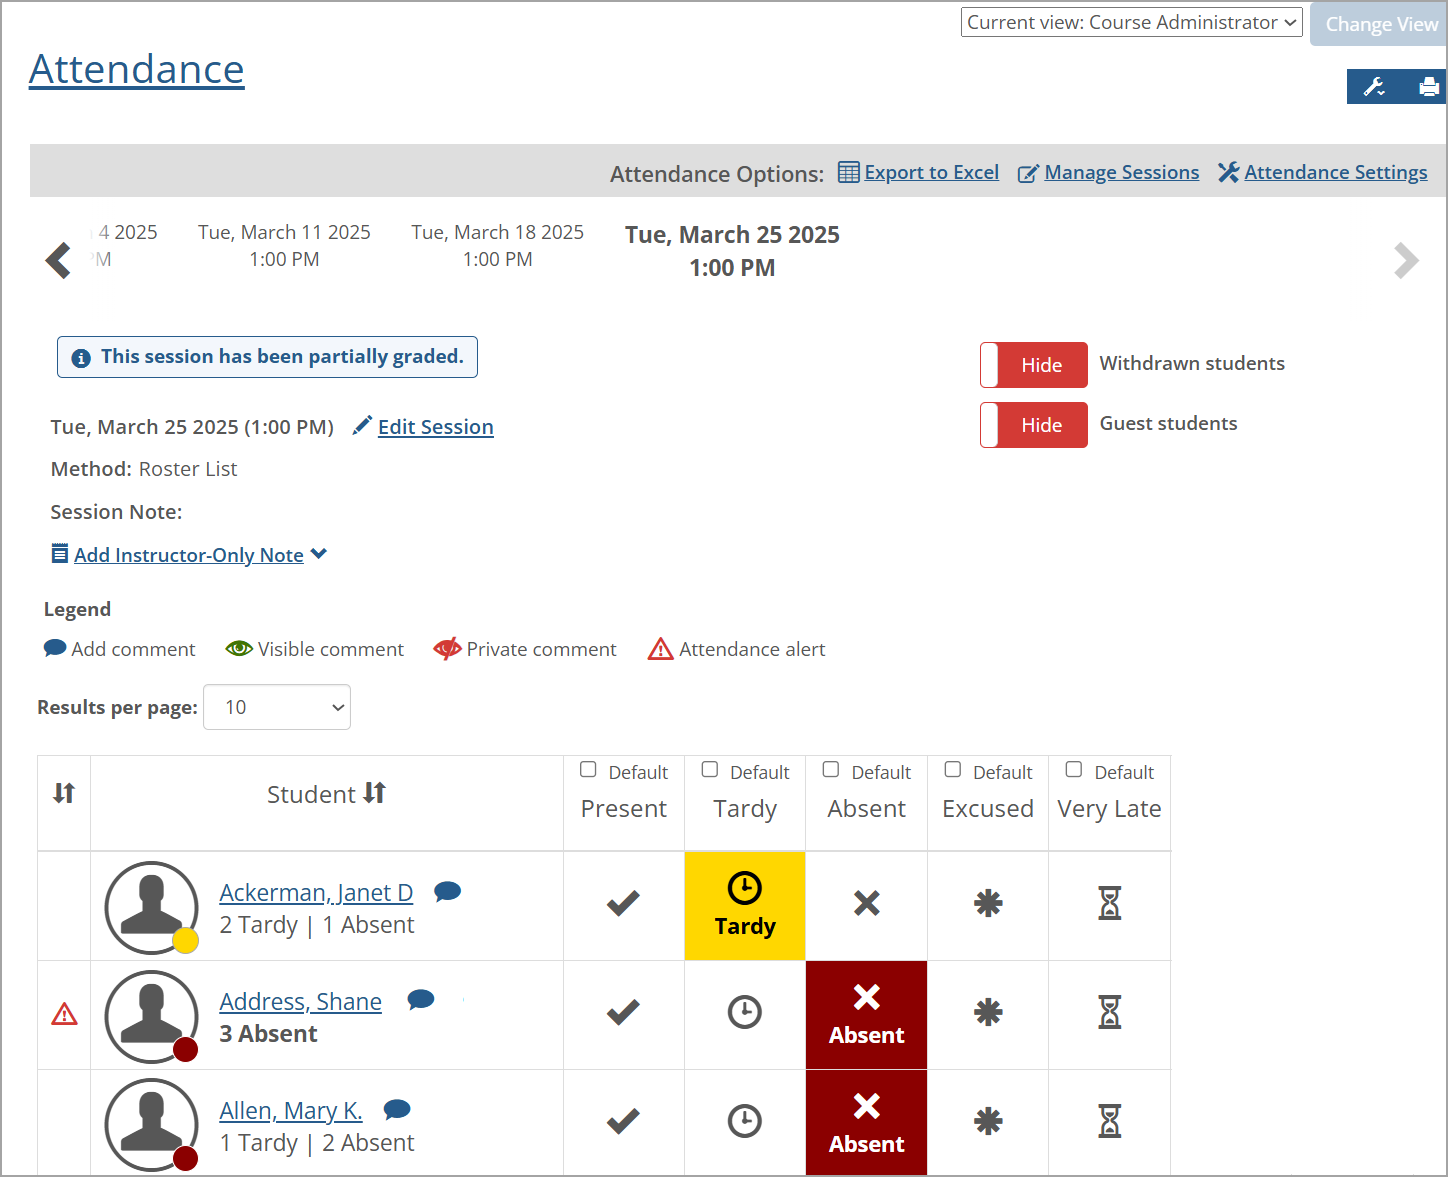
If the Show Attendance alert option is set to Off, or no Attendance notification alerts have been set, the Attendance alert icon isn't shown in the far-left column or in the Legend above the table. Likewise, if no student has triggered an Attendance alert, then the Attendance alert icon isn't shown in the Legend, and the Attendance alert column doesn't appear.
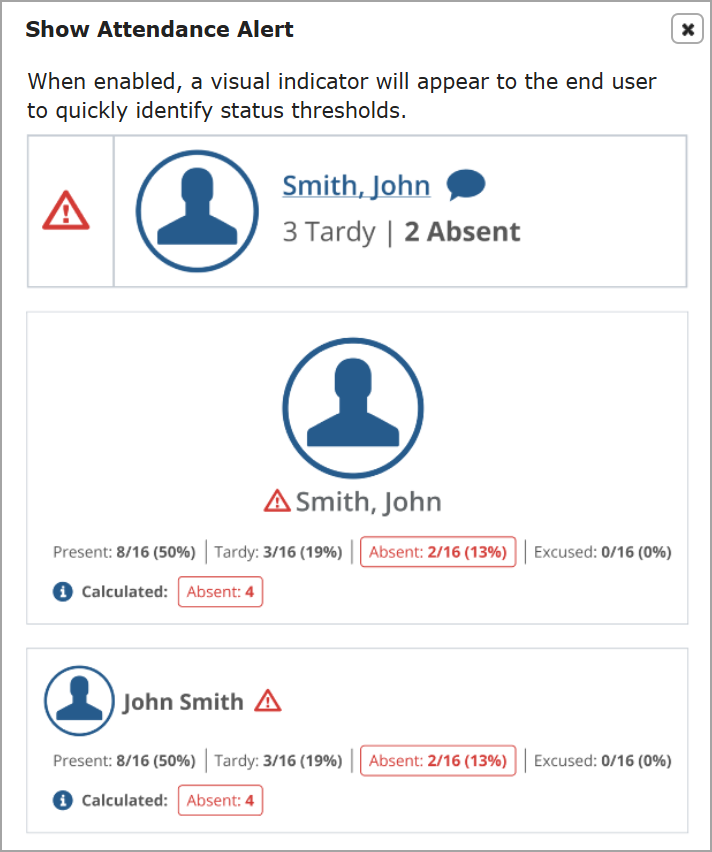
A blue information i icon  appears on the left of the Off/On button. You can click this icon to view the Show Attendance Alert pop-up, which is an example of how the alert appears to the end user if it's turned On. The items that triggered the alert are indicated in red font, e.g., Absent 2/16 (13%) in the example below. If a notification uses a partial credit calculation (except for "consecutive notifications"), then the Calculated row appears. Refer to the Partial Credit Calculation Setting in Attendance Settings for more details.
 |
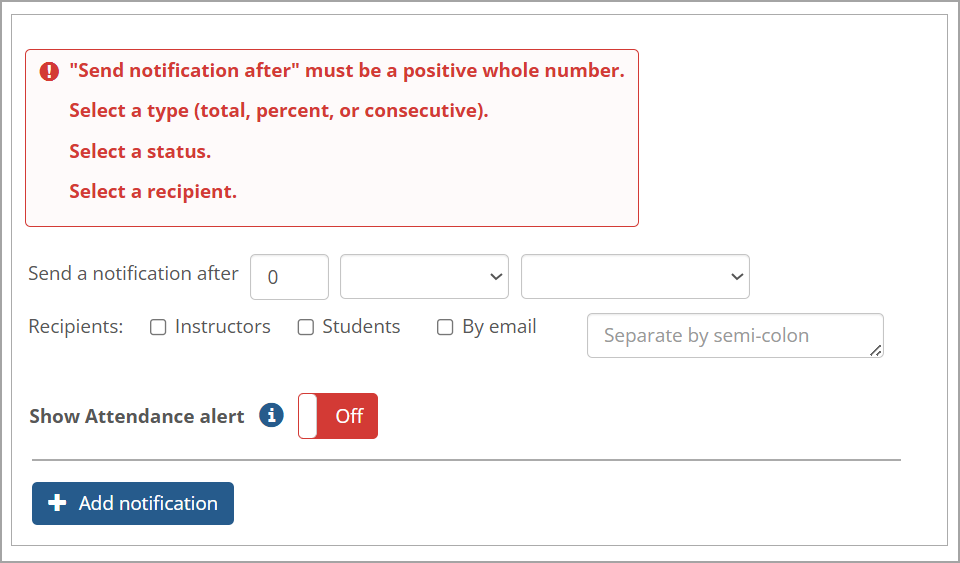
When you start entering data to create a new notification, the data is automatically validated and saved (if it passes validation). If any data is incorrect or missing, an error message in red font appears above the fields indicating the error reason.
For example, entering "0" (zero) in the Notification Limit Count field (the first blank field following "Send a notification after") displays an error message stating it must be a positive whole number. The other error messages indicate missing data in the screenshot example below. The validation also checks for duplicates and displays an error message if a duplicate exists.
 |
Enter data in the fields following the "Send a notification after" text (the fields don't have individual field labels).
Enter a positive whole number in the Notification Limit Count field.
Select an option in the Notification Type drop-down list. The default value is blank.
Options are:
· total: The total number of sessions that triggers a notification to be sent.
· percent: The percent of sessions that triggers a notification to be sent.
· consecutive: The consecutive number of sessions that trigger a notification to be sent, e.g., three sessions in a row.
Select an option in the Status drop-down list.
Default options are: Present, Tardy, Absent, and Excused. Any custom statuses are also displayed on this list (i.e., those statuses created and shown in the Status section of the Attendance page in LMS Manager).
Select the appropriate Recipients checkboxes: Instructors, Students, and/or By Email.
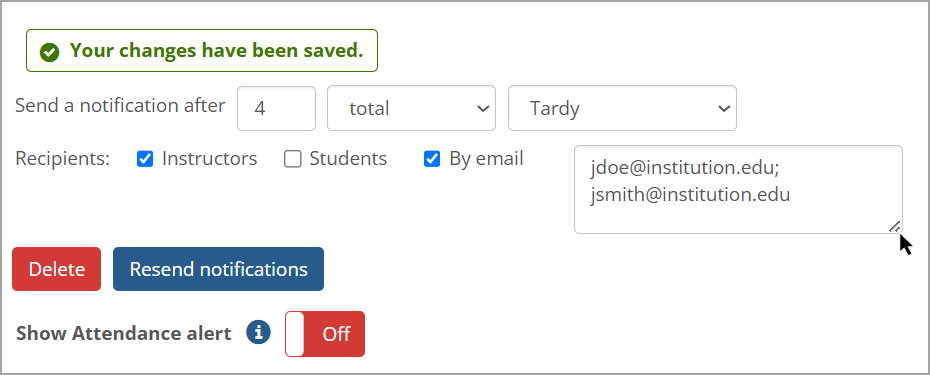
If By Email is selected, enter the recipient's email address in the adjacent blank field. If there are multiple email addresses, separate them by a semi-colon (;) such as jdoe@institution.edu; jsmith@institution.edu. An email will be sent to these recipients for each student who has triggered the notification.
Note
To enter multiple email addresses, click the lower right corner of the text box and drag it down or to the right to enlarge the text box.
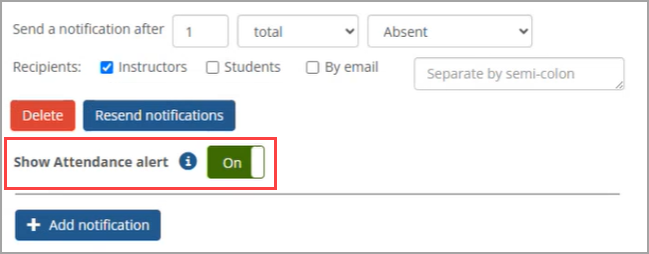
When all required data has been entered for a notification, it is automatically saved, and a green message temporarily appears at the top of that notification stating, "Your changes have been saved." Delete and Resend notifications buttons appear for the saved notification.
If you want the alert to appear on Attendance screens, click the default red Off option in the Show Attendance alert field to change it to the green On.
To edit a specific notification, enter the change in the appropriate field (and click out of that field if it is a text box).
A green message temporarily appears at the top of that notification stating, "Your changes have been saved."
Partial credit calculations are also considered in notifications criteria (except for "consecutive notifications"). Refer to Partial Credit Calculation Setting in Attendance Settings for more details.
Use the following procedure to delete one or more Attendance alert notifications.
Click the Notifications option on the left sidebar in the Attendance Settings screen.
On the Notifications screen, click the Delete button for the applicable Attendance alert notification.
A Delete notification pop-up window appears asking, "Do you want to delete this notification?"
Do one of the following:
Click the Delete button to delete the Attendance alert notification.
The notification is deleted and no longer appears on the Notifications screen.
Click the Cancel button to cancel the deletion.
The notification isn't deleted.
Repeat steps 2 and 3 to delete additional Attendance alert notifications.
To resend an attendance notification to Instructors, Students, or another party by email, follow the steps below.
Navigate to the appropriate Attendance feature instance.
Click Attendance Settings.
The Attendance Settings page displays.
Click the Notifications option on the left sidebar.
The Notifications settings screen displays the notifications that have been created.
If you want to change the existing recipients for the notification, select or deselect the Instructors, Students, or By email checkboxes accordingly for each notification you want to resend.
If the By email checkbox was newly selected, you must enter a valid email address in the text box on the right.
To enter multiple email addresses in the text box, enter a semi-colon after each email address.
To expand the text box for entering multiple email addresses, hover your cursor over the lower right corner until a Double Arrow icon
 appears, then click the corner and move it down and to the right.
To resend notifications for all notifications, click Resend all notifications at the top of the list of notifications.
No confirmation pop-up window is displayed. A green success message appears above the button stating: "Notifications have been sent."
To resend notifications for a specific notification (either total, percent, or consecutive), click its Resend notifications button.
No confirmation pop-up window is displayed. A green success message appears above the button stating: "Notifications have been sent."
Using Time Entry for Attendance Disables Notifications Setting Option
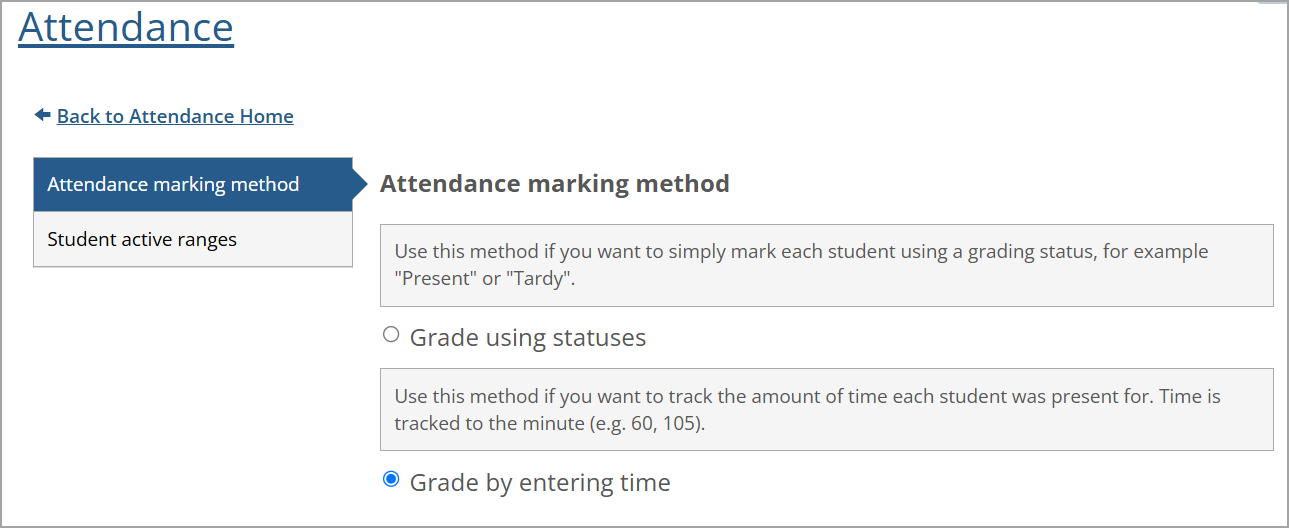
When a user with "Can Admin Attendance" permissions views the Attendance Settings screen, if the Attendance marking method setting in a course section is set to Grade by entering time, then the Notifications setting option no longer appears on the left sidebar. The display of the Notifications setting option is handled dynamically, so changing the Attendance marking method setting to Grade using statuses will show the Notifications setting option (with no need to refresh the screen). This dynamic show/hide display is similar to the way the Code Entry setting option works.
Course Copy Copies All Notification Settings
When using Course Copy to copy a course, if the Coursework, Gradebook, and Attendance option is selected (or if it is a Full Overwrite), then all Notification settings in the destination course exactly match the Notification settings in the source course.