Attendance Alerts, Statistics, and Other Information Shown on Screens
If users have the appropriate permissions, they will be able to view attendance alerts and statistics as well as attendance statuses and counts. Attendance alerts and statistics are shown on the Faculty Student Overview screen and the Student View screen. The location of the currently selected session also appears on the main Attendance screen. The following subsections provide more details.
When a user with "Can Admin Attendance" permissions views Attendance on the Faculty Student Overview screen, a red Attendance alert icon  appears in the student Navigation bar next to the names of students who have passed any notification thresholds. In the Statistics bar below the student names, if the selected student has crossed a notification threshold for any statuses, then the statuses are shown in red. Student Corinn Iyanna has red Tardy and Absent statuses shown in the following screenshot.
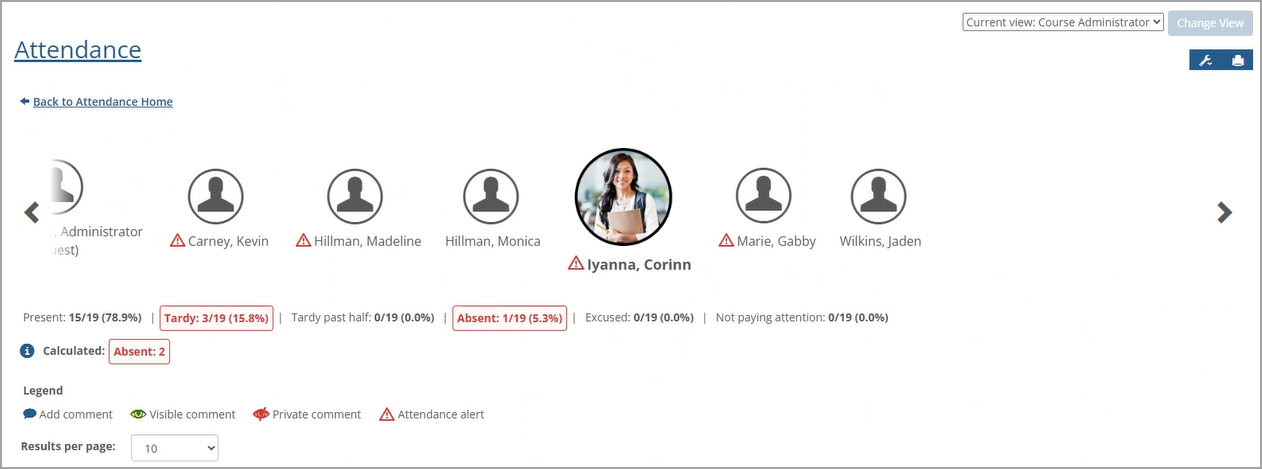
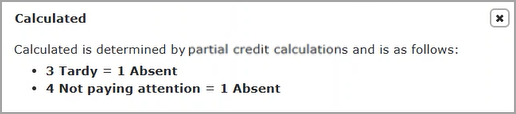
If any notifications have been sent that include Partial Credit Calculations, an additional Calculated row appears, which displays all status counts that include the Partial credit calculation settings. Clicking the blue information i icon  on the left displays the Calculated pop-up for any alert statuses shown in which Partial credit calculations are used (e.g., Absent).
 |
Note
Making changes on this page dynamically updates any fields that have notifications triggered or not triggered as a result of the changes.
A user in the Student role can view any alerts on the Student View of the Attendance screen automatically when the screen displays (i.e., they don't need to click the Statistics icon to view the alerts). A red Attendance alert icon appears on the right of the of student's name if they have passed any notification thresholds. If they have crossed a notification threshold for any Attendance alert statuses, the Statistics bar below the student's name displays the statuses and accompanying statistics in red font in a red box. The following screenshot shows an Attendance alert icon as well as Tardy and Absent statuses with accompanying statistics.
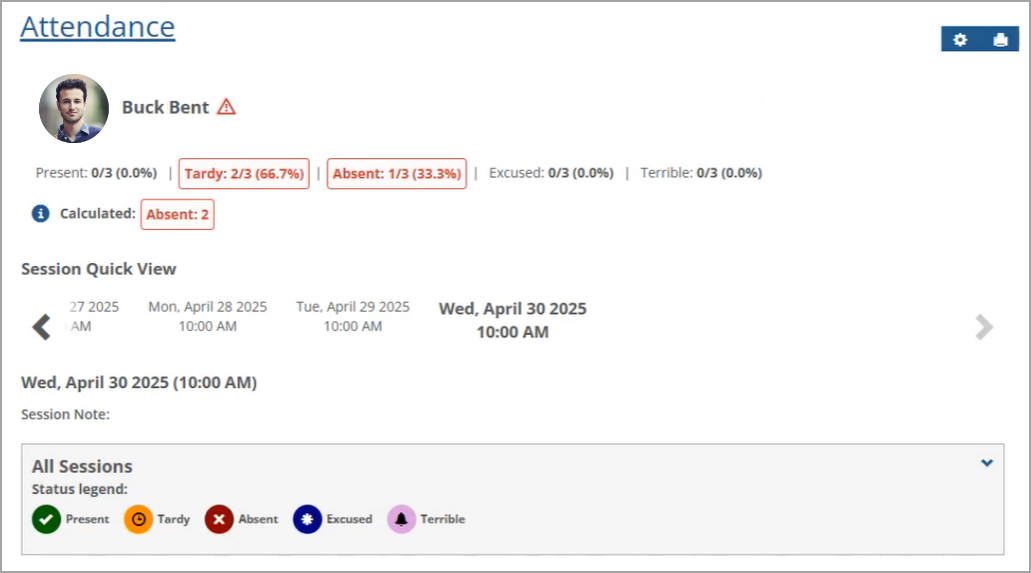
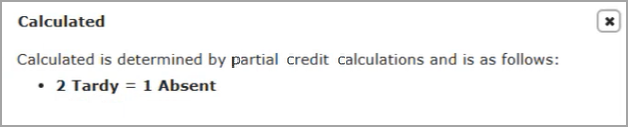
If any Attendance alerts have been triggered that include Partial credit calculations, then an additional Calculated row appears, which displays all status counts that include the Partial credit calculations. Click the blue information i icon on the left to display the Calculated pop-up for any alert statuses shown in which Partial credit calculations are used (e.g., Absent).
 |
Note
Making changes on this page dynamically updates any fields that have notifications triggered or not triggered as a result of the changes.
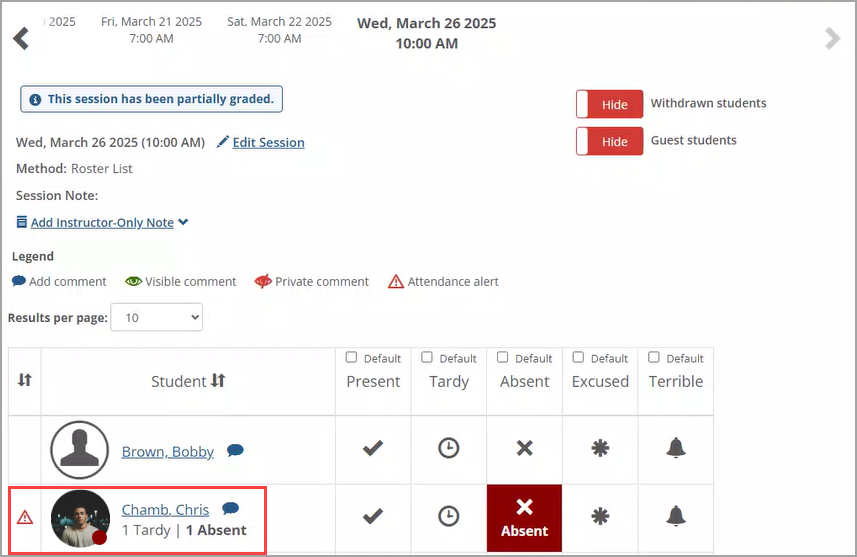
A user with the "Can Admin Attendance" permission on the main Attendance screen can view the following information under each student's name:
A list of all Partial Credit (such as Tardy) and No Credit (such as Absent) statuses that students have received in the entire course, separated by a vertical bar (|).
For each status, the number of times the student has received this status will also be shown, e.g., 3 Tardy | 1 Absent.
Any Partial/No Credit statuses that the student has received. If the student has not received any of these statuses, then nothing is shown. For example, if a student has only been Present, nothing is shown under their name.
The following screenshot shows 1 Tardy status and 1 Absent status for a student. In this example, the Tardy status is not shown in bold font because the criteria to trigger an alert is set to 3. The Absent status is shown in bold font because the criteria to trigger an alert is set to 1.
This information is shown for each student in List View, Time View, Roll Call, and at the top of the Faculty Student Overview screens for users with the "Can Admin Attendance" permission. For individual students, their information is shown at the top in their Student View screen.
Note
Changing statuses on the main Attendance screen, such as changing a Present status to a Tardy status, dynamically updates these counts.
The Attendance alert column on the left displays when at least one student in the course section has an Attendance alert. This column's heading is a Sort icon  . The initial sort order on this screen is by students' last name in ascending alphabetical order. Clicking the Sort icon in the Attendance alert column sorts the data by Attendance alerts, so names of students with these alerts are displayed at the top of the table. Click that Sort icon again to change the table back to the initial sort order.
Some status values in this list may be shown in bold font based on Notification settings:
If a student has attendance data that triggers a notification with "Show attendance alert" turned on, that notification's status value appears in bold font for that student.
Any status that did not contribute to notifications with "Show attendance alert" turned on does NOT appear in bold font for that student. For example, if the "Show attendance alert" is turned off for the Tardy status, then it will not display in bold font.
In the case where a student triggers multiple notifications with "Show attendance alert" turned on, all of those notification statuses are shown in bold font for that student. For example, if a student receives two notifications, one for being Tardy too often and another for being Absent too often, then both Tardy and Absent statuses are shown in bold font for that student.
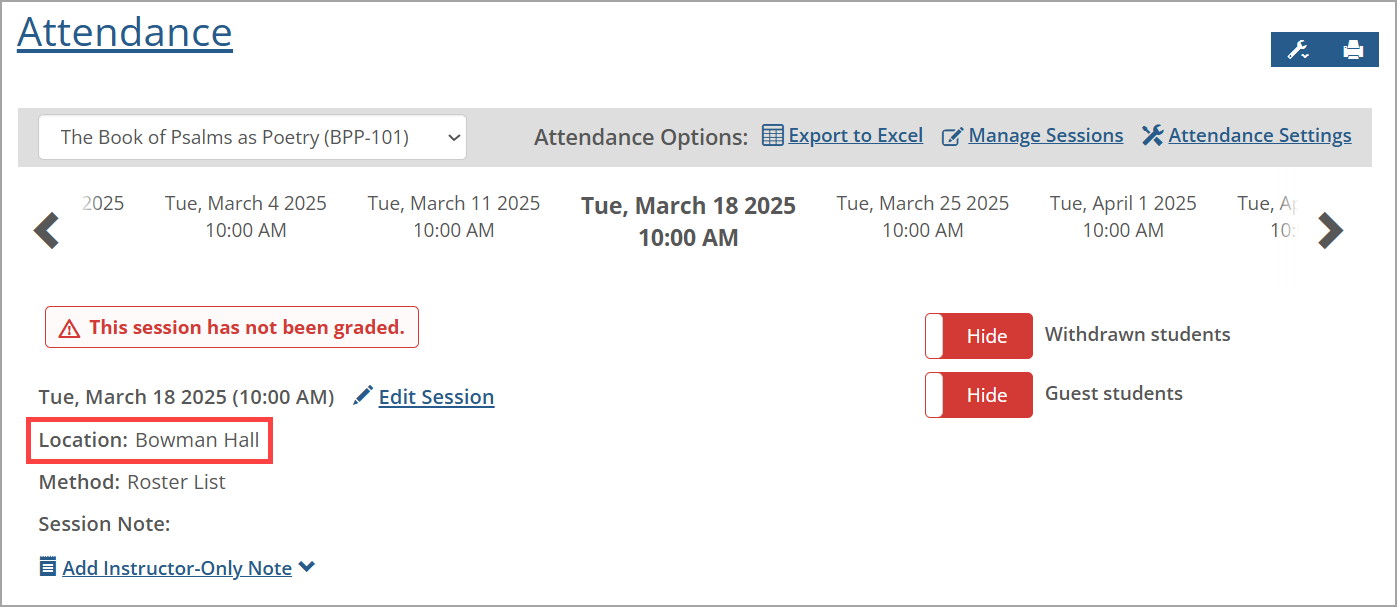
If a course session is attached to a schedule that has a location value, then it is shown in the Location field on the main Attendance screen. Both the Faculty and Student Views of this screen display the currently selected session's location. The following screenshot displays the Location field on the left below the selected session's date. For both views, if the currently selected session's schedule does NOT have a location value, then this row is not shown.
Note
One way to obtain a schedule with a location is to import it in the Data Import Service (DIS). Another way is to set the location in Course Creator.