Forms Rows
Important
Information and features vary according to the roles to which you belong and the permissions associated with those roles. For more information, contact your module manager or your campus support team.
Rows can contain any form item you want, such as textboxes, questions, and action buttons. You can add multiple rows to a tab and move them according to how you want them ordered. Rows without content are removed when the page is refreshed.
Note
When you add a form item, it automatically creates a distinct row. To add it to an existing row, click and hold the drag and drop icon  , and move it to the desired row.
Tip
If you add a blank row to add space, it will be removed from the form. Use a Placeholder item to the form to add blank space.
To work with form rows, you must belong to a Forms role with the "Can edit forms" permission enabled and access to the form itself.
Connect hub, Forms module, Manage Forms page, create or edit a form.
How To
Access the Connect hub, Forms module, Manage Forms page.
Find the form you're updating and from the Actions menu, select Edit form.
Click on the tab where you want to add the row.
Click Add row. The new row appears at the bottom of the form.
Access the Connect hub, Forms module, Manage Forms page.
Find the form you're updating and from the Actions menu, select Edit form.
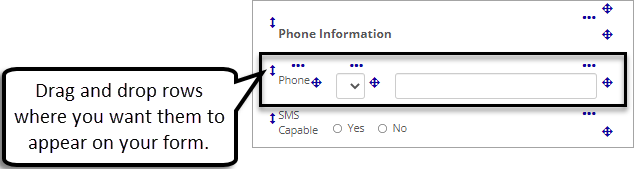
Find the row you want to move, and then click and hold the drag and drop icon
 to move it to your desired location.
Warning
When you remove a row from your form, you also remove any items on it.
Access the Connect hub, Forms module, Manage Forms page.
Find the form you're updating and from the Actions menu, select Edit form.
Right-click on the drag and drop icon
for the row you want to remove.Select Remove. The confirmation pop-up window appears.
Click Yes. The confirmation pop-up window closes and the row is permanently removed.