Scheduled Imports
Important
Information and features vary according to the roles to which you belong and the permissions associated with those roles. For more information, contact your module manager or your campus support team.
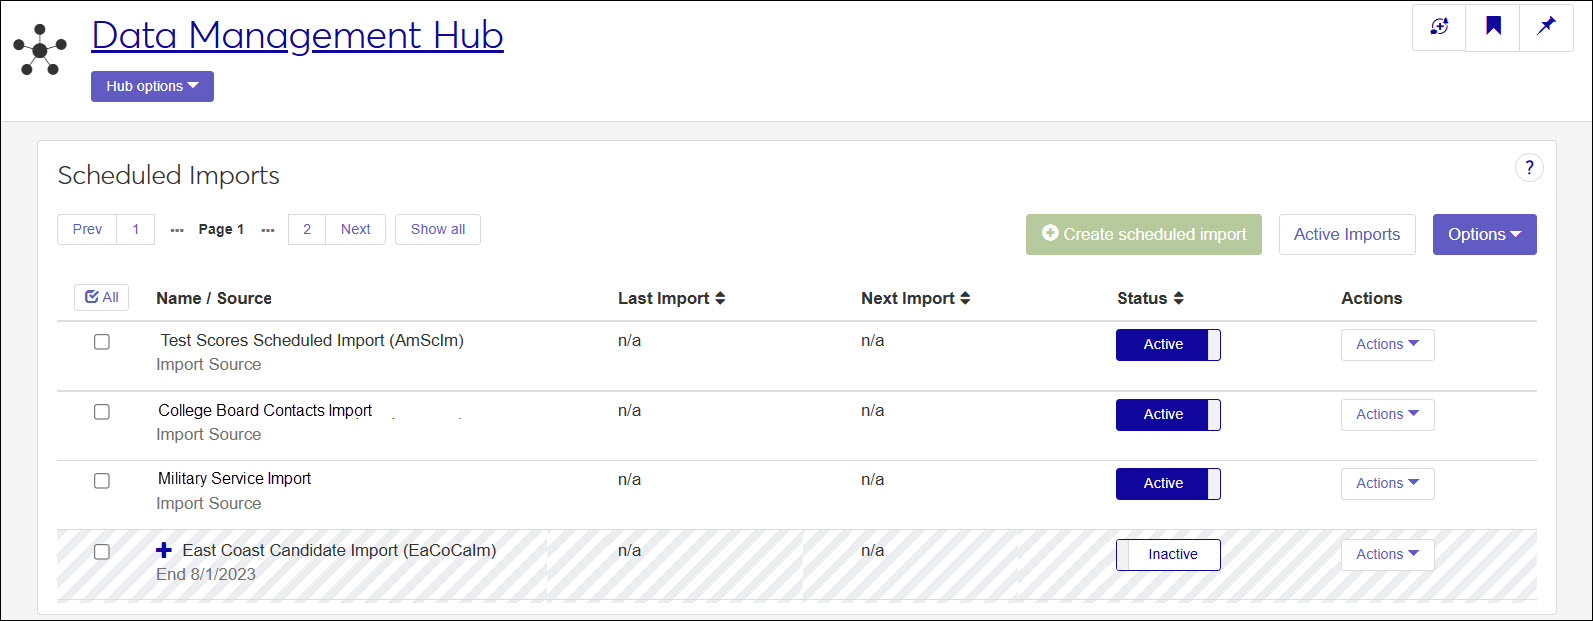
Scheduled imports let you automatically import data on a recurring basis. For example, you might import third-party online registrations or contacts each week. The Scheduled Imports page lets you create, update, activate, deactivate, and delete these imports.
Before setting up a scheduled import, ensure the file includes the data required by its associated mapping template. Files must include all the required columns, and column names must match exactly. The import process is a direct load, not an extract-transform-load (ETL) process. so data must be cleaned and reformatted before placing the file in the import location.
Information needed to set up the scheduled import:
File import location.
Specifies where the system will look for the file. You can use a UNC File Path or SFTP location. Ensure the system has the necessary permissions to access the specified location.
Note
Jenzabar-SaaS and RSMS clients work with Jenzabar's Cloud Services team to identify and configure the file location. On-prem clients must ensure appropriate network locations.
Data mapping template.
Each scheduled import must be associated with a data mapping template. The template determines where imported data is stored and whether records are imported automatically or sent to the processing queue for review. Templates are managed on the Data Management hub, Data Mapping Templates page.
Import source.
A source determines where the imported information originated. For example, a third party candidate resource such as the College Board. Sources are managed on the Campus-Wide Definitions hub, Source Type Definitions page.
Import schedule.
The schedule determines when and how frequently the system retrieves and imports the file. Schedules can run daily, align with academic terms, or follow a custom schedule. They are managed on the Campus-Wide Definitions hub, Schedules page.
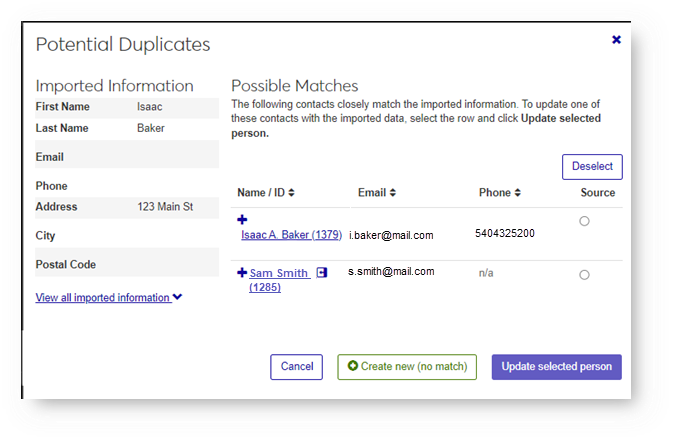
During the manual and automatic import processes, any potential duplicate or invalid data is flagged. You can then compare the existing data in the system with the imported information and choose to update existing data, create new records, or modify the data being imported.
Flagged records appear in the import processing queue for review.
To access this page and work with the different features, you must belong to a Data Management role with the Can manage scheduled imports permission enabled.
To associate data mapping templates with the file being imported, you must belong to a Data Management role with the Can manage data mapping templates permission enabled and the appropriate module access codes enabled. Module access codes are associated with data mapping templates and determine what templates you can view and data you can process.
You can find scheduled imports in several ways:
Using the filter options. If filter options are hidden, click the No filters applied link.
Using the Name filter to search by a keyword in the name.
Combining filters such as alert, status, source, template, etc.
Using the column headings to sort by ascending or descending order.
Access the Scheduled Imports page.
Click the Create scheduled import button. The Create Scheduled Import window appears.
Enter a Name.
Press the Tab key to allow the system to generate a unique code or enter one manually.
In the Import From field, select UNC File Path or SFTP.
Note
Jenzabar-SaaS and RSMS clients will work with Jenzabar's Cloud Services team to identify and configure the location where the file will be located.
If you select UNC File Path, enter the network or server location in the Target folder path field. For example, myserver\applications.
Important
In order to import the file, your J1 Web server in IAS must have read and write access to the network location.
If you select SFTP, enter the following information:
Host: address of the SFTP server J1 Web will connect to. This can be a domain name (e.g., sftp.vendro.com) or an IP address (e.g., 192.168.10.5).
Port: network port. The SFTP default is 22; although, some sites use a custom port.
Username and Password: the credentials J1 Web will use to authenticate to the SFTP server and are managed by the SFTP host.
Host Passkey: SHA-256 fingerprint used to verify a server's identity. This is generated by the SFTP host.
Target Folder Path: directory where a file should be read from. Example: ./incoming/imports
From the Data Mapping Template drop-down, select the template that will be associated with the import.
If the template supports automatic processing, imported data is added immediately and duplicates are sent to the processing queue for review.
If the template does not support automatic processing, all imported data is held in the processing queue for manual review and approval.
From the Source drop-down, select where the file data originated.
From the Schedule drop-down, select when the system will retrieve and import the file. For example, you can select a schedule that will import the file every Wednesday at 9 am.
Click the Create scheduled import button.
Access the Scheduled Imports page.
Find the scheduled import you want to update.
From the Actions drop-down, select Edit. The Edit Scheduled Import window appears.
Make the needed updates. Only the Name, Import Location, Source, and Schedule can be changed. This preserves mapping integrity.
Click the Update scheduled report button. Your changes are saved and the Edit Scheduled Import window closes.
When a scheduled import is deactivated, it cannot be used to automatically import data into the system.
Access the Scheduled Imports page.
Find the scheduled import you want to activate or deactivate.
In the Active column, select Yes or No.
Access the Scheduled Imports page.
Note
Only inactive scheduled imports can be deleted.
Access the Scheduled Imports page.
Find the scheduled import you want to delete.
From the Actions drop-down, select Delete. The confirm delete pop-up window appears.
Click the Yes, delete button.
Common reasons include:
Import file includes unsanitized or incorrectly formatted data.
Import file does not include all the information required as defined by the associated data mapping template.
Import file was not in the correct format.
Not all scheduled imports can be deleted. Only inactive imports are eligible for deletion.