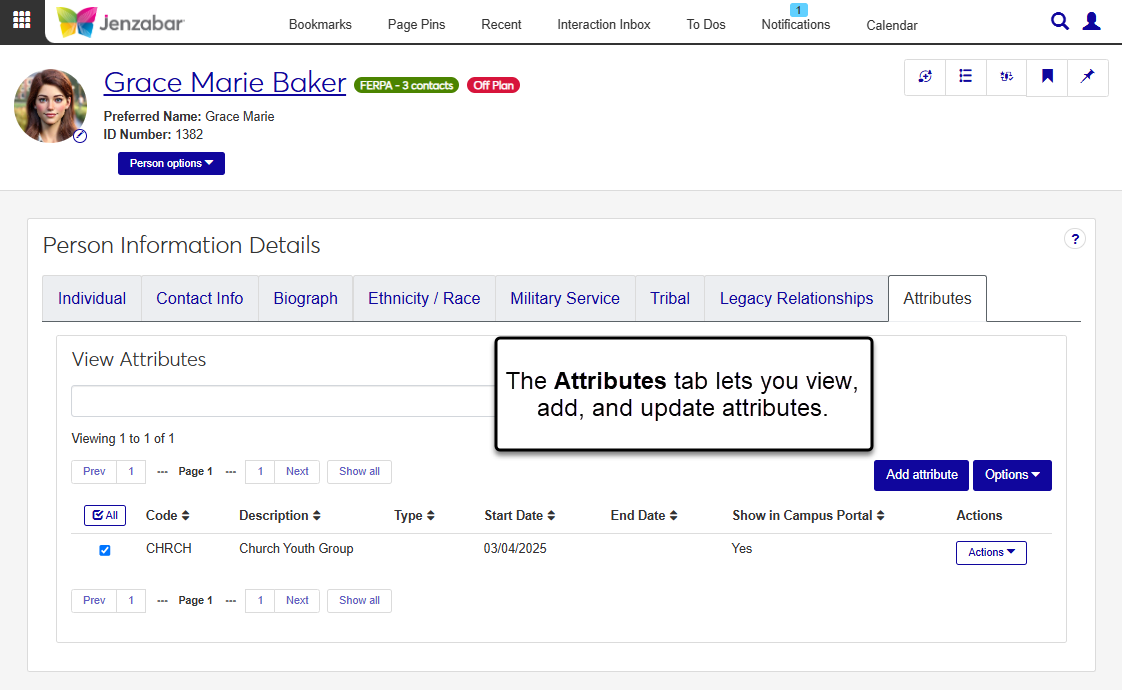
Attributes Tab
Important
Information and features vary according to the roles to which you belong and the permissions associated with those roles. For more information, contact your module manager or your campus support team.
The Attributes tab on the Person Information Details page displays attributes associated with the individual. Attributes are typically indicators of the individual's characteristics, such as a baseball player or scholarship recipient. From this tab, you can add, update, and remove attributes, as well as view and update any user-defined fields (UDEFs) associated with the attribute.
Desktop Location
You can also view and update attributes from the Attributes tab of the Desktop Name Entity window.
Database Location
Updates to attributes from this tab are saved to the ATTRIBUTE_TRANS table.
Permission Required
To access the Attributes tab, you must be in a Person Management role with the "Can view attributes" permission. If your school uses attribute types to group similar attributes, access must also be enabled for at least one Attribute Type on the Associations tab of the Person Management role.
User-Defined Fields
You can capture additional information about individuals with user-defined fields (UDEFs). User-defined fields are managed by your System Administrator and can be useful for internal reporting. You can view and edit attribute UDEFs from the Actions drop-down for each row.
Use the global search to access the person's summary page.
From the Person options drop-down, select Person information details. The Person Information Details page opens.
Click on the Attributes tab.
Use the View Attributes filter to narrow down the list by keyword.
Use Column Sort arrows
 to organize attributes by that column.
Note
You'll only see active attributes that you have access to.
On the Attributes tab of the Person Information Details page, click the Add attribute button. The Add Attribute pop-up opens.
Select an Attribute Code from the drop-down. Required.
Review the Description that autofills based on the selected code, and make updates if needed.
Enter optional Start Date and End Date values. These dates determine how long the attribute is associated with the person's record.
Select or deselect the Show in Campus Portal checkbox as needed.
Click Save.
On the Attributes tab of the Person Information Details page, click the Actions button for a row and select Edit. The Edit Attribute pop-up opens.
Make updates to the following fields as needed.
Description
Start Date
End Date
Show in Campus Portal
Click Save.
On the Attributes tab of the Person Information Details page, click the Actions button for a row and select User-Defined Fields. The User-Defined Fields pop-up opens.
Review the fields and make updates as needed.
Click Save.
Select the checkboxes next to the rows you want to export.
From the Options drop-down, select Download to Excel. The Download to Excel pop-up opens.
Select options for the Excel format and data columns.
Click Download. Your .xlsx or .zip file is saved in the file location that you have set in your browser settings.
On the Attributes tab of the Person Information Details page, select one or more attributes from the list.
Click the Options button and select Delete. The Delete Attribute? pop-up opens.
Review the list and click Yes, delete.
The person may not have any attributes associated with their record, or you may not have access to view the attributes associated with them.