When you remove a hold, it no longer applies, but its history is not deleted.
Use this window to view, add, update, remove or delete holds from individuals or groups. You can use queries to create lists of people for mass processing or for reports.
| When you delete a
hold, its history is erased.
When you remove a hold, it no longer applies, but its history is not deleted. |
|
| Holds are processed in the following order: Delete, Remove, and Add. | |
| Holds associated with privacy requests cannot be deleted. |
The Holds tab is for processing holds for individuals. The Mass Add/Remove/Delete Holds tab is for processing holds for multiple people at once. The Reports tab is for reviewing holds.
Use this tab to view, add, update, remove or delete holds to an individual. You can associate Notepad actions with a hold to track communication related to it as well as add comments/attachments to a hold to provide more detailed information.
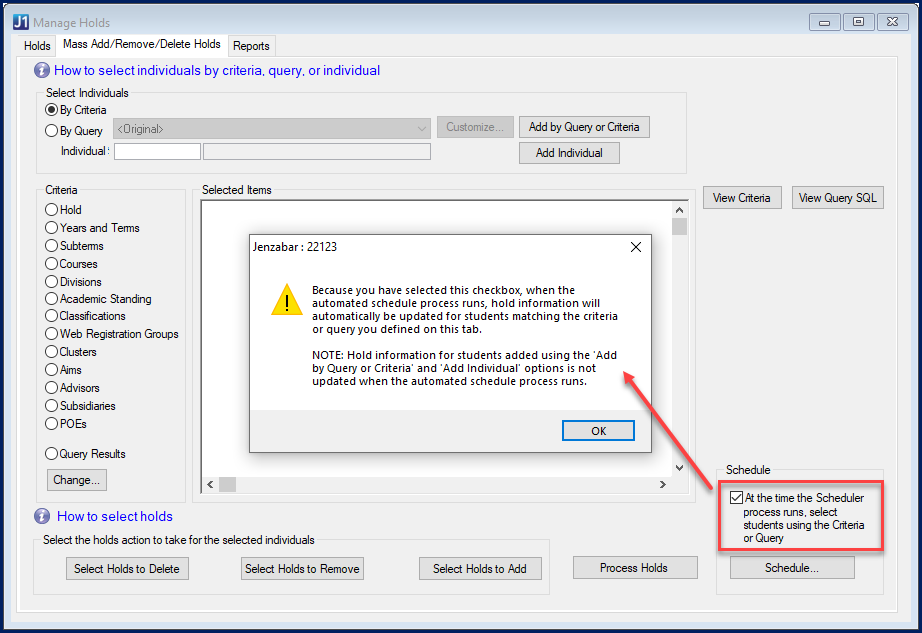
Use this tab to view, add, update, remove or delete holds for multiple people. The process consists of three steps.
To make sure your list is current when the process runs, schedule the process, and select the checkbox for At the time . . . . This will update the list dynamically when the process runs.
 |
Scheduling options are only available if the client application
server is installed on your machine. You can schedule Processing
Holds to run either of two ways:
|
Create the list of people by doing any of these:
· Add individuals by ID number.
· Select criteria for filtering people.
· Use an InfoMaker query.
 |
Use a SQL statement or a stored
procedure.
You can customize queries using either a SQL statement or a stored procedure. We store the entire data window in the parameter table, so both types of custom queries work. |
 |
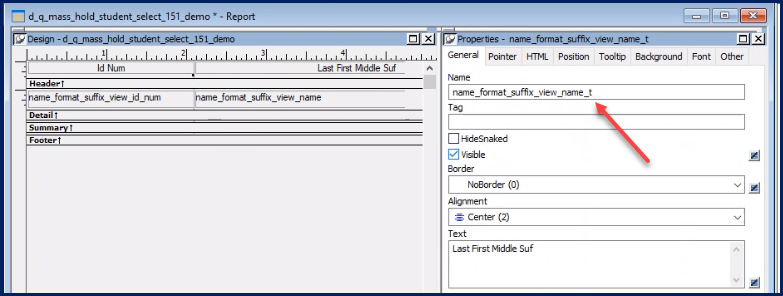
Make sure the names of the columns and text labels are exactly
thus:
|
|
Make sure the background color is Button Face on all the labels.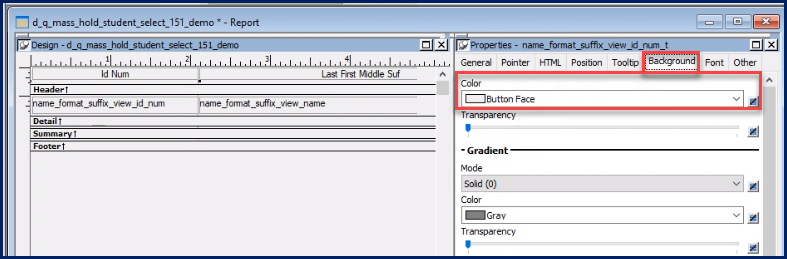 |
Use this tab to access and run the reports about Holds. The Preview button shows the selected report in a Report Preview window, and the Print button sends the selected report to the printer. To generate the report
· Create a list of students.
· Select a report type???by Individual, by Hold, or by Hold Type.
· Choose the selected InfoMaker report format or customize one.
· Choose to either preview the report on screen or print it.
There are three ways to create a list of students for reports on Holds.
· Add individual students by Student ID number
· Select criteria for filtering individuals
· Filter students using an InfoMaker query
If you have Admin rights assigned on the Hold Type Access tab of the Hold Setup window, the Delete This Hold Record button is available. You can also view, add, and remove holds associated with a Hold Type that has Admin Access Level. No right-click options are available.
Access the Manage Holds Window
Add a New Hold to an Individual
Remove a Hold from an Individual
Update a Student Master Column Hold for an Individual
Delete a Hold from an Individual
Add, Remove, or Delete Holds to Multiple People
Mass Add/Remove/Delete Holds Windows