
This guide helps you set up Jenzabar J1 Desktop to maintain your students' Scholarship GPA and the status of their eligibility for scholarships and grants in the Georgia HOPE program.
|
Georgia CHECS features are available for schools with the Georgia College HOPE Eligibility Calculation Service license, also known as the Georgia CHECS license or the Georgia Hope license. |
|
The process collects students' Legal Name. The user running this process needs permission to view Legal Name. (It matters on windows where Legal Name is displayed, such as the Regulatory Reporting window and the State Reporting Snapshot Data window.) |
Calculating a student's eligibility for the HOPE program has been difficult at times because of confusion about transfer courses, weighted STEM courses, and so on. Therefore, for all terms after the Fall 2018 term, the Georgia Department of Education will calculate the Scholarship GPA and eligibility with the information you generate. You then import the Department's eligibility information into J1 Desktop.
The new process is called the College HOPE Eligibility Calculation Service (CHECS). You submit two snapshots to the service. CHECS sends back the calculated eligibility information. You import it to update your information. Next term, you repeat the cycle.

Each term, you submit two snapshots of students' scholarship GPA records:
The GA CHECS Request Data snapshot
As needed
Your snapshot of any students who might need calculation, such as transfers, reenrolled students, or any whose eligibility you have questions about
The GA Transcript Data snapshot
After each term
Your snapshot of all students' performance for the term
CHECS calculates the students' scholarship GPA and HOPE eligibility. They send it back to you in the GPA/Checkpoint file that you then import.
These are the steps for maintaining the Georgia HOPE Eligibility status of your students.

1. Select Your Program; Set Up Permissions
and Definitions
Select your grant or scholarship program.
If necessary, give users appropriate permissions to map values and create
snapshots. Typically, these are defined once and then updated on an as-needed
basis.
2. Map
CHECS Items to J1 Values
Map J1 values to Georgia CHECS fields. Usually, report items need to be
mapped to J1 values only once and then updated on an as-needed basis.
3. Create
a Snapshot
The snapshots collect the needed information. You can evaluate snapshots
to ensure information is complete and accurate. If necessary, you can
update the snapshot data or update the source data and then recollect
the snapshot. You can repeat this until the snapshot information is accurate.
4. Generate
and Submit the File to CHECS
Submit snapshots to CHECS for evaluation. Then the CHECS office will make
any necessary updates to the information.
5. Import
the GPA/Checkpoint File
Import the file with updated information that CHECS returns to you.
Georgia Student Finance Commission HOPE Programs: https://gsfc.georgia.gov/hope
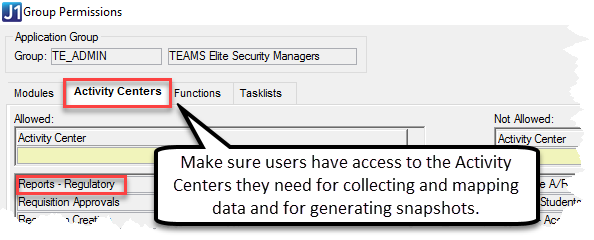
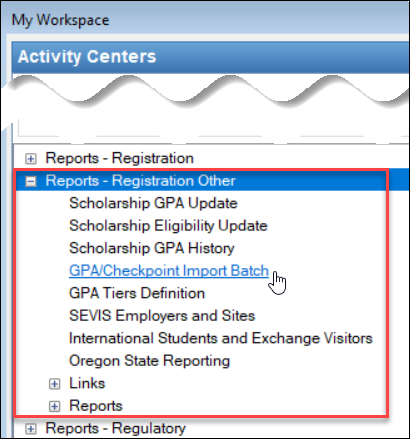
In Jenzabar J1 Desktop, several relevant windows appear in the Reports – Registration Other activity center.
Use this checklist to ensure users have the correct permissions and your data is set up. Details and screenshots are in the following sections.
Task |
Location |
|
Maintain Config Table window |
||
|
Make sure users have permission to these purpose codes: · GACHECKS · GATRANSCRIPT |
Purpose Definition window | Purpose Permission tab Other windows |
|
|
Set these up once and update as needed. |
Maintain Organization Master window Year Definition window Term Definition window |
|
□ Map CHECS Items to J1 Values. Map these values once and update as needed. |
GPA Tiers Definition window Scholarship GPA History window |
|
State Reporting Snapshots window |
||
□ Generate and submit the file to CHECS. · Transcript file (GATRANSCRIPT): After each term · Request file (GACHECS): As needed |
Regulatory Reporting window |
|
□ Import the GPA/Checkpoint file when you receive it from the state. |
Scholarship GPA History window |
|
In Step One, you’ll ensure users have the appropriate permissions, that you've selected the appropriate HOPE program, and that the codes needed to map reporting items to J1 fields are entered.
|
Do this first. It will simplify the steps that follow. |
Select the scholarship or grant program appropriate for your school.
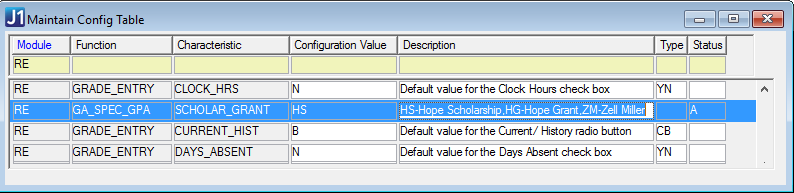
1. Open the Maintain Config Table window.
2. Scroll down to the RE module.
3. In the 'GA_SPEC_GPA' row, enter a code in the Configuration Value column. The codes are listed and described in the Description column:
· HS (Hope Scholarship)
· HG (Hope Grant)
· ZM (Zell Miller)
|
If your school has the Georgia HOPE license, and if you already work with scholarship GPA, transcripts, and reporting, then your users probably already have the permissions they need. But if they run into trouble with access, this section can help you troubleshoot. |
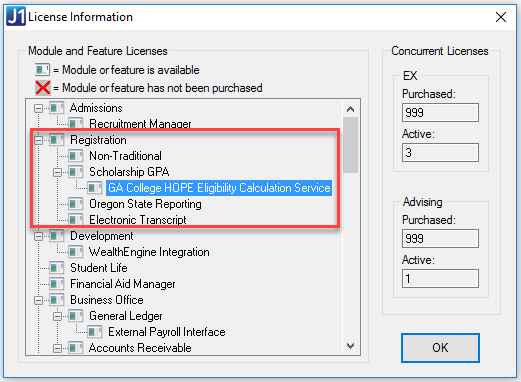
Your school needs the GA College HOPE Eligibility Calculation Service license, which is a subordinate of the Scholarship GPA license and the Registration license.
|
If your school has the Georgia HOPE license, and if you already work with scholarship GPA, transcripts, and reporting, then your permissions and definitions are probably already set. But if you run into trouble with data, this section can help you troubleshoot. |
Purpose codes control who has access to running reports. Users must be assigned to a user group with permission to access the purpose code controlling the CHECS process.
To grant a user group access to the CHECS purpose codes:
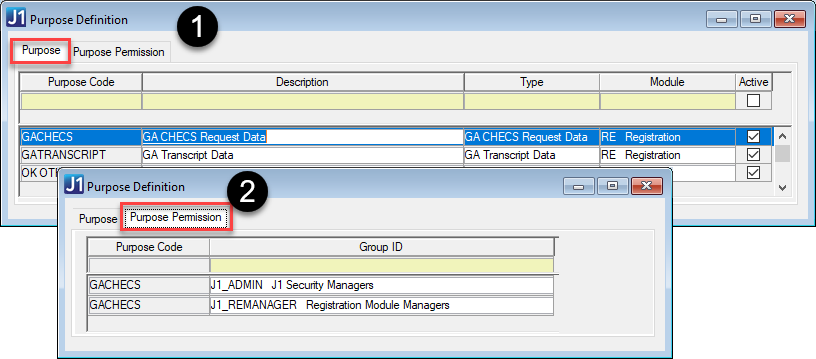
1. Access the Purpose Definition window.
2. Select the GACHECS purpose code on the Purpose tab, and click the Purpose Permission tab.
3. From the right-click menu, select Add Row.
4. From the Group ID drop-down list, select the appropriate user group.
5. Click Save on the main toolbar.
6. Back on the Purpose tab, select the GATRANSCRIPT purpose code, and click the Purpose Permission tab.
7. From the right-click menu, select Add Row.
8. From the Group ID drop-down list, select the appropriate user group.
9. Click Save on the main toolbar.
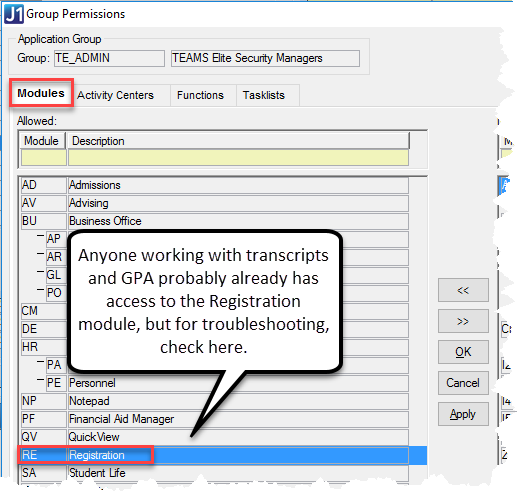
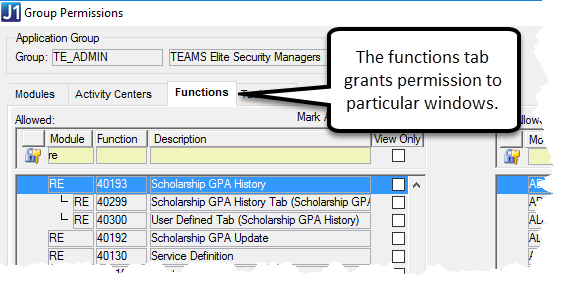
Users must belong to a group with permission to access the modules, activity centers, and functions (windows) used for setting up report item definitions, mapping those definitions to EX fields, and creating the report. Group permissions are managed on the Group Permissions window | Modules, Activity Centers, and Functions tabs (to access, click the Permissions button on the Group Definition window).
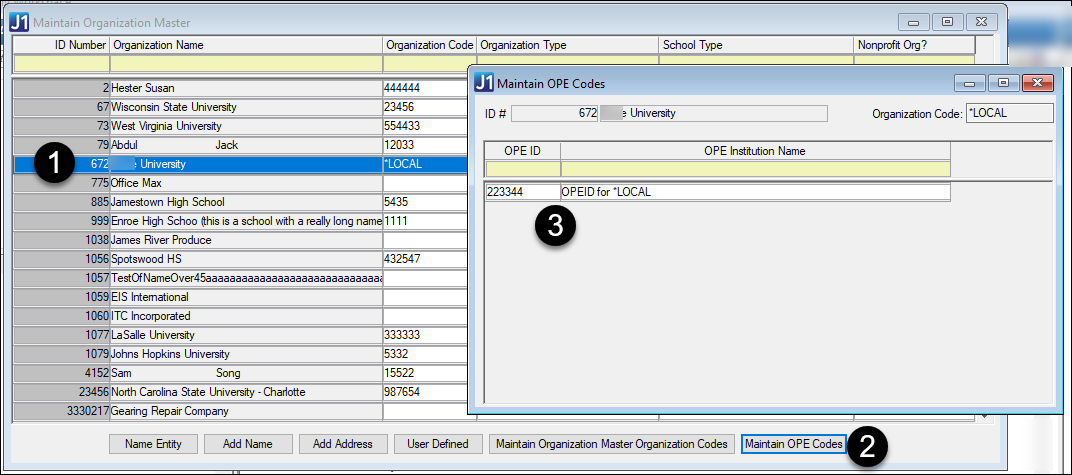
OPE Code
If the FICE code already exists:
1. Open the Maintain Organization Master window.
2. Select the row that has your school (*LOCAL).
3. Click Maintain OPE Codes.
4. Make sure your school’s OPEID is defined.
If the FICE code does not exist:
1. Open the Maintain Organization Master window.
2. Select the row of the reporting institution and click Maintain Organization Master Organization Codes. The Maintain Organization Master Organization Codes window opens.
3. Right-click and select Add Row.
4. Right-click in the Organization Code Type column of the new row and select Maintenance Screen. The Maintain Table Values window appears.
5. From the Column Name drop-down, select ‘org_cde_type’.
6. Right-click, then select Add Row.
7. In the Table Value column, add ‘FICE’.
8. In the Table Description column, add ‘The code once assigned by NCES for FICE use’.
9. Save and close the window.
10. In the Maintain Organization Master window, reselect the row of the reporting institution and click Maintain Organization Master Organization Codes. The Maintain Organization Master Organization Codes window opens.
11. Right-click and select Add Row.
12. From the Organization Code Type drop-down, select FICE.
13. In the Organization Code column, enter the institution’s FICE code.
14. Save and close the window.
Make sure that
· your GPA tiers map to the correct CHECS Checkpoint Code and
· each Checkpoint Code from the state is mapped to one of your GPA tiers.
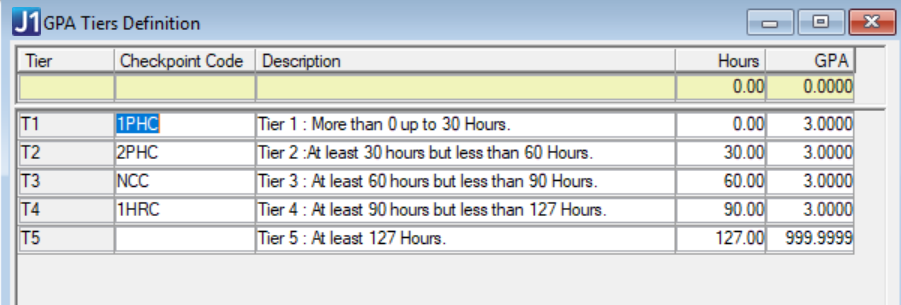
|
Hours
and GPA can be 0. |
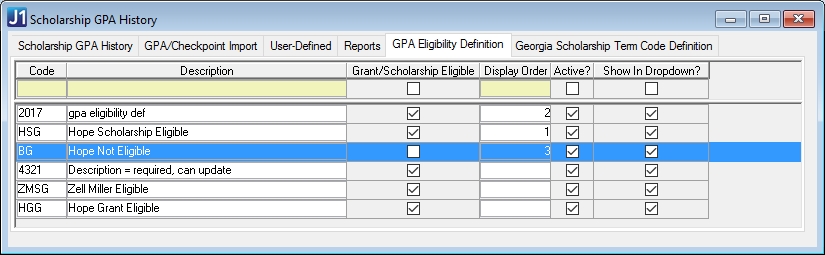
On the Georgia Scholarship Term Code Definition tab, map the CHECS year/terms to your J1 Year and J1 Term.

On the GPA Eligibility Definition tab, you need to define the values in the Import file and indicate which values are Eligible by selecting the Grant/Scholarship Eligible checkbox. Make sure the Grant/Scholarship Eligible checkbox is deselected for the 'Not Eligible' row.
Report snapshots capture state reporting information at a specific point in time which allows you to evaluate the information to ensure it is relevant and determine if any is missing or inaccurate. You can create a new report snapshot, review and update existing report snapshot criteria, maintain and update actual reporting information as well as designate a snapshot as the final for the report period, lock the snapshot down to ensure no additional updates are made, and delete an existing snapshot.
|
You can generate a state reporting snapshot any time prior to the date the report is due. Using the snapshot as a reference, you can make any needed corrections to the information that makes up the content prior to generating the report for final submission. |
|
You must have the appropriate permissions in order to work with snapshots, including creating, deleting, or modifying snapshots and working with student, financial aid, or tuition and fee data. |
Do this after every term.
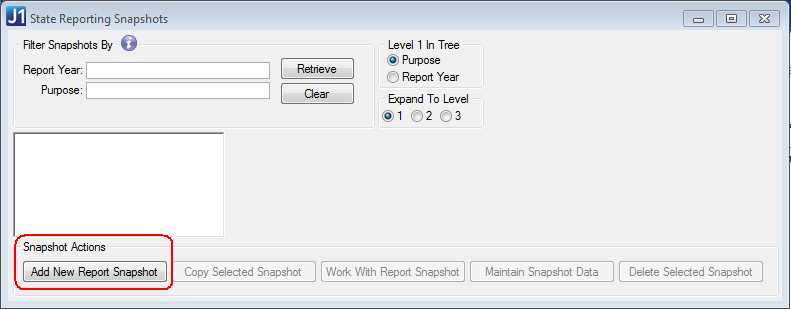
1. Access the State Reporting Snapshots window (in the Reports - Regulatory activity center).
2. Click the Add New
Report Snapshot button. The Define Criteria and Collect State Report
Data window appears.
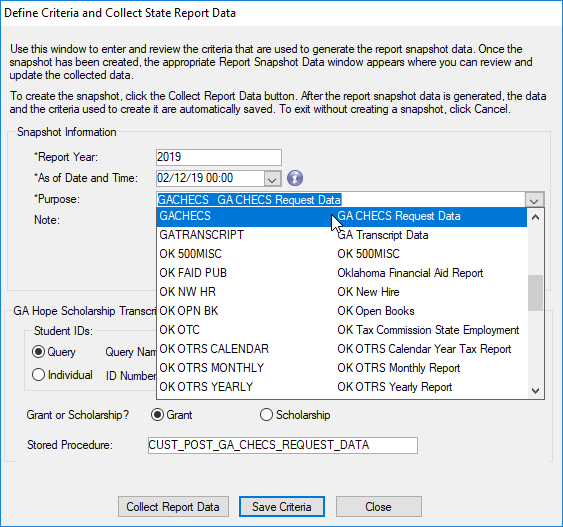
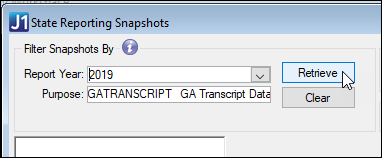
3. In the Report Year field, enter the year for which you are generating the report. This value is not included in the reporting, but it’s useful for snapshot filtering.
4. From the As of Date
and Time calendar drop-down list, select the
date for which you want to generate the snapshot. This value is
not included in the reporting, and is for snapshot filtering. If time
of day is necessary, type it manually. Select GACHECS Transcript Data
from the Purpose drop-down list.
The GA Hope Scholarship Transcript Parameters group box appears.
|
The Purpose drop-down list displays only purposes that you have permission to access. Permissions for Group IDs are maintained in the Purpose Definition window in J1 Desktop. |
5. In the Note field, enter any additional information about the report. This can be useful when working with snapshot criteria or information to let other users know what has been updated and when.
6. In the Student IDs group, user a query or select individual IDs.
7. Click the Years/Terms… button. The Select Report Criteria window opens.
a. Select a year/term and click the Add button.
b. Click OK.
8. Click the Credit Types… button. The Select Credit Types window opens.
a. Select types.
b. Click Select.
9. Select either the Grant or Scholarship radio button depending on which program your school participates in.
10. If you need to customize the batch-collecting process, have your IT administrator customize the CUST_POST_GA_TRANSCRIPT_DATA stored procedure.
11. If you need to change address priority lists, click the ellipsis … button next to Address Priority List. The Maintain Address Priority window opens. Using the Add and Remove button, select the address codes for the priority by choosing them from the Available Address Codes and adding them to the Selected Address Codes. You can also move the codes up and down in order to create the priority in which you want the system to find an address.
12. Click the Collect Report Data button. A message tells you whether your collection was successful.
13. Click the Close
button.

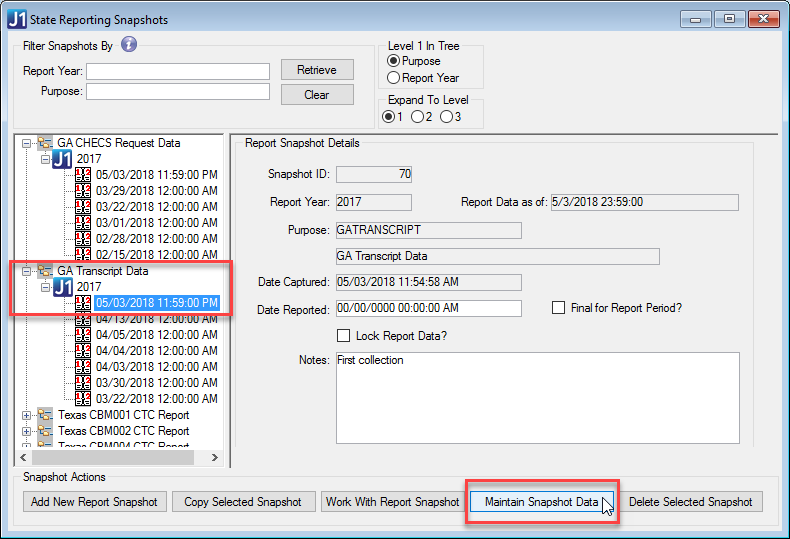
14. Back on the State Reporting
Snapshots window, click Retrieve. Your new snapshot appears in
the left panel. Click it to see the details.
|
To review or update the information, click the Maintain Snapshot Data button. |
Do this whenever you need an update for a student—such as a new student or a student who’s transferring in courses—whenever a change may affect a student’s eligibility for the Georgia grant or scholarship.
Follow the steps for creating a new Transcript Data snapshot, but select GACHECS from the Purpose Code drop-down.
If you need to customize the batch-collecting process, have your IT administrator customize the CUST_POST_GA_CHECS_REQUEST_DATA stored procedure.
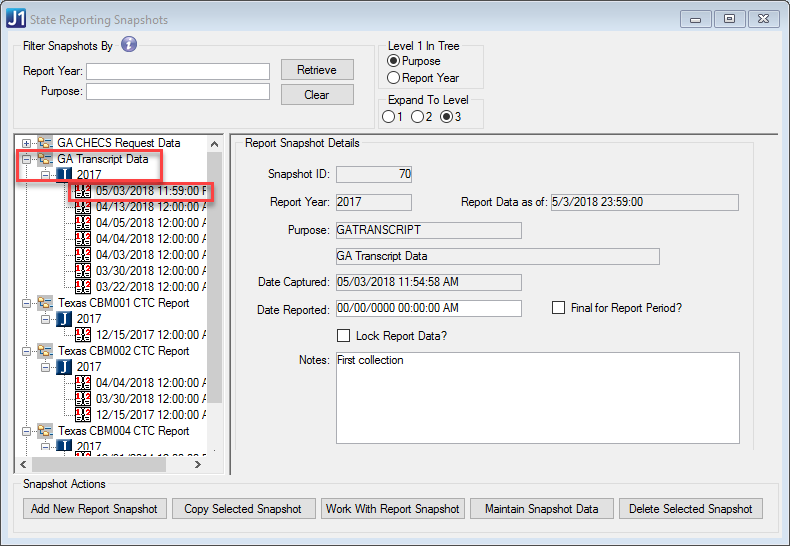
1. Access the State Reporting Snapshots window.
2. From
the Report Year and/or Purpose drop-down lists, select
the snapshots to display.
|
The Purpose drop-down list displays only purposes that you have permission to access. |
3. Click the Retrieve button. The snapshots for that Purpose code are displayed in the left panel.
4. From the retrieved snapshots, select a snapshot. The right panel fills with the Report Snapshot Details group box.
5. Click
the Maintain Snapshot Data button. The State Reporting Snapshot
Data window appears. Use the fields and columns available on each
tab to carefully review collected data and to make any needed updates.
6. For the
Request snapshot (GACHECS), you can delete selected rows, but you
can't edit any cells.
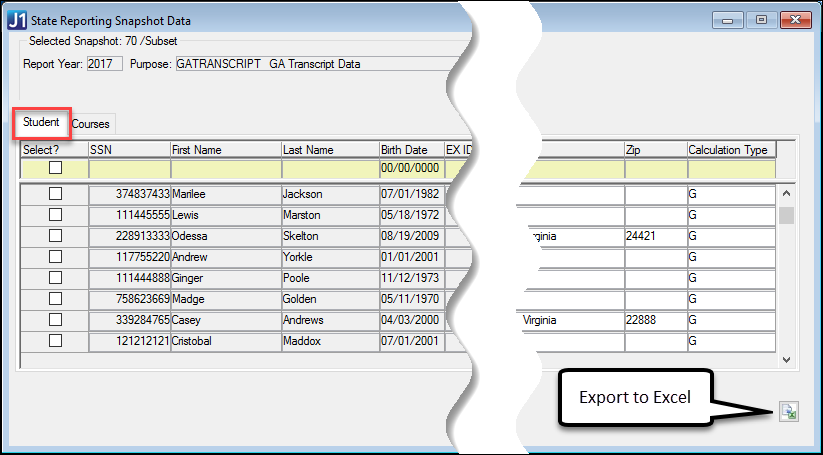
For the Transcript
snapshot (GATRANSCRIPT), you can delete selected rows, and you can
update these columns unless the snapshot is locked:
a. On the Student tab
i. Georgia Test ID
ii. Address Line 1
iii. Address Line 2
iv. City
v. State
vi. Zip
vii. Calculation Type
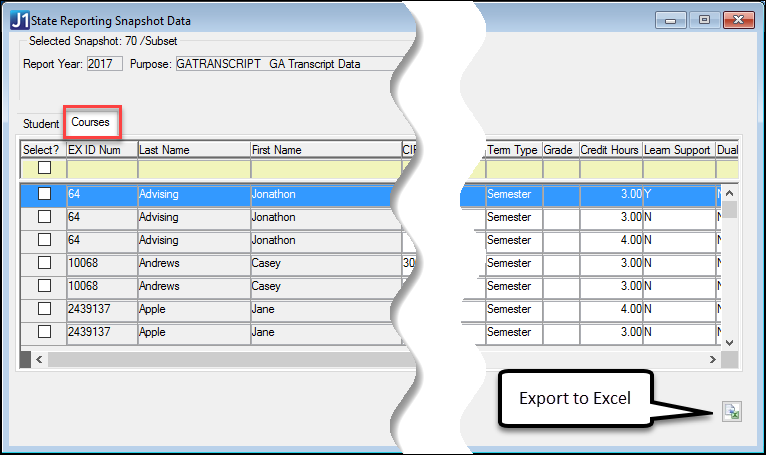
b. On the Courses tab
i. CIP Code
ii. Level
iii. Term
iv. Subject Name/Code
v. Course #
vi. Section #
vii. Course Title
viii. Term Type
ix. Grade
x. Credit Hours
xi. Learn Support
xii. Dual Enrolled
xiii. Joint Enrolled
xiv. Count Towards Degree
xv. Count Towards Degree Effective Term Code
xvi. OPEID
xvii. Institution Name
xviii. High School GED Grad Date
|
When you edit information in the snapshot, it doesn't update in the source J1 tables. For example, if you edit a student’s Degree Awarded in the Maintain Snapshot window, the edit will be included in your snapshot. However, the address will not update in J1 Desktop. Therefore, the next time you create a snapshot or collect report data for an existing snapshot, it will collect the original information from J1. Thus, it's better to go back and update the original J1 source data, and then recollect the Snapshot Data. This will ensure that your updates will be included if the collection process is run again. |
|
Exports to Excel don’t include the SSN column. |
7. To remove a record from the snapshot:
a. Select the checkbox for the record to be removed from the snapshot.
b. Click the Delete Selected Rows button. The row is removed from the snapshot.
8. To lock the snapshot and keep it from being updated, select the Lock Snapshot? checkbox. It is good practice to lock snapshots that have been submitted and approved by the collecting agency, to ensure that information is maintained as it was submitted. You can lock the snapshot here or on the State Reporting Snapshots window (Step 7 above).
9. Use the Export to Excel button if you want to export that data to an Excel spreadsheet.
10. Click the Save button. The reporting snapshot information is updated.
When your snapshot is accurate and complete, you are ready to generate the file you'll submit to CHECS.
When you're confident the information is accurate, you can generate the file for submission.
1. Open the Regulatory Reporting window.
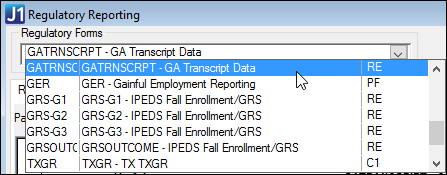
2. In the Regulatory Forms
drop-down, select GATRNSCRPT or GACHECS.
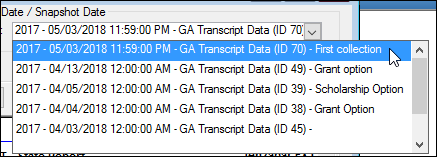
3. In the Snapshot drop-down, select your
snapshot.
4. The information appears on the Report tab.
5. Click the Web Import tab.
6. On the Web Import tab, click the Create the
Web Import File button. The Web Import File Path prompt displays.
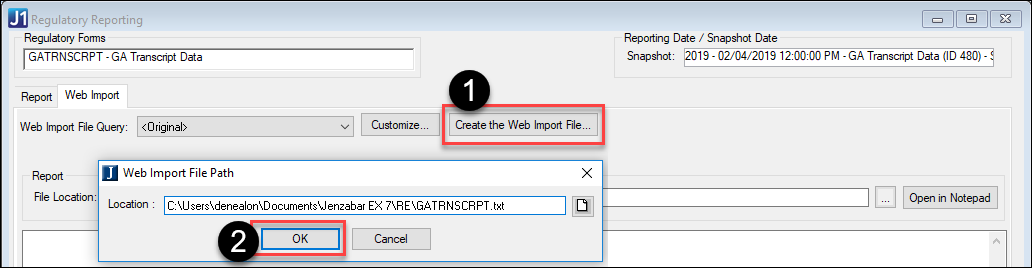
7. Click
OK to accept the default or browse to the location you wish the
file to be stored. You must have access to write a file to the chosen
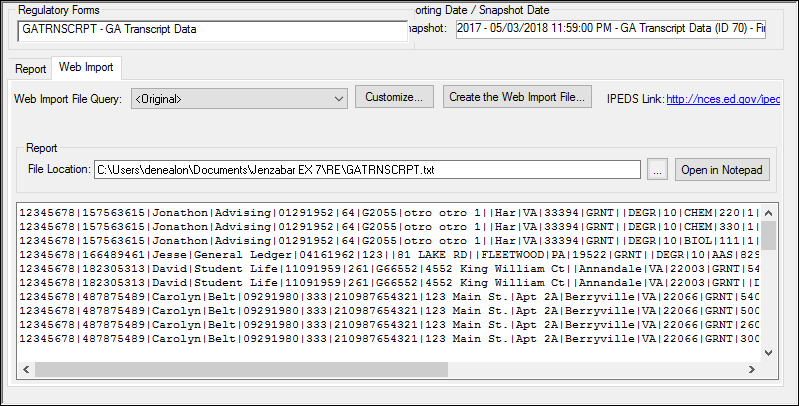
location. The file appears for review on the Web Import tab, and
you have the option of opening it in Notepad.
8. When you’re ready to submit the file to the collecting agency, rename and submit the .txt file created by this process.
After you submit a transcript or request file, the CHECS process evaluates it and makes necessary adjustments for scholarship GPA and HOPE eligibility. The state then sends you the GPA/Checkpoint file to import. You import it and note the changes.
1. On the
GPA/Checkpoint Import tab, click the Select
What to Import... button.
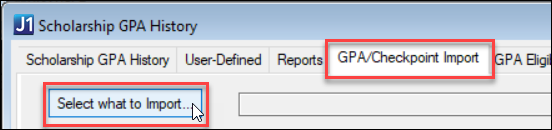
A pop-up window opens.
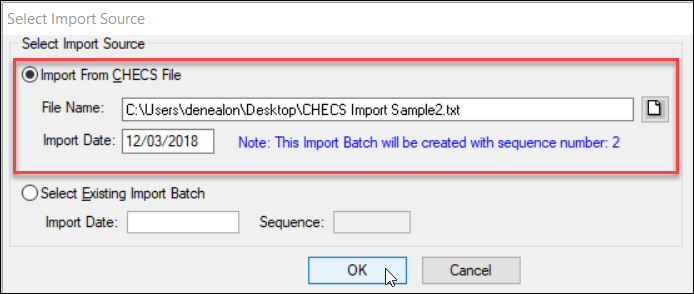
a. Click the Import from CHECS File radio button.
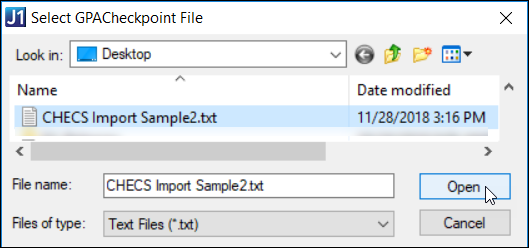
b. Click
the Filepath icon  to
navigate to the file you received from the state.
to
navigate to the file you received from the state.

c. In
the Select GPACheckpoint File pop-up, select the file, and click Open.
d. Select the Import Date. (Today's date is the default.) The system assigns this import a Sequence Number. (Each import on a particular date is considered a batch, and each batch gets a Sequence Number.)
e. Click
OK.
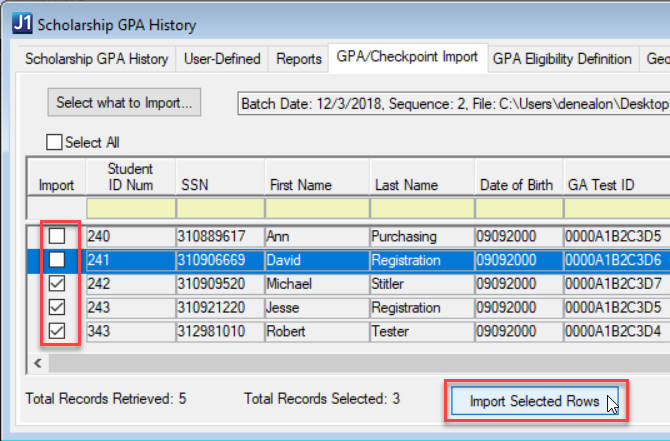
2. In the confirmation pop-up, click Yes. All the pop-ups close, and the information appears in the grid.
3. Select the rows you want to import.
4. Click Import Selected Rows.
5. The GPA/Checkpoint Import Opotions window pops up.
a. Select a Mapping Option (that is, which GPA to map to): Scholarship or Grant
b. Enter a Batch Date.
c. Click the Proceed button.
6. A message tells you
whether the import was successful. The records are now updated and available.
A GPA Tier History App ID is assigned
to each row you imported.
7. If you need to import rows you haven't imported yet, there are two ways to do it.
a. If you still have the window open, select the rows you want, and click Import Selected Rows.
b. If you've closed the window, open it again.
i. Click the Select What to Import button. A pop-up window opens.
ii. Click
the Select Existing Import Batch
radio button.
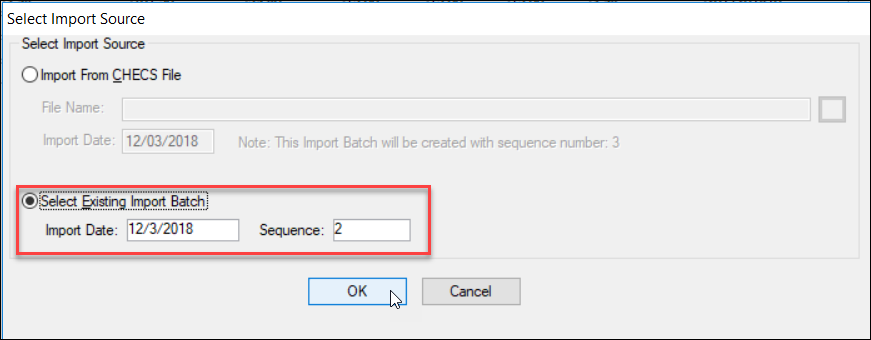
iii. Select an Import Date. (Today's date is the default.)
iv. If there was more than one batch on that date, select the Sequence Number of the batch you want.
v. Click OK. The pop-up closes, and information appears in the grid.
vi. Select the rows you want to import.
vii. Click Import Selected Rows.
|
NULL is allowed in each of the import columns. |
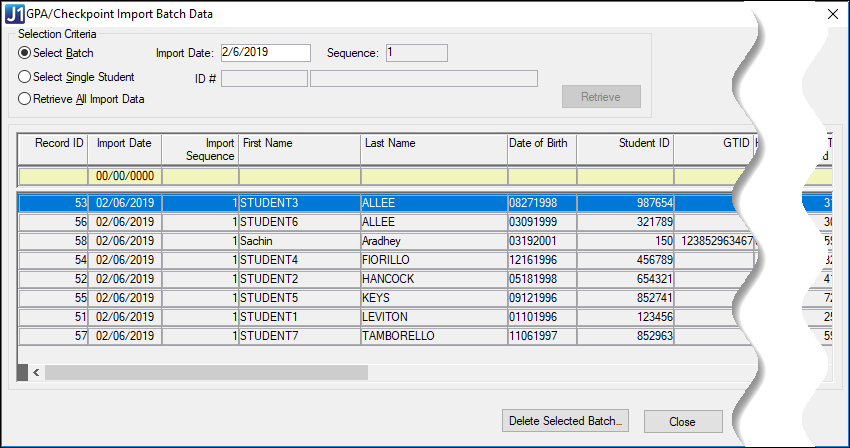
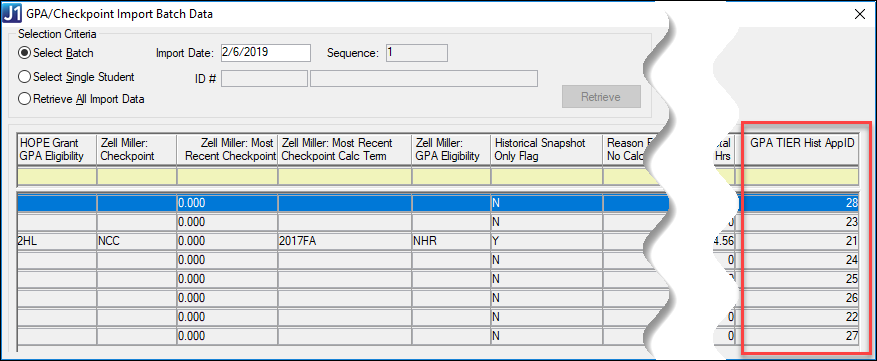
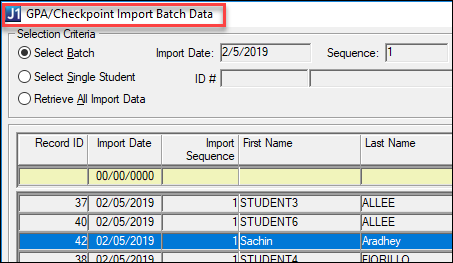
You can view the imported batch in the GPA/Checkpoint Import Batch Data window.
1. Select the Select Batch radio button.
2. Select the batch’s Import Date. If there’s only one batch for that date, the information appears.
3. If there’s more than one batch for that date, select the Sequence Number.
4. Click Retrieve. The information appears—including the Tier Hist App ID, which is a record of the importation of the student information.
The GPA/Checkpoint Import Batch
Data window scrolled to the left
The GPA/Checkpoint Import Batch
Data window scrolled to the right to show the Tier Hist App ID
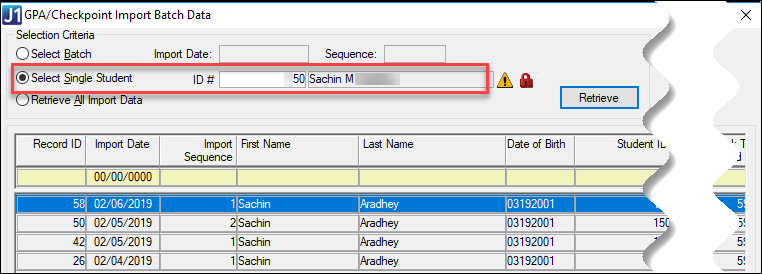
You can view an individual student’s information.
1. Select the Select Single Student radio button.
2. Click Retrieve.
The grid shows the student’s records from all the imported batches.
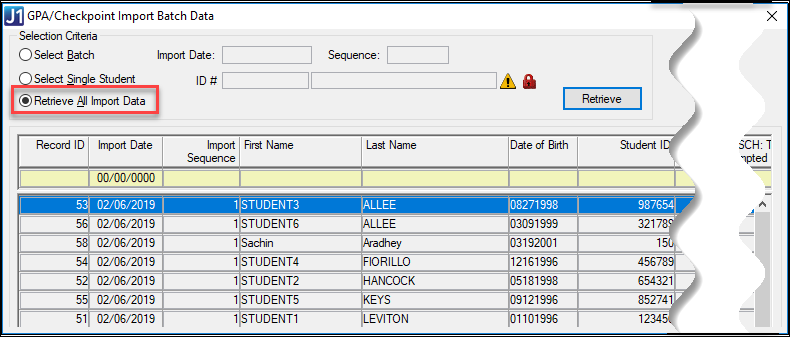
You can view all the information from all the batches at once.
1. Select the Retrieve All Import Data radio button.
2. Click Retrieve.
The grid shows the all the records from all the imported batches.
If you have permission, you can delete a selected batch. Doing so doesn’t delete the student information. Instead it merely deletes the record of it being imported. Deleting could reduce clutter when you have many import batches.
1. Select the Select Batch radio button.
2. Click the Import Date drop-down, and select a date.
3. Click the Sequence drop-down, and select a sequence. (If there was only one import on that date, then 1 is selected automatically.)
4. Click Retrieve.
5. Click Delete Selected Batch. A pop-up asks you to confirm. If records in the batch were used to create Tier rows for students, a message reminds you that you'll lose the reference data behind the Tier row creation but not the actual student data in Scholarship GPA History.
6. Click
Yes.
The entire batch of your selected Import Date and Sequence is deleted.
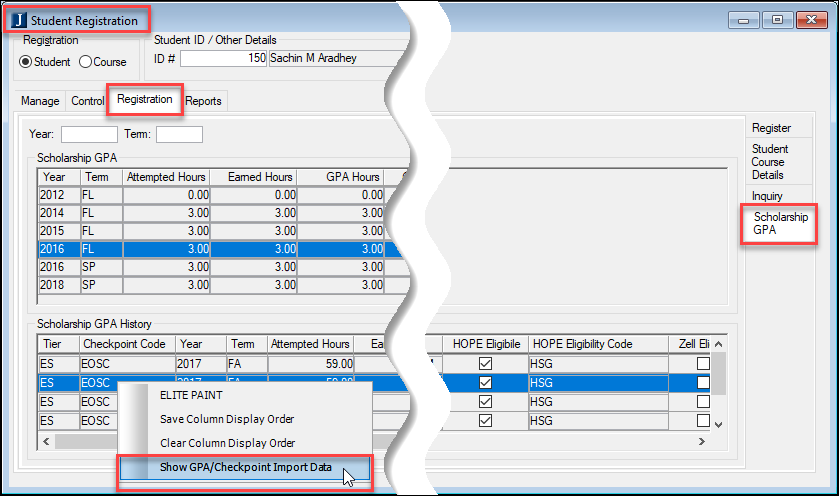
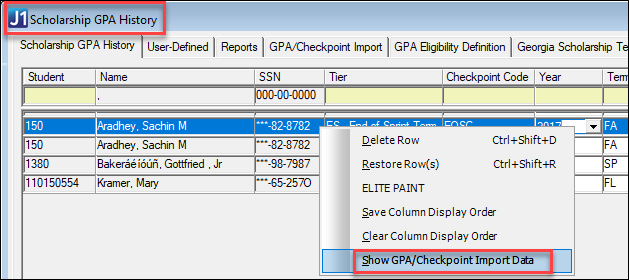
From these two windows, you can select a record and navigate directly to the batch it was created in.
In those windows, right-click a row, and select Show GPA/Checkpoint Import Data.
|
If this option isn't available in the right-click menu, it's because the row doesn't have a Tier Hist APPID value. That is, the row hasn't been imported. |
Georgia CHECS Snapshot Report Troubleshooting


