Use this window to find and access existing documents and to add new ones. You can open this window from several places:
· From the Document Storage System activity center
· By clicking the Documents button in any of several windows. Learn more about the Documents button.
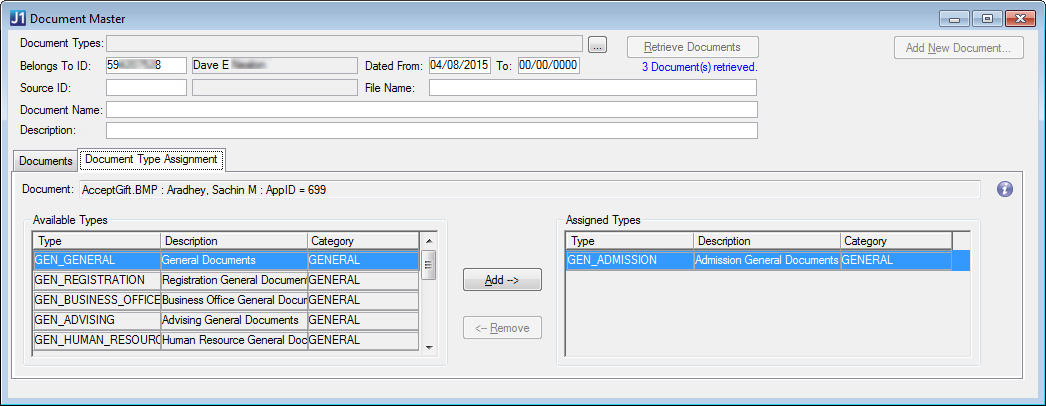
A number of windows show the Documents
button next to the ID # and Name. Click it to open
the Document Master window
already filtered to show only documents that belong to the selected
ID.
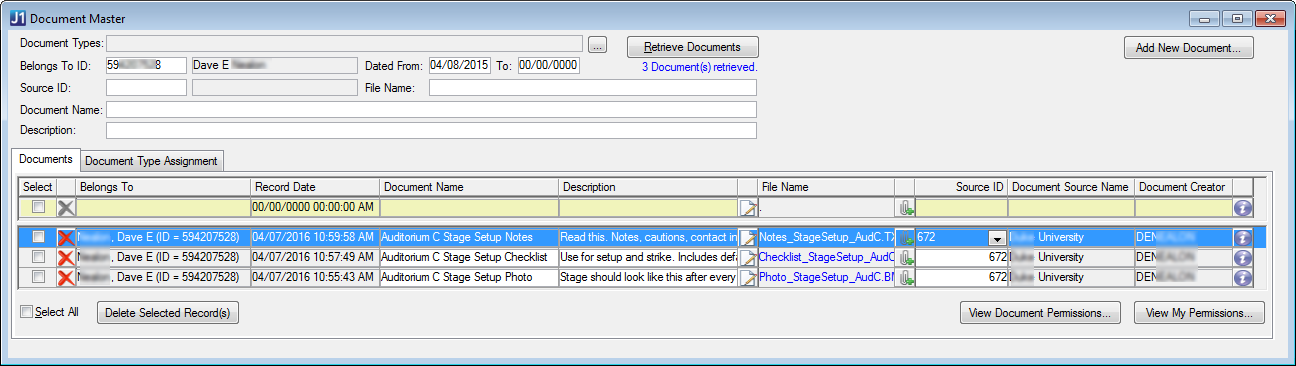
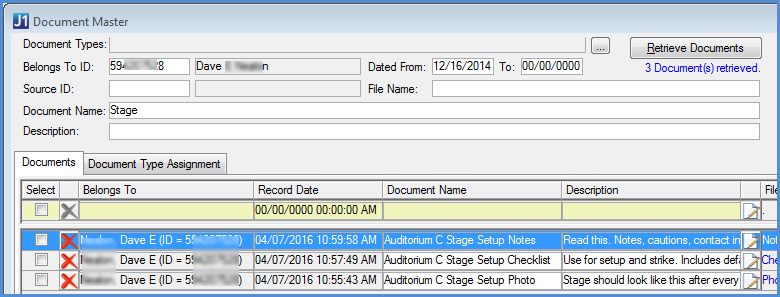
The Documents button is only available for users with permission to access the Document Master window. Options for deleting, replacing, editing, and seeing documents will also vary according to your permissions.
These windows have the Documents button:
Module | Windows |
Admissions |
Maintain Candidacy Quick Candidate Entry |
Advising |
Prospective Student Transfer Entry |
Common |
Alternate Identifiers Alternate Names Financial Aid Inquiry Internet Submissions Organization Tracking for Student Student Awards Student Holds |
Development |
Biographical Data Constituent Research Work with Relationships |
Financial Aid Manager |
CommonLine Student Loans Financial Aid Master Student Employment Master View Student Information |
Registration |
Faculty Information Register Students Student Information Student Inquiry Student Registration |
State Reporting |
Texas Residency Application |
· By clicking the Transcripts button in any of several windows. See the Transcripts in Document Storage topic.
From the Documents tab you can add new documents and search for existing ones. You can edit some of a document's attributes, such as its name, comment, and source. You can delete documents or replace them, and you can view permissions for each document or view all your permissions for documents.
Your ability to delete, replace, edit attributes, open, and even to see documents in a list depends on your permissions.
The Information tool tip at the right of each row shows the Document Types assigned to the document. Thus, even if you don't have permission for the Document Type Assignment tab, you can see the document types (if you have Directory Listing permission for those types).
When you click Add New Document,
the Add New Document pop-up
lets you define and attach a new document.
Example
Image
The Description is required and is helpful in document searches, so provide useful, searchable information.
Documents have the following attributes:
· Document Type: a subset of document category. See the Document Storage Setup Window topic.
· Belongs To ID: who the document is about (such as the student that a transcript describes)
· Source ID: who originated the document (such the university that created the transcript)
· File Name: the file name, including the extension (such as seatchart-0001.pdf)
· Document Name: the document's title (such as Seating Chart 1)
o By default, it is the same as the File Name, but you can edit it
· Description: a description or comment to aid in searches
o Required
o A good description will aid in searches.
· Document Creator: the J1 Desktop log-in user name of the person who added the document to the Document Storage system
You can use these attributes as filters to help you search for documents. Enter a term or partial term in any or all the attribute fields. The Dated From filter is set by default to one year prior to today, but you can edit it.
In the example below, the user searched for documents belonging to ID #59***8 dated from 12/16/2021 to the present whose document name includes the word "Stage".
You can also sort the data window by clicking any column header.
For the document you selected in the Documents tab, you can add and remove assigned types. Each document must belong to at least one type.
This tab is only available if you or the group you belong to have permission to add document types. You can still view the document types assigned to a document. by hovering hover over the Information icon (Documents tab).
1. Open the Document Master window.
2. Click
Add New Document... .
The Add New Document pop-up
opens.
3. Select a Document Type from the drop-down list.
4. Select or enter a Belongs to ID Number.
5. The Record Date/Time column fills automatically, but you can edit it.
6. To the right of the File Name column, click the Document button, and navigate to select the document.
7. The Document Name is filled by default with the file name of the file you selected. However, you can edit it to make it a more readable or meaningful document title.
8. Add a Description. This required field helps users search for documents.
9. Use the optional Document Source column to record the organization providing the document.
a. If the document is from your school, click Select My School ID.
b. If
the document is from another organization, click the Organization
button ,
and select an organization.
10. Click Add Document.
Your ability to delete, replace, edit attributes, open, and even to see documents in a list depends on your permissions.
If the Add New Document... button is inactive, you don't have the Add permission for any document types.
Use filters to find documents that meet your criteria. The Dated From filter is populated by default, but you can change it. You must use at least one filter.
1. Open the Document Master window.
2. In the header, you can use any or all the filters to if you wish to limit your search.
a. Document Types
i. Click
the Document Type Lookup button
.
ii. In the resulting Select Document Type window, select any or all document types.
iii. Click Select.
b. Belongs to ID: Enter an ID or use the drop-down list.
c. Dated
i. Enter a date in Dated From. The default is one year prior to today. Use 00/00/0000 to represent no limit on the earliest date.
ii. Enter a date in Dated To. Use 00/00/0000 to represent no limit on the latest date.
d. Source ID: Enter an ID or use the drop-down list.
e. File Name: Enter the whole or partial file name. Examples: 'document-01.txt' or 'ment-0'
f. Document Name: Enter the whole or partial document name. Examples: 'Graduation Seating' or 'Seating'
g. Description: Enter the whole or partial comment. Examples: 'Promotional Video Script' or 'Vid'
3. Click Retrieve Documents.
Your ability to delete, replace, edit attributes, open, and even to see documents in a list depends on your permissions.
1. Open the Document Master window.
2. Select filters and click Retrieve Documents.
3. Click a document's File Name.
Your ability to delete, replace, edit attributes, open, and even to see documents in a list depends on your permissions.
1. Open the Document Master window.
2. Select filters and click Retrieve Documents.
3. You can edit the following attributes:
a. Document Name: Enter a new name directly in the column.
By default, this is the same as the File Name, but it is editable.
b. Description
i. Click
the Edit comment... button
.
The Edit - Text Data window
opens.
ii. Make your edits.
iii. Click Close and Return Data.
c. Source ID: Enter a number or select one from the drop-down list.
4. Click the Save button on the main toolbar.
Your ability to delete, replace, edit attributes, open, and even to see documents in a list depends on your permissions.
1. Open the Document Master window.
2. Select filters and click Retrieve Documents.
3. To
the right of the File Name
column, click the Replace File
button .
4. Navigate to find the replacement file.
5. Click Replace.
The replacement file must meet the requirements of the document category (such as file size and file type extension) that are established in the Make File Extensions Available window.
Your ability to delete, replace, edit attributes, open, and even to see documents in a list depends on your permissions.
To delete a single document:
1. Open the Document Master window.
2. Select filters and click Retrieve Documents.
3. Click
Delete this Document record
next to the document you wish to delete.
4. The resulting pop-up asks you to confirm your intention.
5. Click Yes.
To delete multiple documents:
1. Open the Document Master window.
2. Select filters and click Retrieve Documents.
3. Click the check box in the Select column for any documents you wish to delete.
4. Click Delete Selected Record(s).
When you delete documents, the action is recorded in the Application Log. All the deletions while the Document Master window is open are recorded under a single log-in ID. If you close and reopen the window or if you log in under a different ID, new deletions are recorded in a new record.
Your ability to delete, replace, edit attributes, open, and even to see documents in a list depends on your permissions.
View Permissions for a Document
1. Open the Document Master window.
2. Select filters and click Retrieve Documents.
3. Click the Select checkbox for the document.
4. Click
View Document Permissions.
The View Permissions pop-up
shows your effective permissions
for the document???that is, permissions you have because they have been
granted to you or to a group or role associated with you.
1. Open the Document Master window.
2. Click
the View My Permissions...
button.
The View My Permissions window
opens, showing the Effective Permissions
data window.
Effective permissions are permissions you have because they have been
granted to you or to a group or role that you belong to. You can also
have effective permissions because you are the owner of a document
or document type, or you are the Document Storage Administrator.
3. In the Document Type tab, view your permissions to each document type.
4. In the Document tab, select filters as you wish, and click Retrieve Documents. The resulting data window shows your permissions for individual documents.
5. Click
View Assigned Permissions.
The Assigned Permissions data
window appears. Assigned permissions are permissions granted directly
to you, the user, rather than to a group or role that you belong to.
Permissions you have for the following reasons don't appear here:
§ You are the owner of a document.
§ You are the owner of the document type.
§ You are the Document Storage Administrator.
Thus, even when a permission doesn't appear as assigned in this window, you may have effective permission.
6. View the Document Type tab and the Document tab as you did in the Effective Permissions data window.
7. Click Close.
Assign Document Types to a Document
1. Open the Document Master window.
2. Select filters and click Retrieve Documents.
3. In the Documents tab, click a row to select a document.
4. Click
the Document Type Assignment
tab.
The Available Types panel shows
all document types that are available to assign to the document. That
is, documents for which you have Directory Listing and Add permission.
The Assigned Types panel shows
the document types that are already assigned to the document. (You
can see the types for which you have Directory Listing and Add permission.)
5. Drag
a type to the Assigned Types
panel, or select a type and click Add.
The system checks to make sure the document matches the file type extension
and file size of the new type. If it doesn't match, you won't be able
to add the type to that document.
6. Click the Save button on the main toolbar.
Your ability to delete, replace, edit attributes, open, and even to see documents in a list depends on your permissions.
Remove Document Types from a Document
1. Open the Document Master window.
2. Select filters and click Retrieve Documents.
3. In the Documents tab, click a row to select a document.
4. Click the Document Type Assignment tab. The Assigned Types panel shows the document types that are already assigned to the document.
5. Select an assigned type, and click Remove.
A document must have at least one type assigned. You can't remove the last assigned type. However, a document may be assigned to some types that you don't have permission to see. So you may be able to remove the last type that's visible to you.
6. Click the Save button on the main toolbar.
Your ability to delete, replace, edit attributes, open, and even to see documents in a list depends on your permissions.
You must have Delete permission to remove document types from a document.
Access Transcripts from Various Windows
From any window in which the Transcripts button appears:
1. Click the Transcripts button. The Document Master window opens.
2. Select filters as you wish, and click Retrieve Documents. Depending on your permissions, you can then view, edit, replace, or delete the document.
Document Storage System Overview
Permissions in Document Storage