You can import large amounts of information into J1 Desktop such as transcript files and applications for admission.
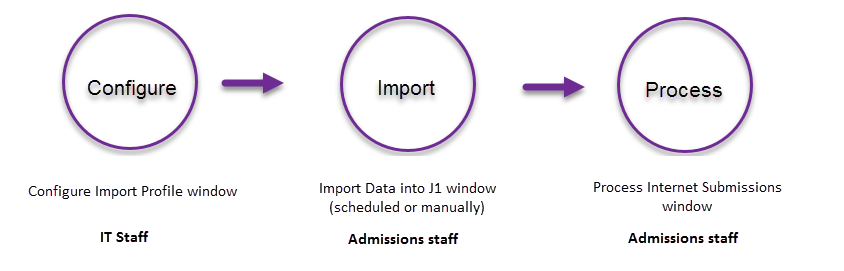
Typically, the import process involves three main steps.
Import profiles tell J1 Desktop how to read the imported files. The profiles are configured by your school's IT group on the Configure Import Profiles window.
This feature currently supports Electronic Data Interchange (EDI ) and some delimited file formats. Jenzabar provides profiles for the following:
· EDI Transcripts
· Apply Texas two-year application
Configuring the import profiles involves selecting the appropriate profile, and selecting the Main and Archive folders for the files.
A profile has many parameters that may be customizable, but we recommend proceeding with caution. Make a copy of the original profile and rename it; then work in consultation with the services team. Although it's possible to customize profiles and to create new ones, these activities are not yet fully supported.
For schools with the J1 Desktop Development license, Jenzabar also provides a WealthEngine profile. This profile is used directly in the Development module; it doesn't require any configuration in the Configure Import Profile window.
Admissions or Registration staff can import files on the Import Data into J1 window. They simply select a profile, browse for the files to import, and click either the Import File(s) button or the Schedule... button. The records contained in the imported files will appear in the Process Internet Submissions window.
Admissions or Registration staff can process the imported records on the Process Internet Submissions window. The Submission Type, Source, and Name columns are most helpful in finding the newly imported records.
![]() Import Transcripts and Other Data
Import Transcripts and Other Data
Configure Import Profiles Window