
Although it's called AD to RE, remember that during this process you can roll candidate information to Advising tables, too, and also provide valuable information to the accounts receivable and financial aid offices.
This window allows you to transfer to Registration those records for Candidates who have reached a stage in Admissions that allows them to be eligible for registration.
When admissions candidates become students, you need their records to transition from Admissions tables to Registration tables. We call this "rolling" the candidates, and we call the process "Admissions to Registration" or "AD to RE".
|
|
Although it's called AD to RE, remember that during this process you can roll candidate information to Advising tables, too, and also provide valuable information to the accounts receivable and financial aid offices. |
Of course, you want an efficient way to roll as many students at once as possible, optimized so you populate as many fields as possible at just the right moment.
There are several important factors to keep in mind for rolling candidates in the AD to RE process.
|
|
Push vs. pull: Some schools have the Admissions office "push" the information to Registration database tables, while most schools have the Registration office "pull" the information. Registration will curate the information from then on, and it's critical to their NSC and IPEDS reporting. Whichever your school decides, make sure the offices communicate well with each other. In this documentation, we assume the Registration office is pulling the information. |
Check that the candidates' information is complete and that your programs are defined.
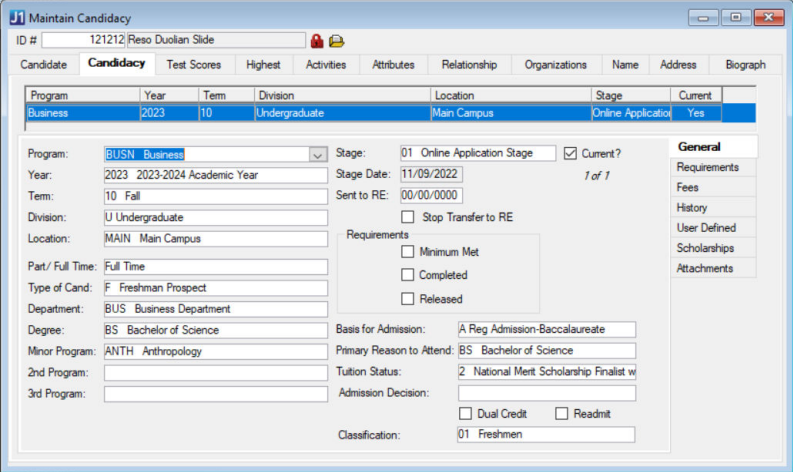
Check the Maintain Candidacy window, Candidacy tab, General subtab to make sure candidates have the information you need to roll. Besides the fields required to save a candidacy record, other fields may be important to your roll, including Classification, Tuition Status, and Degree. Degree is especially important for setting up Advising.
|
|
These fields are required to save a candidacy row:
|
Check also the Organizations tab and, on the Candidate tab, General subtab, the Last Organization attended.
Example of a Freshman Prospect
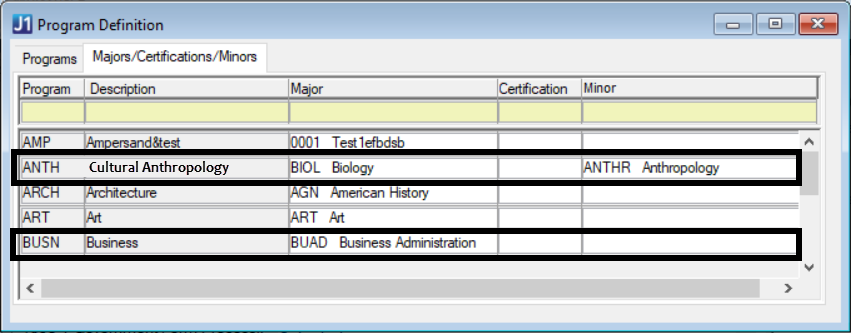
Check the Program Definition window, Majors/Certifications/Minors tab to make sure your candidates' programs are mapped to a major or certification. This will correctly populate their degree program in the Degree History table.
|
|
Your Admissions programs needn't map one-to-one with majors or certifications. For example, the Biology, Biochemistry, and Biology Education programs could all map to the Biology major. |
Example
In this example, the candidate's Business program maps to the Business Administration major, and their Cultural Anthropology program maps to the Anthropology minor.
Candidate information is centered in the Maintain Candidacy window, Candidacy tab. You'll roll candidates in groups based on certain similarities in that data. For example, you might run the process once to roll first-time freshmen in a group. You might have subsequent runs for each of these groups: readmitted students, transfers, and graduate school admissions.
For each of those rolls, the process is something like this:
Decide when to roll each run. (There might be a different optimal time for each group.)
Select the candidates for a particular run.
Select the fields to populate (and options for how they're populated).
Pay special attention to Degree History options.
Optional: Include an RBU cluster.
Run the process.
Verify and troubleshoot.

The Admissions to Registration Transfer window in Desktop is your main work space. There, for each run, you select the candidates and the fields to populate for them. You might also use one or more of these windows:
Candidacy Type Definition
Classification
Maintain Candidacy
Program Definition
For Rules Based Updates:
Cluster Definition
Update Cluster Definition
Update Definition
Update Results and Rules
Now here's what you need to know about the Admissions to Registration Transfer window itself.
The header allows you to select a Transfer Profile to populate the selection criteria (Select Candidates tab) and transfer parameters (Transfer Process tab) in the window.
Clicking the Save As button opens the Save Transfer Profile window. This response window allows you to update an existing Transfer Profile or create a new Transfer Profile. The Transfer Profile is stored in the User Preferences table, saving the Select Candidates and the Transfer Process check boxes you have currently selected on the Admissions to Registration Transfer window.
The Clear Profile Criteria button, when clicked, clears all checkboxes (sets to N) and clears all other data columns on the window.
The Select Candidates tab allows you to select Candidate records for transfer by query (d_ad_re_transfer) or by candidate. When Candidates are retrieved (click Retrieve Candidates), they are added to the Selected Items window and the Selected Candidates radio button is selected. If ID Numbers already exist in the Selected Items window when you click the Retrieve Candidates button, the following message displays: "All currently selected ID Numbers will be cleared. Do you wish to continue?"
Clicking the Change button opens an AD to RE Transfer Select window. Depending on the Query Criteria radio button selected, this window allows you to select years and terms, stages, divisions, candidacy types, etc., to use for selecting candidates for the AD to RE Transfer process.
The Query Options can be used to join to other tables for the purpose of restricting the ID Numbers selected, and this criteria are appended to the WHERE clause of the query.
The Transfer Process tab allows you to select a set of criteria and to initiate the transfer process. When the Transfer Data button is clicked, the transfer process updates existing rows and inserts all missing rows in Student Master, Student Division Master, Student Session Assignment, Advising Master, Degree History, and NSLC Student Master tables. The TW Web Security and TW Group Membership tables may also be updated.
If a cluster is selected in the Update Type Cluster drop-down list, the Rules Based Update is run. The status of the Rules Based Update run is stored in the Application Log File. A progress bar displays while the process is running. The Application Log File contains messages about each processed Candidate.
During the transfer of data to Degree History, the position of the column on the Candidacy tab determines in which column on the Degree tab the mapped value is placed.
· The Program used to create the Candidacy row is always placed in Degree History Major 1 or Certification 1.
· The 2nd Program on the Candidacy row is always placed in Degree History Major 2 or Certification 2.
· The 3rd Program on the Candidacy row is always placed in Degree History Major 3 or Certification 3.
· The Minor Program on the Candidacy row is always placed in Degree History Minor 1.

 Query
Options
Query
Options