An Student Finances license is required to work with this window.
|
An Student Finances license is required to work with this window. |
Use this window to create a new payment plan or edit an existing payment plan for the new Self-Service Payment Plan process.
From the Plan Info tab, enter the payment plan details. Example

Plan Definition:
Type a name for the payment plan that will be displayed to students.
Choose a subsidiary code from the drop-down.
|
While a default subsidiary code is not required for the new Self-Service Payment Plans, selecting a code for this payment plan will automatically tie the plan to the subsidiary code for any student who consents to this plan. |
Include in Institutional Financing Amount for Gainful Employment Report Checkbox
Select this checkbox if your school is required to submit the Gainful Employment report. When this box is selected, any payment plans that contribute to the institutional financing amount will appear in the Gainful Employment report.
For this grouping, you will need to decide if this plan is available for Year Term, Billing Period, or Total Balance. If you select Year Term or Billing Period you will need to select the appropriate time period from the drop-down. When you make the plan available to the student, it will show as available in the Campus Portal (JICS) if the student has an account balance associated with the selection you choose here.
 |
Let's say you label a new payment plan as Fall 2019, choose Year Term as the Balance Plan Available To option, and select 2019/FA from the drop-down options. Then you run the Assign Plans to Students option and make the plan available to students. If the plan was assigned to them, students will be able to log into the Campus Portal Payment Plans page and see the Fall 2019 plan as an eligible option if they have a balance in the 2019/FA year term. |
Sign Up:
|
The Begin and End dates are required fields. |
Enter the date you want students to be able to sign up for this payment plan. When this date is between the current date and the End date you set, the plan will appear for any student that meets the criteria defined when the Assign to Students process runs.
Enter the date you want this payment plan to be removed from student payment plan options. When this date is the current date or later, the plan option will disappear from the student's Campus Portal Payment Plans.
Allow Students to Set Up Automatic Payments?
Do you want to give students the option to make automatic payments on this payment plan? Choose Yes or No from the Allow Students to Set Up Automatic Payments options:
Yes: any student who chooses to sign up for this payment plan will have the option to set up automatic payments that would replace their manual, monthly payments.
No: students will not be able to set up automatic payments for this payment plan and will need to make manual payments each month.
Allow Student to Edit Plan Balance at Signup?
When a student signs up for this payment plan, do you want them to be able to change the dollar amount of the initial payment plan.
Plan Balance Recalculation Freeze Date
|
This is a required field |
Decide on the a date to freeze the payment plan balance after the student signs up for the plan. Enter the freeze date in this field. Once the date has passed, student balances will not be recalculated.
|
You may want a to recalculate a student balance if they sign up for a plan prior to receiving financial aid or the add/drop date. If you want to prevent any recalculation, set this date to the sign up begin date. |
Fees:
If there are any fees associated with this plan, you will need to define them in this section.
|
You can choose to apply any or none of the fees to this payment plan. You can determine each fee amount using a flat rate, percentage, or both. |
This is a one-time fee added to the student's first payment made on this plan.
This fee is added to each payment when the student chooses to use a credit card.
This fee is applied if the total amount of the plan balance is not paid in full. Finance charges are calculated by the Generate Finance Charges process.
Currently late fees are calculated when the Generate Finance Charges process is ran.
In a future release this fee will be automatically applied if the student has not made a payment by midnight on their due date.
Days Late Before Late Payment Fee
Choose the number of days past the due date a student can make a payment before the Late Payment Fee is applied to their account.
Calculate Finance Charge and Late Payment Fees by
For this option, you will need to determine if you want the student's late fee or finance charge to be calculated on their outstanding account or plan balance.
|
This option is only available if you have a percent or amount for the Late Payment fee or Finance Charge assigned to this plan. |
|
You need to associate fees with a Miscellaneous Charge Code. These charges will automatically be created, as needed, when a student makes a payment on their payment plan to ensure the money paid for fees is not deducted from the student's plan balance. At the bottom of the Payment Plan window, there is a link to the Miscellaneous Charge Codes window where you can define, update, or delete miscellaneous codes. |
Monthly Payments:
Use this section to break a payment plan into multiple payments. You can choose to divide the plan into 2-12 payments. Enter a percentage of the plan balance for each payment in the plan. The total percent must add up to 100%.
Select the month the payment plan payments will start.
This is the day of the month that each payment is due. Choose a number from the drop-down to determine a set due date for the payment plan.
|
Let's say you select 15 from the drop-down for a 4 month plan, depending on when the student signs up for the plan, 4 payments will be set up with the 15th of the month as the due date. For example, if a student signs up for the plan on May 20, they will have four payment transactions dated June 20, July 20, August 20 and September 20. |
The year in which the payment plan payments start. The current year is the default.
Set first payment due date to the day after the student signs up
If a student signs up for the payment plan after the plan's start month, day, and year, you can select this checkbox to set the student's first payment day to the day after they signed up. By default, this checkbox is not selected.
|
Payment Plan A starts
on August 15, 2024. Johnny signs up for the plan on
August 26, 2024.
|
From the Consent tab, you can write the Plan Agreement message that students will need to read and consent to when they select this payment plan. Example
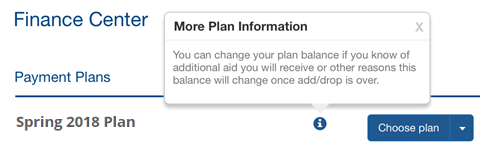
Use the More Info tab to include any additional details about the payment plan that students' may need to know before selecting the plan. Example
|
When you add content to this tab, it will appear in the information icon when a student is reviewing plan details in the JICS Campus Portal. Example
|
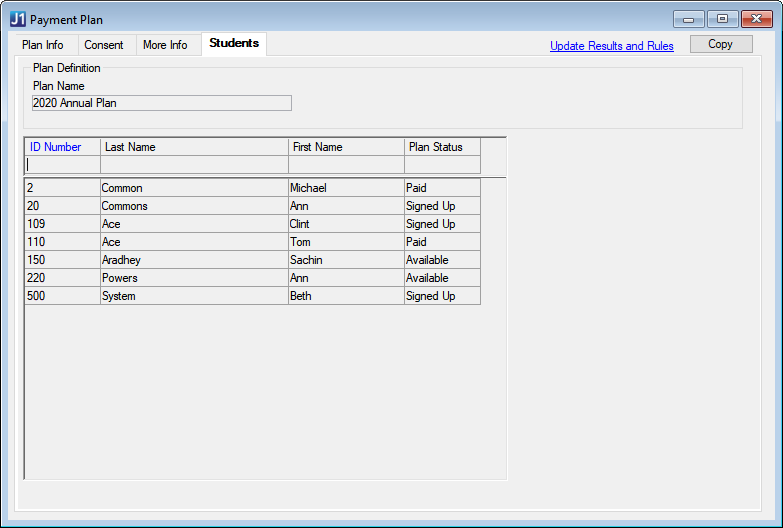
From the Students tab, you can view a list of students that are either eligible, already signed up, or fully paid for the payment plan. If a student's Plan Status is set to Available, you can right-click and delete the row which will remove the student from being eligible for the payment plan. Example
From the Payment Plan widow, click the Update Results and Rules link. You will be able to edit the Results Definition and Results Rules Definition tabs and preview the results in the Print Rules tab.
Open the Payment Plan window.
On the Plan Info tab, you need to define your new payment plan in the Plan Definition section:
Enter a Plan Name that will make sense to the student(s) selecting the plan (such as Fall Payment Plan).
(Optional) Choose a subsidiary code from the Default Subsidiary Code drop-down.
|
While a default subsidiary code is not required for the new Self-Service Payment Plans, selecting a code for this payment plan will automatically tie the plan to the subsidiary code for any student who consents to this plan. |
Select the Include in Institutional Financing Amount for Gainful Employment Report checkbox if your school is required to submit the Gainful Employment report.
In the Balances Plan Available To section, you will need to decide if this plan is available for Year Term, Billing Period, or Total Balance. Depending on your choice, you may need to choose a time period from the drop-down.
In the Sign Up section, you will need to define what students can do with the plan:
Start and end dates for the new payment plan. When do you want students to be able to sign up for the plan and when should the plan no longer be available?
Do you want to give students the option to make automatic payments on this payment plan? Choose Yes or No from the Allow Students to Set Up Automatic Payments options:
Yes: any student who chooses to sign up for this payment plan will have the option to set up automatic payments that would replace their manual, monthly payments.
No: students will not be able to set up automatic payments for this payment plan and will need to make manual payments each month.
Do you want to give students the option to edit this plan balance when they sign up for the plan. Choose Yes or No from the Allow Student to Edit Plan at Signup options:
Yes: students on this payment plan will have the option to change the initial amount of their payment plan. This option offers the student more flexibility if they are still awaiting financial aid or will be adding/dropping courses.
No: students will only be able to finance the available account balance, and cannot edit the initial amount of the payment plan. If this option is used, your school should make sure that students cannot sign up for payment plans until all financial aid is delivered and the add/drop period is passed.
In the Plan Balance Recalculation Freeze Date field, enter the date when you want to freeze a student's payment plan balance after they sign up for the plan. Once the date has passed, student balances cannot be recalculated.
|
You may want a student's balance to recalculate if they sign up for a plan prior to receiving financial aid or the add/drop date. If you want to prevent any recalculation, set this date to the sign up begin date. |
In the Fees section, you can define any charges you want added to the student's balance:
Signup Fee: One-time fee added to the first payment in the plan
Credit Card Convenience Fee: fee added when the student makes a payment with a credit card
Finance Charge: fee added when student doesn't pay the full amount of the plan balance
Late Payment Fee: fee added when the student does not pay by the due date
At the bottom of the Fees section, there are two fields related to the Finance and Late Payment Fees:
Days Late Before Late Payment: choose the number of days past the due date a student can make a payment before the Late Payment Fee is applied to their account
Calculate Finance Charge and Late Payment Fees by: determine if you want the student's late fee or finance charge to be calculated on their outstanding account or plan balance
If you added a fee to the plan, you will need to associate a Miscellaneous Charge Code for each fee.
|
If the code you need is not in the drop-down, you can click the Miscellaneous Charge Codes link at the bottom of the Fees section to manage the available miscellaneous charge codes. |
Once the details of the plan are defined, you are ready to set up the Monthly Payments. You set up to 12 monthly payments for the plan using a percentage for each month. The total percentage for the plan must equal 100%.
|
You can create many different plans for students. Some students may only need to spread the payments across a couple of months, while others may need the full 12 months. Accelerated Plan:Month 1: 33.34% Month 2: 33.33% Month 3: 33.33% Long-Term Plan: Month 1: 10% Month 4: 9% Month 7: 9% Month 10: 9% Month 2: 9% Month 5: 9% Month 8: 9% Month 11: 9% Month 3: 9% Month 6: 9% Month 9: 9% |
When you are finished setting up your new payment plan, click Save before closing the window.
To
view and edit a payment plan from the Payment
Plan window, you can click
the Lookup ![]() icon or you can right-click and choose
Select
Payment Plan.
icon or you can right-click and choose
Select
Payment Plan.
To
view and edit a payment plan from the Payment
Plan
window, you can click the Lookup ![]() icon or you can right-click and choose Select
Payment Plan.
Highlight the plan you want to copy and click OK. Once
the plan is visible on the Payment Plan window, click the Copy button in
the upper-right corner of the window.
icon or you can right-click and choose Select
Payment Plan.
Highlight the plan you want to copy and click OK. Once
the plan is visible on the Payment Plan window, click the Copy button in
the upper-right corner of the window.
The Payment Plan window will refresh with a new record that has default data matching the original plan. The plan name will show "(Copy)" at the end of the name, Freeze Date and Sign Up End Date will be blank, and the Sign Up Begin date will be set to the current date. All content from the Consent and More Info tabs will be copied, but no students will be carried over to the new plan. Once the copy is created, you will need to make any adjustments to the plan before saving.
|
The Plan Name cannot exceed 30 characters. If a plan with a long name is copied, the original title will be shortened to 23 characters to make room for "(Copy)" text. |
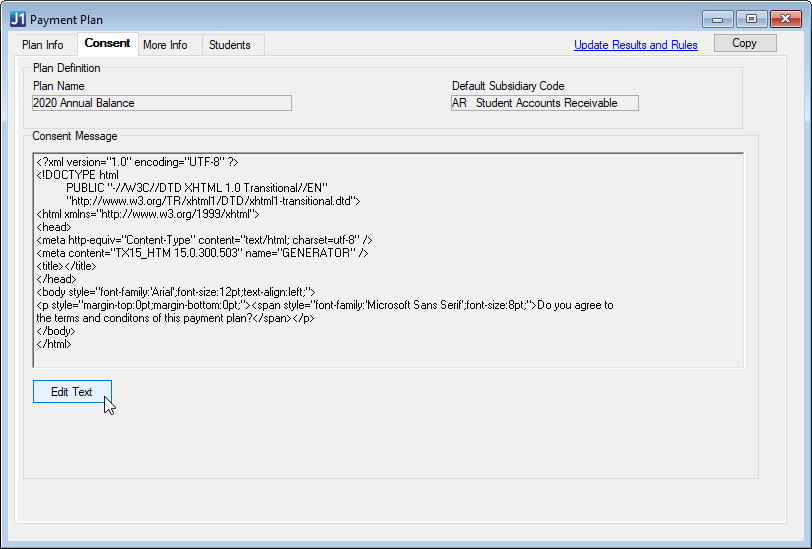
From the Payment Plan window, select the Consent tab.
You will see the Plan Name and Default Subsidiary Code in the Plan Definition section at the top and the Consent Message section below.
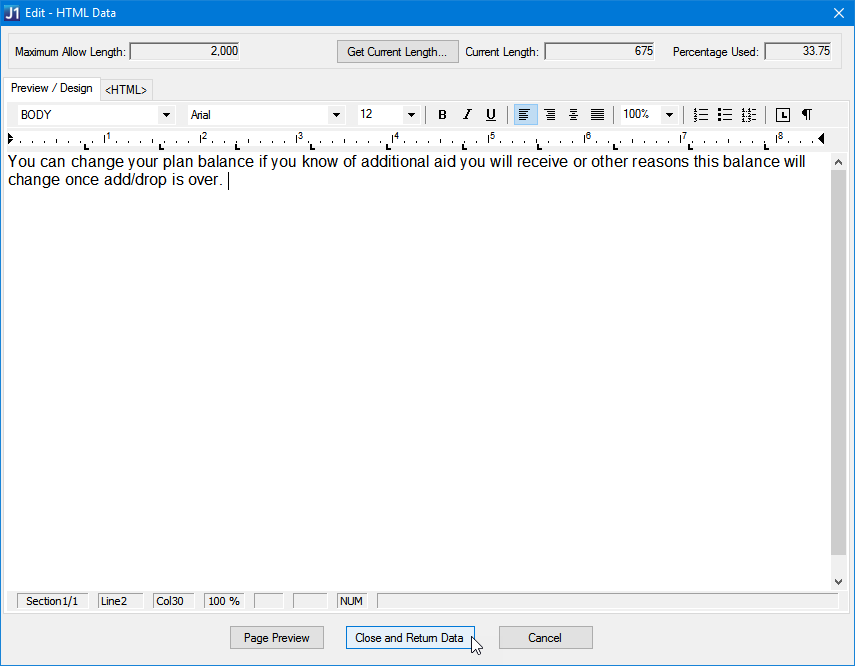
To edit the existing text, click the HTML button in the bottom left of the window.
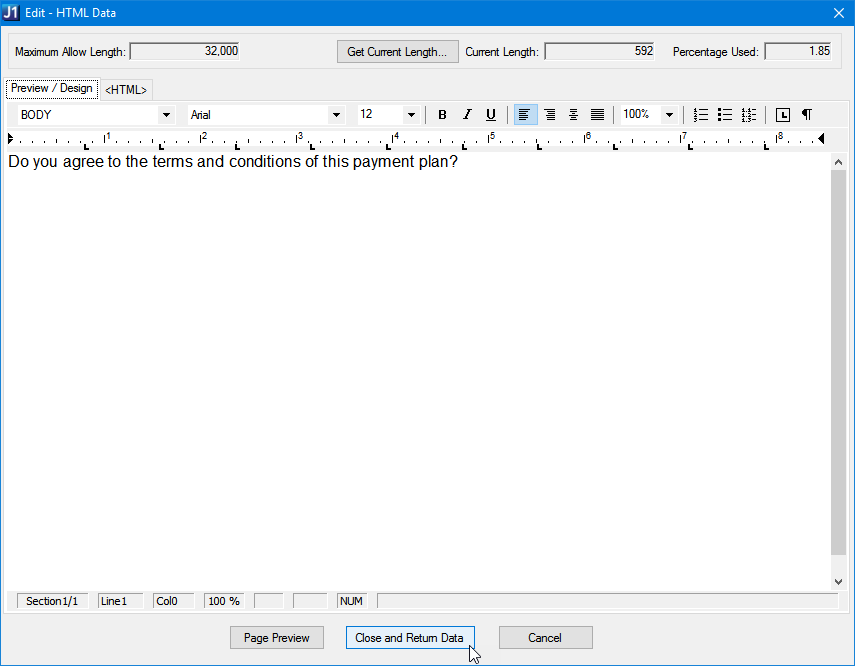
When the Edit ??? HTML Data window opens, you will see two tabs that give you the option of editing in Preview/Design or <HTML> formats.
If you use the Preview/Design tab, you can type your consent message and use the formatting toolbar to change the text appearance. You can also copy and paste text from another program, such as Word.
If you use the <HTML> tab, you can code your more information message to change the text and appearance.
When you have finished writing your message, you can go to the Preview/Design tab to see a Page Preview, or you can click Close and Return Data to save your new message and go back to the Payment Plan window.
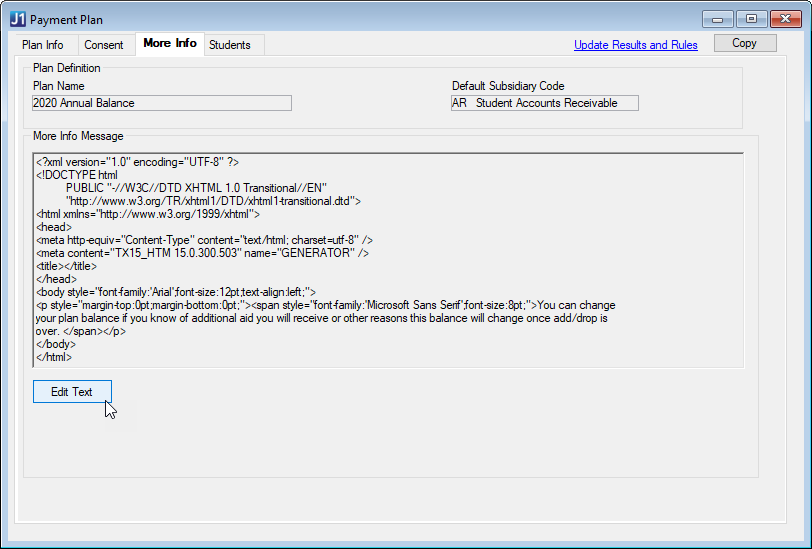
From the Payment Plan window, select the More Info tab.
You will see the Plan Name and Default Subsidiary Code in the Plan Definition section at the top and the More Info Message section below.
To edit the existing text, click the HTML button in the bottom left of the window.
When the Edit ??? HTML Data window opens, you will see two tabs that give you the option of editing in Preview/Design or <HTML> formats.
If you use the Preview/Design tab, you can type your consent message and use the formatting toolbar to change the text appearance. You can also copy and paste text from another program, such as Word.
If you use the <HTML> tab, you can code your more information message to change the text and appearance.
When you have finished writing your message, you can go to the Preview/Design tab to see a Page Preview, or you can click Close and Return Data to save your new message and go back to the Payment Plan window.
|
When you add content to this tab, it will appear in the information icon when a student is reviewing plan details in the JICS Campus Portal. Example
|
View Students in a Payment Plan
From the Payment Plan window, select the plan you want to review from the Plan Name field, the click the Students tab. From this tab you will be able to see all students eligible, signed up, and paid for the plan. Click the Plan Status column label to sort the students by status.
Remove a Student from a Payment Plan
|
If a student has already signed up or paid on the payment plan, they cannot be removed. |
To remove an eligible student from a payment plan, go to the Students tab and locate the student you want to remove. Make sure their Plan Status is Available. If the Plan Status is anything other than Available you will not be able to remove the student from the list.
When you locate the student, right-click and click Delete Row. The student's name will disappear from the list and the plan option will disappear from their list of available payment plans on the Campus Portal.
Click the Save button.
How can I edit or delete a payment plan after I have created it?
To view and edit a payment plan from the Payment Plan window, you can either right-click and choose Select Payment Plan. You can also view and edit a payment plan, by going to the Manage Payment Plans window. When you locate the plan you want to edit or delete, click the Options column and choose your option. If you click Edit, the Payment Plan window with the existing payment plan you selected will appear and you can make changes as needed. If you click Delete, a warning box will appear letting you know if at least one student has selected the plan and/or confirming that you do want to delete the plan.
|
Do not delete a plan if a student has already consented to it. If you do want to delete a plan that students have already consented to, you will need to notify each student on the plan. |
|
If a student has already made a payment on a payment plan, the plan cannot be deleted. |
If a student makes two payments in one day, will they have to pay two Credit Card Convenience fees?
Yes. The Credit Card Convenience fee is applied each time a student pays with a credit card. If they make two payments in one day, they will pay the convenience fee twice.
No. The Credit Card Convenience fee is applied only one time per payment. If they select two payment rows on the payment checkout page, they will pay the convenience fee only once. If they select one payment row and process their payment and then come back and select a second payment row and process another payment, the credit card convenience fee will be charged a second time since it was two separate payments.
What is the difference between my outstanding account balance and outstanding plan balance?
An outstanding account balance is your total account balance where a plan balance may only be the balance for a specific year/term or billing period. If you have multiple plan balances and/or additional charges on your account, they would add up to your total account balance.
When are payment plan fees created?
Fees are automatically created as miscellaneous charges (using the selected Miscellaneous Charge Code) when a student makes a payment in-office or online. The actual charges are created from the Receipt Entry Detail window and the Payment Checkout process in JICS Campus Portal.
If a fee has both a flat amount and a percentage, the percentage is calculated first and then add the flat amount to the percentage amount to get the fee total.